hen scientists first discovered a higher-than-expected concentration of microplastic in New York’s Lake Tear of the Clouds, often described as the highest source of the Hudson River, they initially attributed the findings to airborne deposition. But follow-up research this year points to a different source for the contamination: hiking shoes and clothing.
The concentration of microplastic particles, which are harmful particles ranging from 1 micrometer to 5 millimeters in size, poses significant threats to the environment by contaminating ecosystems and disrupting food chains. ...
This morning I woke up to the feeling of the tent walls closing in on me. I opened my eyes and realized that they were starting to sag inward. Because the tent walls were covered in so much sleet and snow! I shook them off and the tent expanded magically. It was currently raining or sleeting still, and had clearly accumulated to some degree. I was so glad to be in Sprinter’s tent though, and to not have to worry about packing mine up, ...
Almost all of us are afflicted with one of these climbing disesases, and sadly, many of these go undiagnosed and untreated. Every day, at crags around the country, people are climbing with the burden of an unchecked, treatable illness. It’s a national tragedy.
Thankfully, with better medical technology and improved diagnostic abilities, we’re now able to identify these diseases in their early stages. But we still need your help. Our hope is that this document may raise awareness and help prevent needless suffering.
Onsightis
This condition generally presents as obsessiveness with the act of climbing every route on the first attempt, every time. Mild onsightis does not often cause the patient any discomfort and can actually be seen to provide some modest benefits, however it has been known to suppress redpoint grades in chronic sufferers.
Signs and Symptoms
Noticeable lack of enthusiasm for repeated attempts
Demanding/needy, especially at new crags
Resistance to attempting overly difficult routes
May display aggression toward unwanted beta in advanced cases
Treatment
Gentle application of harder routes for the purpose of stimulating the red and pinkpoint glands.
Cragger’s Malaise
Just like the common cold, this common climbing disease is surprisingly rampant for the simple fact that prevention is so difficult. Little is known about the causes of cragger’s malaise and its effects can be shockingly debilitating, leading sufferers to view climbing as more of a social pursuit than an athletic one.
Signs and Symptoms
Overly chatty
Maximum of 2-3 routes in one session
Patient displays preference for beer over climbing
Usually accompanied by low level of skill or ability
Treatment
No definitive cure exists. Most professionals recommend tolerance rather than intervention. Occasionally resolves without treatment.
Obsessive Tick-Listive Disorder
Also known as “Buzzfeeding,” damage to the right mesial prefrontal cortex can result in abnormal collecting behavior. In the sport of climbing, this lends itself to list-ticking and peak-bagging, practices which value completion of an arbitrary list over objective quality of the routes contained therein.
Signs and Symptoms
Patient climbs horrible shit for no good reason
Often accompanied by shameless guidebook fetish
Acquired choss resistance and skewed risk acceptance
Treatment
An immediate course of crags with horrific rock quality or protection
Most cases will be resolved with a one-time application of loose Eldorado Canyon “classics” or Fisher Towers mud climbing.
Boltulism
Doctors and scientists have been unable to reach consensus on a definitive explanation for this very unenjoyable climbing disease. High-functioning patients have been known to produce many quality routes, despite the odd squeeze or contrivance, whereas severe cases can manifest in full-blown grid-bolt mania. All patients are grouped by the overwhelming desire to “get their name in the guidebook.”
Signs and Symptoms
Often financially unstable due to hardware purchases
Observes “phantom lines,” a condition similar to colorblindness, in which vague and spurious routes are reported by the patient.
Often results in link ups.
Sometimes narcissistic
Places bolts in unstable geological formations
Treatment
Removal of drill privileges, followed by bedrest
Partneraphobia
Essentially a condition which results in anti-social tendencies, mild cases often present as a preference for “exploratory missions” to “scope lines” and “check conditions” in wilderness areas, in which partners are not invited. However, if left untreated, this disease can lead to some really weird shit like bouldering alone and rope soloing.
Signs and Symptoms
Patient avoids human contact
Unexplained disappearances
Strong odor, questionable hygiene
Often found in possession of unusual gear, including but not limited to traction devices and aid gear
Treatment
Gradual reintroduction to social stimulus and bathing
Proven effective if paired with a high-quality single-pitch cragging experience
Human Projecting Virus (HPV)
It has been hypothesized that HPV was spread to humans through contact with bats. Proponents of this theory argue that this is the reason for which HPV sufferers tend to spend a majority of their time in caves, flapping their arms about in a sort of interpretive dance known as “sequencing.”
Signs and Symptoms
Pallid appearance and engorged forearms
Fixation/obsession with a single route. Can often last months, sometimes years
Exposure to multi-pitch adventure routes where prior inspection is impossible.
Prescription of a broad-spectrum ticklist which can remedy deficiencies such as slab and crack
Malignant Ego
Inflammation and swelling of the ego can lead to an inflated opinion of oneself. If left untreated, the inner asshole will expand and devour other elements of the patient’s character. Among climbing diseases, this one is considered highly contagious.
Signs and Symptoms
Holier than thou
Toothy appearance, snarls often, occasional frothing at mouth
Unable to refrain from unsolicited beta-spraying
Calls all your hardest ticks “soft for the grade”
Denigrates every style of climbing except for their own
Treatment
Patients will need to undergo a delicate medical procedure where their head will be removed from their anus.
Chronic Overseriousness
If you find yourself offended by any of the above descriptions, you may be suffering from Chronic Overseriousness. It may be possible that you’re taking climbing too seriously.
Signs and Symptoms
Offense taken
Currently limbering up fingers to launch a blistering social media tirade
Often found in comments sections of websites/social media
Sufferers tend to insist that climbing is not a “sport,” but a “form of self expression”
Treatment
Chill out
Get off the Internet and go outside
If you observe any of these symptoms in your friends or in yourself, don’t delay. Consult your crag doctor as soon as possible. Together, we can beat common climbing diseases.
The following two-day recipe for Barley and Pork Hocks is from SurvivalBlog reader Richard T. Equipment: A small cast iron pot, a soup pot, and a rectangular glass cake pan (or a similar pan). Ingredients Two fresh pork hocks ½ cup of barley grain ½ cup of white vinegar Cayenne or hot pepper flakes (to taste) Pepper (to taste) Salt (to taste) Directions Day one: Simmer a couple of fresh pork hocks in ½” of water in a lidded cast iron pot for half a day until the meat can be separated from the bones. Refrigerate overnight. (The extracted bones …
For the next three weeks we’re sharing the finalists from the Paddling Kids Story Contest. Read their stories and vote for your favorites to crown a winner! Comment below, or like and comment on Facebook and Instagram to register your support (maximum one comment per week per user). Voting for “San Juan Madness” is open […]
For decades, Grey Owl Paddles has been a fixture in canoes across Canada. Now, as the brand marks its 50th anniversary, it’s found a new home. The acquisition is the perfect off-season match to complement an already thriving hockey stick manufacturing business, says new owner W. Graeme Roustan, executive chairman of Roustan Sports Ltd. Grey […]
We awake early in the tent, mentally prepared for the daunting crossing of the Sermilik Fjord. My partner, Julie, and I dismantle the polar bear perimeter guard, grab the rifle and walk out to our launch point to reassess the crossing. Chris Christie dodges icebergs in East Greenland The marine fog is burning off, revealing a […]
Every year, tents get lighter, stronger, and more sustainable. The newest batch of three-season shelters is no exception, with spacious, feature-packed options for an entire family, bombproof fortresses for pushing into the fourth season, and affordable designs for the occasional weekend warrior. The nine winners of this year’s exhaustive testing process proved themselves over and over in wind, rain, and even snow.
On a backpacking trip, your campsite is the destination of the day, even if you stop to swim in an alpine lake or take in a scenic overlook along the way. It’s where you’ll cook dinner, organize your gear, and rest for the night, so you want it to be just right.
When you come across a promising spot, you’ll want to consider a few factors before pitching your tent: bugs, wind direction, wildlife paths, water sources, drainage, shade, and other factors all influence your comfort. We combed hiker forums, talked to hiking buddies, and applied our own experience to create this guide that will help you choose the perfect backcountry campsite.
Level, cleared of debris, and previously impacted
Before you unclip your pack and call it a night, know the lay of the land. In some backcountry areas, especially those that require a permit, camping is limited to designated spots. Consult a guidebook or chat with a ranger to find out where they are.
If no restrictions exist, tread lightly. Look for a spot that shows signs of prior use: a level patch of earth cleared of rocks, sticks, and other debris, or maybe a ring of stones if fires are allowed. These subtle signs tell you you’re not the first to pitch a tent there, and choosing a previously impacted site helps preserve the surrounding wilderness for the next hiker who comes through.
Close to a water source—but not too close
Camping near water mostly makes life easier. Nobody enjoys hauling H2O over long distances or hiking down a steep gully to refill their hydration bladder. It’s more convenient to have a source close by for drinking, cooking, cleaning dishes, and even cooling off. Plus, it’s scenic.
However, camping too close to a lake, river, or stream can harm fragile ecosystems and pollute the water. Leave No Trace recommends setting up camp at least 200 feet (about 70 adult steps) from any natural water source. This buffer protects riparian vegetation and prevents runoff from camp activities—like washing dishes or brushing your teeth—from entering the water. It also respects to the wildlife that depends on the water.
Another reason to leave some distance between you and the shore: mosquitos. Standing water, damp ground, and dense vegetation make the perfect breeding ground for bugs. The view might be better directly lakeside, but the bugs will be biting.
Decent drainage and air circulation
That flat spot nestled in the wildflower-dotted meadow? It might look like a dreamy place to camp, but low-lying areas like depressions, hollows, and valleys often collect water. That’s bad news in a thunderstorm or even a steady drizzle. Also: bugs.
But even if rain isn’t in the forecast, cold air tends to sink and settle in those pockets, meaning you’re liable to end up shivering and wake up to condensation in your tent.
Instead, seek slightly higher ground, where it’s more likely that water will run off, air will circulate, bugs will get blown away, and the sunrise will find you early.
Out of the sun and wind, and under the trees
A site with a bit of elevation is almost always better, but venture too high and you’ll trade comfort for exposure. Above the treeline, there’s no escaping harsh sun, strong wind, and other elements. (Note that this is pretty much unavoidable if your route takes you high into the alpine.) Look for spots with a natural windbreak, like big boulders, a small rise, or clusters of trees—live trees, no widowmakers—to keep your tent from flapping in the wind all night.
Tree cover also casts shade that prevents your tent from baking inside during the day and materials from deteriorating in UV rays. And if and when it rains, branches can deflect a surprising amount of water, keeping the ground beneath you drier than you’d expect.
Far enough away from others
You’ve found your perfect spot, but as you settle in, you see a group of backpackers searching for theirs. They barrel over toward you and, without even acknowledging your presence, drop their bags and pitch their tents. Then they’re loud all night. Don’t be those people.
Giving other campers space goes a long way toward preserving the quiet, solitude, and sense of wilderness everyone came for. If there’s truly nowhere else to go, explain your situation and ask courteously—it’s amazing how far a little communication can go.
It’s also a good reason to get to camp early. The earlier you arrive, the more options you have for a private, low-impact site—and you’ll have time to settle in before dusk, when the best spots are often taken.
We interrupt your pre-Halloween planning for this very important news flash:
Despite the prevalence of sunshine and unseasonably balmy conditions in many corners of the country, it is, indeed, lateOctober. This means that Mother Nature can kill you with one wave of her magic wand.
High on the side of America’s tallest mountains, there’s wind, rain, ice, and yes, lots of snow. And alas, a number of Americans are learning the hard way that sunshine and mid-fifties in the high country can quickly become a life-and-death situation.
The latest example of this comes from the San Juan Mountains in southwestern Colorado. On Thursday, October 23, the Hinsdale County Search and Rescue team received a call that two motorists were stranded high on the side of Engineer Pass. A snowstorm had blown in that afternoon, and despite the weather report calling for a blizzard, the jeepers had continued up the route and gotten stuck in two-foot snow drifts.
A jeep is horribly stuck in snow (Photo: Hinsdale County Search and Rescue)
For those unfamiliar with Colorado’s geography: Engineer Pass is a gorgeous if extremely rugged ATV route connecting the towns of Ouray and Lake City. Jeepers, overlanders, and pickup truck enthusiasts drive their four-wheeldrive vehicles up and over Engineer Pass throughout the summer while completing the so-called Alpine Loop.
This corner of the state is known for the occasional mishap on four wheels. Let’s just say that the tourists keep the local sheriff and towing companies busy throughout the summer.
Anyway, Engineer Pass tops out at 12,800 feet above sea level. This is not the elevation you want to be at when a late-October blizzard rolls through.
There’s a jeep somewhere around the bend (Photo: Hinsdale County Search and Rescue)
Luckily for the motorists, rescuers sprang into action and were able to reach them. They got to the duo—a father and son—at about 10 P.M., and were able to bring both of them to safety. But only after they snapped a few amazing photos of the beleaguered jeep stuck up to its axles in snow.
Look, I get it, it’s still sunny out and we all want to go drive over high mountain passes, and climb high peaks. It’s still worth reminding everyone that the scorching rays and summer vibes this time of year can change at the drop of a hat. Just ask those 20 hikers who were rescued from the flanks of Mount Washington on October 25.
According to the Colorado SAR teams, the jeep drivers on Engineer Pass were from Florida. I’m sure it was plenty warm there.
As a thru-hiker and medical professional, wound care and bleeding control are two of my first aid priorities on the trail. By the numbers, the most common non-athletic trail injuries are soft-tissue wounds and subsequent infections from inadequate wound care. Proper care requires managing any bleeding, cleaning, and then dressing a wound. Wound care is part of my risk management planning when I prepare for any trip into the backcountry as a recreationalist or a group leader.
I took my first Emergency Medical Technician (EMT) course in 2008. Then I worked a variety of healthcare jobs over the next decade, ranging from critical care to primary care and family practice. When I started backpacking in 2017, it became clear that everything I learned from my healthcare career would still be of use in the backcountry.
In 2023, I took the month-long wilderness EMT (WEMT) course in Lander, Wyoming, with NOLS. The added backcountry dimension to my prehospital healthcare education has greatly influenced my preferences for my current first aid kit. In addition to the wound care essentials listed below, I always carry a tourniquet—and encourage all backpackers to learn how to use one.
The Best First-Aid Tips, According to a Wilderness EMT
When I teach Wilderness First Response courses, students often ask what I carry in my pack. Here’s what I recommend.
Personalize Your First Aid Kit
First, I emphasize that everyone’s first aid kit should be personalized, because what works for some may not work for others. I’ve found that the typical retail first-aid kits are generic and don’t quite meet my needs.
Assess Your Risk of Getting a Wound
Next, I run down what I carry through a risk management lens. This means I balance the likelihood of a particular injury or illness with its consequences. It is a complicated formula that includes variables such as the weather forecast or how far I will be from definitive care.
Over time, and after thru-hiking a few long-distance trails, I’ve struck a balance in what experience has taught me are non-negotiables versus what I desire for a baseweight.
Bring Sterile Gauze and an Irrigation Syringe
I always recommend carrying some sterile 4×4 gauze pads and an irrigation syringe. These are lightweight tools and useful to everyone for bleeding control and wound care, regardless of activity or skill level.
For most bleeds, the first step is to apply pressure with a sterile gauze. That same gauze will become your initial dressing for the wound. Sterile gauze helps with infection control. However, if you have to treat bleeding and you do not have sterile gauze, infection risk becomes a secondary concern, and you should apply pressure with whatever is available.
During cleaning, flushing wounds with filtered water using an irrigation syringe is essential to preventing infection. The benefits of an irrigation syringe compared to other syringe sizes are its ability to deliver precise force into a wound, which does most of the work of removing dirt and debris.
What About Antibiotic Ointment?
Antibiotic ointment isn’t very helpful, in my opinion, because it doesn’t actually do much to prevent infection—irrigating the wound does most of that work. To ward off bacteria, change the dressing whenever it becomes really dirty or wet, or at least once a day.
How to Deal with Bloody Wounds
Depending on the type of wound and the amount of blood, you’ll need to treat them differently.
Light Bleeding
Sterile gauze is the go-to for applying pressure when necessary for persistent but manageable bleeds. Though there are different kinds of bleeding, the majority we encounter are minor cuts or capillary bleeds, which tend to ooze or bleed slowly and can be controlled with just direct pressure.
Heavy Bleeding
More aggressive bleeds will require more aggressive interventions. Larger, traumatic bleeds cause a loss of blood volume very quickly and forcefully, and it’s critical to control bleeding as soon as possible.
How to Make a Tourniquet to Stop Heavy Bleeding
Tourniquets are one tool to stop traumatic hemorrhaging in areas outside of the trunk. They work by cutting off the circulation to an extremity above the wound to stop blood flow and prevent blood loss through the wound.
There are multiple ways to create a tourniquet, but I advocate a pre-made strap and windlass system to save time on improvisation.
Because of the risk involved, tourniquets should:
Only be applied by someone with proper training
Initiate an immediate evacuation to definitive care
Raquel Sapp, founder of wilderness medicine education provider Backcountry Pulse, recommends the Committee on Tactical Combat Casualty Care (COTCC) approved Sam XT tourniquet because “one of the biggest mistakes people make with tourniquets is not applying it tight enough,” she says. “The Sam XT clicks when all of the slack is removed, and you can begin tightening the windlass.”
Even though I’ve been taught how to make an improvised tourniquet, I always opt for a prefabricated tourniquet because the minimal additional weight is worth the speed and effectiveness.
Of course, I wouldn’t recommend buying gear or supplies you don’t know how to use, and this article is not meant as a substitute for proper first aid training. Improper tourniquet use could result in loss of a limb or failure to control bleeding adequately.
A Wilderness First Responder course is generally 80 course hours and will include instruction on how to apply a tourniquet. Wilderness First Aid courses are much shorter—16 course hours—and also involve bleeding control and tourniquet use.
A Canadian hunter who was mauled by a grizzly bear died on Saturday, three weeks after the attack near Fort Steele, British Columbia. Sixty-three-year-old Joe Pendry died of a suspected blood clot, according to the CBC.
“…Dad suffered a complication and went into cardiac arrest, the nurses and doctors did everything they could but unfortunately they were unable to revive him,” wrote Facebook user Janessa Higgerty in a post announcing Pendry’s death.
Pendry had been hunting elk in Canada’s East Kootenay region on Oct. 2 when he crossed paths with a sow and her two cubs. He fought back, eventually managing to call 911 and his son for help. He was transported by helicopter to the hospital and later underwent several surgeries to repair his face and part of his scalp that was torn off. He was also treated for a severed finger and broken bones. Pendry’s family set up a GoFundMe account that raised nearly $20,000 during his hospital stay.
“It was very touch and go,” his wife, Janice Pendry, toldCBC News a few days before her husband’s death. “But he’s a tough fighter.”
Because he appeared to be recovering from his injuries, his death came as somewhat of a surprise. He had moved from ICU to the trauma ward and his wife says he was walking and laughing at the hospital the night before he died.
“With heavy hearts and profound sadness, we share the passing of our beloved husband, dad, grandpa, brother and uncle,” wrote a family spokesperson in an email to the Keremeos Review. “After fighting the ultimate fight with remarkable courage and strength, he has now found peace.”
During the bear attack, Pendry managed to fire one shot. The B.C. Conservation Officer Service found a dead grizzly nearby a few days after the attack. DNA evidence confirmed it was the same bear.
Pendry was evacuated by helicopter for treatment. BC Conservation Officer Service
“Joey was a man whose spirit reflected the rugged beauty of the outdoors he loved so deeply,” wrote Pendry’s niece Rachel Wells in an email. “A skilled hunter and guide, he found joy and purpose in nature.”
Pendry was not the only elk hunter attacked by a grizzly this month. Celia Easton of Thermopolis, Wyoming, narrowly escaped severe injury when a charging grizzly pulled her boot off her foot. Because it was raining, Easton had been wearing rubber knee-high boots instead of laced hiking boots.
“Here is this big old sow grizzly with her baby about 20 yards away coming right at me,” Easton told Cowboy State Daily. “I was partly under a tree. She was trying to drag me out from under that tree, but then my boot popped off. My foot came free and that bear just swapped ends and ran.”
Easton has a bruised big toe and a punctured rain boot. The bears involved in that case weren’t injured or captured.
“If that was just the tiniest taste of the power that was in those jaws,” Easton said. “You can only imagine what it would be like if she had really clamped down on me.”
In early September two 25-year-old outdoorsmen traveled cross country to meet in Colorado. One hopped a flight from North Carolina with an archery tag for Unit 81, which lies just north of New Mexico along the eastern flank of the San Juan Mountains. The other drove from Utah in a beat-up Subaru to hunt alongside one of his best friends.
Like so many others who’ve explored new valleys far from home, Andrew Porter and Ian Stasko were physically fit, well-prepared, and experienced in the backcountry. They hiked into the Rio Grande National Forest on Monday, Sept. 8 hungry for adventure. But on the fourth day of their eight-day hunt, they failed to check in with their loved ones at home. Andrew’s fiancée, Bridget Murphy, was starting to worry back in North Carolina. So were Andrew’s parents, Lisa and Greg Porter, who’d made their son promise to check in with them through his Garmin inReach at least once a day.
A photo of Andrew Porter (left) and Ian Stasko during their elk hunt together in Montana in 2023. Photo by Bridget Murphy
“The agreement Andrew has with us and Bridget had always been that if we didn’t hear from him after twenty-four hours, I was going to assume he was in trouble and start calling people,” says Lisa. “He’d always been great about that. So when we didn’t hear from him, I knew something wasn’t right.”
That Friday night, after touching base with Bridget and Greg, Lisa called the Conejos County Sheriff’s Office and asked them to start looking for her son and his friend. The search for Ian and Andrew would stretch on for nearly a week, expanding each day as it progressed. Conejos County Sheriff Garth Crowther says he’s never seen anything quite like it during his 46 years in local law enforcement.
The massive effort was led by the county’s search-and-rescue crew, which is made up of around 15 to 20 deputies, firemen, and other volunteers from the community. But at the peak of the search, there were hundreds more people involved from at least 15 states. These folks joined a number of locals from Southern Colorado and Northern New Mexico, who’d left behind their own responsibilities and hunting camps to join the search party.
“I got a call from these guys in Idaho, and they’d drawn tags to bowhunt elk in this unit,” says Blake Crowther, the sheriff’s cousin and the county undersheriff. “He said, ‘My brother and I are turning our tags in. Where do you want us and what time?’ There were dozens of people like that, who were driving down on their own free will to help people they didn’t even know.”
Return to the Scene of the Strike
The October sky is bright blue and sunny when CCSO officers Sergeant Monica Dominguez and Deputy Joshua Salazar set out from the Los Pinos trailhead. A rutted gravel road had brought them up from Cumbres Pass to this portal into the high country, where aspens shimmer in golden waves that wash along the mountainsides. Looking west through a pine forest riddled with beetle kill, they can almost make out the Continental Divide.
From where the two officers park, it’s a short, 1.5-mile hike to where the bodies of Ian and Andrew were found. They know the route; they’d walked a huge swath of this terrain three weeks prior. They parallel the creek toward the bowl of cliffs above, then break off trail to cross above a waterfall. Game trails lead them the rest of the way.
CCSO Sergeant Monica Dominguez (right) and Deputy Joshua Salazar were part of the county’s core search-and-rescue crew that led the operation. Photo by Dac Collins
There, in a strip of pine trees near a meadow on the edge of the South San Juan Wilderness, a piece of flagging marks the last place the two young men had stood. The county coroner Richard Martin determined their cause of death was an indirect lightning strike. He says they would have died instantly, without any pain.
Scanning for clues beneath the scraggly pines, they find no burnt tree trunks or other obvious signs of a lightning strike. Martin says the burn marks on the bodies, which were caused by electrocution, were sufficient evidence for him to draw his cause-of-death conclusion. Andrew’s inReach was also found in pieces in his pocket; it had sustained more damage than a drop or fall would have caused. But the spot itself, at just under 11,000 feet of elevation, is puzzling in a way. It’s exactly the sort of place a hunter would have sought shelter during a high-country lightning storm.
A piece of pink flagging marks the spot where the two men were finally found. Photo by Dac Collins
“They were on their way down to their vehicle. I just know it,” undersheriff Blake says. “And in my mind, they did what they’d been trained to do — or at least what people are supposed to do in a lightning storm. They got into a patch of trees. They weren’t under a single tree, or on a ridge, or in a low spot.”
It was sunny too, but colder, on the morning of Sept. 13, when Blake drove into the mountains to start the search on his own.
Kindred Spirits
Andrew and Ian were born and raised in Charlottesville, Virginia, where they grew up fishing, camping, and exploring the Piedmont’s waters and backwoods. They played Little League together and graduated from the same high school, and they both attended college at James Madison University. That’s where their friendship cemented.
“Ian was just a leader, an initiator of adventures. And he was always an adrenaline junkie,” says Missy Sirch, Ian’s mom. “He started out climbing trees, and then moved on to other things he wasn’t supposed to be climbing.”
Ian Stasko balances atop a rock face in Virginia. Photo via Instagram
That included the stadium lights at the high-school baseball fields, and the local mall, which Ian and a friend scaled for fun. (In his defense, he did tell his mom they were going to the mall.)
Dylan Stasko wasn’t at all surprised by these antics. She says her older brother’s outgoing and magnetic personality made others want to join him in the outdoors. Ian and his sister also spent time on the Carolina coast many summers and, like any real thrill-seeker with access to a beach and a fishing rod, Ian became obsessed with catching big sharks.
“There was this one time, when me and my mom had been waiting for like an hour and a half at this spot where we’d dropped him off on his paddleboard,” Dylan says. “He finally paddled up and he was sunburnt to a crisp, because he’d hooked up with this 8-foot bull shark. So he was basically getting dragged around, just holding on for dear life … and at one point, his rod snapped.
“He’d flagged down a boat [to bring him back], and by the time we saw him, the tops of his feet and thighs were purple,” Dylan laughs. “He was so pumped about it.”
By the time Ian entered JMU and joined the same fraternity as his hometown friend, Andrew was already seeing Bridget. The two had met in class during the second semester of their freshman year. For their first date in Charlottesville, Bridget met Andrew’s parents at the Porter’s home for dinner, then Andrew launched an old red canoe on a nearby farm pond.
“I thought it was just dreamy,” Bridget recalls. “I also thought it was kind of funny, because of how much effort he’d put into getting this big canoe down there, and we were just catching these little bass. But it was more about him [paddling] me around and just being out on the water. He was sincere. He did things with a purpose.”
It would be the first of many such outings together, as Bridget introduced Andrew to deer hunting during college. She says he was more reserved than Ian, which is part of why the young men got along so well.
“There’d be this huge party going on at the frat house, and the two of them would be in the kitchen standing over this huge cast iron skillet. They’d be there cooking venison and potatoes, planning their next big adventure or talking about the essence of life.”
Ian (left), Andrew, and Bridget hunted elk together in Montana’s Rattlesnake Wilderness in 2023. Photo by Bridget Murphy
She remembers a few of those deep conversations when the three went hunting elk together in Montana’s Rattlesnake Wilderness a few years ago. After graduating in 2022, Bridget and Andrew had moved to Missoula together. They each bought their first compound bows there, and Andrew was learning all that he could about Western big-game hunting. Stasko joined the couple for his first-ever hunt that fall, in 2023. After a week of eating tag soup, he was ready for another helping.
“So, last year he came up, and they went bowhunting together in the Crazy Mountains for a full month. Ian didn’t have a tag. He was there to help Andrew scout and [hopefully] pack out a bull, which just shows the level of dedication they had to each other,” Bridget says. “They were unstoppable … I could barely keep up with them. And that’s why I didn’t go this year.”
The Search Begins
A fresh skiff of snow covered the ground when Undersheriff Blake Crowther arrived at the Rio de Los Pinos trailhead the morning of Saturday Sept. 13, the day after the hunters had been reported missing. A game warden with Colorado Parks and Wildlife had confirmed that Stasko’s Subaru was still parked in the last place Porter’s GPS unit had pinged: the trailhead parking lot, at around 10,000 feet above sea level.
The search for Andrew and Ian was based out of the Rio de Los Pinos trailhead, where their vehicle was found. Photo by Dac Collins
Blake knew from his brief conversation with Lisa the night before that the two hunters weren’t supposed to be out until Tuesday, Sept. 16. But when he peered through the hatchback window, he saw a pile of gear still inside.
“I could see backpacks, and what looked like sleeping bags, stuff like that. And something just didn’t feel right,” he says. “It had been storming on-and-off up there since Wednesday.”
Blake hiked up and off the trail toward where he thought two hunters might go — above the creek and up into the bowl that surrounded the broken meadows. By the time he’d climbed a couple miles, though, the weather was already turning. Afternoon thunderclouds had poured over the Divide and they cracked overhead as he hiked down.
Blake’s first call was to Sheriff Garth, who was already out in the national forest for Saturday’s muzzleloader opener. Garth had been hit by the same storms Friday night, and after hearing Blake’s concerns, he quickly broke camp and drove to the station in Antonito.
Both Crowthers grew up in Conejos County, where Blake and Garth have hunted and fished “since we were peewees.” They’ve seen the San Juans in all their glory, and they’ve gotten lost in the thick of it — when fog and sleet and screaming winds make navigation all but impossible. They’ve also found and rescued plenty of people over the years.
Undersheriff Blake Crowther (pictured) and his cousin Garth Crowther grew up hunting the same unit that Ian and Andrew were in. Blake still hunts there every fall, usually with a traditional bow. Photo courtesy Blake Crowther
Between the Continental Divide thru-hikers and all the other recreators who flock there, Conejos County gets hit hard with search-and-rescue calls. The sheriff’s office responded to 38 of those calls in 2024 and, as of Oct. 7, another 31 so far this year.
“This summer has been terrible,” says Garth. “And now it’s rifle season we’re dreading. Because people are on edge after all this, and I guarantee you that if someone is five or ten minutes late coming home, we’re gonna be getting a call.”
In a typical search situation, Garth explains, he and Blake can usually sort it themselves, or with the aid of the local SAR team and maybe a single helicopter. By the evening of the second day, though, the two officers knew they would need more help.
Final Messages
Greg and Lisa Porter say their son had a quiet and gentle charm about him that drew others in. Andrew was also a craftsman. During the pandemic, he spent his lockdown at home building a cabin in his parents’ backyard.
“He had just the kindest soul, and he was so easy to get along with,” Lisa says. “So even though he was very quiet, I think people just naturally gravitated toward him because he was so approachable.”
Andrew and his twin brother, Ryan, were born to move. Lisa says they were climbing out of their cribs by the time they were 13 months old. As they matured, along with their older brother, Matthew, they threw themselves into traditional sports, but Andrew always seemed more drawn to outdoor adventures.
Andrew Porter kneels beside the whitetail buck he tagged in Montana while hunting with Bridget Murphy. Photo by Bridget Murphy
Discovering hunting with Bridget only fueled his fire, especially during their time together in Montana, when she was attending grad school. And while Andrew never killed an elk with his bow, it wasn’t for a lack of trying. Bridget remembers one fall where they hunted every single day of rifle deer season, and he finally tagged a buck on the last evening. He told her it would be his last harvest with a gun — he was going all-in on bowhunting.
“We went trout fishing up there in the Yaak Valley together during the summer of 2024,” says Greg, Andrew’s dad. “But as we were fishing, he kept wanting to check out these meadows — he’d run up a mountain just to see what was up there and look for sign. So, I was kind of laughing at him. I said, ‘Are you out here scouting? Or are you fishing?’ … And he said to me, ‘I just love being out here. This is what I live for.’”
Bridget and Andrew got engaged while living in Montana, and before they moved to North Carolina together. Their wedding was scheduled for May 2026. Photo courtesy Bridget Murphy
By spring 2025, Andrew and Bridget had moved to Asheville, North Carolina, to continue building a life together. They bought their first house and planned to marry in May 2026. For obvious reasons, a fall wedding was out of the question.
Before accepting his new job as a project manager for a home builder, however, Andrew had told his boss he planned to take a good chunk of September off to bowhunt elk out West. He had drawn a Colorado nonresident archery tag in April, and began planning his hunt. He knew Ian would be game before he even asked.
If Andrew was the planner in their friendship, Ian was the philosopher. Dylan says her brother was constantly thinking and talking about this idea of collective consciousness — the shared beliefs and perspectives that help unify society.
Ian Stasko with a big flathead catfish he caught from the James River in 2017. Photo via Instagram
“He wanted to change the world,” says his mom, Missy. “His capstone [in college] was how to find solutions to the climate crisis by changing the world’s conscious evolution. He was continuing to work on that idea, and doing a lot of writing, when he was out in Utah.”
Holding a day job and saving money were more secondary concerns, Missy jokes. That is, until Ian’s truck broke down a week before his elk hunt with Andrew. Instead of fixing the pickup, he found an old Subaru with a failing transmission and paid $1,400 for it. Missy says that car “probably should not have made it to Colorado.”
But the Subaru did — all the way to the Los Pinos trailhead. Bridget got a text sent from Andrew’s inReach late on Sept. 7: “Made it to the end of the road.”
After spending a night near the clunker, Andrew and Ian hiked into the basin above, where they pitched camp and hunted for a few days. Andrew was even able to FaceTime Murphy briefly a few days before he died, while they were glassing from a ridge.
“The call was only 59 seconds, so it wasn’t really a conversation,” Bridget says. “But I’m so glad we had it, because I could tell how happy he was with Ian up there. He was smiling, and I could hear Ian in the background, and at one point he said, ‘I want to show you this.’ He flipped the camera around, and it was this big, beautiful meadow on top of a mountain.”
Bridget continued to get daily updates. But on the afternoon Sept. 11, she and Lisa received what would be Andrew’s final messages. He said they’d gotten soaked by storms and were headed back to the car to dry out their gear. He also let Bridget know they’d found a herd of elk and had a close encounter. The two buddies were feeling more confident than ever that they would kill a bull.
A view of part of the basin that Ian and Andrew were hunting in the Rio Grande National Forest. The area featured pine forests that surrounded a series of meadows along Rio de Los Pinos creek. Photo by Dac Collins
Bridget thinks Andrew and Ian slept in the Subaru that night. Search crews would later learn that the two bumped into other hunters a nearby trailhead Friday morning. Andrew and Ian told the hunters about the elk they’d seen near Los Pinos, and they were back at that same trailhead by the afternoon.
“I think they just went out for an afternoon hunt, which is what we’d done together before,” Bridget says about that fateful day in the mountains. “They’d seen a herd, we know that. And they would have left all of their heavy stuff, and just taken what they needed to shoot a bull and bring back the first load of meat. And then I guess the storm came in.”
Historical weather data for the region shows that a series of thunderstorms hit the eastern San Juans sometime around 3 p.m. Friday. The storms brought heavy winds, rain that turned to snow overnight, and lightning.
The Search Grows … and Grows
Lisa flew to Denver on Sept. 13 and met Bridget and Greg, who flew in early the next morning. They drove south to the trailhead, which had turned into incident command headquarters. Missy and Dylan Stasko, who hadn’t been getting Andrew’s inReach messages and weren’t as in the loop during the hunt, started traveling Monday and arrived early Sept. 16.
A quick clip of the trailhead where searchers gathered, courtesy Dylan Stasko.
By then, the sheriff’s office had tapped the New Mexico State Police search-and-rescue teams, along with crews from La Plata County, Colorado Parks and Wildlife, and the Forest Service. These agencies brought horse teams, dog teams, and drones, and they joined forces with local outfitters and guides, who’d brought up their own horses to help. Small businesses from the closest towns of Chama and Antonito delivered food and water in shifts.
“Just the way that people were supporting us, and the love and generosity, it was incredible,” says Missy. A family in Chama insisted that she, Dylan, and Ian’s two roommates stay at their home during the week of the search, and the family fed them dinner each night. “For me, with everything going on in the world right now, it was this beautiful demonstration of humanity, of people just being there for one another.”
The Rio de Los Pinos trailhead serves as an entry point into the South San Juan Wilderness. Photo by Dac Collins
The search crews spent each day combing a 5-mile radius around the trailhead as helicopters and planes flew overhead. They walked through deadfall, up drainages, and over scree through some of Colorado’s roughest country. But the hardest part, according to local law enforcement, was having to hang it up each evening.
“Our shortest day was 14 hours, and most were 18-hour days,” says Garth. “But it was the same feeling every night, and we kept saying to ourselves, ‘What more can we do? We gotta find these boys.’ That stress wears you out much faster than the physical part of climbing mountains.”
Bridget was also moved by the locals’ response. But the clock was still ticking by the end of the day on Sept. 15, and she felt like they needed more help. So she logged onto Facebook and made a post: “URGENT PLEA FOR PEOPLE ON FOOT IN SEARCH.”
“I just thought it could do something. I did not expect it to take off as much as it did, or as fast as it did.”
Bridget’s cry for help resonated, and the post caught fire, especially on several hunting pages. By the next morning, Tuesday Sept.16, there were additional cars at the trailhead, all driven by people who’d seen Bridget’s post. She then made a follow-up post, offering a $10,000 reward, and by that Wednesday, the place was packed. (Few people who turned up ever asked about or mentioned the monetary reward.) A private pilot from Wyoming had brought his helicopter down, and a group with a mule team had driven from Texas, fueled entirely by local church donations — just a couple examples of the overwhelming response they received. The sheriff says they almost had too much help at times.
“We kept saying to ourselves, ‘What more can we do? We gotta find these boys.’ That stress wears you out much faster than the physical part of climbing mountains.”
“It was beyond belief,” adds Blake, who estimates that around a third of the volunteers were spurred by Murphy’s posts. “I have lists and lists of people, agencies, and private companies who came out. That’s not mentioning the people we had in reserve … and I wish I could thank them all individually. Everyone, from the solo person who showed up to the ten-man teams, was important.”
But even with all the horses and hounds, and the high-tech drones and choppers, crews spent five long days and sleepless nights desperate for a development. The sheriff and undersheriff, meanwhile, were putting immense pressure on themselves to bring the families an answer.
“You always try to keep that faith, but it affects you seeing them hurt, and their hopes getting thinner and thinner,” Garth says. “And the two of us, me and Blake, we have sons around that same age. They’re always hunting, always out here in the mountains. You look at all that and realize: These could have just as easily been our own boys.”
A Sliver of Peace
Thursday morning — now a full week since Andrew’s last inReach message — broke calm and clear, with even more activity at the trailhead. The Colorado Search and Rescue Association had brought more resources from around the state, and Garth was now having to hold volunteers back just to keep everyone safe. There were more than 140 people out looking in the forest that day, along with dozens more at incident command trying to keep the search organized.
“The mornings and the evening were the worst. I’d be trying to take a hot shower, and knowing that they couldn’t, that they could be out there freezing in the woods … I just felt so helpless, and our minds were our own worst enemies, coming up with every scenario possible,” says Bridget. “But at the same time, it was heartbreakingly beautiful. Seeing all these good people coming together to get them home.”
Andrew and Ian’s bodies were found in this strip of pine trees at around 10,900 feet of elevation. This spot is 1.5 miles from where their vehicle was found. Photo by Dac Collins
A team of CORSAR professionals mixed with civilians were the ones who finally ended the search. They’d been assigned a new chunk of terrain on the far side of a ridgeline, so the team took the most direct and steepest route out of the creek toward the ridge above. There among the pines, they stumbled upon the two camouflaged bodies in the grass.
Blake would realize that night after looking over his own GPS tracks that he’d walked within 125 yards of the bodies on Saturday, the first day of the search. Sgt. Dominguez had walked within 52 yards of them. And for several days, until the cause of death was announced as lightning, Dominguez was distraught. She thought she’d missed her opportunity to rescue the men.
When people are dealing with unexpected or traumatic circumstances, well-meaning supporters often talk about finding “closure.” But Andrew and Ian’s families say there is really no such thing when the body of someone you love is brought out of the woods.
Bringing them home, at least, gave the families a “sliver of peace,” Bridget says. The cause of death announcement also squashed the baseless theories that had been floated in previous days by online commenters: that Porter and Stasko were somehow unprepared or unable to survive the conditions they faced.
“I guess it made us realize that they didn’t do anything wrong,” Lisa says. “They were just tragically unlucky.”
Ian (from left), his mom Missy, and his sister Dylan on a beach in the Carolinas. Photo courtesy Dylan Stasko
Dylan, too, says the fact that Ian and Andrew were struck by lightning raises a whole different set of existential questions about how they were taken and why. Questions that her older brother might have liked to chew on.
“[Ian] was always fascinated by entropy, and just the randomness of the universe. So it feels extremely ironic at the same time,” she says. “We were also thinking about the fact that they’d been dead for six days, and they still brought all these people together who were focused on a common goal. That was the thing he had always envisioned, this idea of collecting people’s consciousness.”
We may earn revenue from the products available on this page and participate in affiliate programs. Learn More ›
Let’s get this part out of the way first: Trail cameras are a pain. Batteries die, SD cards get corrupted, settings get messed up, and squirrels trigger thousands of useless images. So why would you make your trail camera strategy more complicated by throwing in cellular cameras, which require network connection and pairing with apps? Simple, it’s because once you finally have the best cellular trail cameras linked up and set properly, they provide you with constant, realtime scouting information that will help you pattern deer.
With that in mind two diehard deer hunters spent the last couple years testing the top cellular trail cams. We ran them in the field and conducted a standardized backyard walkthrough test. Our results will help you pick the best cellular trail cameras for your hunting style and area.
We put each camera through a straight-forward walkthrough test. Photo by Scott Einsmann
We test cell cams both objectively and subjectively. Out of the box we fire them up and connect them to related apps. Then we run each camera through a straightforward walkthrough test. After that we hang the cameras in the field and utilize them just as any hunter would run cameras on a property. We’ve been testing trail cameras for several years now. So we have years of experience with certain cameras, and only a few months of data on other cams. But as we let each of these cameras soak (and as new models come out) we’ll continue to update this story with new info.
The Walkthrough Test
Each cellular trail camera is set to its fastest shooting mode and highest sensitivity. Markers are placed at 10 feet, 60 feet, and 110 feet. Then the tester walks past the camera (left to right and then right to left) at a medium pace at each given distance — about the speed of a rutting buck tromping through the woods.
The walkthrough test is then repeated at night. From there we analyze the results for blank photos, failures to trigger, blurry images, and overall photo quality. The test is meant to measure the camera’s detection range, trigger speed, shutter speed, and flash range.
Field Testing
We set each camera in the field to see how it performed in real world conditions. We set cameras in areas that had reasonable cell service. In the field, we evaluated the camera’s photo quality, reliability, and ease of setup. This included the ability to use each camera’s app to review and sort photos. Over time, we get a sense of the camera’s durability – but this can very greatly from camera to camera (even among the same brands and models).
The Test Team and Locations
Scott Einsmann, gear editor, Virginia
Alex Robinson, editor-in-chief, Minnesota and Wisconsin
For the third year in a row Tactacam is our editor’s choice winner. The new Reveal Ultra has everything we like about last year’s winner, the Pro 3.0, and adds on features that serious trail camera users will appreciate. It has GPS, low and no-glow flash, and live video streaming. It maintains the 3.0’s fast camera speed, good battery life, and easy-to-use app.
The Reveal Ultra can toggle between low-glow or no-glow flash. Low-glow flash means there is a visible red light that comes on when the camera is triggered. The low-glow flash is brighter and illuminates a larger area than a no-glow flash. A no-glow flash emits no visible light and is a completely stealth option. It doesn’t light up a huge area and is best for photos where the subject is less than 60 feet away — scrapes and trails. No-glow is also a great option if you’re using a trail camera for security rather than hunting.
If you need to find your trail camera you can activate its GPS, which gives you a location update every 6 hours. The GPS function works even if the battery is dead or removed for up to 72 hours. That means if you lost your cameras, it gets stolen, or is moved by someone, you’ll be able to recover it.
During the walkthrough test, the Reveal Ultra triggered 100 percent of the time at 10 and 60 feet, but failed to trigger at night at 110 feet. That is above average performance based on past trail camera tests. Between the dozens of Tactacams we have in the field, we routinely see photos of deer captured at 60 feet and beyond.
The photo quality is excellent both day and night. Subjects are captured as they enter the frame or directly in the center. The images are crisp with no motion blur. The low-glow flash is impressive and it illuminates well beyond 110 feet without over exposing objects up close.
One thing I like about Tactacam is their plans are straight forward and fairly affordable. Here’s a breakdown of the different plans they offer.
Plan
Price Per Month
Max Photos
Price for Adding an Additional Camera
Starter Plan
$5
250
$5
Intermediate Plan
$8
500
$7.50
Pro Plan
$13
Unlimited
$12
You can pause your plan and restart it at any time, which is a convenient feature. It’s also important to note that if you want to get on-demand photos, download HD photos, or enable live videos you have to get the Xtra plan, which is an additional $9 and covers all your cameras.
There are a few downsides to the Ultra. In video mode, you can’t view videos right away. The app displays a thumbnail and you’ll need to request the video before viewing it. The live video mode is slower to start up than my Spartan GoLive2. The Reveal app doesn’t have a species filter which can make sorting through photos time consuming. It does have filters for custom tags, weather, date, and time.
I currently have three Tactacams on my lease and 30 more on an out of state property. Alex Robinson, OL’s editor-in-chief and one of the authors of this article, also runs several Tactacams. That’s a large sample size and we’ve yet to encounter a significant issue. I got to test the Ultra before it was released to the public and on the launch date, it started glitching. I used Tactacam’s US-based support line to trouble shoot the issue and quickly spoke to a real human. The customer service representative helped me resolve the issue and I was back in business.
In our experience, you’re not likely to have an issue with a Tactacam, and if you do, they have excellent customer service to help you out.
Moultrie allows you to select which types of pictures are sent
Integrated GPS
Connects to Moultrie feeders
40 MP images
1080p video
100’ advertised detection range
.5 second advertised trigger speed
Low-glow flash
Price: $99
lux:814
lux:154
Moultrie combines a powerful app with smart integrations, a ton of customization and features, a reliable camera, and all for a relatively affordable price. I’ve messed with every major camera brand on the market and I can say with confidence that they offer more value than any other cellular trail cam brand out there. Despite tariff issues in the outdoor products industry and continuing inflation, the fact that you can still get their new Edge 3 camera for under $100 bucks is nothing short of incredible.
I’ll start with the camera itself and then dive deeper into the many features of Moultrie Mobile. The new Edge 3 has an improved 40 MP camera, live aim capabilities, a battery life estimator, and is GPS enabled, which works in part with onX integration (but more on that in a minute). There is also a Pro version of this camera that offers more camera capabilities, but at the higher price point I think most hunters should opt for the standard Edge.
This camera performed admirably in our walkthrough testing capturing quality images day and night. However I did have one issue with the app not uploading all photos during the test. Moultrie identified this as a known issue in the app and fixed it a couple days later, but those lost images never did come through. Happily, the camera did capture solid images in the field. My family members and I have been running Moultrie cameras on our deer property in north central Wisconsin for a couple years now, and so far, we have not had any reliability issues.
Where Moultrie really offers bang for the buck is in its app features and integrations. First, you can link your cameras to your onX account. This allows you to map your trail camera coverage in an area and check recent photos (in the onX app) in a logical way that will lead to a sharper hunting strategy.
Beyond that, Moultrie cameras also link to compatible feeders (if those are legal in your area). Moultrie Mobile allows you to sort photos by critter (you can see only bucks if you like), time of day, date range, temp, pressure, and even moon phase. Moultrie already had the most powerful app in the game, and now with the onX integration, it’s even better. The total package is the best deal going.
Triggered at all distances during the day and out to 60 feet at night
Live function works with just a slight delay
Easy to use and set up
Cons
App could be improved with species filters
Expensive
Key Features
Live streaming up to 30 FPS
Multi Carrier Transmissions
96 degree field of view
Infrared flash
Anti-theft GPS
Uses micro SD cards
Uses 12 AA batteries
2 year warranty
Price:
$330
Plans from $16 to $33 per month
I’ve had the Spartan GoLive2 in the field for nine months and its been a great camera. The live works quickly every time and I get great quality videos. The issue I have is that the live video feed can vary in its image quality. Occasionally, it’ll come in pixelated, clear up, and then become pixelated again. I find the live is best used in wide open fields or for seeing animals that are inside 15 yards.
The Spartan GoLive2 showed solid performance in the walkthrough test, capturing all distances during the day and out to 60 feet at night. In the field, it captured coyotes on the move and deer feeding at distances from 10 to 75 feet, with very few blank photos.
I primarily use the GoLive 2 in video mode. The videos populate in the app and are ready to view instantly. The video quality is great, but the flash range on videos is low compared to photos.
Nighttime photos from the Spartan cam. Photo by Scott Einsmann
The technology within the Spartan GoLive2 is impressive. However, the camera itself needs improvement. The camera struggles to find the right exposure at night and during daylight. It most often over exposes images, which reduces detail.
Another issue is the shutter speed is too slow — probably because the camera is trying to use a lower shutter speed to gather more light — and I get a lot of blurry images. A quick software update would probably fix those issues and I hope Spartan releases one because aside from that, the camera has been excellent in the field. — Scott Einsmann
I used the previous version of the Revolver Pro last year and was enamored with the concept. The camera has a 360-degree detection range, meaning it can pick up deer cruising through the area from any direction. It’s the ideal tool for monitoring fields or open hardwoods, especially when there’s not a well-defined trail.
The camera body contains a small motor that rotates the lens to each of the six zones when triggered. When in “360 mode” you get six photos that the app stitches together to provide a full-circle panoramic scene. This allows you to see what triggered the camera, but also everything else around it. You simply turn your phone sideways to scan the 360 view (see my screen recording below as an example of what you’ll experience in the app).
Though you don’t need to use 360 mode if you don’t want to. In walkthrough testing, I found this camera to capture me moving through the area from all directions, just as advertised. This year’s Pro 2 version promises improved durability (the previous version was prone to moisture issues) plus live on-demand photo and video.
This is one of the few trail cameras that can receive photos for free. All you have to do is add the camera to the SpyPoint app by scanning the QR code inside the camera and you’re ready to receive photos. The free plan is good for 100 photos per month. I use it in my low-activity areas, but it would also be great if you are using a trail camera to monitor a property for trespassers.
The cameras performance is OK, but not great overall. I get some motion blur in night photos and the detection range during the walkthrough test was 60 feet (only captured walking in one direction).
Automatically pairs with strongest cellular network
Price:
$120 (plans start at $5 monthly)
The Stealth Cam Deceptor Max was the only camera to pick up detail at 110 feet at night. Photo by Alex Robinson
If you’re tired of scrolling through blurry, low-quality nighttime trail camera images, you should consider Stealth Cam’s Deceptor Max. Last year the Stealth Cam Deceptor handily won our nighttime walkthrough test. This year, the Deceptor Max delivered Stealth Cam with back-to-back wins. It’s essentially the same camera as last year but upgraded with more battery power (16 AAs). Notably, Stealth Cam will soon be offering a rechargeable battery pack that will really add to the utility of these units.
Even in thick cover, the Deceptor Max captures solid nighttime photos. Photo by Alex Robins
As for nighttime performance, the Deceptor Max captured me clearly at 110 feet, even though the advertised detection range is only 80 feet. It’s the only camera in the test that delivered what I consider to be usable nighttime images at 110 feet. This is extra impressive considering it’s a no-glow camera, so there’s no noticeable red flash when it takes night images. Usually low-glow cameras, which emit a faint red flash, have better long-range nighttime performance. We hung our Deceptor Max deep in a bedding area and tethered it to a Stealth Cam solar panel. The hope is that we’ll be able to run it through the fall without having to reload new batteries.
The Bushnell took decent night photos. Scott Einsmann
One of the best buys in cell cams is the Bushnell Cellucore 20 with its 20 MP photos, customizable low glow flash, and easy-to-use app for around $100.
During the walk-through test, the Cellucore triggered at 10 feet with a perfectly centered photo—day and night. The camera didn’t capture me at 60 or 100 feet during the day, but at night it captured a series of five photos of me walking at 60 feet.
The nighttime walkthrough test at 60 feet.
The Cellucore has three flash settings: short range, fast motion, and long range. I used the long-range flash setting during the walk-through test and it illuminated out to 43 yards. The downside of the long-range flash is that close objects will be over exposed. For my in-the-field test, I used the fast-motion flash and it produced evenly illuminated photos with good detail from 5 to 15 yards. It also captured several deer walking without much movement blur.—Scott Einsmann
The Cuddeback Tracks camera did a nice job of stopping motion at 10 feet (left), however night time images at longer range were not as clear. Alex Robinson
Cuddeback is one of the trail camera O.G.s and their new Tracks cellular cam certainly stands out with its two large antenna paddles. Another big differentiator with this camera is that it runs on 4 D batteries instead of AAs, like all the other models in this test. Cuddeback says the D batteries provide more juice and lifespan for the money, which is notable. Anyone who has run a half-dozen or more trail cameras over the course of a deer season knows that batteries and SD cards can get spendy. The Cuddeback is also compatible with a solar panel to provide even longer battery life in the field.
From a performance standpoint, the Tracks camera did OK. It didn’t capture images at 110 feet and it missed me during the daytime walkthrough at 60 feet. Nighttime photo quality was decent. The camera did a great job of stopping motion at 10 feet. However, the images at 60 feet were not crisp. There were stronger performers at this price point, but if you’re a longtime Cuddeback fan and just want one cell cam to get started, this is the camera for you. Initial plans start at only $4 per month. —A.R.
The Stealth camera offers a ton of photo and video options.
Let’s cover the bad news first: During setup the camera failed to sync with the app. I received an error code and called customer service. I spoke with a very nice representative who couldn’t figure out the issue and guessed that I had a bad sim card. After two hours of waiting on hold, I gave up.
Now, let’s assume the bad sim card was simply bad luck and focus on the good news: this camera offers a motherlode of interesting photo and video settings. It has four video resolution options (including 4K) and four photo resolution options (up to 32MP). It also has a interesting option that allows you to shoot in burst mode and record from 1 to 9 images per triggering. Other cameras often shoot three or maybe five images in burst mode.
The Stealth camera triggered at 60 feet day and night. Alex Robinson
In the walkthrough test, the Stealth Cam did a nice job of capturing me at close range and at 60 feet. Though the nighttime photo quality was not as good as other top cameras in this test. It did shoot high quality photos in the field. —Alex Robinson
The Wildgame nighttime walkthrough test at 10 feet. Alex Robinson
Wildgame is known for making affordable trail cameras and at $120, the Terra Cell is right on par with other budget cell cams in this test. However the Terra Cell’s performance wasn’t as strong as those competitors. During the walkthrough test, the camera did not trigger at 60 feet, during day or night. At 10 feet, it did a nice job of capturing me in the middle of the frame, though image quality at night was not very strong.
The Wildgame camera performed better during the daytime. Alex Robinson
On a happier note, the HuntSmart app allows you to sort photos by species and time of day (though it doesn’t present the data quite as intuitively as the Moultrie Mobile app). Still, if you’ve been running Wildgame cameras for years and want to step up to the cellular version, this would be a solid option to hang near a feeder, food plot, or key natural food source. —Alex Robinson
The camera body itself is only part of the cost when it comes to running cellular trail cameras. In most cases, you also have to add a data plan. These plans can range from free to several hundred dollars per season, depending on how many cameras you run and how many photos and videos they capture. Below is a quick breakdown of the cell camera data plans for the cameras we reviewed in each test. If you’re just getting into cell cams, it makes sense to start with the basic plan and then upgrade as needed. Note: all of these companies offer discounted yearly subscription plans, but most deer hunters don’t run their cameras 365 days a year. So for most it makes sense to do a monthly plan and then cancel it when you quit hunting for the year.
Cell Cam Plans Compared
Camera Brand
Cheapest Plan
Details
Most Expensive Plan
Details
Tactacam
$5 per month
250 photos per camera; $5 per additional cam
$13 per month
Unlimited photos; $12 per additional cam
Spypoint
$0
100 photos per month; one camera per plan
$15 per month
Unlimited photos; one camera per plan
Stealth Cam
$5 per month
600 photos per month; one camera per plan
$20 per month
Unlimited photos & video; discounts for additional cameras
Moultrie Mobile
$10 per month
1,000 images and 10 videos each month
$35 per month
Unlimited images & 50 videos; additional cameras are $8 per month
Reconyx
$5 per month
200 photos per month, per camera
$20 per month
Unlimted images; one camera per plan
Spartan
$16 per month
Up to 3 cams & 500 MB of data (approx 1,500 lo-res photos)
$33 per month
Up to 10 Cameas and 2GB of data. (6,000 low res photos)
Bushnell
$10 per month
250 MB per month (approx 2,000 lo-res photos)
$20 per month
1 GB per month, per camera
How Cellular Trail Cameras Work
All the cell cams in this test have a similar basic setup process. First you download an app from the company. Then you set up a plan, load the camera with batteries, a sim card, and an SD card, pair the camera with the app (by scanning a QR code with your phone) and then establish your camera settings. When set in an area with cell service, the camera will send photos (or videos) to the app. Plans for each company are structured differently, but there are usually monthly or annual options ranging from about $5 per month to more than $20 per month.
Cellular Trail Cameras and Hunting Ethics
There is some controversy in the hunting community about using cellular trail cameras to hunt big game (make sure to check your local regulations before buying and using a cellular trail camera). Recently, the Boone & Crockett club issued this policy in regards to cell cams: “The use of any technology that delivers real-time location data (including photos) to target or guide a hunter to any animal in a manner that elicits an immediate (real-time) response by the hunter is not permitted. ‘Real time’ is the key concept. Seeing a photo and harvesting an animal a few hours later, or even the same day, uses this technology to assure a kill. It also takes advantage of the animal, which cannot detect impending danger from a camera. Waiting several days, or even until the following season, to pursue an animal captured on camera is different, and would not be deemed an unethical use of a trail camera.”
In reality, I don’t see many hunters using cell cams to capture images of a buck on a food plot or corn pile and then running out there to kill him that moment (though I’m sure it has happened). A more practical, and ethical, way to use this technology is to record consistent data on deer movement and then using those patterns to decide where to hunt. Most of us have limited days to hunt, so picking the prime spot is critical. The best cellular trail cameras help with that.
FAQs
Q: Are cellular trail cameras worth it?
Hell yes. There’s some extra setup and expense required with cell cams, but once you get them dialed they send photos to you real time. It’s hard to overstate how much fun it is to receive deer pictures all season long. Plus, with a smart trail camera strategy, you can pick the perfect places to hunt at the perfect times. There’s much less risk of spooking deer because there’s no need to hike in and check cameras (read our guide on where to hang trail cameras, here).
Q: Do all cellular trail cameras require a subscription?
All the cameras in this test require a subscription. But setting up the subscription is generally quick and painless. It’s all done through each company’s app, and all you need is your credit card information. Plans usually aren’t too expensive ranging from about $5 per month to a little more than $20 per month. I recommend going with unlimited image plans.
Q: How long do batteries last in a cellular trail camera?
This depends on the type of batteries, the activity in the area, and the setting of the camera. For max battery life, go with lithium, select a lower megapixel image, and opt for more delay time between photos (video kills batteries more quickly). In an area with average deer activity, a cell camera will easily last an entire season or longer.
Final Thoughts on the Best Cellular Trail Cameras
The best cellular trail cameras are powerful scouting tools. But they are also incredibly fun to use (after you get through the setup process). There’s nothing like receiving pictures of shooter bucks all week to get you fired up for a weekend hunt. Even when you’re working, mowing the lawn, or watching your kids’ football game, one simple photo can bring you right back to the woods, if only for a moment.
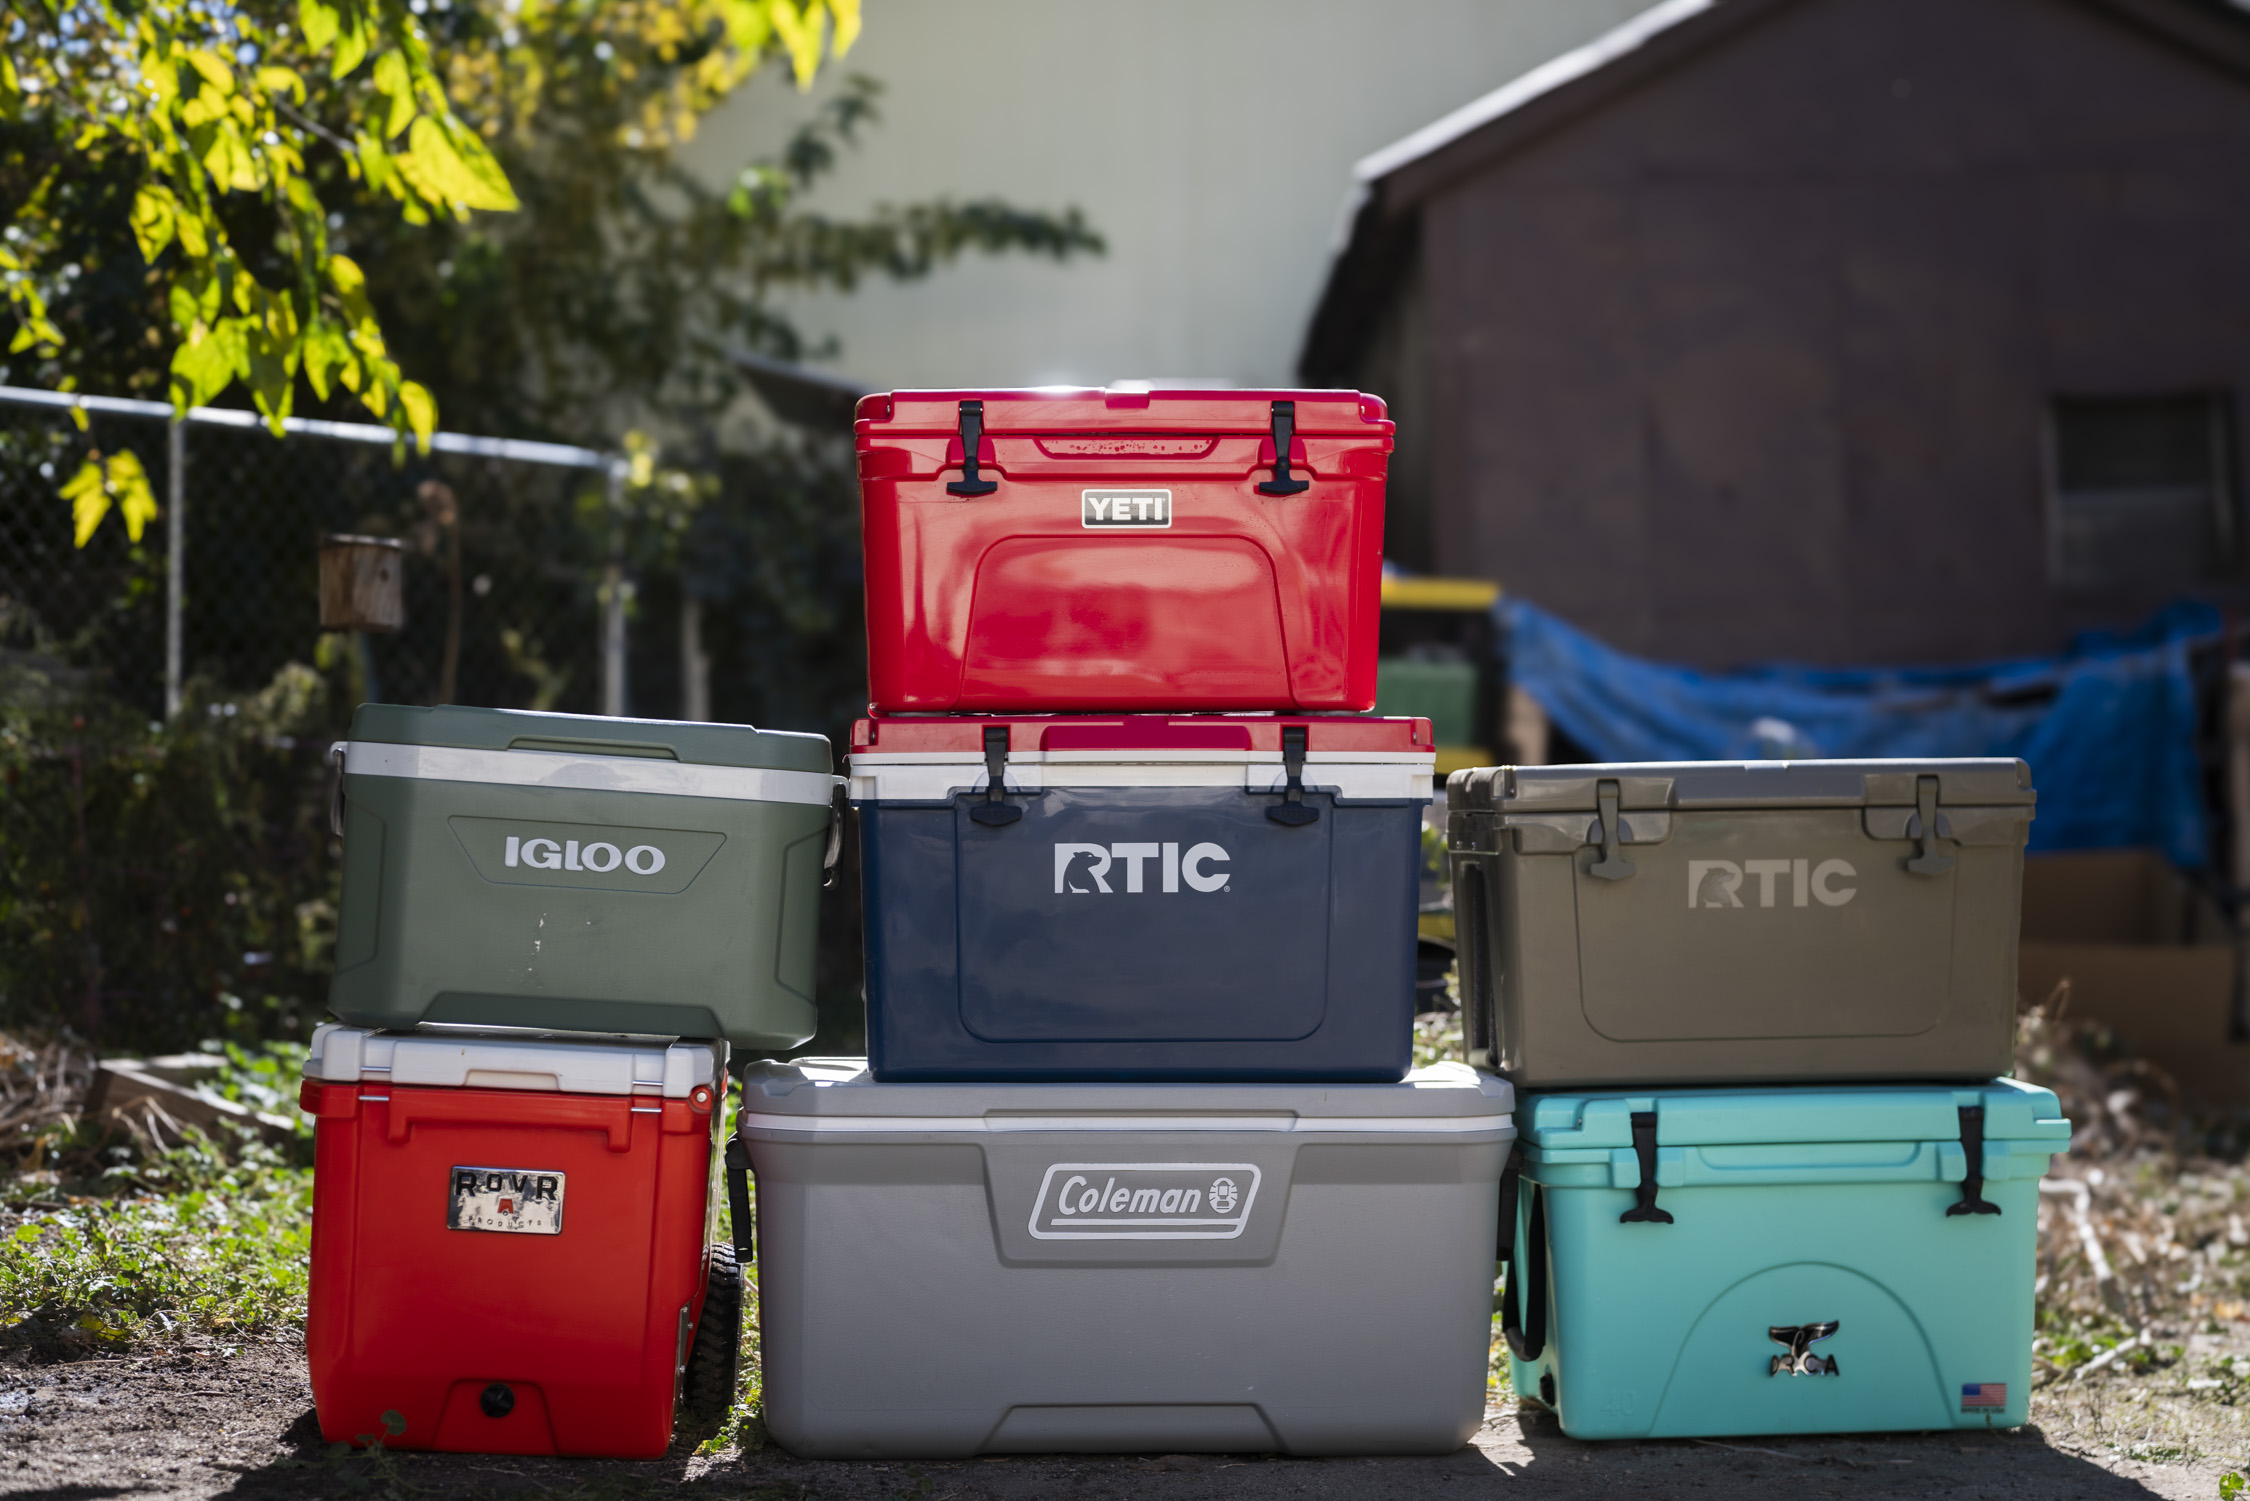
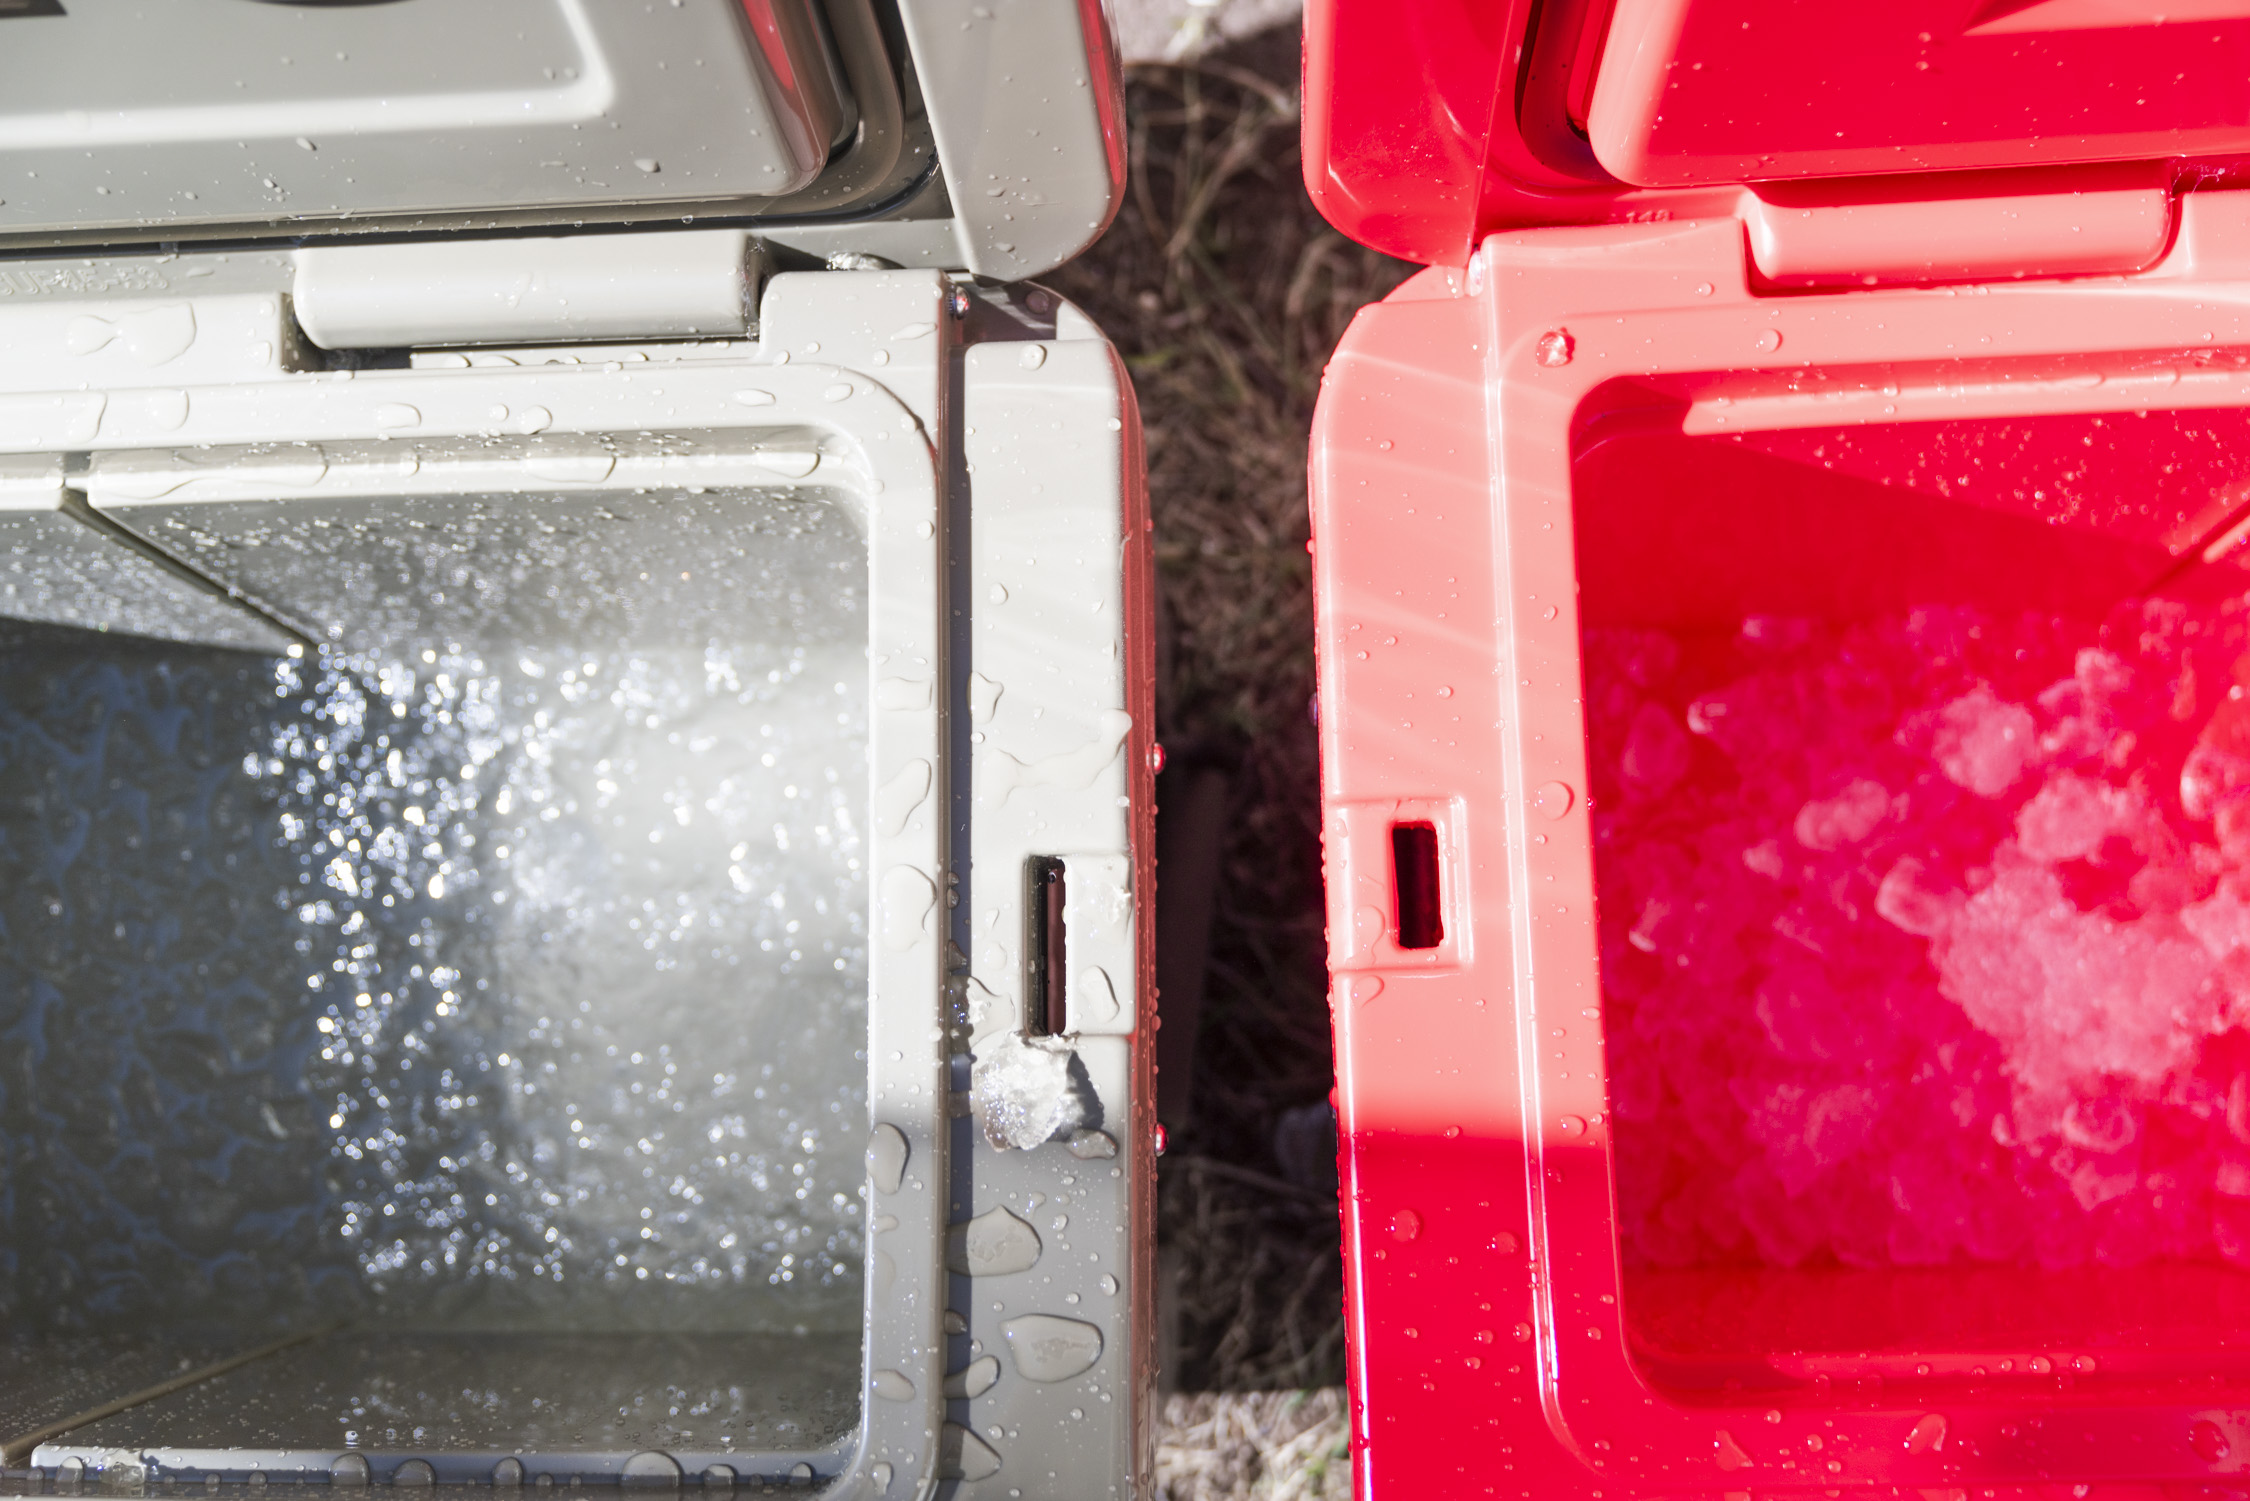
Whether you’re headed to the beach or a backyard barbecue, finding the best cooler means balancing ice retention, durability, and price. Lucky for you, we’ve tested dozens of coolers in real-world scenarios to help you find the right pick.
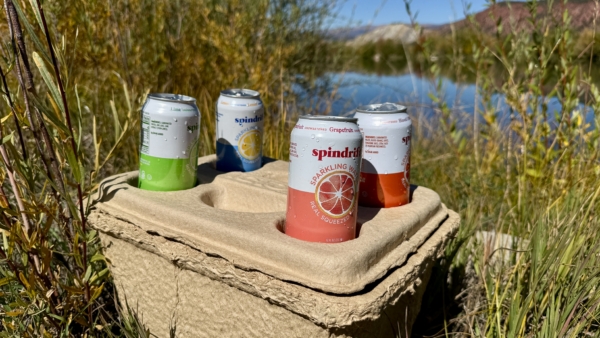
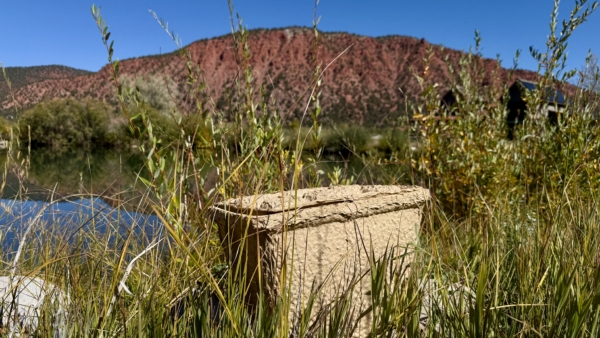
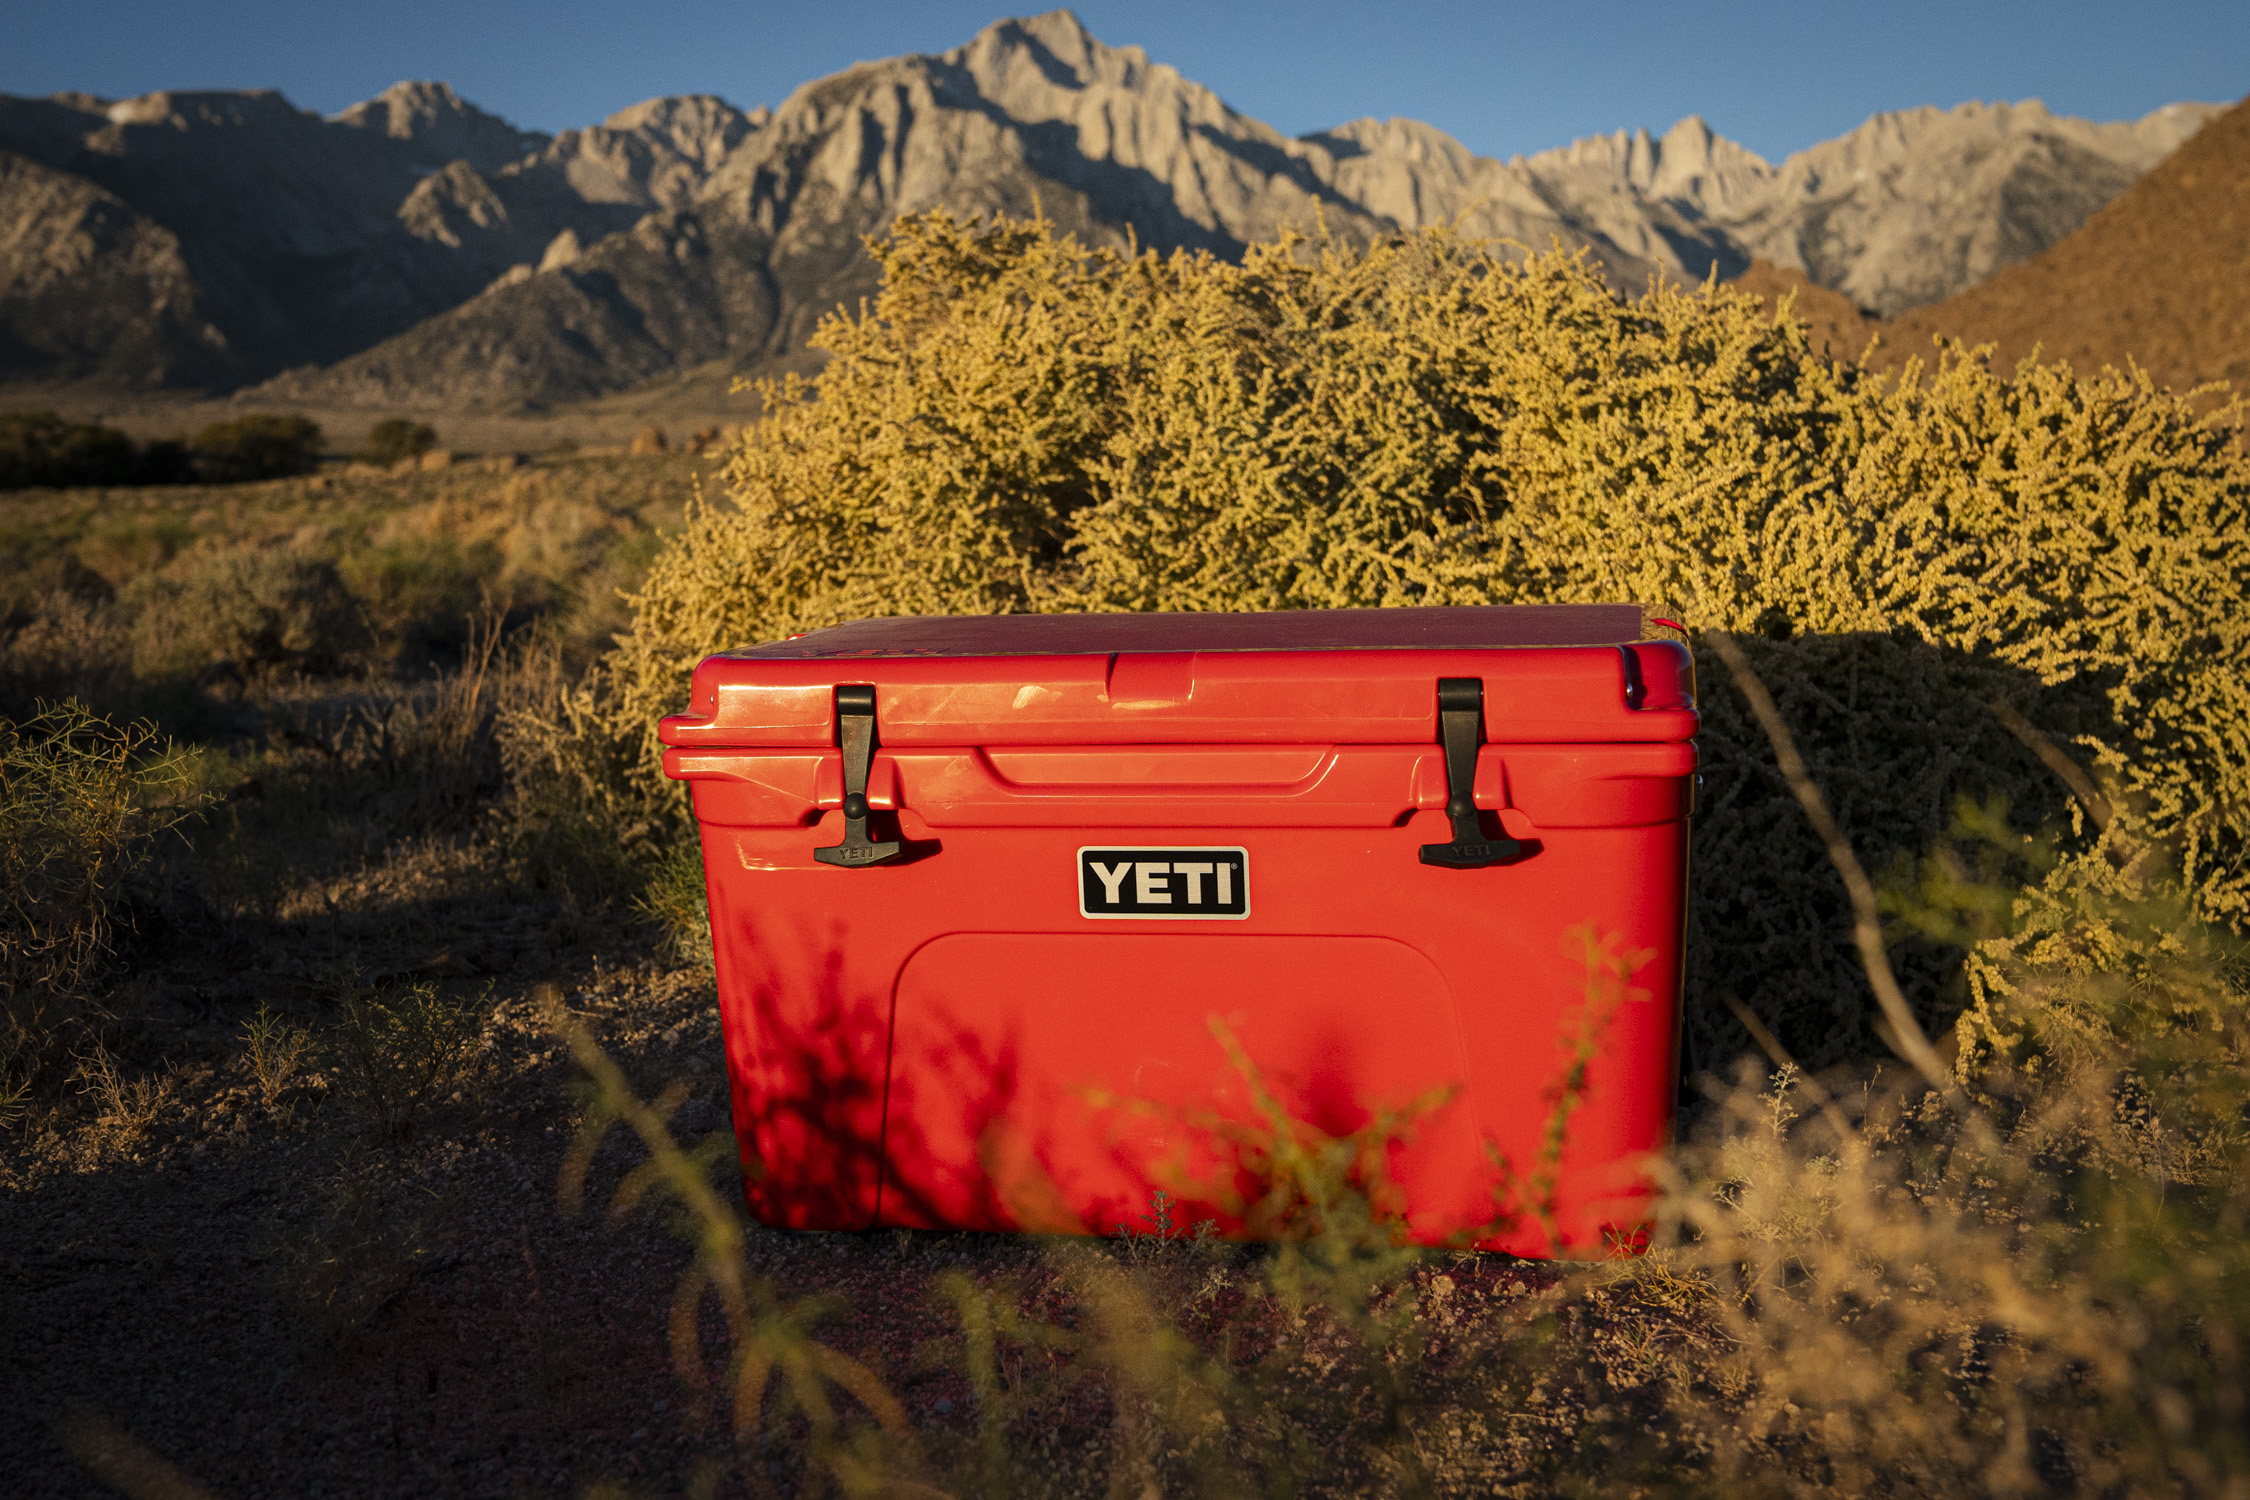
We’ve put coolers through the wringer: loading them with ice and drinks, hauling them on camping trips, stashing them in hot cars, and dragging them along to swimming holes. Standouts include the indomitable YETI Tundra 45, which continues to set the standard for durability and multiday performance, and the new Igloo Recool, a compostable cooler made from recycled paper pulp that offers a sustainable alternative for shorter outings.
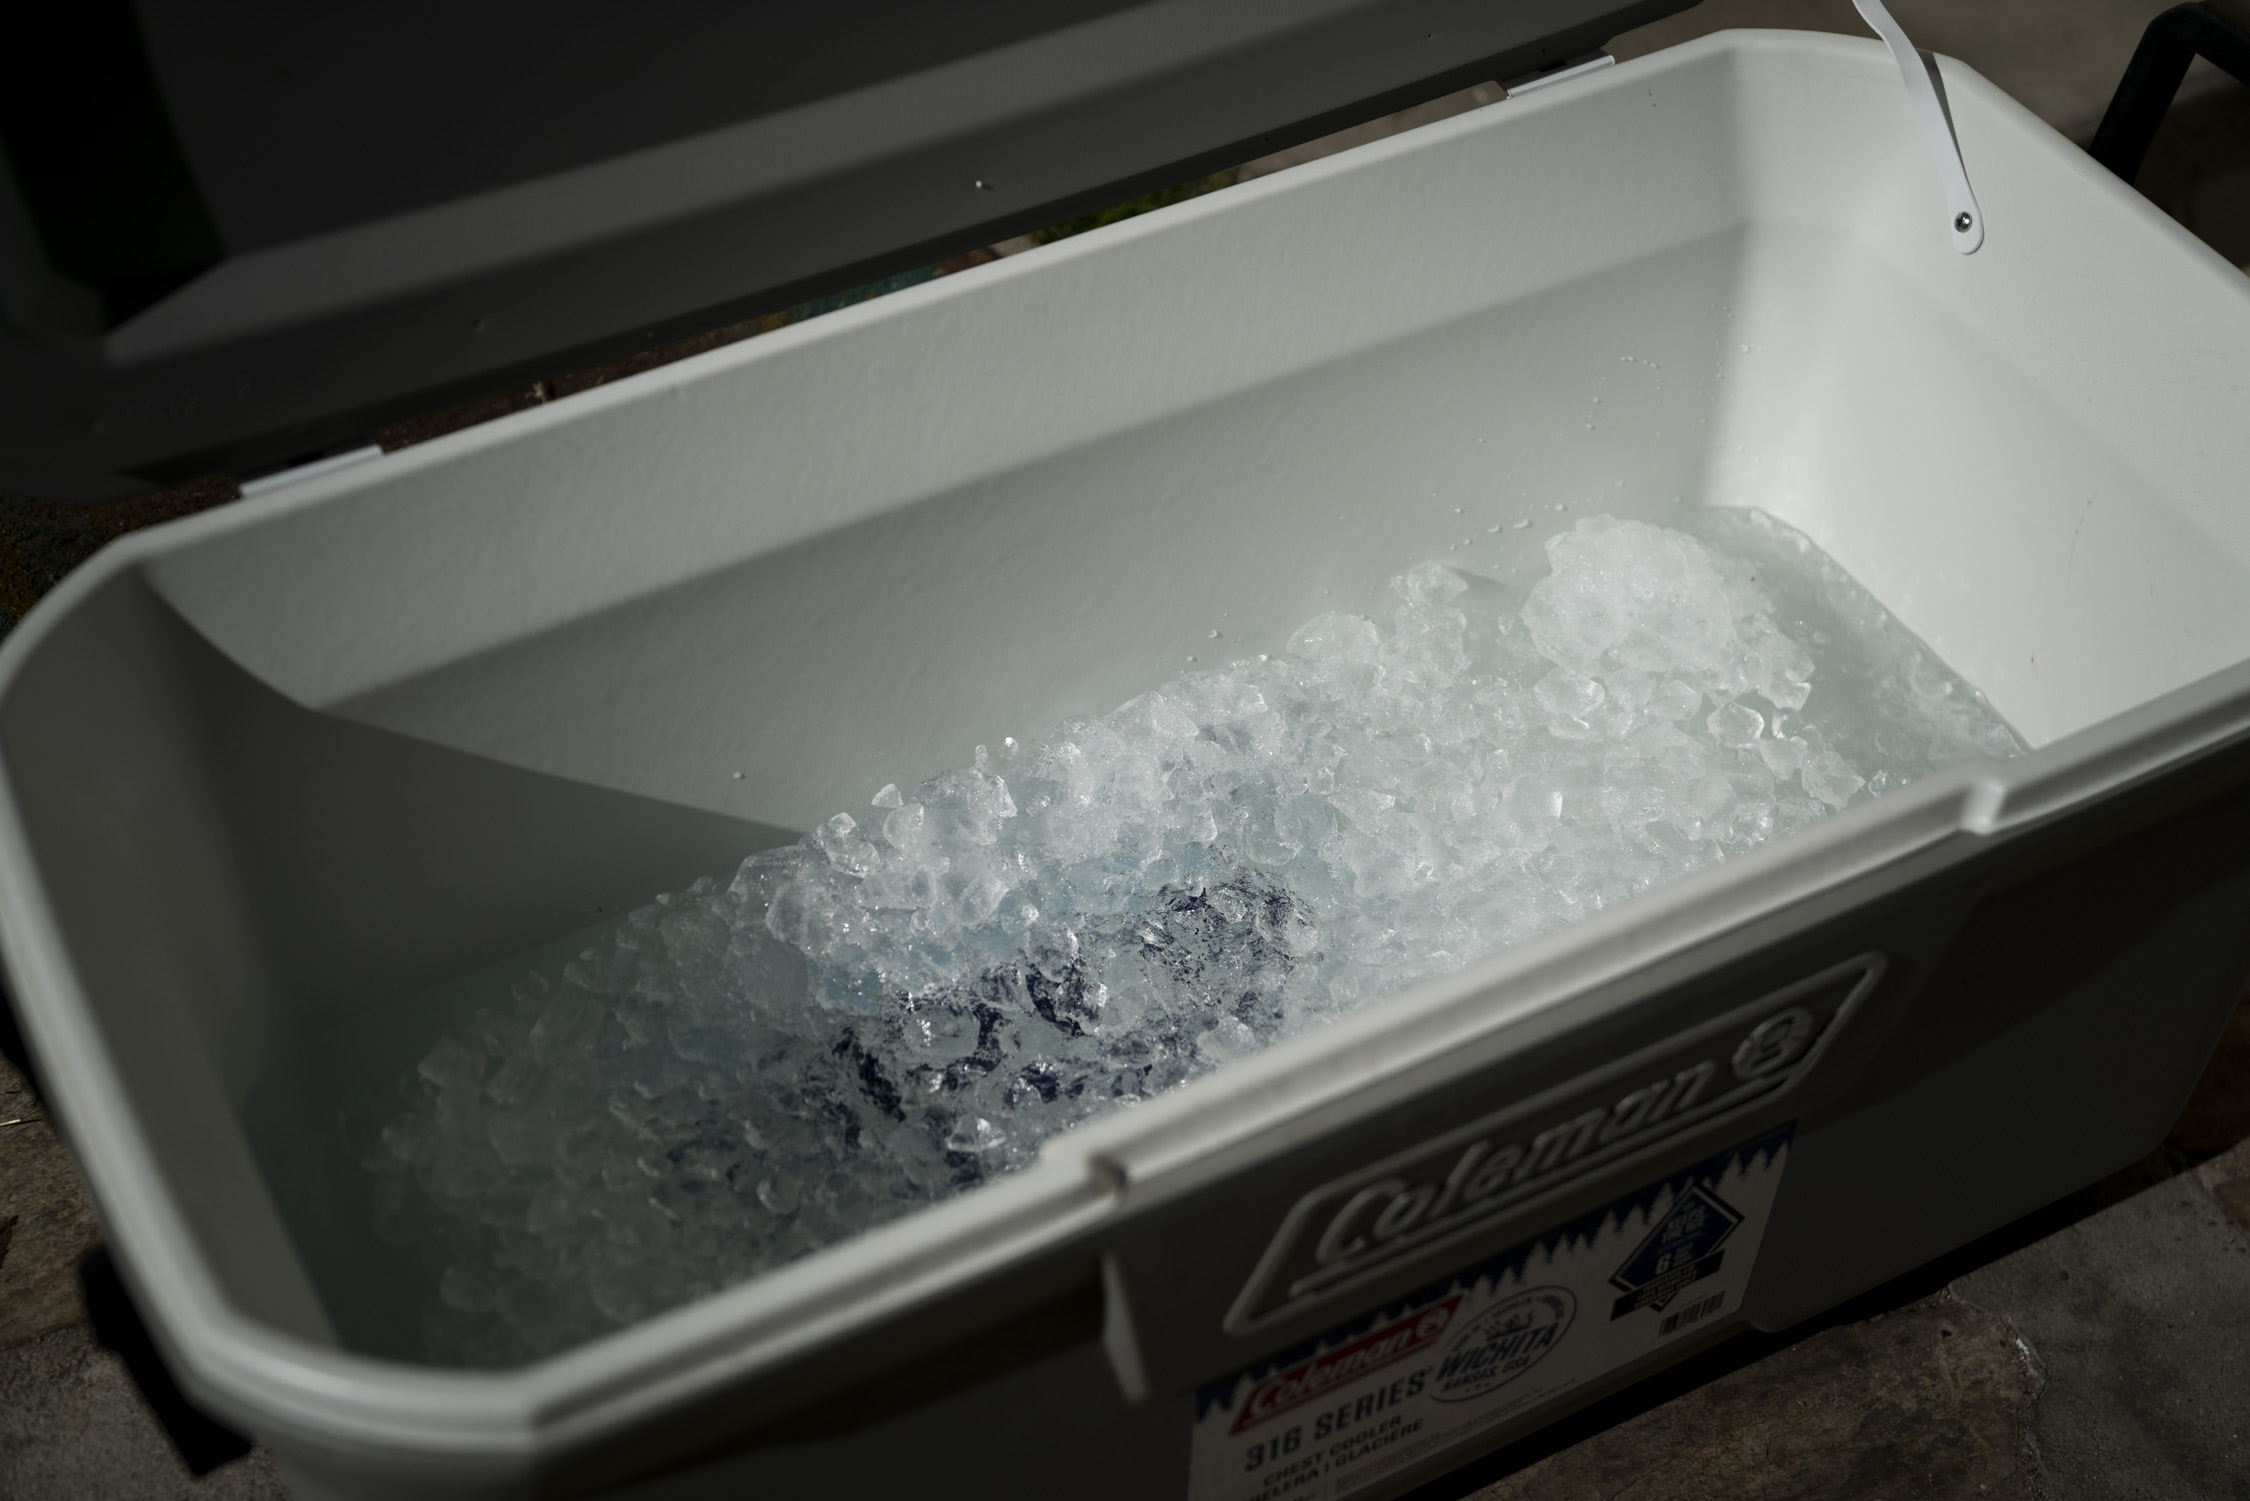
Every cooler we field test also goes through a standardized ice retention test, giving us objective results to compare alongside our real-world use. From premium hard-sided builds to lightweight, eco-friendly options, we dig into cooling performance and accessories to help you choose the right one for your next adventure.
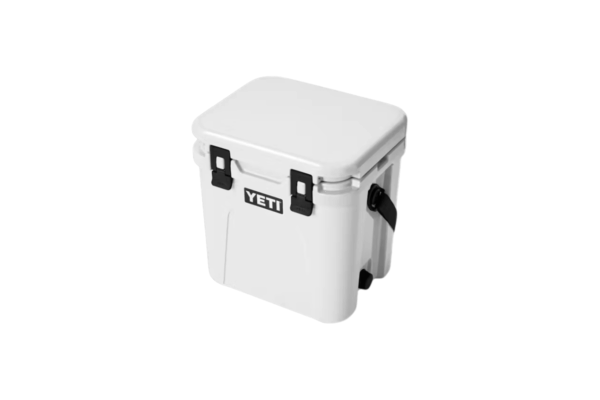
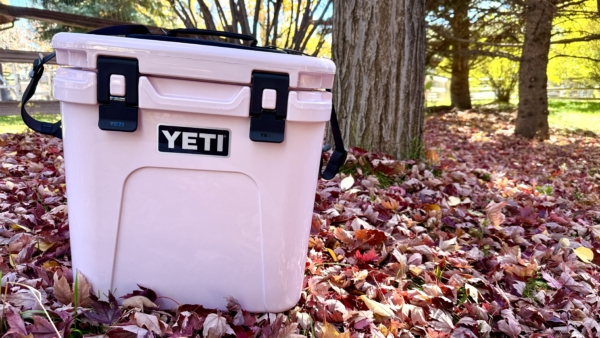
Editor’s note: As of October 22, 2025, we’ve added the newly-updated model of the Yeti Roadie 24 2.0 to this guide. We also added detailed rating metrics to each product in an effort to explain how we tabulated each testing score.
YETI has long since made a name for itself in the cooler world, and the Tundra 45 ($325) is popular for good reason. This mid-sized cooler is the perfect companion for a family weekend getaway, is a reliable road trip companion, and is definitely built to last. With superior insulation qualities and a robust design, this cooler is our top pick with the only downside being the hefty price tag.
The Tundra 45 actually only has a 32.9L capacity. This size will hold 28 cans, and plenty of ice, and is designed to fit long-neck bottles. It will not fit a 750mL wine bottle standing upright, however. A dry-goods rack keeps items you don’t want to get soggy lifted above the ice, and this cooler’s extra thick walls will retain ice for days.
A rotomolded polyurethane construction, a freezer-quality gasket, burly haul handles, tie-down slots, a drain plug, and a certification of bear resistance from the Interagency Grizzly Bear Committee all help to explain the $325 price tag.
YETI is the brand that pioneered the rotational molding or “rotomolding” technique which has become the gold standard in premium cooler construction today. This design process ensures perfectly uniform thickness, extra durability, and superior ice retention. The cooler walls are filled with polyurethane foam, which is superior to the lighter-weight styrofoam used in more basic coolers, and 2 inches of insulation make YETI coolers the best at retaining cold air.
So, the big question: How did this cooler measure up when GearJunkie contributor Miya Tsudome put it through our ice retention test? Well, the Tundra 45 retained ice for the full 10 days we tested it, to no surprise. Some ice melt occurred, of course, but plenty of cubed ice remained, attesting to YETI’s gold standard of ice retention.
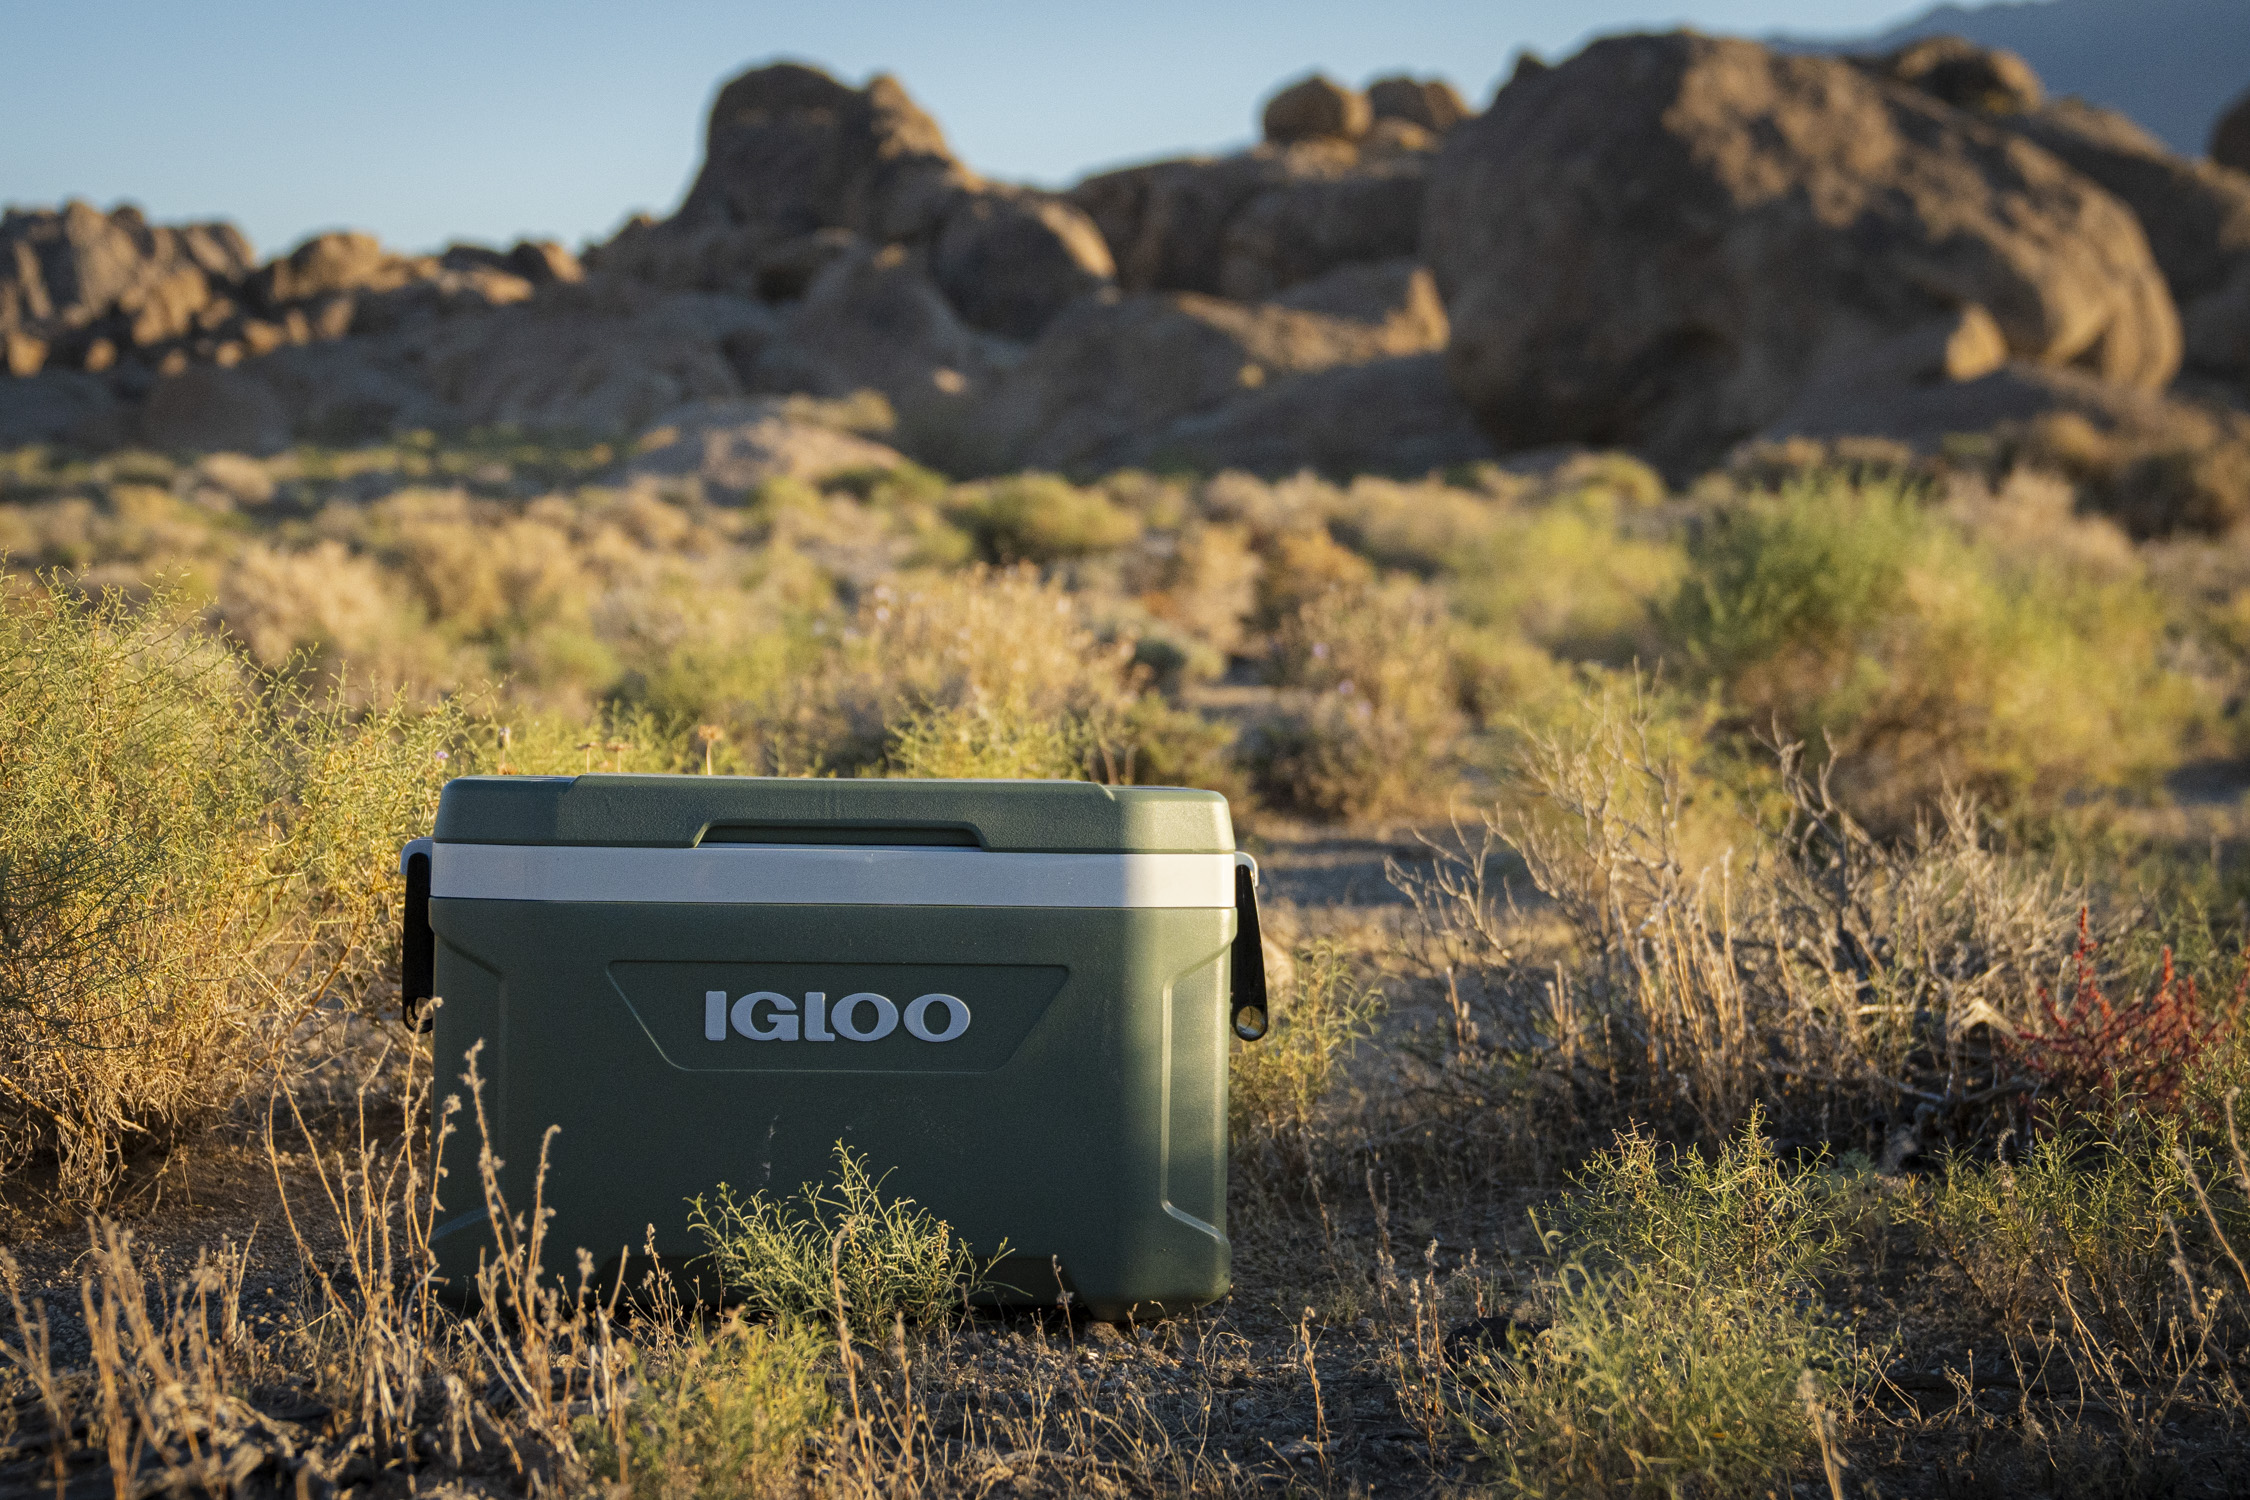
Some folks out there aren’t looking for the latest and greatest, most expensive cooler on the market. That’s why something like the Igloo ECOCOOL ($60) is the perfect budget pick for those who use a cooler for the occasional day trip, keeping groceries cold, or going on an overnight camping trip.
This cooler is not roto-molded like many of the others in our lineup and instead has a plastic frame injected with an insulated foam layer. The ECOCOOL is extremely lightweight at 9.84 pounds., which is over 75% lighter than many of the other coolers we tested. This also makes it a good choice for someone who might not want to throw out their back picking up a fully loaded 30-pound cooler.
This cooler is not the most durable we tested, and while we used all the others as a step stool and a seat, we wouldn’t want to do the same with this one. The lid flexes considerably when weighted, making us wary of its strength.
The plastic handles are also flimsy and don’t inspire confidence when lifting the cooler fully loaded. This ample cooler also doesn’t come with a drain plug. This is typical of smaller coolers, but for a 52-quart cooler with inferior insulation properties, there is going to be a lot of water to drain.
Despite these setbacks, one of the biggest selling points of this cooler in our tester’s opinion is that it is made with recycled post-consumer resin, and its foam layer is made in such a way that decreases CO2 and VOC emissions. Surprisingly, it retained some ice at the end of our 10-day ice retention test. This was especially surprising because at 48 hours in it had the highest interior temperature of all the coolers at 34.6 degrees F.
While this might not be the best-performing cooler, nor is it as high-quality as our top pick, the ECOCOOL remains a great choice for the occasional cooler user who wants something to keep items cold for a day or two, and doesn’t want to break the bank.
The RovR RollR 45 ($349) is nothing if not an impressive-looking specimen. With beefy, all-terrain wheels, a bear-resistant, roto-molded body, several different places to attach accessories, and a deep main compartment with a dry bin, this roller makes the most of being a medium-sized cooler.
The first thing that struck GearJunkie tester Alex Kirk is the almost comically large wheels. While they may look overbuilt for a medium-sized cooler, they performed impressively over rocky and sandy terrain on a desert camping trip in the Alabama Hills of California, and make transport overall a much easier affair. Getting from point A to point B lugging a heavy cooler can be the least enjoyable part of a camping trip. But the RovR couldn’t make it easier to roll your perishables to wherever you need them to be.
Another noticeable feature of this cooler is that it ditches the typical rectangular shape typical of most models in favor of a taller, cubic one. This makes it convenient to pack into the trunk of a car because it takes up less space and is also easier to handle as one person.
The interior is deep and spacious with a 42L capacity and has a removable dry bin that makes organizing food and drinks much easier. With the bin inserted, however, there is only enough room to fit 16 lbs of ice. The ice in this cooler lasted 6 days compared to YETI’s 10.
The telescoping handle is also noticeably lacking in quality compared to the rest of the cooler. It isn’t very smooth to deploy, and feels flimsy, especially considering the $400 price tag. While the Bullseye latches work just fine, our testers preferred wider rubberized pull tabs that you can grab and pull with your whole hand, rather than just using one or two fingers.
It is also one of the heaviest coolers we tested, at 37 pounds. Despite these setbacks, the outer rim of the cooler has attachment points for accessories such as a prep board, cup holders, and an umbrella rod holder, making this cooler the most customizable out of any other in our lineup. If you are looking for a cooler that can really go places, the RovR is our top pick for its ease of transport.
The Igloo Recool Cooler ($10) stands out in today’s gear market for what it isn’t: another hunk of styrofoam destined to live forever in a landfill. Instead, this 16-quart cooler is made from recycled paper pulp and a plant-based binder, making it fully compostable and biodegradable after use. While that might suggest “single use,” in testing, the Recool proved surprisingly sturdy.
To test whether it would collapse faster than a house of cards, GearJunkie contributor Heather Balogh Rochfort loaded a 50-pound dumbbell into the Igloo Recool and carried it around her house. Surprisingly, the hardest part was the carrying itself; it didn’t crack, bend, or even warp. Honestly, she could have gone heavier, which is not what she expected from a recyclable paper cooler.
At just 1.6 pounds, the Recool is ultralight and incredibly easy to carry when it’s not loaded with gym equipment (or cans, too). It’s also delightfully affordable, making it a great grab-and-go option for casual daytime adventures or last-minute picnics. The lid features four built-in cup holders and doesn’t squeak, crumble, or leak water all over your car.
Of course, there are always some trade-offs with a $10 cooler. Ice retention is moderate — you can easily get a half day — but it can’t compete with pricier hard-sided coolers. And while Igloo advertises space for 20 cans plus ice, we found the real-world capacity to be closer to a dozen cans. Still, for single-day outings and laid-back affairs where you don’t want to lug around a behemoth, the Igloo Recool Cooler is an easy win.
Still less ice retention than the rotomolded Yeti or Orca
Injection-molded therefore less durable than rotomolded models
Heather Balogh Rochfort
Tired of dragging a fully loaded cooler that could weigh up to 50 pounds in and out of the back of your car? Enter the RTIC Ultra-Light Hard Cooler ($219) — a premium cooler that is 30% lighter than other coolers of the same capacity.
Three inches of foam insulation and an O-ring gasket for the lid keep your items cold despite the lighter weight. However, this cooler is injection-molded instead of rotomolded, and therefore, its ice retention will be a bit less overall than that of heavier, rotomolded models.
The ice retention of the ultra-light RTIC cooler ended up actually being pretty comparable to its rotomolded counterpart. This, however, could be due to the fact that it was filled with more ice because of its larger size, and the more ice a cooler can hold, the longer it will retain that ice. But with 8 solid days of ice retention, the RTIC Ultra-Light Hard Cooler really measured up.
Having a large cooler that is easy to carry around may also be very advantageous for some. This cooler additionally has many of the same features as its rotomolded counterpart, the RTIC 45,with secure rubber latches, two drain plugs, non-skid rubber feet, tie-down slots, molded in side handles, as well as marine-grade nylon rope handles on either side. It also comes in a smaller 32-quart size, as well as 52-quart and 72-quart wheeled versions.
Materials:
Rotomolded polyethylene and pressure-injected polyurethane foam
Dimensions:
17.4" x 16.6" x 14.1"
Weight:
13 lbs., 1.6 oz.
Pros
Great insulation
Retained ice for the full 10 days of testing
New carrying strap makes the 2.0 much easier to tote around
New drain plug is a huge upgrade
Cons
Pricey
Heather Balogh Rochfort
The YETI Roadie 24 2.0 ($250) may look familiar, but this isn’t the same cooler that launched in 2020. For 2025, YETI gave its beloved mid-size hard cooler a small but critical upgrade. Not only did the brand add a much-needed drain plug (the main knock on the OG version), but it also added a carrying strap in place of the old handle. These two changes may sound minor, but they make the Roadie 24 virtually unstoppable.
At 24 quarts, the Roadie is perfectly sized for one or two people for a weekend trip. It fits a standard bottle of wine upright, holds more than two dozen cans and ice, and slides neatly behind a car seat (Note: This only works if you’re short. GearJunkie contributor Heather Balogh Rochfort had no problem driving the car with the Roadie behind her, but her 6-foot-tall husband couldn’t make it work in their Subaru Outback).
The real change, however, is how you carry it. The old rigid handle made it feel like you were hauling a bucket full of ice. Not only was this awkward and uncomfortable when fully loaded, but it was also really heavy. The new strap design makes a world of difference, distributing weight more evenly and making transport far more comfortable.
Another long-overdue upgrade: a drain plug. Previously, you had to tip the whole cooler to empty melted ice water, a task that was both messy and cumbersome. Now, the new BestDam Drain Plug allows quick, easy drainage without sacrificing performance. Balogh Rochfort tested the updated cooler for 10 days, assuming the new port might compromise insulation. But nope. The Roadie 24 2.0 still crushed ice retention, with plenty left after 10 days of just….chilling.
Like all YETI hard-sided coolers, the Roadie 24 2.0 features rotomolded polyurethane construction, a freezer-quality gasket, and burly T-latches designed to withstand years of abuse. With these upgrades, it’s practically perfect for a small cooler….but yes, you’re still going to pay for it.
More Coolers, Field Tested
The following coolers didn’t make the top of our list, but we’ve included them for their unique features or superior ice retention, and a few are great budget alternatives.
Ninja — yes, of blender fame — brings a novel feature to its cooler, at a nice price. The Ninja FrostVault ($200) has a bottom drawer that lets you store anything from produce to deviled eggs, so your chow doesn’t get wet from ice in the main compartment while it stays cool. Though it doesn’t insulate quite as well as its roto-molded competitors, its performance is respectable, especially considering it’s $100 less than a Yeti Tundra 45.
The single latch design and the lack of an air-tight seal impair the overall insulation performance, but don’t write off the FrostVault just yet. The single latch is durable and keeps the lid closed just fine, and a little air leakage prevents a vacuum so that the lid won’t get stuck. It’s a compromise, but if you’re using your cooler for a day trip or an overnight, the FrostVault will suffice.
The unique sliding drawer on the bottom, known as the DryZone, is about 10x11x3 inches. It keeps food dry and Ice-free. It also protects fragile food items like strawberries, pie, or the aforementioned deviled eggs from getting smashed during transit. A latch keeps the drawer from opening unexpectedly, and the drawer can be completely removed for easy cleaning. Don’t forget to empty the drawer. GearJunkie editor-in-chief Adam Ruggiero found out the hard way that it’s easy to forget about the drawer after emptying the main compartment; he was left with a pretty smelly mess a few days later.
The FrostVault is not a heavy-duty grizzly-proof cooler, and we’re willing to bet plenty of folks looking for a good cooler aren’t going to be in bear country. Leave this one at home for multi-day rafting or fishing trips. For a few days on the road or at a drive-in campsite, the Ninja FrostVault will serve you well. And if you dig the design and would like more space, you can get the 50-quart version for about $50 more.
Materials:
Rotomolded kayak plastic with pressure-injected foam insulation
Dimensions:
28.5 x 15.5 x 16.75
Weight:
26 lbs
Pros
Rotomolded construction
Easy-to-use latches
Light for its size
Cons
Hard to carry for one person when fully loaded
Easy-to-use latches don’t seal in air as well as other coolers we tested
Not IGBC certified
Heather Balogh Rochfort
A robust, family-friendly cooler, the new Canyon Coolers Outfitter 55 ($300) offers a blend of convenience, performance, and durability in its V2 design. Its robust, rotomolded body ensures quality ice retention and durability, making it a solid companion for outdoor adventures. The easy-to-use latches provide effortless access, while its straight-edged shape allows for efficient packing in your vehicle without consuming unnecessary space.
We put the Outfitter 55 to the test in the scorching summer heat, subjecting it to extensive evaluations in comparison to our lineup of the best coolers of 2025. This Arizona-made cooler did very well in our testing metrics, including size, volume, weight, ease of transport, durability, and ice retention.
During our ice retention test, the cooler maintained usable ice for four days under extreme conditions of 100-degree heat, suggesting it could perform even better in more typical outdoor environments.
Our lead tester, Miya, took this cooler camping with us on a weekend trip to Tuolumne Meadows in Yosemite National Park and found it hard to handle as just one person due to its size, width, and weight when fully loaded. It would be nice to have a cooler of this size with wheels to make it even more convenient.
But it is also unlikely that you would buy this cooler for just one person, therefore you’ll be sure to have a helping hand for loading and unloading on your next vacation.
Overall, the Canyon Coolers Outfitter 55 stands out as a family-friendly cooler with a spacious 55-quart capacity, ideal for weekend trips or longer excursions for two to four people. It is lightweight for its size, weighing only 26 pounds while the Yeti Tundra 45 weighs 23 pounds with only a true 37-quart capacity.
Its latches are its standout feature, though they don’t quite suction in air as much as the thick rubber latches found on Yeti and other premium coolers. But this cooler’s performance and usability make it a great value for your next family excursion.
Materials:
Rotomolded body and polyurethane insulation
Dimensions:
28.2" x 17.9" x 18.2"
Weight:
31 lbs.
Pros
Lots of features
Drain plug with tether
Rotomolded design
Cons
Not IGBC-rated
Heavy
Latches not as airtight as other brands
Heather Balogh Rochfort
The Xspec Pro 60 Quart Cooler ($230) is nothing if not impressive and is the most feature-filled cooler we tested. A heavy-duty, rotomolded construction with a reasonable price, this 31-pound cooler gives some other more expensive models a run for their money.
This 60-quart cooler actually has 60 quarts of usable space, unlike other brands which end up having less capacity than they claim due to their thick, insulated walls. It faired quite well in our ice retention test as well, holding usable ice for a total of 6 days while outside in a mix of shade and direct sunlight.
The Xspec is dry ice compatible for even longer periods of cold retention. It also features a drain plug with a tether for safe-keeping, heavy-duty grab handles, a molded ruler on the lid, a built-in compass, bottle opener, non-slip feet, and molded tie-down slots — making this a burly cooler for overlanders and other adventurers.
And, this cooler is the only one in our lineup to have an air release knob as well, so you’ll never have to worry about your lid getting suctioned to the cooler body while you’re just trying to grab a cold one. No one likes that.
While the Xspec is a worthy competitor in the world of rotomolded coolers, it’s worth mentioning that while its plastic latches are infinitely easier to open and close than the thick rubber ones you have to use two hands to pull down to secure, they don’t keep the cooler quite as airtight.
With the thick rubber latches found on the Yeti Tundra 45, you can feel the air being suctioned out of them as you pull down the latches to essentially “engage” the rubber gasket on the inside of the lid.
While many of these premium brands hold a certification from the International Grizzly Bear Committee, the Xspec does not. Although it does have stainless steel locking plates to keep the cooler secure, we don’t know if it would withstand a curious grizzly.
All in all, this feature-laden, rotomolded cooler has decent ice retention and a spacious capacity for a pretty affordable price. So, if you’re looking for a larger cooler that has some more bells and whistles than your average ice box, you may love the Xspec Pro 60.
Sometimes a standard cooler just isn’t big enough. Enter the Coleman 316 Series Chest Cooler ($110). 120 quarts of space at only 20.7 pounds, this oversized ice box is great for birthday parties, barbecues, sporting events, and the like.
Built-in cup holders and a lid that can double as a seat and support up to 250 pounds make this cooler more versatile than it seems. While the injection-molded design and relatively thin walls make multiday ice retention less viable than more expensive models, the Coleman 316 is a great choice for single-day events.
While we think that any cooler of this size should come with a pair of wheels for easier transport, the Coleman 316 is, unfortunately, wheel-less. Its plastic side handles are also not the most confidence-inspiring, and the size of the cooler, when fully loaded, necessitates another person to lend a helping hand.
For only $6 more, you can get the slightly smaller, 100-quart Coleman 316 Series Insulated Portable Cooler with Heavy Duty Wheels, which solves the wheels issue though sacrifices 20 quarts of space.
This cooler did quite well in the ice retention test, lasting the full 10 days with ice. This, however, is partially due to the sheer quantity of ice we filled the cooler with. The more ice, the longer a cooler will stay cold. But we were quite pleased with its performance regardless. If you’re looking for an inexpensive, large cooler for the occasional event, it’s hard to beat the Coleman 316.
The Blue Coolers Ice Vault ($350) is a quality rotomolded cooler, that lends itself to comparison with (you guessed it) the all-might Yeti. Is it better than the closest YETI equivalent, the Tundra Haul? In some ways, yes.
In terms of capacity, the Ice Vault has an additional 8 quarts over the Tundra haul, despite having a smaller exterior size. What’s going on here? Well, the Yeti has a thicker roto-molded shell, which definitely gives it an advantage in terms of insulation. But if you value space savings in your tightly packed vehicle, the Ice Vault may work better for you.
This cooler doesn’t have any bear-proof certifications or locking points, so the YETI is a better choice if you’re in bear country and don’t have proper food storage options. Again, there are plenty of places to go camping in the lower 48 where you’re never going to run into a bear. The latches are a hard plastic that lever the lid into an air-tight seal. Using them isn’t less difficult than the Yeti’s rubber latches, just different.
The only real gripe that GearJunkie editor Rachelle Schrute had with this cooler is the drain plug cover. It isn’t leashed to the cooler and could easily get lost, rendering a $350 cooler much less effective. You chalk that up to user error, but still. All in all, this is a solid cooler that has a very similar performance to a YETI or an ORCA. Though its name may not reference a majestic sea creature or a beloved cryptid, it’s about $100 less than those coolers.
This cooler has no drain plug, but the smaller yet capable 25-quart size makes that OK. This Igloo Picnic cooler ($55) is not only a decades-old classic (now out in new “retro” colors), but it’s also a great size for day-trip outings like excursions to the park, city trailhead, beaches, or your favorite lake.
At a park picnic, we were able to fit bottles, cans, and flasks, as well as boxes, bins, and bags of snacks galore. If you aren’t packing food for snacking, it can hold 36 cans.
We used it for day trips and car camping and liked its size (it can fit in your passenger seat area), capacity, and convenience for a few days’ worth of food and drinks.
In testing, this cooler kept contents cold for 3 full days, and this was with us periodically opening it on occasion to check ice retention. (Igloo claims retention for this cooler at 1-3 days.)
Given all that, we give this cooler an A+ for not only living up to specs but also being a perfect, portable, budget-friendly option for shorter-length trips outdoors.
The YETI Tundra came on top after our ice retention test; (photo/Miya Tsudome)
How We Tested Coolers
Our expert gear testers have been reviewing coolers since 2014, meticulously researching dozens of the best coolers on the market to continuously update this review. This is an extensive look at seven of the best coolers you can find today.
Our Expert Testers & Testing Grounds
Contributor Heather Balogh Rochfort is an avid outdoor enthusiast based in Colorado who spends most of her waking hours hiking, biking, camping, trail running, or skiing. Coincidentally, she also loves food so toting a cooler along on all of her adventures is a given.
Miya Tsudome brings over 3 years of gear reviewing experience combined with over a decade of being a serious outdoor enthusiast to help bring this current review to life. Having spent many months living out of her car in pursuit of rock climbing adventures all over the country, she knows that having a good cooler during the hot summer months can make a world of difference.
Our Testing Process
Each product was tested over several weeks, and taken out on different occasions for real-world applications — overnight camping trips, backyard barbecues, and day trips to the local swimming hole. The most recent lineup of coolers was tested in October in the high desert of Bishop, Calif. The average temperature was in the high 70s to low 80s for the majority of the month.
Each cooler was rated based on its performance in our ice retention test, its insulation and materials, durability, extra features, weight, ease of transport, and ease of maintenance and cleaning. The coolers that ranked the highest in specific categories were assigned an award in our top picks.
The ice in the RTIC 45 (left) and YETI Tundra 45 (right) after the 10-day ice retention test; (photo/Miya Tsudome)
Ice Retention Test
For our ice retention test, we filled each cooler up 85% of the way with the same type of bagged, cubed ice. Each cooler stayed indoors before the test, to ensure that their starting temperatures were all about the same. It’s recommended to pre-chill a cooler for the best ice retention, we did not prechill any of the coolers to best mimic how we would actually use them.
For the actual test, we stored the coolers outside in an area that was mostly shaded during the day, with a few hours of direct sun exposure and temperatures that varied from 35 degrees overnight to 100 degrees in direct sun. This was also our idea of the best imitation of how these coolers would typically be stored outdoors.
Variables that can affect ice retention include the ice quantity, outside environment and temp, exposure and amount of sunlight, type of ice (crushed, block, cube, dry), airspace, and more. In order to find the best of the best coolers, it was crucial for us to do a direct comparison.
We checked each cooler’s ice retention/melt rate once a day and recorded the time and temp for each one. We also noted the time once each cooler’s ice was fully melted. The YETI Tundra 45 and the YETI Roadie 24 2.0 took first place, both retaining ice for the full 10 days.
The RTIC Ultra-Light came in next, retaining useable ice for 8 days with interior temperatures 48 hours in at 29.2 degrees F and 31.2 degrees F.
While the Igloo ECOCOOL had an interior temperature of 34.6 degrees F at the 48-hour mark, it surprisingly still had some ice left inside after 10 days. The RovR RollR 45 only lasted 6 days with useable ice, but it also had the least amount of ice inside out of all the coolers due to the useable space.
In contrast, the Coleman 316 still held a large quantity of ice after 10 days. This is more so due to the amount of ice that it holds in its 120-quart interior rather than due to its insulation properties. More ice = more ice retention.
This test was not meant to be purely scientific, but rather to reflect the realistic use of a cooler outdoors and accurately compare cooler performance. To keep it fair, we made sure that all coolers were subjected to the same variables and criteria as much as possible.
It is worth mentioning that this test was not performed in the height of summer, but rather during a time when overnight temperatures dipped fairly low, causing the ice to melt much slower than if this test was done in July.
Ice left in the Coleman 316 after 10 days; (photo/Miya Tsudome)
Our Cooler Rating System
When comparing coolers side by side, we break our evaluations into four key categories. This system provides a balanced look at performance, usability, and design, all while helping us determine which coolers stand out — and which ones melt under pressure.
Ice Retention
Ice retention is the most important measure of a cooler’s performance. We evaluate how long each model keeps ice solid in real-world conditions, including during road trips, camping weekends, and multi-day tests in fluctuating temperatures. Coolers that maintain low internal temps for several days (even when opened frequently) earn top marks here. For this metric, please reference our ice retention test (above).
Build Quality
A cooler’s durability often determines how long it will last. We look closely at construction methods (rotomolded or injection-molded) along with hinge strength, latch reliability, and gasket design. We also consider overall sturdiness, resistance to dents or warping, and how well the cooler stands up to heavy use in the field. A cooler earns bonus points for quality and durability if it is bear proof but that isn’t a requirement, nor is it always worth your hard-earned cash.
Portability
From quick tailgates to long hauls across camp, portability can make or break a cooler’s usability. We assess handle design, strap comfort, weight when fully loaded, and balance while carrying. Coolers that feel awkward or strain our arms lose points here, while those with ergonomic grips or smart strap systems get high marks.
Capacity and Organization
A cooler’s capacity isn’t just about volume; it’s about usable space. We look at how efficiently each model stores cans, bottles, and ice, and whether its internal layout makes access easy. Features like baskets, dividers, and wine-bottle-friendly heights earn extra credit for improving real-world organization and versatility.
Buyers Guide: How to Choose the Best Cooler
Cooling Performance
Insulation & Materials
Coolers have a long and storied history. From a humble beginning as a wooden box with an interior tin chamber invented by Thomas Moore Jr. in 1802, to the decently insulating styrofoam boxes that came from the World War II era, to the plastic exterior coolers we know today pioneered by the Coleman company, coolers have come a long way.
Historically, coolers have been made with interior and exterior shells of plastic, with hard foam in between. Many basic coolers are still made this way today, such as the Igloo ECOCOOL and the Coleman 316.
In 2006, two brothers named Roy and Ryan Seiders revolutionized the cooler market with their rotational molding or “rotomolding” design. This involves a heated plastic mold that is rotated continuously while powdered polyethylene is added to it to create a uniform thickness. They also pioneered the use of polyurethane instead of styrofoam as insulation, which created superior ice retention.
YETI was the company born from its design and is considered the gold standard in coolers today. Many companies have since adopted the rotomolding technique for their coolers. Now, a majority of premium coolers like the YETI Tundra 45 and the YETI Roadie 24 2.0 are rotomolded.
Rotomolded coolers typically have thick, rounded edges which is a product of how they are rotated to be evenly molded, as seen here on the RTIC 45; (photo/Miya Tsudome)
Coolers use a few different sorts of foam or petroleum-based insulation, typically double-walled. YETI employs its pressure-injected polyurethane foam, while Igloo uses its proprietary THERMECOOL insulating foam.
While rotomolded coolers offer the best ice retention and durability by far, they are also considerably more heavy and expensive. The trade-off for lighter, less expensive coolers, however, will be in their performance and durability.
More recently, manufacturers have introduced coolers made from recyclable or compostable materials. These models, such as the Igloo Recool Cooler, are built from molded paper pulp with plant-based binders instead of petroleum-derived foams. Their insulation is modest compared to plastic or rotomolded designs, but they offer a sustainable alternative to disposable Styrofoam chests. Best suited for short-term use like picnics, concerts, or day trips, compostable coolers trade multi-day ice retention for environmental responsibility.
Seals
The highest-performing coolers in our lineup all have heavy-duty rubber gaskets that work to seal their lids airtight. In order to keep your cooler as consistently cold as possible, you need to be able to trap that cold air inside and keep it closed.
The best coolers will implement the same materials and mechanisms as deep freezers will, with rubber gaskets that create airtight seals, and sturdy, thick latches that pull the lids tight. The Igloo ECOCOOL, the Igloo Recool and the Coleman 316 are the only coolers in our lineup that do not implement this feature.
The white colored top of the RovR RollR 45 will reflect sunlight, making it less likely to overheat than darker-colored coolers; (photo/Miya Tsudome)
Exterior Color
Another thing to consider if you want the absolute best-performing cooler you can buy is the color you choose. When measuring the outside temperature of each cooler during our ice retention test, the lighter-colored coolers consistently had lower exterior temperatures. So although that dark grey cooler might be more your style, the white one might be the better choice.
Size & Volume
The sweet spot volume of all the coolers we tested was a 40- to 45-quart cooler. This medium size is the most convenient, providing enough space for 3-5 days’ worth of food for one or two people, plenty of room for a few six-packs of cold drinks for a backyard barbecue.
In terms of the different sizes that each brand offers, 30- and 60-quart capacities are also popular. The largest cooler we tested was the Coleman 316. It can serve a purpose for large events or gatherings and is a good value for its size. On the flipside, the smallest cooler we tested is the Igloo Recool 16qt Cooler that is best suited for day-long activities like picnics or small gatherings with friends.
The Tundra 45 actually only has a 37-quart capacity. But this is enough for 1-3 days’ of food and a few drinks for two people; (photo/ Miya Tsudome)
You’ll want to consider not only how much cooler space you may want for different adventures, but also consider a cooler’s dimensions. You don’t want to buy the perfect cooler only to find out that it doesn’t fit in your car when packed, or in a spot on your storage shelf. Most coolers are rectangular in shape, and can be easy to slide into car trunks and stack other things on top of.
Some coolers have wheels, like the RovR RollR 45, which, while making transport easier, can take up more room in a trunk or on a shelf. It’s also a good idea to think about the items you’ll be keeping cool and make sure those (maybe wine bottles or a coffee press for camping) fit the internal dimensions as well.
Weight
Weight is also an important consideration when choosing a cooler. Rotomolded coolers with their thick, 2 inches of insulation and durable outer plastic layer will be the heaviest cooler you can buy. Coolers like the YETI Tundra 45 all weigh between 23 and 30 pounds alone. The RovR RollR 45 weighs a whopping 37 pounds. Granted, it has wheels, which means transportation won’t be as difficult an affair.
The RTIC Ultra-Light Hard Cooler is a great innovation from RTIC that uses injection molding to create a lighter, midsized cooler. At 31 pounds, the 52-quart model is around the same weight as its 45-quart, rotomolded counterpart, resulting in a higher capacity for less weight.
The Igloo ECOCOOL weighs in at only 9.84 pounds, putting it on the lighter side for a hard-sided cooler (None of these coolers weigh less than the Igloo Recool Cooler at a featherweight 1.6 pounds). However, its lightness is attributed to its injection molding, thin walls, and noninsulated lid. Though lightweight, the ECOCOOL is not a premium cooler for the serious consumer but is a great budget pick or option for someone who has more trouble carrying heavier loads.
Some would say this is personal preference, but in our opinion, it all comes down to your cooler volume and what you’re hauling. So, if you are leaning toward a 20- to 40-quart cooler, you probably don’t need wheels.
These coolers aren’t so wide that it’s difficult to carry them on your own, and typically come with molded indentations as well as sturdy rope handles on either side. Our testers loved the YETI Tundra 45 with its military-grade nylon rope handles and comfortable, rubber grips.
If you are going to invest in a cooler with a capacity of 60, 70, or 100+ quarts, definitely consider one with wheels, or at least one with a few different carry options (tow handles, grips, two-person carry, etc). This is a flaw in the Coleman 316 we tested, which at a 120-quart capacity and 37.9-inch width does not come with wheels and pretty much requires two people to carry it fully loaded.
The RovR RollR 45 Wheeled Cooler, however, comes with beefy all-terrain plastic tires that can handle sand, gravel, and rough terrain with ease, making it the best of its class for ease of transport.
If you are frequently loading up on ice and filling that bad boy with cans, you may want something with wheels. Or maybe not, if you plan on rolling that cooler over rugged terrain. But, if you know you’ll be hauling your cooler around with family or friends, a two-handled one may work just fine.
The RovR is heavy, but its huge wheels make it easy to move over uneven terrain; (photo/Miya Tsudome)
Durability & Build Quality
It’s also worth considering the durability and build quality of a cooler, especially when you start shelling out some more cash. A cooler can be an expensive investment, and if you are planning on using one a lot, it’s nice to know that it will hold up to years of use.
Rotomolded Coolers
Rotomolded coolers take the cake in this category again, with their continuous molding design creating a noticeably thick and robust exterior. This method creates a uniform thickness all around. These coolers have superior ice retention and can be a seat or footstool, not to mention withstand attempts at forced entry by grizzly bears.
Yes, you read that correctly. Coolers such as the YETI Tundra 45andRovR RollR 45 hold certifications from the International Grizzly Bear Committee that state that they successfully withstood attempts at entry from actual grizzly bears.
Not only is this a testament to their durability, but it also allows you to have peace of mind if you do any camping in areas where bears might be of concern.
YETI coolers don’t just look good, they also perform exceptionally well; (photo/Miya Tsudome)
Injection-Molded Coolers
Injection-molded coolers create two separate shells, fused together by insulated foam. They are lighter than their rotomolded counterparts. Yet they are more likely to crack or separate, causing their durability to be called more into question over time.
While you can sit on the lids of the Igloo ECOCOOL and the Coleman 316, the noticeable flex of their plastic will make you want to be more careful handling these coolers.
Recyclable & Compostable Coolers
Recyclable coolers (like Igloo’s Recool) take a completely different construction approach, using molded paper pulp rather than plastic shells. While they aren’t built to last for years like rotomolded or injection-molded coolers they’re sturdier than disposable Styrofoam chests and can handle the weight of food, drinks, and ice for a day. Their durability is best suited for occasional use, festivals, or day use where ruggedness isn’t the main priority.
Maintenance & Cleaning
After purchasing a new cooler, it’s important to keep up with some basic cleaning and maintenance to ensure its lifespan is as long as it can be. After use, you’ll always want to leave the lid open to let the cooler air dry. This ensures no moisture gets trapped inside, causing mildew or bacterial growth. It’s a great idea to wash the interior with some warm, soapy water, and then let air dry.
You do not want to leave a cooler with food and water in it for days, as this will ensure bacterial growth (and in coolers like the Igloo Recool, may cause disintegration). Most of the coolers in our lineup are relatively easy to clean. The lighter coolers, such as the Igloo ECOCOOL and the Coleman 316, can tip over easily when empty and the lid is open. This makes them a little more cumbersome as the lid can flop close on you while giving the scrub down.
The affordable Igloo ECOCOOL won’t hold ice as long as a YETI, and its plastic components are more likely to break if mishandled, but it’s still a great budget pick; (photo/Miya Tsudome)
Price & Value
The best coolers are not cheap, but if you know what you need, it’s easier to find a model that can fit your budget and your food storage needs.
Budget
In general, the less expensive cooler will be smaller and have injection-molded plastic shell with some sort of foam insulation. They have thinner walls and don’t insulate as well as more expensive models. If you’re only going to use your cooler for day trips or brief overnight, then it’s totally possible to make an inexpensive cooler work for you!
The most affordable cooler in this guide is the Igloo Recool 16qt Cooler ($10), a recyclable and reusable featherweight. It’s quite different than all the other coolers listed here because it’s made of recycled paper and is not built for the long haul. Still, it does a great job of keeping drinks chilled for a day when portability is the priority.
The Igloo ECOCOOL ($60) gets you 52 quarts of storage for food and ice is lightweight, and even had a little ice left at the end of our 10-day retention tests. Its handles are a bit flimsy, it isn’t bear-proof, and there is no drain plug, but if keeping your food fresh for a day or so is all you need, it will absolutely do the trick. If you need even more space without breaking the bank, check out the Coleman 316 Series Chest Cooler ($110)
Mid-tier
The Xspec Pro 60-Quart Cooler ($230) sits smack in the middle of price and performance and is a great option if you need a cooler to last a week. Or, for a few more dollars, you can snag the YETI Roadie 24 2.0 ($250), a rotomolded option with fantastic ice retention and a newly-added drain plug.
Premium
The YETI Tundra 45 ($325) is our top pick and one of the more expensive coolers on our list. The Tundra is THE cooler that set off the roto-molded cooler wars and has pushed the competition to really up their game. The Tundra 45 is IGBC-certified (bearproof), has high-quality polyurethane foam insulation, and easily held ice for over ten days.
The Canyon Coolers Outfitter 55 ($300) isn’t bearproof, but does have better storage capacity, and the RovR RollR 45 Wheeled Cooler ($350) is easier to move around. All are excellent insulators, but it’s best to check the specs to make sure you’re getting exactly what you’re looking for if you’re going to pay top dollar.
Frequently Asked Questions
What is the best hard cooler?
There is no single best cooler. Really, what’s most important is what you’ll be using the cooler for and how often. If you plan on taking it out every week, a more durable cooler is probably the best pick.
We’ve listed the best cooler (based on our feedback and testing) but also the best budget, the best wheeled cooler, and a few others for you to choose from.
What is the best cooler for the money?
Out of the coolers we tested, you really can’t go wrong with Igloo or Coleman coolers. Both are great quality for the price.
Conversely, most people wonder if YETI is worth that high price tag. The answer is yes, but it’s also overkill for many people — do you really need a cooler to keep ice cold for 10 days? Are you beating up a cooler enough that you need rotomolded construction? Most of us aren’t off the grid in rugged environments for that long or very often.
What is the best type of cooler to buy?
If you’re looking for the best cooler to keep contents cold, a hardside cooler is much better than a softside one. They are also more durable.
But really, the answer to this question is personal. What’s the best type of cooler for you? If you need help answering that question or narrowing down your choices, we’d recommend comparing our best picks.
Are hard coolers better than soft coolers?
Hard coolers usually offer more insulation and much more protection (both inside the cooler and on the exterior). They also offer features that soft coolers can’t, like drainage plugs and wheels for easy transport. Many employ bear-resistant latches and locks so you don’t have to worry about leaving them outside at camp.
If you need a cooler that will live in your garage or vehicle — and that you can also take to the field, beach, or camp — a hard cooler is better. But if you’re concerned about carrying it longer distances or care about weight, a soft cooler might be better. The best option: Get one of each!
How long do coolers keep ice?
How long a cooler will hold ice depends on its construction, size, and the conditions you’re using it in; ice will last much longer in the high alpine than it will in the desert, for example. Premium rotomolded coolers, like YETI or RTIC, can keep ice for 5–10 days if packed properly and kept out of direct sun. More affordable injection-molded coolers, like Igloo or Coleman, usually hold ice for 1–3 days. Compostable or disposable coolers, such as the Igloo Recool, are designed for shorter outings and typically last up to 12–24 hours. No matter which cooler you choose, pre-chilling it and minimizing how often you open the lid will make a big difference in ice retention.
What size cooler do I need?
The right cooler size depends on how many people you’re packing for and how long you’ll be out. For day trips or solo use, a 20–30 quart cooler is usually plenty. Weekend camping trips for a couple of people often call for a 45–60 quart model. Larger groups, extended expeditions, or hunting and fishing trips might require 75+ quarts. Keep in mind that ice takes up a significant amount of space; usually around 30–40% of the cooler’s capacity. Size up if you’re planning on storing food and drinks for multiple days.
The following simple recipe for Chicken and Egg Sandwiches is from The New Butterick Cook Book, copyright 1924, now in the public domain. That is one of the many bonus books included in the 2005-2025 20th Anniversary edition of the waterproof SurvivalBlog Archive USB stick that will be available in February of 2026. Ingredients 1 cup cold cooked chicken Yolks of two hard-cooked eggs 1 teaspoon rich stock 1 teaspoon lemon juice 1 teaspoon melted butter or butter substitute Salt Pepper Bread slices Directions Pound the chicken to a paste. Add the mashed yolks of hard-cooked eggs, the stock, Iemon …
Base layers for men often don’t get the same sexy headlines, bleeding-edge technological advances, or eye-bulging price points as their outer layers counterparts. But your next-to-skin layer is just as important, arguably more so. The priciest, top-of-the-line Gore-Tex shell won’t do you much good if a soaking wet base layer is chafing your skin and chilling your bones. Picking the best base layers is incredibly nuanced and personal to your location, physical output, and body. We tested 42 new men’s base layers last winter to help you navigate this tough choice.
When a husband-and-wife paddling team set out on a 1,000-mile, 64-day unsupported canoe trip through Canada’s northern Barren Lands to solve a century-old mystery, they knew success would be like finding a needle in a haystack. One hundred years prior, John “Hermit of the North” Hornby and British financier John Critchell Bullock set out on a […]
Winter Backpacking Packs are more specialized than regular three-season backpacks, with a stronger emphasis on carrying heavier weight loads, external attachment points, and durability for handling bulky gear with sharp points, such as snowshoes, skis, ice axes, and crampons. They also favor more pockets and the ability to access and put away gear quickly, so …