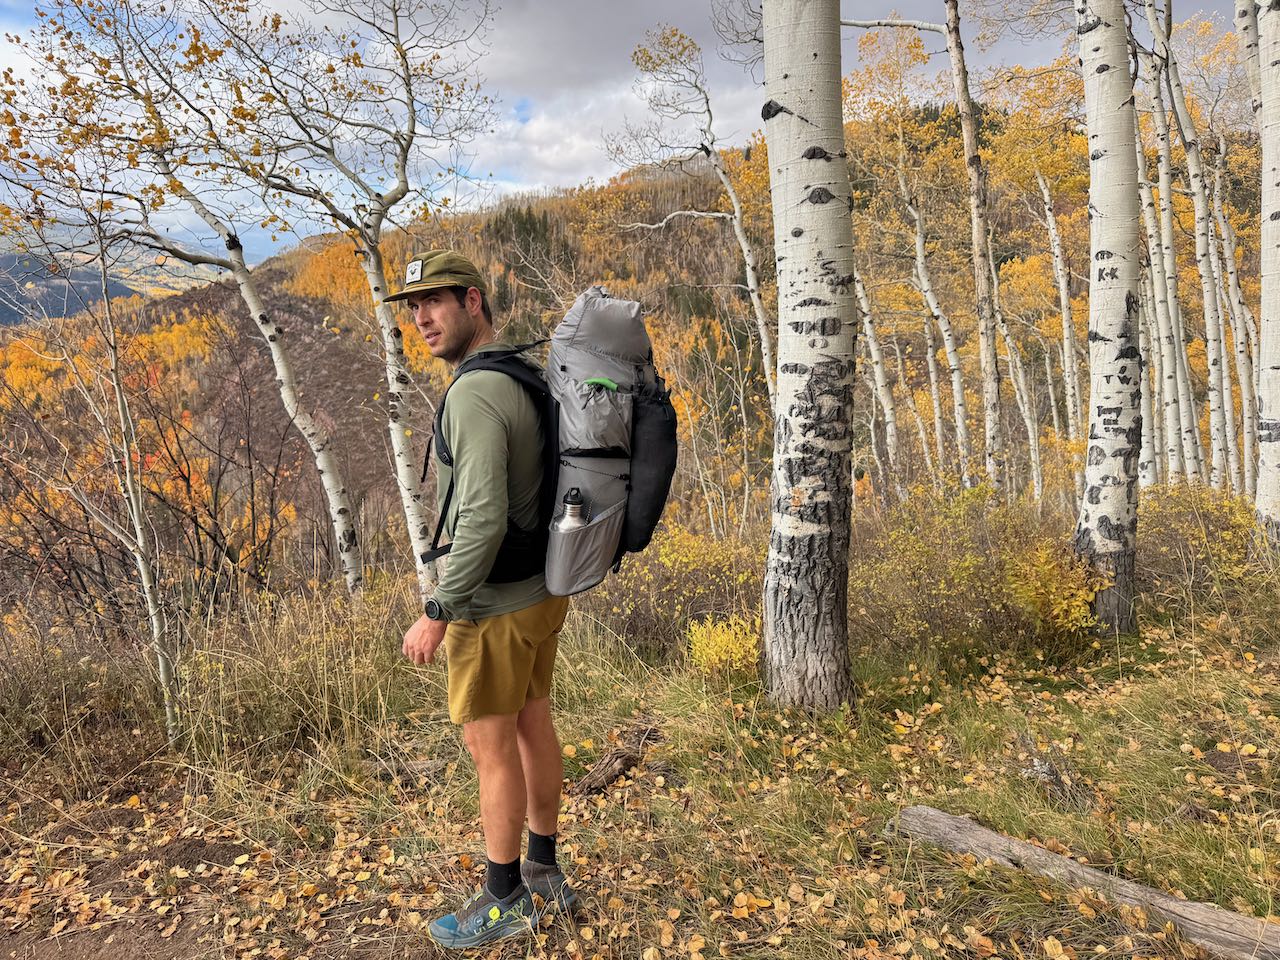
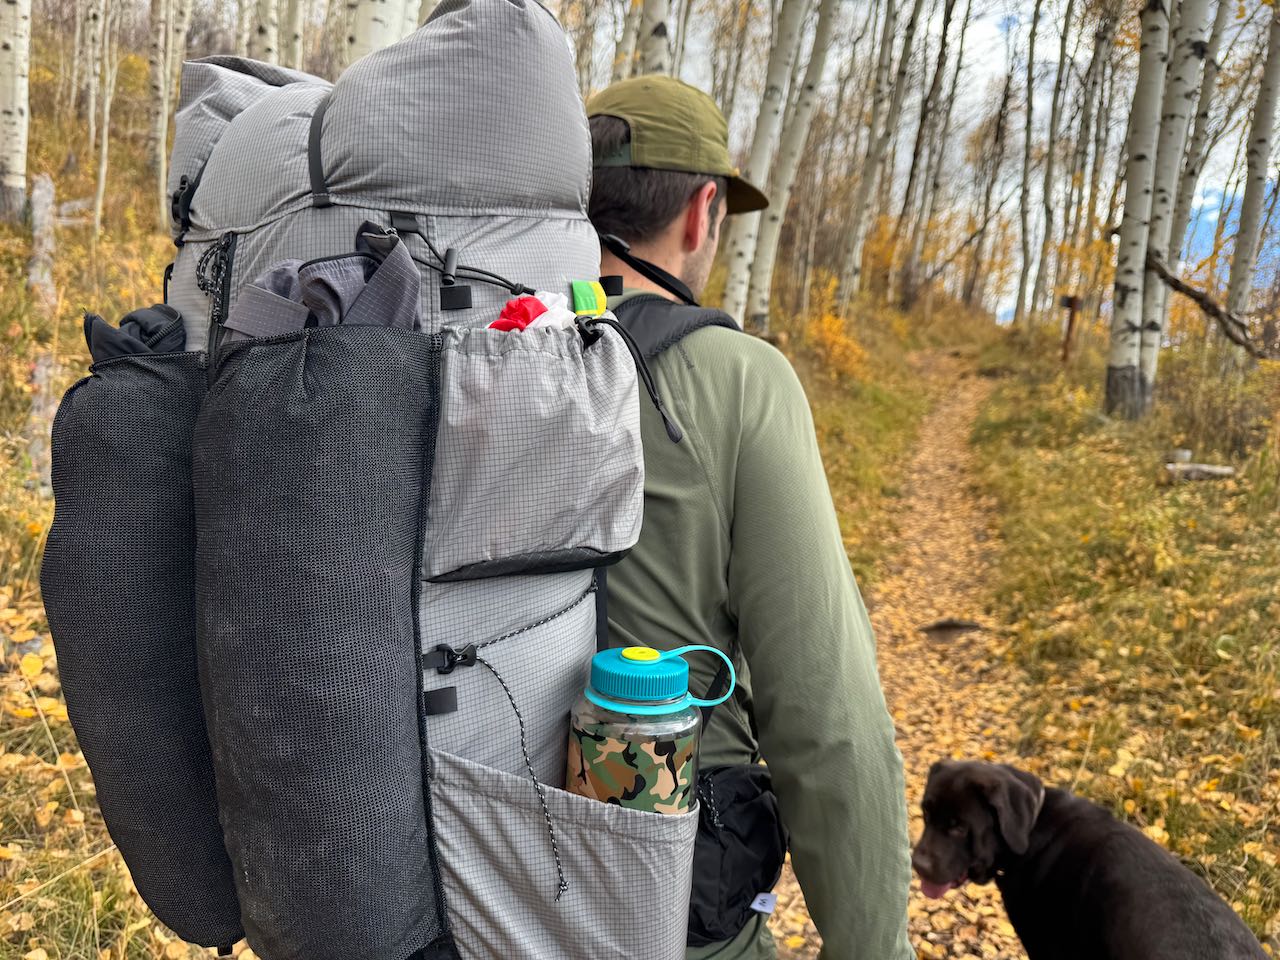
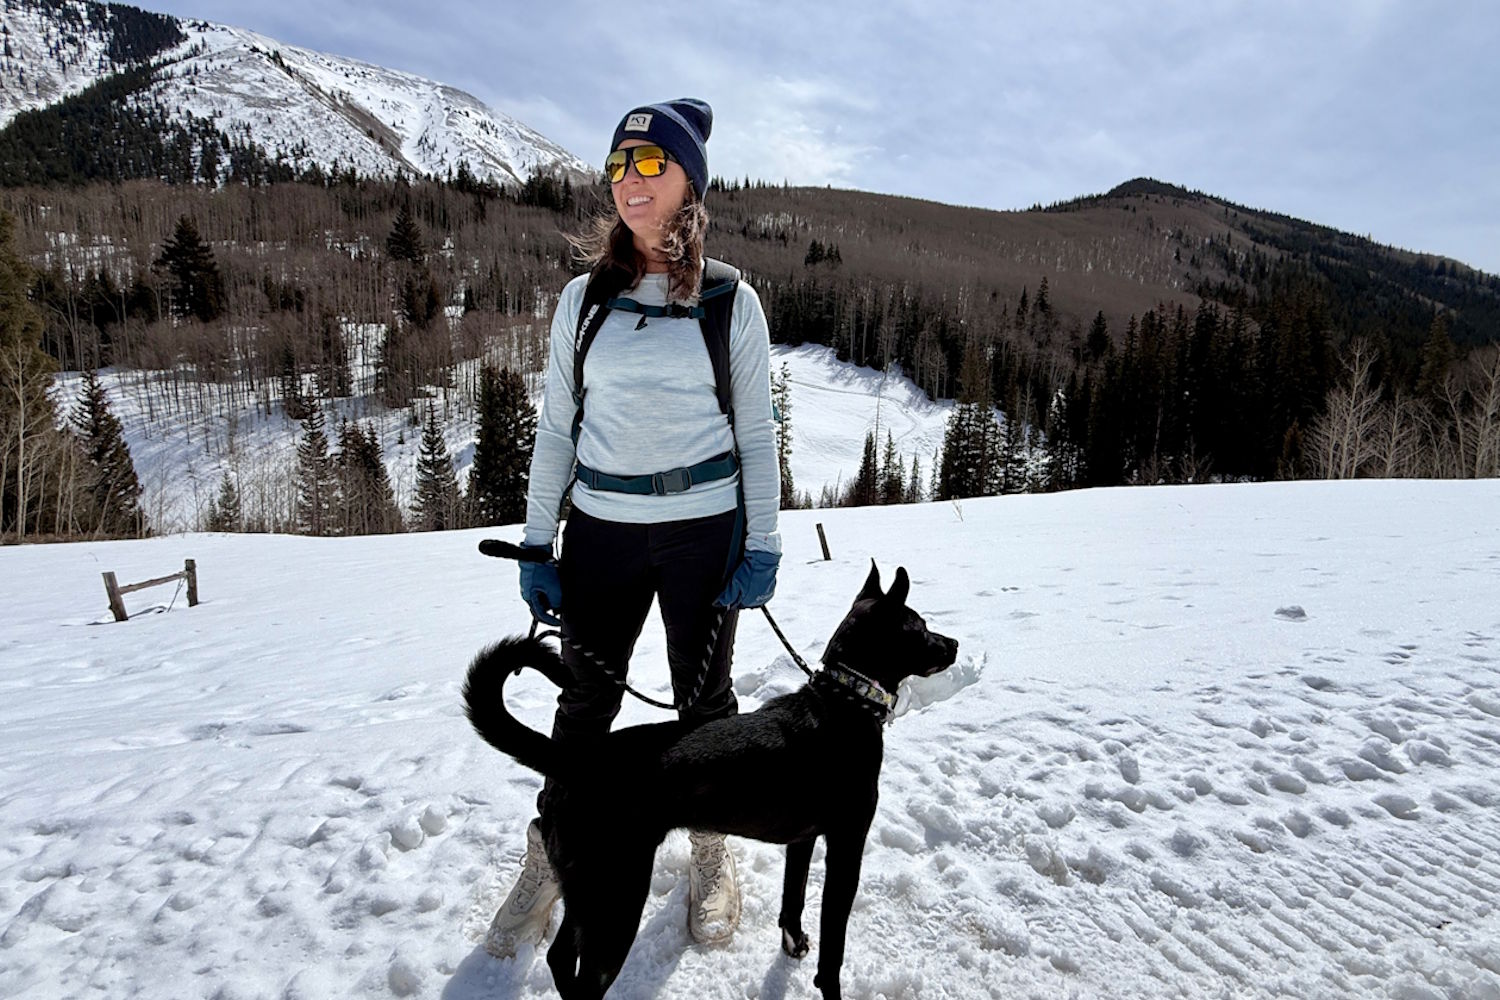
Pushing the last backpacking trip of the year to late fall in Colorado’s high peaks comes with a near guarantee of bad weather — but outlandish beauty in exchange. And pure solitude if you get deep enough. I hoofed it deep into Colorado’s Gore Range just past the peak of the fall colors. Cold, wet, and worth it.
Outdoor Vitals’ overhauled Shadowlight 60 ($275) carried the load. It’s an ultralight adventure-ready backpack at a competitive price point that proved a solid companion in the shoulder season. The 60L pack has the volume for my 0-degree down bag, my huge puffy jacket, and more.
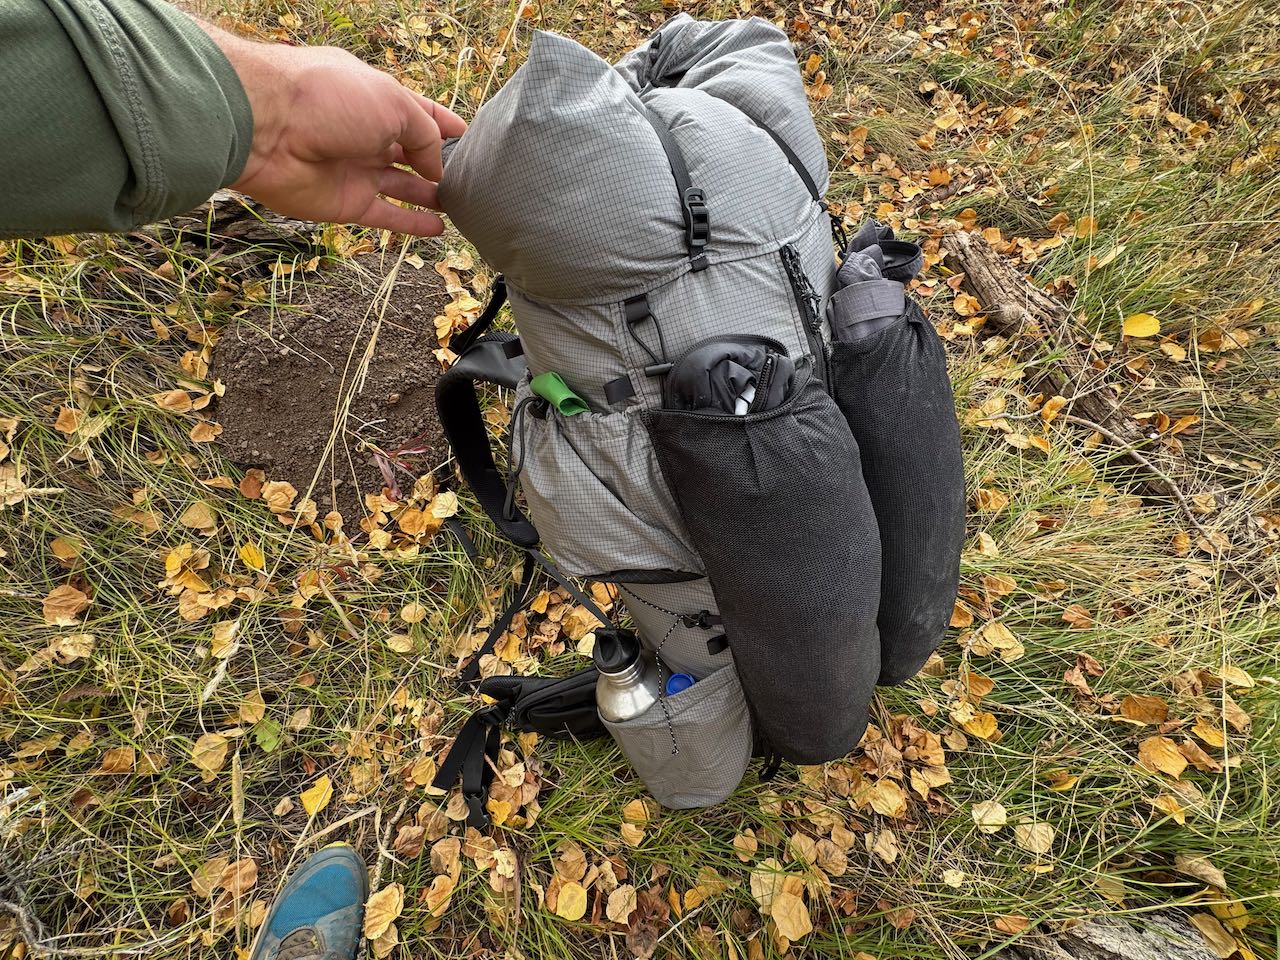
Big, external pockets kept my rain gear immediately at hand when the sky opened up. Just shy of 2 pounds, it kept my base weight low. But best of all, it was surprisingly comfortable for the ultralight category.
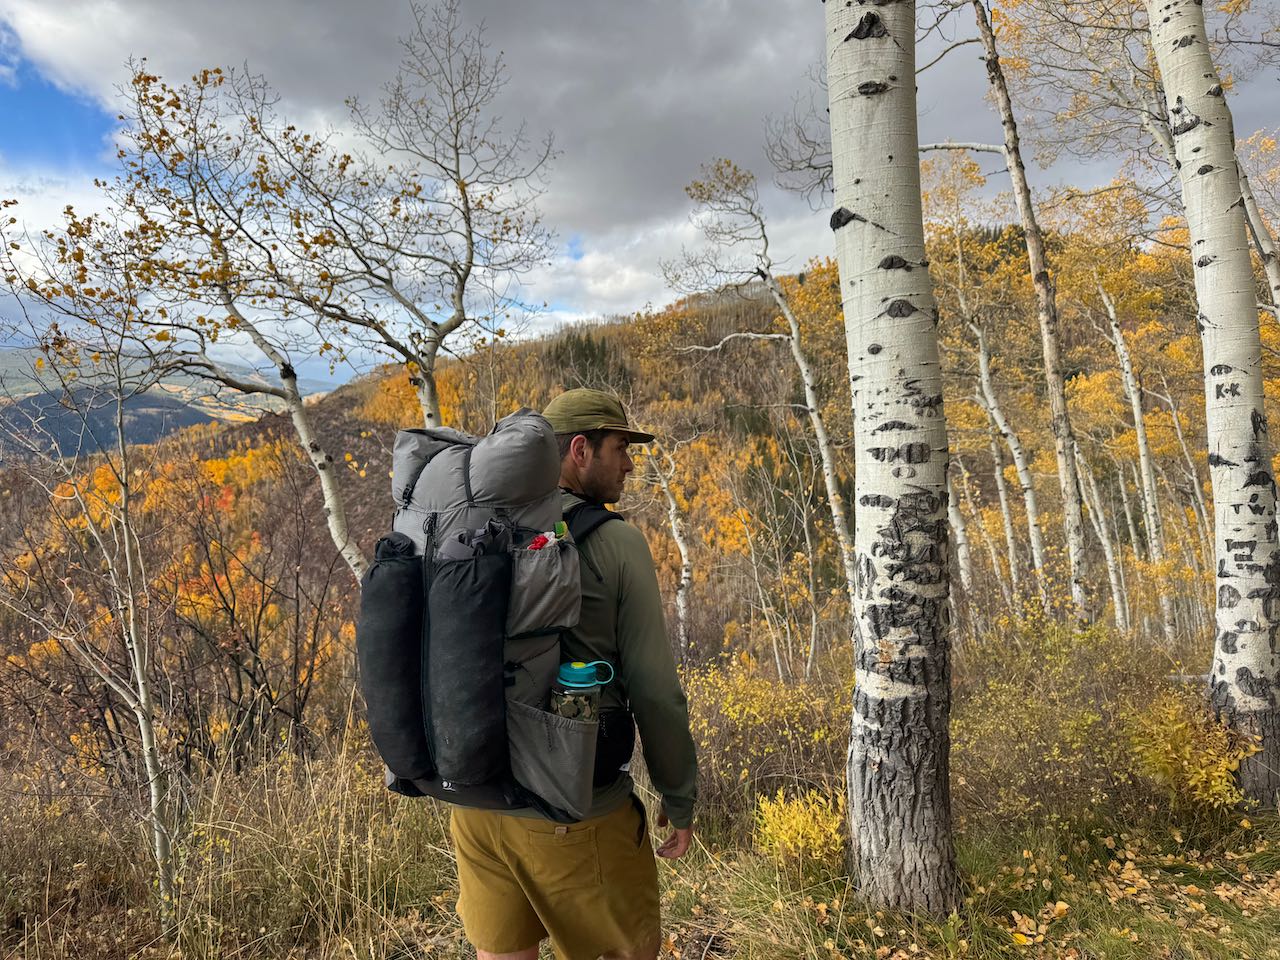
We carried the Outdoor Vitals Shadowlight 60 on multiday hikes to test comfort, storage, and trail performance; (photo/Bergen Tjossem)
Nearly every feature felt dialed — the bottle access, weight transfer, and pocket layout. It feels as though the designers obsessed over every detail and seam. That makes this pack feel closer to a work of craftsmanship than something mass-produced. As I cracked open my favorite small-batch pale ale at a soggy campsite, it struck me — the Shadowlight 60 is the craft beer of backpacks. (And yes, a beer or two is always worth the weight.)
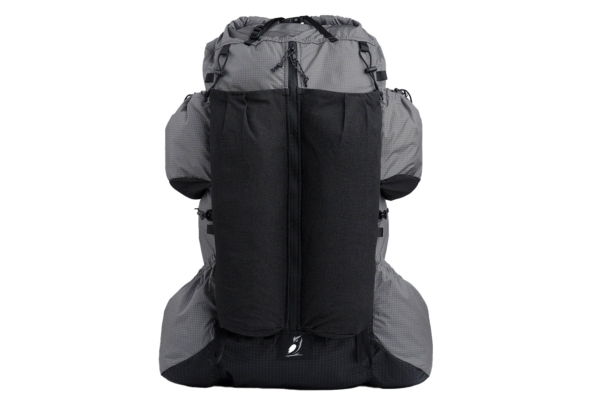
In short: Outdoor Vitals’ overhauled Shadowlight 60 backpack is characterized by big, accessible pockets peppering the outside for more efficient access to necessities and less trailside pack explosion. It is one of the few sub–2-pound ~60 L packs under $300. The Shadowlight 60 carries the load on carbon stays that move weight comfortably to the hips. This pack was made for thru-hikers, fast packers, and distance backpackers.
Compare the Outdoor Vitals Shadowlight 60L Backpack to those on GearJunkie’s guide to the Best Ultralight Backpacks.
Sizing:
Torso: Tall, Regular, Short; Hip Belt: XS – XL
Max recommended carry weight:
40 lbs.
Pros
Comfortable carry and weight transfer
Tons of external pockets
Under 2 lbs.
Competitively priced
Cons
Not waterproof
Pack doesn’t sit upright on the ground
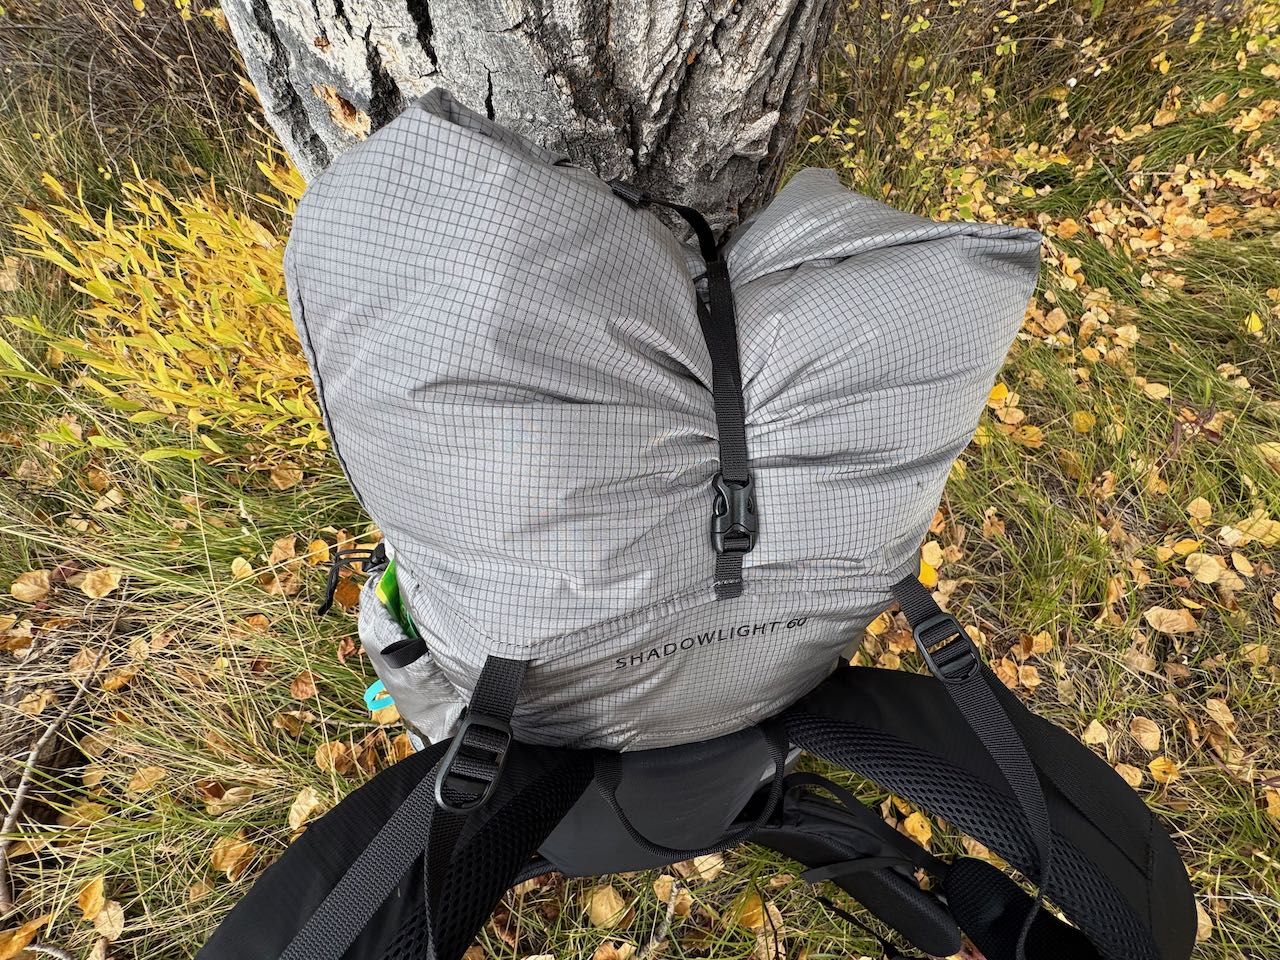
Back panel deforms with overstuffing
Bergen Tjossem
Outdoor Vitals Shadowlight 60 Review
The Shadowlight 60 is a value-oriented sub–2-pound backpack. It’s an overhaul of the original, which launched in 2020, rather than being new from the ground up. Outdoor Vitals put in the work figuring out how to upgrade the original Shadowlight.
The brand improved on nearly everything while retaining the original silhouette — suspension system, back panel, mesh pocket fabric, waist belt, pocket closure systems, and lashing loops sprinkled about. But in true ultralight backpacker fashion, they managed to do it without increasing the weight.
Carry System
The Outdoor Vitals Shadowlight 60 carried comfortably over long distances with even weight distribution and supportive hip padding; (photo/Bergen Tjossem)
The Shadowlight 60 was unusually comfortable on the trail despite the ultralight pedigree. It’s the highlight of this backpack. Big, padded hip straps give cushy support to the load that didn’t bruise my hips over time. They’re the type of hip cushion that you typically find on much heavier packs from brands like Osprey. It’s the kind of pack that’s easy to forget you’re wearing when you get into a hiking groove.
Some of that fit can be attributed to sizing. Outdoor Vitals offers the Shadowlight 60 in three torso sizes and five hip belt sizes. In total, there are 15 different sizing combinations available. Regular/Medium mapped almost perfectly onto my 6’1”, 195-pound body.
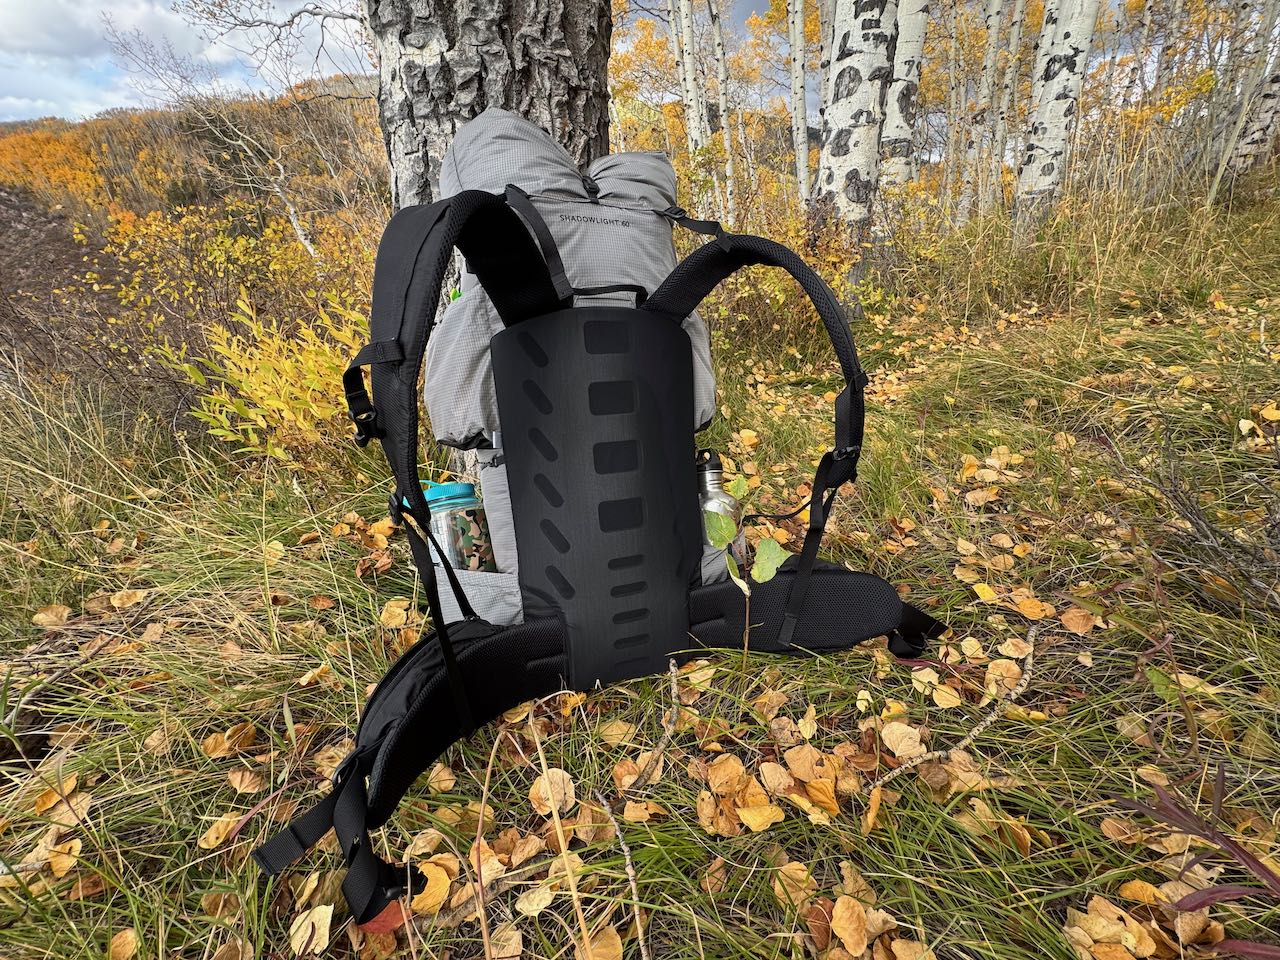
The Shadowlight 60 uses two vertical carbon stays and a foam back panel to transfer weight efficiently to the hip belt; (photo/Bergen Tjossem)
Pack structure is handled by two vertical carbon stays within the back panel that allow the pack’s weight to transfer to the hip belt. It wasn’t subtle. The Shadowlight 60 carries medium weights surprisingly well for its lightweight build, thanks to the effective load adjustment straps positioned above the shoulder straps. Outdoor Vitals recommends a maximum carry weight of 40 pounds.
The pack stays light and affordable without skimping on comfort by utilizing a simple foam back panel with cutouts for breathability. It’s an effective setup. The foam was plenty thick to keep my back comfortable, even if the breathability was nothing to write home about.
The one small tradeoff of such a lightweight, nonrigid back panel is that the pack can deform when you overstuff it. It morphs into the shape of your favorite beer keg. At one point, I had my stove poking into my middle back in a way that got annoying over time.
It was easy to adjust when I packed more consciously. I ended up overstuffing more heavily in the side-to-side rather than front-to-back axis to keep the pack’s shape comfortable. It’s not as rock-solid as packs with heavier frames, though.
Pockets and Storage
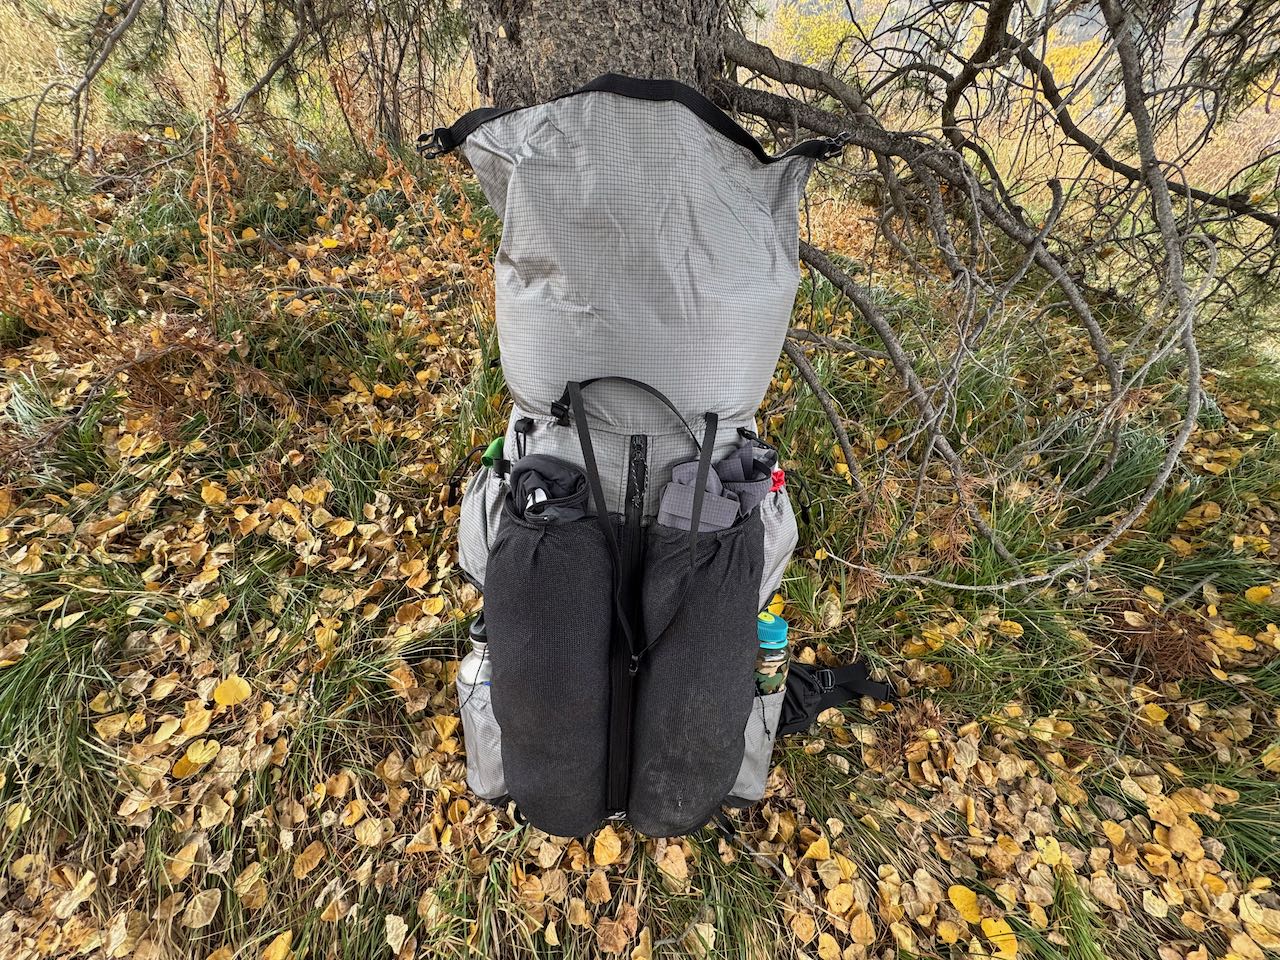
The Outdoor Vitals Shadowlight 60 offers multiple external pockets that make organizing and accessing trail gear simple; (photo/Bergen Tjossem)
The Shadowlight 60 had plenty of packing volume for shoulder-season backpacking. Yes, 60 L is even overkill for summertime, but I love that you can roll down the top of the 49L main compartment if you’re not using the full volume of the pack.
But fall in the Rockies called for my warmer sleeping bag and a few extra layers to keep the chill at bay. So, with my lightweight (but not outrageously minimalist) kit, I didn’t have a problem maxing out the internal capacity.
The pack’s design lends itself to packing the main compartment and leaving it closed until you hit camp. Everything that may or may not need to be accessible during the hike can be stowed in external pockets. The Shadowlight 60 is absolutely covered in them. Outdoor Vitals claims that the six external pockets add over 15 L to the pack’s volume, which is nothing to sneeze at.
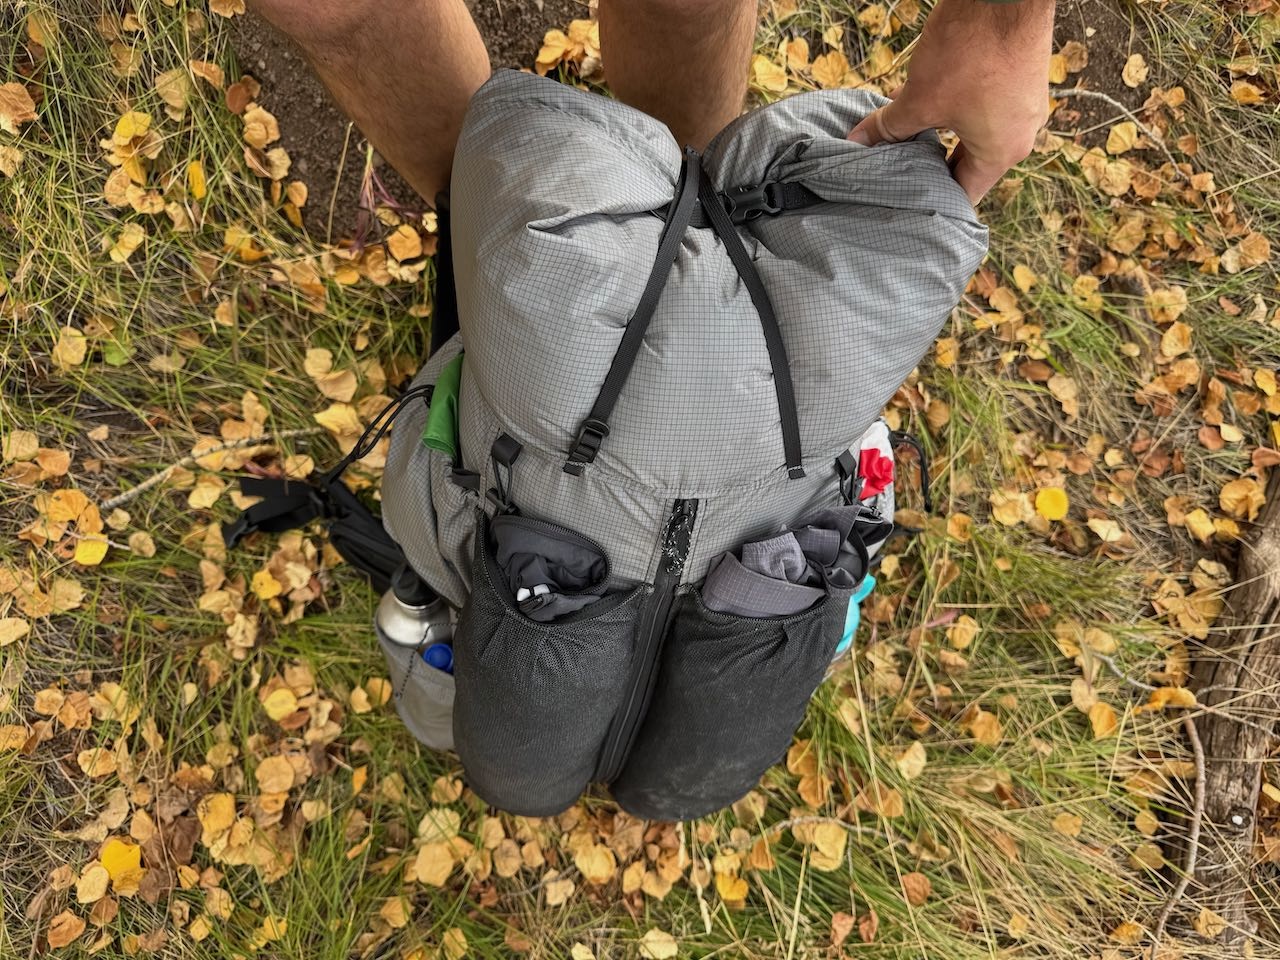
The Outdoor Vitals Shadowlight 60 stands out with tall UltraStretch pockets that stretch to fit bulky gear and hold their shape on the trail; (photo/Bergen Tjossem)
The defining characteristic of the Shadowlight 60 is the pair of tall, vertical, tube-shaped UltraStretch pockets on the outside of the pack whose fabric is both tough and stretchy. Those external pockets are split by an 18-inch vertical zipper that opens directly into the main pack body, so you can access a good portion of the pack’s contents rather than pulling them out from the top. It’s a unique feature for backpacks like this one.
The tradeoff is that instead of one big outside pocket, you’ve got two smaller, more slender tube-style pockets. They’re useful, though, even if they aren’t the easiest shape to pack. I tended to stuff my rain jacket in one and a grid fleece in the other. Between those two pockets and the two upper side pockets, the Shadowlight 60 was all about easy access to stuff.
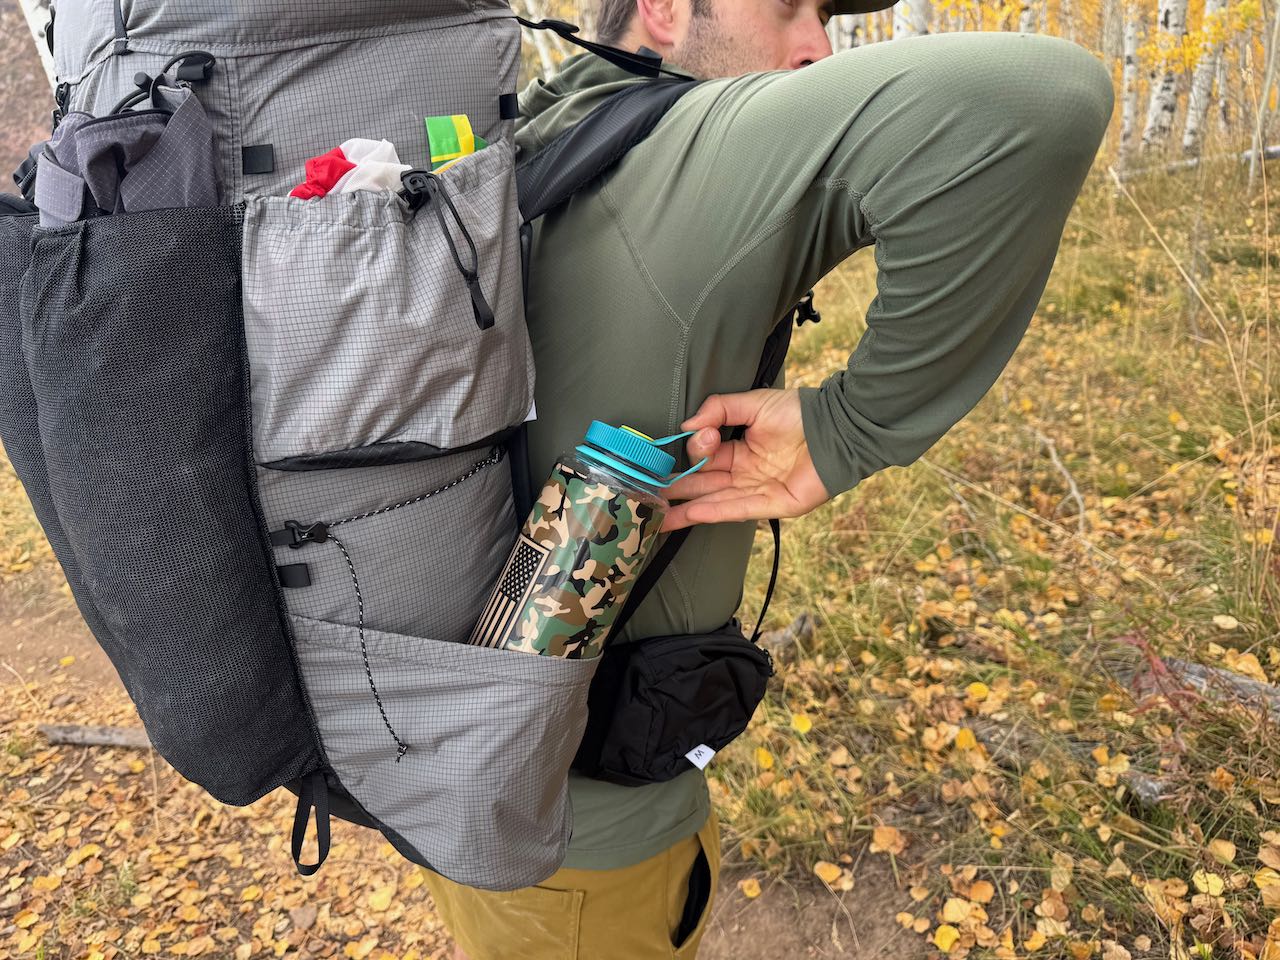
The Shadowlight 60’s side pockets securely hold large bottles that can be reached and replaced with one hand on the move; (photo/Bergen Tjossem)
The two lower side pockets were clearly designed for large water bottles (Nalgenes and the like). Most importantly, it was easy to grab and replace bottles while wearing the pack with one hand. And when the bottles were holstered, they stayed put even when I bent down. You’d think it’s a low bar, but it’s worth mentioning just the same.
Inside the main cavity hangs a detachable water bladder pocket. I tend to rely on water bottles, especially because they’re so easy to access on the Shadowlight, so I removed it pretty quickly. But water tube enthusiasts will be glad to hear it’s an option.
The sheer number of pockets borders on overkill. I didn’t have enough stuff to fill all those external pockets and still need easy access to the interior. Still, it made organization easier, and it was great avoiding a full gear explosion at camp. Backpackers accustomed to packs with lids (aka brains) for all the odds and ends will appreciate the compartments.
Value vs. Tradeoffs
The Shadowlight 60 balances durable, lightweight materials with affordability, though it isn’t fully waterproof like some pricier packs; (photo/Bergen Tjossem)
The Shadowlight 60 is one of the few packs in this weight (<2 pounds) and volume (60L ± 5L) class under $300. Roughly a quarter of the packs in GearJunkie’s Ultralight Backpacks guide meet that criteria. Even fewer are as fully featured and comfortable.
The tinkerers at Outdoor Vitals figured out how to pack in the value at an approachable price point. They even managed to weave in a proprietary blend of UHMWPE and Robic fibers to keep the whole thing light and tough. It’s not fully UHMWPE like some higher-end packs. However, it’s also more than 30% cheaper than a competitor from Hyperlight.
The rolltop may have you thinking otherwise, but this pack isn’t waterproof like some higher-end models. That won’t matter to many users, but it could be a dealbreaker for trekkers in wet climates. It wore on me this fall. But for a lot of folks, the lack of waterproofing is an acceptable tradeoff when paired with a rain cover, considering the pack’s price and weight.
Qualms
The Shadowlight 60’s curved bottom panel prevents it from standing upright when set down, a small but frequent annoyance on the trail; (photo/Bergen Tjossem)
The Shadowlight 60 has a lot going on: lots of features, lots of pockets, and lots of protrusions. Its design language may be polarizing to a small number of users, especially those who prefer a simpler, more tube-style pack like the brand’s own CS40. But given that it’s primarily an aesthetic preference, I’m leaving it out of the “cons” column.
Other than the aforementioned barreling back panel, my other qualm with the Shadowlight 60 is its refusal to sit upright on the ground. This is a tradeoff of the “self-compressing curved bottom” design, which ostensibly funnels gear toward the wearer’s back.
Since my sleeping bag is always stuffed in the bottom, I’m not sure that I appreciated the design. The curved bottom panel means that when you set the pack down on the ground, it falls down almost aggressively. It’s annoying.
The Outdoor Vitals Shadowlight 60 delivers comfort, organization, and thoughtful design that make it a standout ultralight backpack for the price; (photo/Bergen Tjossem)
The Outdoor Vitals Shadowlight 60 is a comfortable ultralight backpack at a great price. It’s one of those rare pieces of gear that makes you think, “Why would I need something more than this?”
Sure, some ultralight packs are lighter. Some add more structure, and some are fully waterproof. And man, do I miss packs that sit upright on their own.
But the Shadowlight 60 does a lot for $275. It’s comfortable even with decently heavy (30+ pounds) backpacking loads. It’s got more external pockets than I know what to do with. In true thru-hiking fashion, you can strap just about anything to the outside using the lash points peppering the exterior. The storage options are flexible and seemingly unlimited, to say the least.
The Shadowlight 60’s handmade feel is like my favorite pale ale. Just right in so many ways, as if an artisan tinkered with the straps, structure, and pockets over time without undermining the recipe, where each batch is just a slightly better iteration.
With a price that competes fiercely with the backpack “macro-breweries,” the Shadowlight 60 is worth a look for lightweight backpackers and thru-hikers across the experience spectrum who want solid value without many tradeoffs.
Pocket knives are flat-outhandy. And they’re a ton of fun. Whether you’re a general outdoorsman, blue-collar worker, or someone who’s looking for an everyday practical tool, they can quickly turn into an obsession.
Obsessed would be a good way to describe the team at GearJunkie. We have backpackers, climbers, hunters, fishermen, and general outdoor enthusiasts. It’s safe to say that all of us see the value in a trusty pocket knife and use one regularly. Pocket knives transcend our differences in interests. They’re a piece of gear for everyone.
Fortunately, as a team, we have the opportunity to test, use, and abuse a ridiculous amount of knives. Below is our selection of favorites, all but guaranteed to make you feel the same excitement you did when you opened your first one. From high-end knives with advanced steels to some of the cheapest, most time-tested knives in history, you’ll find the perfect addition (or start) to your collection.
Editor’s Note: This guide was revamped on October 16, 2025, with all-new selections.
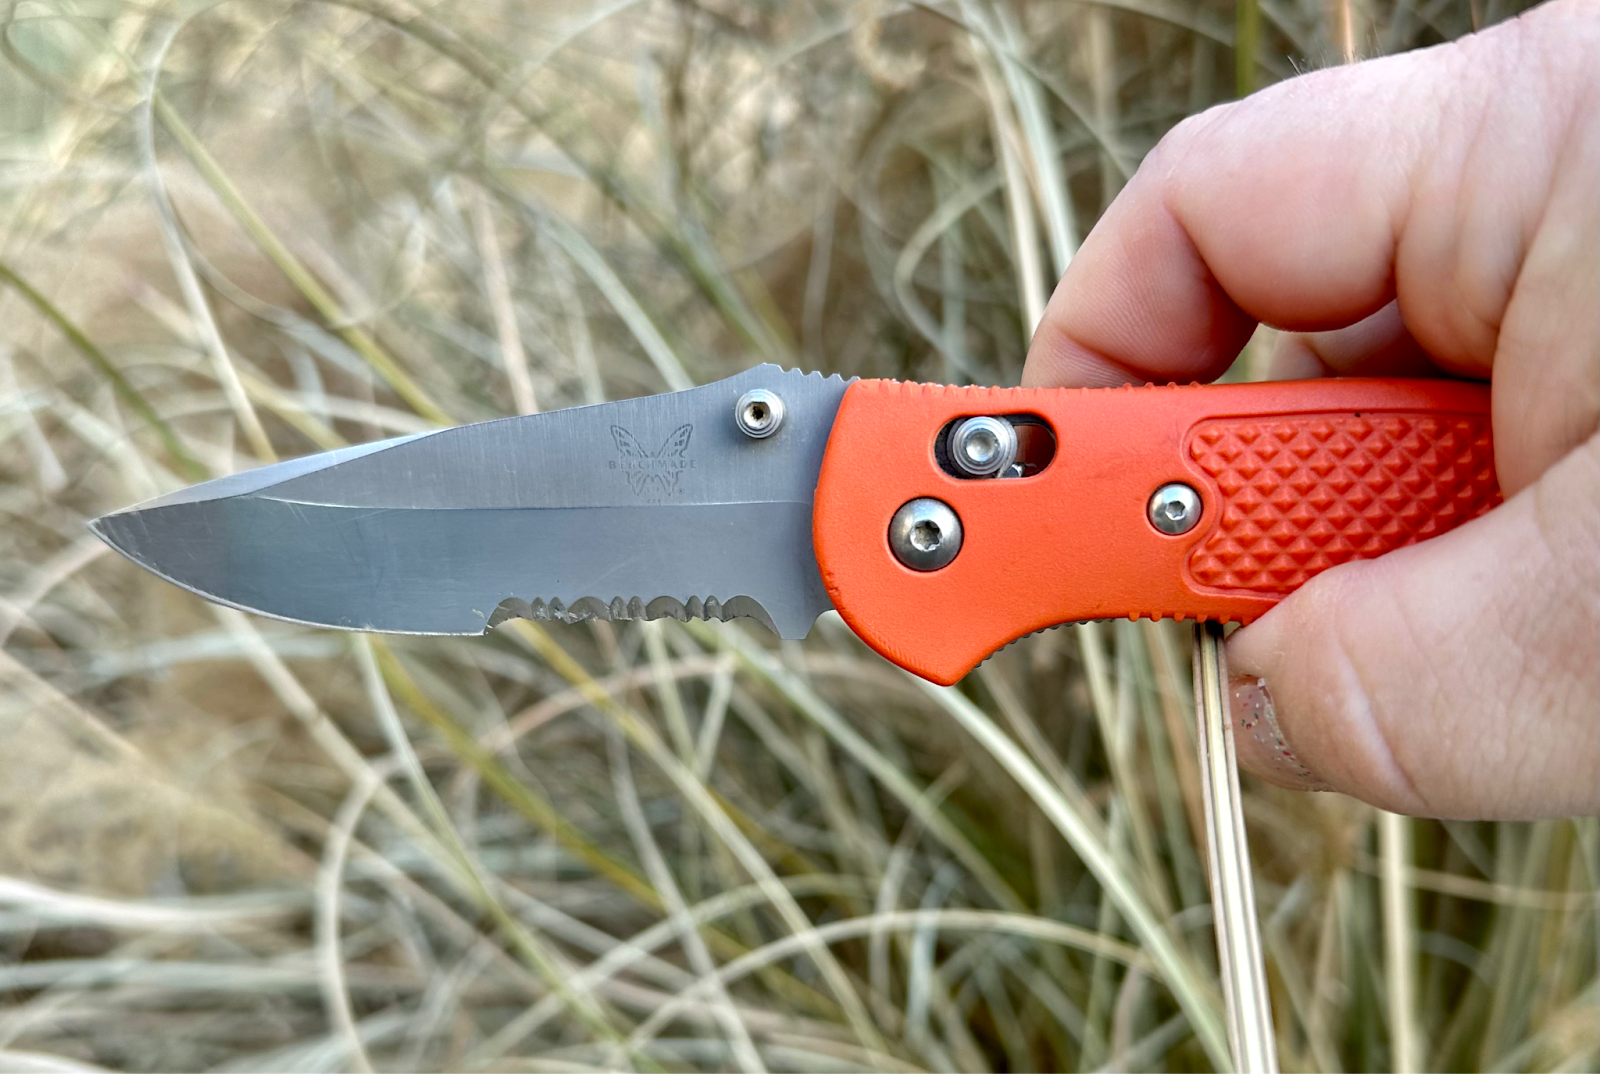
Benchmade crafts some of the best knives on the market, and the Bugout (starting at $180) is the top seller in the entire lineup. Any pocket knife list wouldn’t be complete without it. If you’re looking for a knife to be your trusted companion for the next decade, it should be high on your list, even if it is a bit cliché for those obsessed with knives from custom makers.
From an everyday carry standpoint, it’s one of the nicest carrying pocket knives available. It’s ridiculously light at 1.85 oz, and the handle is a mere 0.42″ inches wide. The knife slides into your pocket perfectly, and it’s easy to forget it’s there.
Despite the light weight, the knife isn’t too small for practical everyday use. The standard version is equipped with a 3.24-inch, drop-point, S30V stainless steel blade. Our tester used it to slice cord, cut food in camp, and do some carving, all without complaint. It’s a useful blade that maintains utility in a lightweight package.
And, with the popularity of the knife, Benchmade now allows you to customize the Bugout in virtually any way you want. Seriously, the options are limitless. Check it out here. You can upgrade steels, handles, put custom designs on the blade, you name it. If you want a high-performing, unique-to-you pocket knife to carry by your side every day, you’ll be hard-pressed to find a better option.
While testing, the lightweight, thin Grivory handle (which comes standard) did flex slightly under extreme pressure. But in reality, that was in situations a “pocket knife” isn’t really designed for. The thin, ultralight design is well worth the tradeoff, and the Bugout may be the quintessential, trusty pocket knife.
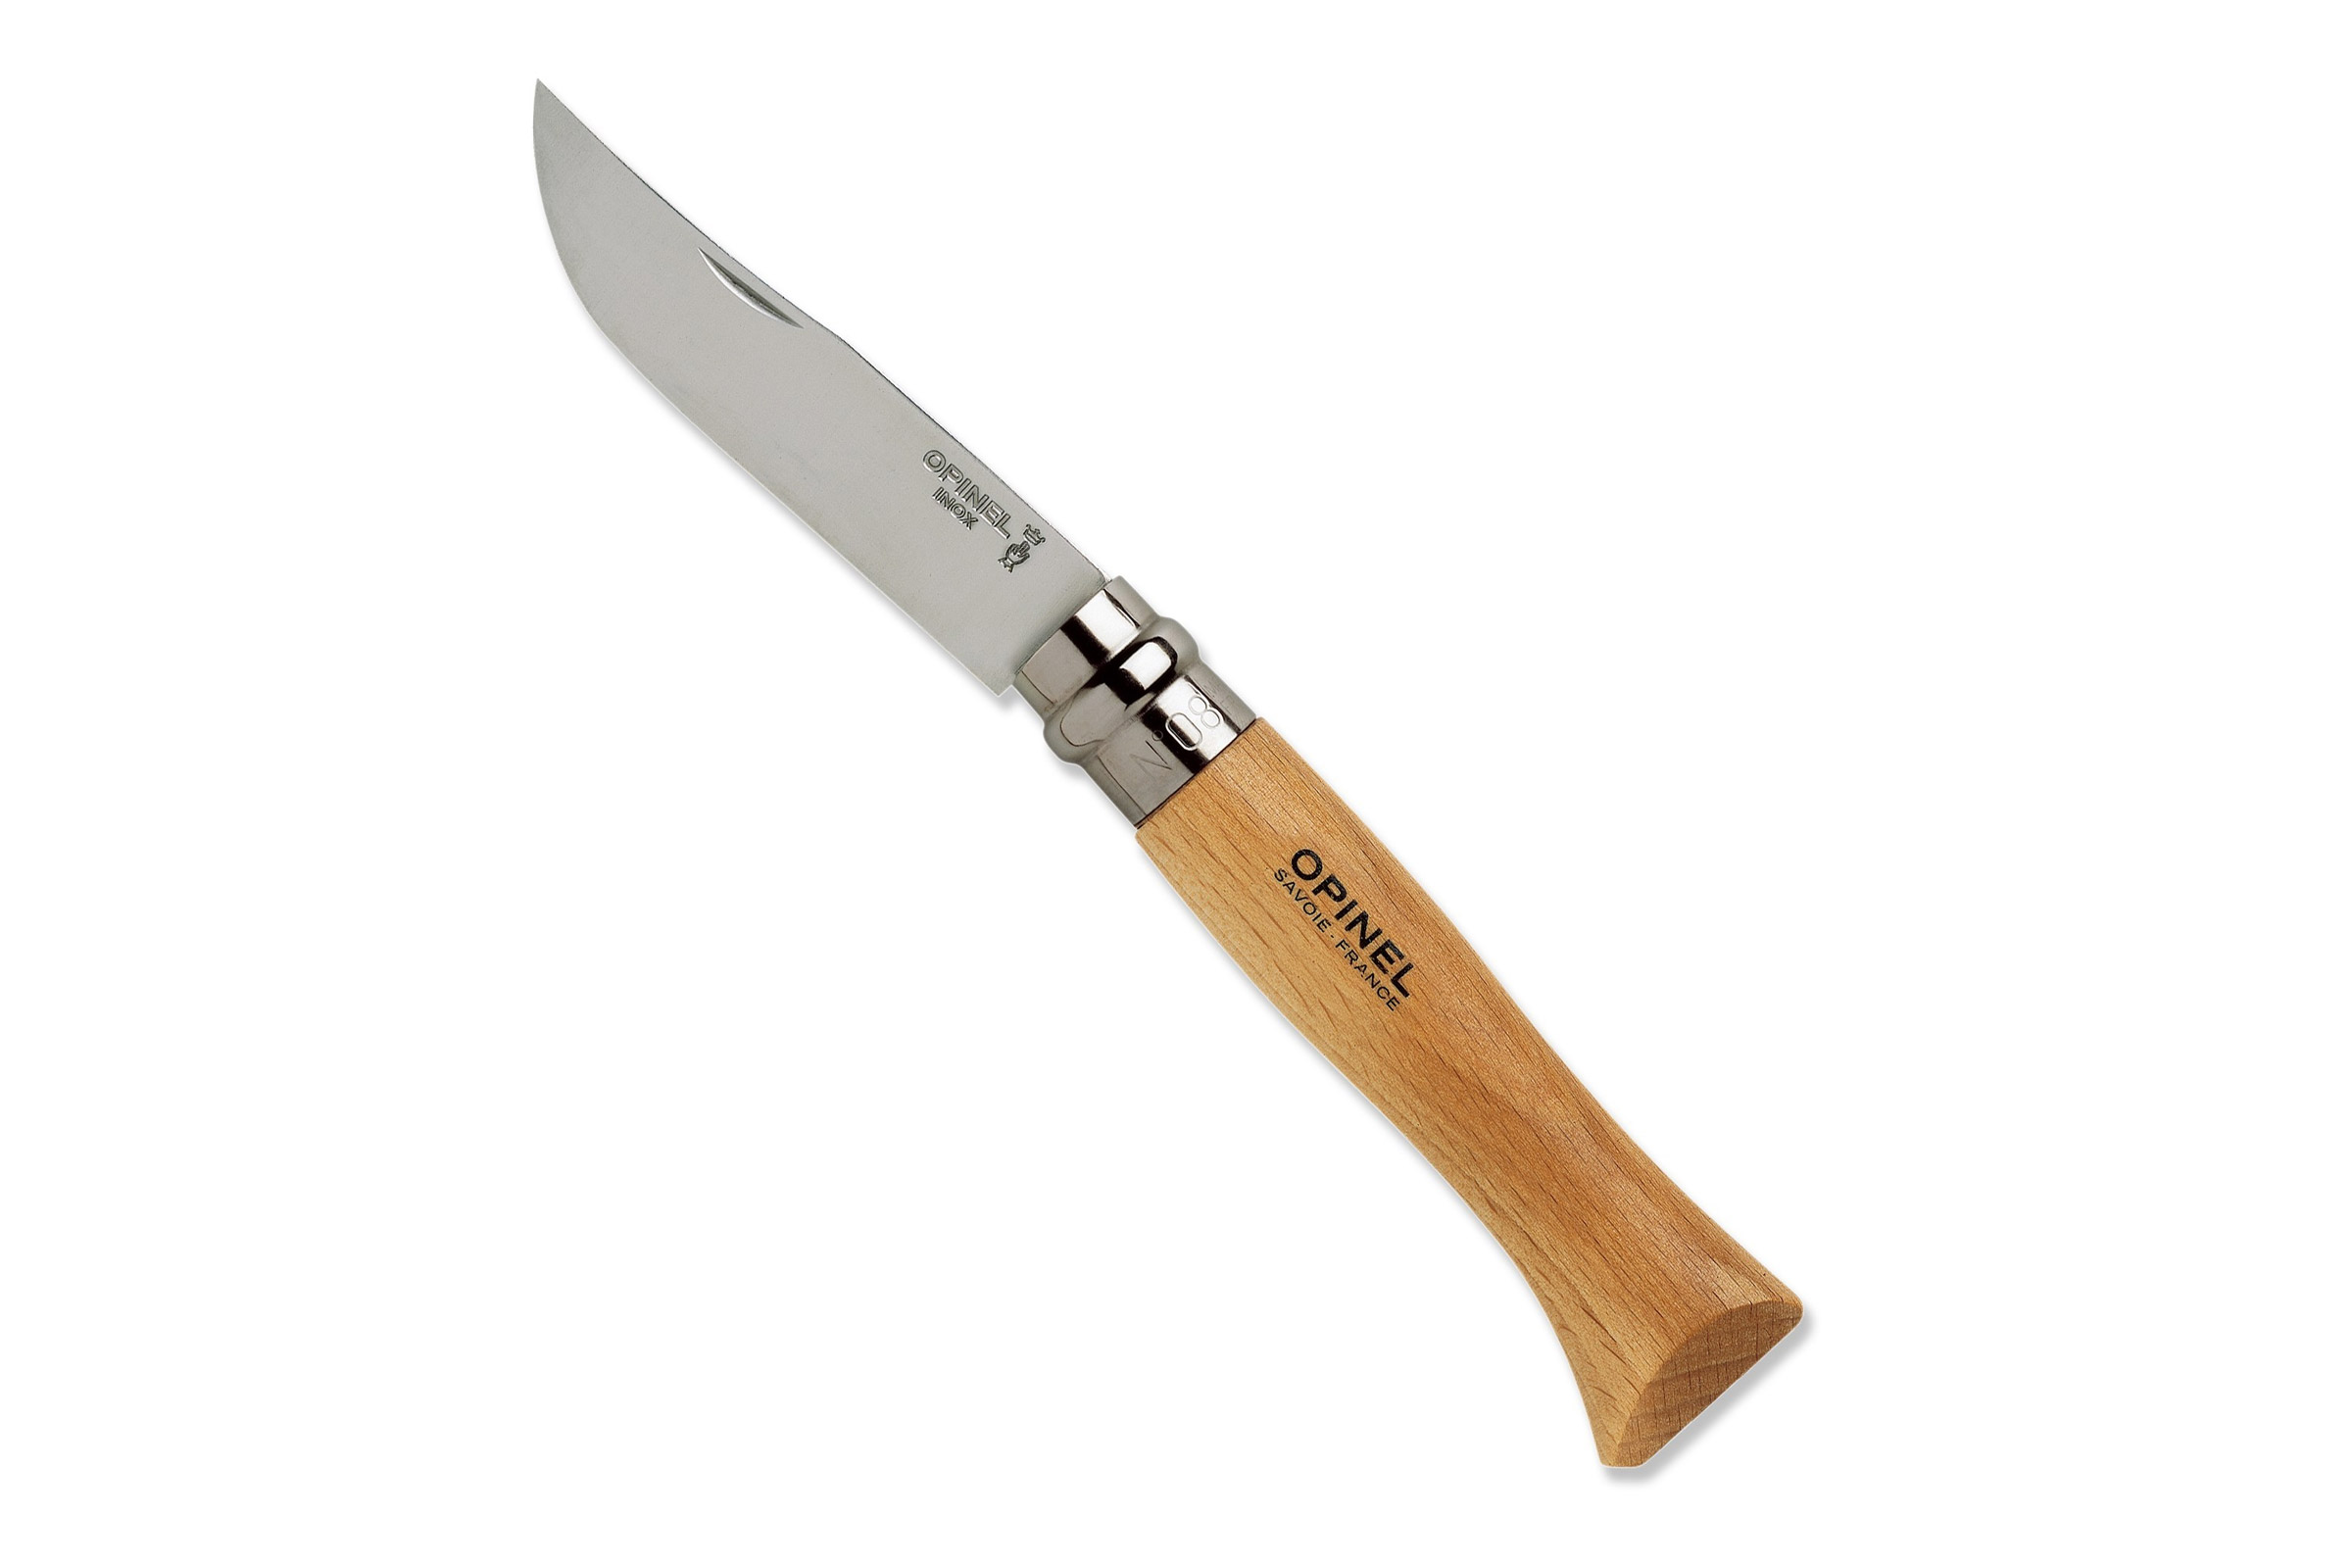
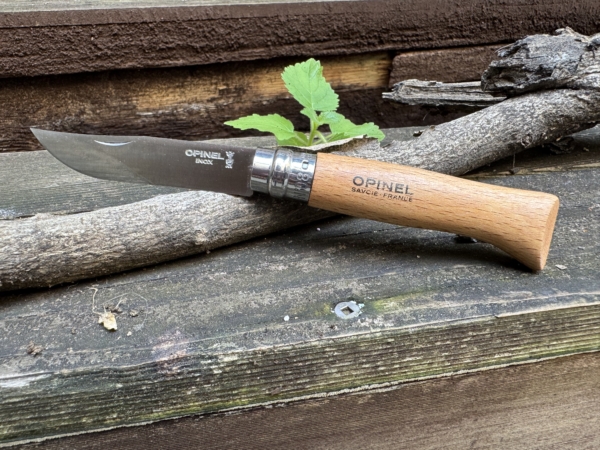
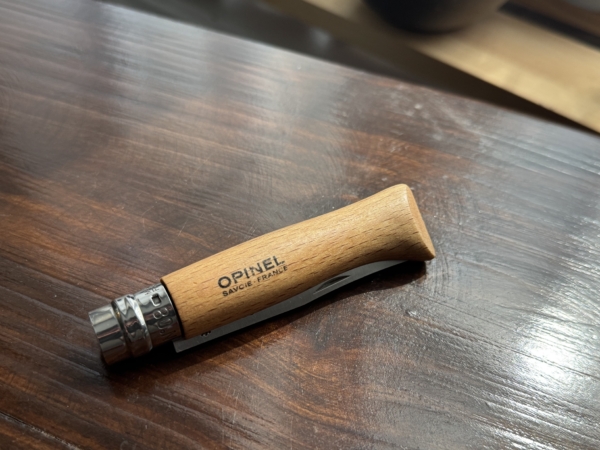
Nineteen bucks for a pocket knife? In today’s world? Surely, this has to be something from TEMU. But no, the Opinel No.08 Inox ($19) is actually from France, where it’s been manufactured for 135 years. People were relying on this knife as an everyday carry before humans had even taken flight.
The design has remained pretty much the same, hence the borderline criminal price. While not as fancy as some of the new knives at our disposal, it’s time-tested, and it clearly gets the job done. If it didn’t, it would have been discontinued in its more-than-a-century existence.
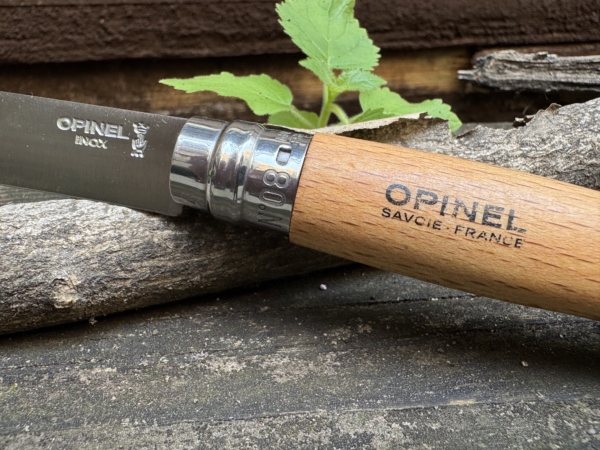
The blade is 3.28″ long and is made from Sandvik 12C27 stainless steel. Is the Swedish steel going to blow your socks off? No, modern steels are much better for holding an edge, but again, its $19. Give it a quick, easy touch-up, and you’ll be back in action. As far as corrosion resistance goes, GearJunkie contributor Matt Jancer said he’s never had a single spot of rust pop up on his trusty Opinel No.08, despite not babying it.
One of the few updates this knife has received since its inception is the inclusion of a locking mechanism. In the tradition of a more old-timey aesthetic, it’s a simple feature without fancy springs or small parts. Just rotate the locking ring at the top (called Virobloc), and the blade is literally blocked from closing on your hands. While it is prone to getting gummed up with dirt, its easy enough to clean out and is an upgrade that was much needed.
The out-of-the-box sharpness surprised Jancer, and the factory edge is better than some more expensive knives. Whether you’re on a shoestring budget or are looking for a timeless classic to add to your collection for a minimal investment, the Opinel delivers time-tested performance.
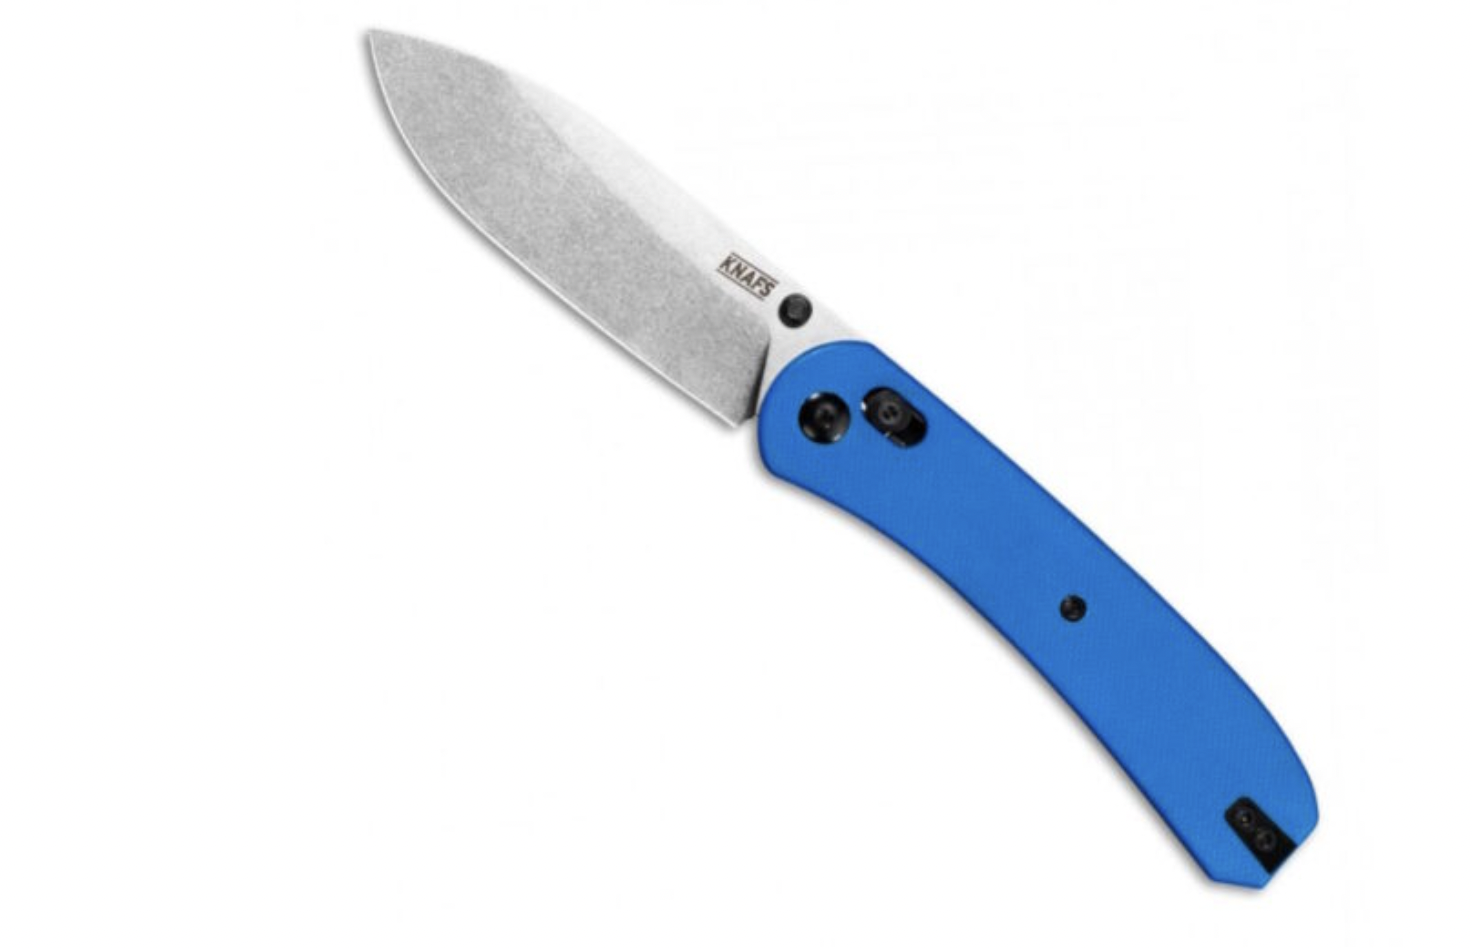
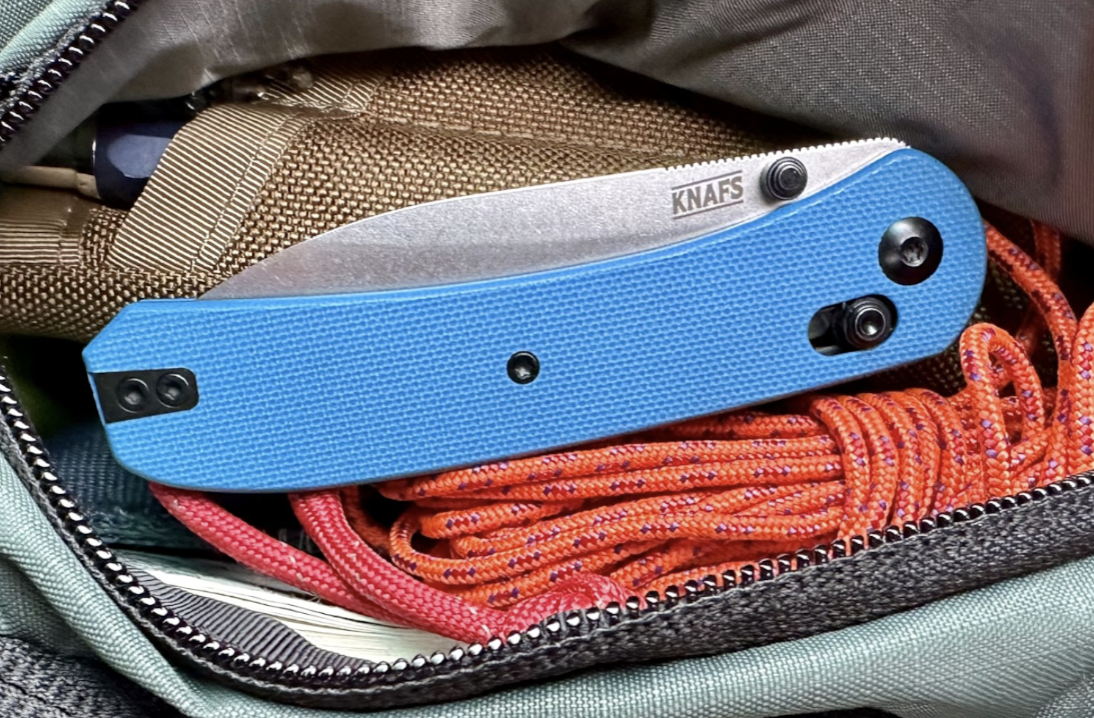
The Knafs Lander 2 ($129) is the hardworking answer to Benchmade’s Bugout ($180). Where the Bugout has been touted for being lightweight, the tradeoff is that it’s only good for light to medium-duty work. By adding only an ounce more of weight, the folks at Knafs created a pocket knife that can be used and abused at your discretion for years to come.
Available now in a variety of handle scale options and blade finishes, the Lander 2 makes use of S35VN steel. S35VN is one of the most popular premium steels because it’s easy to maintain and staves off corrosion and abrasion like a champ. It also hosts the strongest lock mechanism on the market today, the Clutch Lock, a branded version of the crossbar lock that first climbed to fame through Benchmade as its Axis lock.
From LeFort: “One of four different Lander models, the Lander 2 gets my top pick award because the balance between materials, size, function, and weight is hard to match. Since writing the original article in January of this year, I have swapped out my Blue G10 carry for the Green Micarta ($140) version. However, if you plan on adding a Lander 2 to your pocket, I would recommend you look at the brand’s expanded lineup of custom handle scales — or consider making them yourself.”
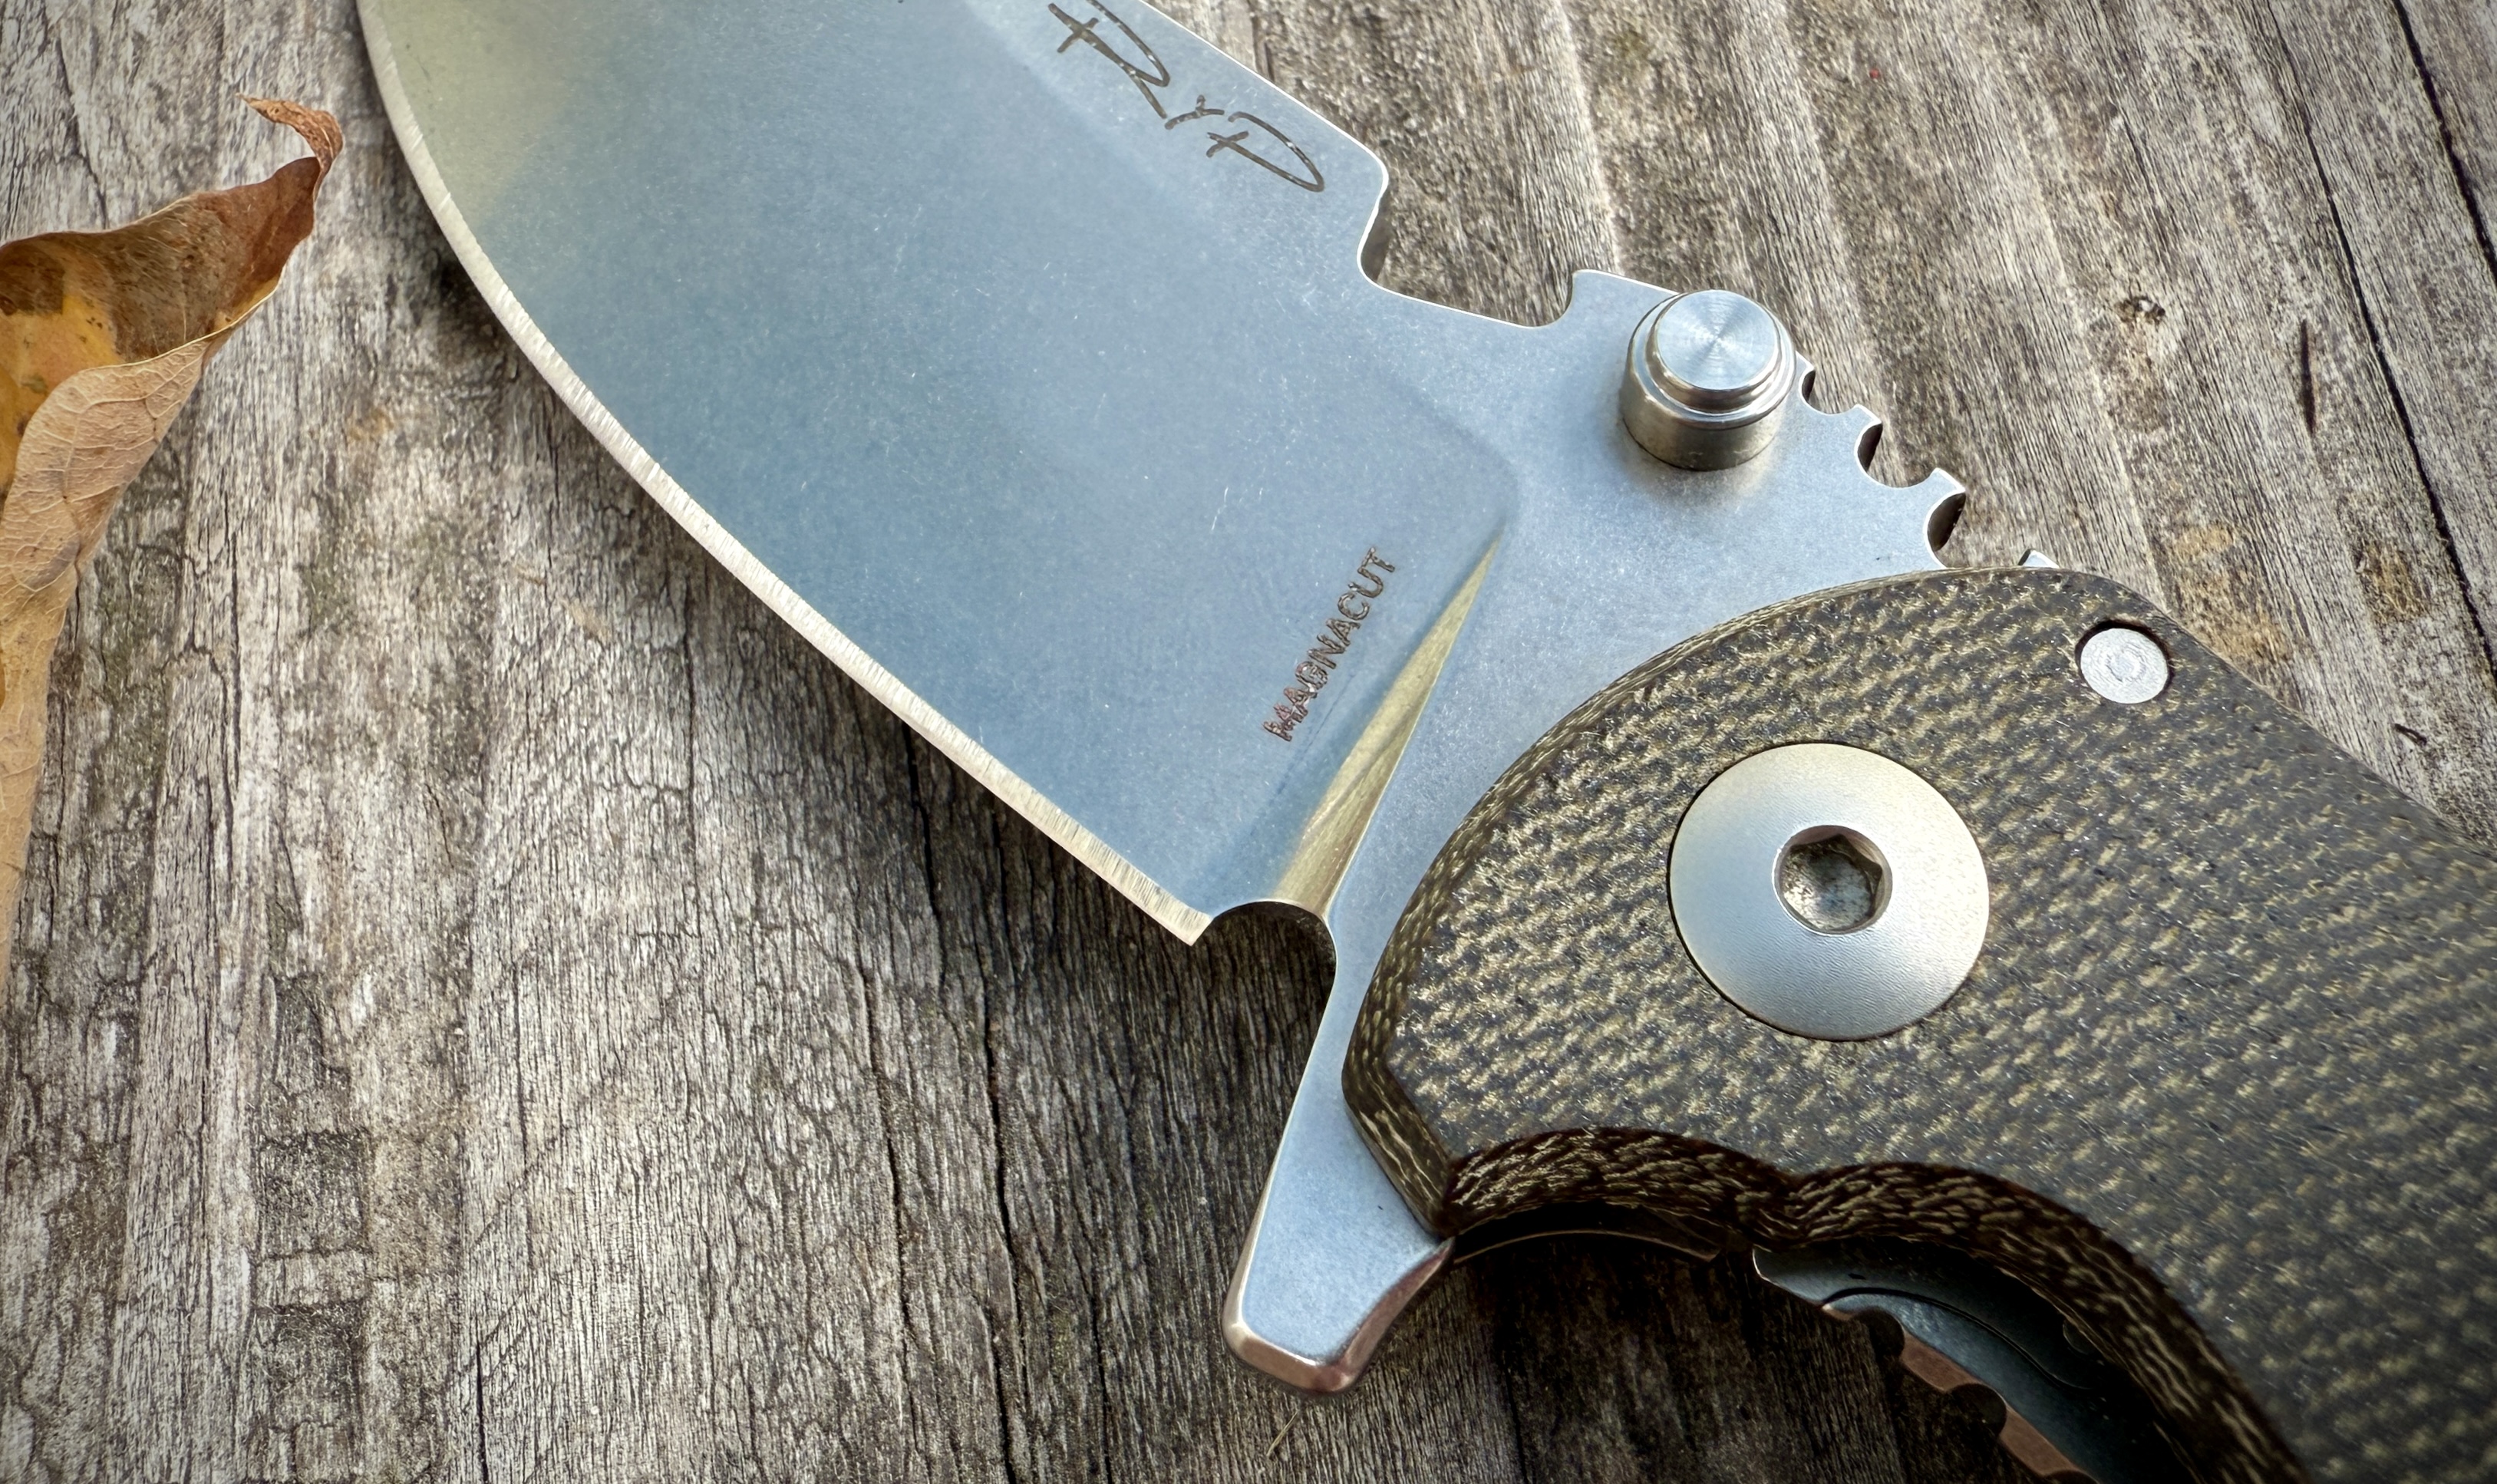
While the listed price ($249) of the Kershaw Bel Air doesn’t scream value, the kicker is that this knife is often available for considerably less. At the time of this writing, it’s available for around $150 in most places, and certain colors are available for $115 on Amazon. And it’s a MagnaCut blade.
Yep, that’s right, you can see what the MagnaCut craze is all about without feeling like you’re blowing a ridiculous amount of cash on a pocket knife. It’s a premium steel at a middle-of-the-road knife price. That alone makes it a super cool pocket knife.
But the benefits of the Bel Air don’t stop at just the steel. The Reverse Tanto blade is thin, at a mere .09″, something that is usually reserved for much more expensive, or hard to get knives. While thick blades used to dominate the market, thinner, much “slicier” blades are now possible due to improvements in steel technology. The Bel Air gives you that at a reasonable, mass-produced knife price.
Our tester took only this knife on a vacation, and used it to cut up snacks for kids, open cardboard beer boxes, carve driftwood, and process lobster for dinner. The only wear the knife showed was a slight diminishment of the blackwash on the blade. While some may view that as a negative, it actually gives it a cool, “trusty, used tool” vibe.
The handle is aluminum with grippy scales and a Cerakote finish. Even after being taken to the beach, the knife was in great shape, although our tester did admit to babying it a bit around sand. That was due to the Duralock locking mechanism. It is quite literally a replica of the Benchmade mechanism (the patent expired), and it can certainly be trusted. But it does have a lot of moving parts that can get gummed up with extreme use.
Honestly, this U.S.-made pocket knife is a steal for just about anyone. But its an especially good grab for those who are considering dabbling in the premium pocketknife world, just to see what the hype is all about. There’s hardly anything not to love.
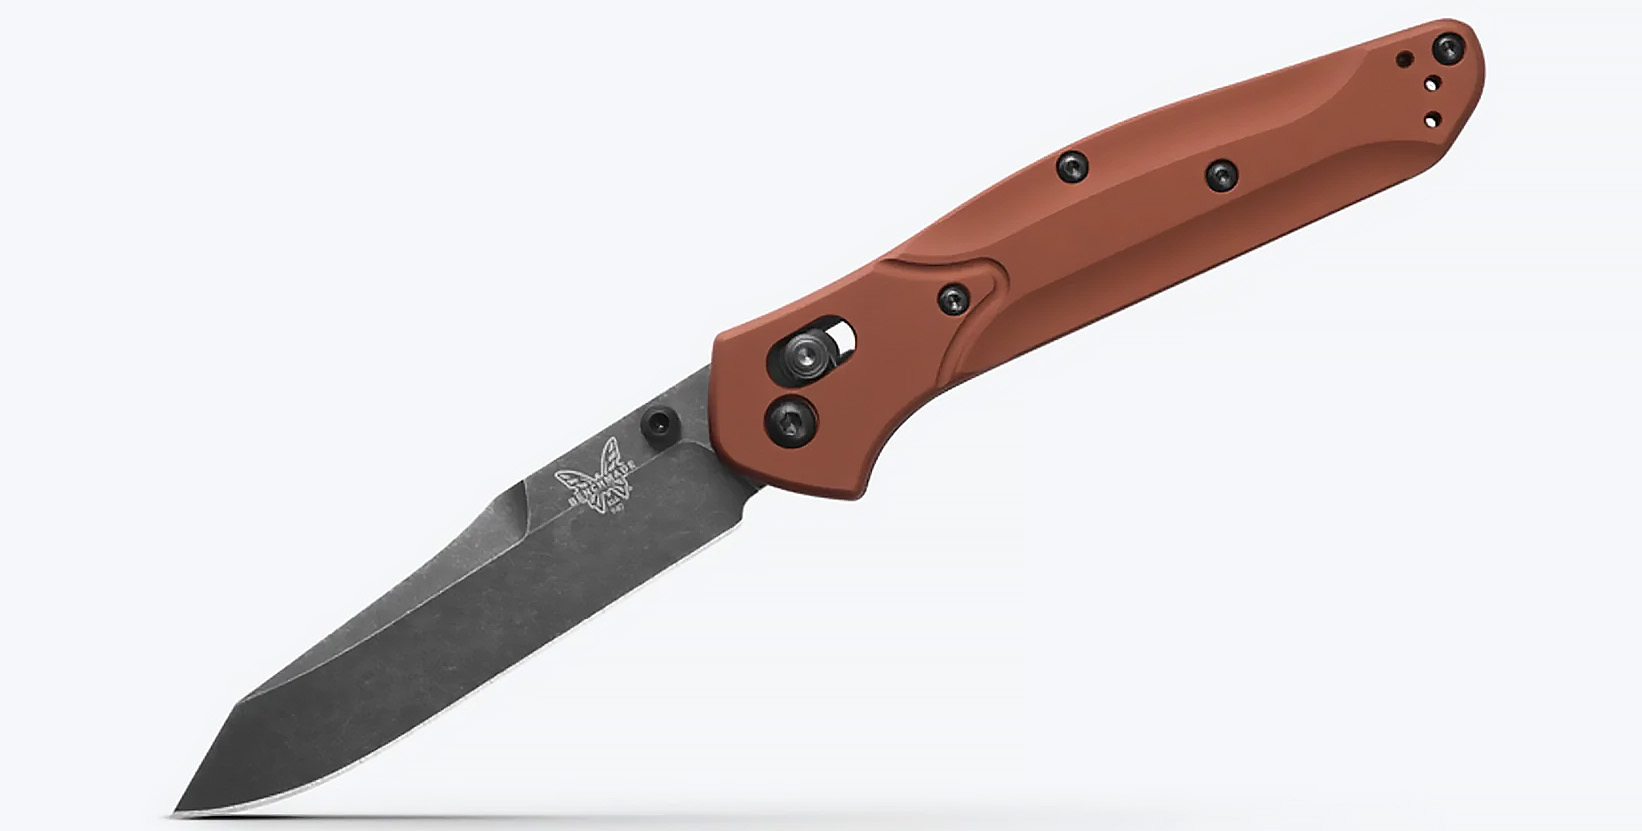
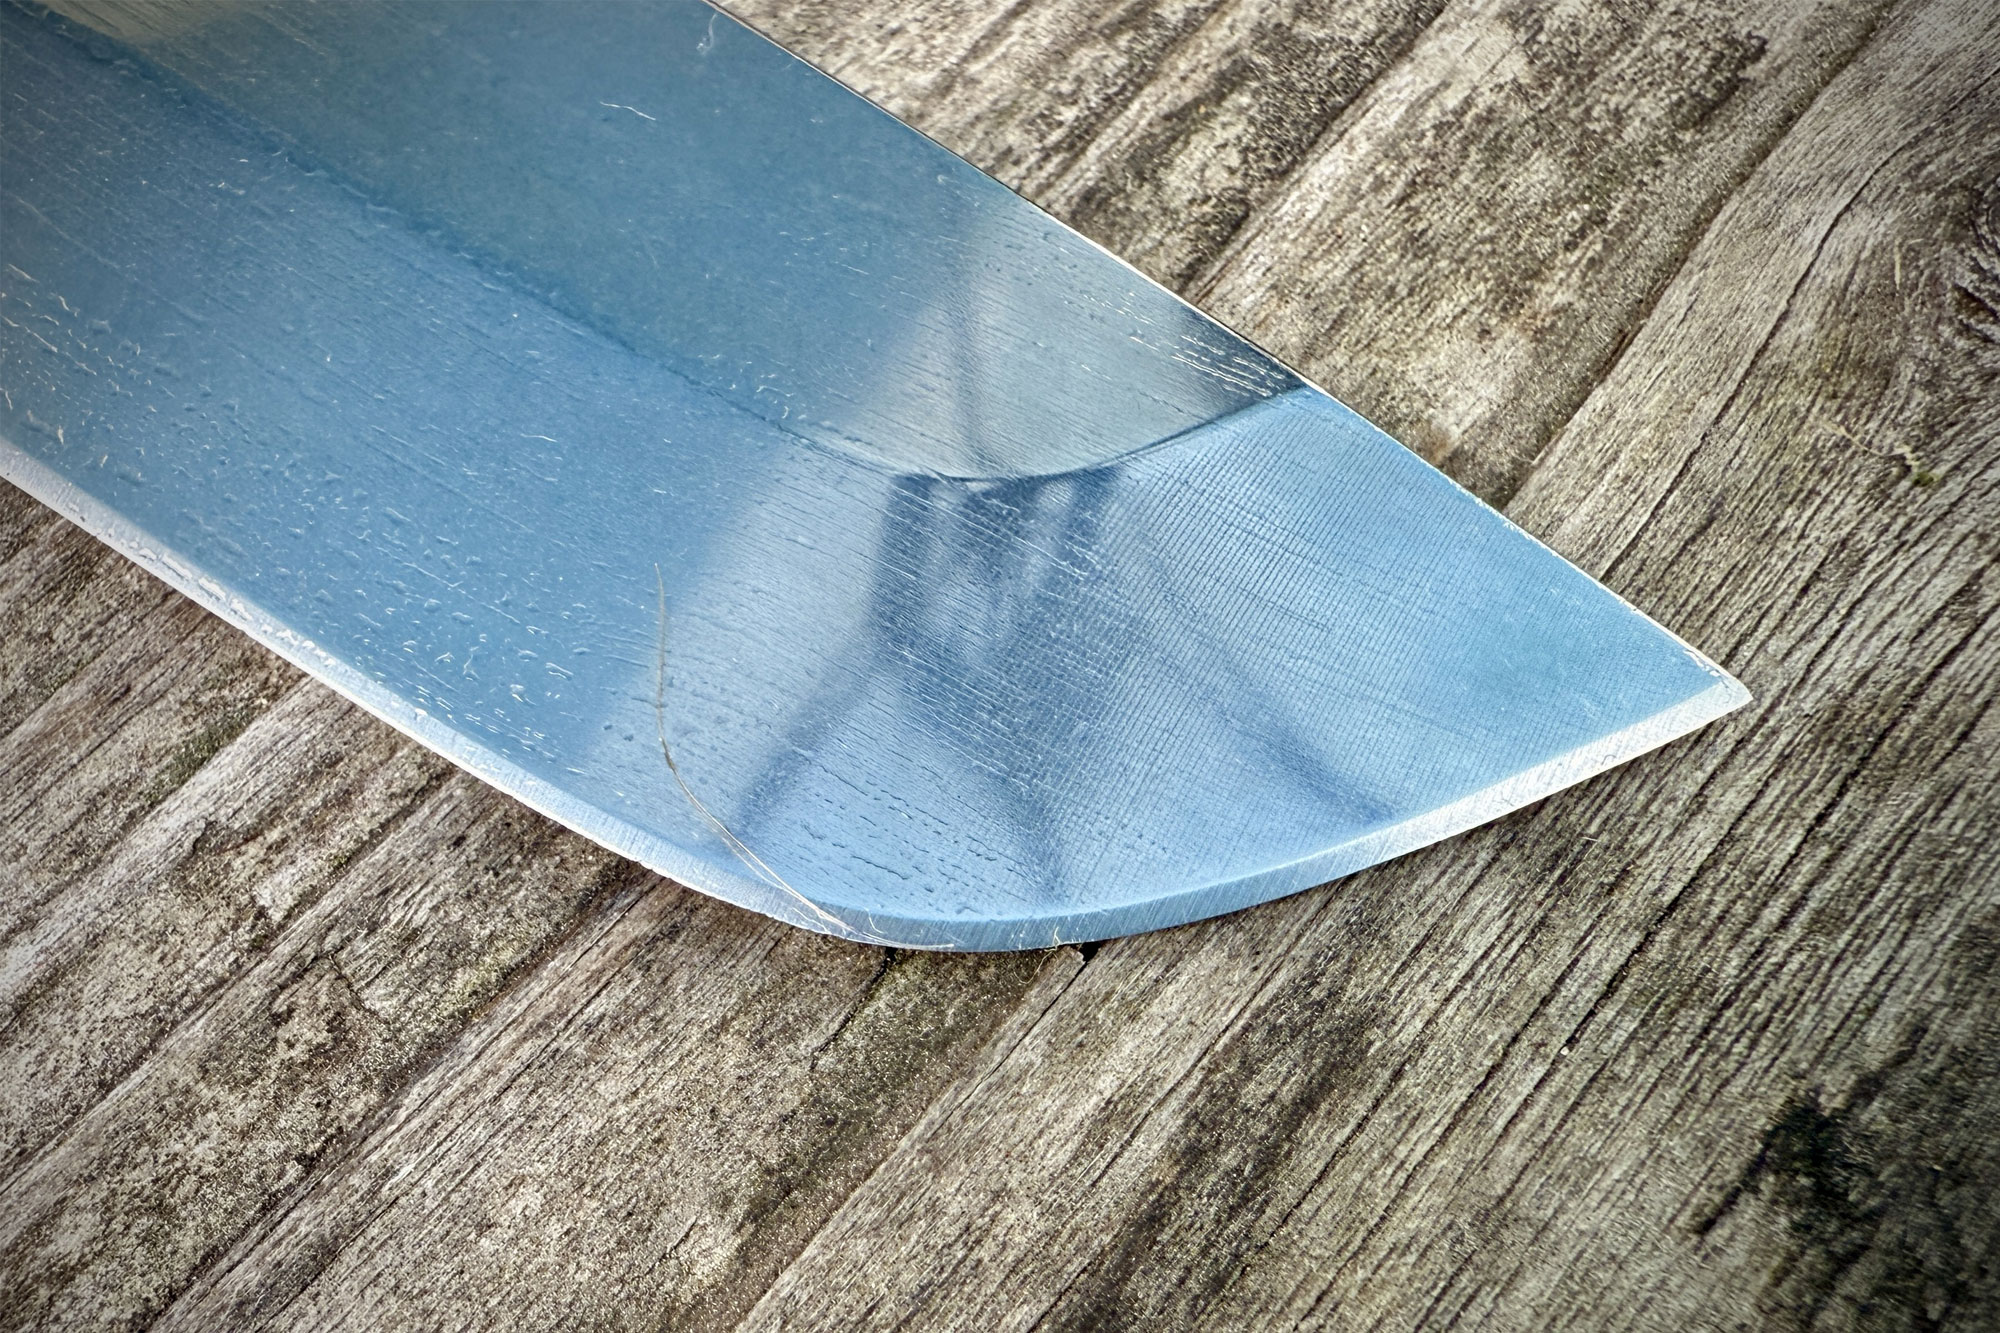
Many of the knives on this list stand out as subtle, thin, easy-to-carry pocket knives. While the Benchmade Osborne ($300 Magnacut, $240 S30V) isn’t a heavy or bulky carry, it is built to withstand heavier-duty tasks than other knives on this list. That gives it a good position for those who demand more than opening packages or cutting up the occasional snack from an everyday carry.
The unique blade design, which is the antithesis of modern thin blades, allows it to withstand tougher tasks. The spine is 2.92 mm thick, and the grind shape creates an aggressive wedge rather than an ultra-thin profile. It’s very angular and beefy, making it great for some things and not so great at others, like thinly slicing vegetables.
But it excels at tougher tasks, like hacking branches from trees, and it wouldn’t be ridiculous to use it for heavier-duty fire-making activities. And after cutting 50 1-foot slices through a cardboard box, Editorial Director Sean McCoy found the knife still sharp enough to slice through paper, although not as cleanly as it did out of the box.
Like many of the knives listed, you can find an Osborne in different steel types to fit your exact needs and budget. All of them look really good though, and the knife demands attention from onlookers with a modern but rustic look.
Almost everyone we know got into knives because they were given a “Swiss Army Knife (SAK)” when they were a kid, if not at some other impactful time in their lives. That said, this list wouldn’t be complete without having something from Victorinox on it. Last year, we had Victorinox’s Hiker ($36) in this slot. But, after a year of testing and toiling, we feel that the best tool for this category is the Huntsman ($50).
For roughly the same amount of pocket real estate as the Hiker, you get the added benefit of scissors and a multipurpose hook. Yes, you do lose a dedicated Phillips screwdriver, but we’ve found that the small screwdriver on top of the can opener gets the job done.
With 15 onboard tools, the Huntsman is well-rounded without any bloat. Even though we would love to see the tools lock on a SAK, it’s something you learn to work around and keep yourself aware of. That said, even when using some of the more demanding tools like the saw and awl, there was never an instance where they closed in on our hands.
Aside from the tools and blades being made from stainless Swedish steel, the shining star of the Huntsman is the multipurpose hook. At 3mm, it allows you to do such things as remove a hot pot from a fire and pull tent stakes out of the ground.
The scissors also came in handy for cutting fishing lines and excess cordage leftover from making knots and loops. For those of you who love a nice glass of Pinot Grigio at camp, you’re going to love the corkscrew.
For those of you looking for something fancy out of your SAK, Victorinox offers the Huntsman Wood ($64), which has Walnut wood scales.
Crossbar lock has shorter pull than the industry standard
No obvious lanyard options
Nick LeFort
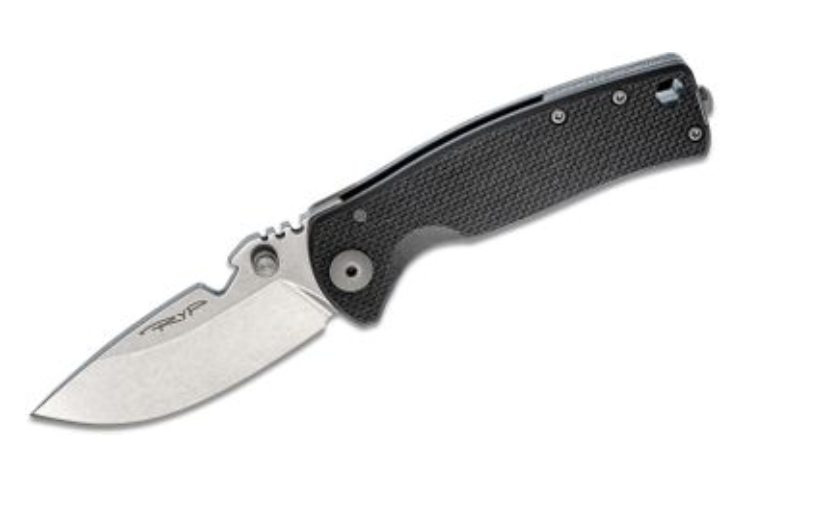
The CIVIVI Yonder ($67) is a mid-size folder with Micarta handles and a 14C28N stainless steel spey point blade. It has a crossbar lock and caged ceramic ball bearings around the pivot for fluid opening and closing, and locks up reliably when in use.
With an overall length of 6.62 inches, the Yonder is compact but well-suited for people of all hand sizes. For those folks with really big paws, you’ll enjoy the ability to move your thumb up the spine of the blade onto the jimping and use the grip in a three-finger configuration, wrapping your pinky up around the butt of the knife.
14C28N is considered a value steel, and it’s become prolific in the knife world over the past year as more and more brands look for ways to cut costs but still use a quality, reliable knife. It’s stainless steel, so corrosion won’t be an issue, and its abrasion-resistant qualities are also impressive. In terms of edge retention, you should expect the Yonder to hold an edge for a decent amount of time, and resharpening will be a breeze.
The Yonder won “Blade Show Best Buy of the Year 2024” days after it debuted in the summer of 2024. I think it’s the kind of knife made for anyone looking for a dependable pocket knife for years to come.
Note: In the original review of the Yonder, LeFort listed one of the cons as the crossbar lock’s shorter pull. He wants to take that back — in the last few months, he’s gotten used to it and recognizes that the shorter pull allows for quicker deployment.
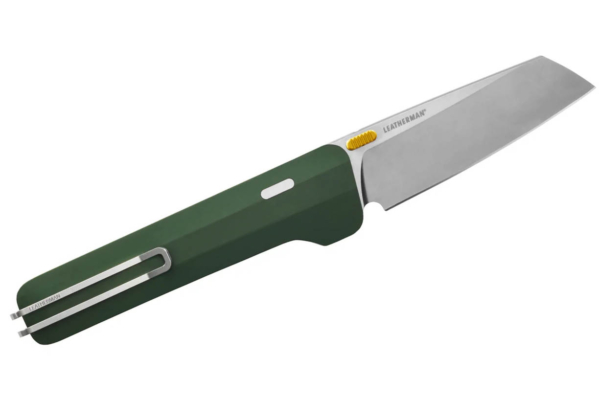
Leatherman has been synonymous with practical, affordable pocket knives and multitools. With the introduction of the Glider ($300) and a few other knives, Gerber jumped into the highly competitive premium knife space. The execution was excellent, and this is one tough, yet versatile knife.
As one of the heaviest knives on this list, the Glider isn’t a great option for those who prefer minimalism over practicality. One of the first things you’ll notice when you pick up this industrial-feeling knife is the heft of the Cerakoted aluminum handle and MagnaCut, 3″ Sheepsfoot blade. Where the knife lacks in weight savings, it makes up for it in a durable, rock steady, fixed-blade knife feel.
After 2 months of testing without being sharpened, Sean McCoy found it held a very sharp edge after regular, hard use. The wide blade, while unique for an EDC, is great at performing a variety of tasks, from spreading peanut butter, cutting vegetables, and whittling, to opening packages. The patented compression wedge lock is solid, and there is no blade play in this folder. It’s stout and built for hard work.
It’s not perfect, and the thumb stud opening is good, not great. It has a tendency to hang up when halfway open. In hand, it’s also not the most ergonomic knife, and the metal, angular handle can dig into your hand a little while making hard, aggressive cuts.
People may also find it annoying that over time, the Cerakote finish will start to wear. However in our opinion, that gives the Glider a unique character and a cool, industrial look.
The Spyderco Paramilitary 2 (starting at $199) was the premium pocket knife of the mid-2000s. It is still in production today, which makes it a timeless classic in the modern era. It feels like just yesterday that it was the knife you had to have. Yeah. You’re getting old.
But timeless classics are classics for a reason. Every once in a while, a brand stumbles on something that works and runs with it. That’s the case with this knife. In 2015, Editorial Director Sean McCoy labeled it as the “Best Do-It-All Pocket Knife,” and 10 years later, there’s still a case to be made for that statement.
The large thumbhole on the blade, while creating an unusual blade-handle ratio, is synonymous with Spyderco knives and creates an irresistible, “have to fiddle with” feel. It makes one-handed operation a breeze, and the compression lock is rock solid.
While the Benchmade Bugout can start to flex under pressure, the 3.44″ blade on the PM2 is built to handle tougher tasks, like cutting glued linoleum and thick tree branches. Yet it’s still thin enough to work as a passable kitchen knife in a bind.
With this knife being around so long, it’s hard to nail down an exact price. There are a ridiculous number of options available from S45VN steel with a G10 handle for around 200 bucks, up to a Maxamet version that often fetches over $400. Whichever you choose, though, you can trust the Spyderco Paramilitary 2 to be a lifelong companion.
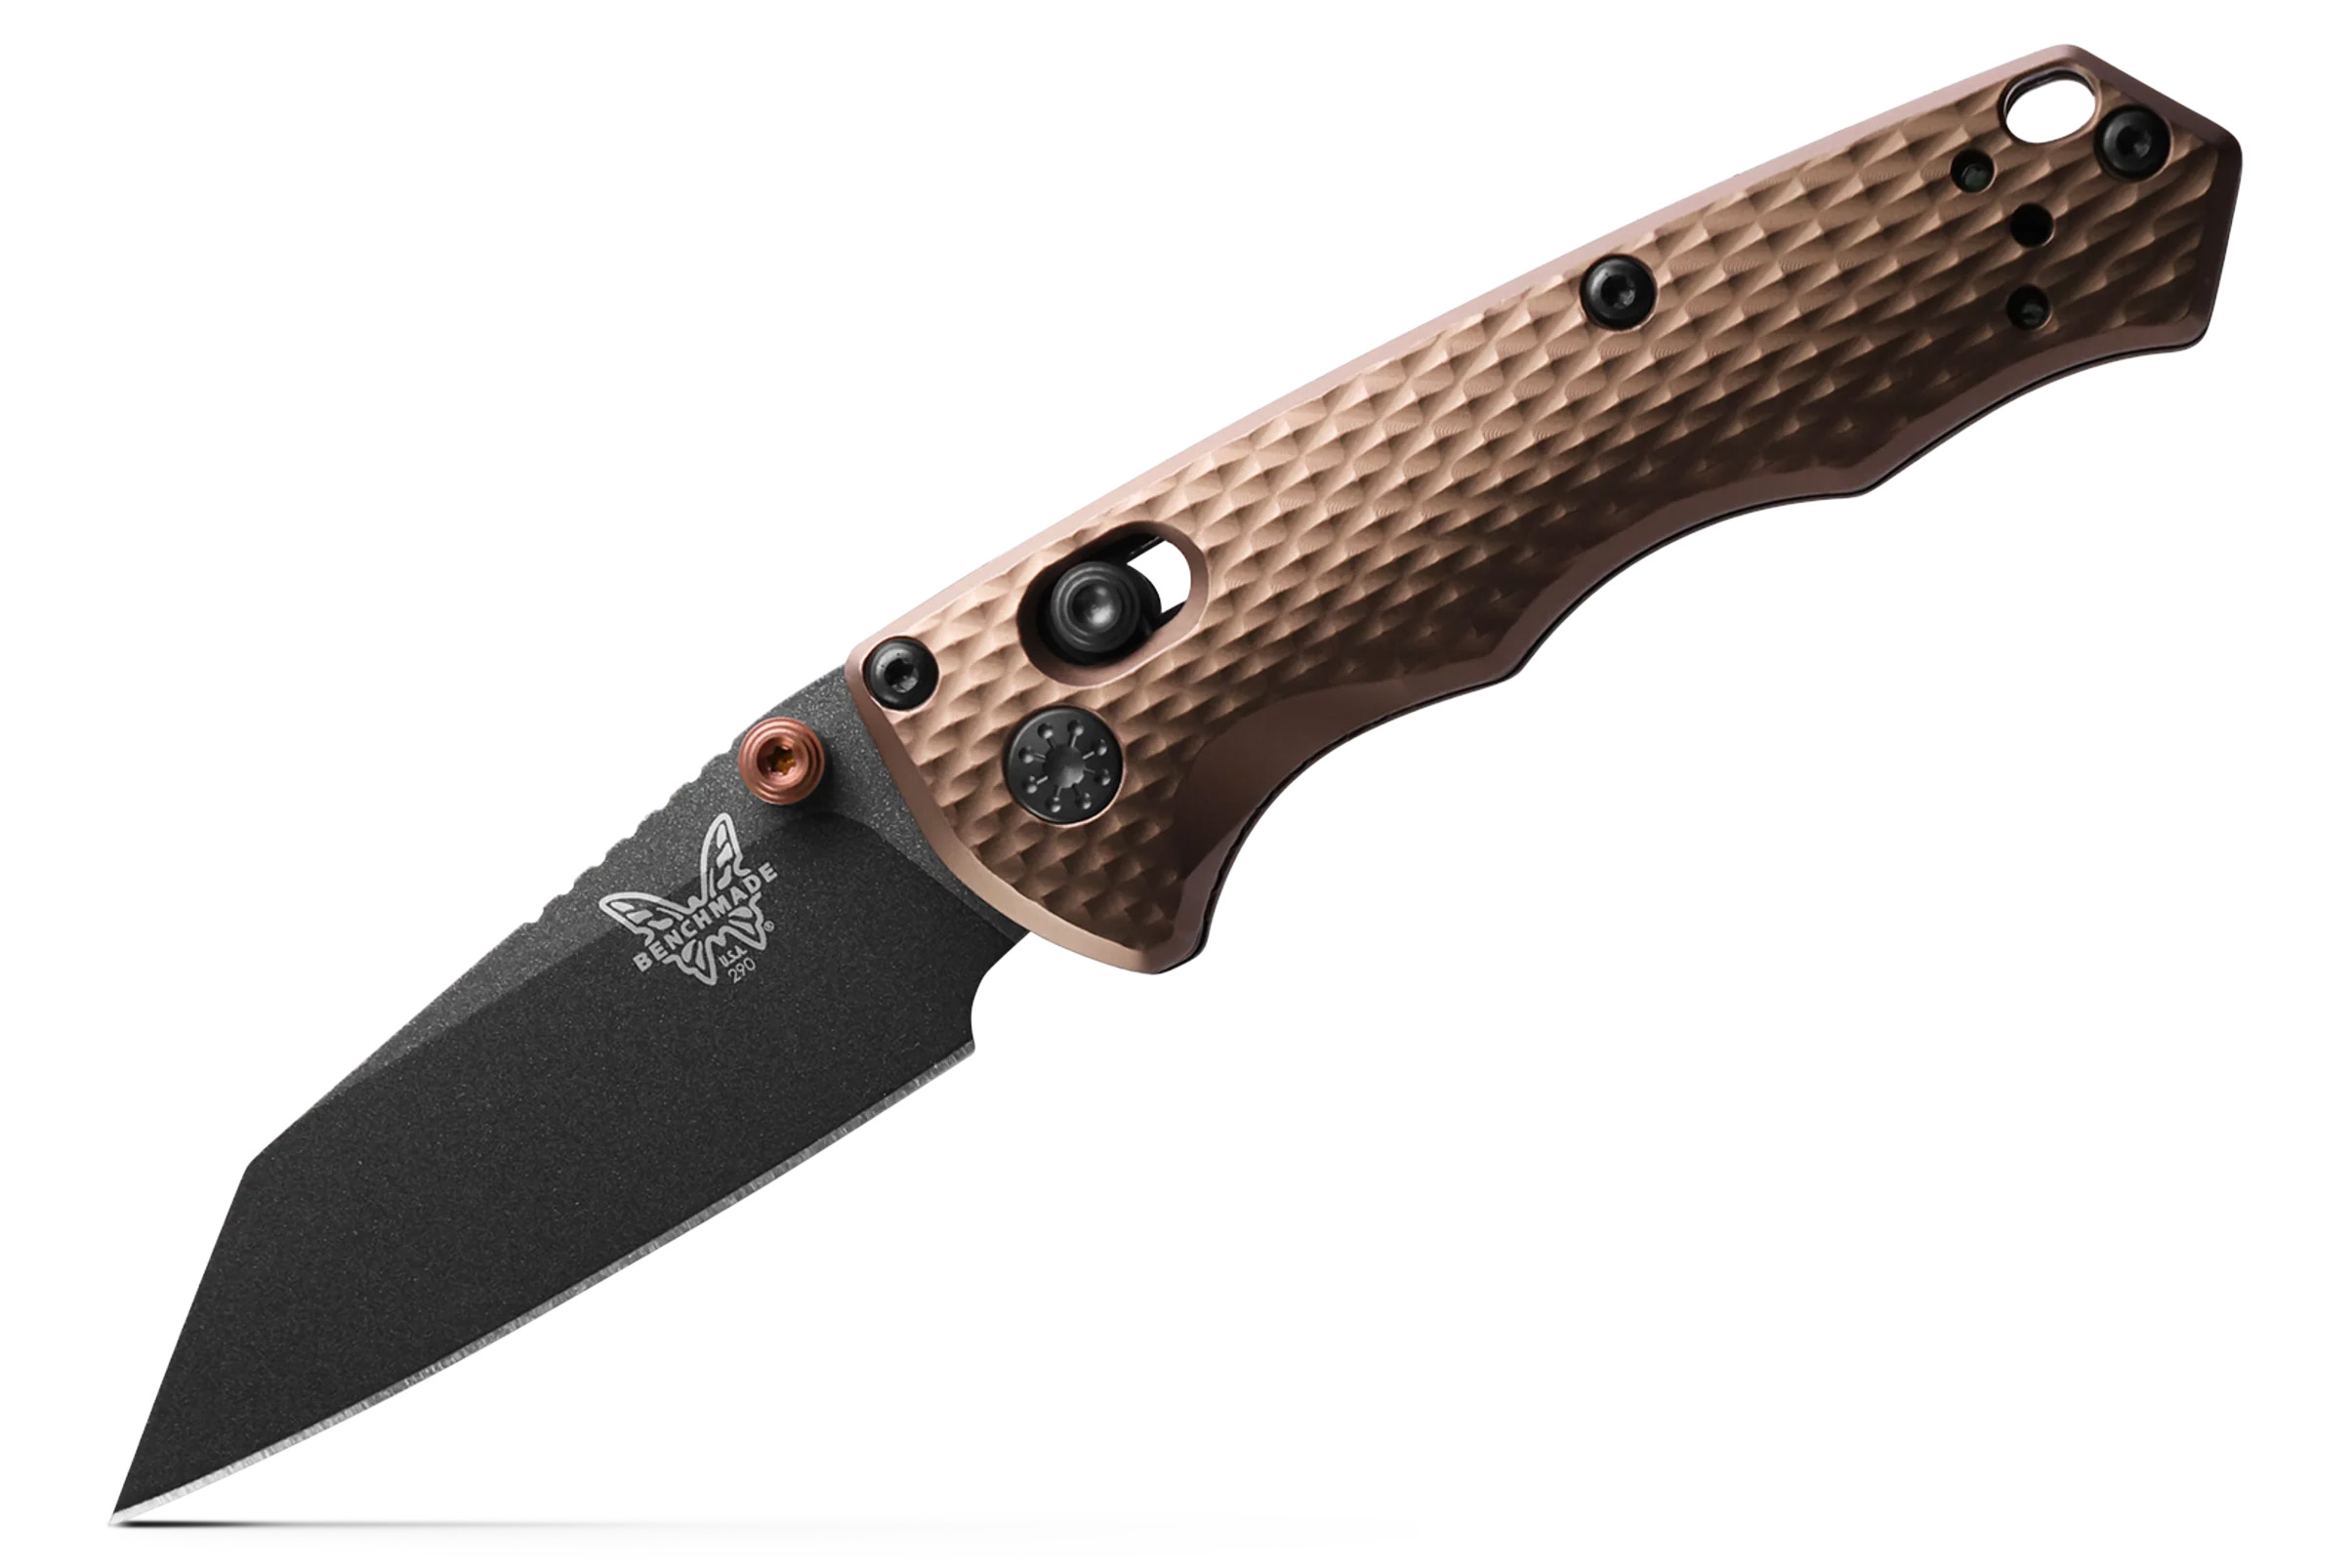
The Benchmade Auto Immunity($325) was designed to meet or beat knife laws stating that knife blades on automatics must be under 2.5 inches to legally be carried. It’s also made from one of the best knife steels around. What it lacks in size, it makes up for in capability.
The steel we’re talking about here is one of the few ultra-premium, super steels: M4. On its own, M4 has very good corrosion and abrasion resistance. With the added Cerakoting found here on the Auto Immunity, it might be the best knife steel on the planet. It also holds a serious edge for a prolonged period of time.
This is good because, like S90V, it’s a beast to sharpen. Don’t worry, when the time comes, you can take advantage of Benchmade’s Lifesharp Guarantee, where they’ll resharpen it for you, for free.
In terms of overall size, some people might find the Auto Immunity a little small for more demanding tasks like kindling prep. However, due to its Wharncliffe-style blade, it’ll excel in precision tasks like carving, coring, and food prep.
In fact, after a couple of months of carry and use, our tester, Sean McCoy, didn’t even notice that it was an undersized knife. He stated, “It both carries and performs better than the venerable Bugout at a very similar weight. It has a much better and stiffer handle than the Bugout, and locks up stronger.”
The only thing keeping the Benchmade Auto Immunity from being closer to the top of this list is the fact that it’s going to run you $325 bones. But we couldn’t leave it off the list for proud pricing.
GearJunkie contributor Nick LeFort was a big fan of the show MacGyver growing up. The main character, and the show’s namesake, was always getting himself into bad situations and making contraptions to get out of them. The one tool he carried with him was a Swiss Army Knife. Now, the DPx Gear HEST/F 4.0 ($275) doesn’t offer the same variety of tools as a SAK as the Victorinox Huntsman, but it is built to get you out of a hostile environment.
The HEST/F 4.0 is a knife that could be used and abused without having to worry about it getting wet, dirty, twisted, turned, torqued, or yelled at in an aggressive tone. With a 3/16-inch-thick MagnaCut drop point blade, titanium frame, and Micarta handle scale, all of which contribute to that. The flipper-style opening and caged ball bearings around the pivot are just an added benefit.
Aside from being a beefy knife that can pierce, cut, slice, shave, chop, and pry, the HEST/F 4.0 comes with a few other features that heighten its tactical ability. Built into the butt of the knife is both a glass breaker and a ¼ bit driver. Additionally, the spine jimping is sized for stripping electrical wire.
There’s also a notch on the spine in front of the thumb stud that’s designed to be a cap lifter and a means to lift a pot off a fire. To be the Best Tactical Pocket Knife on this list, you need to be ready for war. In making the HEST/F 4.0 (as well as its three predecessors), DPx Gear understood the assignment.
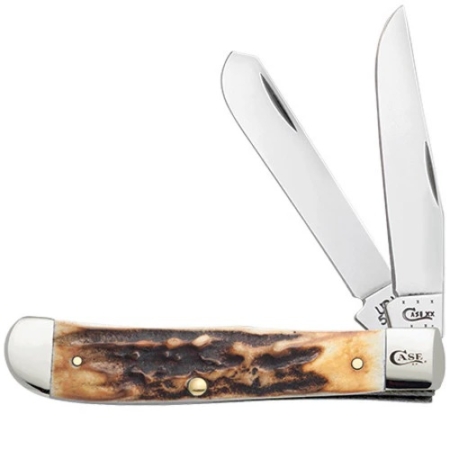
The Case Trapper looks like the knife your grandpa, or maybe great-grandma, carried in the 1980s. And it still does everything today that it did back then.
It’s a beautiful, USA-made pocket knife that opens with a nail nick and is only held open with a detent. It’s a simple knife from a simpler time, drawing nostalgic references. It sits deep in the pocket with no clip, so it is a truly light EDC that won’t show on the outside of the pocket.
The trapper has been in continuous production for more than 100 years. And if that isn’t enough, it’s available in a huge variety of handle scales, from bone to chestnut wood to antlers. If you’re looking for a time-tested, yet timeless, design, the Case Trapper is a legend of a pocket knife that is instantly recognizable and perfect for light EDC tasks.
3.54" blade may run afoul of the law in some cities
Nick LeFort
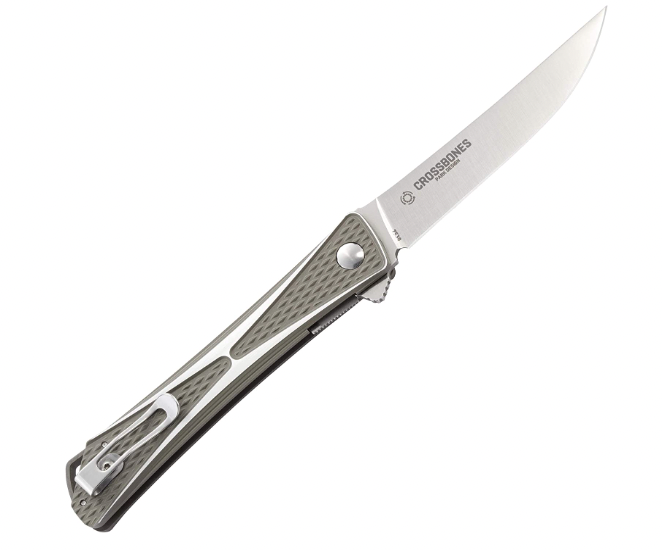
If you feel naked without a pocket knife but are unsure what to carry when wearing dress pants, look no further. The CRKT Crossbones is an excellent EDC knife that disappears into a pocket but still offers good performance with a spicy, thin blade.
The Crossbones is a very attractive, smooth-operating flipper. It’s very light at only 2.4 ounces, and has a deep carry that, coupled with the slim handle design, is barely noticeable even when carried in light fabrics of dressy clothing.
But the Crossbones still brings serious functionality. The 3.54-inch AUS-8 blade is great for everyday tasks like opening letters or boxes. But with an attractive satin finish and thin profile, it won’t freak people out when you flip it open to cut an apple at your office lunch.
It’s the ideal dress knife, with good looks and competent cutting power. Editor Sean McCoy grabs it when business-first attire is on call.
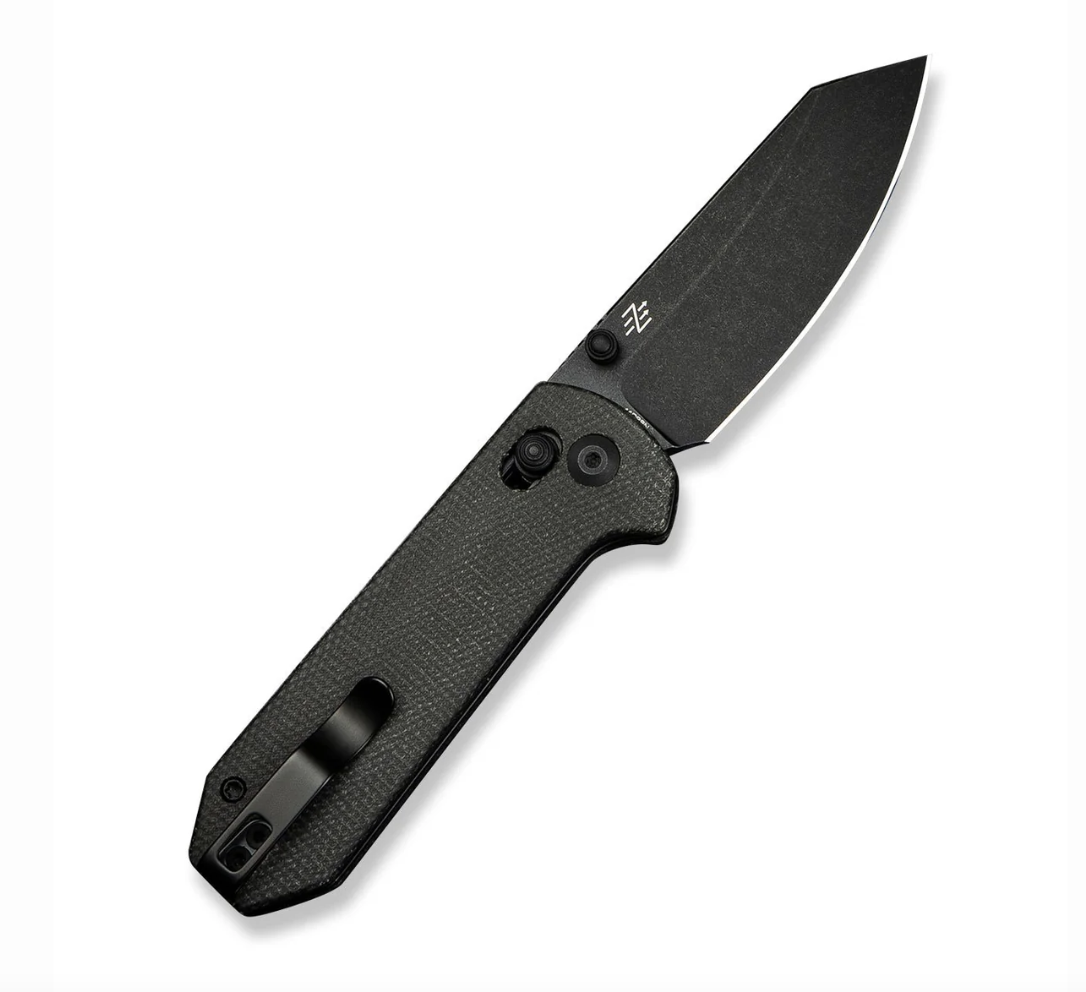
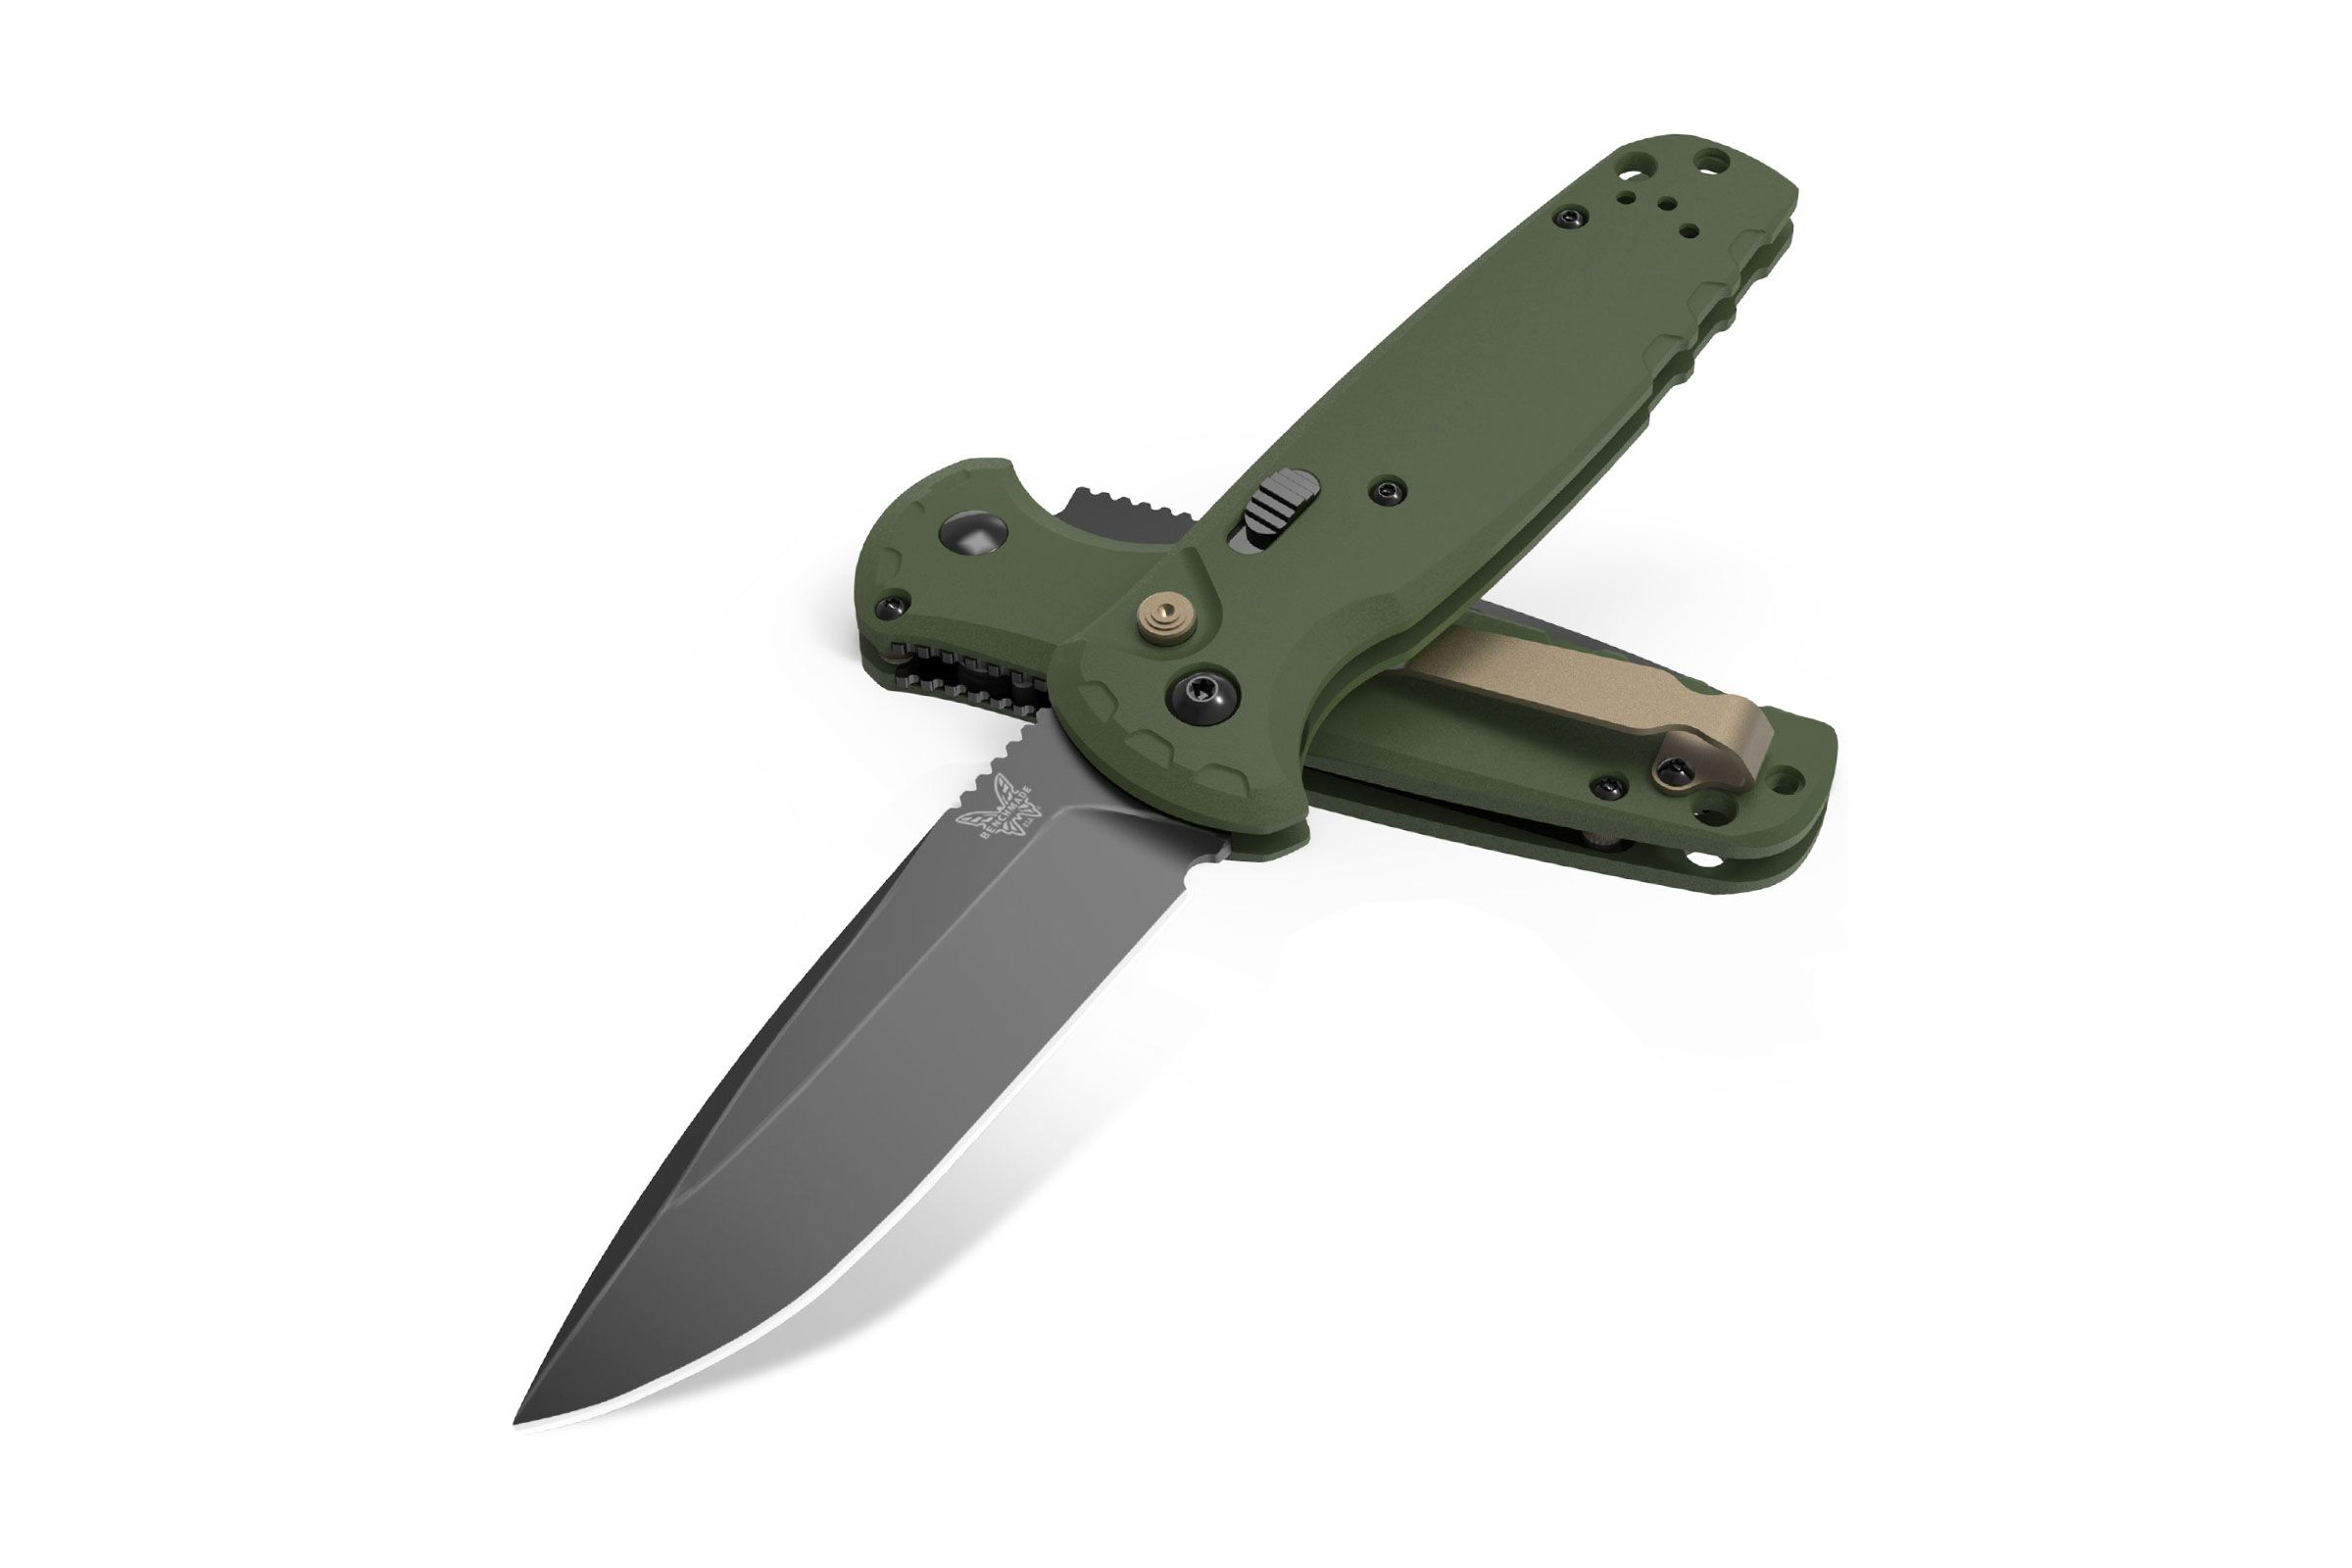
To be considered tactical, a pocket knife needs to have some features that aren’t necessarily found in other EDC pocket knives. In the case of the Benchmade CLA ($400), that feature is lightning-fast automatic deployment at the push of a button. That’s right — the CLA is an automatic knife, which makes this a restricted item in some states. But that doesn’t mean we can’t give it credit where credit is due. After all, in testing, all the CLA did was impress.
Considered a bridge between EDC knives and tactical knives, the CLA is composed of sculpted and contoured OD Green handle scales and a DLC-coated “Battlewashed” MagnaCut drop point blade. This color combination alone is stellar, but the materials used here make the CLA nearly indestructible. That’s not an exaggeration.
When the first version of the CLA launched almost 9 years ago, it was the first automatic knife from Benchmade with composite handle scales. The “Composite Lite Auto” became a very successful attempt to create an automatic knife for the people. It was less bulky and lighter than all of the other autos Benchmade had put out previously. This made the CLA a perfect fit for people looking for a reliable EDC knife.
This model of CLA is an upgrade from the previous model, which featured 154CM steel. The upgrade to MagnaCut became something of a theme for production knifemakers in 2025. For good reason, too — MagnaCut steel is probably the best EDC steel out there. This is due to its balance resistance qualities, edge retention, and ease of resharpening.
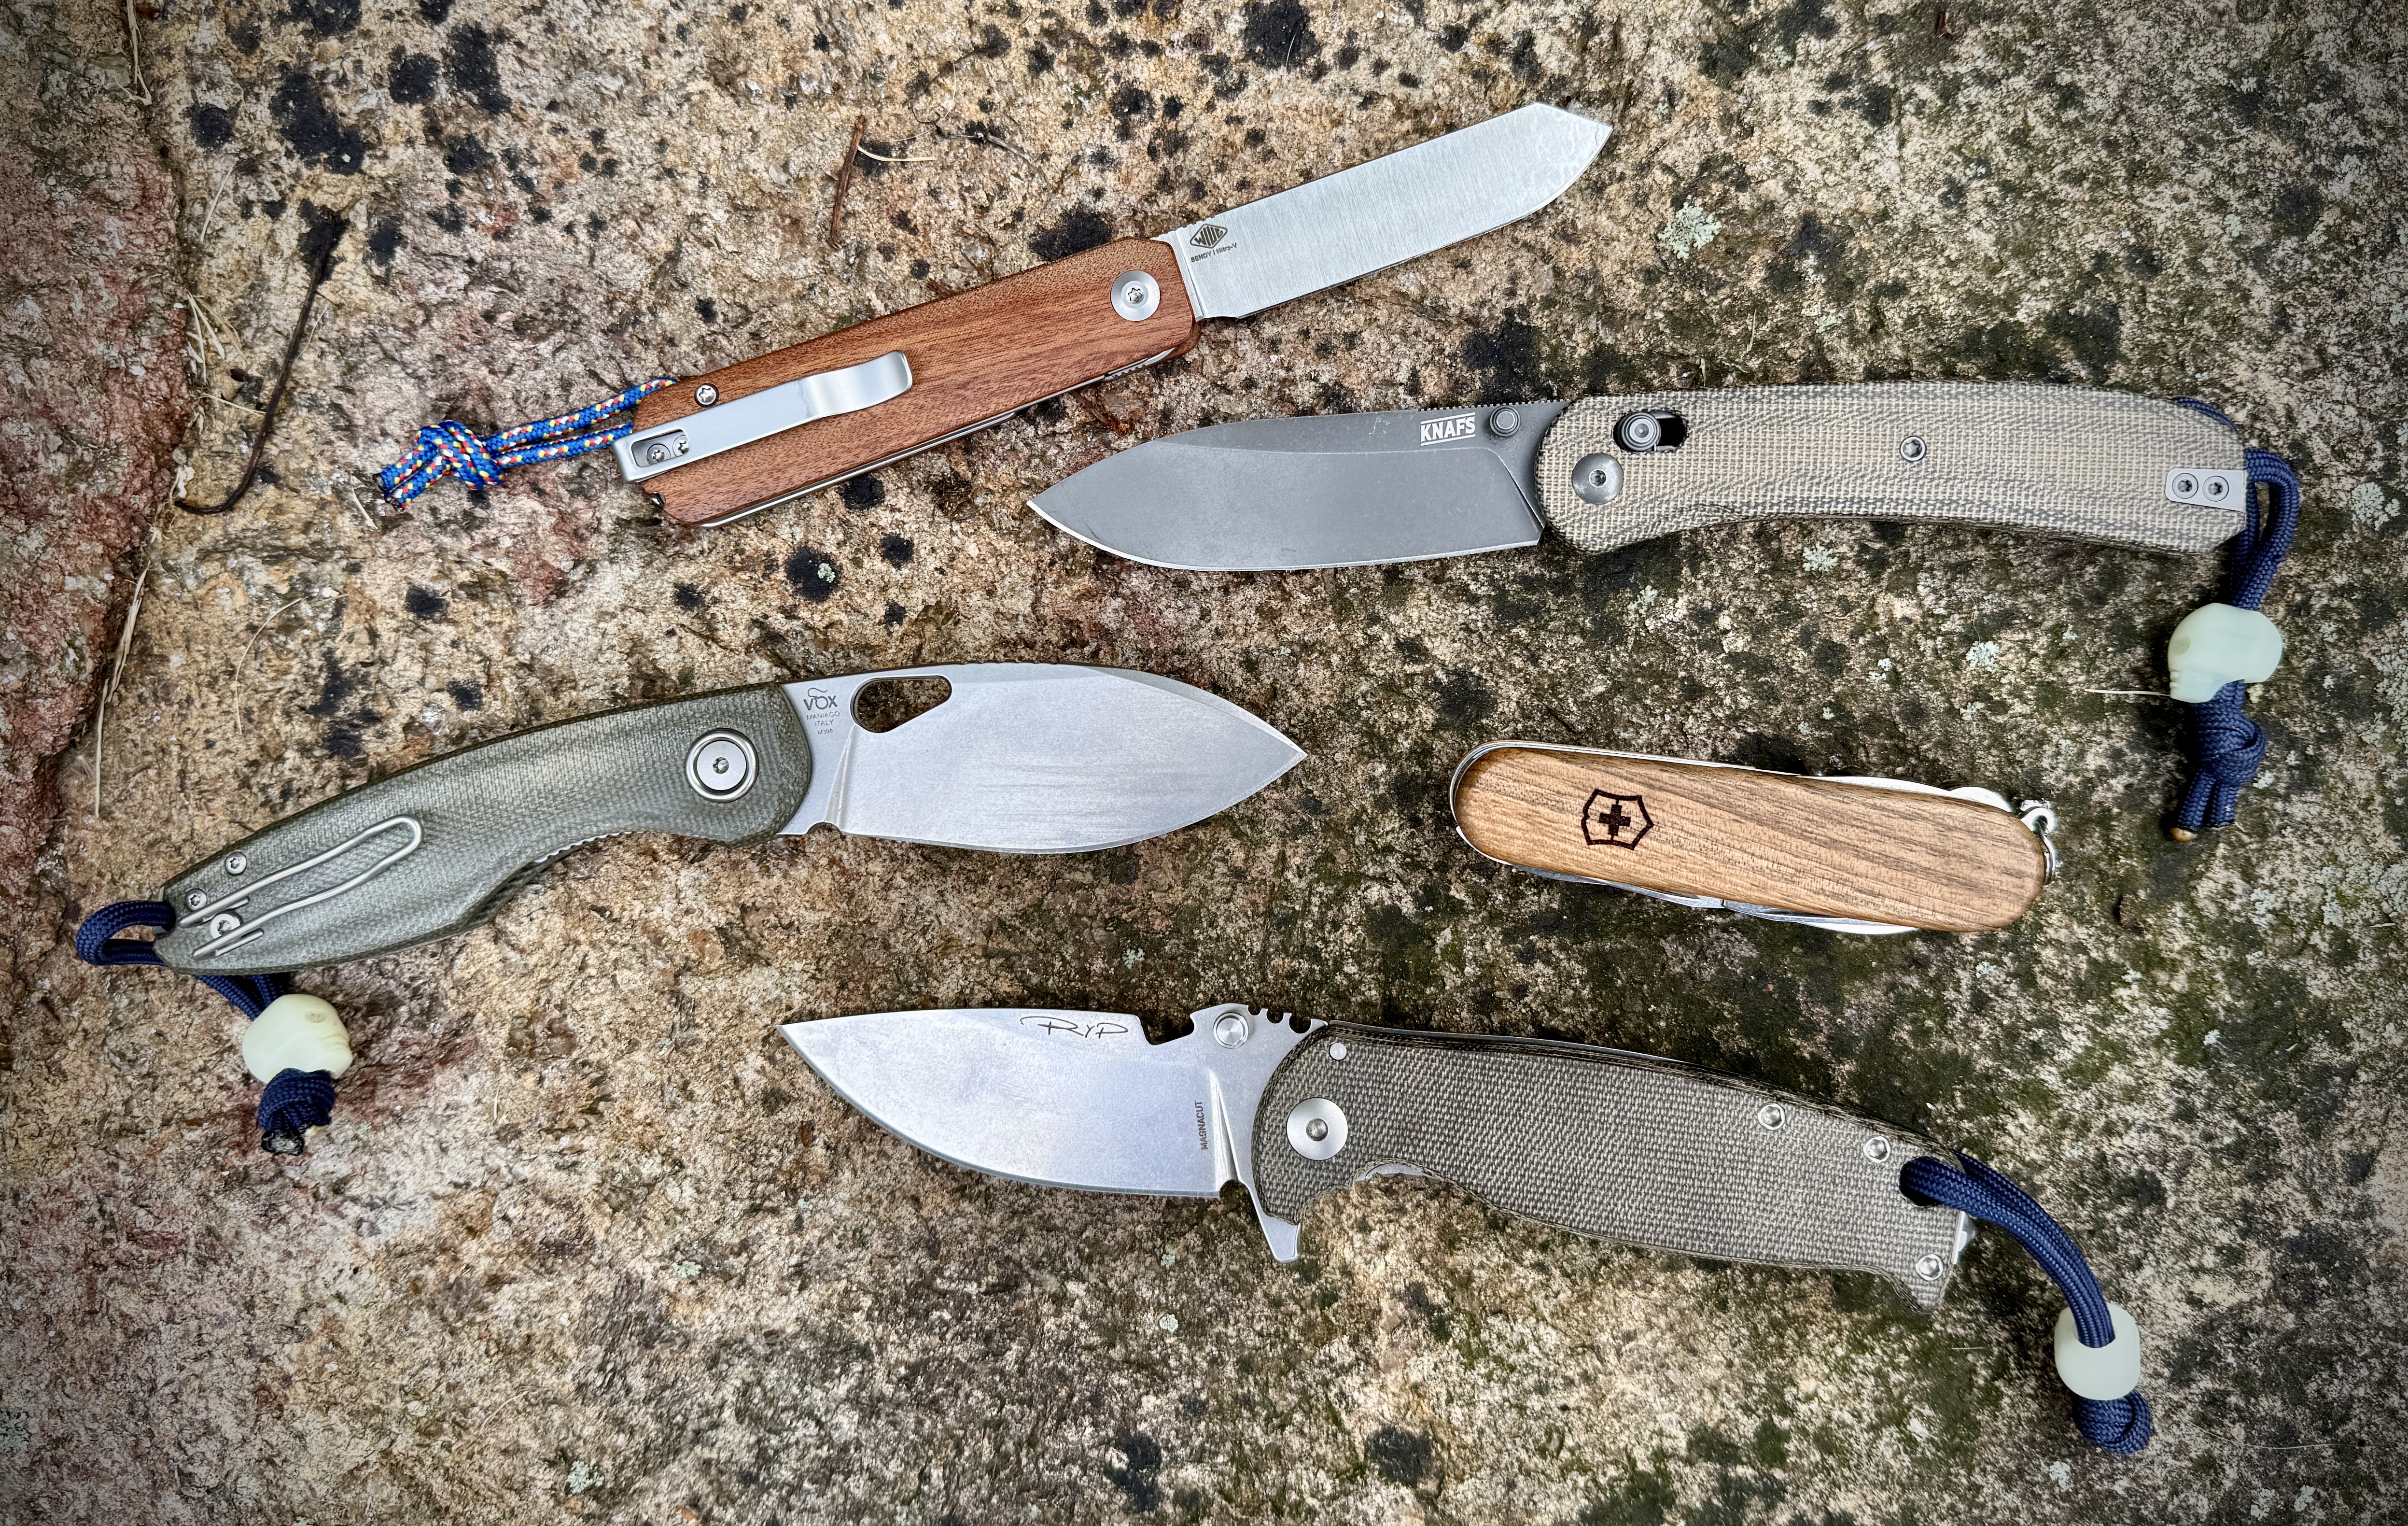
Each one of these knives has been used and abused, but also cared for; (photo/Nick LeFort)
How We Tested the Best Pocket Knives
Out of all of the things we test around GearJunkie, pocket knives seem to get easier and easier every year — because everyone wants one. Suffice it to say, the knives we’ve recommended on this list weren’t just tested at a desk or in some random workshop in the Midwest, they were used, abused, loved, and carried for extended periods.
For this update, we enlisted our resident knife tester, Nick LeFortto take the reins to determine what knives out there were worthy of this list. He spent the fall and winter testing out a variety of knives in his day-to-day life, out on adventures, and in all conditions. LeFort believes that the best way to see what a knife can do is to rely on it in real life. He’s not wrong.
So, What Did They Do?
Where you can find YouTube and the internet peppered with people cutting rope and cardboard in their garage, you’re more apt to find Nick out in the woods, down by a river, or wherever his day takes them. Heck, you may see him wandering around Whole Foods with one of these knives (in their pocket, of course). To him, testing isn’t a 9-to-5 job; these knives are part of his life.
Having a keen sense of how a particular knife steel performs, or how a certain handle material’s grip could be impacted by inclement weather, as well as a vast knowledge of what’s going on in the market, he was able to act and react accordingly. On these few aspects as well as many others. The end result is the purest form of product testing: in the moment.
The bottom line is that our approach to testing is to make sure a product and its parts perform as expected. With marketing being what it is, with the intent to sell one particular knife above all of the others, it’s easy to buy into the hype. In this case, we look at that hype and see if it’s all just talk or the real deal.
Buyer’s Guide: How to Choose a Pocket Knife
Benchmade’s Axis lock is a crossbar-style lock that is extremely reliable; (photo/Nick LeFort)
Knife Steel
The amount of knife blade steel and handle materials out there is pretty impressive. But, where the handle materials seem to have stabilized, there’s new steel coming out every year. As you can see from the above selection of eight knives, there are seven different knife steels. Our recommendation is to consider each steel on a case-by-case basis. But they should still meet or exceed the following requirements:
Corrosion Resistance
The last thing you want is your knife turning orange on you out in the field. Especially if you’re planning on using it to prepare food. All of the steel mentioned in this guide either has exceptional corrosion resistance or has been coated to eliminate the occurrence of rust.
Abrasion Resistance
Some people consider this property to be more form than function. But in all reality, if your blade can easily get scraped up that can lead to chipping, which then could lead to blade failure.
Edge Retention/Ease of Resharpening
No matter what knife you carry, the worst knife you could carry is a dull one. That being said, you want to look for knife steels that either excel in edge retention or can be easily resharpened.
You can learn more about specific knife steels here.
The DPx Gear HEST/F 4.0 exceeds expectations with its MagnaCut steel blade; (photo/Nick LeFort)
Handle Material
When it comes down to handle material it’s all about grip. Ergonomics play a part in this as well, as you could have great handle material in a weird shape that will cause fatigue. In the end, you won’t want to use the knife and you’ll have wasted your money. These are some of the more preferred materials on the market today:
G10 & Micarta
G10 and Micarta are both extremely strong materials. Both excel in grip whether your hands are wet or dry, which is why those two materials are so popular with EDC, Survival, Tactical, and Bushcraft-style knives.
Nylon & Plastic
Nylon and plastic also make for great handle materials because they’re durable and lightweight. They’re also generally textured. It’s this texturing and styling that increases the grip on a knife with these materials.
Note: Nylon and plastic handle scales carry a litany of names. Some of the more popular names are: FRN/Zytel (Fiber Reinforced Nylon), GRN (Glass Reinforced Nylon), GFN (Glass Filled Nylon), and Grivory (Injection Molded).
Carbon Fiber
A lot of folks think carbon fiber is just pretty to look at, but in all reality, this woven material is lightweight and strong. Depending on its composition, it could be the perfect balance between strength, weight, and durability. You can bet your bippy you’ll pay more for a knife with carbon fiber, but it’s worth it.
Aluminum & Titanium
Both aluminum and titanium are incredibly strong and lightweight materials, making them great for knife handle scales. But where aluminum has become relegated to budget knives, titanium is usually saved for premium and ultra-premium knives. The only drawback to both of these materials is that they can be slippery when wet.
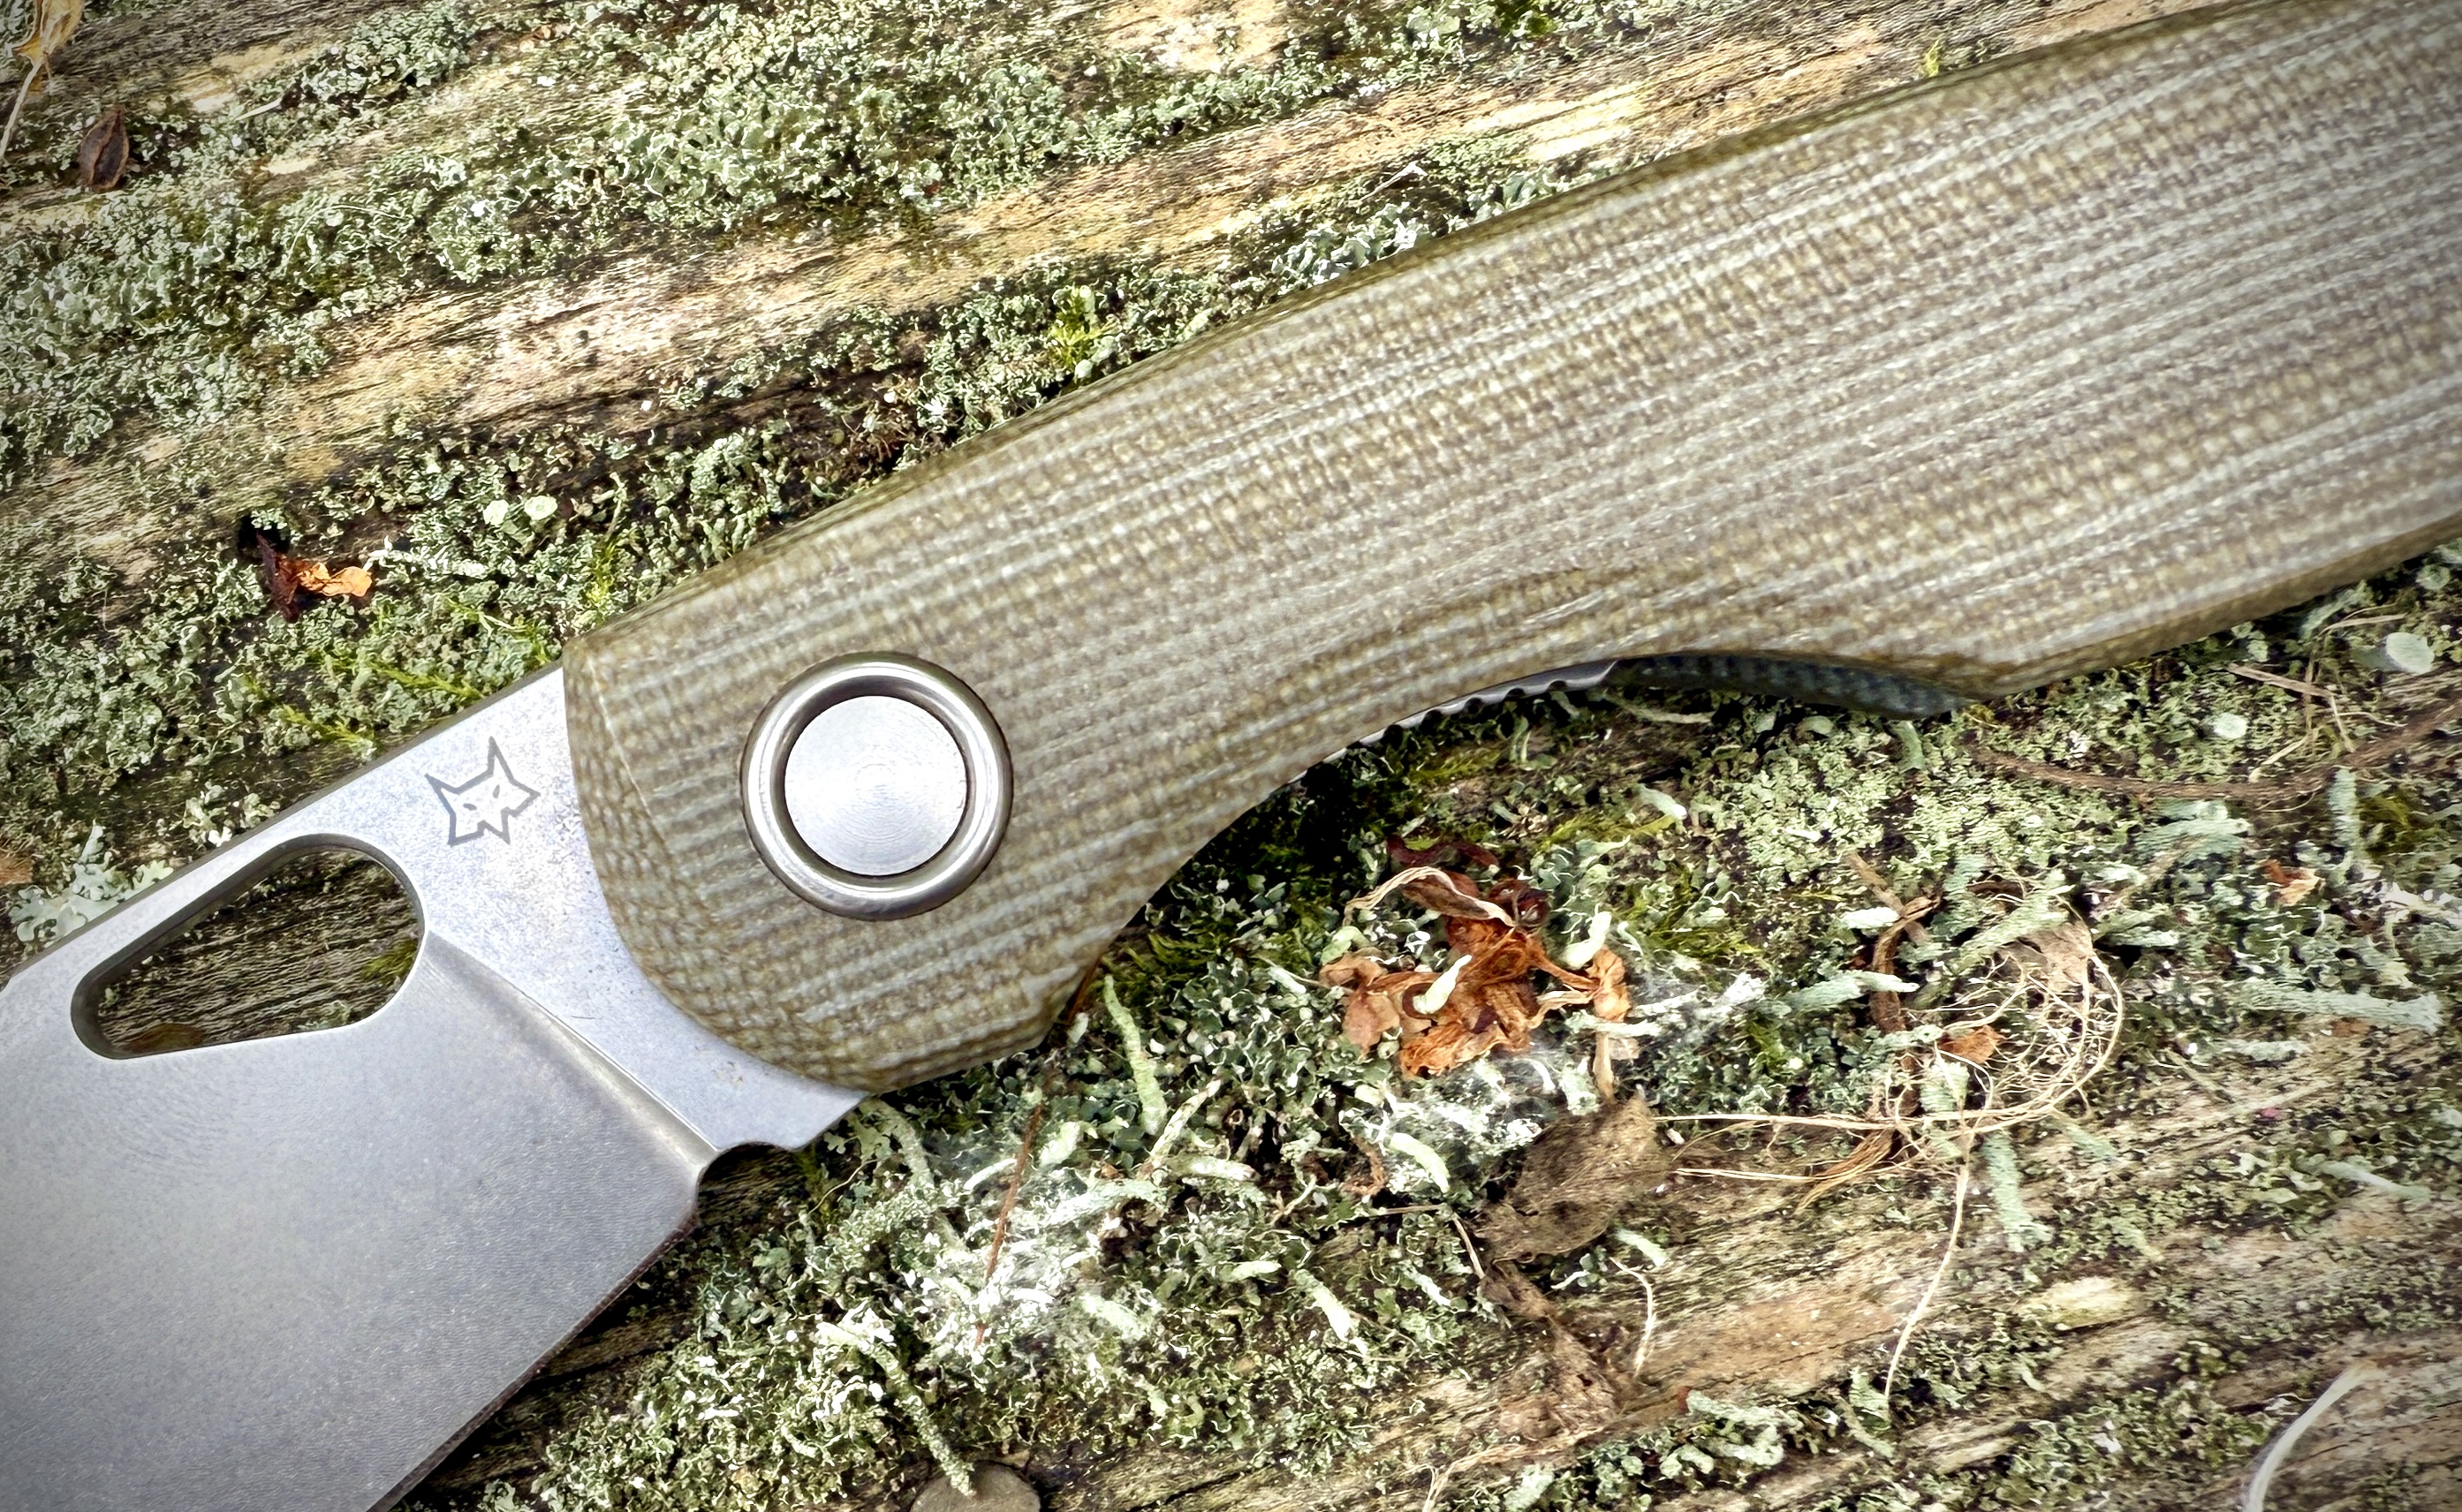
The Fox Knives Chilin benefits from the strength and grip of its Micarta handles; (photo/Nick LeFort)
Ease of Use
Ease of use is a big deal when considering what knife is right for you. It can come in many forms from ergonomics, to lock design, to the hardware used to keep the knife together and in good functioning order. All in all, the last thing you want to do is struggle with or be uncomfortable using your knife.
Accessibility
Aside from how a knife functions, your ability to access it plays a role in its reliability. After all, if you can’t reach it when you need it, then why carry it at all?The right knife for you will be easy to carry in your pocket or on your belt.
Ergonomics
A good knife will feel right in your hand. From the shape of the handle scales to the overall thickness, and even texturing, ergonomics can be the difference between you being confident with your knife or leaving it in your drawer at home. When you consider a knife, put it in your hand and give it a good squeeze. Then, push down hard on a hard surface. If everything feels right, that’s your next knife.
Lock Mechanism
Without fail, you will find yourself in a position where you need to rely on the lock on your knife more than you expected.
Some of the more common lock types are liner/frame locks that use a bar that indexes into the back of the blade. There are also button-style locks that use a steel barrel to keep the blade engaged. However, the most popular lock type is the crossbar lock which also uses a steel bar to hold the knife in place.
In my time and experience, I have never seen a crossbar-style lock mechanism fail without some outside force, creating a major disruption in how the knife functions. Like a truck running it over.
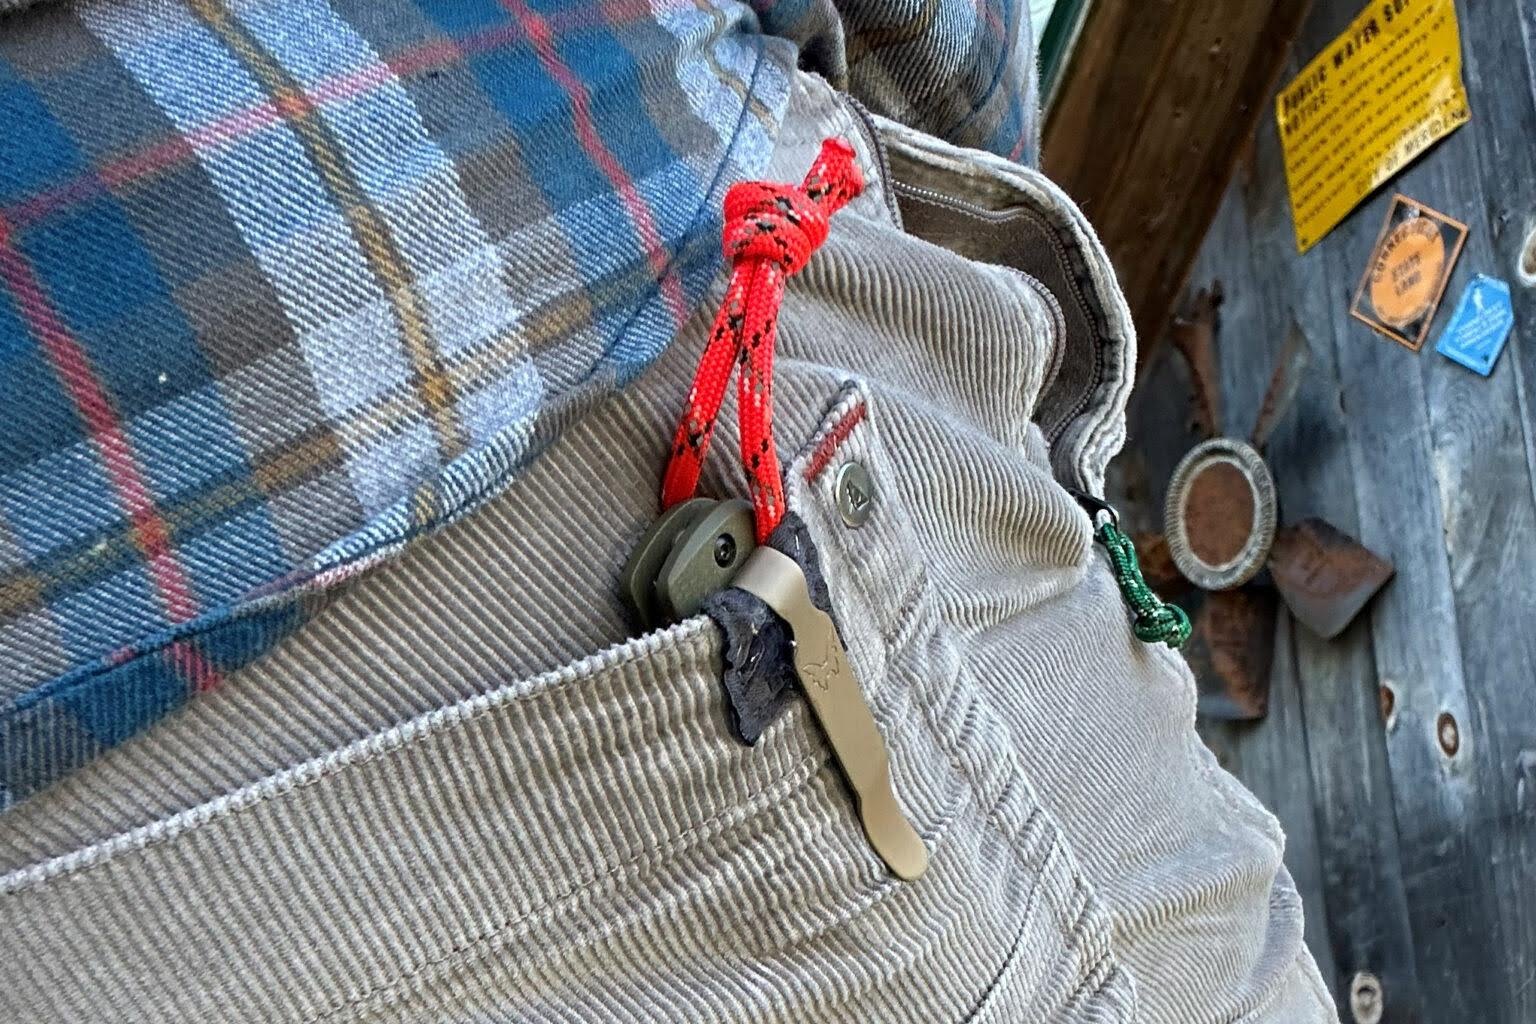
How a knife carries is an important factor in picking the right one for you; (photo/Nick LeFort)
Pocket Clip
The right pocket clip will keep your knife in place in your pocket and will be easy to insert and remove. Generally, pocket clips are steel or titanium, designed to retain their shape, and be around half the length of the knife when they are closed.
However, there are wire pocket clips that can deform over time. There are also shorter pocket clips that, depending on the size of the knife, can cause it to float around in your pocket, or even come out of your pocket.
I would pick a wire pocket clip over a shorter clip any day.
Ball Bearings
Ten years ago, you needed to pay $300 to get a knife with ball bearings in it, but now you can find them for under $100.
Ball bearings assist in the opening and closing of a knife. In fact, there are some knives out there that are so fluid in operation, due to ball bearings, that they’re just as fast, if not faster than an automatic knife. They’re also legal in more places than an auto.
The liner lock on the CIVIVI Sendy is reliable and easy to actuate; (photo/Nick LeFort)
Price & Value
Knife pricing isn’t as cut and dry as I think most of us would like it to be. Yes, just like with any other consumer good, factors like materials, design, and function all play into the final price of a knife. However, as we’ve recently seen with a reliable and desirable $10 knife from Walmart, there are a lot of things going on behind the scenes that determine what we pay at the store for a knife.
How much material a knife manufacturer buys has a major impact on the price you pay for a knife. Material prices, in general, will fluctuate based on how much of each item a brand purchases overall. We’ve most recently seen this with MagnaCut, which became a popular steel seemingly overnight. As more brands adopted it in their knives, the overall price of the steel itself went down.
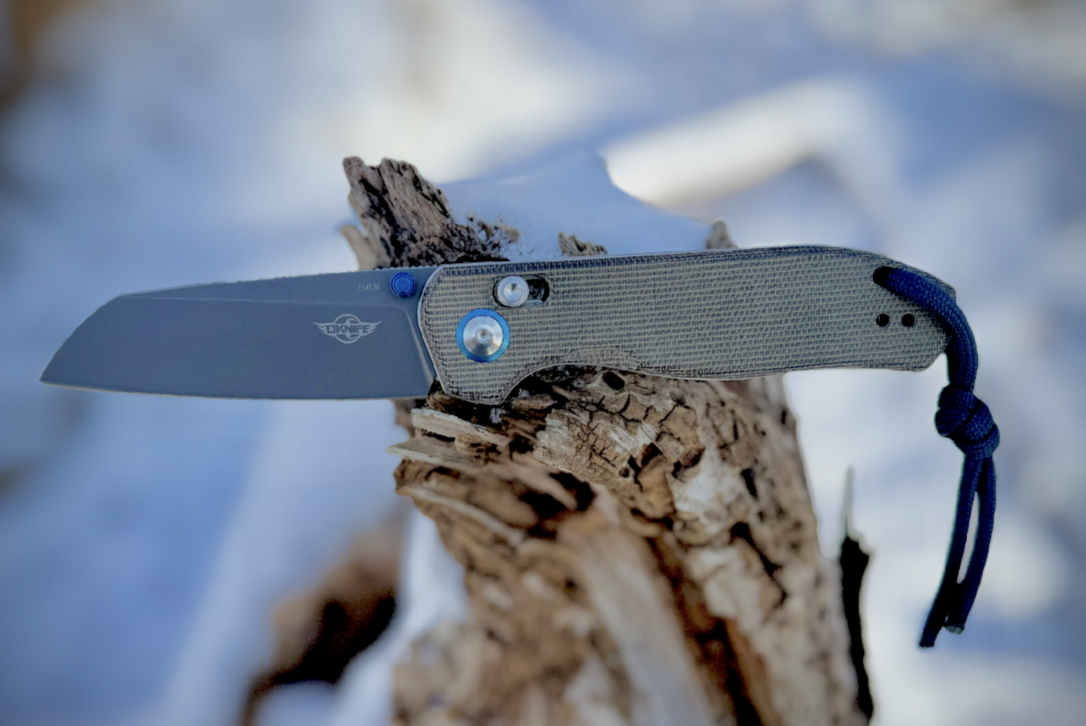
Another major factor is the country of origin. Within the last decade, the quality of knives made by overseas brands like WE Knife, CIVIVI, and most recently, OKNIFE has improved beyond anything we could have imagined. However, the brand’s prices are still comparatively lower than similar knives made in North America.
This brings up the brand name factor. Knives from brands like Benchmade generally retail for more than similar knives from other brands. It’s not outside the realm of reason that you’re paying into the brand as much as you are the product. In the case of Benchmade, you’re also buying free sharpening for life as well as a pretty significant lifetime warranty.
With that said, we’re going to break knives down into the following three categories based on pricing in general. But, to be fair, in the production knife world, there are no clear and defining lines between Budget knives, Mid-tier knives, or Premium knives. The following is a generalization of what you can expect from each category.
Budget
You can expect to pay less than $100 for budget knives, which usually have more affordable materials. Does this make the knife any less useful? No. A budget knife should do everything you would expect it to. However, it may require more maintenance to keep it up and running.
Knives like the CRKT CEO Microflipper ($60) and CIVIVI Yonder($67) that use Sandvik 12C27 and Nitro-V are considered budget knives. Although both steels are stainless and will, therefore, stand up against moisture and stave off rust and corrosion, both steels require more sharpening to maintain their reliable edge.
The Rubato 2 from OKNIFE uses premium and mid-tier materials and is considered a budget knife; (photo/Nick LeFort)
Another great budget example is the OKNIFE Rubato 2($85). It has premium 154CM, Micarta handle scales, a stainless steel liner, and a crossbar lock. Ten years ago, this knife would have cost $150-175, but as other steels have taken precedence over 154CM, the price of that steel has plummeted. This is a major bonus for anyone looking for a heck of a knife on a budget.
Mid-Tier
A majority of people carry mid-tier knives around. Ranging from $100 to $200, they may feature a range of steels like 154CM, M390, S35VN or even MagnaCut. All four of those steels can also be found on premium knives, due to their corrosion and abrasion-resistant properties, toughness, and edge retention. Mid-tier knives tend to have a more robust build than Budget knives.
The Lander 2 is a prime example of a mid-price knife; (photo/Nick LeFort)
There also may be a heavier focus on ergonomics and knife weight. The Knafs Lander 2 ($129) is a great example of a mid-tier knife. It has S35VN steel, Micarta, G10, or carbon fiber handle scales, and a crossbar lock. These are all desirable materials and features at an easy-to-digest price
Premium
Premium knives are the cream of the crop and make up a small segment of the market. They may be priced higher due to the manufacturer or where the knife is made. They could also use new and innovative materials, or a combination of all three of these reasons.
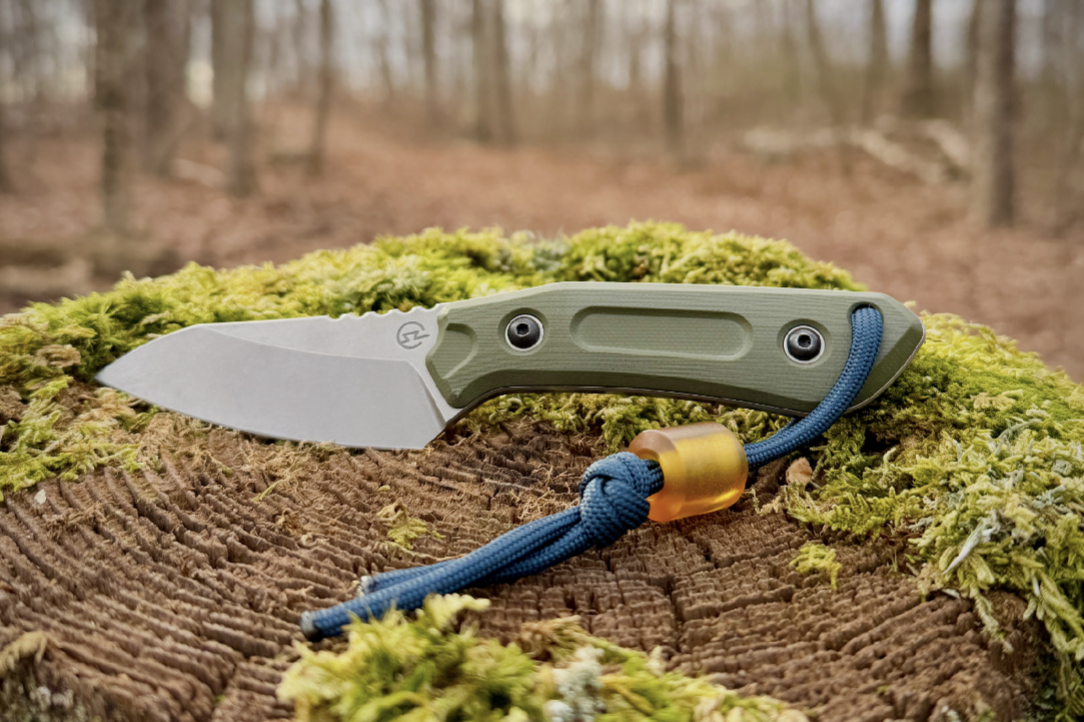
The Schwarz Knives Overland Sport is premium for a lot of reasons; (photo/Nick LeFort)
Another variable is availability. Some manufacturers make knives in smaller batches. Other knives are custom. In these instances, you can expect to pay more as well. The Schwarz Knives Overland Sport ($265) from Schwarz Knives is a small-batch, customizable, made-to-order knife. Due to its exclusivity, its price is reasonably high.
Where a lot of people instantly think of Benchmade as their prime example of premium, there’s also DPx Gear, which is a smaller, boutique-style brand. They offer production knives like the HEST/F 4.0 ($275), which is hand-made from premium materials. So, again, like Schwarz Knives, there’s a hint of exclusivity here, although in the case of DPx, it’s on a larger scale.
Frequently Asked Questions
Why should I carry a pocket knife?
From opening packages to slicing up food, pocket knives offer a wealth of utility. Rather than using your fingernails, a car key, or half of a pair of scissors, pocket knives are a natural piece for people with a lot of tasks on their hands. This is especially true for outdoor enthusiasts, who deal with materials like rope, wood, and canvas all the time.
One reason you won’t see on this list is self-defense. Despite what some industry marketing material would lead you to believe, carrying a pocket knife doesn’t turn you into a commando or modern-day gladiator.
Unless you’re a trained weapons expert, you’re just as likely to injure yourself as any would-be attacker. If you feel the need to carry something for protection, you’re far better off with a can of pepper spray. Pocket knives are best treated as tools — not weapons.
What’s the best size for a pocket knife?
Although there’s no right answer that fits everyone and their needs, a folding knife with an overall length of 8-8.5” with a blade length of 3-3.5” is ideal. At these lengths, you can expect the knife to be balanced, able to complete most daily tasks and be carried comfortably.
That said, we always recommend you test fit the knife to make sure it fits your hand and you feel safe and confident using it. Beyond that, keep in mind that each state, and even cities, have specific laws and regulations regarding knives. Make sure to read up on your local laws before making a purchase.
Should I get a plain-edge or serrated-edge knife?
Plain edge blades are generally one continuous edge and they can be great for cutting, chopping, shaving, and slicing.
Generally, a serrated blade is a combination of a plain edge and serrations, usually towards the back of the blade near the pivot. The benefit of serrations on a blade is that it can be used for sawing through limbs and rope.
Overall, when choosing between a blade with a plain edge and one with serrations you need to take into consideration if you really need it. Serrations take up space on a blade edge and are more complicated to sharpen.
How do I maintain my knife?
Your knife is only going to benefit you if it’s in good working order. With a fixed-blade knife, maintenance is generally focused on keeping the blade edge sharp and free of knicks or chips as this can lead to failure. With a folding knife, it can get a little more complicated as there are moving parts that need to be maintained to make sure the knife is safe to use for years to come.
Here are some basic tips that you should get into a routine of doing to make sure your knife is reliable and ready for your next adventure.
Make sure it’s sharp!
A dull knife isn’t any good to you. In fact, a dull knife can be dangerous. Thankfully, most knives on the market have steels that you can easily sharpen with the right sharpener and a little practice. That said, if you ever have any questions about the blade steel on your knife and how to sharpen it, we recommend contacting the manufacturer.
Pro Tip: Some knife manufacturers, like Benchmade, offer free knife sharpening for life.
Keep it clean and lubricated!
Water, dirt, and debris can all lead to your knife failing on you. Make sure to wipe your blade down and that the handle cavity is dry and free of debris.
It’s perfectly fine to wash down your blade with dish soap and water, making sure to wipe it down and let it air dry. We also recommend coating your blade with any type of food-grade lubricant.
Additionally, you want to make sure that the lock mechanism and pivot are free of debris and in working order as well. These can be cleaned with a Q-tip soaked in rubbing alcohol, or canned air. You should always re-lubricate these areas after cleaning your knife.
If the knife manufacturer recommends a specific lubricant, it’s always best to use that.
Are automatic knives good for everyday carry?
There was a time when we would have told you no, but as more and more automatic knives arrive in the market, they can be.
Though they tend to be more expensive and can be a hassle to maintain, the stigma surrounding automatic knives is legality. Generally speaking, automatic knives are relegated to military and law enforcement personnel. Depending on where you live and where you plan on carrying an automatic knife, as a civilian you could be breaking the law.
That said, we recommend you check your local laws and regulations before carrying an automatic knife.
Known by many names, a tactical knife generally refers to a hardworking, do-all blade. Here, we review the best folding and fixed-blade knives for every…
While there isn’t a single best camping lantern for everyone, we sure looked for one. We’ve tested nearly 40 different light sources across half a decade of camping seasons to pull together a list of the most worthy light sources to bring on your next wilderness outing. Our choices have traveled with us from the dark deserts of Joshua Tree to the green tunnels of the Appalachian Trail, and we weren’t gentle on them, either.
A good camping lantern is an outdoor essential. It’s a major help while cooking, is great for nightly camp games, and sets just the right outdoor ambiance. Sure, you could just use a flashlight or headlamp, but a top-pick lantern like the BioLite AlpenGlow 500 lights up the entire camp, and even budget options like the Duracell Tri-Power put out enough to illuminate the inside of your tent.
During our testing, we charged up, gassed up, and lit up our campsites with lanterns — paying special mind to a number of different factors: light output, power supply, burn time, durability, and more. Below, we’ve broken the list into handy categories to help you identify the best lantern for your use.
Editor’s Note: We updated our Camping Lantern guide on October 2, 2025 to add the BioLite Luci Original Clear Lantern, a classic inflatable light that’s simple to use and stays topped off on power after a day in the sun. We also added new rating attributes to our suggestions to allow for better comparison between options.
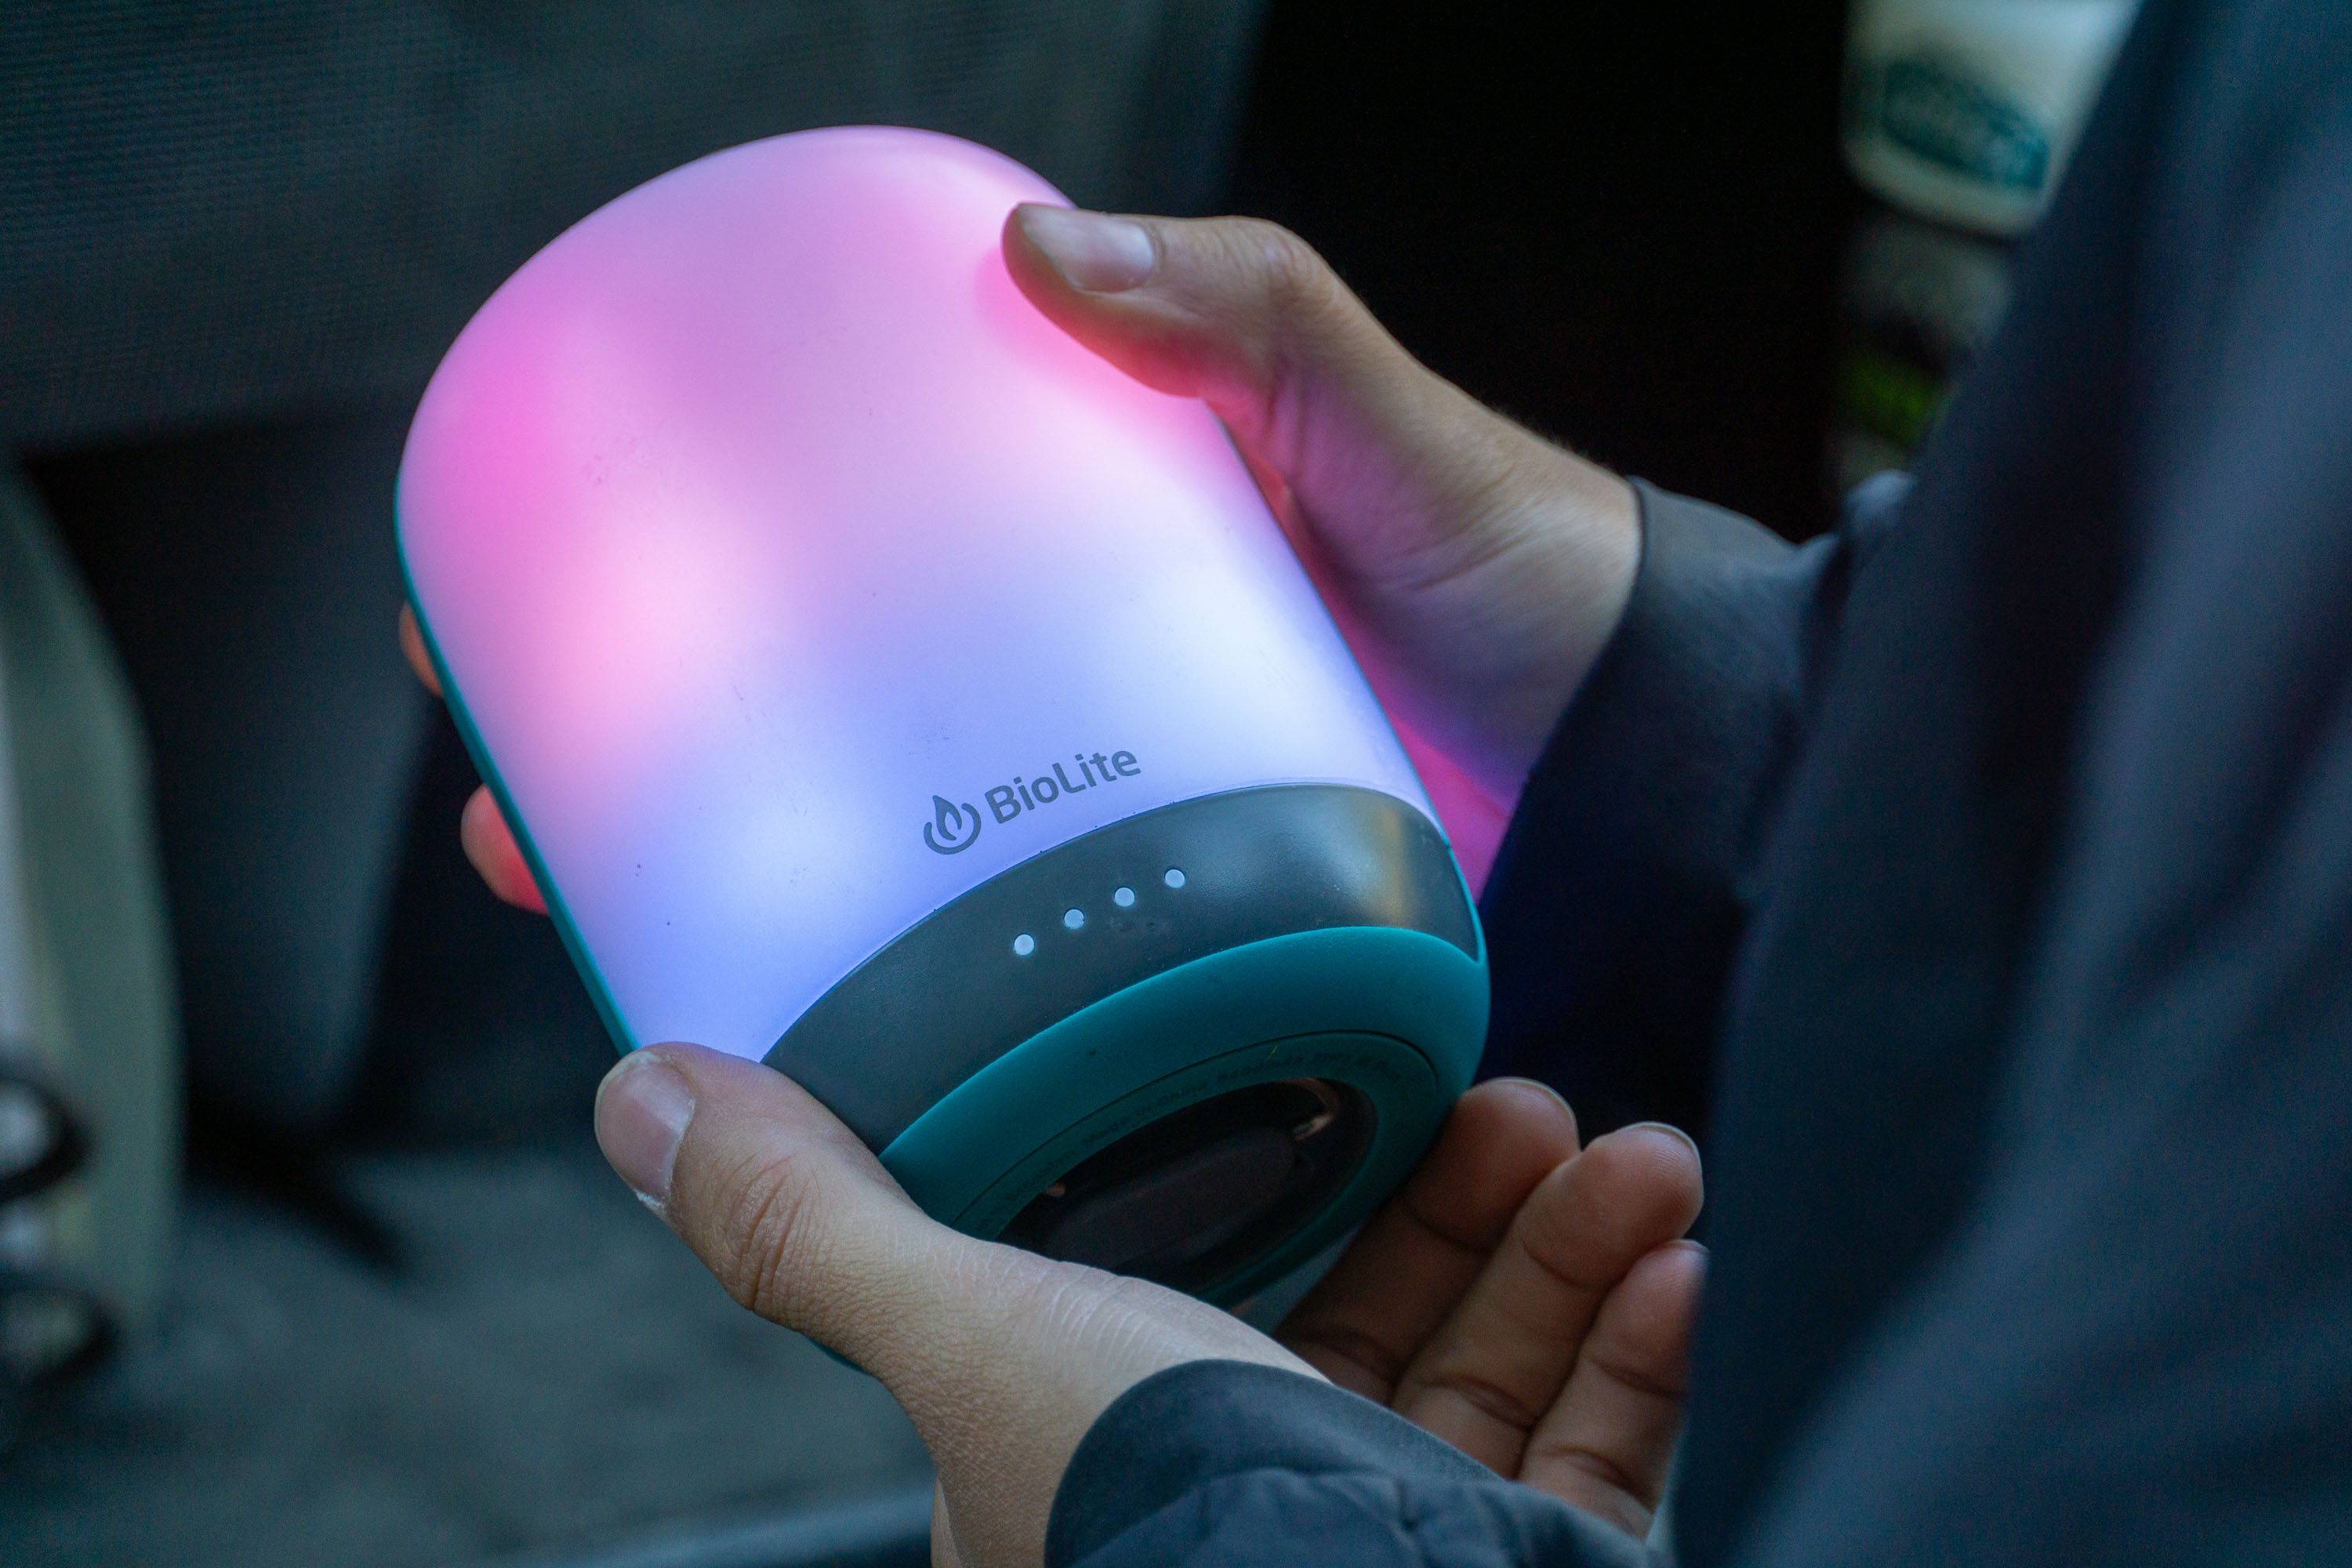
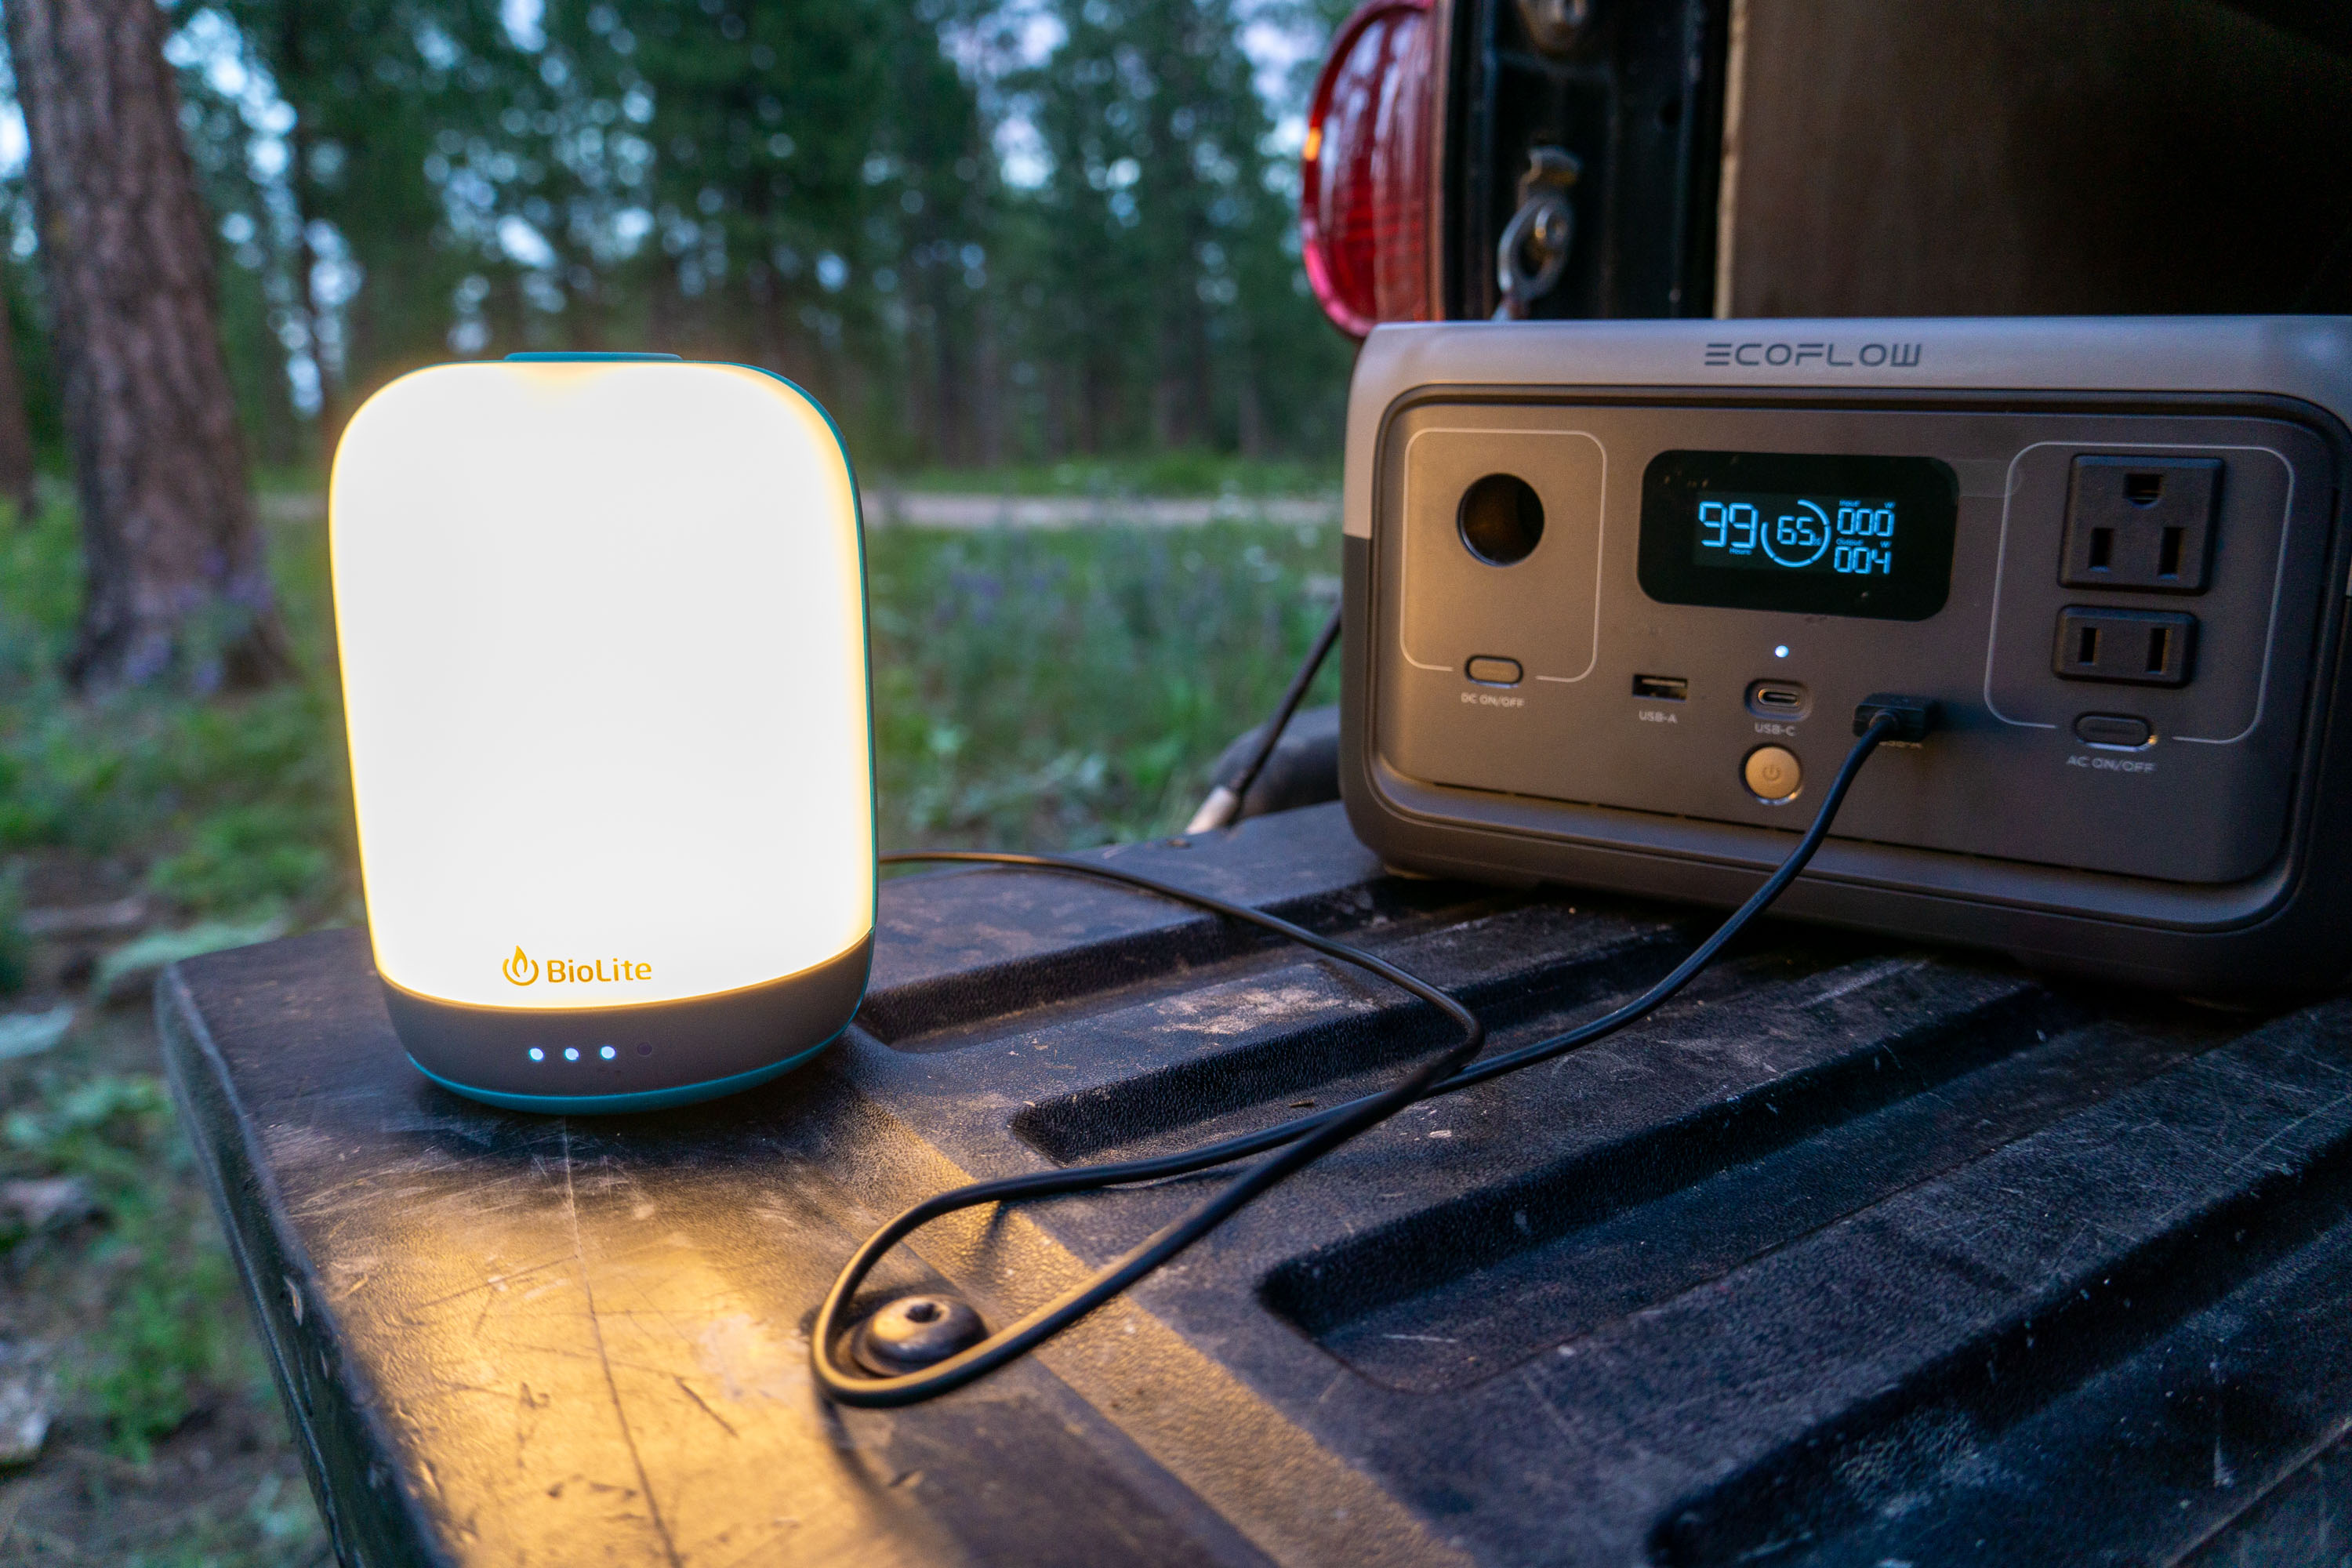
BioLite didn’t miss when they brewed up the AlpenGlow 500 Lantern ($80), a light that’s as versatile in the backcountry as it is for car camping. There’s little we could come up with that we would have done differently, which easily landed it the title of best overall. If you’re after a straight-ahead camping light source that has a few tricks up its sleeve, the AlpenGlow is your lantern.
Need a quick burst of white light? One tap. Feeling a little more natural? Tap again. A third tap brings the color, and a fourth ignites color-changing ChromaReal LEDs. BioLite also incorporated a number of secondary modes to each, giving you the ability to limit the light to only one side of the lantern or imitate a candle flicker.
There’s even a third press option triggered by a quick shake of the lantern. While we do applaud the unique way of integrating an accelerometer, we found this to be a little hit-and-miss. Eventually, the lantern will catch on — it may just take an extra shake to get there. These different lighting options take a minute to memorize, but the tiered setup means you can blitz through them pretty quickly if you pass the one you’re after.
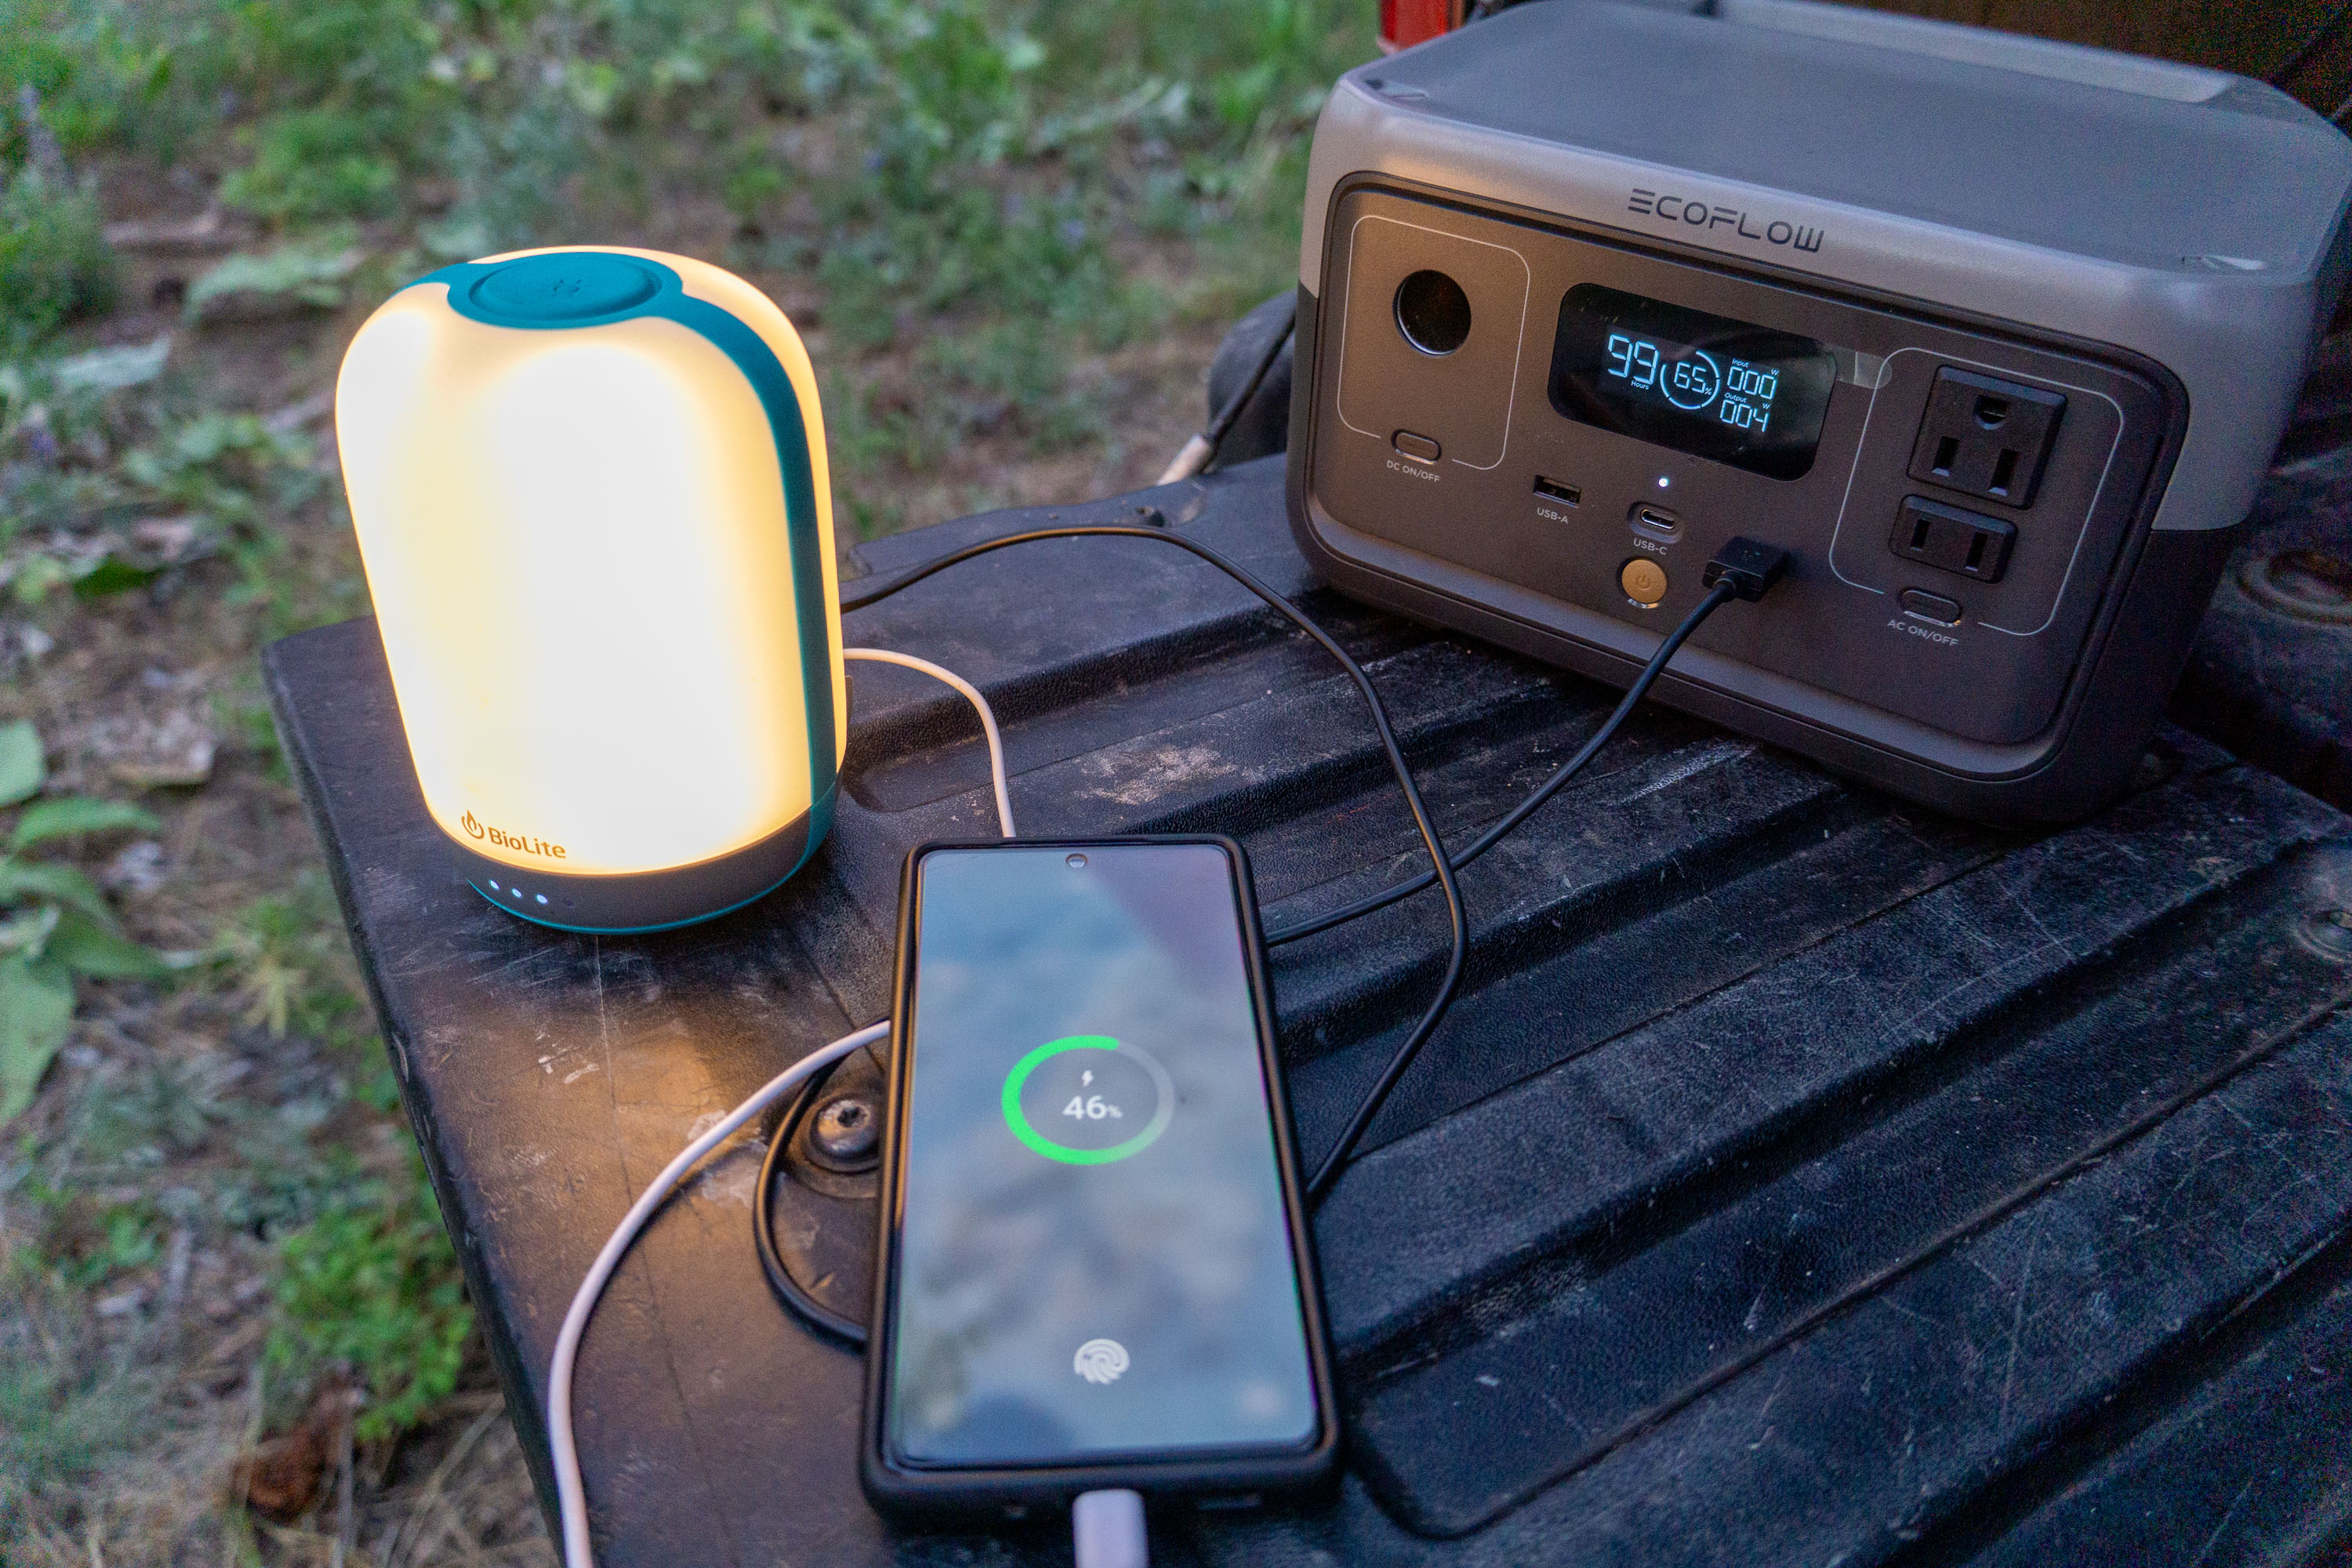
In addition to its impressive lighting capabilities (500 lumens is dang bright), the AlpenGlow incorporates a number of features we’ve come to expect in a lantern, such as an integrated 6,400 mAh power bank to charge your electronics (which, unfortunately, is USB-A output only for now).
Looking forward to the bright future of portable electronics, we’d love to see a pivot to USB-C here, which BioLite got right in the later offering of the AlpenGlow Mini. And for those looking for all the same functions in a middle-ground package, there’s the AlpenGlow 250.
Beyond the BioLite offerings, those after a generalist lantern like the AlpenGlow 500 with a few more mounting and lighting options would be well-served to consider the Black Diamond Orbiter 650 — a lantern that sports both tripod legs and a top-down mode to spot-illuminate your camp table at night.
Our decision to choose the AlpenGlow over the Orbiter for our top spot was difficult, but incredibly, it came down to light quality and color. Across the board, the ChromaReal LEDs in this lantern provide a richer and more pleasing light compared to the Black Diamond lantern.
Night after night, the AlpenGlow 500 puts out impressively natural-looking light, which we greatly appreciate. Anyone searching for an all-around powerhouse of a lantern would likely find it in the AlpenGlow.
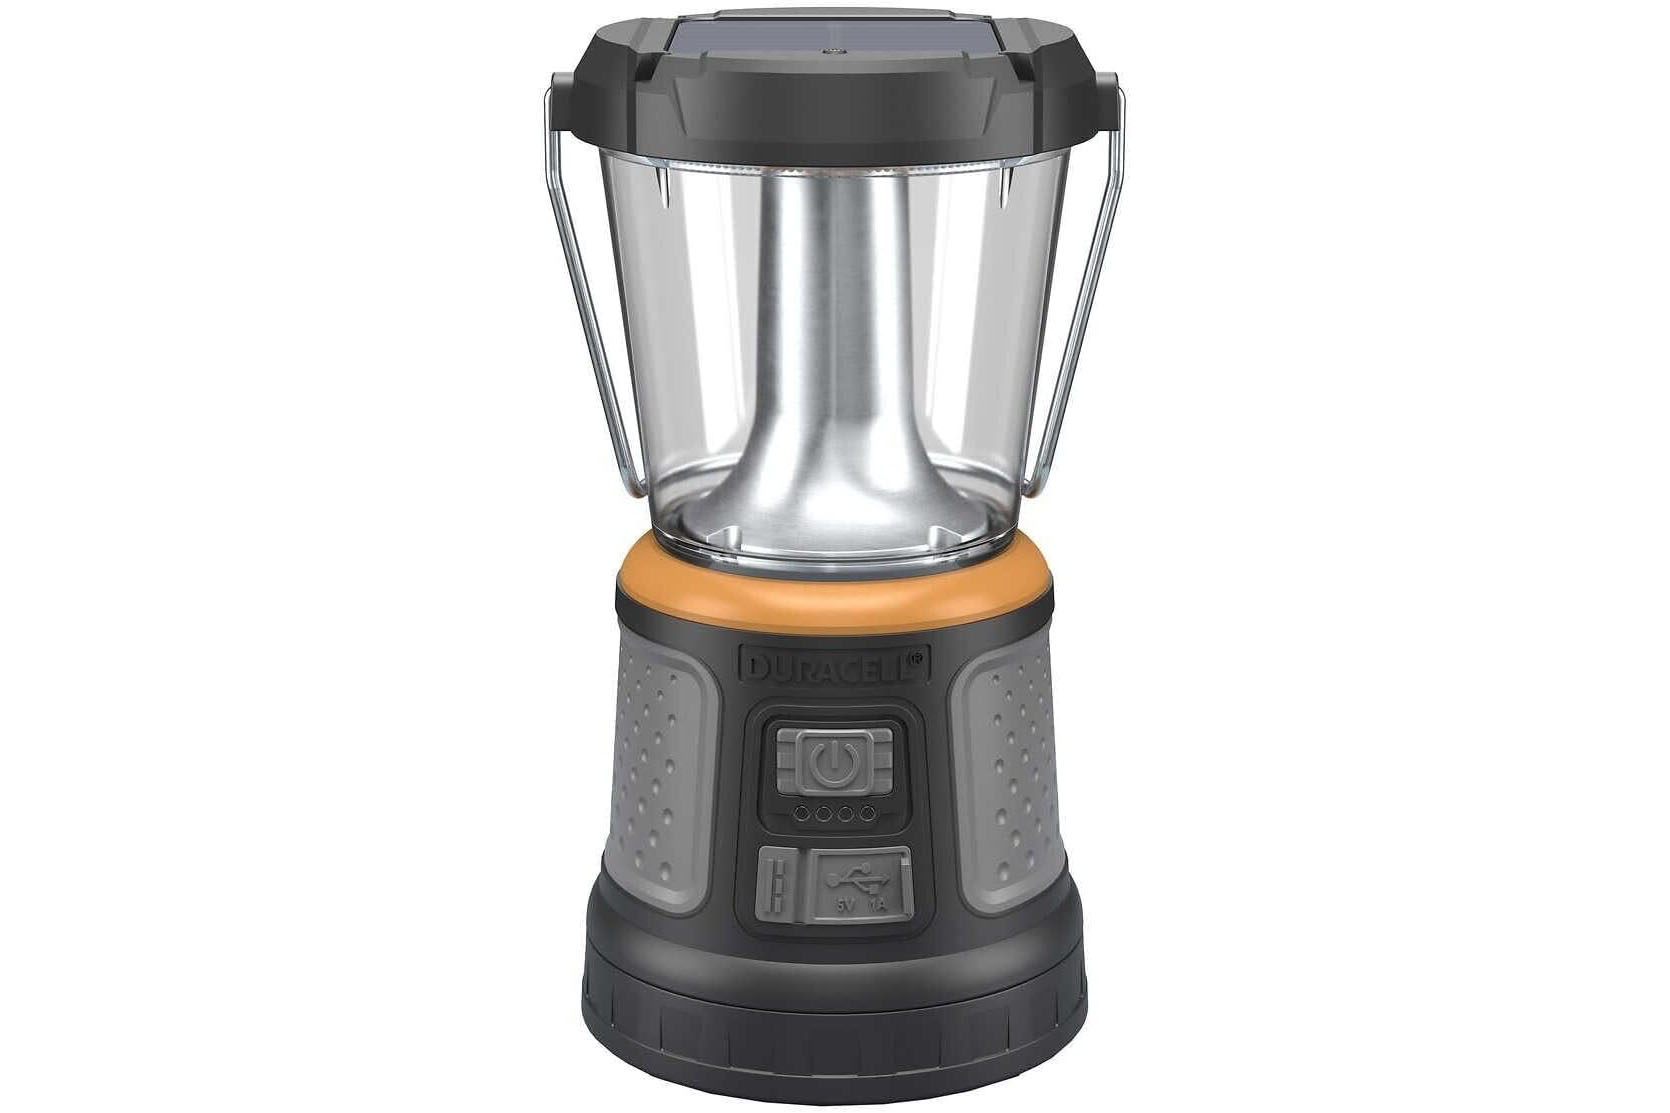
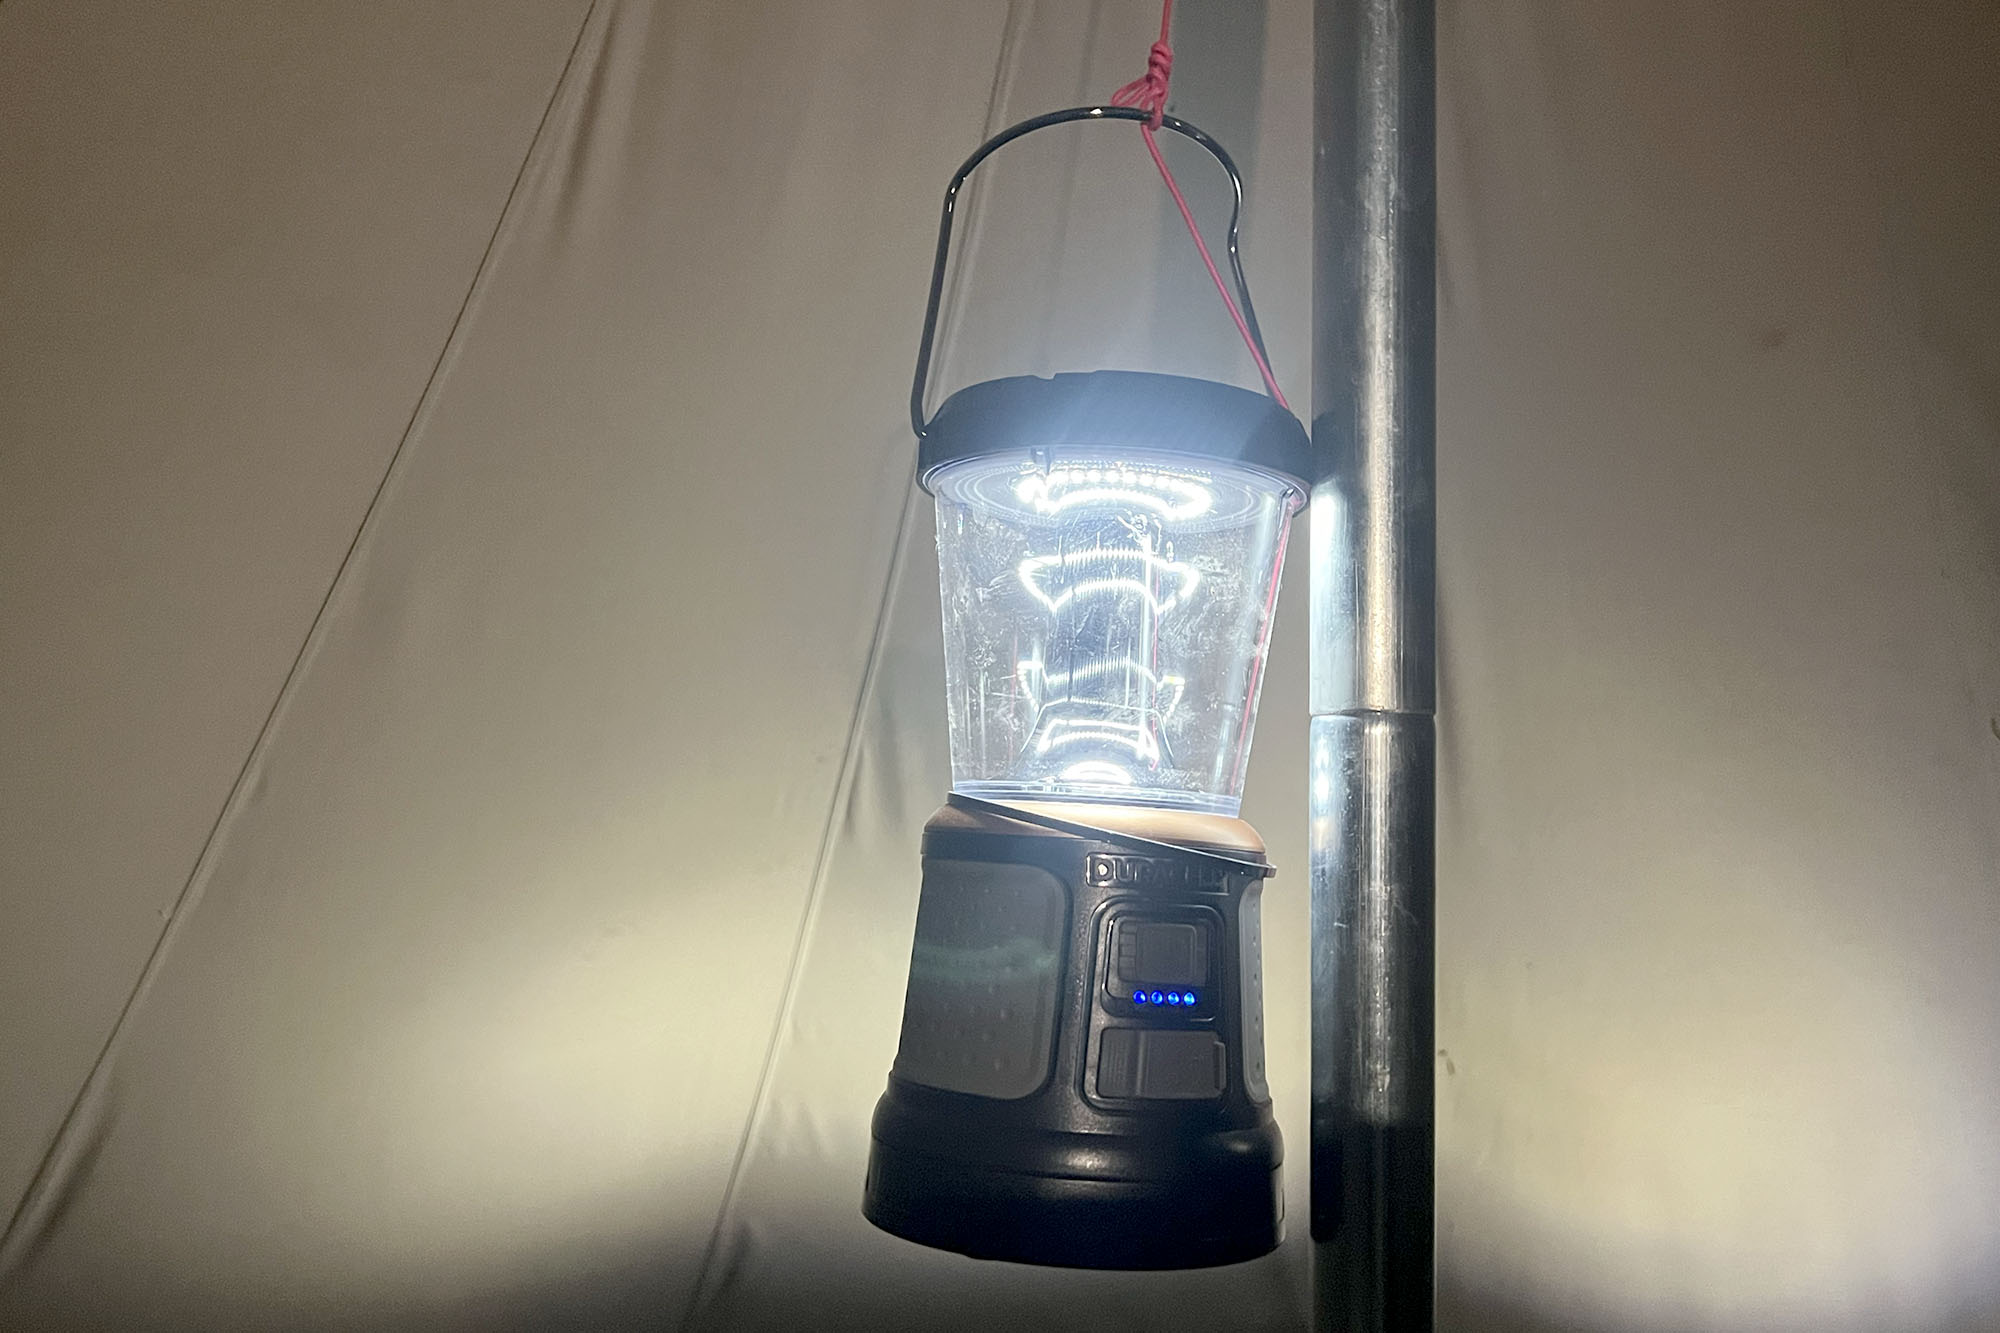
For $30, we’re willing to forgive the ‘surprise’ nature of the Duracell 2000 Lumen Tri-Power, which turns on at a full blast of 2,000 lumens. Get beyond that, and this is one excellent budget camp lighting option, with two separate ways to power it and just as many ways to charge it.
Editorial Director Sean McCoy tested the Tri-Power recently while base camped during an elk hunt, and found the little lantern could hang (and illuminate the interior of an entire 13-foot canvas tent). Unlike some camp lanterns (where feature bloat makes for a difficult-to-use light), the Tri-Power is simple: you have high, medium, and low power, as well as a flashing red light. That’s it.
But tech-trickle down has certainly improved this Duracell lantern, and we were pleased to see it sport both a solar panel and a USB-C port for charging the internal cells. The lantern will also run off of classic D batteries, which make for a great backup. We also used the USB-A output to keep our phones topped off, but wouldn’t count on getting multiple full charges out of it.
The Tri-Power isn’t perfect, and besides turning on at full bore, we find that solar panels are best suited to lower-output lanterns, like the BioLite Luci Charge 360. Even still, we found that the Tri-Power would recharge itself enough to run for a couple of hours on medium after sitting in the sun all day. The red light will also only flash and not stay steady, which isn’t great if you’re trying to use it to preserve your night vision.
For more than half of what our best overall pick will run you, the Tri-Power is an excellent budget lantern.
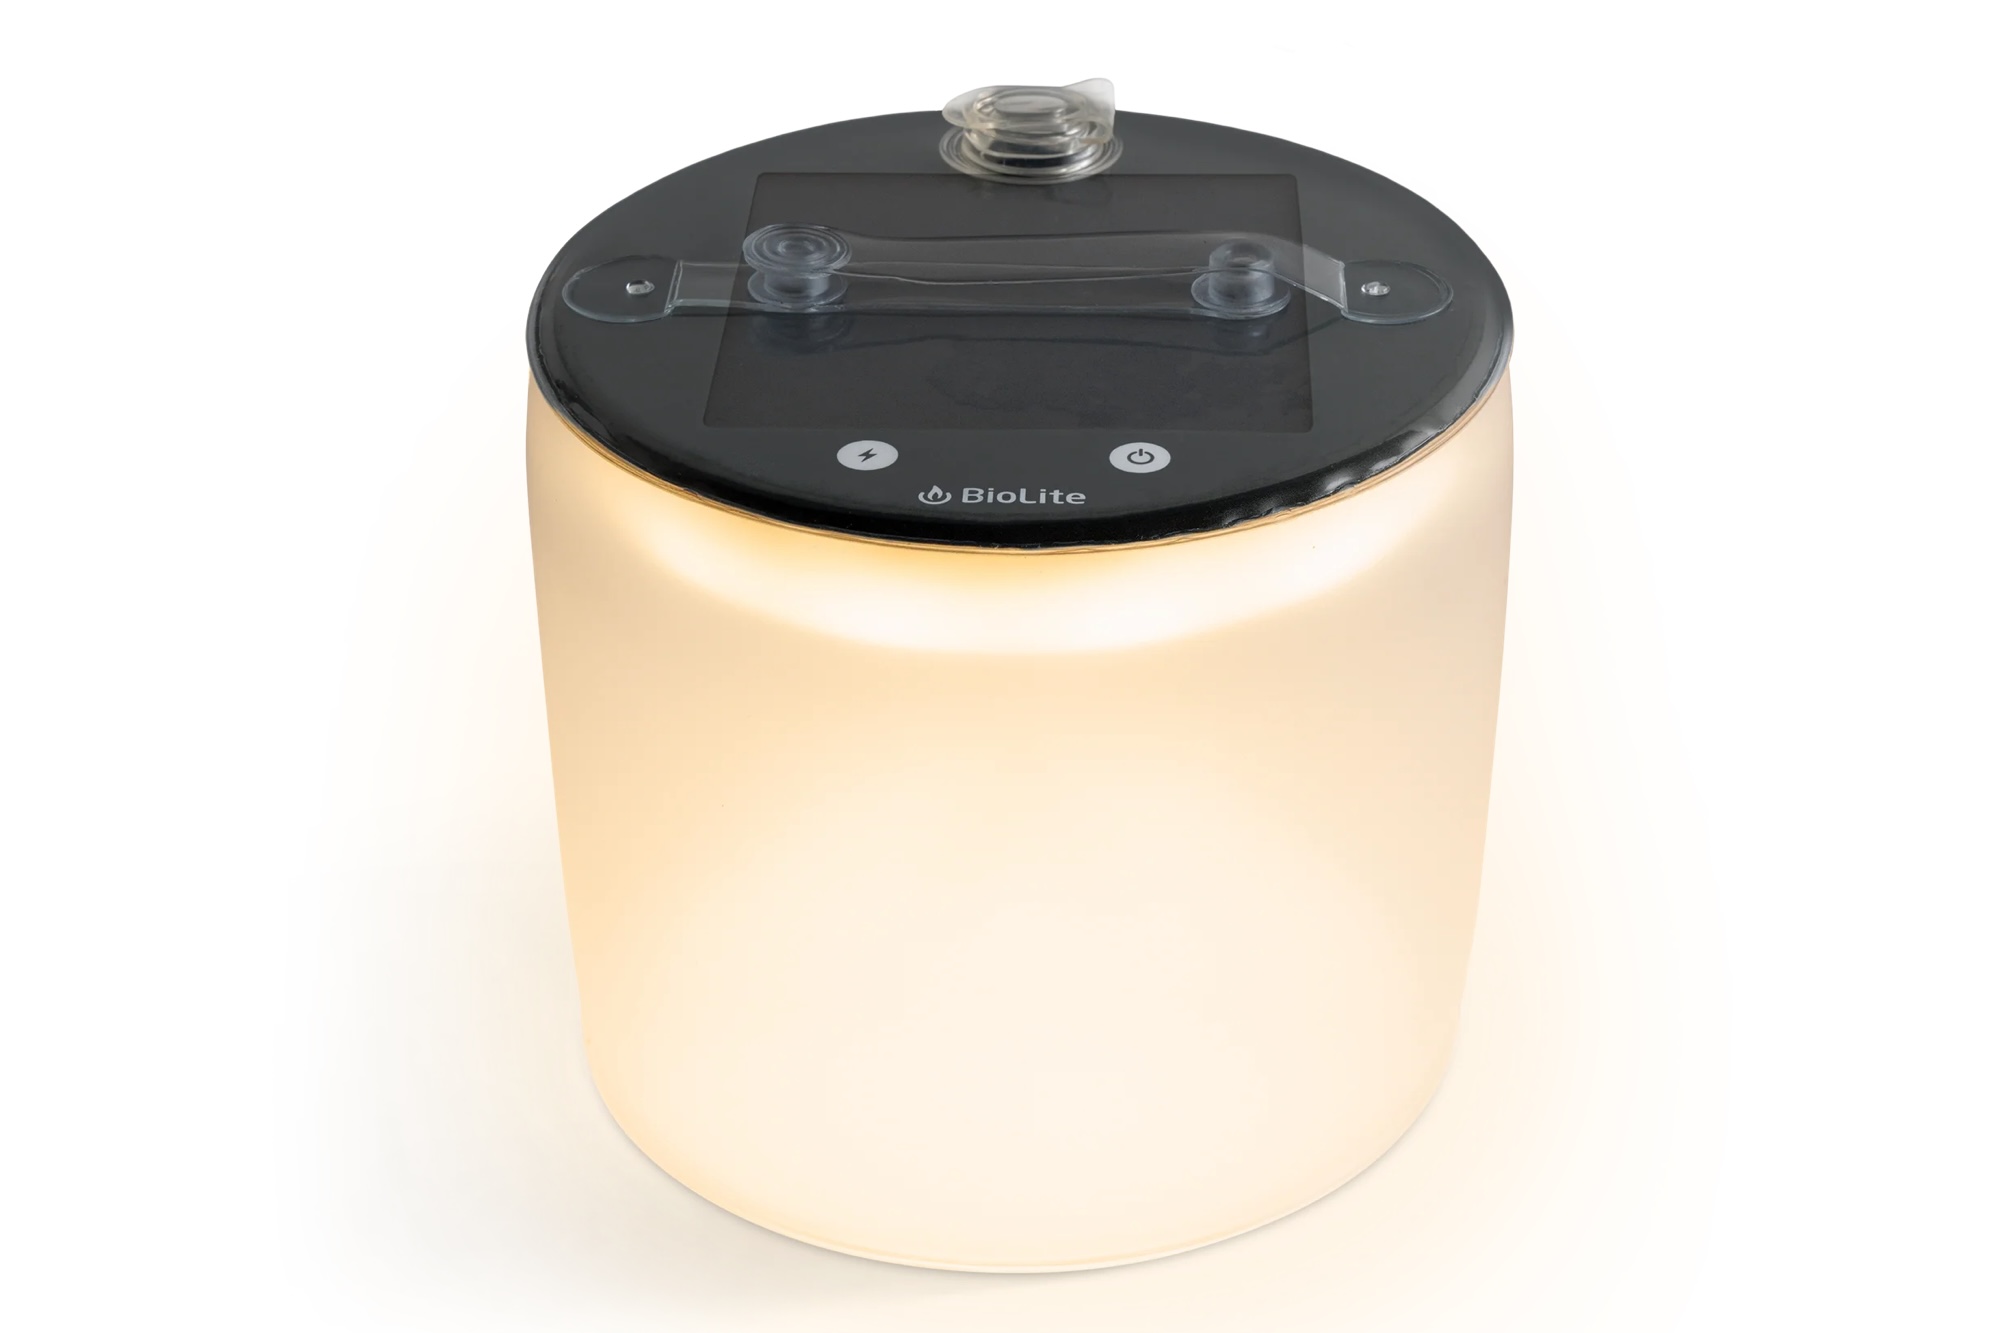
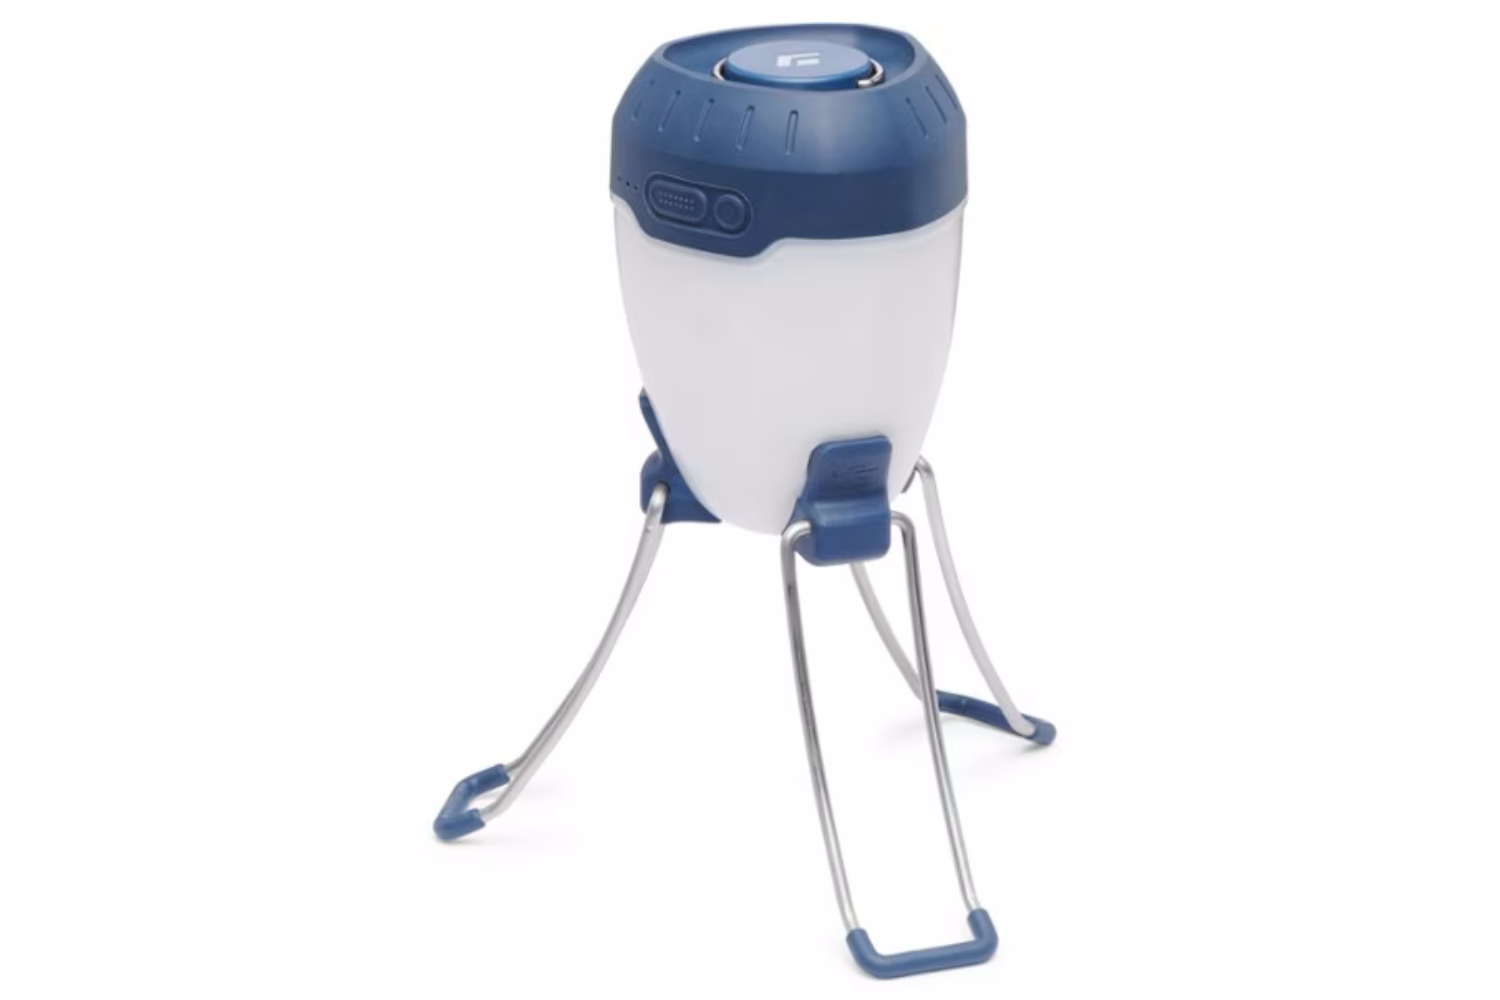
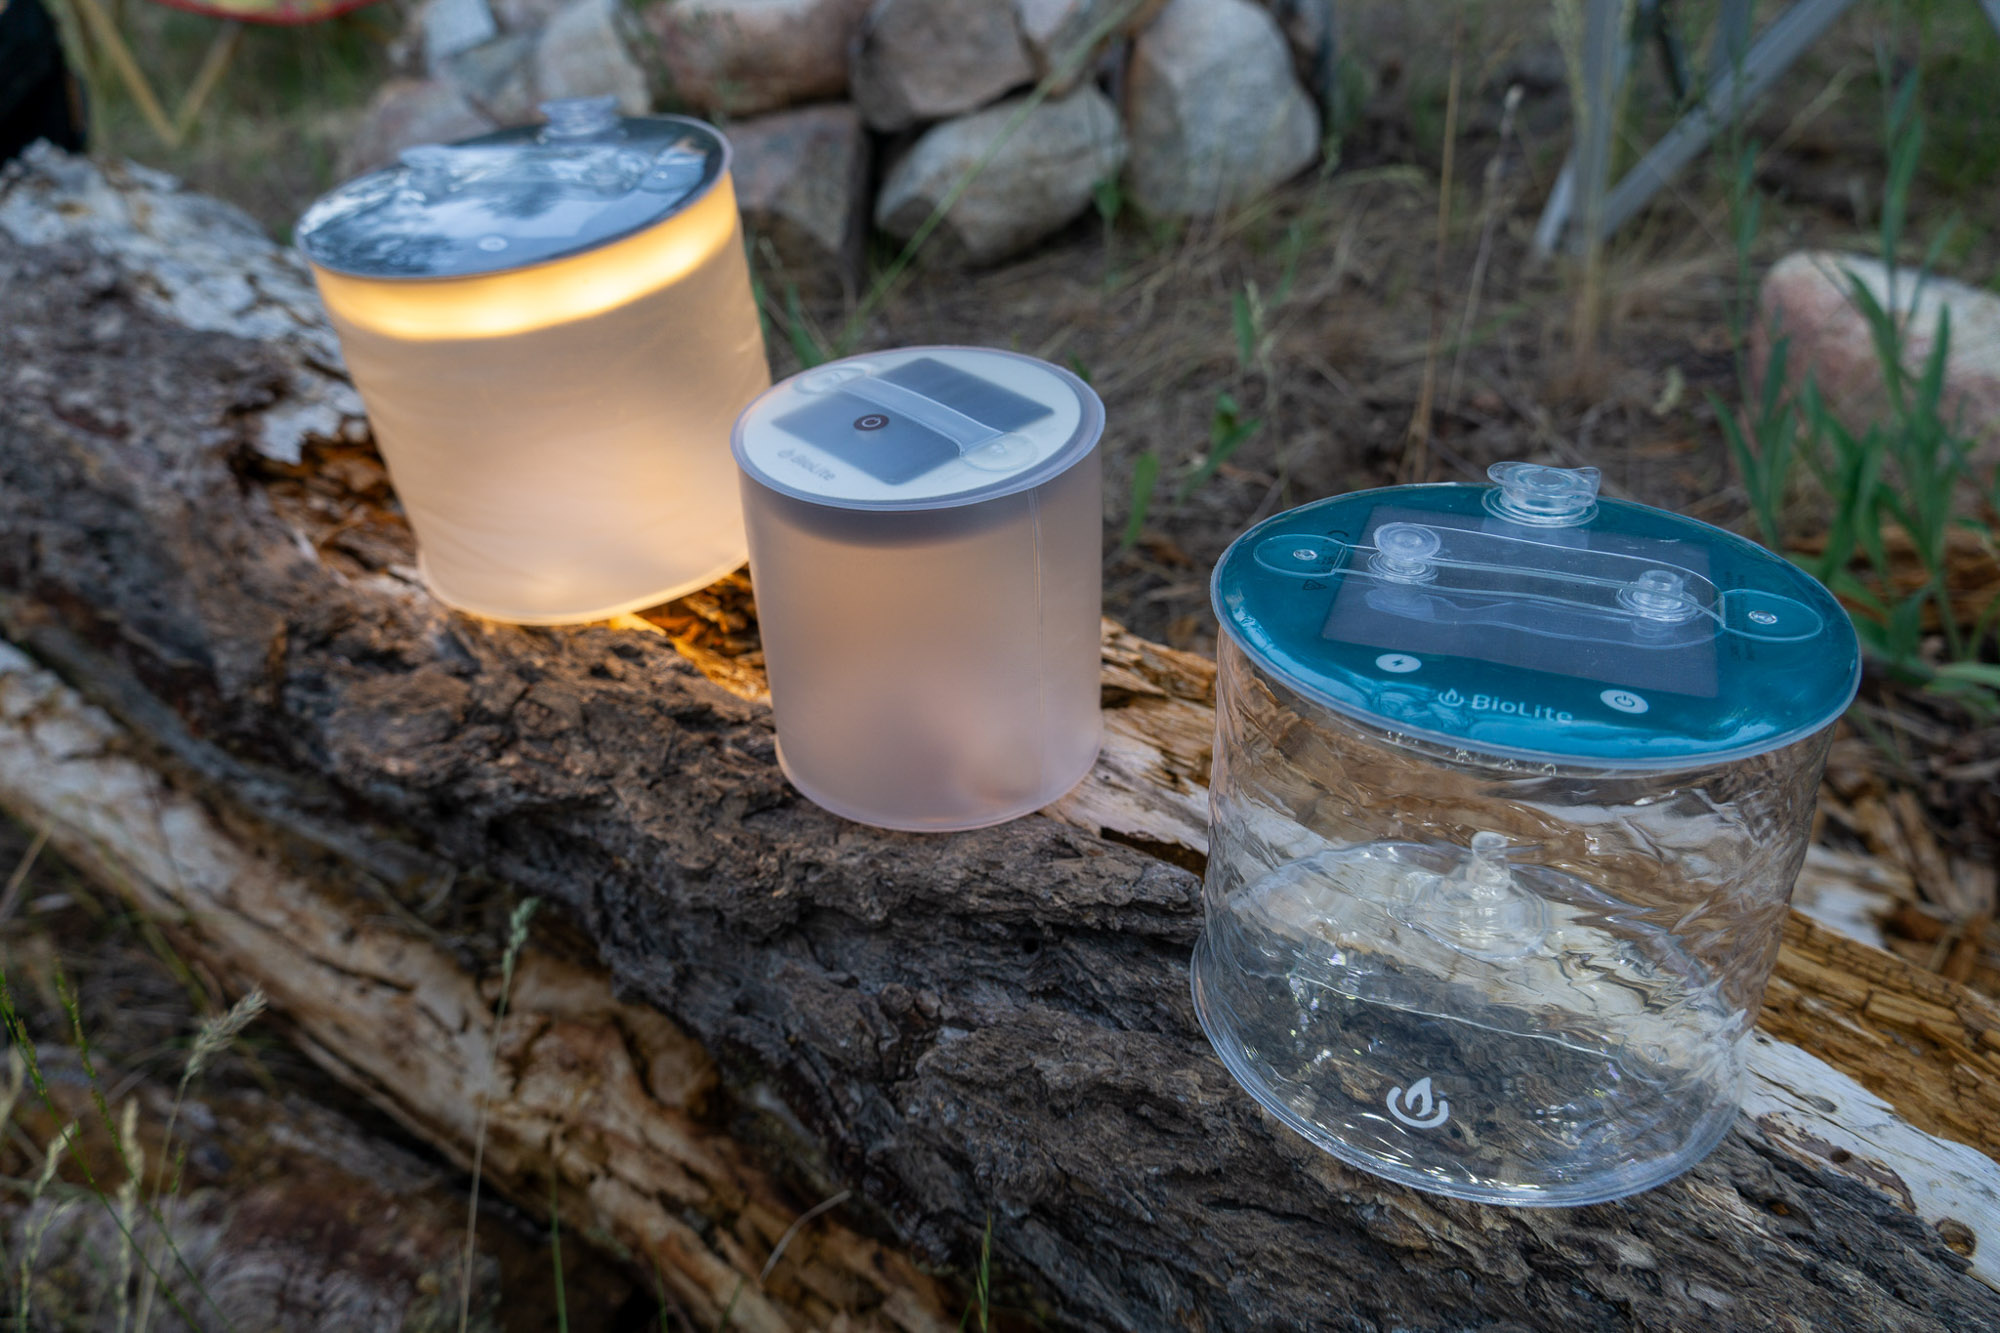
While we plucked the BioLite Luci Charge 360 ($60) for this award, similar praise can be heaped on all of the inflatable Luci (formerly MPOWERD products, now BioLite) light offerings. All are supremely camp-able, and range from the lovable, petite Luci Candle, which is only $20 and flickers with mock candlelight, to the larger Luci Charge models, which can charge electronics via USB.
Regardless of the model, all Luci lights are lightweight, collapsible, come with a handle for hanging, and can be recharged in a day of sunlight. On road trips, we put ours on the dashboard, which keeps them topped off. One time, the novelty of them there even got us through Mexican customs more smoothly, thanks to a chatty border agent.
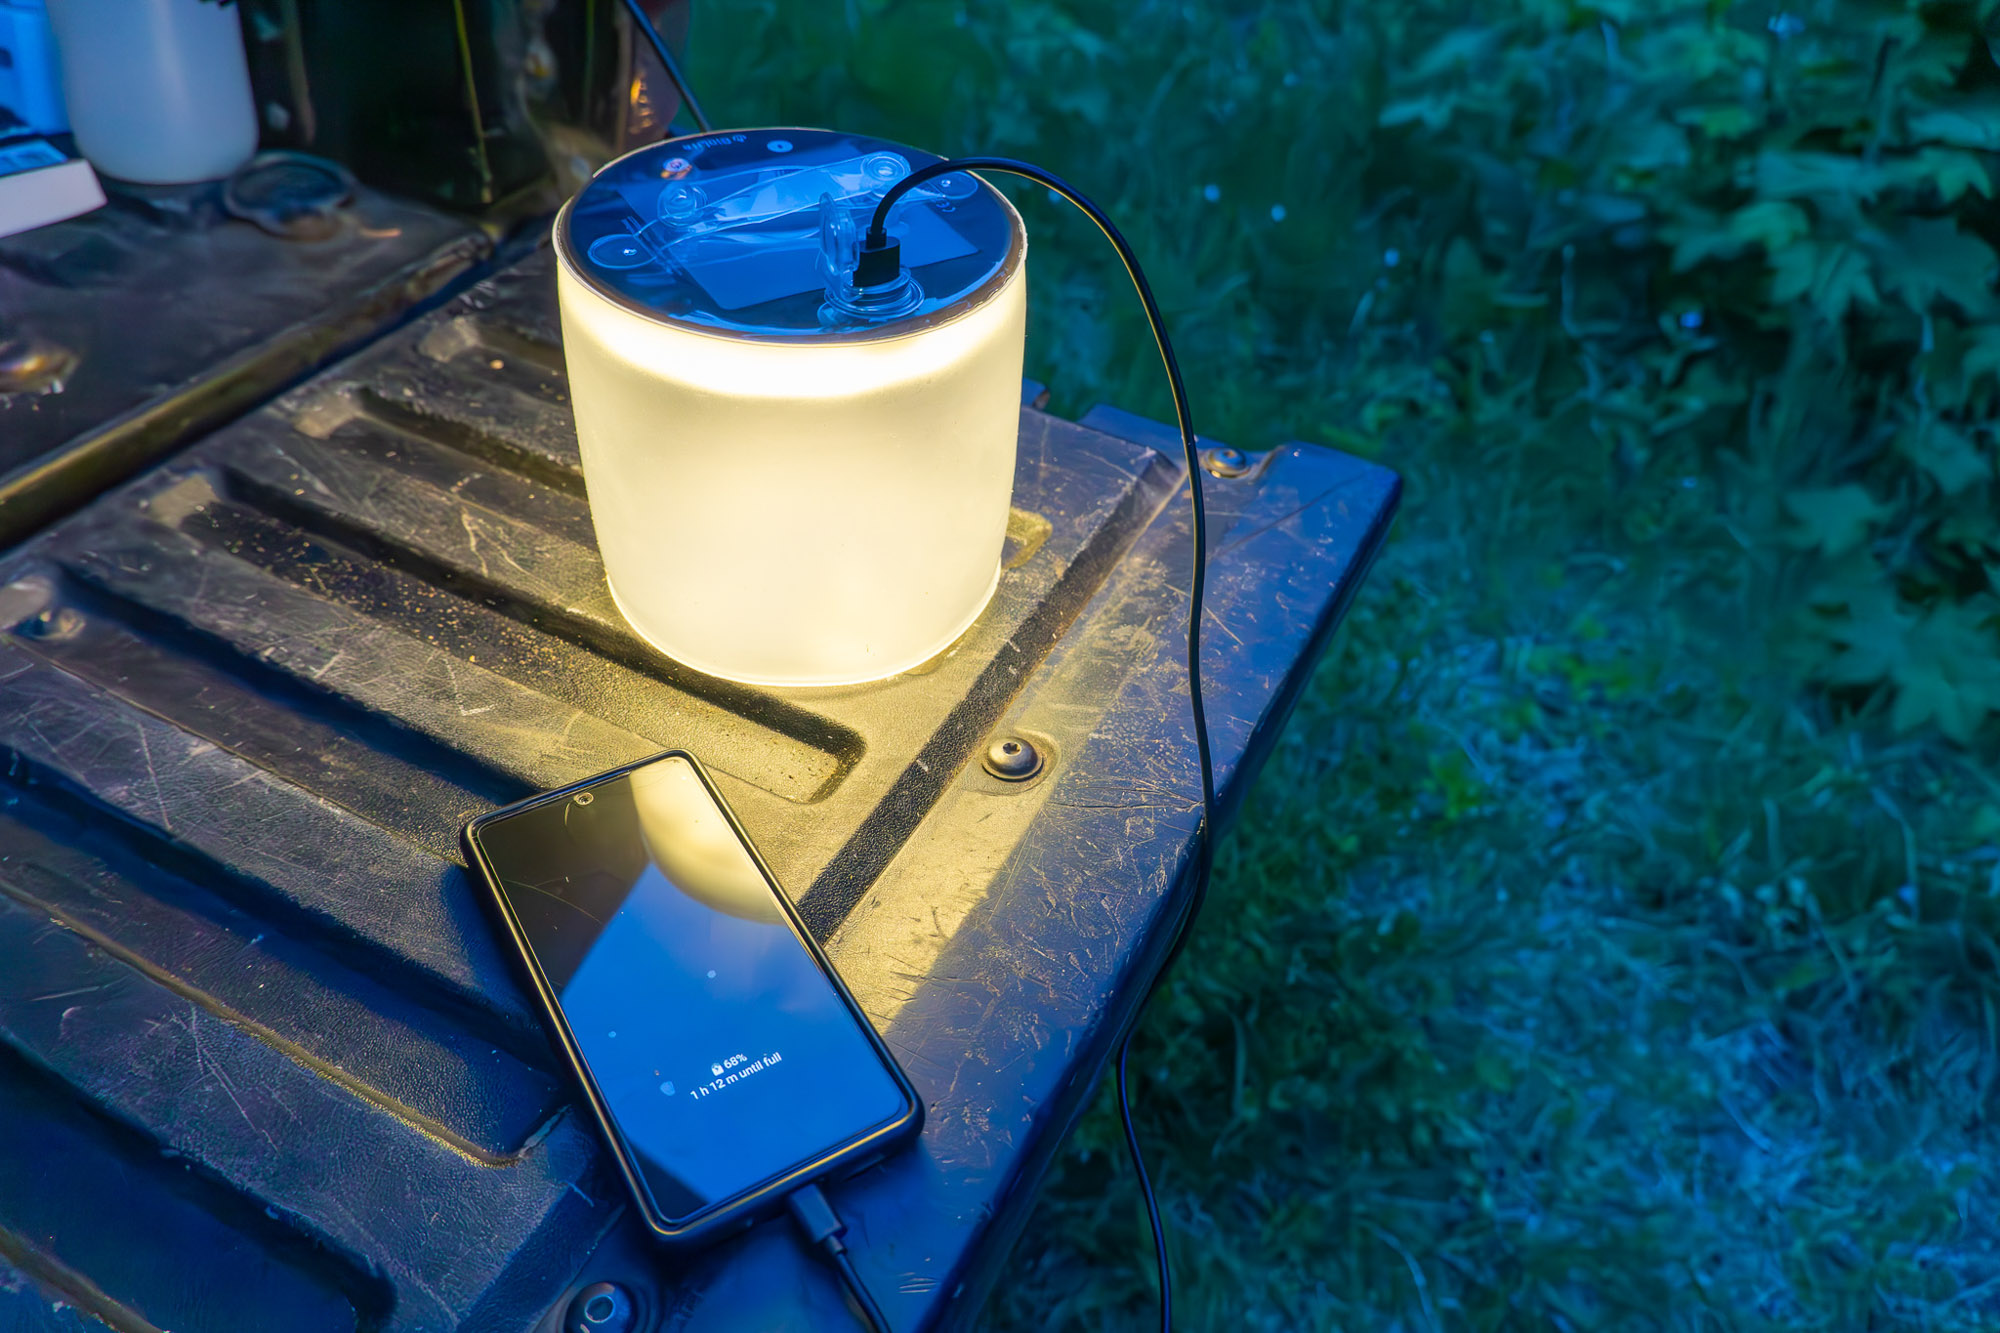
The Luci Charge 360 is a great do-everything light. Its 31 LEDs give off a total of 360 lumens, which is enough for backcountry cooking or taking a shower in a dark state park campground stall. It also has a battery level indicator, and that 3.5″ square solar panel is large enough to keep the lantern self-sufficient on longer trips (something smaller solar lanterns struggle with). The internal 4,000 mAh battery pack isn’t quite as big as the one in the AlpenGlow 500, but it still will charge our phones at least once.
If the Charge 360 is a bit too large for your backcountry trips, we also bring along the Luci Candle for a cozy ambiance. We use several of them in flicker mode to line walkways at night (but be warned, they look so convincing that they attracted a park ranger who thought we were violating the fire ban). They are smaller than the 360 and don’t last quite as long, but at 25 lumens, they’re dim enough that they don’t mess with your night vision.
BioLite claims its lights can withstand up to 150 pounds of pressure, and the waterproofing has held up when we’ve left them in the rain. But we’ve found that, in general, the Luci lights aren’t particularly durable. We’ve purchased more than a dozen of them over the years, in various models, and about half of them fail after a year or two of heavy use. Some tear, which isn’t a big deal because even if they don’t hold air, they still function.
Still, the Luci Charge 360 is our go-to solar-powered lantern for most situations. Some version of these lanterns have traveled with us for many years, miles and nights under the stars, and when we run into friends camping, they almost always want to show off their Luci lights, too.
No turning up this lantern, the light you get is what you get
Austin Beck-Doss
The littleUCO Original Candle Lantern ($30) is a must-have for your emergency kit, bugout bag, or go-to camp kit. It’s extremely easy to use — just slide the glass down and light the candle for instant light. The included reflector clip directs the light where you need it most.
A single candle burns for nearly 9 hours, and the spring-loaded system keeps the flame at a consistent height. It does get hot, so use caution when extinguishing or moving. It packs down to 4.25 inches long and weighs just 6.4 ounces.
The neoprene case protects everything during transport and makes it a convenient addition to your camp kit. We’ve used one exclusively at camp when we wanted a classic, soft firelight. And it’s always in our chuck kit, just in case.
Need a little longer-burning light? UCO also sells natural beeswax candles that burn for an extended 12 hours. For those buggy summer nights, there are even citronella candles that’ll keep the skeeters at bay.
To be sure, this lantern is an ambiance-first option — don’t expect to use this as your only source of camp light. While the warm glow is an inviting one, there’s only so much of it, and trying to cook dinner by candlelight can feel a bit limiting when there are so many other electric options out there.
While many lanterns these days incorporate some type of ‘candlelight’ option, a great middle ground to consider is compact gas lanterns like the Snow Peak GigaPower or Mini Flame. These provide a warm glow that is adjustable and often brighter.
But for the real deal, it’s tough to beat the OG, and the UCO is certainly that. It’s also a top pick for emergency preparedness — whether you live in a hurricane zone or have frequent blizzard-induced power outages, it’s a good idea to have a backup light available. The Candle Lantern is an affordable, easy-to-use, reliable option for both camping and emergencies.
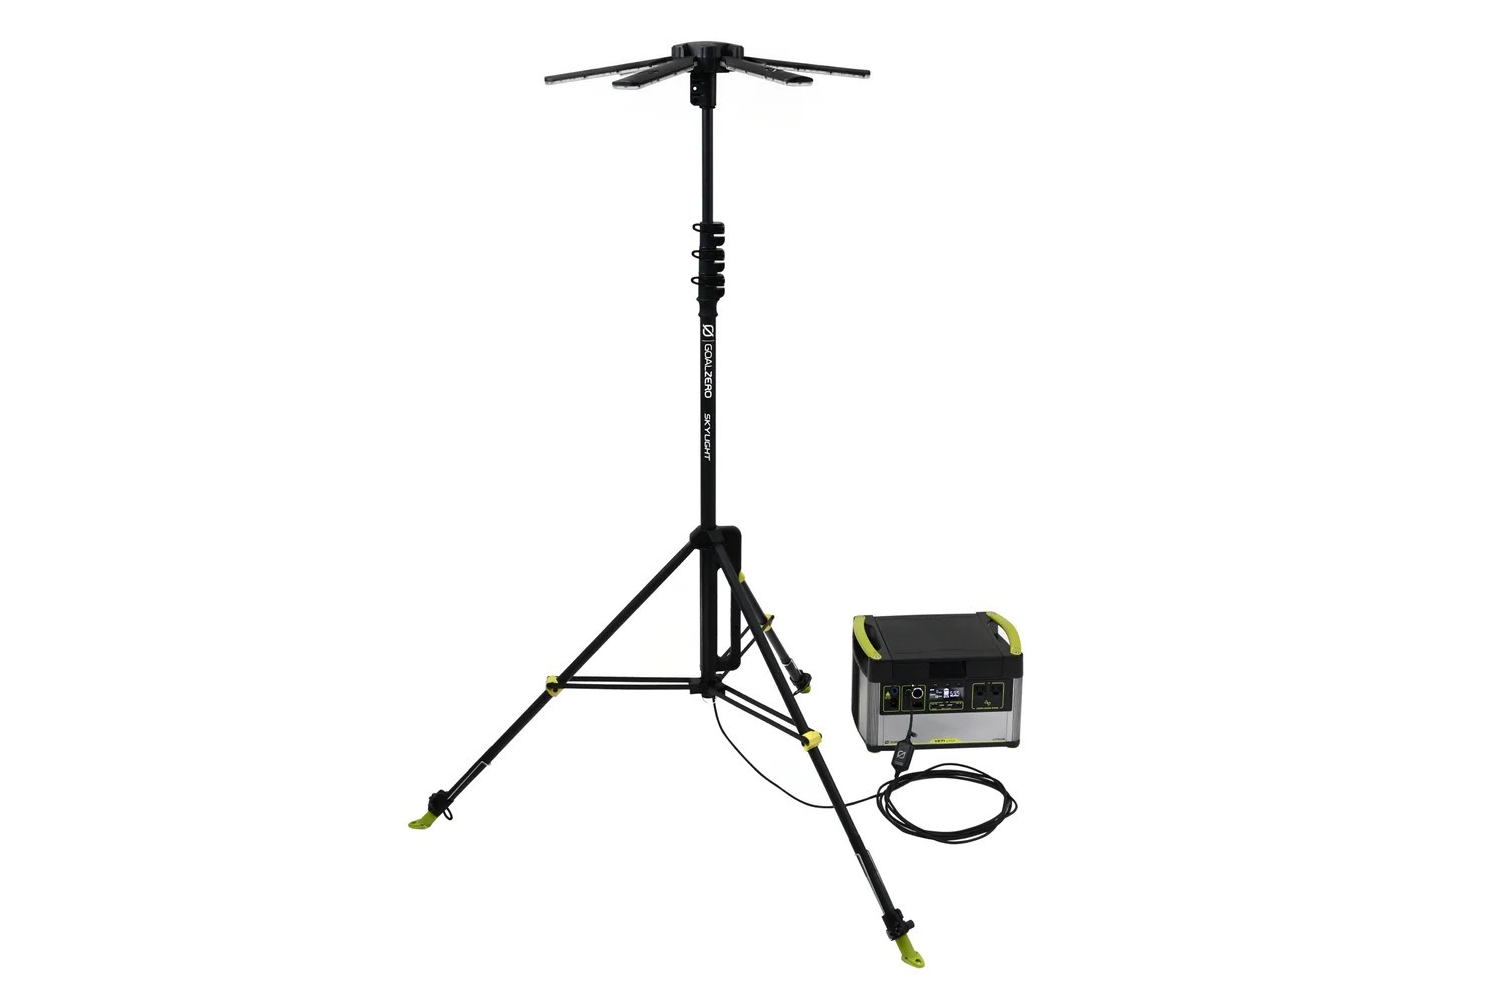
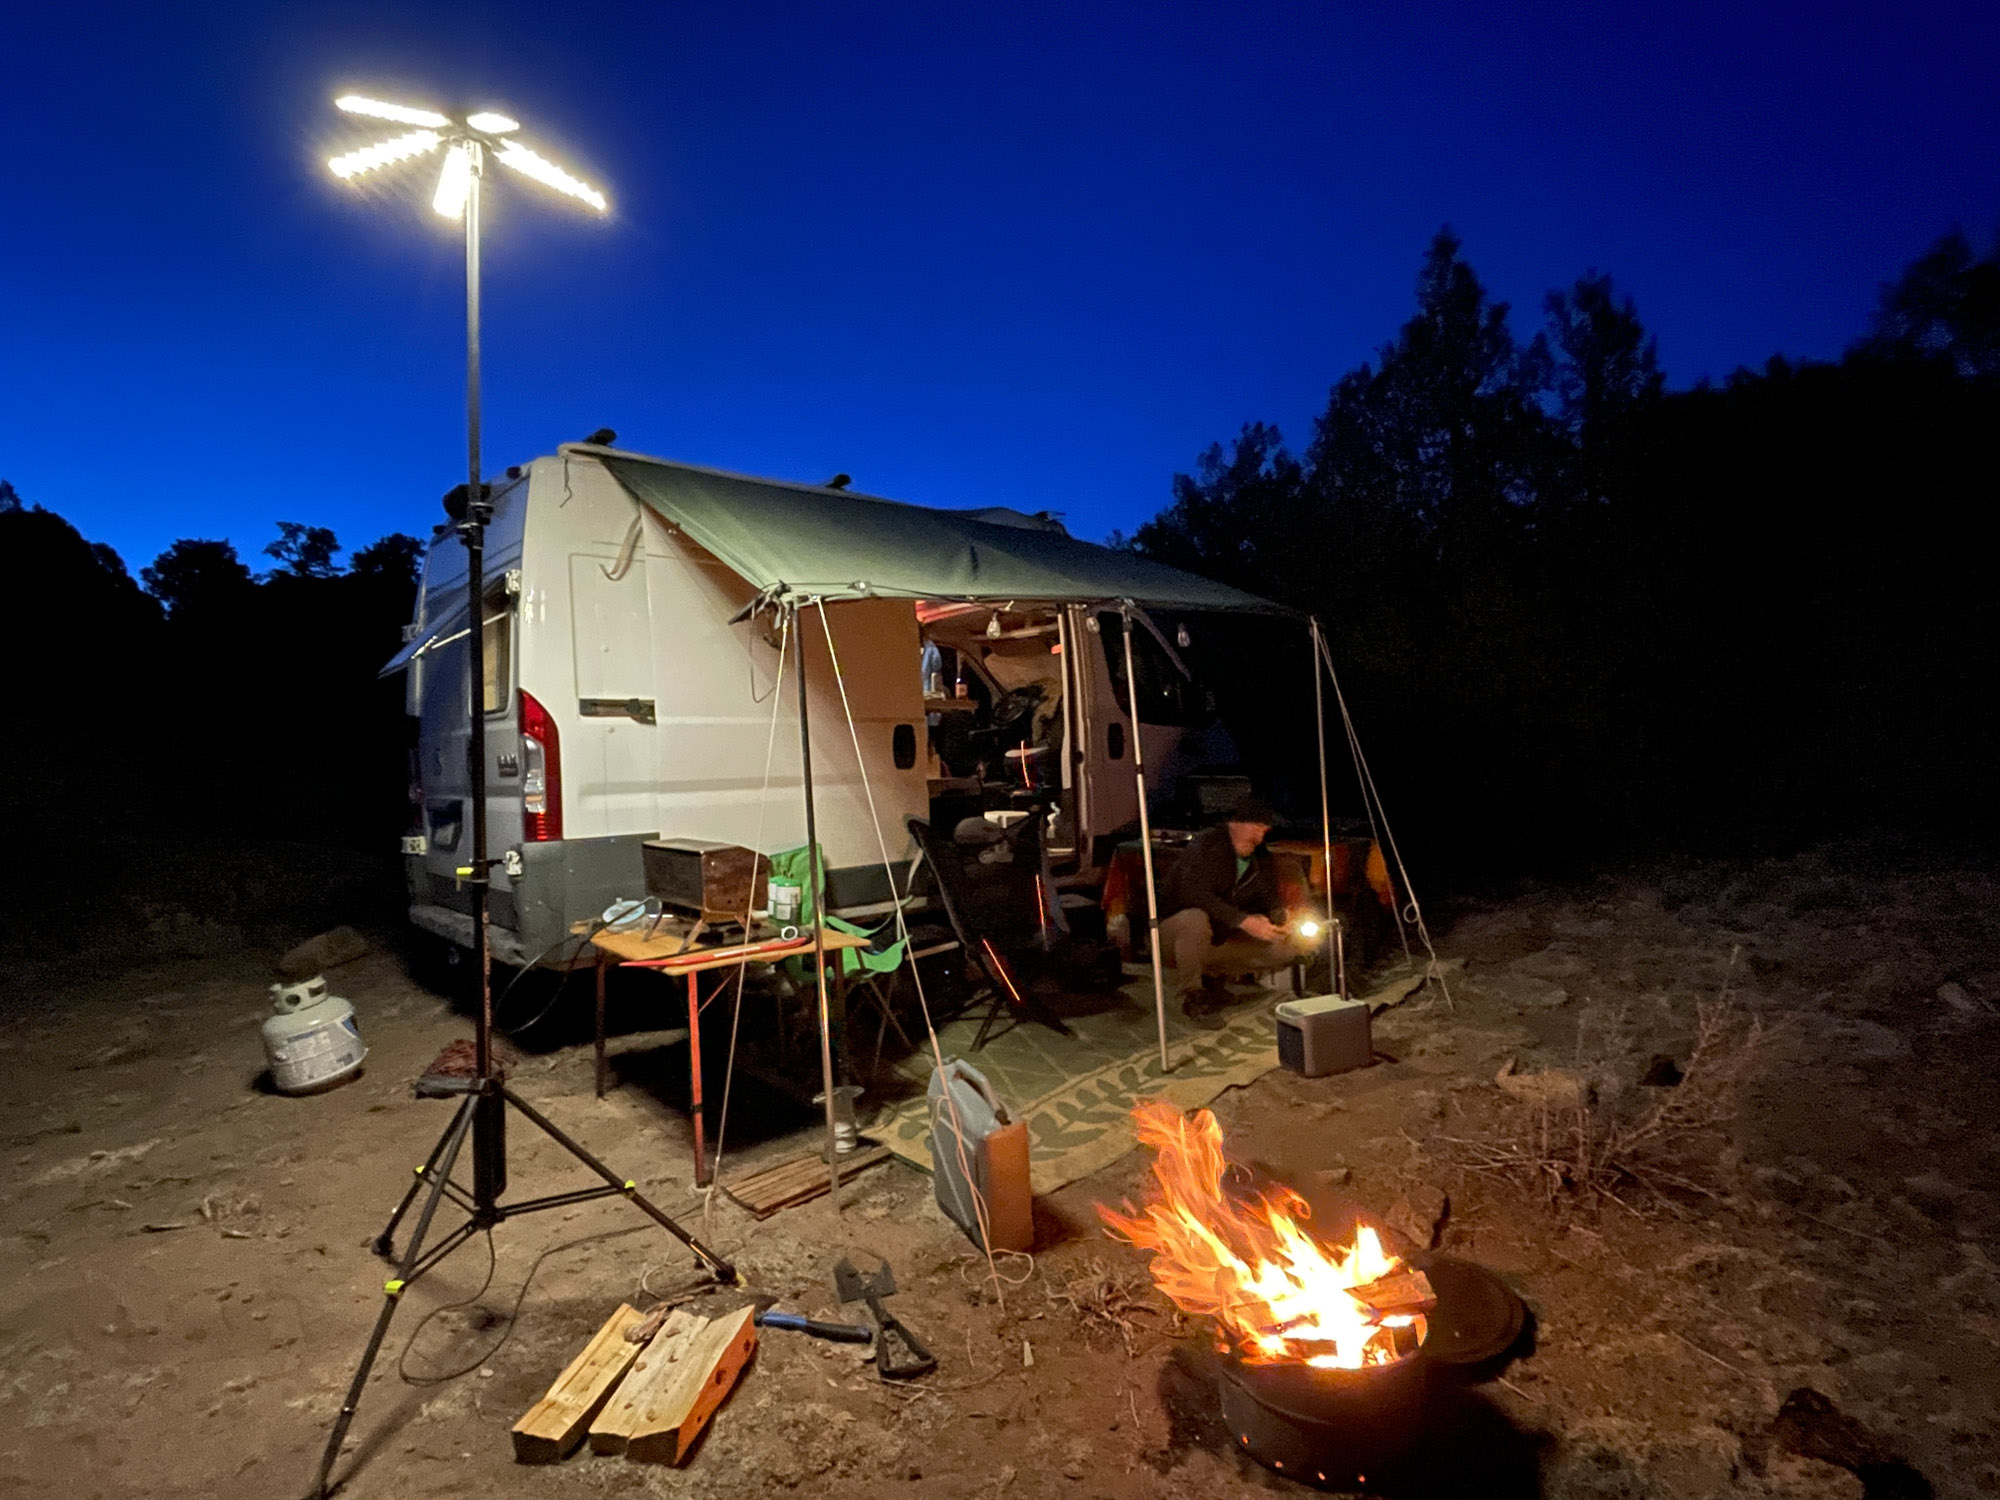
With up to 6,000 lumens (!) and casting light a full 150 feet in every direction, the Goal Zero Skylight Portable Area Light($300) is a portable sun for your next overlanding, basecamp, or outdoor group shindig. Utilizing our typical go-to for lighting up large campsites, we’d need whole spools of string lights to accomplish the same lighted area, but the Skylight does it with ease.
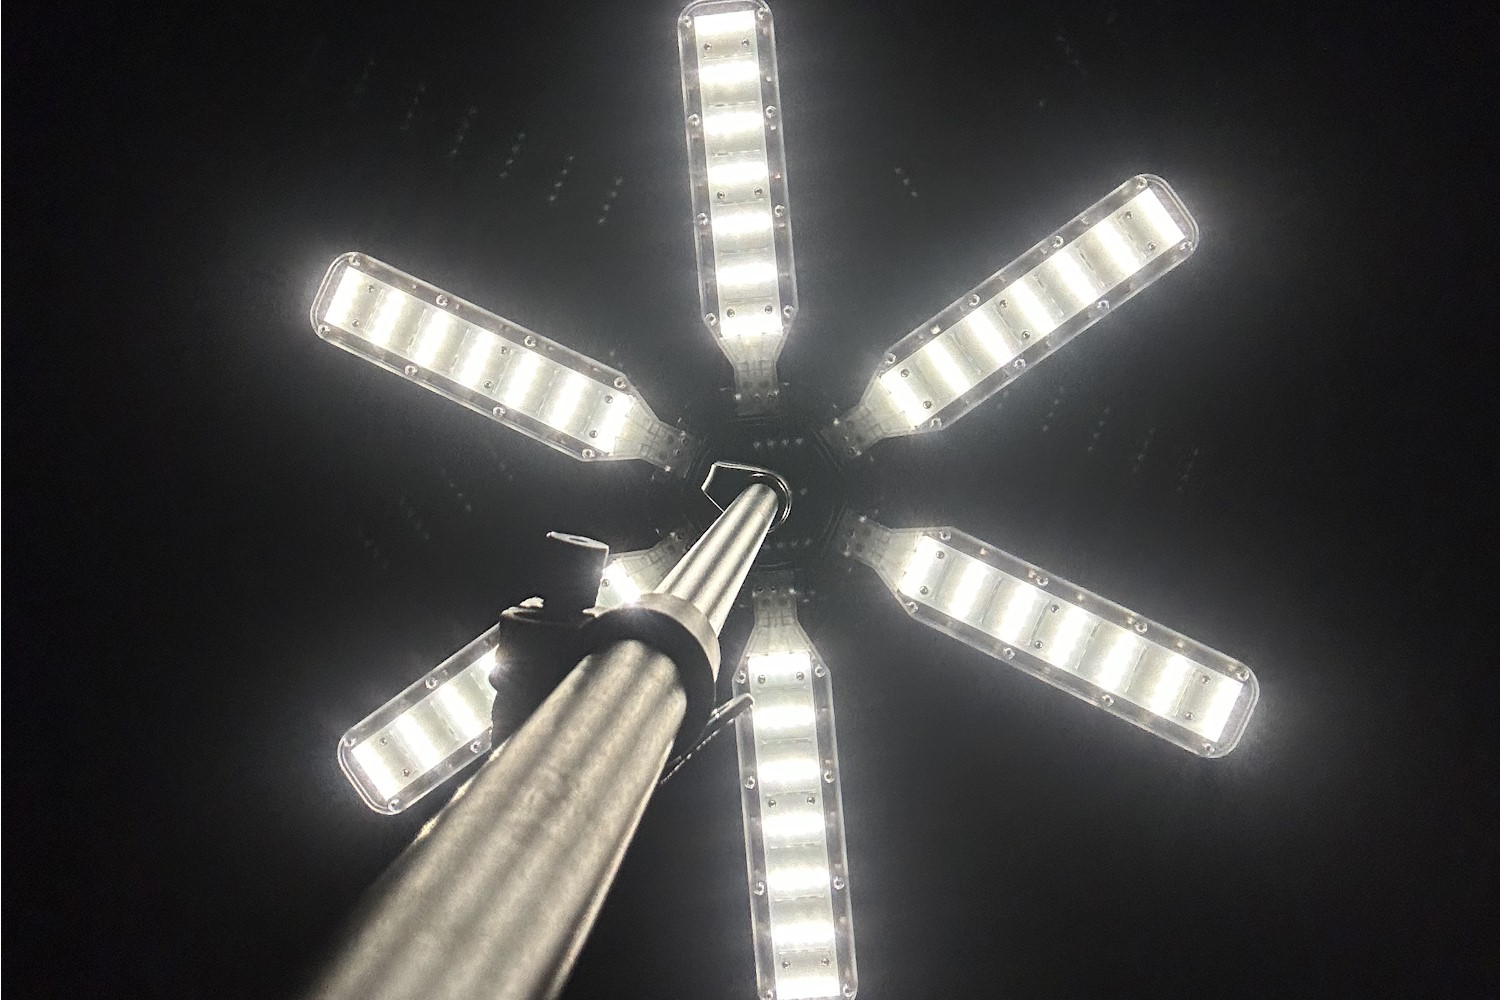
The design of the Skylight borrows from the world of worksite lights but puts a much more user-friendly bent on it with a warmer light profile (3250K) that casts a cozy glow across your entire campsite. The six LED-covered petals atop the light are all individually adjustable as well, meaning you can direct light where you need it (or away from neighboring camps).
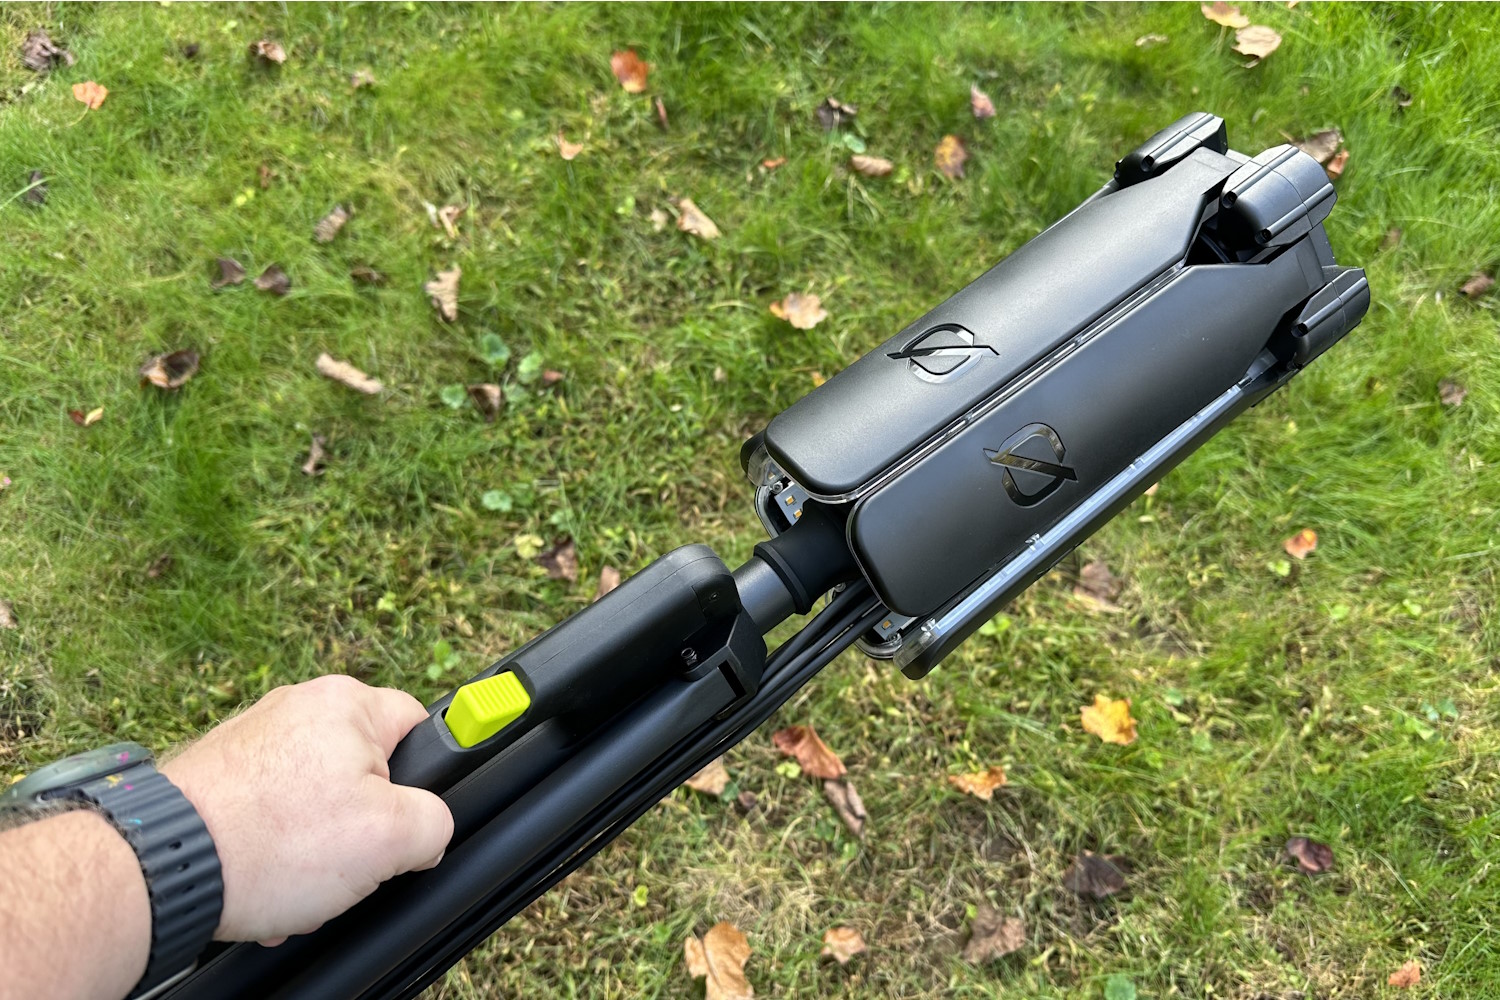
The whole apparatus is planted atop a 12-foot telescoping pole that anchors itself securely with a broad tripod base. Being able to raise the light this high not only increases the spread but also keeps buzzing insects that might be attracted to it out of your orbit. During testing, even the sandy soils of the Northeast that typically give camp chairs trouble weren’t an issue for the Skylight, which incorporates staking holes in each leg to secure it.
The Skylight does sport an internal battery (of 33 Wh, or ~8 hours on low), but was designed to ideally be run off of an external battery source, such as Goal Zero’s Yeti Power Stations, or from a 12V cigarette lighter plug. When powered by one of these large battery banks, run time increases tremendously, up to 375 hours on low with the Yeti 1500X.
Rounded out with four different lighting levels — including a ‘boost’ option — the Skylight has become standard issue on our overlanding excursions where we need light for a broad area in between vehicles. Complemented with a few close-quarters lanterns like the Black Diamond Moji or Goal Zero Crush, you’ve got a backcountry lighting system to rival many rock concerts.
Power source:
4,000 mAh Li-ion rechargeable battery, solar panel
Burn time:
40 hrs. on low; 8 hrs. on high
Water resistance:
IPX4 water resistant
Weight:
1 lb., 10.2 oz.
Length:
44'
USB port:
USB-C in; USB-C and USB-A out
Pros
Ability to light up a broad area, focus on specific zones
String lights store on the lantern, limiting tangles
Detachable power hub powers your electronics with USB-A and USB-C ports
Warm light tone is softer on the eyes
Cons
The solar panel is small, and the charging capacity is limited
Take care not to snag the lights, as the wiring can break
Austin Beck-Doss
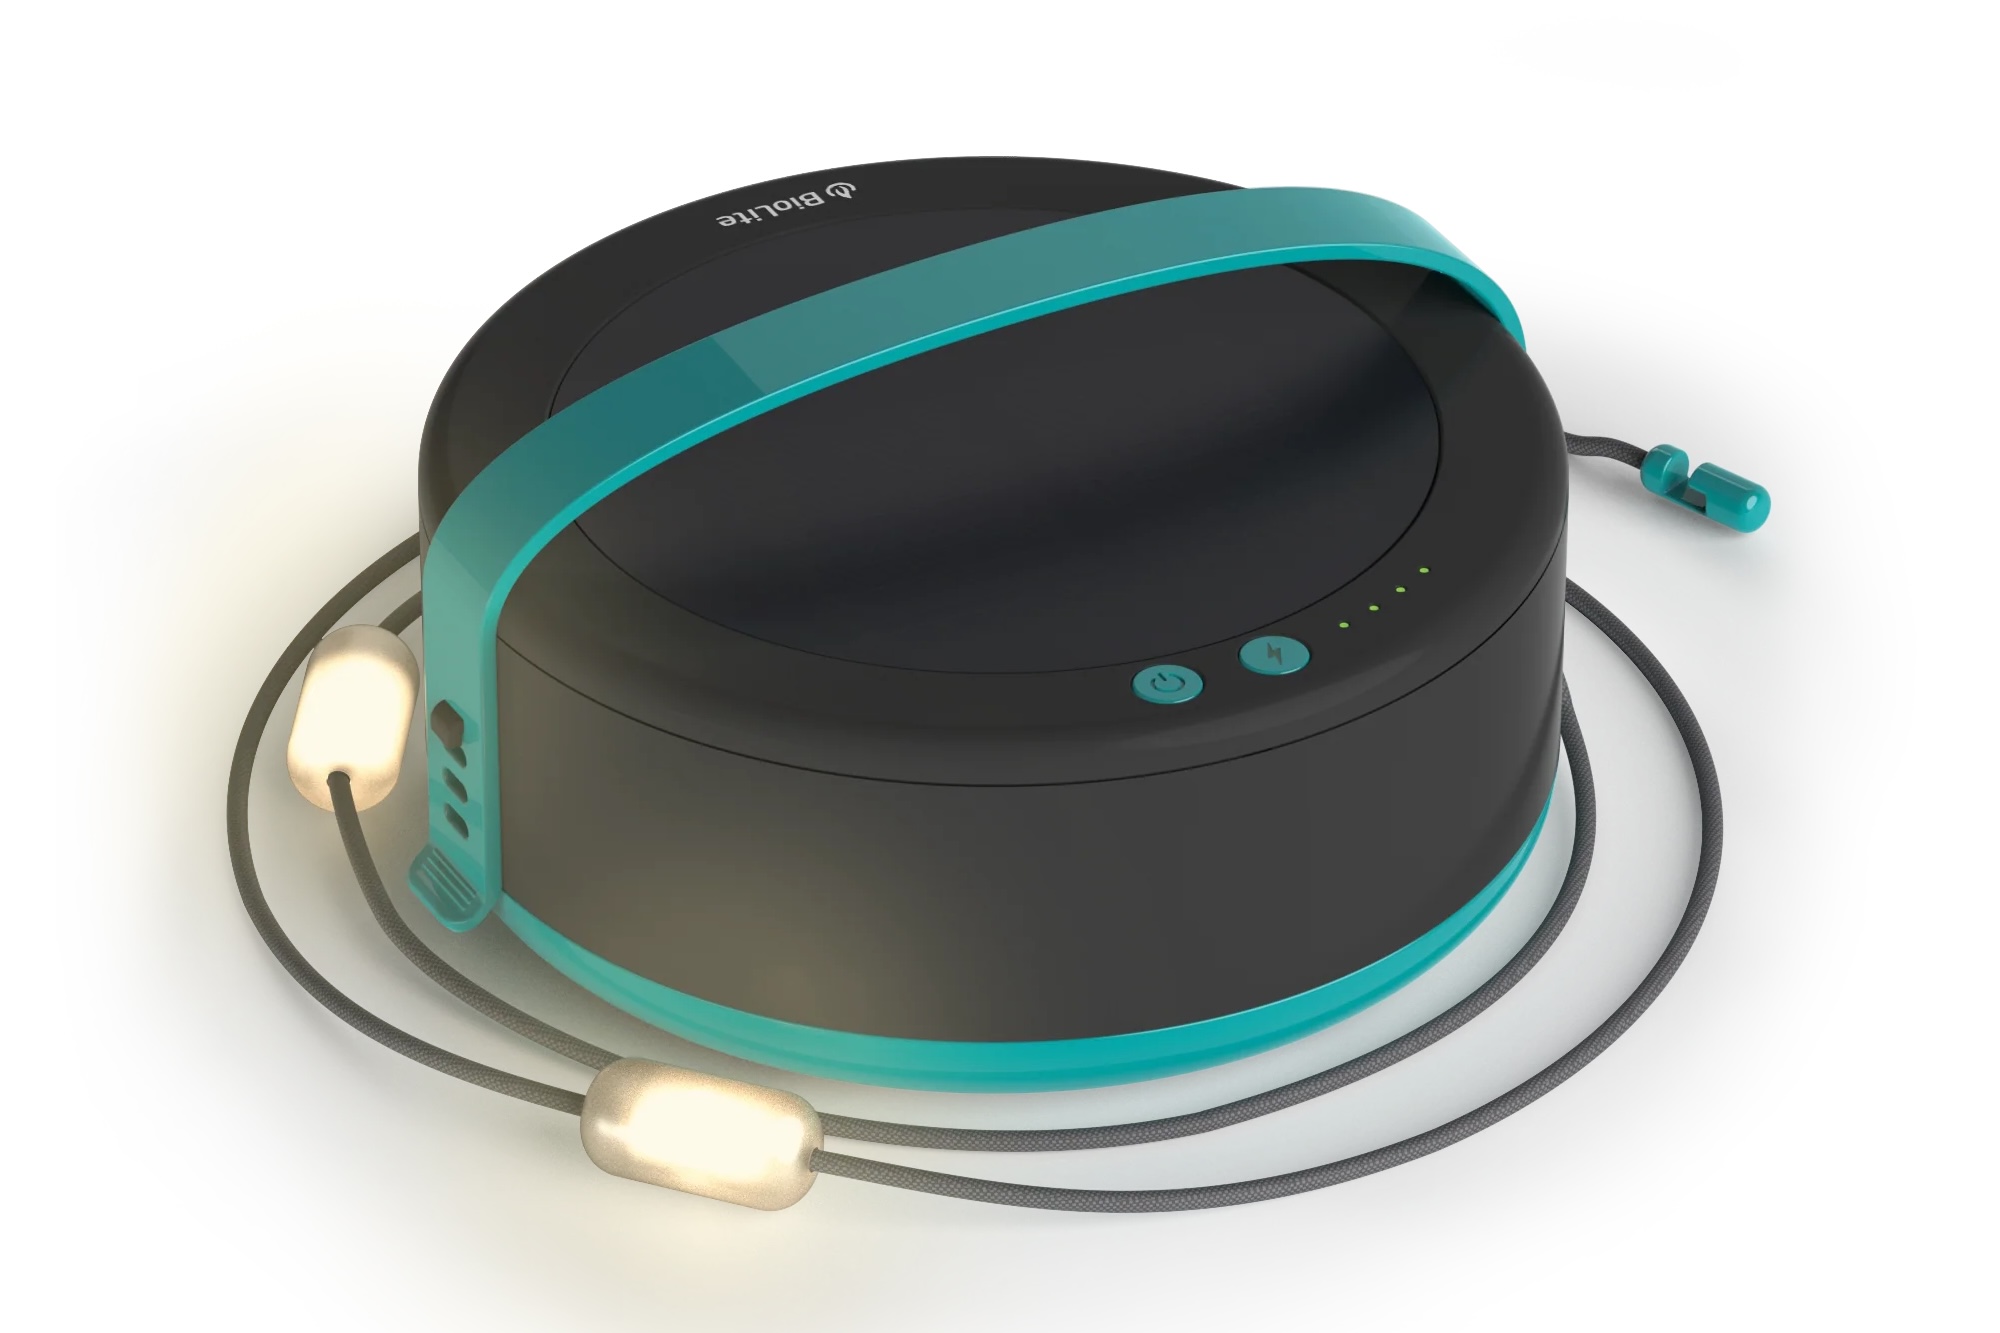
TheBioLite Luci Solar String Lights ($100) are everything we loved about the old MPOWERD version of these twinkling stars, just with a new name. Twenty individual light pods are spread across 44 feet of braided nylon cord, allowing you to light up a large area. It’s all the camp ambiance you need in a neat package.
In practice, we were able to light up entire campsites with these string lights, stretching from tents to picnic tables and back again. You’ll need to get creative to secure the lights on either end (we quite like the Nite Ize Gear Ties for this), but once you’re set up, the lights will run a full 8 hours on high. At a more mellow ‘medium’ setting, we were able to get close to the full 24 hours of run time that the brand claims.
We particularly like the way these lights store in themselves. Simply wrap the string lights into the solar base and twist closed. Pro tip from our testing: Be sure to avoid too many overlapping bulbs or it will become too bulky to close.
Because of its small form factor, the integrated solar panel does struggle a bit to charge the lantern from flat dead (something we also noticed with other solar-powered lanterns). It charges fully in about 3-5 hours via USB-C or 16 hours via solar, so we recommend charging it up prior to camping and then using solar to keep it topped off throughout.
We’ve used these string lights nearly every day for many months, and they’re still going strong. The color is a pleasing, natural warm light, and we’ve been impressed with how bright it gets on the highest setting. The Luci Solar String Lights are a favorite option for adding a bit of camp ambiance or brightening up the backyard.
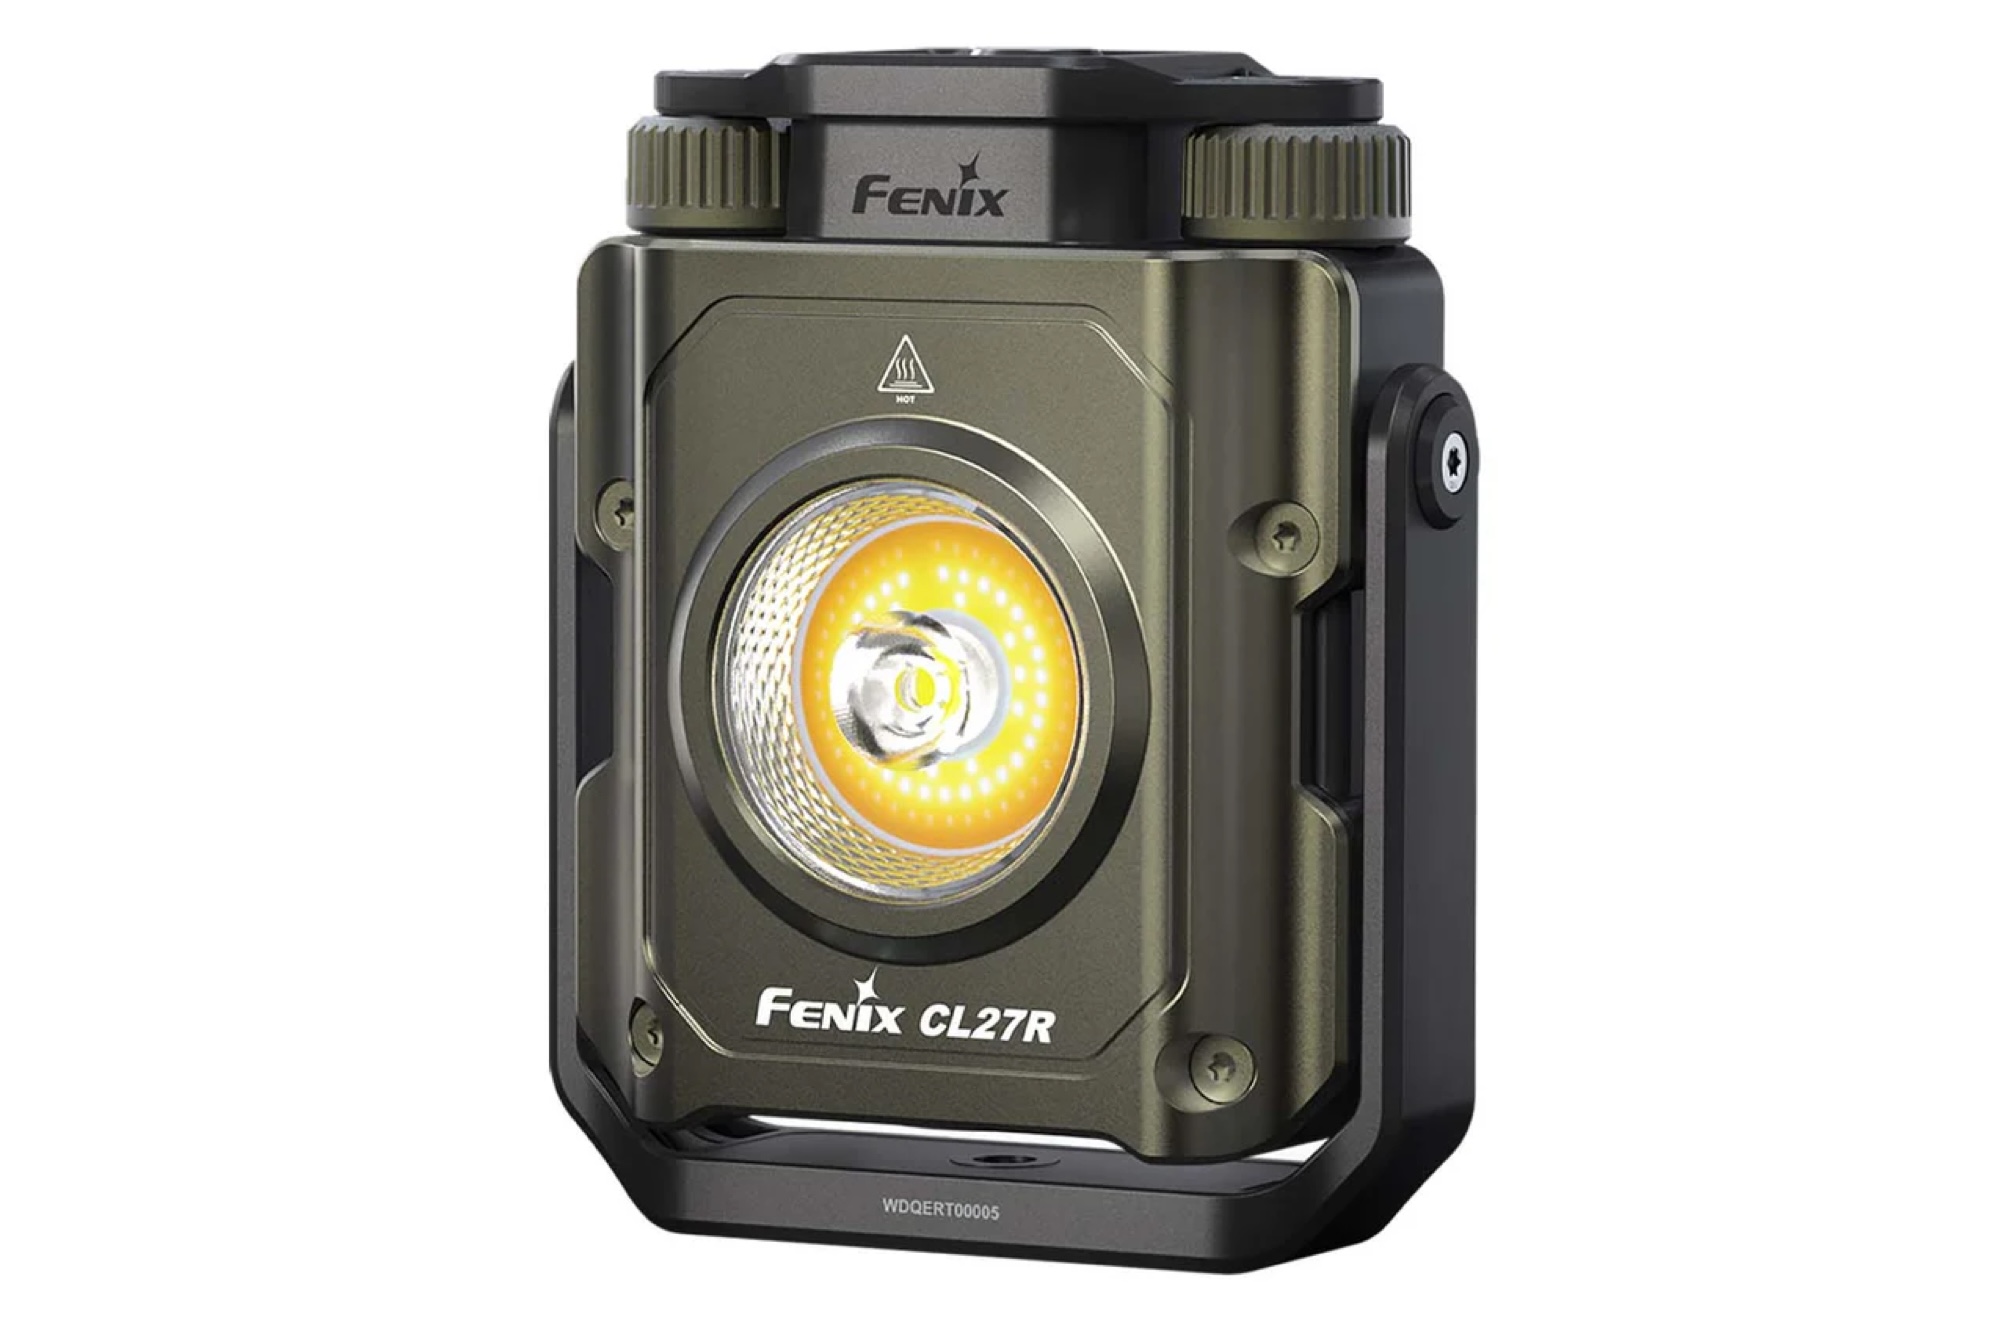
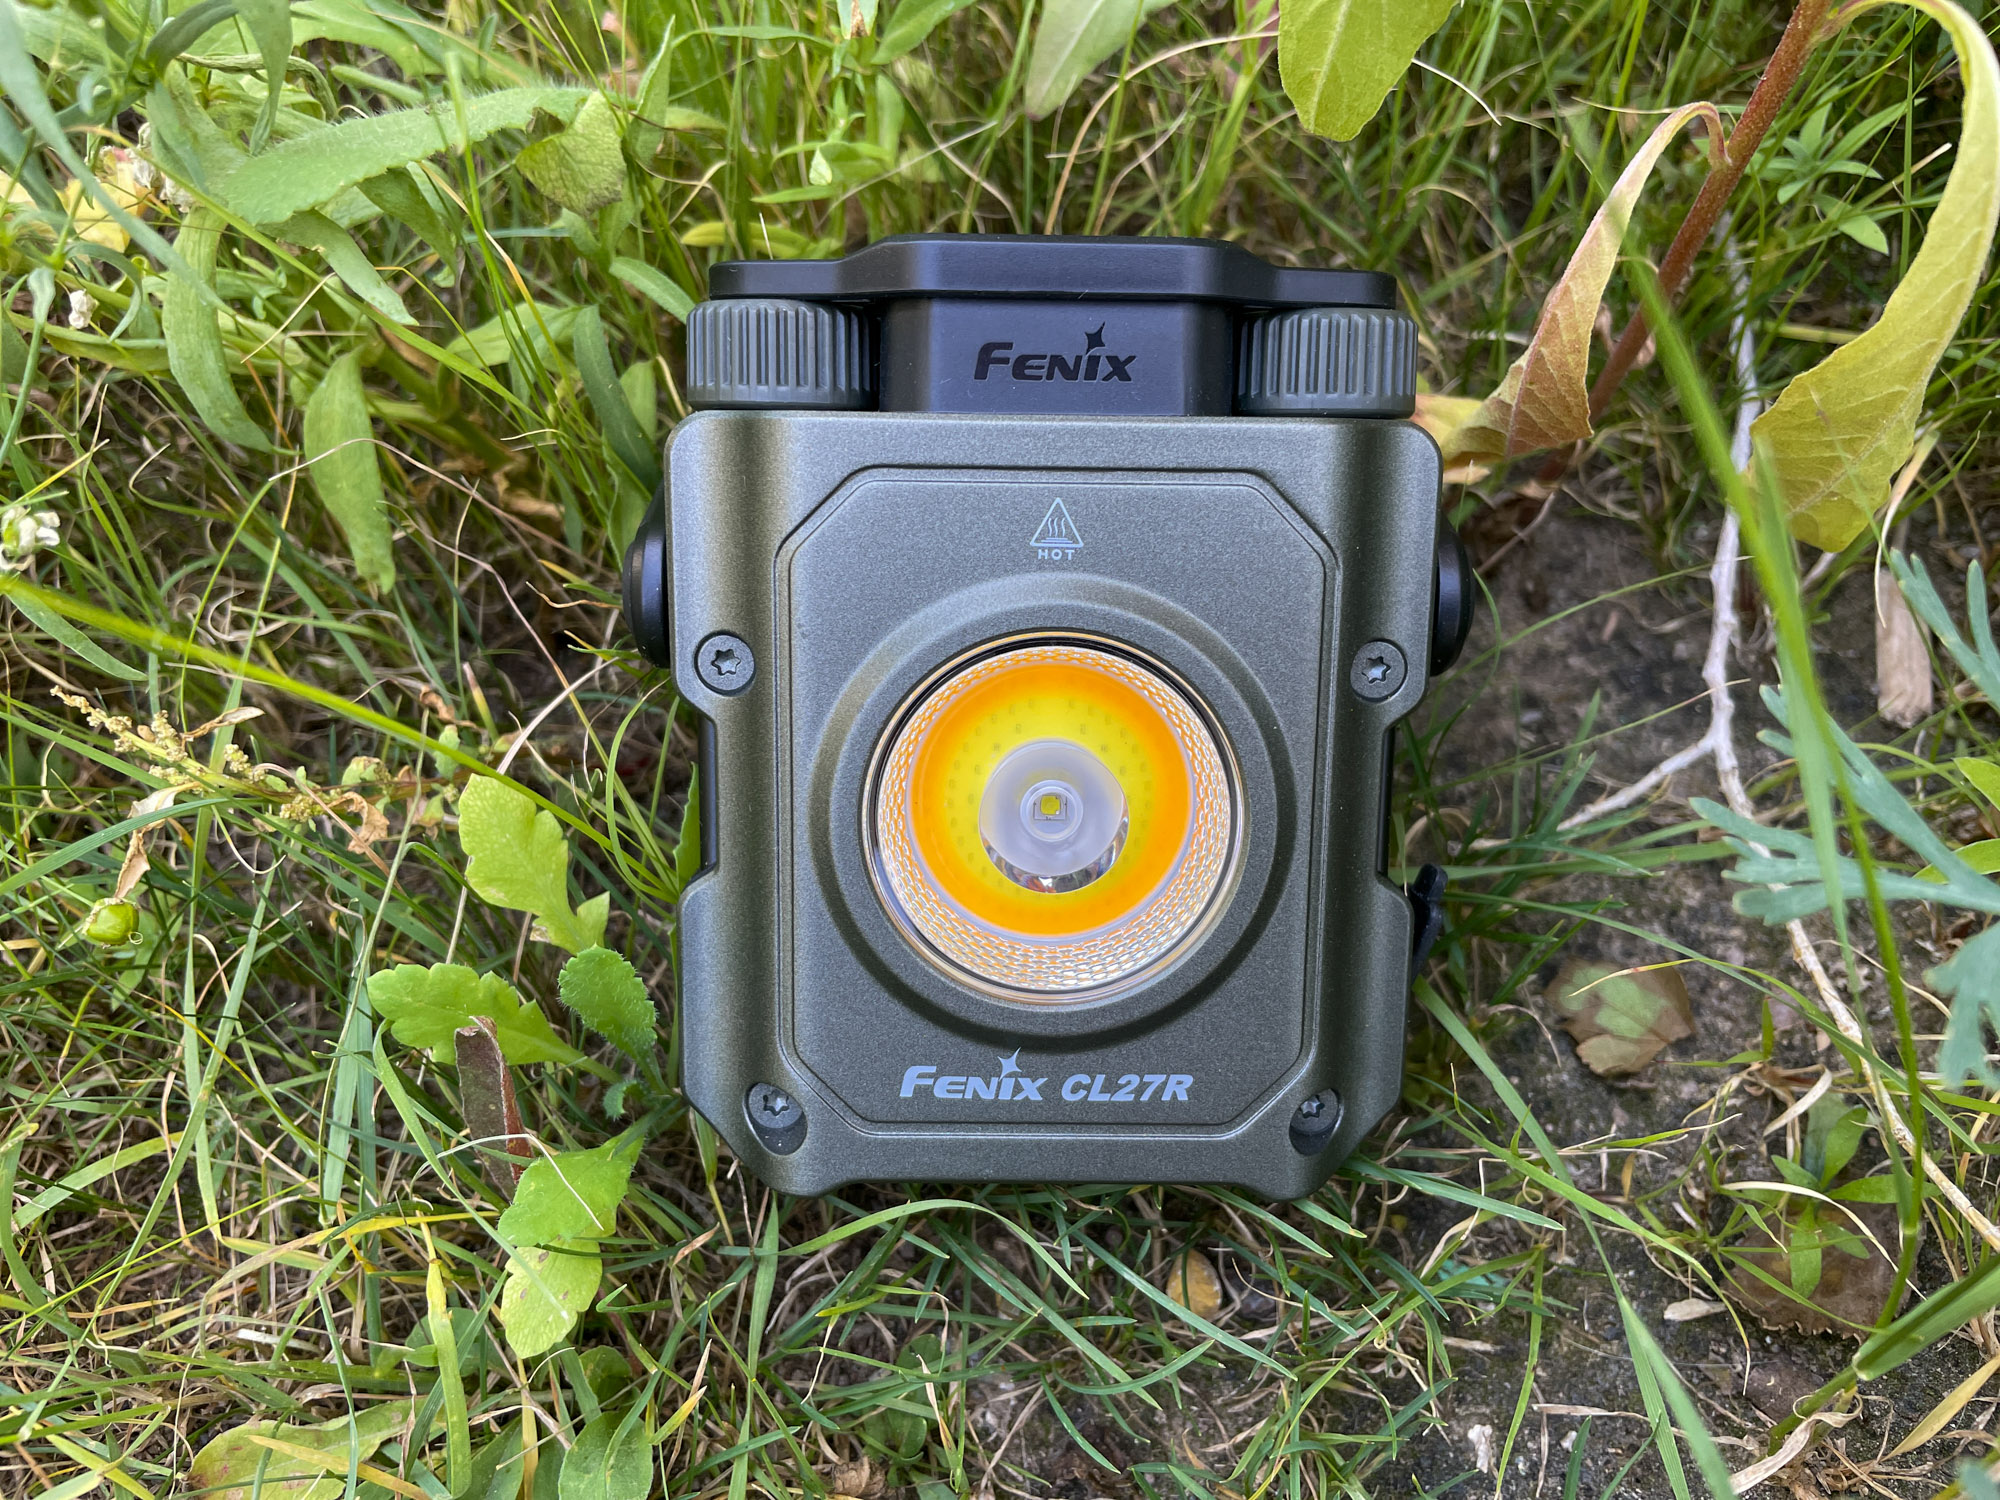
Right out of the box, it’s easy to covet the Fenix CL27R ($85) because of its exceptionally sturdy feel. It has a rugged metal case and build that puts it head and shoulders above the other lanterns. On top of that, it’s also more compact than the previous CL30R lantern we’ve reviewed. If you want a camping lantern for the end of the world, this is it.
But the CL27R is more than just a tough face, and you can dial in the light not only in brightness but also in color temperature — a feature we haven’t seen in many other lanterns. These settings are step-less, meaning they progress as you turn a dial rather than change at incremental settings.
For temperature color, those ranges span from a charming 2,700K to a stark-white 6,500K. For brightness, it tops out at an alarmingly intense 1,600 lumens, which can cover a nearly 600-foot radius. It can also dim down to the more friendly glow of a soft candle. In spotlight mode, it has a narrow 14.5-degree beam, and in floodlight mode, a 105-degree beam. Spotlight and floodlight modes can be used together or independently.
Other stellar features of note are USB-C recharging, an IP66 waterproofing rating, and drop resistance to 1.5 meters. On the short end, it lasts nearly four hours (a claim we verified with testing). On the long end, it can eke out 285 hours on its lowest setting. It also has a red-light mode and recharges in about 2.5 hours. On our weight test, it came in at 10.5 ounces, which is actually slightly lighter than the company claims.
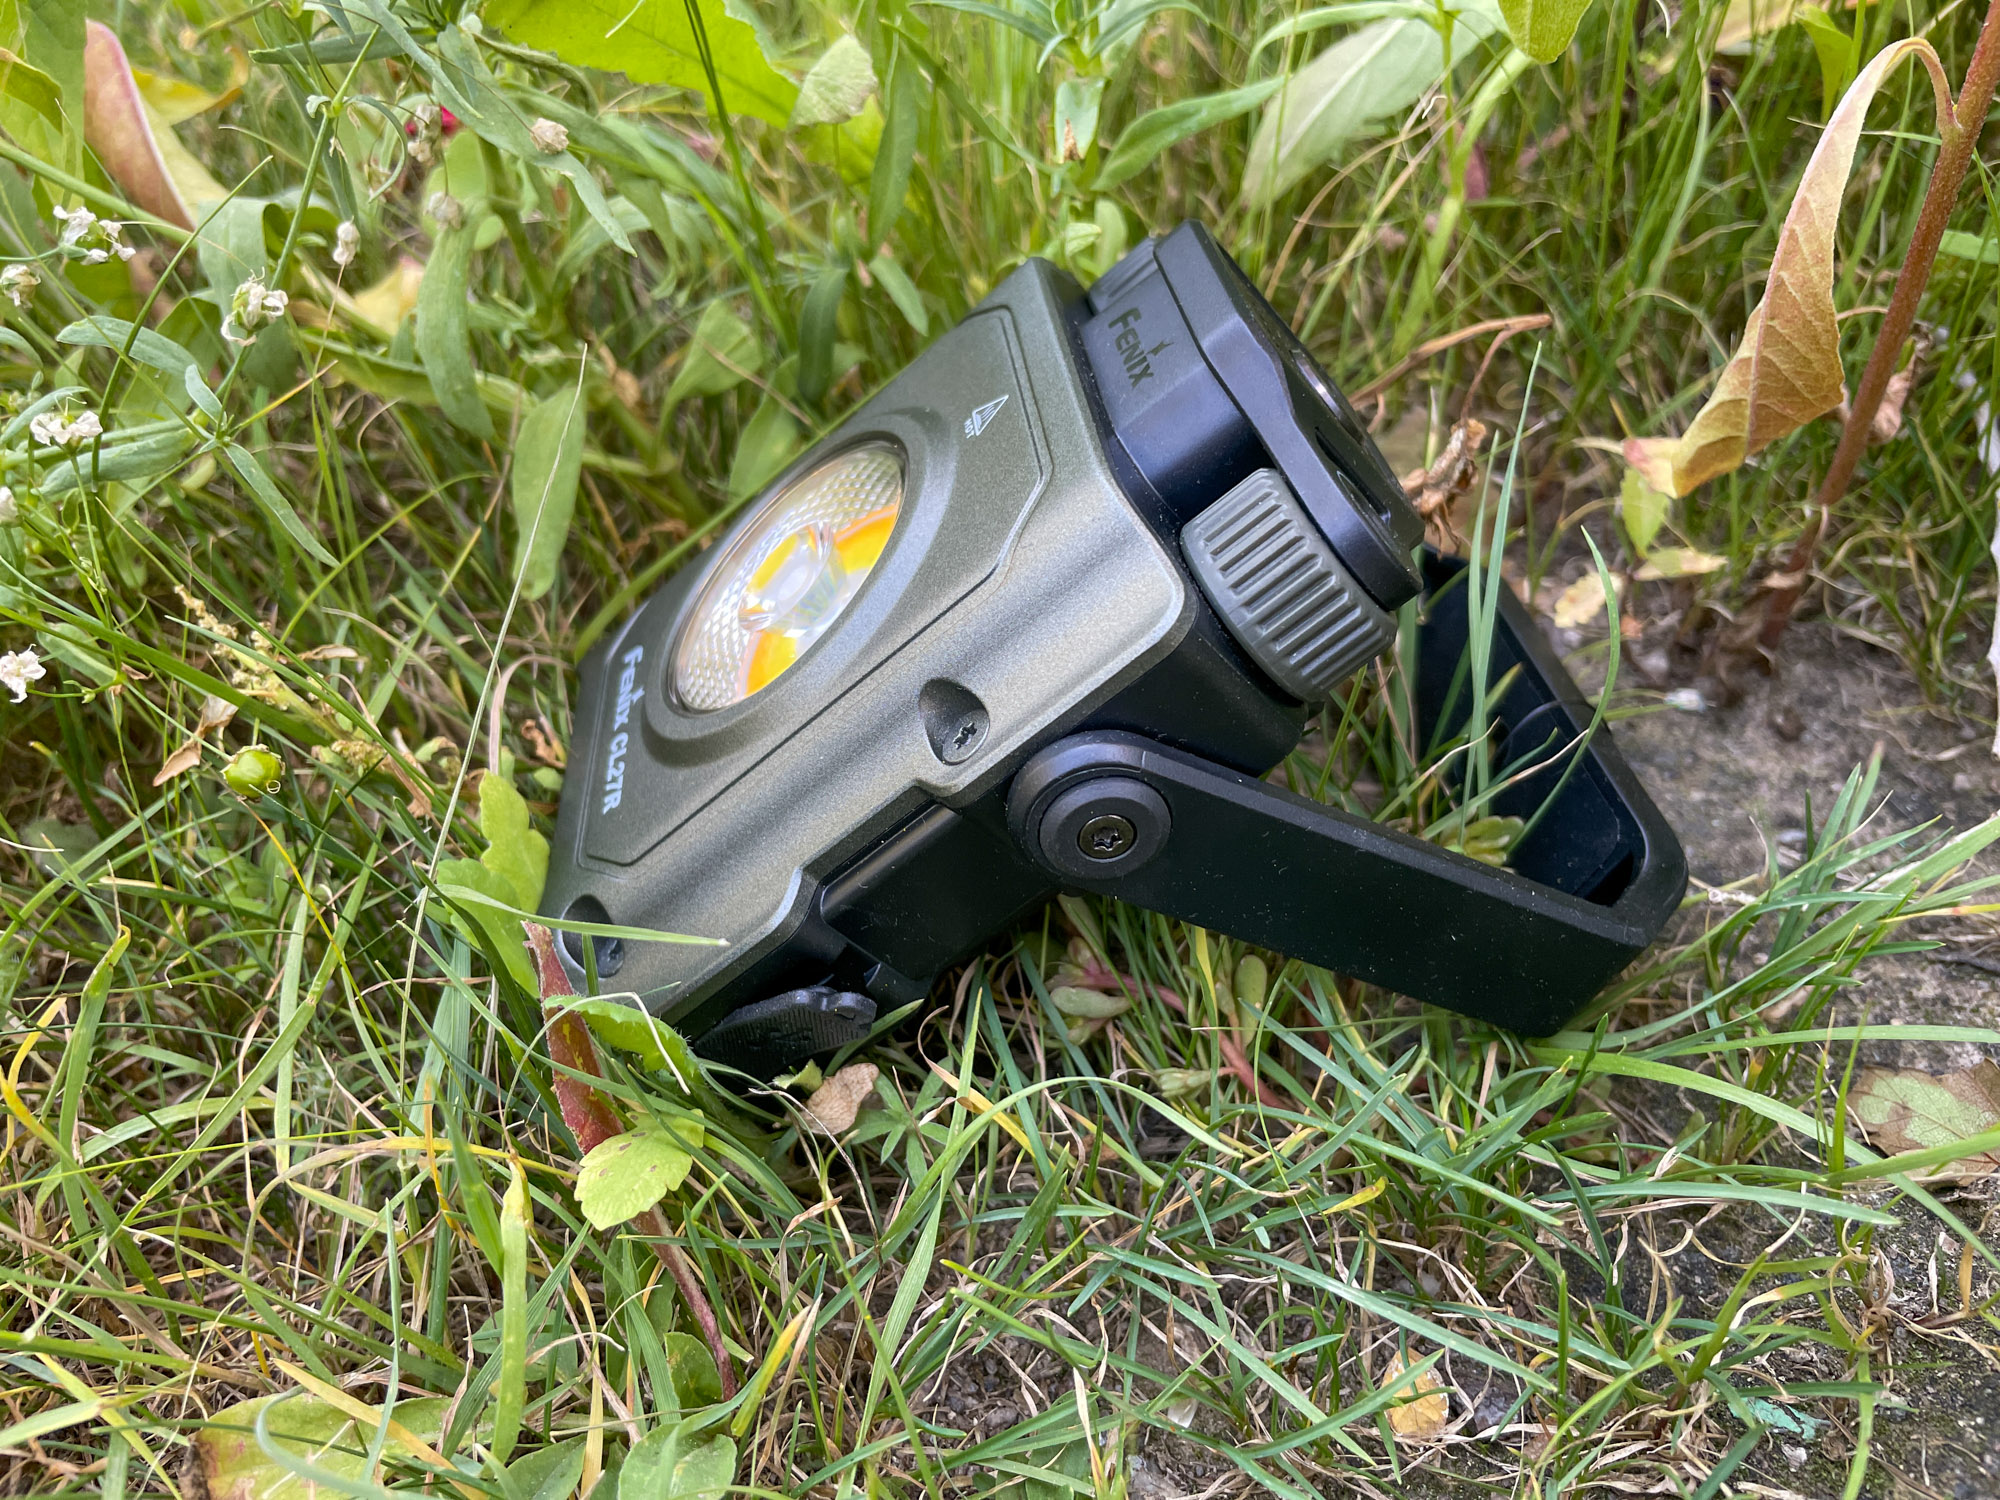
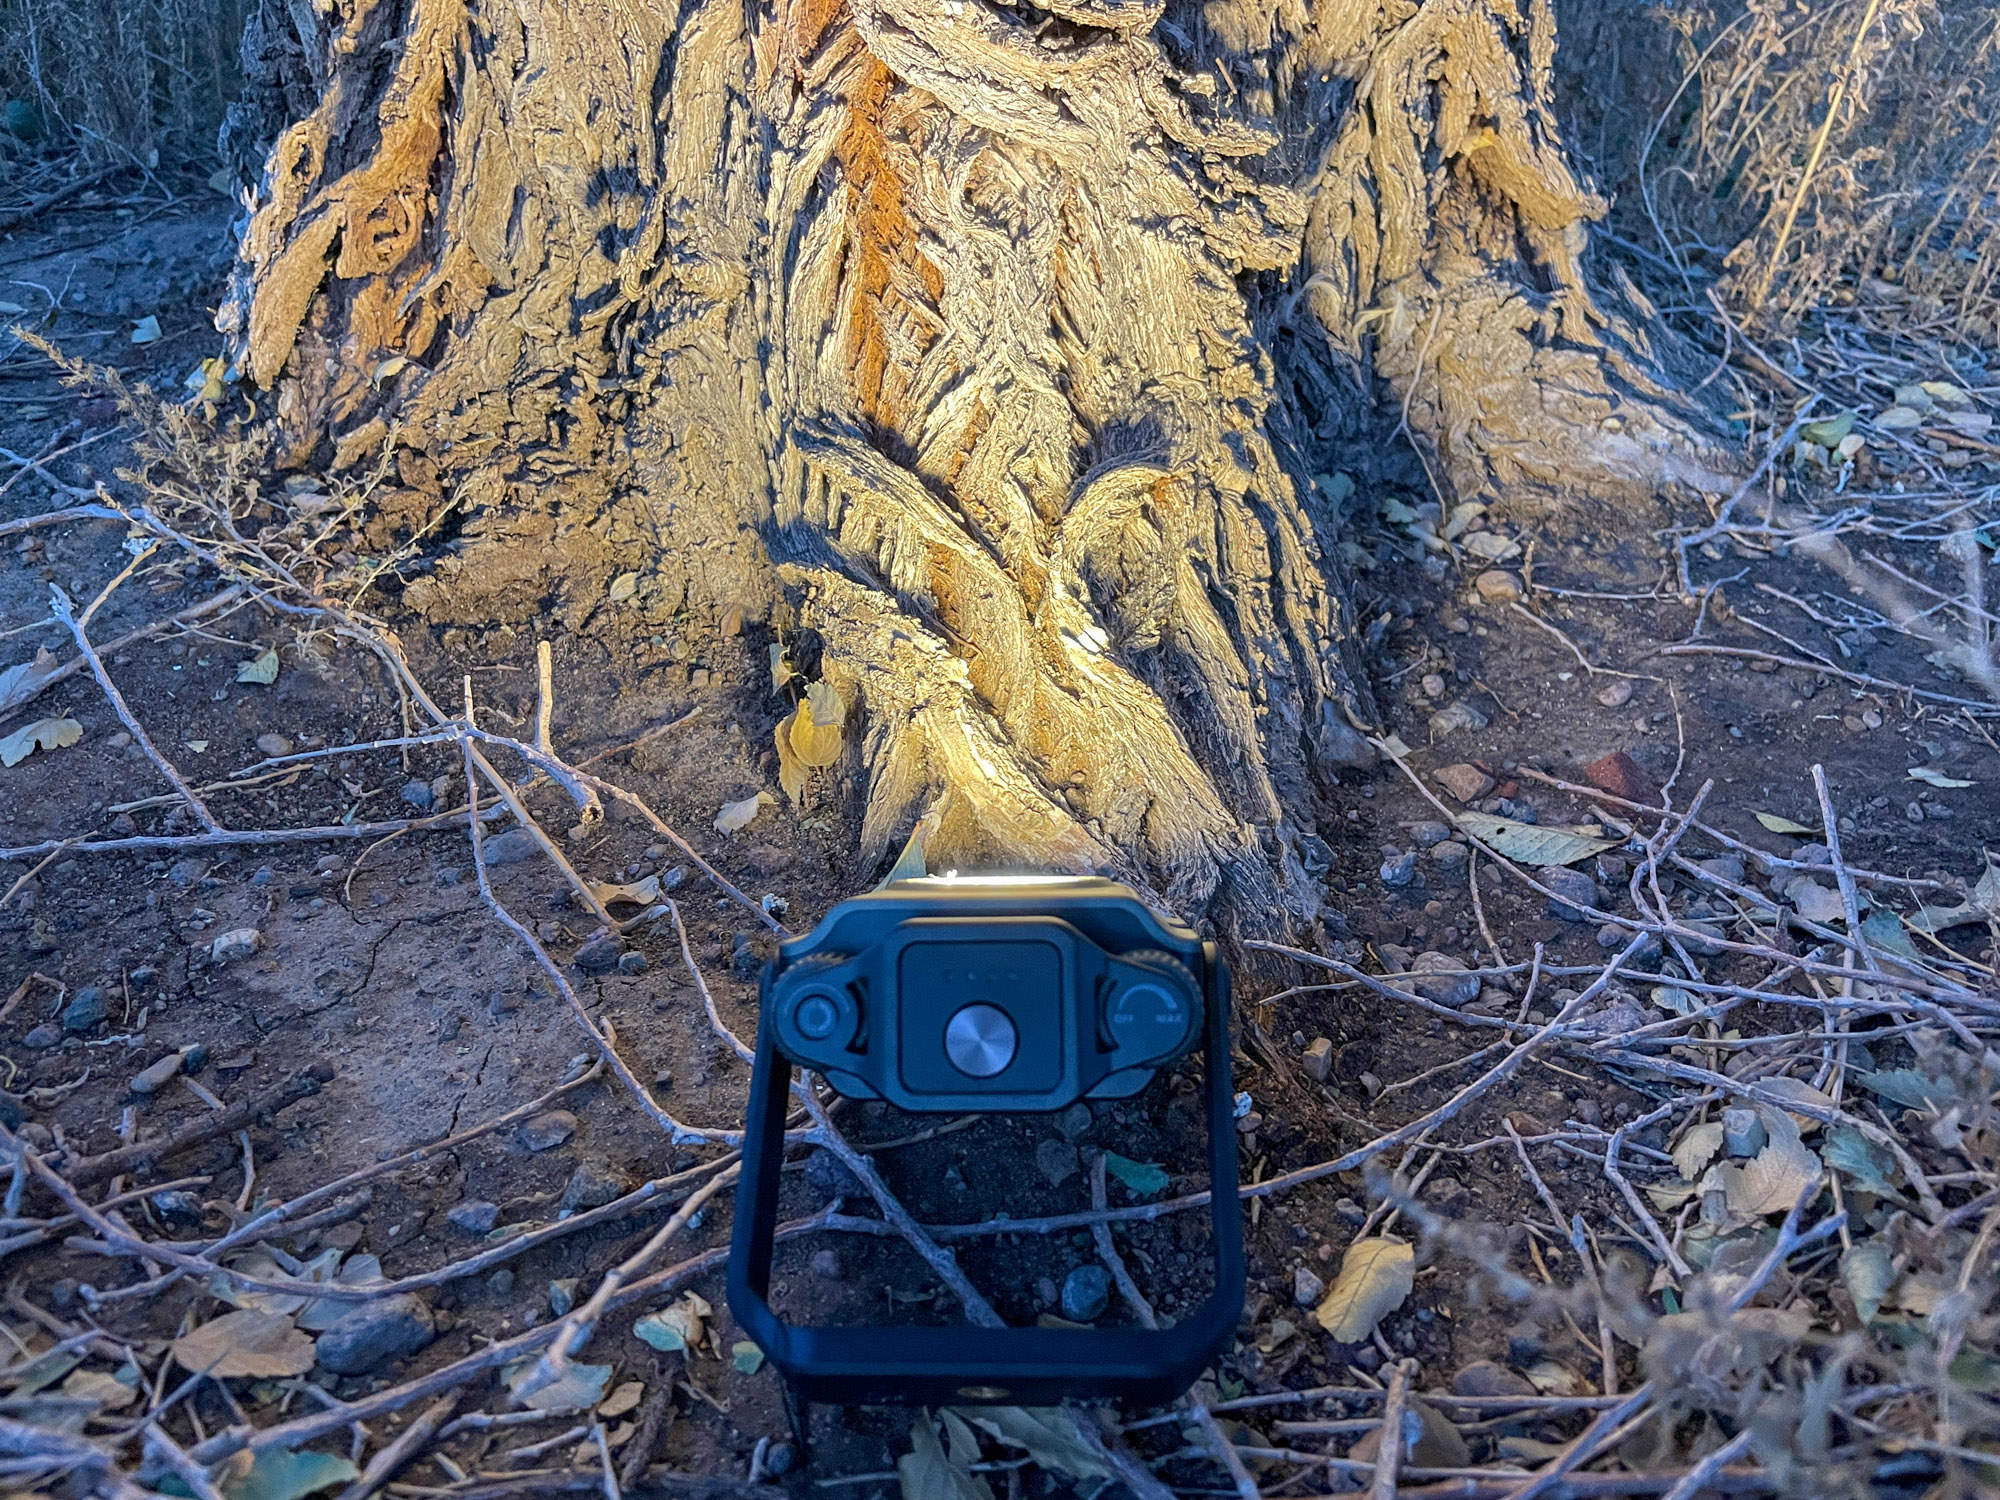
The Fenix CL27R also comes with a number of helpful and unique carrying and hanging options. Its handle rotates 360 degrees, which can prop up the beam at different angles, plus makes it easy to carry and hang. The handle is also magnetic and includes a tripod mount, which is particularly helpful for low-light filming and photography. Alternatively, you could couple it with a monopod to reenact your favorite Lord of the Ring scene — all fair game.
Jokes aside, camping with the CL27R really does give one a feeling of reassurance: it’s highly versatile and comforting, like that friend who’s always reliable no matter what hits the fan. And in a pinch, it has enough power to blind an intruder, and easily enough heft to knock out a rabid chupacabra.
Other Lanterns to Light Your Way
The lineup of lanterns above is enough to keep any campsite well-illuminated long into the evening, but they aren’t the only lights we’re fans of. Consider our alternative options below as stellar runner-ups.
Power source:
5,200 mAh Li-Ion rechargeable battery
Burn Time:
240 hrs on low; 4 hrs on high
Water Resistance:
IPX4
Weight:
1 lb., 1.9 oz.
UAB Port:
USB-C in; USB-C and USB-A out
Pros
Nice and bright at 650 lumens
Multiple charge in and out options, with modern USB-C
Can be hung or used on tabletop
Full spectrum color modes
Cons
5,200 mAh battery isn't as large as top-tier lanterns
Bit heavy to hang from inside tents
Austin Beck-Doss
So bright you can see it from space — well, not quite, but at 650 lumens, the Black Diamond Orbiter 650 Lantern($70) can still more than light up your next campout. With a hefty amount of smart functionality onboard, this lantern absolutely impressed in our testing. Compared to top lanterns like the BioLite AlpenGlow 500, its honestly neck-and-neck, and your choice will come down to a few slight differences.
Looking like it’s liable to blast off your camp table, the Orbiter lantern combines a number of different hanging and folding modes with six different lighting settings, each of which is dimmable or color-changing. The folding leg design is reminiscent of the Goal Zero Lighthouse lantern, but better executed, in our opinion, as it sports three legs to the two on the Lighthouse.
This design allows the lantern to be both propped up above cluttered picnic tables, as well as hung from above with the double-hook metal loops to attach to tent webbing loops or cordage around camp. An additional LED at the base of the lantern provides the illumination for this mode, and we found in our testing that it’s a targeted light that’s perfect for positioning over camp stoves or board games.
Moving through the lighting modes, the lantern offers up a bright white, along with the additional downward spotlight, the spotlight on its own, a flickering campfire mode, solid colors, and a color cycling mode. It’s the most feature-packed lantern we’ve encountered to date with this many modes, and they all can be dimmed to as low as 25 lumens and cranked to as high as 650.
Rounding out the Orbiter 650 is a forward-thinking USB-C charge-in port (recharge occurs in about 3.5 hours), as well as not one, but two options to recharge other devices: a USB-A port and a USB-C port. The 5200 mAh internal battery bank can be leveraged to recharge your electronics, and while it’s not quite as large as the 6,400mAh cell the BioLite AlpenGlow 500 sports, the additional charging options go well beyond that lantern.
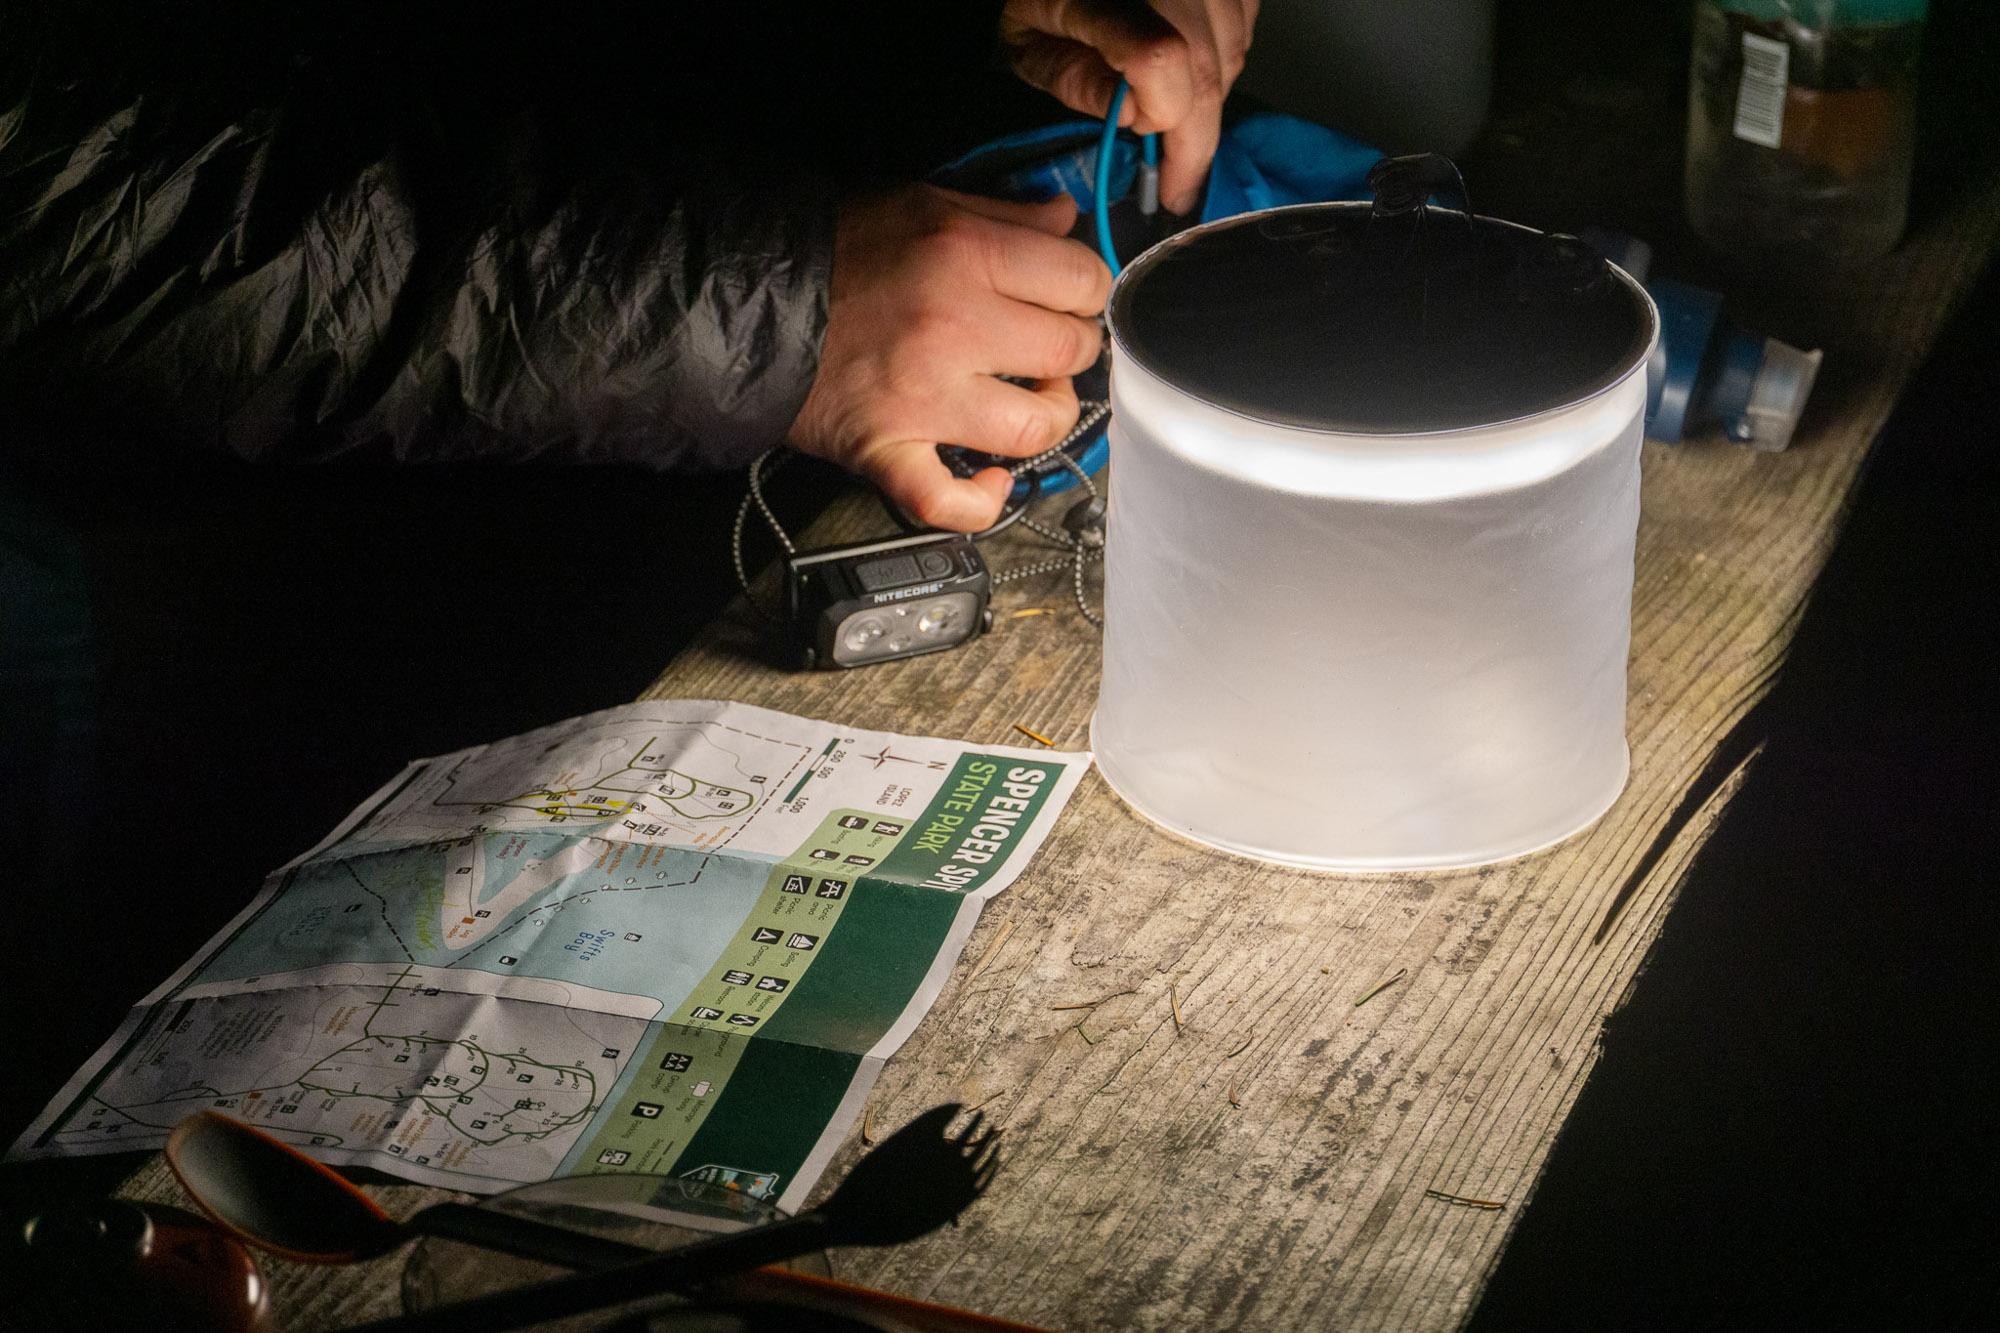
The BioLite Luci Lantern Original Clear ($30) is the inflatable lantern that everyone should own. While not quite as feature-packed as the Charge 360 model, this classic is affordable, bright enough, and has earned its keep around camp.
This little inflatable light source puts out up to 75 lumens. It keeps things simple with only four light modes: low, medium, high, and flashing. The cool white light is ideal for detail-oriented tasks like food prep, but if you need something a little softer, the lantern is also available in a matte finish that’s easier on the eyes.
The Luci Lantern’s solar charging has always been a big deal, mostly because it just works. Other cheaper lanterns might implement solar cells, but they are subpar and fail to recharge at a decent rate. The Luci Lantern will top off completely in 7 hours, meaning a full day of sun will keep you charged indefinitely.
The Luci Lantern has changed much since it hit the market 10 years ago, but thankfully, its kept up with modern technology and integrated a USB-C charging port. This gives you a failsafe backup to recharge your lantern if the sun isn’t shining.
Luci Lanterns aren’t bombproof, and our years of use have shown that they will eventually develop a hole or the hanging strap will rip off. Even still, we get a few solid years of use before this happens, and for the money, these are solid camping lanterns.
Burns isobutane, which you may already have on hand from making dinner
Pleasant and warm light output
Piezo ignition makes lighting easy
Cons
Will need to be used with care, as the glass globe can break
You may need an additional canister if you want to cook food and power the lantern
Austin Beck-Doss
The Snow Peak GigaPower ($87) is a little lantern that runs on isobutane (just like your favoritebackpacking stove) and doesn’t take up much room. It weighs in at just 4.6 ounces and measures about 3.75 inches around and is the perfect addition to your camp table come dinner time.
We found the light output particularly pleasant during our testing, yet plenty bright to complete all our camp chores. It has a max output of ~400 lumens and will run for about 5 hours in warm conditions. Similar to stoves, the run time decreases in colder weather. The benefit of running on stove fuel, however, is that you can use your depleted canisters that are too low to bring along for cooking. Genius!
The body of this lantern is machined aluminum, coupled with brass fittings that ensure a smooth attachment to a gas canister. The glass globe is held in place by a stainless steel cage and houses the lantern mantle that will be needed to illuminate this lantern. This takes a little finesse the first time, but once it’s in place the lifespan should be many nights before it needs replacement.
An added bonus? Since it’s burning fuel, this little lantern will give off a bit of hand-warming heat, perfect for when the chill sets in. Just remember to let it cool down before stowing — something we were (painfully) reminded of during our initial use.
Compared to the gas lanterns of olden times (we’re looking at you, Coleman Deluxe), our allegiances have shifted to compact backpacking fuel lanterns like this one. They are simply easier to use, don’t require bulky green propane canisters, and put out enough light to count.
It began raining while we were using this lantern, but it never went out or had any issues. Being made of glass, it is susceptible to breaking if dropped. But the included hard carrying case will keep it safe when packed. For a portable warm glow, the GigaPower Lantern is our top choice.
Power Source:
3x D batteries, or 8,800 mAh Li-ion ZITHION-X battery pack
Burn Time:
225 hrs. on low; 7.5 hrs. on high
Water Resistance:
IP54 waterproof
Weight:
2 lbs., 8.5 oz.
USB Port:
N/A
Pros
Emergency-ready light source
Blindingly bright high-mode
Tough exterior build
Multiple power source options
Cons
ZITHION battery pack required to hit full output numbers
A little on the heavier side
Austin Beck-Doss
Talk about beam for your buck — the Coast EAL22 Lantern ($40) cranks up the lumens to a blistering 1,250 on high and does it while sliding in as one of the cheaper lanterns in our lineup. The lantern is styled as more of an emergency light source, but there’s nothing holding it back from illuminating your next camping trip.
The lantern lives up to the tough reputation that Coast has garnered for itself and is made from a bash-resistant nylon shell and polycarbonate diffuser that even after accidentally knocking off a camp table, we couldn’t ding.
The run time of 225 hours is on the endurance side of the spectrum, with only the Goal Zero Lighthouse 600 and Fenix CL30R besting it in total burn time. The five lighting modes begin with a soft white light that is perfect for gathering around for a card game, then pivots to a set of brighter white modes for really illuminating a campsite or outdoor kitchen. The final two modes are red and include a flashing option should you need to hail anyone or warn oncoming traffic.
Mounting options are also packed in, with two carabiner-style hanging hooks on top and bottom of the lantern, as well as a bail handle for walking around with. This flexibility even extends to the powering options on the EAL22, as it is a dual-power lantern that can run off D-cell batteries or a separate battery pack.
The ZITHION-X rechargeable battery pack is nigh-essential in our opinion, which does take a bit of the budget along with it as it costs as much as the lantern itself. You certainly can make do with D-cell batteries, but the ability to recharge other electronics with the lantern is a handy feature we wouldn’t want to leave home without.
This added cost keeps this lantern from finding itself higher on our lineup, as the light itself is a bit bulky and for the same price, you can snag a solid option like the Black Diamond Orbiter 650 or BioLite AlpenGlow 500.
Made to be stormproof, we didn’t fret over leaving the Coast EAL22 out on the picnic table in an overnight shower, and this is really the main selling point for this lantern. If you’re looking for a rough-and-tumble style lantern, consider the EAL22.
Power Source:
5,200 mAh Li-ion rechargeable battery
Burn Time:
320 hours on low; 2.5 hours on high
Water Resistance:
Unpublished
Weight:
1 lb., 1.6 oz.
USB Port:
USB-A in; USB-A out
Pros
Unique crank ability provides unlimited power supply
Simultaneous recharge and discharge means you can provide light while charging
Multiple mounting options, including hanging hooks and extendable legs
Able to light only one side of the lantern at a time
Cons
The permanently attached USB cord seems like a failure point
Wire legs are a bit wobbly
No light diffuser makes higher outputs difficult to look at
Austin Beck-Doss
Leave it to solar-power guru Goal Zero to come up with a lantern that incorporates a number of smart charge and recharge features that turn the Lighthouse 600 Lantern ($80) into a light source you can trust to stay on when you need it.
With three methods of charging the lantern (solar panel, USB, or spinning the crank atop the unit), we never felt we’d see the flicker of this lantern running out of juice. When we tested the brand’s claim of 10 minutes of light for every minute of cranking, we found the numbers to be fairly accurate (and our wrists tired). It makes an excellent basecamp lantern, perched above a table or hung from the inside of a tent.
While the integrated charging USB cord is a handy touch, we do see this as a potential future failure point should the cable become snagged or kinked. A simple USB port with a cover would have been our preference.
Beyond this, there’s one Achilles heel to the Lighthouse that keeps it from ranking higher in our books, and that’s the diffuser — or the lack of one. With a clear plastic globe, the higher reaches of this lantern become too bright to look directly at, and multiple of our testers commented on this independently.
We also had some issues with the twin-leg design, which, unlike the three legs of the Black Diamond Orbiter 650, could be made to tip over when jostled.
Unlike some of the other lanterns on our list, the Lighthouse 600 doesn’t use an integrated solar panel to recharge from the sun. This means you’ll either need to already own a Goal Zero solar panel or purchase one (check out our favorite panels in our Buyer’s Guide). For those who use a panel regularly, the Lighthouse will be an obvious companion.
Ready for whatever, the Lighthouse 600 would make a great lantern for anyone who wants an all-in-one system for light and charging ability.
No lantern review would be complete without this classic Coleman Deluxe Propane Lantern ($65). If you’ve never used a gas lantern, it’s important to make note of a few things. First, in lieu of light bulbs, it uses mantles that fill with fuel and burn brightly. The glass can become extremely hot, and caution should be used when handling it.
That said, it’s a solid lantern that will last for years. And it clocks in at just $65. The dual-mantle design pumps out 1,000 lumens on high, and it will run for nearly 7.5 hours on high before needing a new fuel canister. The green propane cylinders run about $10 for a single 1-pound canister. While this isn’t outrageously expensive, it does add up and should be a consideration when lantern shopping.
We found it easy to thread the light onto the propane cylinder and appreciated the footed base that prevents tipping. It’s worth noting that you will need a match to light this lantern. But once it’s up and running, it’s easily manageable for the entire evening. There’s even a plastic base that interfaces with the propane canister to ensure tipping won’t be an issue.
When it comes to versatility, the era of gas lanterns has largely moved away from propane-fueled options like this in favor of smaller, isobutane-fueled options like the Snow Peak GigaPower, in our opinion. That doesn’t mean that the Deluxe is lacking in any old-school charm, however (it’s got it in surplus), but that you should consider potentially having a few other lanterns on hand for more functional use. This lantern makes a killer place to gather around, and when supported by a few electric modern options, it’s a winner.
When you’re ready to turn the lights out, be sure to let the Coleman Deluxe cool down before disassembling. Thankfully, the lantern ships with a hardshell case to port it around in between camping trips.
Outdoor lighting technology is always advancing. Not too many years ago, the best you could buy were propane lanterns, which, while having a classic look, brought along some classic issues. Today, most lanterns depend upon battery power for illumination, with improvements in lithium-polymer and lithium-ion batteries greatly extending burn times. Light element tech has also taken off, with smart LEDs that can change temperature and even color being the standard.
Our Testing Process and Testing Grounds
Our camping lantern testing begins when the day ends, and we’ve hit campsites across the country to test lights in all manner of settings and scenes. We busted out the large communal lanterns at front country campgrounds in Georgia and Utah, lighting up the night and getting a sense of total usable lit areas.
Backpackable lanterns were weighed and tucked into overnight packs on sections of the Pacific Crest Trail. Gas lanterns were run clear out, and we burned through a not-small number of batteries and candles to get a better sense of operating times.
Overall, we aimed to use these lanterns as they were intended. When we were done, we cycled them out to others on the testing team. Individual preferences vary, and we wanted to get a better-rounded opinion of these lanterns — no matter how you like to camp.
IPX4 water resistant? We’ll see about that; (photo/Nick Belcaster)
Our testing doesn’t end when the camping trip does, either. It extends to a set of bench tests designed to challenge manufacturer specifications and ensure accurate claims about these lanterns. One of our most important (and taxing) bench tests is our burn-time test, where we challenge claims on total run time with the lantern set on high. These tests can often last an entire day and end when the lantern finally winks out.
Our water-resistance test is equally rough. We break out the garden hose and spray each lantern from varying angles. We’ve only killed one lantern (so far) and find that most can hang in a light simulated rain.
Finally, a lantern isn’t much good if it’s not as bright as it claims to be, and we used a tool known as a lux meter to accurately measure the lumen output of each lantern, both on low and high. All of these tests aim to ensure that these lanterns do what they claim to do, and when they fall short, we make note of it.
Our Expert Testers
While putting this list together, our lead tester, Austin Beck-Doss, was living off-grid and relying on a lantern every single night. His exploits range from rock to snow, but when the light tilts out, its a lantern that he always reaches for. With outdoor products he’s personally tested tallying into the hundreds, Austin has honed a keen eye on what flies and what falls flat when it comes to getting outside.
Adding to the tester pool is Senior Editor Nick Belcaster, who has spent months at a time outdoors where having the proper illumination is key. He’s to thank for our updated bench testing regimen, and he dutifully mans the hose and timers to ground truth claims. Outside of the nitty-gritty, it’s his every-weekend-outside philosophy that keeps lanterns tested on a regular basis.
(Photo/Nick Belcaster)
Our Lantern Rating System
When scoring these camping lanterns, we look at four specific rating attributes. These metrics are separate from our overall product scores and are meant to allow you to compare them when deciding on your next purchase.
Brightness is key in a lantern, and the more available, the better, in our opinion. We look for a healthy 500 lumens or more to award a high rating here, with lanterns over 1,000 lumens earning the highest rating. Battery Life is just as important, and we run these lanterns through an entire charge multiple times and record the overall run time. 5 hours at the highest output is what we expect from the best lanterns, along with at least 100 hours on low. The Feature Set is also considered and rated, with lanterns that include more usable abilities scoring higher. Finally, we rate Durability based on resistance to water, dropping, and overall battery longevity.
While gas lanterns give off a classic warm light, many modern electric lanterns are getting pretty good at emulating that light; (photo/Nick Belcaster)
Buyer’s Guide: How to Choose a Camp Lantern
Electric vs. Gas-Powered Lanterns
Choosing between an electric and a gas-powered lantern comes down to what features you prefer. Electric lanterns are quiet, lightweight, and safe to use inside a tent. In general, we believe that battery-powered lanterns are the best investment these days, and the ever-improving quality of LEDs and rechargeable cells only reinforces that.
However, alkaline batteries lose about half their capacity when temperatures drop below freezing, and rechargeable batteries may not last on multiday trips without a recharge. Consider battery life whenever setting out for longer camping trips, as it’s a bummer to see your lantern flicker out.
Gas-powered lanterns like the Snow Peak GigaPower Lantern Auto are bright, have a long burn time, and work well in sub-freezing temperatures (the runtime drops, but not as much as when using alkaline batteries). Because they use a live flame, they are hot to the touch, need to be used away from flammable materials, and require ventilation. They are also more fragile than electric lanterns. But for the money, it’s hard to beat the old-school feel of the flame.
Lumens and Light Modes
The 6,000 lumens of the Goal Zero Skylight was made to do one thing, and that’s throw light far; (photo/Nick LeFort)
Lanterns need to be bright enough to light up an area, but not so striking that they’ll temporarily blind you if you accidentally look at them. Brightness is measured in lumens, and while you probably won’t need a lantern to mimic the sun (35.73 octillion lumens, by the way), most lanterns have a maximum lumen output somewhere between 200 and 500 lumens. This is more than enough to light up most camping spaces, and it is most often dimmable to adjust to ambient light.
If you’re looking for a more pleasant glow, aim for an output of 60 to 100 lumens. Lanterns like the BioLite Luci Original Clear work well for use inside a tent. Also, know that diffusion is key in how light is displayed around camp, and that translucent globes will provide a softer, more diluted light that’s easier on the eyes. Lanterns like the BioLite AlpenGlow and Goal Zero Lighthouse 600 might be able to put out the same 500 lumens, but the AlpenGlow will be much nicer to look at in intimate settings.
Light Modes
Thankfully, we’ve come a long way from the simple ON/OFF button, and camping lanterns today feature many additional lighting settings for fine-tuning your lighting solution. Dimmability is one of the most important functions, in our opinion, as it allows you to dial in the light output in a set range.
Camping lanterns today have broad dimming ranges, with many able to reduce down to single-digit lumens and then ramp up to full power or even a turbo mode, such as the Fenix CL27R.
Some, like the BioLite Luci Original Clear, are fairly minimal, with only three different light settings: low, high, and flashing. Others jam in different modes to amp up the ambiance at camp and lend some light to whatever mood you’re going for. The BioLite AlpenGlow 500 has four main modes (white light, warm light, color light, and multi-color light), which can be further augmented with a few shakes to add single-side lighting, flickering, and even a “fireworks” light show effect.
Other lanterns, like the Coast EAL22, still offer a red light option, which can be very helpful when aiming to maintain your night vision (or avoid waking your tentmate). This lantern also flashes an SOS signal for emergency situations and a strobe meant for self-defense.
Ounces matter on the Alaskan tundra, and a lightweight but powerful lantern is just the ticket; (photo/Nick Belcaster)
LED vs. Incandescent
Lanterns of old all utilized incandescent bulbs to provide their light, but these have largely gone away in favor of LEDs. Light-emitting diodes are far more energy efficient — often more than 75% — and have a lifespan that exceeds the wire filaments of incandescent bulbs.
Another benefit of LEDs is their high Color Rendering Index (CRI) level, a measurement of how natural colors render in certain light. Lanterns like the BioLite AlpenGlow 500 Lantern boast a CRI of 90 and produce high-quality color lighting.
One downside, however, is that LEDs are typically not user-replaceable. Thankfully, an LED’s lifespan is often given in years, not months, so barring a faulty light, you should never run into the issue.
Weight and Packed Size
Inflatable lanterns such as the Luci Light offerings pack down quite small; (photo/Nick Belcaster)
Consider how you will use your lantern. For car camping, weight and packed size are not going to be an issue. If you plan on packing your lantern into the woods, however, you’re going to want something lighter that won’t take up much pack space. If you’re going backpacking, look for a small or collapsible lantern. A good flashlight or a headlamp may even be in order.
Camping Lanterns
Lanterns like the BioLite AlpenGlow 500, Black Diamond Orbiter 650, and Goal Zero Lighthouse 600 are all at the top of our list of the best lanterns to take on camping trips. They all sport an extended battery life, broad light cast, and mounting solutions that make them amenable to different camp setups.
These lanterns all hover around the 1-pound mark, and while they aren’t the most packable, typically, folks going camping need only worry about over-filling the back of the car.
There are also a number of fun lighting options, like the MPOWERD Luci String Lights, which can be strung up and really spread some light, or the Goal Zero Skylight, which will illuminate your whole campsite (and then some). Consider a mix of both types of lighting to cover both your flood and spot light needs.
Backpacking Lanterns
When looking for a lantern to take backpacking, we’re quick to reach for the BioLite Luci Original Clear or Luci Charge 360. The collapsible options are excellent for long-distance trips where weight really matters.
Don’t count out candle- or isobutane-powered lanterns on your backpacking excursions, either. Both the UCO Candle Lantern and Snow Peak GigaPower lanterns are minimal enough not to be a boat anchor in your pack, and operate with fuels you’re likely already bringing along. We’ve often enjoyed the natural flicker of a flame over an LED when deep in the backcountry, and these lanterns easily make the cut in our packing lists.
Battery Life and Types
Recharging the BioLite AlpenGlow is a cinch and fully tops off at around 3 hours on the cord; (photo/Nick Belcaster)
If you’re going with an electric lantern, battery life is a consideration, especially if you’re going to be in the woods for a few days or more. Many lanterns will give you 5-10 hours on high, with longer times in the lower settings. Among the longest-lasting lanterns in our testing were the BioLite AlpenGlow 500 Lantern at 200 hours on low, theFenix CL30R at 300 hours, and the Goal Zero Lighthouse 600 Lantern at an impressive 320 total hours of burn time.
Lanterns that take disposable batteries will typically accept either alkaline or lithium-style batteries, though it can be good to know when each is warranted. Alkaline batteries are standard household batteries and are generally cheaper than lithium batteries. However, they won’t last quite as long and will lose voltage as they discharge, meaning a dimmer lantern.
Lithium batteries, on the other hand, maintain their voltage until almost dead, are better in the cold, and last up to two to three times as long as alkaline batteries. They are also rechargeable in wall-outlet chargers.
With an integrated 5,200 mAh Li-ion rechargeable battery, the GoalZero Lighthouse 600 lantern is able to both charge your devices, and itself with an integrated hand crank; (photo/Nick Belcaster)
If your lantern uses disposable batteries, it pays to carry extra batteries on your trip. If your lantern uses a rechargeable battery, bring along a portable battery bank or solar charger to top off your lanterns between uses. Some lanterns even incorporate a charging system into the light itself, such as a solar panel or hand crank.
It is good to note that lanterns with rechargeable batteries are becoming increasingly commonplace, though it should be remembered that recharging a lantern from dead flat will take considerably longer than swapping in some fresh AAAs.
Consider also the type of rechargeable battery your lantern uses. Some, like the Fenix CL30R, use a standardized rechargeable 18650 cell that can be used in other electronics, such as headlamps. Most others will be integrated into the lantern and are non-serviceable.
Ease of Use
The easy hang loop of the Ledlenser ML6 made it very popular with our hammock-savvy testers; (photo/Nick Belcaster)
Electric lanterns generally win the prize for ease of use. They turn on with the push of a button, and the brightness is simple to adjust. Gas-powered lanterns require a bit more work to apply the fuel canister and light the wick.
With advances in lantern tech and more features being added every year, be sure to look for a lantern that hasn’t suffered from tech bloat. The pattern of button presses to move through the different lighting cycles should be easy to remember.
Chock-full of extra features, the BioLite AlpenGlow 500 offers white, natural, and multi-colored options for its light; (photo/Nick Belcaster)
Many of the best camping lanterns offer additional features, such as the ability to charge electronic devices and double as a flashlight. These are perks, but they aren’t real game-changers when choosing a lantern.
We’ve found that the most important features enhance the lantern’s main function. Look for lanterns that are water—and dustproof, ones with multiple dimming settings, and ones with integrated solar chargers.
Hang Loops, Clips, and Hooks
Hanging your lantern from the inside of your tent or from a well-placed tree limb can greatly increase the amount of light it can cast on your camp setup. Look for a lantern that sports some type of hook or loop that will allow you to suspend it from above and make the most of your light. The Black Diamond Orbiter 650 is particularly adept at mounting solutions, with a set of hooks for hanging at the top and a set of tripod legs for tabletop use.
Battery Banks and Solar Panels
Because many lanterns today utilize an integrated rechargeable battery pack, they are also able to be used to recharge your electronics on the go. Just how much power you’ll be able to port around will depend on the lantern, but we’ve found that the larger lanterns are able to juice up a modern phone most of the way to a full charge. Remember to pack an appropriate charging cable.
The addition of a solar panel can theoretically extend your lantern time to infinite, though it is important to note that on lanterns that sport them, like the BioLite Luci Charge 360 or Luci Solar String Lights, the panels are typically quite small, and thus will take an extended period of sunlight to fully recharge. This is easier to accomplish when you’re hiking into your camp spot but is better thought of as a nice boost to your lantern’s battery, versus a true recharging technique.
Durability & Water Resistance
The IPX7 water resistance rating of the Fenix CL30R makes it one of the toughest lanterns in our review; (photo/Nick Belcaster)
We won’t lie — there have certainly been times when we’ve left our camping lanterns out overnight and woken to a soggy light. That’s why investing in a lantern with a high degree of durability will pay out in the long run.
First, consider that many gas lanterns still require a glass lens to operate. Obviously, these will require some more care, and we recommend utilizing a carrying case for transporting them around. The mantles used to contain the flame are also fragile, so be mindful of these as well.
When it comes to electric lanterns, many incorporate some type of rubberized overmolding to guard against bumps and bruises around camp. In terms of water resistance, many lanterns today are built to resist splashes or brief immersions in water.
These are often rated using the Ingress Protection testing standard, which measures resistance to dust and water. An IPX7 rating, for example, relays resistance to water immersion up to 1 m deep.
Price & Value
Camping lanterns typically won’t be the priciest bit of camping kit you’ll ever purchase, but there are a few different levels of value to consider. If camping is an every-now-and-again thing for you, a simple budget lantern might be the ticket. Or, if this is your thing, going out and purchasing a bit of a legacy lantern can make a lot of sense.
Budget
Budget lanterns take some shortcuts to keep their prices low, and one of the main ones is in overall size. The form factor of these lanterns is often smaller, with lights meant for in-tent use being common. Because they are meant for enclosed spaces, they also won’t typically be the brightest, but you won’t need as much firepower to illuminate the interior of a tent. 200 lumens is about the maximum seen here. Expect to pay between $20 and $50 for lanterns of this stripe.
The Duracell 2000 Lumen Tri-Power ($30) is our newly appointed best budget pick, and it’s proof that good technology trickles down. The 2,000-lumen max output is very impressive for such an inexpensive light, and the internal rechargeable battery can be charged through the USB-C port or the integrated solar panel.
The BioLite Luci Original Clear ($30) is a backpackable option that packs down quite small for folks who are watching their pack weight. The Coast EAL22 ($40) is a bit of an outlier in this category, as it puts out an impressive 1,250 lumens and has a larger footprint.
Mid-Tier
The middle band of lanterns is where we suggest most folks consider sourcing their next camp light from, and most are often of the tabletop variety meant to light up most of your camp. These lanterns will max out around 500-600 lumens (bright enough for most any camp task) and run on low for 200-300 hours.
You’ll also get more functionality in these lanterns, including different color modes and integrated power banks to recharge your electronics. For between $50 and $100, you can get into a lantern that’ll last for many seasons to come.
The BioLite AlpenGlow 500 ($80) is an excellent all-arounder lantern with a suite of different light modes and tucks away a 6,400 mAh battery that can top off your phone at the end of the night. The Black Diamond Orbiter 650 ($65) is similarly equipped and brings a few more usage options to the table, like a set of tripod legs. For this price range, you can also get into some more specialized lanterns, such as the Snow Peak GigaPower Lantern ($87).
Premium
For more than $100, you’re getting into some seriously specialized lanterns. These boast outsized output or battery life numbers and are meant to light up your entire campsite (and maybe your neighbor’s, too). High-end materials or build quality can also make lanterns this pricey, with all-aluminum constructions or user-replaceable 18650 battery cells powering them.
The Fenix CL30R ($144) is certainly in the latter camp, and while its output is about on par with what you would pay for a mid-tier lantern, the build is rugged and can manage being kicked around without worry. The Goal Zero Skylight ($300) was the most expensive lantern we’ve tested to date and offers up a full 6,000 lumens in exchange for it, as well as the ability to illuminate your entire overlanding camp.
Frequently Asked Questions
What is the best camping lantern?
The best camping lantern is the one best designed for how you plan to use it. Look for a lantern that’s bright enough to illuminate your camping space and one that is simple enough to use after a long day of hiking. For 2025, we found the BioLite AlpenGlow 500 Lantern to fit the bill for most of our camping outings, with the Black Diamond Orbiter 650 being a close second.
For backpackers, a lightweight lantern that doesn’t take up too much pack space is ideal. Also, an electric lantern should be able to give you several evenings of light without requiring a recharge.
In our testing, the BioLite AlpenGlow 500 best ticked our boxes for the best overall lantern; (photo/Nick Belcaster)
How many lumens do I need for a camping lantern?
For most campers, 100 lumens or above is enough to light up many camp spaces. If you prefer a more gentle glow, 50-75 lumens will be enough. Electric lanterns under 50 lumens are good for in-tent use.
What is the best camping lantern for power outages?
For occasional use, a brighter lantern with replaceable batteries will work well. Replaceable batteries are ideal for situations in which an external charging source is unavailable. Candle lanterns will also work well, as they don’t require any fuel besides the candle.
What is the best camping lantern from Coleman?
We’re fans of the classic Coleman Lantern. For $65, Coleman has made a solid lantern that will give you years of use. It produces 1,000 lumens on high, and it will run for 7 hours on high before you need to switch propane canisters.
What is a lantern mantle?
Lantern mantles are ceramic mesh sacks that encase the flame in gas-powered lanterns. They keep the flame small and contained inside the lamp.
How long do lantern mantles last?
If you take care of it, a lantern mantle can last years. You can lengthen the life of the mantle by not dropping or shaking your lantern excessively and by not exposing it to strong wind without the globe attached.
Yes, headlamps are many people’s go-to lighting solution. But the best flashlights offer more power and longer-lasting batteries and will shine wherever you want, not just where your head points.
You can get exceptional lighting performance, a fantastic user interface, and long, rechargeable battery life from the Fenix PD36R Pro flashlight. It’s my top choice from more than 50 I’ve tested over the past 5 years of maintaining this guide. Otherwise, if you’d like an affordable option for home or outdoor use, the Acebeam TAC 2AA is a great value.
I’m a flashlight buff, and during my more than 13 years at GearJunkie, I have used, abused, and tested countless flashlights. For this guide, I chose to test mostly small, versatile flashlights primarily for outdoor and general use. Each light in our top choices has survived drop testing (except the Imalent SR32), water submersion, and longevity testing. Most importantly, I vet them through real-world use. Read on to learn more about how I chose the test lights, how I test them, and why you should trust me.
What follows is my best advice for buying flashlights, the same advice I’d share with friends and family. So, let’s get you the best flashlight for your needs.
Editor’s Note: On September 26, 2025, I added the Olight ArkPro as the best pocket-sized EDC flashlight, replacing the still-excellent Nitecore EDC33.
The Fenix PD36R Pro ($120) is the latest evolution of our favorite overall flashlight on the market. A slightly upgraded model of the also-great PD36R, the PD36R Pro has one big improvement, and that is the dual tail switches. The system works like this: One larger tail switch turns the light on and off.
The other toggles through the five brightness modes, or, if the light is off, activates the strobe function for self-defense. In the dark or with gloves, it’s still incredibly easy to manipulate the switches and get the desired output in seconds.
If you prefer the lighting control mounted on the body of the light, the standard PD36R is still available. But I suspect most users will love the upgraded PRO model.
Beyond user experience, the runtime is phenomenal. With the new PD36R PRO in Eco (30 lumens) mode, you can achieve a solid 42 hours of runtime. If runtime is your primary concern, the non-PRO version of this light has a much longer runtime, but lower overall output.
For casual users (occasional camping trips and short bursts of high-output modes), that should amount to months between charges. Our tester has gone more than 2 months without recharging this flashlight with regular usage.
Speaking of modes, the PD36R PRO ranges from a low-end 30 lumens to a searingly bright 2,800 lumens. At that 2,800-lumen turbo mode, you can easily see objects at 1,247 feet. That’s more than enough for most use cases for outdoor recreation. And impressively, the PD36R PRO can maintain that brightness for 3.5 hours.
With an IP68 waterproof rating, it can withstand being underwater for 30 minutes at up to 6.5 feet. It’s also dustproof and shock-resistant. One feature I love is how easily you can manipulate between tactical (and strobe-enabling) functions.
Beyond the specs, this is a perfect hand-size flashlight (5.74 inches long, 1.04 inches in diameter) with user-friendly functions. Turn it on and off at the large tail switch, press the smaller tail switch to adjust power, and check the LED near the USB-C charging port when turning the light on for a battery-level indication.
Overall, the PD36R PRO is the best flashlight on the market today.
The beam of the Fenix PD36R Pro illuminates both near and far in an exceptional spotlight with nice spill; (photo/Sean McCoy)
This small, affordable flashlight is one of the best values in lighting. With a retail price of $50 (and usually available for about $30), the Acebeam TAC 2AA is powerful, reliable, and versatile. It’s the perfect flashlight to toss in your car, junk drawer, or backpack.
First, it produces a very bright, clear beam. At 1,600 lumens on turbo, it casts light up to 181 m. That is a very impressive performance for a light that’s about the size of a large pen. Dial that power down to medium, and it will run for 9.8 hours while producing a very useful 110 lumens. That’s enough light to navigate a house or campsite comfortably.
Next, this is a “dual-fuel” flashlight, meaning it runs on both an included USB-C rechargeable battery and any AA batteries you have around. In emergencies or long power outages, the ability to drop in AA batteries adds a lot of versatility while, in daily use, the rechargeable battery is much more efficient.
Finally, this light includes a couple of diffusers that add utility. Toss them over the end and you have a great signal light or lantern. It’s a little bonus that is so sweet for a budget light. Add in a deep pocket carry clip and a relatively easy user interface (that does take a little bit to learn), and you have a recipe for a super good deal.
If you need an affordable flashlight, just grab one. This light will do everything most people will ever need a flashlight to do.
The Acebeam TAC 2AA has a powerful beam with a bright center spotlight and nice spill; (photo/Sean McCoy)
The Olight ArkPro is far from the brightest light on this list, but it has incredible utility for the EDC user that elevates it above the competition. First, this small, flat flashlight fits wonderfully in a pocket. Indeed, it feels much like a nice pocket knife in a front pocket. It carries like a dream.
Next, the user interface is dialed, literally. A single button on/off and rotating dial gives access to a flood light, spot light, and UV light setting. Each of these is well executed, offering clarity and smooth light edge-to-edge. The spotlight offers a nice, bright center with good spill, making it useful for both outdoors and urban use.
It has good battery life, running for 13 hours with 100-lumen output and up to 72 hours on low 15-lumen output. Turbo only gives about four minutes before regulating down to 520 lumens for a remaining 140 minutes on flood mode.
The built-in UV light is a slick and useful feature for those who need to check cash for UV watermarks or look for other fluorescent objects. It’s plenty bright enough to illuminate UV ink from four feet away or more. And it certainly makes watch lume pop!
Finally, a green laser pointer functions with its own on/off switch on the side. For construction workers, contractors, or public speakers, it’s a great bonus tool that adds utility to an otherwise excellent EDC flashlight.
The ArkPro also happens to be Olight’s first EDC light that uses USB-C charging, which removes one of the significant cons from the brand’s lighting from the future.
After testing the ArkPro for a few weeks, it edged out the previous pocket-sized choice, the Nitecore EDC33, for its added UV light and laser pointer, as well as its excellent pocket-friendly shape. If you don’t need extremely bright light, the ArkPro’s 1,500 lumens should be excellent. If you need more, the EDC27, up next, might be a better choice.
The Olight ArkPro spotlight offers a long throw in a compact package; (photo/Sean McCoy)
The NITECORE EDC27 ($90) first launched at SHOT Show 2023. This light dazzled folks with a wonderful design and massive light output. If you can get your hands on one (it’s still selling out quickly with every batch produced), this light is the latest and greatest EDC flashlight on the market. I expect it to be popular for a long time.
Let’s begin with the design. The NITECORE EDC27 is a flat flashlight with a pocket clip. That means it fits easily in your pocket. It will even fit in most knife pockets on pants, making it a dream to carry. To turn it on, press the large tail switch. Next to that switch is a smaller tail switch.
Once on, depress that smaller switch to flip between modes. Or, you can press the smaller tail switch when the light is off to fire the strobe or momentary on modes. For the EDC user who may need to use the light for self-defense, this is a slick interface that should result in never hitting the wrong button for the needed use.
A quick look at the specs reveals class-leading numbers. A top output of 3,000 lumens and a 200m range will serve all but the most dire search and rescue, hunting, or tactical needs. And a runtime of 37 hours on low provides a good, long life for the vast majority of uses.
Finally, the light has an easy-to-read OLED display. It reads run time and current lumen output. This takes the guesswork out of recharging the battery and lets the user know exactly what they can expect the light to do.
Overall, theEDC27 is an incredible new flashlight. I haven’t had enough time testing it to say it will outperform our current top pick, but it certainly should give Fenix a run for its money.
The Nitecore EDC27 casts a nice floodlight; (photo/Sean McCoy)
Klein Tools makes some nice flashlights these days. Overall, the BBM6412 ($44) is an excellent upgrade to our previous top flashlight for mechanics.
At around the $40 range, this light packs in a ton of performance that makes it fit for both the garage and the wilderness. It has a top output of 500 lumens — while not super powerful, that’s certainly sufficient for use on the trail and around the campsite. And it’s more than enough power when working under the hood of your truck.
Where it really stands out is its magnetic base and side-throw lantern. This work light illuminates a larger area with soft, useful light at five brightness settings. In testing, it was the perfect companion while checking for loose wires under the hood of a truck in the dark. And it’s capable of big tasks, too. It’ll kick out 375 lumens for 10 hours in work light mode or 500 lumens for 7 hours in standard mode.
I loved the simple, common USB-C connection for fast recharging and the multicolor battery level indicator. Top it off with a glow-in-the-dark bezel that makes it easy to find in a center console in the dark, and you’re looking at a lot of flashlight for not much money.
The Blackfire Rechargeable Weatherproof Magnetic Flashlight has a modest beam, but its built-in lantern is excellent for close-up work; (photo/Sean McCoy)
What’s the world’s brightest flashlight? Well for several years, it was this one, the Imalent SR32. Recently, Imalent updated its lineup with a new model that outshines the SR32’s 120,000 lumens with a ridiculous 200,000 lumens. I haven’t had my hands on the new version, called the MS32, yet, so I can’t recommend it. But the SR32 is still available and still has the longest throw of any flashlight on the market.
It’s overkill for most people, but I include it here as this was the benchmark until very recently, and I have had good experience. At 120,000 lumens, the Imalent SR32 is vastly more powerful than automobile headlamps and lights up a remarkable area. It has use cases for search and rescue or industry, but is far too much flashlight for most recreational users.
But here it is, the former brightest flashlight in the world, and still a very strong contender. If you need tremendous lighting, this is it. I’ll be testing the newer MS32 as soon as I can get my hands on it.
The author tests the IMALENT SR32 on a closed roadway; (photo/Sean McCoy)
Other Flashlights I Recommend
While these aren’t my absolute top choices, I have tested and liked all of the flashlights below. If you’re also a flashoholic or if these appeal to you more than my favorites, they’ll all serve you well. But since I realize most people just want to buy a good flashlight and move on with their lives, I’ve trimmed our primary selection list above down to the best of the best choices.
The following were previously among our primary buying guide choices. This segment will change as testing continues, with new models coming quarterly.
The Nitecore EDC33 ($70) was a new light for 2024, and it’s incredibly powerful yet very small. For context, this little light will fit in the palm of your hand and weighs a scant 4.48 ounces. It clips to the inside of your pocket, where it doesn’t take up very much real estate. But pull it out and push the tail switch, and wowsers!
The EDC33 packs incredible power, reaching a maximum of 4,000 lumens with a beam distance of almost five football fields. But even better, it has nice low and mid-output modes that are very usable at normal viewing distances of close proximity out to about 50 yards. And at that distance, this little powerhouse will burn and burn and burn, kicking out a very useful 300 lumens for nearly 7 hours straight.
The EDC33 has a bunch of other fabulous tech packed in the diminutive package. It has a great, physical lock to secure it in the off mode. Given the power of this light and the heat it creates, it’s very important. Fortunately, it’s easy to use.
The light packs a “Lumen Shield” mode, which it touts as a replacement for strobing self-defense. Call it what you will, but it’s a great, powerful floodlight. Finally, the light has a proximity sensor that automatically dials down the power when it’s too close for high output modes.
Now, for the negatives of a small, powerful flashlight. First, the battery is not removable. That means if the battery gets weak, the flashlight won’t perform as well. Given the quality of Nitecore batteries, I imagine you’ll get a long lifespan of multiple years from the light, but it’s worth considering, and a significant drawback for some buyers.
Next, note that this light will get very hot very quickly in high-power modes. So, if you need a powerful beam for longer than a few seconds at a time, get something bigger.
Overall, I love this light. Some folks don’t like the single-button tail switch, but it works well for me. And the light will tail stand! If you want a tiny light that has a lot of power, this one is worth considering. It’s also a heck of a good price for so many features.
The Nitecore EDC33 is incredible for such a small flashlight; (photo/Sean McCoy)
Battery:
Nitecore 21700 i Series (other options available)
Bulb type:
4 x CREE XP-L2 V6 LEDs
Dimensions:
Length: 5.57", height; 1.25"
Weight:
4.09 oz.
Pros
Very powerful
Operates on various battery types
Extremely long runtime
USB-C Rechargeable
Cons
No pocket clip
Overkill for many users
Sean McCoy
NITECORE discontinued one of our previous favorites (the i4000R) but replaced it with an even better, more powerful torch. A strong contender for the best overall flashlight, the new NITECORE P20IX($120) is one of the best flashlights on the market in terms of overall performance.
It’s slightly larger than our winner from Fenix, however, so it’s less suitable for hikers, hunters, or others who value lightweight and small size.
That said, the new version shaves half an ounce and half an inch off the previous model, coming in at 4.06 ounces and 5.57 inches long. So, it’s edging closer and closer to a pocket-friendly size.
The P20IX punches through the darkness with 4,000 lumens on turbo mode for up to 30 minutes. That’s enough to light up objects 250 yards away, so it should be high on your list for performance alone. More importantly, it has four continuous and strobe modes, ranging all the way down to the 2-lumen ultralow mode that provides light for up to 350 hours.
It runs on a rechargeable battery that powers four CREE XP-L2 V6 LEDs. This setup provides exceptional versatility for everyone from campers and hunters to search-and-rescue and tactical uses. The user interface is great, providing easy access to toggle between modes (like its turbo output and strobe mode) through a dedicated button separate from the rear tail switch.
While this is a high-end flashlight, it’s absolutely worth the price for those who need a powerful, reliable flashlight with the potential to hold up to extremes.
While the ThruNite Archer ($30) lacks a few of the higher-end features of other lights on this list, it comes in at an excellent price of just $30. For that, you get a quality CREE XP-L V6 LED light source with a maximum power of 500 lumens. While that number may not look impressive, it’s more than enough for most uses. Using two AA batteries, it has a runtime of up to 4 days on firefly mode and 11 hours on medium (75 lumens).
You heard that right — this flashlight does use AA batteries. That certainly brings down the price compared with high-end rechargeables and costs money to operate. Our team prefers rechargeable flashlights for several reasons I’ll get into below. But flashlights with disposable (or rechargeable) AA batteries are very easy to repower on backcountry trips — just bring a couple of extras.
A budget flashlight needs to have more than just a nice price. It must also be durable, so you won’t have to run out and buy another in a few months. I put the Archer through rigorous testing, including submersion and drop testing. It came through with flying colors, barely edging out the competition with the Coast G32. I loved the simple interface — particularly the side button to scroll through brightness settings.
For a budget flashlight, the ThruNite Archer is still the one to beat.
The ThruNite Archer’s beam is much less powerful than pricier flashlights, but still functional at close distances; (photo/Sean McCoy)
We put the Coast G32 ($25) in a head-to-head test against the ThruNite Archer, a historically popular budget choice. The competition was neck and neck. In the end, the ThruNite defeated the Coast in the drop test. The G32 failed a brutal drop from 10 feet to concrete onto the lens, while the ThruNite survived.
The G32 is a no-frills AA flashlight with two modes, but it provides excellent lighting. Zoomed out, it provides a wide, perfect circle with no halos, thanks to Coast’s Pure Beam focus. Then, zoom the lens for a bright light point with a 134-meter throw. The zoom motion is very simple and smooth. Grab the zooming head by the nice knurling and twist it. It zooms to a hard stop on wide and long throws.
For the money, the G32 is a solid, well-made flashlight that impressed me in use outdoors and around the house. It’s a bit long for EDC use but will work great around the campsite or at home. And, if you want to upgrade it, Coast offers its ZX555 ZITHION-X rechargeable battery (not included).
TheLedlenser MT10 rechargeable flashlight($90) competes well with the Fenix above, and on paper, it in some ways outshines the competition. The specs put these two top flashlight choices in similar categories, and I expect users will love them both.
One thing I love about the MT10 over the Fenix PD36R is the Ledlenser Advanced Focus System. This simply means you can adjust between a broad floodlight and a long-distance beam in an instant. Simply press the front bezel forward, and the light focuses tighter and tighter.
It works extremely well in the field. We’ve used it to find our way out of the woods while bushwhacking during elk hunts in the Rocky Mountains and appreciated the ability to scan far away hillsides for trails and landmarks with the max 1,000 lumens and 180 ms of throw.
TheLedlenser MT10 also gives a great usable low light, running up to 144 hours at 10 lumens. It has a mid-power setting, but the brand doesn’t share specs on it. But at its middle setting, you get nice light for hiking and good runtime. I’ve only charged this flashlight twice in about a year of testing.
Speaking of charging, this light charges off a micro-USB cable. I love that feature, as it’s a common size and doesn’t require you to carry an oddball cable on trips.
Overall, the MT10 is one of the best flashlights you can buy, with most of the features an outdoor user will require. It’s reasonably priced as well, given its strong power and battery. I also appreciate its simple user interface.
The only ding against this compared with the more expensive Fenix is the build feels a little less robust (it’s IP54-rated for dust and water splashes and rain but is not fully waterproof). I also liked the color rendering a bit better on the Fenix. But the Ledlenser MT10 still puts up a great fight.
The Olight Prowess ($140) is a unique entrée to our flashlight guide due to its charging system and the fact that it can be configured as a lantern. While we’re not crazy about the charging system, the lantern mode combined with its low light settings make it a very versatile light in emergencies.
Purely as a flashlight, the Prowess packs a powerful 5,000 lumens with a commendable beam distance of 245 m. Five levels of lighting allow you to dial in your preferred brightness-to-battery life ratio, with 10-hour runtime at 300 lumens. Not too shabby.
With the flick of a switch, the Prowess becomes a lantern, projecting a warm light, redirected toward the base of the flashlight. While resting in its detachable charging base, the light can sit on any flat surface, producing a cozy glow to read or work by. In its lowest moonlight setting, it can go for a continuous 20 days.
The charging platform and magnetic charging cable keep this light from reaching the top of our list. We love the ability to recharge any electronic device. It’s cost-effective, better for the environment, and you’ll never have to hunt through your drawers for batteries. The Prowess can be charged with a USB-C cable, via its detachable base, and it can also directly connect to an MCC3 cable for super-fast charging.
However, if you lose the base and the MCC3 cable (they’ve got to be in a drawer somewhere with all those batteries), then you can’t charge with the ubiquitous USB-C, and you’ll need to buy another MCC3 cable, and the light is already on the pricey side. The USB-C is the current standard and should be the default method
Charging preferences aside, the prowess is compact, plenty powerful enough for most applications, and the lantern function is super useful in camp or whenever the power goes out.
Our primary flashlight testers are not just super into the outdoors; they’re also flashlight nerds. We really love the technology that goes into flashlights and headlamps. As the author of this article, I personally spend hours every month testing the newest flashlights to see if they can outperform our favorites listed here.
For the record, it takes a long time and impressive performance for a flashlight to earn a spot in this article. I constantly test new flashlights and updates from our favorite brands and update this article many times each year to keep it up to date with the best flashlights available.
This article has evolved significantly since it was first published back in 2018. At that time, it explained in depth why I love flashlights, and how they differ from headlamps. I still love flashlights for their directionality and ease of use in many situations. However, our team has done much more testing since this guide’s inception. I base our new recommendations on those results.
So, how do I test flashlights? First, I use them in controlled environments, measuring runtime and brightness compared to claimed numbers. I put them on a scale to check the weights. I submerse them in water and drop them onto concrete.
Weighing the ThruNite Archer budget flashlight (batteries included); (photo/Sean McCoy)
These flashlights also get significant field testing. Our team takes them on all kinds of adventures — hiking, mountaineering, backpacking, hunting, boating, and camping are all part of the mix. Most of our team’s tests occur in the mountains of Colorado and fields and forests of the Midwest.
I take all this information and experience and compile the best advice for you. Over the years I’ve tested about 50 flashlights specifically for this buyer’s guide, selected from hundreds pitched to me by brands and examined at events like SHOT Show and the Outdoor Retailer convention. I aim to give you the same advice I give my best friends.
How I Choose Which Flashlights to Test
Battery Type
While some folks prefer AA battery lights, I disagree. You don’t replace the battery in your phone, do you? Or your earbuds? We’re all accustomed to recharging electronics in 2024. Let’s move past the archaic days of disposable batteries.
AA and AAA lights are OK for budget flashlights, but they are wasteful and not as good. Further, they require you to keep batteries on hand. It’s much easier to plug your light into a USB-C cable and keep it fresh than to buy new batteries from the store. And you’ll get better performance than from throw-away or even rechargeable AA or AAA batteries.
If you don’t use your flashlight often, just charge it every few months. I have lights that have sat for more than a year without charging that fire right up, so as long as you don’t leave it empty, you can expect a quality light to work during your next power outage. If a hurricane is on the way, grab a portable battery to keep all your electronics topped up.
Thus, most of my choices here use rechargeable batteries. I hope to replace our budget choice with a rechargeable option soon, too.
Brightness
I pick our best flashlights for several attributes. First, they need a bright white light capable of lighting a trail or workspace. My budget choice is 1,600 lumens. That’s enough to do a good job during a power outage or to light up the insides of closets at your home. If this is you, just get the Acebeam TAC 2AA and call it a day.
But if you need your light more frequently in your vocation, a top power of 500 lumens is not sufficient. Tradesmen, law enforcement officers, guides, foresters, and countless other professionals and recreational users will simply want more power and functionality.
Durability
Next, I consider water resistance and durability. All the lights tested here survived at least a 5-foot drop test onto concrete and submersion in water.
After these tests, and more importantly, I and other testers put all these flashlights through real-world, outdoor use. We use them camping. All of the selections have ridden in the center console of my truck for at least a couple of weeks. Most of them have been in a rainstorm.
To test durability, I dropped all flashlights from 3 feet and 6 feet onto concrete and put them in one foot of water for 1 hour. All of my recommended flashlights survived these tests.
Charging Speed, Type
Some flashlights recharge much faster than others. For example, the Fenix PD36R Pro uses USB-C charging at 2 amps and can recharge in less than 2 hours. Older micro-USB flashlights can take much longer to recharge.
I strongly prefer USB-C charging over all other methods. It’s a nearly universal cable type, and you probably have many in your home already. However, I will concede there are advantages to some magnetic charging styles, such as those used by Olight. These magnetic charging cables enable excellent water and dust proofing and work quickly — just don’t lose or forget the cable.
Buyer’s Guide: How to Choose the Best Flashlight
When choosing a flashlight, consider the following specs: size and weight, max power output (usually noted in lumens), minimum power output, runtime (especially in lower modes), durability, and waterproofness.
Just a few of the many flashlights we’ve tested over the last 10 years; (photo/Sean McCoy)
Lumens: Max Output
For most campers, anything over 1,000 lumens is overkill. You’ll often find yourself using much lower settings, especially around camp. So all the lights included have excellent low-power settings. From 30 lumens on my top choice to one-lumen “firefly” modes, these lower settings sip electricity.
The core of your light use will probably be in the 300-1,000 lumen range. This gives you plenty of light at normal ranges up to around 50 feet. Tight beam patterns can extend this range significantly, but the lights included here have more useful, wider light beams.
Finally, bigger numbers over 2,000 lumens are fabulous when you need them. Whether trying to spot far-off objects or searching for a lost item or drop of blood while hunting, powerful lights have a valuable place in the outdoors. You’ll rarely use high power settings often, but be very thankful for them when you need them.
Flashlight users want easy control of the illumination their lights produce. The interface — the buttons and switches that control the light source — is an important consideration.
Most of the best flashlights, particularly smaller EDC flashlights, have a tail switch. The tail switch is usually a button that you press to turn the light on and off, and often also scrolls through brightness levels or other modes. Some of them have a momentary-on, which turns the light on through a partial press, which lets the light turn off when you release the switch. Others, like our favorite Fenix PD36R, have two tail switches to control different functions.
The Fenix PD36R has a two-button user interface that is simple and easy to learn; (photo/Sean McCoy)
Some flashlights have side switches in place of, or in addition to, tail switches. A few flashlights also have physical switches that lock the flashlight in the “off” mode for safety and battery protection.
Regardless of the style of the buttons, they should be easy to learn and simple and reliable to use. We have tested and learned about the user interfaces in the flashlights in this guide. All of the lights here are effective and acceptably easy to use.
Battery Life
Another important consideration is if the flashlight uses its own rechargeable battery or if it runs on disposable batteries. Most people will get more value out of a flashlight that offers long runtimes and is easy to recharge.
Battery Type
As noted above, our team prefers rechargeable batteries in most situations. Most rechargeable batteries, such as the 21700 rechargeable Li-ion battery included in the Fenix PD36R PRO, offer superior performance to both disposable and rechargeable AA or AAA batteries.
But more importantly, flashlights that include this type of high-end rechargeable battery do not have hidden costs. And those who will use a battery more than casually will find that the cost of batteries will very quickly add up to more than the cost of the flashlight.
The rechargeable battery of the Fenix PD36R packs 5,000 mAh of power; (photo/Sean McCoy)
Next, rechargeable flashlights generally have a charging port or system built in. As you can see with our choices, our favorite flashlights today use USB-C charging. This is quickly becoming the industry standard as it is much faster than micro-USB charging. And unlike magnetic charging systems (or other proprietary chargers), you can easily find a USB-C cable anywhere and likely own several already.
One final note on AA and AAA batteries. Some folks argue that it is easier to replace batteries in the field than to charge them. Our testers have carried small battery chargers on many adventures, and they work great with flashlights for long trips. For trips over a week or two in length, though, disposable batteries still have an edge.
So keep battery and charging style in mind when you buy a flashlight. It will make a difference when you’re packing for a trip as to how many cables you’ll need to bring, or if you’ll need to buy batteries continually through the life of the product.
However, it’s convenient to quickly change batteries and refresh your flashlight in the field. Both are valid options but consider how you’ll use the light (and if you mind constantly buying new batteries).
Quality and Output
Modern LED flashlights vary in the quality of their color rendering, meaning you can see color better with some higher-end lights. The best flashlights on the market should always give you a colorized, realistic view.
Better-quality lights also tend to have more efficient LEDs. Some even have “regulators” that electronically manage the power output, resulting in consistent lighting. To expand on that, first understand that most flashlights, even very good ones, lose a little output as they run and deplete the battery. Better flashlights use a regulator to manage this drop-off. Poor flashlights tend to lose power consistently over time, gradually becoming less and less useful as the battery slowly drains.
Price & Value
As the above table reveals, flashlight prices vary widely. While a budget flashlight might seem like a good deal at first, there are good reasons for spending a little more for a truly high-quality flashlight. The battery, LED, and weatherproofing are generally superior in flashlights over about the $70 range. Here’s what you can expect:
Budget
Under $30, you will usually not get a rechargeable battery. If you do, it’s likely lower quality and won’t have a very long lifespan. In this price range, expect mediocre performance for many jobs outside of basic home use. Our budget choice is the Acebeam TAC 2AA ($50). It runs on AA batteries or the included USB-C rechargeable battery. It’s a compact little light that packs a punch and is good to have around for emergencies.
Mid-Tier
From $30 to $90, folks can expect more in terms of quality batteries, LEDs, and reflectors. A lot of good flashlights are available at this price range, especially if you don’t need a lot of lumens. Both the NITECORE EDC27 ($90) and the NITECORE EDC33 ($70) fall solidly in this category with their lithium Ion Batteries and 230+ meters of throw.
Premium
Over $90, you should get a high-quality CR123A, 18650, or other purpose-built battery. The light should have a regulated output and temperature management and a great user interface. If you use a flashlight regularly, it’s worth the investment to step into good flashlights.
My top choice is the Fenix PD36R PRO ($120), a versatile light with 2,800 lumens on its max setting, a 380m beam range, and my favorite user interface. The mighty Olight Prowess ($140) blasts an impressive 5,000 lumens if it’s maximum brightness you’re looking for.
Frequently Asked Questions
What does lumen mean?
A lumen is the basic unit of measurement for how bright a light is. The brighter the light, the more lumens it produces. The Merriam-Webster dictionary defines a lumen as “a unit of luminous flux equal to the light emitted in a unit solid angle by a uniform point source of one candle intensity.”
For the layperson, a 1-lumen flashlight is barely enough to read a typical book at a normal reading distance from the face, or the amount of light of one birthday candle one foot away.
Do LED flashlights get hot?
Yes, LED flashlights do get warm if they’re pushed hard enough. For many flashlights, this is a sign the heat sink is working, moving heat away from the delicate electronics inside.
What flashlight has the highest lumens?
The highest-lumen flashlight currently on the market is the Imalent MS18, which claims a jaw-dropping 100,000 lumens. However, many huge claims like this are questionable. The brightest flashlight I have tested is the Fenix LR50R. It blasts out a verifiable 12,000 lumens and lights objects clearly up to 950 yards away!
What does ‘EDC flashlight’ mean?
EDC is an acronym for “everyday carry.” It refers to the items that you carry around with you on an ongoing basis.
As a philosophy, EDC is built on utility and being prepared for anything. In this case, it represents a flashlight you carry every day with you in case you ever need light in a dark environment.
What is the best EDC flashlight?
First and foremost, you’ll want a small flashlight that’ll fit in your pocket, clip to your belt, or fit in your daypack. After that, look for a flashlight with good brightness, long battery life, and easy operation.
1,000 to 2,000 lumens is plenty bright for an EDC. That should give you enough juice to see objects 200 to 300 yards away. Our top choice for everyday carry is the Nitecore EDC27.
A good slice-of-life documentary highlights a certain side of people. Usually, the more niche the personalities involved, the more entertaining the movie is.
For instance, Hands on a Hardbody documents an annual competition where 24 contestants keep a hand on a pickup truck, and the last person standing gets to keep it. The King of Kong: A Fistful of Quarters makes viewers care who holds Donkey Kong’s high score — and root for an underdog to win so that he can move on with his life.
Now we have Listers: A Glimpse Into Extreme Birdwatching. This feature-length documentary was published on YouTube last month and is completely free to watch. Whether you’re a birder or not, it’s an entertaining — if not overly raucous — film. Part nature documentary and part road movie, it follows two brothers living out of a 2010 Kia Sedona van as they spend an entire year tracking down as many bird species as they can.
The Film
What makes Listers approachable and fun is the setup of two novice birders, brothers Quentin and Owen Reiser, entering the world of competitive birdwatching. They set off on a “Big Year,” which is essentially a year-long road trip to see how many bird species they can document in the Lower 48.
Soon, the two are as consumed in the pursuit as the quirky experts they meet along the way, and much of the film’s humor is derived from their raw immersion in the birds’ environment.
There is no attempt to romanticize their brand of stoner van life as the duo experience sleepless nights, mosquito swarms, and a few vehicle repairs. These challenges add to the hero’s journey, as it were, and break up the film’s main story with glimpses of life — often in a Cracker Barrel parking lot.
Much of the movie uses raw, handheld footage from within the van or along the trails as they search for birds, which serves as a contrast to the crisp, smooth footage of the birds documented. Overall, the film’s editing stands out. It’s arguably what makes this a recommended watch, both visually and thematically.
Note, this documentary is for mature audiences. So you may want to pass on it if cussing and smoking pot ruffles your feathers, or if you were thinking of watching it with kids. Lastly, the film is entirely free to watch, but if you appreciate the years of work that went into making it, you can drop the filmmakers a donation through Venmo.
(Screenshot/Listers: A Glimpse Into Extreme Birdwatching)
The Deep End of Birdwatching
Much of what propels the movie is watching how the brothers’ immersion into birding changes them over the course of their “Big Year.” They ride the highs and lows through stubborn determination while their oddball approach brings levity to their quest. Along the way, they stumble upon birding etiquette, interview record holders, and ultimately question the entire enterprise for themselves.
For context, birders often chase rarities the way ski bums go after fresh powder during a “Big Year.” Finding roughly 500+ birds should be easy enough to spot over the course of a year with enough driving between the country’s main regions. Getting up to 700 birds means taking cruises to find seabirds within coastal waters, hitting slivers of Arizona and Minnesota, where certain species may just barely cross into the Lower 48.
And then there are the extra rare birds (vagrants) that may veer off course during migration and end up adding a chance for another checkmark on the year — one that could ultimately set them apart from the competition. These fleeting rarities can cause people to fly across the country at a moment’s notice and swarm an area for the chance of a sighting. In short, it’s one of the ugly sides of listing.
In the documentary, the novice brothers interview and get advice from advanced birdwatchers and guides. This dynamic makes the film accessible for general audiences while keeping an edge to the subject matter that’s fresh for birders who have likely seen a few documentaries on their hobby before.
The birdwatching shines with high-quality montages in the documentary; (screenshot/Listers: A Glimpse Into Extreme Birdwatching)
For non-birders, there may be eyebrow-raising moments that make you want to check on your birdwatching friends. Whereas experienced birders — who likely know where the film is headed based on the title — may find it’s time to reflect on some of their own obsessive behavior as displayed in this documentary.
Relatable moments include: the brothers trying to describe the location of a bird in a tree 50 feet away, pronouncing a bird’s name for the first (or fifth) time, and the silly gear the pair finds themselves carrying around the country.
Then they go one step further, crafting boats to get closer to a bird, clicking rocks together to mimic a call, and (my favorite) donning a black hockey helmet to “share a moment” with a black-capped vireo — a once-endangered species.
The Listing Debate
As the title suggests, the film’s main moral quandary is about how listing can become rote and workmanlike. And in the case of a Big Year, it brings out the competitive side in people.
(Screenshot/”LISTERS: A Glimpse Into Extreme Birdwatching”)
As the documentary shows, there are several types of lists. At its most benign, birders may have a life list of species they’ve seen.
That can be chopped up into annual lists or location-based lists. Many birders report every bird they see whenever they use apps like eBird, which also plays a large role in this film. The app has proven to be a great resource for crowd-sourcing population and migration data. And that data also makes it easier to find birds, which is why Big Year participants typically end up listing more than 700 species.
Listers takes an irreverent approach to birding and especially listing, but you can see through the cracks that the brothers are indeed enjoying it. The brothers make passive rants about the eBird review process, cover past bird reporting scandals, discover the debate over bird call playback, and ultimately find a sincere decision on listing.
While Quentin Reiser is the star of the show, having his brother Owen present behind the camera adds to the charm of the film. We see their sheer exhaustion from chasing birds, and we empathize with being bitten by multiple mosquitoes at once.
As I mentioned earlier, sometimes you know a good documentary by how odd the summary sounds. This movie is about two brothers who drive all over the country looking for new birds to add to a list. They’re funny, they don’t really know what they’re doing, and they’re living out of a van while mainly subsisting on a diet of canned beans for an entire year. For those of us who enjoy offbeat outdoor documentaries, this one hits the sweet spot.
Camping and food go hand in hand, especially when car camping affords you the luxury of a two-burner stove. And when good grub is on the line, not just any stove will do. That’s why we’ve been testing the best camping stoves for multiple seasons in a row, and have fired up nearly 25 different options in our quest.
A good camp stove should fire up quickly, provide steady heat to get things rolling, and be able to dial it back for precision work. My top pick, the Camp Chef Everest 2X, has plenty of firepower to keep dishes rolling off the line, but you don’t need to spend the big bucks, either, with the budget Coleman Cascade Classic only running $100.
With years of combined experience with camp cooking, we used our collective knowledge to narrow down the best options today. For each stove in this review, we considered design, ease of use, BTUs, windy weather performance, simmer control, weight, cost, and boil time. On the surface, these stoves all have a lot in common, but each has unique features that stand out for specific uses.
If you’re still unsure which kind of camping stove is right for you, check out our Explainer Series article: How to Choose a Camp Stove.
Editor’s Note: We updated our Camping Stoves buyer’s guide on August 29, 2025 to add the Camp Chef Pro 14 as our new favorite option for cooking for large groups and families. We also added new Rating Attributes to each stove we’ve tested, allowing you to compare and contrast them before making your purchase.
Windscreen tabs stay secure with exterior locks, which is a nice touch
Cons
A bit heavier (12 lbs.) and bulkier than we'd like
Mary Murphy
The Camp Chef Everest 2X ($230) replaced the older Mountain Series Summit model from this brand. The Everest is definitely as high-powered as its predecessor (if not more so), with two 20,000-BTU burners, an auto-igniter, and a redesigned burner area and exterior.
Although the Camp Chef Everest has some of the strongest burners we tested, it still simmers well. And with the new burner and surface design, you get a few more cubic inches of cooking space for the same weight.
Tester Mallory Paige lives in an off-grid cabin and has been using the Everest 2X as her family’s primary stove. After cooking up to three meals a day on it for over a year, the stove has held up impressively well.
The striker still works, and the mix of high output settings and good simmer control meets the demands of any cook. From quickly boiling water at high altitudes to carefully toasting pine nuts, it does it all. This stove roars to life for heavy-duty use, but is delicate enough for finer cooking. The only negative we could rustle up was the weight and bulk.
At 20,000 BTUs per burner, this stove has power to spare compared to standard ~10,000 BTU burners like the Primus Kinjia, and while we typically find this to be enough to cook more camp meals, we can’t complain about having more knob to turn if needed.
The build is stout, and some may consider the 10-pound Primus Alika to be a better all-arounder. For a stove that’ll do most anything, however, it’s hard to ding the Everest.
The previous contender for the best overall stove, the Camp Chef Summit 2-Burner Camp Stove model, also had impressive heat output, but we had issues with the striker (and the price tag). Now, after multiple years of unfailing service, we found the auto-igniter on the Everest 2X to be much more consistent, and the redesign adds features that make it our overall best camping stove.
The simplest option on the list is also one of my favorites. As a tried and true model that meets the basic demands of car camping, it’s been a go-to choice for our staff over the years.
The Coleman Cascade Classic Camp Stove ($130) might not have all the fancy features of the others on the list, but it’s hands down the most bang for your buck out of all camp stoves on the market. The windscreens do the job, and the flame pattern can be set from a simmer to a roar. It weighs just under 12 pounds, which isn’t much more than most more expensive options.
For as low as less than $100 on sale, you get two 10,000-BTU burners in a classic, trusted design. I’ve cooked up plenty of meals on the Coleman Cascade Classic and appreciate how simple it is. The cooking surface is a bit smaller than a stove like the Camp Chef Everest, but I found I could fit a cast iron skillet and pot for boiling water without a problem. The simmer control knob is a bit rough, which was one of the few downsides I could sniff out.
For the money, I reach for the Cascade Classic almost every time, but budget-hunters may also consider the GSI Selkirk 540+. That stove does bump up the output to 14,000 BTU burners but asks $50 more for it, and I found cooking performance to be close to the same. The windscreens on the Coleman do protect it a bit better, so consider where you’ll be cooking before deciding between the two.
If you’re camping on a budget, or want an extra two burners for large meals, the Cascade Classic would be a great addition to your outdoor kitchen setup.
Small but powerful — the Primus Kinjia Camping Stove ($230) brings a light footprint to your camp kitchen and is perfect for those who want a capable stove but don’t want to renovate their campsite in the process.
With a base area of 19” x 12”, the Kinjia slides into spots where other stoves in our testing simply couldn’t, and isn’t much the lesser of a stove for it. The twin 10,200 BTU burner heads are sized more similarly to those on backpacking stoves but still performed admirably in our cooking tests. Where the Kinjia really shines, we found, was in the detail work.
Simmering is a breeze with this stove, and making more delicate dishes like omelets, fish, or crêpes can be whipped up with ease. Camper Bergen Tjossem whipped up a dinner of creamy polenta that required low and slow work and found the Kinjia to be more than up to the task. There’s no ignoring that this is just one good-looking stove, too. The black stove body is accented with brass rivets and topped off with a wood-trimmed handle that adds a bit of class to your next cookout.
When it comes to fueling, the Kinjia takes an interesting approach with a metal propane canister stand that stands alone from the rest of the stove. This holds the fuel bottle at what we imagine is the optimal angle, but in reality, it was just another loose piece we feared losing track of. Tjossem also lamented over the lack of windscreens, but has gotten pretty good at building up DIY walls instead.
The Kinjia is undeniably a compact stove, but there are a few others to consider when camp kitchen real estate is in high demand. For $70 more, the unique Jetboil Genesis Basecamp Stove System folds both burners together to cut down on space, but has slightly less powerful 10,000 BTU burner heads.
Single-burner options like the Snow Peak Home & Camp Burner are a good bit cheaper at $120. However, you do miss out on the ability to cook two things at once. Most lightweight camp stoves leave out windscreens, and we certainly did miss them on this stove when things got blustery.
It’s tough to deny the packed size of the Kinjia, however, and if you don’t need the overbuilt quality of something like the Camp Chef Everest 2X, the Primus Kinjia is an excellent solution. Vanlifers — this is your stove.
Add-on leg system makes the stove fully freestanding
Plenty of heat with twin 20K burners
Cons
Higher price
Adapter needed to run 1 lb. propane bottles
Mary Murphy
The Camp Chef Mountaineer ($470) may as well come equipped with a chow bell — this is one burly cook station that’s primed to feed the whole wagon train. The Mountaineer is ideal as an overlanding, river rafting, and base camping stove, and is a perfect option for those who cook outdoors often — and seriously.
Sporting the same dual 20K BTU burners as our favorite Everest 2X stove, this stove has firepower to spare, and I love the integrated burner-head windscreens that help direct heat up toward your cookery. The major difference between the two comes in the fueling, and while the Everest ports up to your average green 1 lb. propane bottles, the Mountaineer sports a remote hose and regulator for 5-pound canisters.
The build is also noticeably different between the two stoves, with the Mountaineer decked out in an all-aluminum body that helps to keep the weight down on this larger stove. The cooking surface is a larger 302 square inches and easily accommodates two 12” cast iron pans. During truck-assisted camping in Washington state, I used the Mountaineer to whip up Dutch oven nachos, kebabs, and salmon.
I tested the Mountaineer with the add-on leg kit ($44), and as the saying goes, if you have the means, we highly recommend picking them up. The height is just about perfect, and each of the legs is adjustable to hit the perfect balance. The stove performs equally well on a camp table; however, just be sure to remember the larger footprint it takes up.
The stove has its tradeoffs, one of which is the need for 5-pound propane tanks. An adapter is available to run the stove on more camp-friendly 1-pound bottles, but you’ll have to get your mitts on it separately. The 20,000 BTU burner strength is also hot to trot, and while the stove dials down nicely, I still suggest using slow-heating cookware like cast-iron skillets.
Finally, $470 is not a small amount to ask (the stove jumped in price late summer of 2025), but with no steel to rust out and high-quality burner heads, I’ve little doubt that the Mountaineer could last a decade or more. The price is exactly the same as what you’ll pay for a Partner Steel 18″ 2-Burner Stove, the all-aluminum stoves that Grand Canyon guides adore. With the Mountaineer being easier to snag, I think it’s the one to aim for.
Compared to other large-group stoves like the Camp Chef Pro 14, this stove is much more versatile with its option to be used on a table or freestanding, and while I loved the iKamper Disco for overlanding, those who want a more familiar cooking set-up would be well-served by the Camp Chef Mountaineer. Its rugged build will shrug off being jostled around in the back of a pickup and won’t blink at whipping up food for entire families.
If car-based adventuring is your jam, you’re going to need a camping stove that’s dialed in for the task. And while I’ve tried many, none have made an impression more than the iKamper Disco Series Stove($515) — an uber-modular cooking system that’s primed for van life, overlanding, or gathering around with friends.
Let’s start with the obvious: what’s the deal with the satellite dish? Traditionally made from plow discs, discada cookers are native to the American Southwest and Mexico and utilized by farmhands who need to cook up lunch quickly. The “cowboy wok” on the Disco stove is a 16” cast iron skillet that comes pre-seasoned, and I found it to be perfect for butter-basting steaks, cooking up chilaquiles, and making classic discada tacos.
Powering the Disco stove is a Kovea-made 8,455-BTU burner that nests solidly into the tripod stand — an impressive structure in its own right. The burner also sports collapsible feet, allowing it to be fired up on a camp table or tailgate. It runs off your standard-issue isobutane canisters. When coupled with the heat retention of the cast iron discada, this stove has enough power to shallow fry and can also be dialed back to keep things like tortillas warm.
The tripod is really where the modularity of the Disco stove shines. Adjustable in height, the stove is meant to be used standing up, providing a real community cooking feeling. A slick little table rides side-saddle and keeps all of your utensils, spices, and beer at close hand. And the real hat trick: the discada can be suspended beneath the tripod and over a campfire, turning this stove into a dual-fuel cooker with built-in entertainment. Get your cowboy TV roaring and lower the skillet to the correct level with the built-in chain and pulley system. Genius.
Other overlanding-style stoves to consider are the Camp Chef Mountaineer, a rough-and-tumble all-aluminum traditional stove that will pump out more BTUs than the Disco, but with a much larger — and less modular — footprint. The Primus Kinjia takes a different tack that will appeal more to car campers who are strapped for space, but ends up being just about the same packed size as the Disco, and that’s without the built-in cooking surface.
It’s hard to overstate just how enjoyable this stove system is to use, and that’s not just my opinion. While testing, I fielded questions from almost everyone who passed by camp. Yes, this stove system commands a pretty penny (and became $25 more expensive in 2025), but in use, I struggled to identify any potential failure point that would keep the Disco Series Stove from lasting long into the future. Overlanders rejoice, your ideal stove has arrived.
The legs and burner are low to the ground, reducing wind interference
Great simmer control
Highly responsive dials
Cons
On the pricier side ($120) for only one burner
Butane fuel can be less universal than propane
Mary Murphy
While full-fledged stove systems might get all the glory, counting out a good single burner would be foolish, and the Snow Peak Home & Camp Burner ($120) is just that: one heckuva good single burner.
The utility of a single burner is that it can be used as either a cooking solution for a couple of campers, or added into a camp kitchen as an additional burner for more dishes. During my testing, I did this often, and to great applause — nothing is better than having all your food come out hot at the same time.
Simply open the top, slide out the legs, and engage the locking pin to swivel the burner out onto any surface. Then, slide in a butane gas canister. While minimal, I didn’t experience any durability issues and would expect this stove to hold up well to extensive use.
This is one of the only butane-fueled stoves on our list, highlighting propane’s relative supremacy on the camping stove scene. While it’s not difficult to get, it may not be as universal as going with a propane stove. Compared to single burners like the Jetboil Genesis Basecamp, the Snow Peak exhibits origami-like collapsibility, making it easily the most compact on our list.
At such a small size, the Home & Camp Burner is ideal for in-vehicle cooking (just please ventilate accordingly). With no included attachments, you’ll need to add your own windscreen in blustery weather. If you ride solo often or are looking for a quality camping stove that’s equally capable and compact, look no further.
While the less-refined Explorer 14 has been our go-to get-together cooker for some years now, it was only a few minutes of using the Camp Chef Pro 14($380) before reckoning that the title had just been wrestled away. This three-burner 30,000 BTU brute has all the afterburner to boil stock pots of Dungies and whip up the sides — all at once.
The Pro 14 (which, we’ll note, is a name pivot from the previous Pro 60X — same stove) is Camp Chef’s flag bearer and is tricked out with all the bells and whistles you’d expect. All revolves around two huge burner heads that rival commercial units in size and churn out enough heat to get skillets ripping hot. During all of our testing, we never wanted more output.
Those burners are set inside a 14-by-32-inch cooking surface, which, in practice, we could fit two 8-quart stock pots atop. Protected by an ample windscreen and flanked by two folding side shelves that are stable enough for light prep work, the Pro 14 is the cookout battle station of choice for anyone looking to feed a lot of people.
One of the biggest draws of the Pro 14 for most folks is going to be the suite of other Camp Chef 14-inch accessories that can be mated up to the stove. There are pizza ovens, grill boxes, and griddles, and since the Pro 14 is a two-burner stove, you can use a few simultaneously. Editor Will Brendza used the whole spread while testing, and found the 14-inch Pizza Oven to be the gotta-have-it accessory for the Pro 14. It gets hot quick, and turns out perfect pies.
At around 50 pounds, the Pro 14 is closer to portable grills than some of the lighter camping stoves on our list. However, that weight packs up admirably well and stows with a folding leg design (a definite upgrade from the screw-on legs on the Explorer series). Still, consider that this stove takes some considerable space to move, and plan accordingly.
For family get-togethers or simply aiming to feed a large number of people, the Camp Chef Pro 14 is the stove to do it with.
(Photo/Will Brendza)
(Photo/Will Brendza)
(Photo/Will Brendza)
(Photo/Will Brendza)
Other Camp Stoves to Get Cooking On
We’ve been testing and cooking on camp stoves for nigh decades now, and while the seven award winners above are my top picks for almost any situation outdoors, there are plenty of others on the market that’ll get it done. Consider the eight options below as excellent alternatives that we’ve vetted and would stand behind any day.
If looks were the main consideration, the Primus Alika ($330) would take top honors with its sleek powder-coated lid, oak laths, and brass accents. But I also particularly like this stove because it hosts a number of unusual features, including a removable lid, which allows for larger pots and nimble cooking from all sides.
In Primus-land, aka Sweden (this stove is actually made in Europe), they envision the lid-off scene as a “360˚ gathering spot, and a place to connect over drinks and a steaming plate of food.” Needless to say, the company has embraced some new technology since then, and this stove is (almost) entirely well thought out.
A long, flexible fuel hose means you’re not married to canister placement. The regulator also stows neatly underneath, in a spring-action lock. It has a comfy webbing handle and two exterior locks for transport, which means it doesn’t rattle furiously in the car. It’s versatile, too, with an included butane adaptor kit. Oh, and those pretty oak laths aren’t just for show: with the lid removed, they function as a hot plate.
This stove also sports stout grates and two burner sizes: 10,200 BTUs and 13,300 BTUs. Both boil and simmer very well, though with a bit less overall BTU oomph than the Camp Chef Mountaineer or GSI Outdoors Selkirk. The Primus Alika is not as compact as the minimalist Primus Kinjia, but at 24” x 10.7” x 3”, it is a touch smaller and more streamlined than other two-burner models. It’s also easy to clean, thanks to a removable drip tray.
The windscreens work well, but could benefit from smaller gaps at the bottom, and the metal hooks that hold them in place are a rather chintzy design for such an otherwise superbly thought-out stove. Also, although Primus touts its snazzy piezo ignition, camper Karuna Eberl had little luck getting it to work well consistently. Finally, this stove is on the expensive side, though still considerably cheaper than the Camp Chef Mountaineer.
If you’re someone who likes to buy upper-end gear that will last a lifetime, the Alika is your stove. It’s highly innovative, and clearly a lot of thought went into the details of the design.
If you’ve been feeling cramped on your current two-burner setup, the Coleman Cascade 328 ($260) might be the beast for you. It has two standard burners on either side, then a rectangular one in the middle. All in all, you can nestle in three 8-inch or two 12-inch pots. It’s also deeper than typical two-burner models, which means it can handle a large cast-iron pan or spaghetti pot.
Otherwise, the Cascade 328 offers a fairly typical setup, kind of like a Coleman Cascade Classic on steroids. It has an attractive, burlier look and feel, with a beefed-up base and lid. More significantly, it has nicer grates that hold pots and pans a slight bit higher off the flames, which makes simmering more precise. Those grates also have a circular shape, which makes it obvious if the pot is not centered over the flame.
The windscreens work well and are decently tall, with only a small gap at the bottom. The burners are also amply recessed, but that design does create a large gap between the flame and the pot, causing water to boil more slowly. Overall, this stove feels like it can take a beating (like most Coleman stoves).
The knobs have a solid, quality feel to them, plus the whole kaboodle comes with rubber feet, so it can be slightly elevated. Also note that the ignition requires an AA battery. It comes with it, but it would be wise to bring a spare along.
On the downside, those three burners take up space and add weight. It’s more than seven inches deeper than the skinniest stoves we tested and weighs 18 pounds. Luckily, it includes a sturdy handle, which is handy for lugging it around. Otherwise, the only annoying bit is that it’s rattly when transported (stuff some towels inside to help fix that).
On that note, be sure to store the regulator in a camp towel, or it’s liable to roll into the ignitors and break them. Also, if you’re going to be using it with full guns-a-blazin’, bring extra propane canisters, as you’ll blow through your first one in about an hour when all three burners are on high.
Overall, for the price, the Cascade 328 is a great stove, especially for families or those cooking for a larger crew. Like all of the Coleman stoves we’ve used, it’s not particularly fancy, but it will likely be durable enough to be handed down through at least a generation or two.
Newly updated, the GSI Outdoors Selkirk 540+ Camp Stove ($150) bumps up the BTUs from an original 10,000 to 14,000, greatly improving this stove’s performance in my cooking tests.
While it doesn’t blow any other stove out of the water, the Selkirk 540+ does its job admirably — easily boiling water or sautéing veggies for any camp meal you can dream up. Twin metering knobs provide a smooth output and twist a full 720 degrees, offering up great fidelity to fine-tuning your perfect stir-fry, and the piezo ignition was strong right out of the box.
MY testing has shown that higher BTU output is connected to worse fuel efficiency, however. Indeed, the Selkirk was thirstier than the typical 10,000 BTU stoves like the Coleman Cascade Classic. This was the main reason the stove didn’t find itself higher in the line-up.
I also greatly appreciated the stainless steel stove basin and easy-to-remove grate for when the time came to clean up. After a few quick swipes, the stove was clean and ready to be put away. Some stoves harbor more nooks and crannies, but there’s no such issue here.
The windscreens, while of ample height, unfortunately, leave a bit of a gap between the base of the stove and the grill supports, meaning that wind had a pesky tendency to skirt around these walls and interfere with the flame pattern. Careful setup can help alleviate this, and it’s something to be mindful of when arranging your camp kitchen.
A jack-of-all-trades type of stove, the Selkirk 540+ hit the high points in our testing and would make an excellent stove for anyone who needs a stove that just plain works.
This camping stove comes with not one but two cast iron attachments for grilling and cooking on a griddle. Trust me, theColeman 3-in-1 ($275) aspect is awesome. Thanks to the versatility, you can use two burners like any other camp stove, or one burner and a grill, or one burner and a griddle.
What I loved most about this stove in testing was its durability, heat output, and simmer control. The windscreens were even adequate for 20-30 mph winds. All of the features offer a quality feel, and it can cook just about anything.
The quality of the cast iron was also on par with more expensive options (though the cast iron components do make the stove fairly heavy). Still, the Coleman 3-in-1 (a two-burner stove, grill top, and griddle) weighs less than the only other camp griddle we tested, the Camp Chef Versatop.
One somewhat glaring error, however, was the short windscreens that this stove incorporates. Not only do taller windscreens limit heat loss, but they also cut down on the grease splatter that a griddle can emit. Build up those walls, Coleman!
Hybrid stoves like the 3-in-1 generally lag behind straight-ahead camp stoves in popularity, but can be an excellent way to divide up cooking space for a number of dishes. The main tradeoff comes when sharing cooking space with multiple pots or pans and not being able to remove griddle attachments, such as on the Camp Chef Rainier 2X.
Thankfully, the Coleman is modular, and while the Rainier is a bit cheaper, this ability, plus hotter burners, keeps the Coleman 3-in-1 in the top dog spot for hybrid stove options.
If you’re a fan of cast iron, or simply want an all-in-one option that performs well in every category, the 3-in-1 is one of the best camping stoves you can buy.
Great option when cooking for large groups of people
You don't need additional pans
Cons
It takes a while to heat up fully
Can't boil
Weighs a hefty 24 lbs.
Mary Murphy
While not technically a stove, a griddle can bring a lot of joy and simplicity to outdoor cooking. The Camp Chef VersaTop($190) has a nonstick cooking surface with a wide 18,000-BTU burner underneath, plus a grill accessory.
The unique part about the VersaTop is its versatile design. With separate attachments, you can cook on a flat top, grill, or even bake bread inside. You just pull off the cooking surface, place it on another, and start cooking.
While quite heavy (24 pounds), the size and weight make you feel like a real chef. During a previous GearJunkie campout, our editors had a blast cooking breakfasts, sandwiches, and large helpings of stir fry on this stove. The 17″ x 18″ cooktop of the VersaTop is much more spacious compared to other hybrid camp stove options, including the Coleman 3-in-1’s twin 13″ x 11″ griddles, and Camp Chef Rainier 2X’s 14″ x 9″ aluminum top, and we found the raised backsplash of the VersaTop better suited for piling on food and cutting down on splatter.
Of course, going with a dedicated griddle will mean that you’ll need to lean on another single burner for any of your boiling needs, but we’ve found that adding the Snow Peak Home & Camp Burner to the kitchen when cooking on the VersaTop makes for a perfect duo. You’ll also need to take care of the flattop as your cooking surface is integrated into the stove body, and scorching can be a real pain to get rid of.
At $190, you’ll need to calculate how many killer breakfasts you’ll need to turn out to justify the expense, but if you’re a griddle savant and don’t mind the extra weight in your rig, the VersaTop might be the best camping stove for you. We find that most folks are better served by a classic two burner, but as a breakfast powerhouse, this stove reigns.
The Jetboil Genesis Basecamp Stove ($450) brings one of the more novel (if not genius) designs to the classic camping stove. It functions with a clamshell design that unfolds to display the cooking surface. And, underneath each burner is a place to chain additional burners.
“Where the Genesis really shows through is its simmering ability. The burner knob can be spun in four full rotations from the lowest to the highest setting, and each slight movement of the knob makes fractional adjustments to the flame,” we wrote in our full-length Jetboil Genesis review.
This stove system packs up small, and with the ability to chain additional burners, you can turn this system into a full-fledged kitchen for large groups at a fraction of the packed size. It’s quite expensive, but the technology backs it up, and it also comes with a lightweight pot and pan.
It’s that price, however, that keeps us from signing the praises of the Genesis at full volume, as $400 can net you the Camp Chef Mountaineer, easily a more durable and capable stove unit. While the compact nature of the Jetboil stove is one of the highpoints, we actually end up leaning on the Primus Kinjia more often for the slightly hotter burners and low-profile design that slides into camping bins with ease.
If you’re cramped on space or want to tote a two-burner system into the backcountry, the Genesis could be the best camping stove for you. While the foldability isn’t necessary for the average car camper, it’s truly one of the most versatile setups we’ve tested.
Side-by-side testing is core to our process at GearJunkie, and we challenged these stoves together to see which came out on top; (photo/Mary Murphy)
How We Tested the Best Camping Stoves
You wouldn’t head out into the backcountry with an untested backpacking stove, and while the stakes might not be as high while camping, it’ll certainly put a damper on the evening should things fizzle out. Luckily, we’ve done the heavy lifting for you, and thanks to our crew of outdoors enthusiasts, we’ve field-tested the entire spectrum of camp stoves, from compact single burners to brew up your coffee to full-blown mobile kitchens that’ll feed 10 people with ease.
Our Expert Testers
Guide author Mary Murphy is a multisport athlete, and it wouldn’t be off-base to claim that camp cooking is also one of those sports. From her outpost in Denver, she assembled our initial slate of 12 camp stoves in 2021 and dreamed up our boiling and simmering testing regimen to ensure each stove was tested on an even playing field.
I, Senior Editor Nick Belcaster, have experienced the entire backcountry culinary spectrum, from cold-soaking ramen noodles on months-long thru-hikes to whipping up full-course meals for groups of friends while car camping, and my time on the hot side has earned him the title of honorary grill master among camping compadres. Based in Washington state, I continue to test the latest and greatest in camp stoves on forays into the mountains and out to the coast — typically in something a bit more casual than chef’s whites.
Our Testing Process
Besides just boiling water, we cooked meals on each of the camp stoves for this review (including mac and cheese, sautéed veggies, meats, rice, and more). I also conducted boil and simmer tests — both with and without a manufactured wind blowing — which are a consistent way of comparing stove performance. I believe this provides a good understanding of each stove’s technical cooking capabilities. And finally, as the green canisters started to pile up, I tallied our fuel consumption to figure out the relative efficiency of each stove.
When I test a camp stove, I’m also looking at the big picture, and pay special attention to functional differences in ease of use, packability, weight, and availability of fueling. All told, our team has put close to 25 different stove systems through our ringer, and have come up with a pretty good understanding of what makes a great camp stove the center of your outdoor kitchen.
From ramen to strip steaks, we fired it up on meals across the country to test ease of use and versatility; (photo/Erika Courtney)
Boil and Simmer Tests
I subjected each propane stove to a substantial boil test. I boiled 1 L of water with the same GSI pot and lid on each stove. Before each test, I made sure the pot and water were at the same temperatures as in prior tests. I also checked the water occasionally to note when it began to boil.
Different air temperatures and altitudes will boil water differently, so I tested all of these stoves at the same altitude. Don’t buy one of these stoves and expect it to boil water at these specific times; instead, use this as a rough guide as to which stove heats the most effectively and gets the hottest. Some stoves might have faster boiling times, and others might have better simmer capabilities.
Simmer Test
To test how well a stove could simmer, I tested the knobs and saw how low the flame could go while still remaining active. I also placed a hand above the flame and lowered it to see how close we could get before it got uncomfortable.
The closer the hand could comfortably get (measured in inches), the lower I found a burner could go. Why does this matter? You don’t just want a stove to have hot and very hot settings; sometimes, you need less flame to cook on a low simmer.
I also tested each of the dials to see the range of control they allowed. The higher the degrees of rotation, the more you can turn the dial and change the heat output.
Generally, the higher, the better, as this lets you clearly know if you’re cooking on low, medium, or high. The highest were the Jetboil Genesis and Primus Alika, with 1440 and 1300, respectively, while a few only went 180, including the Camp Chef Pro 14.
Our simmer testing shed a lot of light on the pure performance of these stoves; (photo/Mary Murphy)
This list is for car camping stoves. If you want to eat hot food while hiking or backpacking, check out our review of the best backpacking stoves. Or, if a good char is your thing, take a look at our gear guide of the best portable grills. Otherwise, read on as I break down the nitty-gritty details of camping stoves.
While the camp stove might be the centerpiece of your camp kitchen, its not alone, and building out your perfect camp kitchen will require assembling the proper cook and tableware, utensils, furniture, and organizers. Check out our article on Dialing in Your Camp Kitchen for more details.
Types of Camping Stoves: Standalone Remote Fuel or Freestanding
A remote fuel stove like the iKamper Disco System means you can swap in canisters without disassembling the stove, and even use the burner remotely; (photo/Erika Courtney)
Camping stoves can be broken down into two main groups, and deciding what kind of camp cooking you’re aiming to do will help you narrow down which stove is better for you. The vast majority of camp stoves are stand-alone, remote fuel stoves, which differentiate themselves from backpacking stoves by not relying on the canister to support the stove. Weighing right around 10 pounds and packing down efficiently to be stowed away, these stoves are best placed on a camp or picnic table, with their outboard fuel canisters supported.
Freestanding stoves, on the other hand, are large group cookers and totally self-supporting. They have adjustable legs that make them easier to stand at while using, but also bulkier and harder to move around. These models typically have higher outputs to handle boiling large pots for things like crab boils or stews, and the 30,000 BTU Camp Chef Pro 14 is an excellent example. Freestanding stoves typically are fueled by the larger 20-pound propane canisters or can be used with smaller refillable canisters like the Ignik 5-pound Gas Growler.
Number of Burners
Two burners are our recommendation for most everything you’d want to cook up while camping, but chainable systems like the Jetboil Genesis allow you to add on even more; (photo/Eric Phillips)
If you spend more than 2-3 months out of the year camping — even if you are a single household — I’d recommend going for a two-burner camping stove. Two burners mean you always have the option of cooking with a pot and pan or, for instance, making one entrée alongside a vegetarian or kid-friendly option, and you avoid the musical chairs of attempting to have everything hot at the same time.
Not to mention, two-burner stoves are the standard. However, for those wanting something different, there are now many single-burner (and even a few three-burner, like the Coleman Cascade 328) options on the market. For larger groups, consider a three-burner such as the Camp Chef Pro 16, which sports 30,000 BTUs across the cooking surface.
Another easy way to augment the number of burners available is to add a single-burner type stove, like the Snow Peak Home & Camp Burner, into the mix. I’ve often utilized combos like this to churn out pasta and sauce, while my sous chef whips up a hot side.
Chainable stove systems like the Jetboil Genesis Basecamp are another excellent way to add additional cooking surfaces and reduce the number of propane bottles you need to carry. Compared to bigger three-burner units, the beauty of a chainable system is that you can leave components behind if you’re going solo or don’t need to cook that much.
BTUs Explained
The author camping and cooking along the Arkansas River; (photo/Eric Phillips)
BTU stands for British Thermal Unit. Basically, it’s a measurement of energy and, in the case of camp stoves, heat. A gas range stove you’d find in a home has about 6,000-8,000 BTUs per burner (on average), and for the curious, a single BTU is the amount of energy needed to raise the temperature of 1 pound of water by 1 degree Fahrenheit.
Lower BTUs generally mean lower-heat cooking (good for simmering and light cooking uses). Higher BTUs (anything above 10,000) indicate high-heat cooking (great for meals with longer cook times and essential for boiling lots of water quickly). The flame pattern that a burner head puts out will also affect heat transfer, but BTUs are a relatively clean way to compare stoves.
Most camp stoves today produce around 10,000 BTU, which is a perfectly functional amount of heat for almost all cooking purposes. This balances fuel efficiency well and will still boil a pot of water in a reasonable amount of time. Stoves like the Coleman Cascade Classic, Primus Kinjia, and Eureka Ingite all produce around this amount and worked admirably in our testing.
Bumping up the BTUs can certainly speed up the cooking process, especially when it comes to bringing water to a boil. The GSI Selkirk 540+ and Coleman 3-in-1 both pump out around 12-14,000 BTU, and were able to bring a liter of water to a boil in less than 4 minutes and 30 seconds.
This increase in performance does come with a cost, however, and in high-performance 20,000 BTU stoves like the Camp Chef Everest 2X, fuel consumption will take a hit. Consider bringing along multiple gas canisters when cooking with these higher-power options.
Time to Boil
Firepower is typically the quickest route to a fast boil, but other mechanisms are at play, such as wind shielding and burner head design; (photo/Sean Jansen)
Usually, when you go camping, you’re there to enjoy the outdoors. And yes, that also means enjoying hanging around camp and eating good camp food. One of the most essential criteria for a camp stove is its ability to boil water.
Some stoves can boil in 3 minutes, while others take as long as 10 minutes. The stove that boils the fastest marks a great stove, but doesn’t necessarily make it the best. If you are looking for certain features, say a lightweight stove or one with an igniter, you may have to sacrifice some boil time.
In my testing, it was no surprise that the 30,000 BTU powerhouse Camp Chef Pro 14 was hot to trot right out of the gate and boiled a liter of water in less than 3 minutes. Following that were the higher-end BTU stoves, including the Camp Chef Everest 2X, the Camp Chef Mountaineer, and the Coleman 3-in-1.
Interestingly, the glut of stoves with around 10,000-12,000 BTU shook out with a wide variance of times, and can likely be attributed to their burner size and shape. Bringing up the rear was the budget Coleman Cascade Classic, which took a full 7 minutes to boil.
All the stoves I reviewed were able to efficiently light/start, heat, and reach a rolling boil in 8 minutes or less.
Simmer Control and Flame Pattern
Afterburners are cool and all, but being able to dial back your heat will make much more enjoyable meals; (photo/Nick Belcaster)
I did a whole test on simmer control because, as I’ve mentioned, boiling water isn’t everything. In order to enjoy a good chef-quality camp meal, you want to be able to boil, but also bake, sauté, fry, simmer, grill, and more. I measured the simmering range on the flame of each burner/stove to see how they stacked up.
The pattern of the flame that the burner head puts out also has a good bit to do with how well a stove will simmer. Small burners like those present on the Primus Kinjia concentrate the heat in one area, and you’ll need to continue stirring to keep food from burning, or use cookware that dissipates heat, such as cast iron. This was one of the reasons I loved the Camp Chef Everest 2X so much, which has broad burner heads that distribute heat evenly and make for fuss-free simmering.
Performance in Wind
Tall windscreens, like on the Eureka! Ignite, can greatly reduce the wind effect on your stove’s flame pattern; (photo/Mary Murphy)
Think about how often and under what conditions (such as in cold weather) you’ll be using your stove. The more you expand your horizons to travel, the more likely you are to encounter harsh weather and wind. Knowing whether or not your stove can hold up in windy weather isn’t something you want to learn on a 10-day camping trip on the blustery New England coast.
Camp stoves aim to protect themselves from the wind in three ways. The first is windscreens, which are typically attached to the lid of the stove and are deployed by folding them out. This creates a three-sided barrier from gusts that might otherwise attempt to snuff out your flame. Windscreens aren’t often very adjustable, so you’ll want to aim your stove with the lid pointing into the wind.
The second method of blocking wind is recessing the burners into the stove pan. This is fairly prominent on stoves like the Primus Kinjia or Coleman Cascade Classic but noticeably absent on the GSI Selkirk 540+, which likely contributed to that stove’s lesser ability to avoid being blown out. The final barrier against wind is only seen on the Camp Chef Everest 2X, and those are small metal dishes that surround each burner. These made the Everest extremely resistant to being blown out.
If you live somewhere windy, you can also ensure better stove performance in wind and cold by investing in more BTUs.
Fuel Types, Capacities, and Efficiency
While butane isn’t the most popular fuel type, it is still readily available and can make for an overall more compact stove setup; (photo/Mary Murphy)
The majority of stoves on this list use 1-pound propane canisters. However, a few, like the Snow Peak Home & Camp, use butane fuel, and the Primus Alika and iKamper Disco can use both. While it varies based on how long you take to cook your meals and what setting your burner is on, a 1-pound propane canister generally lasts about three or four meals, or about 1 hour of cooking time. If you’re headed out for a weekend, I recommend packing a few canisters, as multiple meals can start to chew through them.
Propane is generally considered an all-weather cooking fuel, but it will start to get finicky as the temperatures drop. You can help safeguard against this by keeping your canisters in a warm place before cooking and tucking them back away when you’re done. Butane, on the other hand, doesn’t do so well in the cold, and I don’t generally recommend it for shoulder-season cooking.
In testing, I timed each stove for how long it would run on a single 16-ounce propane canister and found that, in general, the higher the BTUs, the thirstier the stove and the quicker it would burn fuel. At full-blast the Camp Chef Everest 2X will always find the bottom of a canister before the 10,000 BTU stoves, and because of this I always recommend only running your stove as hot as you need to cook on.
While traditional 1-pound propane canisters are single-use, you may consider investing in a refillable propane tank like the Gas Growler from Ignik ($150), which will allow you to refill your camp canister from 20-pound propane tanks. This can greatly simplify your camp cooking needs and keep disposable tanks out of the landfill.
Or, if space is at a premium, the Flame King 1-pound refillable bottles offer the same convenience, at the same size as the single-use tanks. Take note that generally all camp stoves use a screw-on adapter that accepts 16-ounce canisters, but adapters can be purchased for running off bigger tanks.
Weight and Packed Size
Weight is one of the biggest differentiators between the stoves on this list. However, these stoves are built for car camping, so you won’t really be carrying them too far. If you know you want a capable and strong two-burner, weight might not matter as much as other features.
What matters more is the packed size. There’s only so much space in your car or truck or at your campsite, so compact stoves like the Jetboil Genesis Basecamp Stove or the Primus Kinjia can make a difference.
Check to see if the stove packs down into a case, has a cover, and how the fuel line and grill can be stored. Is it all stored together? Do accessories take up more space? These are all factors to consider for your unique preferences and needs.
Ignition: Strikers vs. Matches
While packed size isn’t as important as with backpacking stoves, you’ll want to consider the overall size and weight for lugging around in your adventure-mobile; (photo/Eric Phillips)
Strikers, also sometimes known as auto-igniters or piezo igniters, are buttons that expel a spark using electricity to ignite a stove. (It’s a process similar to the button that ignites the pilot light on your stove at home.)
Over the years, I’ve had the pleasure of using some high-quality piezo igniters and felt the sadness of realizing that the built-in striker has bit the dust. Know that different qualities of piezo igniters exist, and that generally, you get what you pay for.
Other strikers that provide a spark can be flint or metal. I always opt for a camp stove that has an integrated igniter — as long as the igniter works consistently, this is the best option.
The last option for lighting your camp stove is the good ol’-fashioned match. However, matches can be wasteful and fragile, and not allare waterproof or can stand up to harsh weather. You can always bring flint or some matches as a backup method.
Extra Features: Griddles, Grates, Pots, and More
The ability to switch to cooking over a campfire makes the iKamper Disco super versatile; (photo/Nick Belcaster)
Think about who you’re cooking for. Is your group size usually one to two people, three to four, or a larger family? Also, consider what you’re cooking.
Do you make a lot of one-pot meals, or do you like sautéing, simmering, slicing, dicing, and baking when outdoors? Do you want to invest in these features down the road? Or do you want a stove with a compatible grill top, or a stove big enough for say, a dutch oven?
Finally, consider your budget. If you see a stove on sale for less than the others, I recommend jumping on it.
If you need a little more information before making your decision, take a look through our Explainer Series article How to Choose a Camp Stove.
Price & Value
(Photo/Nick Belcaster)
Buy the right one, and a good camping stove can be a bit of a legacy item. But knowing which one is right more often comes down to how often you’ll be using it and what you’re looking to cook on it. From $100 budget burners to $500 specialist units with built-in cast iron, there’s a pretty wide range of options out there.
Budget
If camping is an on-again, off-again endeavor for you (or maybe you just backpack more than you car camp), there are not many reasons to splurge on the nicest stovetop in the campsite. Budget camp stoves will certainly get the job done, and even these options will come with two burners as standard. 10,000 BTUs is common in these frugal units, and you may have to give up the ease of a piezo ignitor. Expect to pay under $100 for these burners.
For a bit more than a C-note, the Coleman Cascade Classic Camp Stove ($130) is a dual-burner that just doesn’t quit in my experience. Yes, the build uses a bit thinner material than other stoves (and it weighs a bit more, somehow), but it’s proven to be a dependable cooker, even despite the budget price.
Mid-Tier
For between $100 and $250, you can get into a camp stove that’ll go the distance and bump up the firepower a bit for dishes that might require shallow frying. Burners of between 15 and 20K BTUs will get you there and are often shielded by better windscreens and set below larger cooking surfaces that can accommodate big frying pans. This is also where some more specialist stoves reside, such as 3-in-1 options with different cooking surfaces.
The Camp Chef Everest 2X ($230) has been our top pick for almost 5 years now, and I’m sticking with it. No other stove has the rugged build quality, 20,000 BTU burners, and reliable piezo ignitor as it does. There are a number of reliable dual-burners that perform just slightly less, however, such as the GSI Outdoors Selkirk 540+ ($150).
Premium
North of $250 are the premium options, which include large camp stoves with integrated legs and dual-burners with novel designs, such as all-aluminum constructions or collapsible configurations. These stoves are certainly investment pieces, but our testing has shown that they’re built to last.
The Camp Chef Pro 14 ($380) is my new stove of choice for feeding large groups, and the two 30,000 BTU burners have more than enough to do it with. The Camp Chef Mountaineer ($470) is everything I love about the Everest 2X — just lightweight aluminum — and if you’ve got the extra dough, I highly recommend it. At the very end of the spectrum, the $500+ iKamper Disco costs a pretty penny but jams in so much cooking ability that its tough to use it all in a weekend.
Frequently Asked Questions
What is the best small camping stove?
Small can mean compact or, in the case of camp stoves, slimmer and lighter. Each of the stoves on this list is designed with some form of portability and compactness in mind.
If you are tight on space and looking for a truly small stove to stash away in your camp kit or vehicle, I’d recommend the Snow Peak Home & Camp Burner (a one-burner option) or the Primus Kinjia (a slim and more budget-friendly two-burner).
What is the best camping stove for families?
By far, the best stove for families is the one that will fit your family’s needs. That being said, I’d recommend a stove that’s sturdy, versatile (can cook multiple meals), and easy to clean.
You can’t go wrong with any of our top picks, but the Camp Chef Everest 2X stands out for peak cooking performance and durability. The Coleman Cascade Classic Camp Stove, on the other hand, stands out for budget-friendly, simple, and durable use. Both are durable options that should last for years of family gatherings.
Which is better — a butane or propane camping stove?
Both butane and propane have their pros and cons. Both are pressurized gasses — gas that is compressed and stored as a liquid. Butane tends to perform less well in colder weather. Propane canisters can come in all types of sizes (a better variety to suit a wider range of needs).
It’s important to take note of what climate you’ll be using your camp stove in most. Also, propane is fairly easy to access — you can find it in a big city, in rural towns, even in general stores near state or national parks.
Does the stove have a fuel line adaptor to accommodate different types of fuel? Only a few stoves on the market can run on multiple fuels (Coleman even makes one that runs on gasoline), but the majority are designed for solely butane or propane.
Backpacking stove vs. camping stove: What’s the difference?
Backpacking stoves are very small single-burner units that can fit in a backpack (even the palm of your hand). Their weight is measured in ounces. Camping stoves, however, are used at “base camp” when you are car camping, truck camping, visiting National Parks, or traveling between.
Camp stoves are bigger and heavier (average 8-14 pounds), and they’re made to be set on a tabletop, truck bed, picnic, or camp table, converting your camp into a camp kitchen.
If you’re looking at the differences between both and are still stumped as to which to choose for your next outing, read up on How to Choose a Camp Stove in our handy guide.
What should I look for when buying a camping stove?
First, consider how you plan on using your camping stove. Someone who is looking to make a near-fixture of their camp stove in a van build-out is likely to have different requirements over someone who only needs to boil water during weekend camping trips. If you are in the first camp, look into your more substantially built stoves, such as the Camp Chef Everest 2X. For more casual use, consider the Coleman Cascade Classic.
Then, think about the types of meals you are looking to brew up. More substantial or complicated meals will require more cooking space, as well as potentially more heat output. Look for a twin burner stove with at least 10,000-BTU output if you’re the camp chef of your friend group. We find the Coleman 3-in-1 to be a versatile stove that is ready for any type of meal.
Finally, consider if you might ever utilize your stove in a hike-in capacity. There are a number of lighter camp stoves on the market, such as the Snow Peak Home & Camp Burner or Jetboil Genesis Basecamp Stove, that make packing them into camp a much easier chore.
The right stove makes life on the trail better. From ultralight canisters to four-season and multifuel options, we’ve found and tested the best backpacking stoves.
A good shotgun is a long-term investment. I’ve personally been carrying one shotgun in my lineup, a Remington 1100 Special Field, since the early 1990s, and it’s still going strong with minimal maintenance.
So when you decide to close the deal, you’re cementing a relationship with a tool that you may have for the rest of your life and pass on to your children. No pressure!
Fortunately, shotguns also hold their value fairly well, so trading them out won’t usually break your wallet. But you want to make an informed decision when getting a new shotgun, so our hunting team put our years of collective shooting experience together for some recommendations to help guide your purchase. (And it’s worth mentioning that this article focuses on shotguns you can buy new today.)
A note on specs and product scores: with so many of these shotguns having different variations, all specs are for the most basic 12-gauge model, unless otherwise noted. For many of these guns, there are models suited for specific needs that will have different specs. However, the specs of a standard 12-gauge will give you a relative comparison. And some of these non-12’s are too good not to share.
Likewise, the application rankings in this guide are based on the standard model. Specific models would change our scores.
I’ll jump right into my favorite shotguns now. But if you want more guidance, hop down to the end of the article, where I discuss the intricacies of shotguns so that you can make an informed purchase.
Editor’s Note: GearJunkie updated this guide on August 29, 2025, by adding product scores, updated specs, expanded reviews, and a more in-depth buyers’ guide section. We also added the ATA Arms Neo X Max-7 as “The Best Deal in Shotguns.”
Benelli invented the inertia-drive system of shotguns and thus has earned a reputation for producing the most reliable semiautomatics on the planet. And the Super Black Eagle 3 (starting at $2,199) might be the most reliable of all.
Unlike many shotguns that cycle through the redirection of expanding gases, Benellis use the inertia created by recoil to cycle new shells. It’s a foolproof method that is recently being copied by a lot more brands now that Benelli’s patent on the system has expired.
But still, there’s nothing like the original. The Super Black Eagle 3 is a beast of a shotgun, with the 12-gauge model capable of chambering everything from 2.75- to 3.5-inch rounds. It’s a renowned weapon of waterfowl hunters, but capable of handling light enough loads to tackle upland game.
Now, for the B.E.S.T acronym: It means “Benelli Surface Treatment” and is the brand’s new proprietary finishing technology. The coating protects steel with a tough, impenetrable armor that stops rust and corrosion.
Benelli is so confident the treatment is impervious to the elements, the brand backs parts treated in B.E.S.T. with a 25-year warranty. Throw it in a duck boat, drop it in the mud, and shake it off. It will keep on firing and cycling reliably.
In 2025, Benelli also introduced the A.I. version of the SBE 3. No, that doesn’t mean artificial intelligence, but rather “advanced impact.” This technology is in the barrel of the shotgun and results in deeper penetration of bb’s. That means more effective kills and fewer cripples.
But if you can’t quite afford the original, maybe consider this runner-up to the Benelli. Made by a subsidiary of the same company, Franchi offers much the same engineering as its sibling at a more palatable price.
The Affinity series shotguns land right around the $1,050 mark; they’re not cheap, but not particularly expensive in the world of guns. And at that price, they are excellent, reliable tools that are remarkably versatile.
The Affinity 3.5 is the big hammer of the line. Available in several synthetic finishes as well as wood, the Affinity 3.5 can cycle everything from 2.75- to 3.5-inch shells. That makes it a versatile performer for those who want to shoot light ammo for target and smaller quarry, or up-gun to the big 3.5-inch magnums for turkeys and waterfowl.
That particular model is the everyday shotgun carry for contributor Morgan Nowels’ younger brother. He’s used it for turkey, South Dakota pheasants, and quail and huns in Washington state. It has never once failed to cycle after four years of use. It flat-out shoots. By using a shim kit, he was able to get a custom fit, and a perfect shotgun without forking over ridiculous amounts of money.
As the Affinity uses an Inertia Drive system very similar to that of Benelli’s, this Franchi is a very reliable semiauto that can handle the extremes hunters will throw at it.
Finding a reliable, true budget semi-auto is a tall task. The $530 ATA Arms NEO X Max-7, however, is up to it. Obviously, the price is a huge selling point, but there are numerous things that make this shotgun such a standout performer.
First is the inertia-driven, semi-automatic system. Like the Franchi, the similarities between the system on this gun and the much higher-priced Benelli SBE 3 can’t be ignored. I’ve shot this gun plenty, and have had no jams. It cycles reliably, even with light target rounds that can give inertia-driven guns trouble.
Out of the box, it fit perfectly without needing to use the provided shim kit. It swings well, shoots accurately, and is lightweight for long days in the field.
Furthering the value, the ATA Arms NEO X Max-7 comes with five chokes, meaning you’ll be set for any hunting scenario you throw at it. No, the finish isn’t as nice as other guns, and no, it doesn’t come in a 3.5-inch chambered version. But if you’re looking for a semi-auto that will flat out perform and leave plenty of wiggle room in the budget, this is it.
The Browning Citori is a legendary line of over-under shotguns. It hit the market in 1973 as a more affordable option to the Browning Superposed, which is more or less the grandfather of modern over-under shotguns.
But one criticism of the Citori is it’s somewhat blocky in shape. Well, the Citori 725 (around $2,550) streamlines that classic shape for a slimmer over-under. It also adds a mechanical trigger, which will fire a second barrel even if the first barrel doesn’t shoot.
Straight up, this is my favorite shotgun on the market right now. I recently dropped a big chunk of cash to buy my own after months of researching shotguns online. And after several hundred rounds of breaking clays, I love it.
The crisp trigger pull, lightness in the hands (7.6 pounds for the 12-gauge, just under 7 for the 20-gauge), and quick mounting make it a perfect over-under for the field as long as you can stomach the price tag.
If the Browning isn’t your cup of tea, or you want a 12-gauge, the Beretta Silver Pigeon ($2,450) is another iconic over-under for the field. The Italian double gun has a reputation as a well-balanced, quick-pointing shotgun that is accurate, reliable, and beautiful. It’s also a fairly light gun to carry, weighing in at 6.8 pounds for the 20-gauge.
The design of the 686 uses opposing trunnions (projections) mounted on the receiver walls where the barrels pivot, thus eliminating the need for underhooks to form a hinge. The result is a more compact arrangement that some shooters love for instinctive pointing and a low-profile line of sight. This well-loved classic is a stalwart of the upland fields.
If you were to choose one shotgun to do everything in every condition, you’d be hard-pressed to find a better all-arounder than a Remington 870 in 12-gauge.
Remington introduced the 870 in 1950, and with millions produced since then, you can find them in every possible configuration, stock material, and gauge. It’s an icon of the shooting world for a good reason: It’s cheap and works very well.
If you’re on a budget, you’re in luck as you can usually find the Remington 870 Express for under $400. Or, maybe you already have a favorite shotgun but are looking for a second turkey, upland, or home defense shotgun but will only use it occasionally. There are 870s available for all of those applications.
However, many people will buy the classic 870 Express and hunt everything from South Dakota pheasants and Wisconsin r■ grouse to Mississippi waterfowl and East Coast deer with it. There were some reports of quality issues pre-2020, but since the formation of RemArms, the 870 is back to its legendary reliable performance.
With a unique humpback design, the Browning A5 stands out like a sore thumb on any gun rack. But while beauty is in the eye of the beholder on this one, for some, the A5 shoots like a dream. That’s due to the odd humpback that tends to put some shooters’ eyes on the perfect sight plane.
Well, the Sweet Sixteen ($1,779) is Browning’s 16-gauge edition of the A5. It’s a very unique gun in that regard, but one that has admirers among a decent swath of serious shooters. On the plus side, 16-gauge is a really versatile size and tends to be quite rare. Thus, it holds its value very well. And oh, the Sweet Sixteen is a dream to shoot. I’ve crushed a bunch of clays with one and fell quite quickly in love.
On the downside, well, 16-gauge is rare. Finding ammo can be tricky, and the selection will be much more limited than that of 12- and 20-gauge models. But for those who want a gun that stands out from the crowd, this one will be a pleaser.
In the world of shotguns, the words “over-under” and “budget” rarely meet. Double-barrel shotguns of good quality just tend to be expensive.
One exception is the CZ USA Drake, a legitimate shooter that rings up at a retail price of $750. CZ USA imports guns from Turkish manufacturer Huglu and has developed a reputation as a darned good gun for the budget shooter.
No, the fit and finish won’t match that of higher-end doubles on this list. But if you’re itching for that classic double-barrel feel and aren’t flush with cash, this is a very good option.
The Drake has extractor operation, a single selectable trigger, mid-rib delete, and laser-cut checkering. You can get one in 12, 20, 28, and .410 with 28-inch barrels. While some upland hunters like the extractor operation for ease of picking up spent shells, GearJunkie contributor Morgan Nowels dislikes it because he’s really good at missing birds. The extractor makes follow-up shots near impossible.
Amazingly for the price, the Drake ships with a set of five flush interchangeable chokes (except .410, which has fixed IC/MOD). The Drake also comes in the Southpaw, a lefty-friendly variant for the left-handed shooter.
Endless variations for application specific hunters
Great point-ability
Smaller sizes are lightweight
Price
Cons
Heavy trigger pull (7lbs. 11.5 oz)
Sean McCoy
The Winchester SXP ($359) claims to be “the world’s fastest pump-action shotgun.” That’s due to its inertia-assisted pump action. Whether the “fastest” claim is true or not doesn’t really matter, as the SXP is a killer value for a well-balanced, well-made bird gun.
We shot the standard 28-inch field model and were impressed with the point-ability as well as the smooth action. It comes standard with three chokes, and, at 6 pounds, 14 ounces, it was a breeze to carry for consecutive days in the field.
There are a plethora of models available in a wide variety of price points, but the standard SXP Black Shadow is a great budget pump, trying its best to be an autoloader.
The Benelli Ethos ($1,999) is one beautifully shooting semiauto, particularly for upland hunting. The Ethos uses Benelli’s excellent Inertia Drive system. And while recoil-operated semiautos tend to kick a little more than a gas-driven system, the Ethos has a nicely engineered recoil management system built into the stock.
We’ve hunted with this gun quite a bit and really enjoyed the way it carries in the field. And upon a flush, it points quickly while offering enough barrel weight to swing through well. It’s a real hammer on pheasants and allowed us to even take a few doubles on roosters.
For those looking for a single semiauto shotgun that can do it all and still be light enough to carry all day in the field, it’s hard to top the Ethos.
Buyers Guide: How to Choose the Best Shotgun
The author and his dog hunt on a logging road in northern Minnesota; (photo/Thacher Stone)
While I’ve tried to lay out some top options above, there are literally thousands of very good shotguns you could buy, dating back to the early 20th century. So chances are very good that you’re going to consider buying one that’s not on the list above.
What do you need to know to buy the best shotgun for you? Let’s break it down.
Gauge
(Photo/Paul Einerhand)
The gauge of a shotgun refers to the diameter of the barrel. It’s a measure of how many lead balls of the barrel’s size equal a pound. Yes, it’s an asinine way to measure something. But it’s what we’ve got. Thus, a smaller number equals a bigger barrel.
Most hunters will choose between a 12-gauge and 20-gauge, with other, less common sizes being 16-gauge, 28-gauge, and .410-caliber, the latter of which is actually a measurement related to rifle size and very small.
A 12-gauge is the do-it-all, most common option. It will do everything you’ll ask of it, whether it’s waterfowl, upland, turkey, or deer hunting. If you can only have one, a 12 should be it. The only downside is that the gun will be heavier and kick more than other options. For that reason, you’ll see many new hunters, youth, and women shoot a 20.
Twenty gauges are very popular in upland hunting circles due to the lightweight nature of the gun and the relative delicacy of the game they’re chasing. You don’t need a booming 12 with 3.5 shells to take out a grouse in thick cover.
While they can also serve as a good turkey and waterfowl gun, a 20-gauge shouldn’t be the first choice for those applications. But, if you’re looking for less kick and weight while maintaining versatility, a 20 is a great bet. And for experienced shooters, a 20 is arguably the best there is.
Our team does need to note the love for the 16-gauge, and the Browning Sweet 16 in particular. Usually, a middle-of-the-road approach leads to a product that isn’t good at anything. That isn’t the case with a 16-gauge. Maybe it’s the rarity of it, but we feel a 16 is absolutely perfect for everything. Yes, the ammo is limited, and you’ll probably have to start reloading. But dang, it’s a good gun to own. Plus, you look refined carrying a 16, and the value is going to stay up there.
Action
Range time prior to the rain found us taking aim at clays; (photo/Matt Gagnon)
The action refers to how the gun cycles between shots. Common actions are semiautomatic, pump-action, and break-action.
Semi Autos
Semi-autos use either the inertia of the shot recoil or gases created during firing to cycle a new shell into the chamber. As a very general statement, a gas-operated gun will kick less, but experience more cycling issues. An inertia gun will kick more, but reliably cycle. But even that requires an asterisk.
If you’re target shooting with light loads, opt for a gas-driven gun. It will effectively use the gas to cycle between rounds. A light load in an inertia gun, on the other hand, may not give enough kick to cycle effectively. But both work well in either situation. The skinny is, if you’re hunting, go inertia; if you’re target shooting, go gas, even though both can work in either situation.
Pump Action
A pump action is exactly what it sounds like. Hunters use a mechanism called a “pump” to eject the spent shell and insert a new one. The big draws to pump-action guns are that they’re priced affordably and are very reliable.
While it takes longer to cycle between shots, some hunters actually prefer that. The action of pumping requires you to slow down and re-acquire a good sight picture on your target rather than wildly slinging lead or steel down range with a semi-auto.
Break Action
Break-action shotguns work by opening the gun with a lever, exposing the back end of the barrels where the shooter loads shells. When you close it back up, two barrels fire in succession as the trigger is pulled, much like a semi-auto.
There are two types of break-action guns: an over-under and the less common side-by-side. The names are indicative of the orientation of the two barrels.
There are also differences in how shells are expelled from a break-action gun. When you open the gun after firing, it will either use an ejection system to shoot out the spent shells (an ejector) or the hunter has to pull the spent shells out by hand (an extractor). An ejector allows for a faster reload, but it can make finding spent shells more difficult.
One of the most significant benefits of a break-action is the ability to use two separate chokes on the same gun. You can stick a more open choke in the first to fire barrel and a tighter choke in the second barrel for longer shots as the target or game moves away from you.
If you’re walking a long way with a shotgun, break-action guns also offer a wider variety of carrying options, and are an absolute pleasure to carry in the field. Just remember, you’re realistically limited to two shots.
Choke
The choke of a shotgun is a restriction in the last portion of the barrel that helps control the way pellets disperse into a “pattern.” Common chokes, from most open to tightest, are improved cylinder, modified, and full.
There are many other choke variants, but in short, hunters use open chokes like improved cylinders when they expect close shots and want the pellets to spread quickly. Full choke keeps the pattern tight for longer shots. Modified falls in the middle.
Many modern shotguns use interchangeable chokes that you can change easily even in the field. These enhance the versatility of the shotgun. Most new hunters or shooters should buy a shotgun with interchangeable chokes if possible.
Shotguns for Different Hunting Applications
Now that you understand some of the differences in shotguns, it’s time to put that knowledge to real-world use. Below are recommendations for different hunting applications. However, you need to understand that these recommendations are generalizations. You can use just about any shotgun for any type of hunting. That’s what makes them so awesome.
Upland
(Photo/Rachelle Schrute)
Upland hunters have different needs than other shotgun users due to the amount of ground they cover in a day in the field. Weight savings and comfort in carry become some of the most important features of a gun.
Since most upland game birds aren’t hardy, a 20-gauge like the Browning Citori is a very popular choice. The overall weight of the gun is lighter, and there isn’t a need for the extra punch a 12 offers. However, 12-gauges are still popular (especially with pheasant hunters), and can absolutely be used for upland hunting.
Break-action guns are the classic guns for upland hunters. The main reason is the diverse carry options a break-action provides. It can be broken apart and slung over your shoulder, which makes it feel like you aren’t even carrying a gun. You can also sling it over a forearm, or carry it closed just like you would a semi-auto.
However, there is one situation where a semi-auto may be the better choice. Most upland regulations do not have a shell limit, and many chukar hunters love having five rounds. The amount of work to find birds is unmatched, the shots can be hard on steep slopes, and the birds covey well. Having the extra shots is well worth it.
Waterfowl
(Photo/Chad Belding)
If waterfowl is your primary target, lean toward a 12-gauge. A 12 will have plenty of power to knock down big mallards at a distance and is the gauge to use for larger birds like geese.
It’s hard to know for sure, but either a pump action or a semi-auto is the most popular action for a waterfowl gun. Both will allow you the maximum three shells allowed for waterfowling.
A pump, like the Remington 870, gets the nod for affordability. A semi-auto, like the Benelli Super Black Eagle, gets the nod in functionality. It’s nice only to have to pull the trigger when mallards are raining into your spread.
Waterfowlers should also consider the finish on their shotgun. You’ll be dragging the gun through mucky swamps and often getting it wet. Those conditions can quickly rust a shotgun. That’s especially true if you plan on hunting saltwater. GearJunkie contributor Morgan Nowels has hunted ducks on the Great Salt Lake, and every morning his shotgun would develop rust spots within a few hours.
Most of the guns on this list come in a variety of finishes. A cerakoted gun will be more expensive than the standard version, but its worth the investment for waterfowlers.
Turkey
A successful hunt with the Holosun HE508T X2; (photo/Adam Moore)
Many people use their standard 12-gauge for turkey hunting, and there isn’t any reason the gun you have won’t work. But for those who religiously chase springtime gobbles, a dedicated turkey shotgun is awesome. And if that sounds like you, check out our Best Turkey Vests buyer’s guide.
A gun like the Franchi Affinity 3 Turkey offers a pistol grip that excels at accuracy while shooting from a seated position, an actual sight rather than a simple bead, and a camo finish. It comes standard with chokes designed for turkey hunting.
This type of gun is a bit of a one-trick pony, but it would also excel at deer hunting. However, even if you don’t spring for a dedicated turkey shotgun, you should opt for one with a camo finish if you plan on chasing long beards.
Final Thoughts
Of course, shotguns are complex tools. Many books have been written about them, so I’m leaving out a lot of details. Things like stock material (wood versus synthetic) and length of pull have a huge effect on the way a gun performs and feels. But if you’re getting a shotgun, you have a lifetime to learn about the nuances of the tool.
For now, you should be on your way to making a reasonably informed decision. Good luck — and happy hunting.
A good pair of socks can make or break a day on the trail. Whether I’m out for a casual hike, tackling a big summit, or heading out on a multiday backpacking trip, the right socks keep me comfortable and focused on the adventure. After testing dozens of options, I’ve found a few that hold up to everything I throw at them.
Over the past five years, I’ve put more than 30 pairs of hiking socks through hundreds of miles. I tested them on everything from quick afternoon loops to long, rugged hikes and multiday treks. I paid close attention to breathability, cushioning, comfort, stretch, and long-term durability.
Like every pair of Darn Tough socks I’ve owned, the Darn Tough Hiker Micro Crew Cushion ($26) stands out for its high-quality merino wool, seamless comfort, and impressive durability. The merino blend resists odor, keeps the fit dialed in, and holds up far better than synthetic socks I’ve tried. They never slouch, bunch, or fall, even during long hikes. I’ve worn these on some of my toughest days in the Tetons, and I’ve never had to adjust them. That alone makes them worth it in my book.
I wear them year-round, but they shine in spring, summer, and fall. They’re warm enough for chilly mornings but wick moisture well when temperatures climb. The crew height is perfect too, offering protection from rocks and brush without feeling too tall or bulky.
The medium cushioning is my sweet spot. It’s enough padding for rocky trails without feeling overly thick or sweaty. Darn Tough’s lifetime guarantee is another big win for me. If they wear out, I can return them for replacement. My only minor complaint is that they don’t feel as soft as others, including the REI Co-op Merino Flash Socks.
They are more durable than plush, but I’m happy to make that tradeoff for the longevity. If you hike in primarily hot weather, consider the thinner, Light Hiker Micro Crew version. Or, if you want to add a little style to your hiking garb, consider one of the many fun options of this sock, like the Men’s Close Encounters or the Women’s Treeline Micro Crew.
No matter the color or style, the Hiker Micro Crew is a stellar choice if you’re looking for durable, tried-and-true socks to help you tick off all your hiking goals.
Our best overall pick, the Darn Tough Micro Crew Hiking Socks are ideal for big pushes in the mountains; (photo/Elk Raven Photography)
Hiking isn’t about how you look, but it’s a bonus when your gear performs incredibly well and makes you smile. That’s exactly how I feel about the Darn Tough Bear Town Micro Crew Lightweight($25). They’ve become one of my favorite pairs, not just for the adorable bear design, but because they deliver serious comfort and performance on the trail.
These merino wool socks are lightly cushioned and low-profile, which I love. They allow my feet to move naturally inside my shoes while providing enough padding to keep me comfortable during long miles. I’ve worn them on everything from short training hikes to over 20-mile days in the Tetons, and they’ve never bunched up, slipped, or caused blisters. The reinforced footbed and heel cushioning boost overall comfort and enhance durability.
One of the things I appreciate most is how well they last over time. I’ve rotated between a few pairs for years and still find myself putting on the Bear Towns first. The merino keeps odor to a minimum, even after wearing them for days in a row, and they’re incredibly soft; no itch, no stiffness. I’ve even gotten compliments on the trail just for the fun design, which honestly gives me a little morale boost when I’m deep into a big hike.
The only downside is sizing. They run a little small in my experience, so if you’re between sizes, I’d definitely recommend sizing up. That’s what finally gave me the perfect fit.
If you’re looking for a durable, lightweight hiking sock that performs just as well as it looks, the Bear Town Micro Crew is a great pick, especially if you like your gear with a bit of personality.
The best hiking socks can make all the difference; (photo/Elk Raven Photography)
I tested all of these socks, including the Darn Tough Bear Towns, by hiking to epic destinations in the Tetons; (photo/Elk Raven Photography)
I’ve put the REI Co-op Merino Flash Socks($20) through the wringer on Teton trails, and they’ve quickly become a favorite since the price is right and the quality is top-notch. From long days climbing to Amphitheater Lake to quick loops around Phelps Lake, they’ve nailed that balance of comfort, breathability, and durability.
On sweaty uphill pushes, especially on steeper sections like the switchbacks going to the top of the Jackson Hole Tram, these socks kept my feet cool and relatively dry. Even when my trail runners were soaked due to creek crossings, the merino dried surprisingly fast right on my feet. My feet can get sweaty, but I never felt clammy or uncomfortable in these.
I also noticed how well the cushioning worked on rockier routes like the Paintbrush-Cascade Loop. My feet stayed blister-free with no hot spots, even after 15-plus-mile days. The only minor issue I had was a little heel bunching on steep scrambles, so I’d recommend trying a couple of sizes if you fall between two.
Overall, these have become my three-season staple. They are breathable enough for hot afternoons and warm enough for those chilly early starts.
The REI Co-op Merino Lightweight Flash Socks are breathable and a great value ; (photo/Elk Raven Photography)
I’ve always been a fan of Smartwool’s lightweight ski socks, so I was curious how its summer hiking socks would stack up. The Smartwool Hike Light Crew socks ($25) quickly won me over. They’re soft, comfy, and breathe really well. Previously called the PhD Outdoor, Smartwool made some upgrades on this round that I definitely noticed.
The fit feels dialed in, with just enough cushioning in all the right places. I like that they’ve added more mesh zones for breathability and reinforced high-wear areas. After months of regular use, they still look and feel like new, which says a lot considering I’ve worn them for everything from hiking and trail running in the Tetons to backpacking through the Winds and even along the coastal trails of Point Reyes.
On the steep climb to Delta Lake, they stayed put with no bunching or blisters, and I really appreciated the cushioning under my heels and arches on the rocky trails. On sweltering hot days, I choose something lighter like the Balega Hidden Comfort Socks because the Smartools run warm. If you like more cushion, the Darn Tough Hiker Micro Crew is worth a look, but for most of my hikes, these have been a perfect balance of comfort and breathability.
The Balega Hidden Comfort ($16) is my top no-show sock for running and light hiking. It delivers a soft, cushioned feel without adding bulk, and the moisture-wicking performance holds up surprisingly well. Whether I’m logging miles on the trail or heading out for a casual hike, these socks keep my feet comfortable and blister-free across a range of conditions.
I originally bought them for running, but quickly realized how well they perform on the trail. I’ve worn them on mellow loops around Phelps Lake and quicker hikes up to Bradley Lake in Grand Teton, and they always stay soft, breathable, and comfortable from start to finish.
What stands out most is the plush underfoot cushioning. It provides just enough padding to take the sting out of rocky or uneven terrain without ever feeling thick or restrictive. They disappear inside my trail runners, stay put without bunching, and dry quickly after sweaty climbs or stream crossings. These aren’t warm socks, which makes them perfect for hot summer hikes when my feet need breathability more than insulation.
They work best with low-cut hiking shoes or trail runners, but not boots, so their use is somewhat limited. I also noticed they sag a bit on longer hikes, especially after multiple washes, which gets annoying by the end of a long day. I save them for easier outings, casual hikes, travel, and everyday use when comfort is the top priority.
Not ideal if you’ll be taking them on and off throughout the day
Chris Kassar
If I’m planning a fast-paced hike or trail run, I always throw on the CEP Run Compression Socks ($19). I’ve run, hiked, and worked out in them, and they consistently deliver on comfort and performance.
The targeted compression helps improve circulation, reduce swelling, and ease foot fatigue, especially on longer days. I’ve even noticed they help with mild plantar fasciitis flare-ups. If you’ve never tried compression socks, these are a great way to start.
They wick moisture well, breathe better than I expected, and come in fun colors that make them enjoyable to wear. I use them both during hikes and afterward for recovery. While they aren’t as durable as thicker hiking socks and can be somewhat difficult to put on, they’ve significantly improved my speed and performance.
Keep feet cool and comfy with the CEP Run Compression; (photo/Elk Raven Photography)
Thick, soft cushioning for comfort under heavy loads
Merino wool wicks moisture and resists odor
Very durable and holds up well after repeated use
Cons
Too bulky for warm weather or snug-fitting boots
Not suitable for fast hikes or high-output activities
Chris Kassar
I turn to the Smartwool Mountaineer Classic Edition Crew Socks ($27) when I know I’ll be out in the cold for hours, especially on slower-paced hikes or winter trips. These are the thickest, warmest Smartwool socks I’ve used, and they deliver serious comfort in frigid conditions. I’ve worn them on snowy day hikes, hut trips, and winter camping, and they always keep my feet warm, even in sub-freezing temps.
The full cushioning is the main draw. My feet feel completely protected from pressure points, and the extra padding helps on rocky terrain or when I’m carrying a heavy pack. The merino wool handles moisture surprisingly well for such a thick sock, and I haven’t had issues with clammy feet or blistering, even after long days in winter boots. I’ve used these for long days of ice climbing in Ouray, epic winter training expeditions on Mount Elbert (Colorado’s highest peak), and for an actual summit of Denali, where I was in these socks (and a few other pairs) for 27 days. Even though I was stinky, exhausted, and hungry all the time, these socks exceeded my expectations.
That said, I don’t use them for everything. They’re too warm and bulky for shoulder-season hiking or any fast-paced days. I also have to size up slightly in some boots because of how thick they are. But, for cold adventures, these are the first socks I throw in my pack.
I like socks that can handle workouts but also look good for everyday wear, and the Feetures Elite Lite Cushion socks ($20) do both really well. With fun color options and an athletic look, they’ve quickly become one of my favorite all-around pairs.
The left and right foot-specific design gives a snug, supportive feel whether I’m running, biking, or hiking. They’re thin but surprisingly cushioned, and the seamless construction adds noticeable comfort. They wick moisture well in breathable shoes, but I’ve noticed my feet get damp in waterproof boots.
These aren’t my choice for hikes when I want extra padding, since they don’t have the cushion of a thicker hiking sock. But the fit is spot-on, they stay comfortable all day, and after months of regular use, they’ve held up really well. For $20, they’re a great option for active days on and off the trail.
The Feetures Elite Light Cushion deliver a moderate amount of cushioning; (photo/Elk Raven Photography)
I’ve worn the Icebreaker Merino Hike+ Light Crew Socks($25) on everything from mellow hikes to multiday backpacking trips, and they’ve consistently delivered comfort and performance. The light cushioning feels just right for warm-weather hikes or when I want a little extra padding without bulk. The merino blend keeps my feet cool, dry, and stink-free even after hours on the trail. With targeted support zones and a snug fit, they stay in place and don’t bunch or slip inside my boots. Over time, they’ve proven to be impressively durable, even after repeated washes and heavy use.
That said, they’re not cheap, and on especially hot days, the wool can feel a bit warm. Hikers who prefer ultra-thin socks or want maximum breathability in peak summer heat may find these slightly overbuilt for their needs.
These socks are a great fit for hikers who want a light, comfortable, and breathable merino option that can withstand serious mileage.
Lower cut offers less protection from brush and debris
Chris Kassar
The Darn Tough Quarter Cushion Socks ($22) have become a staple in my rotation for everything from hiking to running. They’re lightweight but still provide just enough cushion to stay comfortable mile after mile. The merino wool blend strikes a great balance between warmth and breathability, and they’ve never felt too hot or too thin, even on longer hikes.
I’ve put in hundreds of miles in these socks, from day hikes in the Tetons to quick trail runs, and they’ve always stayed snug without slipping or rubbing. They’re breathable enough for summer but still work well in cooler shoulder season hikes.
Compared to the Darn Tough Micro Crew Hiking Socks, these feel lighter, more breathable, and better suited for faster-paced days or lower-mileage hikes. The Micro Crews offer more cushioning and a taller cut, which I prefer for rocky or brushy trails. The Quarter Cushions, with their lower cut, feel faster and cooler but offer less protection from trail debris.
I also appreciate that all Darn Tough socks are made in the U.S. and backed by a lifetime guarantee. I reach for these when I want to move fast, stay cool, and keep my feet comfortable through every mile.
When I want something light and breathable, I choose the REI Merino Wool Lightweight Hiking Socks ($18). They have a cool, airy feel that works great for warm hikes and quick-paced days. The recycled polyester is soft against my skin, and the crew length keeps dirt and brush off my legs without overheating.
Even though they’re called ultralight, the extra reinforcement around the heel, toe, and footbed makes them feel a little sturdier, which I like for rocky trails. The seamless toe adds comfort, and they wick sweat quickly, keeping my feet dry through long miles.
They do feel slightly thicker in the reinforced zones, so they’re not as barebones as a pure super-light sock, but I don’t mind the tradeoff for the extra durability.
These are solid picks for fast-moving hikes when I want to stay cool but still have some protection.
I grab the Smartwool Classic Hike Extra Cushion Crew ($24) whenever I need maximum comfort on the trail. These are thick, warm, and heavily cushioned, making them perfect for cooler days, backpacking trips, or any hike with a heavy pack.
The extra cushioning reduces the sting from rocky trails and long downhill sections. My feet always feel supported, and the thick padding helps lessen soreness after long miles. The merino wool does a great job managing sweat and odor, keeping my feet dry and fresh even after full days on the trail.
Plus, they hold up well. After dozens of hikes and washes, they haven’t lost their shape or softness. I also appreciate the extra coverage from the crew height, which keeps my ankles protected from brush and trail debris.
They do feel bulky, though, so I skip these on warm days or when I wear snug-fitting shoes because the extra thickness can make everything feel cramped. They work best in cooler conditions when I’m carrying more weight and moving at a steady pace. When I want all-day comfort and extra cushioning, these are the socks I reach for first.
Tight fit may not suit those who like a relaxed feel
Chris Kassar
The Swiftwick Pursuit Quarter Crew socks ($21) are a solid choice when I need a lightweight, supportive sock designed for movement. The merino wool blend feels soft immediately and keeps my feet comfortable in changing conditions. I’ve worn these socks for everything from fast-paced day hikes to easier recovery walks, and they consistently deliver comfort.
What stands out most is the snug, secure fit. The light compression wraps around my foot and stays in place without slipping or bunching, even on steeper terrain. The cushioning is low-profile but effective, providing enough padding to soften rough ground without adding bulk.
These socks also excel at temperature regulation. I’ve remained comfortable on cool mornings and warm afternoons, and they breathe well without feeling swampy. After numerous miles, they have held up without noticeable wear. I appreciate the quarter crew height, which offers ankle coverage without the extra fabric of taller socks.
The only drawback is that they lack the plush feel some people prefer in a thicker hiking sock. If you like a looser fit, the snug compression might feel a bit too tight; however, for me, this was a plus.
For breathable, stay-put comfort on low-mileage hikes or quick trail outings, these socks have been a reliable choice for me.
The WRIGHTSOCK Double Layer Silver Escape Crew ($25) is one of my favorite options for longer hikes when I know I’ll be sweating a lot and can’t easily wash my gear. I’m definitely someone who notices sock odor after a long day, so I was really curious if the silver-lined fabric actually lived up to the odor-resistant hype.
I tested them on back-to-back big days in the Tetons, including a long climb up Death Canyon with a heavy pack and another push over Paintbrush Divide. By the end of the first day, my shoes and shirt were soaked, but my socks stayed surprisingly fresh. I let them dry overnight and wore them again the next day. It took until the third day and well over 25 miles before I noticed any smell, which is impressive.
They feel soft and cushioned like a classic wool hiking sock, but are much more breathable than I expected. My feet stayed comfortable during climbs and rocky descents, and I didn’t get any blisters. The double-layer design really reduces friction, which I noticed most on steep downhills.
I prefer these thicker socks for longer hikes with a pack, but if you prefer thin, minimal socks, these may feel too bulky. The Silver Escape is a great choice if you want something durable, breathable, and odor-resistant for big days or multiday trips.
I used to think toe socks looked a bit silly, but after trying the Injinji Liner Crew ($12), I completely changed my mind. These are some of the most comfortable socks I’ve worn, and their performance easily matches the comfort.
The biggest benefit is blister prevention. I get hot spots on longer hikes, especially around my oddly-shaped toes, but these completely eliminated that. By separating my toes, the fabric stops skin-on-skin rubbing, and I finished hikes without a single blister where I’d usually have issues.
The COOLMAX Ecomade polyester feels incredibly soft and dries quickly. Even on hot days in the Tetons, my feet remained cool and comfortable. During one hike, I slipped crossing a creek and soaked my shoes, but the liners dried surprisingly fast just from walking in the sun.
They take a bit longer to put on than regular socks, and they’re less durable. Since each toe is individually wrapped, there are more areas prone to wear. I’ve developed a few small holes after heavy use. Still, at $12 and knowing they are made with recycled materials, I have no issue replacing them once they wear out. For anyone prone to toe blisters, these are a game-changer.
I tested all of these socks, including the Darn Tough Women’s Bear Town, by hiking to epic destinations in the Tetons; (photo/Elk Raven Photography)
How I Tested Hiking Socks
Why Believe Me?
As an avid hiker and mountaineer who has trekked for months on end through Nepal, Africa and Thailand, climbed the tallest peaks in Alaska, Canada, and the Pacific Northwest, and gone on month-long explorations on foot in countries like Costa Rica, Bali, Iceland, and more, I know what it’s like to spend more time on your feet than off them. So, I know how important it is to have the best hiking socks for each situation.
When I took over this guide in 2025, I wanted to go beyond basic comfort tests and see how these socks actually performed in the wild. I tested every pair across a range of terrain and conditions, from climbing rocky peaks in Colorado to hiking endless switchbacks in the Tetons and bushwhacking through thick brush in Alaska. I focused on real-world use, paying close attention to fit, comfort, breathability, durability, and how each pair handled long days on the trail.
My Testing Approach
I tested socks of all cuts, materials, and thicknesses across every season, mixing in everything from short day hikes to multiday backpacking trips and snowy winter outings. I paired them with different footwear, including trail runners, low hikers, and tall boots, to see how they performed in a variety of setups. Whether I was moving fast or carrying a heavy pack, I looked for socks that stayed comfortable, managed moisture, prevented blisters, and held up after repeated use and washing.
I tested these socks by hiking a ton; (photo/Elk Raven Photography)
Buyer’s Guide: How to Choose the Best Hiking Socks
The first step in the process is choosing the correct hiking socks for your preferred activities and your budget. Do you do a lot of backpacking and want socks with more support and cushion? Or do you mainly enjoy fast and light endeavors? Do your feet run hot or cold?
Decide how often you’ll be hiking and what features are most important to you. If you hike a lot, the more durable, the better. If your feet run hot, stay away from wool.
The two main variables to consider are your physical constitution and the types of activities you’ll be engaged in.
We tested all these socks made of different materials over a long period of time to bring you our favorites; (photo/Elk Raven Photography)
Materials
If your feet run cold, wool socks (like the Smartwool Performance Hike Light Cushion) are a great choice. Wool is generally considered the warmest yet most breathable option for outdoor gear.
If your feet run hot or you’ll be hiking in high temperatures, consider something with a mix of materials and excellent moisture-wicking properties. TheREI Co-op Merino Lightweight Flash Socks are a great example, made with a combination of wool, polyester, nylon, and spandex.
Obviously, we’re focused on hiking, but that could mean a 2-hour excursion or a 2-month trek. Some people take their time, and others hustle. Luckily, certain socks work better for each type of jaunt, and some work well enough for all.
If you’re thru-hiking, you’ll want to look for durability, long-term comfort, and exceptional technical function. In that regard, there aren’t many better options than the Darn Tough lineup, including the Darn Tough Hiker Micro Crew Cushion. The Smartwool Hike Light Crew is another durable option.
They last long enough for the company to offer a warranty, and their performance is up to par. They’ve long been considered one of our top picks.
If you’re into fast-paced endeavors, a lighter, streamlined, running-inspired sock will probably better suit your needs. On this list, the Swiftwick Pursuit Sevenand Balega Hidden Comfortare perfect examples. Both have a compression feel, wick moisture extremely well, and dry out quickly..
Moisture wicking and breathability are essential for just about all types of hiking, especially fast-paced endeavors. Moisture-wicking pulls moisture away from the feet and promotes evaporation, while breathability helps expel trapped heat. As you can imagine, these factors go hand in hand.
Merino wool is a wonder fabric when it comes to the combination of warmth and breathability, whereas synthetic fibers tend to wick moisture better. The REI Co-op Merino Lightweight Flash offers an optimal blend of nearly half merino and half synthetic fibers, so it’s a great choice if you’re looking for a compromise.
If your feet sweat profusely and you’re keen on high-output activities, we recommend the CEP The Run Compression socks. Their moisture-wicking properties are exceptional, and your feet will thank you after a long day.
As mentioned above, compression socks improve blood flow, can aid in injury prevention, and are useful as a rehabilitative tool post-hike. If you’re an outdoor athlete and haven’t given them a try, we’d recommend giving them a shot both on and off the trail.
Because they have a very tight fit and can leave weathered footwear feeling loose, they aren’t optimal for casual hikes (unless you’re trying to keep plantar fasciitis at bay). If you’re wearing performance footwear, expect to sweat, and are planning on your feet and ankles taking a beating, they’re ideal.
That said, we all have unique feet and needs. CEP’s compression lineup comes in a variety of stylish colors, so you may find yourself wearing them as your everyday socks to aid in recovery.
The Smartwool Hike Light socks offer cushioning in all the right places; (photo/Elk Raven Photography)
Cushioning
Cushioning is a tricky subject because more cushioning doesn’t necessarily translate to more comfort. Our shoes provide the primary source of padding from the ground, but socks with no cushioning at all can leave us with hot spots and blisters.
The heel and ball of the foot are the primary areas where at least some cushioning is needed, and every sock on this list addresses those to some degree. Thicker socks with higher wool content tend to provide more cushioning underfoot, whereas tighter, performance-oriented socks tend to have less. The Smartwool Hike Light Crew are thin and comfortable, but cushioned in all the right places.
While running or moving quickly, we’re more prone to using the muscles in our feet to brace ourselves, which means we actually require less cushioning. Cushioning is more important for long-distance hiking, where the impact is less but remains consistent throughout the day.
The Feetures Elite socks are thin, but have the ideal amount of cushioning; (photo/Elk Raven Photography)
Price & Value
Budget
They cost more than those cotton 12-packs that you’ll find at Costco, but fortunately, hiking socks don’t generally cost a ton of money. A good budget pair of socks will run you anywhere from $10 to $15. In this price range, you can expect technical fabrics like polyester, which dries quickly and wicks away moisture.
The least expensive sock on this list, the Injinji Liner Crew Socks ($12), are an excellent (if somewhat fragile) lightweight sock that dries quickly and is exceptional at minimizing blisters.
If you’re curious about trying out toe socks, the Injinji Liner Crew Socks are a solid choice at a value; (photo/Andrew Potter)
Mid-Tier
In the $15-25 price range, you can find more natural materials like merino wool on wool/synthetic blends, as well as thicker socks for more insulation and durability. TheDarn Tough Hiker Micro Crew Cushion($26) is our top pick, thanks to the stink-proof merino and nylon blend. They’re also ridiculously durable — we’ve worn holes in them, but only after 500+ miles during thru-hikes.
Our top overall pick for women, the Darn Tough Bear Town Micro CrewLightweight($25), is extremely durable, comfy, and cute. These socks perform well and make a fashion statement.
Darn Tough socks are among the most durable we’ve tested, so they’re a great value because they outlast most others; (photo/Heather Balogh Rochfort)
Premium
If you’re looking for a sport-specific sock or one made with a more unique material, you could spend over $25. The priciest sock on our list, the Smartwool Mountaineer Classic Edition Crew Socks, will cost you $27, but they offer unmatched warmth and cushioning in our pick for best winter hiking socks.
This is partly based on intended activity and use, and partly based on preference. Thicker socks with medium to heavier cushioning might feel more comfortable in a traditional hiking boot, while a light-cushioned sock might feel better in a lightweight or low-hiker. If you plan on doing a lot of hiking in the fall and winter or on longer trails, consider thicker socks (both for support and warmth).
What hiking sock material is best?
This is really a preference, and materials vary widely by brand and sock style. However, we’ll say we had the best performance and durability from socks with a merino, nylon, and elastane (or spandex) blend, where the merino is the higher material content (50-60%).
There’s no better way to end a day outside than to gather around the campfire. While we’ve all spent many an evening balancing on a log, it’s hard to beat the best camping chairs. That’s why our team has tested close to 50 over the last decade, and I’ve collected the top 14 on the market today in this guide.
In order to find the best, we’ve spent countless hours testing chairs in a variety of locations and weather conditions. From the wilds of the Desolation Wilderness to the swamps of Apalachicola, from birthday parties at the park to relaxing somewhere with a view, we’ve spent countless hours setting up, taking down, and, well, sitting.
While no single “best” chair will suit everyone, I’ve broken the list into categories that should help you identify the ideal chair for your needs. Look to the top-pick REI Co-op Campwell if you’re after the most well-rounded available, or snag a couple of Coleman Broadband Mesh Quad Chairs for the same price. Otherwise, read on for my other recommendations and buying advice.
Editor’s Note: We updated our Camping Chairs guide on August 18, 2025, to add the NEMO Stargaze EVO-X and KUMA Aurora Heated Chair — both excellent places to plant it with their own perks (the EVO-X is a rockin’ seat, and the Aurora sports Bluetooth-controlled heat!). We also added additional rating details to further explain our testing process.
Cupholders:
One pear-shaped cupholder for a variety of beverage containers
Pockets:
One smaller mesh drawstring pocket for small items
Weight Capacity:
300 lbs.
Pros
Simple, lightweight design
Made primarily of mesh for easy cleanup and breathability
Comes with a shoulder bag for easy transport
PFC-free DWR finish
Cons
Mesh could cause concerns for long-term durability
Not a tall seat height for ultimate lounging
Nick Belcaster
The REI Co-op Campwell Chair ($60) is an ever-so-slightly updated version of the Skyward Chair — a popular but now bygone classic. As a part of the Campwell series that includes tents and other camping accessories, this camping chair is a no-frills seat that is easy to transport and pop open from backyard barbeques and soccer games to campgrounds near and far.
The Campwell Chair is the same as my beloved Skyward, with the only notable difference being a non-PFC DWR finish and an extra inch of height gained. For the same price, I’ll take it. For ultimate all-around comfort, simplicity, and stability, I reach for the Campwell almost every time.
The price is moderate, the features are just what you need, and the weight is light and easily manageable for a variety of arrangements and activities, making it a solid choice for a daily driver.
A predominantly mesh seat makes this chair easy to clean and dry if it gets wet. A spacious cup holder and a drawstring pocket keep your favorite beverage, along with your phone and keys, close by. The four flat, sturdy, square-shaped feet stayed well-planted on the ground during my testing, making the chair level and secure while standing up and sitting down.
While the mesh back and seat make for easy cleanup and great breathability, I found that we were a little chilly in colder weather. While this could prove to be an advantage in warm summer months, it’s definitely a disadvantage in the wintertime or if there is a cool breeze. The Kuma Aurora Heated Chair or the Kelty Discovery Low Loveseat Nest would be better options for keeping your bum toasty.
Also, being primarily made of mesh and polyester, there could be concerns about durability. But I was satisfied with the chair’s durability during the testing period, finding that it could take a beating as I threw it in the back of the truck and tossed it around from backyard to campsite. It doesn’t provide neck support, and the seat height reaches 15 inches, so it’s not the ultimate or largest lounge chair like the GCI Outdoor Freeform Zero Gravity Lounger.
But the Campwell is my go-to choice for those who want a simple, hardworking, all-around camp chair.
Just $30 and it has a cooling mesh back? Yep, this Coleman Broadband Mesh Quad Chair is a bargain hunter’s dream. And to top it off, I found it impressively comfortable during the initial testing foray. There is an ocean of cheap camp chairs like this on the market, but let it be known: this is the top of the heap with a trusted brand name to rely on.
At 21 inches wide, it provides a roomier seat than the smaller backpacking options I’ve reviewed. It also has a taller seat height and a more upright back, which makes getting in and out easier. The fabric of the seat itself is actually a sturdy mixture of breathable mesh and solid fabric, which raises the comfort level when sitting in this chair for long periods of time. Most other options at this price point will be all solid fabric, so the mix here is welcome.
While the armrest does sport an integrated cup holder, your drinks will have to go koozie-less to be able to fit, which was a small price to pay considering the budget buy-in this chair commands. At $30, you very well could snag a cheap cooler to go along with the chair! Otherwise, there’s no storage on this sling, so you’ll need to find somewhere else to park your keys.
You’ll also need to consider that the Broadband Mesh Quad Chair won’t pack down quite as small as some of the other chairs in our review, like the ENO Lounger DL Chair, but for most campers, the walk from the car to the campfire is a short one. Thankfully, the chair comes with a simple carry bag with a shoulder sling. Good enough is good enough here.
You wouldn’t want to haul this chair for long distances, but the included carry bag eases transportation and helps prevent rust. The Broadband Mesh Quad Chair is a solid option for hanging in the backyard, sitting on the sidelines, or car camping.
The NEMO Stargaze EVO-X ($180) is the updated version of my favorite rocking chair from NEMO with a significant update: an easy-folding and deploying frame. No more setting tubes into hubs — this Stargaze unfolds similarly to most other camp chairs but keeps all of the rocking comfort I loved about the initial version.
Camping expert Karuna Eberl took this chair with her on a multi-month road trip across 12 states this summer. Through it all, the EVO-X impressed, even stacked up next to her trusty GCI Comfort Pro Rocker (the reclining functionality of the new NEMO helped edge it over the top). Eberl noted how the previous iteration of the Stagaze was plenty comfortable and rocking-ready, but required some assembly to get there.
The EVO-X, on the other hand, now unfolds in seconds and doesn’t give up any reclining action or capacity to do so. Eberl and her partner represent the opposite ends of the height spectrum, but both her 5’4″ and his 6’1″ frames found the seat to be comfortable, with the seat easy to recline even for smaller folks. The reclining mechanism is smooth and forgiving, with the ability to stop at any angle to get into perfect stargazing position.
The EVO-X’s materials are rugged, and even the carry bag is padded. The seat sling sports two elastic-hemmed cupholders, which probably aren’t the most secure, but we haven’t seen a spill yet. The padded headrest is extra comfortable when you’re really leaned back in this chair, and supports your head in ways that no other chair in our lineup can touch.
Eberl’s wishlist for the EVO-X was pretty short: a footrest would be appreciated on a dedicated camp recliner like this, and at 14 pounds, this chair is better suited for close-to-the-car camping where you won’t have to lug it around too much. Even still, the updated Stargaze EVO-X is a winner, and an excellent improvement on a now classic camp chair.
Not lacking in storage with two pockets and two cupholders
Impressive company support for replacement parts
Cons
Heavier than most chairs at 13 lbs.
Fabric not immune to fraying with extensive use
Nick Belcaster
If you’re worried about your camp chair blowing away, this robust chair is your go-to choice. The ALPS Mountaineering King Kong ($100) has a heavy, rigid frame, and with super sturdy, tough feet, this chair is unlikely to topple over.
It’s the outsized weight capacity that got my attention first on this chair — 800 pounds is above any other camp chair I’ve encountered so far, even the sturdy YETI Trailhead that tops out at 300 pounds. The powder-coated steel frame and 600D quilted polyester sling are to thank here, as the design doesn’t take any special departure from other chairs.
Besides the impressive capacity, the King Kong also comes specced out with a number of niceties: Two pockets hang off each armrest, and the uppermost section on the backside of the chair back has a full-width hanging mesh pocket for miscellaneous stashes. With an adjustable fit, the angles of the arms can be tinkered with via two buckles — something that lesser chairs leave to the friction fit of the arm connection points.
I’ve also found company support for this chair to be above and beyond. After nearly 5 years of hard use, the seat fabric had begun to fray at the binding, and it was only an exchange of emails or two in order to have a discounted replacement seat sent out. Very nice.
This chair is one of the most supportive, stiff options out there, which is great if your back is achy or for folks who prefer an upright brace. The King Kong chair back is also relatively high, and I really appreciate that extra backing when feeling tired. Plus, the seat is deep, reinforcing hamstrings.
My budget pick, the Coleman Broadband Mesh Quad Chair, also has a supportive, upright back and could be a good alternative for those who want to shell out less cash.
If you don’t mind hauling a heavier-set chair in and out of your rig or on a short walk to the park, this is an excellent option, especially for breezy weather. If you do mind, the REI Co-op Campwell Chair is a similar design, weighing 3 pounds less. A shoulder bag with two backpack-style shoulder straps on the King Kong makes the trek easier, though. While a bit pricey, it’s one of the best camping chairs you can buy.
Adjustable cupholders for small or large beverages
Quilted seat fabric is lightly insulated
Now comes with two insulated blankets
Cons
Heavier at 17 pounds
Bulky to pack out to far campsites
Nick Belcaster
The Kelty Discovery Low Loveseat Nest ($150) is the spruced-up version of our favorite camp couch with a fresh twist: a set of insulated blankets to snuggle up under with your camp compadres. While the ‘campsite couch’ idea isn’t the only option on the market, this is the one we keep having to fight our friends over for a spot in.
First, what’s remained the same: The 59″ wide seat is wide enough for two campers to park it, and the steel frame is strong and can handle up to 400 pounds. The quilted fabric is pliable, which is nice for multiple people sharing the same seat.
I like that the seat is slightly reclined for comfort, and I found the shorter 19″ height allowed for a more relaxed lounge. But tall couples may prefer the standard loveseat, which is a few inches taller off the ground. Small details also didn’t go untouched: The armrest cupholders have a divider so you can fit both larger and smaller bottles or even insulated mugs with handles.
And the new blankets? They’re certified cozy. They stow beside the chair with some quick toggles, deploy separately, and are even machine washable. We enjoyed many nights under the stars under these blankets, and their inclusion helped hedge against accidentally leaving camp hang-out insulation at home.
The addition of the blankets does raise the cost to $150 compared to $130 for the previous version, but I think they’re worth the money. Although it certainly isn’t the lightest chair on the list at nearly 16 pounds, I was still impressed with how easily it packed up. The Low Loveseat Nest rolls into a separate padded roll that buckles together like many tool or knife rolls.
You wouldn’t want to hike any distance with this, but for campfire nights or outdoor concerts, the Low Loveseat Nest is a top pick. Looking for a comfortable low seat, but don’t have a boo to share it with? The ENO Lounger DL Chair is a good choice with its comfy, low-slung seat.
This ain’t your grandpappy’s woven shore chair. Full inflatable, collapsible, and beach-able, the BOTE Aero Chair XL ($229) has turned the idea of the ideal beach camping chair on its head, and makes use of the same drop-stitch technology that inflatable stand-up paddleboards use in order to support entire days of kicking back in the sand.
The beach can be a pretty rough place for a traditional camp chair. Saltwater rusts hinges and legs, harsh UV degrades woven fabrics at an accelerated rate, and sand finds its way into any and all crevices. The Aero Chair’s monolithic design and PVC material shrug off all of this treatment.
Inflating is a cinch, and while the recommended max PSI of 10 was a bit too firm, the lower end of 7 PSI provided the slight cushion that won me over. The seat is low-slung, with a seating position ideal for digging your toes in. Because the legs are really rails, there’s no tipping when the ground isn’t level. I also dragged this chair from the beach to the forest and didn’t have any concerns with punctures. This seat is tough.
And for the curious: While the Aero Chair is inflatable, it isn’t balanced enough to float on in an upright position. Trust me, I tried. Best to plop this seat down in the whitewash where it’ll stay put.
The need for a special pump is certainly a ding, but for those who already own an iSUP or something similar, it’s an easy pivot. The only other thing I could complain about is the need to purchase the cupholder separately, which, when the chair is already a few bills, was a bit of a bummer.
But still, when compared to faded and ratty folding beach chairs, I’m never going back. The Aero Chair XL is just about the best thing going when it comes to kicking back in the sand.
Bluetooth connectivity in a camp chair? Yep, we’re there, and the KUMA Aurora Heated Chair ($200) uses it to dial in the warmth you’re receiving to your backside. This camp chair is truly one of the most techy out there, and if you can get your hands on it, it’s a worthy spot to plant it for the night.
Heated camp chairs aren’t new, but integrating an app to control the heat level certainly is. The Aurora sports two heated zones in the seat and chair back to keep you toasted when temps dip, and the app can dial in the heat with 10 different levels. A 10,000 mAh battery pack comes with the chair, and can even juice up your phone if need be.
In practice, I found that the Aurora will run for about three nights in a row on a single battery charge, which was pretty impressive. Thankfully, the chair can still be operated without the app, although you’ll be limited to just three heat levels (Low, Medium, and High).
The Aurora offers great comfort besides the heated experience. It closely mimics the brand’s Lazy Bear Chair, which has a broad padded sling and a high back that makes sitting back super comfortable. However, the chair’s collapsed size is a bit bulky, and the included cinch strap is necessary to reduce it to a packable size.
The rapid discharge rate of the battery bank makes us question the overall longevity of the included battery bank (I’ve got around 20 charge/discharge cycles on it so far, with no drop off yet), so we’ll continue to test and watch for overall durability.
It’s also tough for campers in the States to get an Aurora Heated Chair, as tariff confusion has limited the Canadian company’s supply. But if you can find one, this is one comfy camp chair.
(Photo/Nick Belcaster)
(Photo/Nick Belcaster)
(Photo/Nick Belcaster)
Other Camping Chairs to Park It In
The seven camping chairs I’ve awarded above are excellent options for just about anyone (or any adventure), but they’re far from the only seats out there. Before you make your choice, check out the lineup of camp chairs ranked highly below. They might not be the best of the best, but they’re solid options and might be the best for you.
This chair rocks, literally, making the GCI Outdoor Comfort Pro Rocker ($70) unique from any other chair in this lineup. Beyond that novelty, though, it’s also outstandingly comfortable, with a sturdy overall feel, breezy mesh panel, and a high back for good support.
The rocking aspect might sound like a front porch novelty, but beyond adding entertainment, it brings versatility to the activities this chair excels in. You can kick back and watch the stars in it, or use it as a more upright seat for eating and table activities. Camper Karuna Eberl found that it’s also great for people with knee problems since the rocking action makes it easier to get in and out of.
Additionally, on the comfort front, Eberl found the shape and seat height to be comfortable for a range of people with very different body shapes, which is somewhat unusual for a camp chair.
Also, the rocking action works well for both lighter-weight and heavier campers (it can accommodate weights up to 250 pounds). On the downside, that means that we’re always in competition for who gets to sit in it.
This is a newer version of the company’s beloved Freestyle Rocker. Differences include a higher backrest (24” versus 17.5”) and a more laid-back seating angle on the Comfort Pro. GCI still makes the Freestyle Rocker, plus several other rocking models, including those with flat-fold designs.
Rounding out the features on the Comfort Pro Rocker are a built-in carry strap, drink holder, phone pocket (though only big enough for small smart phones), and a lot of wild color choices.
Eberl’s only complaint is that it’s a bit of a lunker. Those spring-action rockers add some weight, topping the scales at 11 pounds total for the chair. But it has a quad-fold design, which means it doesn’t take up an excessive amount of room. The folding action is also a little stiff, but it gets easier as it breaks in over time. If you’re in a chilly location, bring a blanket to keep the breeze from freezing your backside.
All in all, the Comfort Pro Rocker is a really comfortable chair for every occasion, from car camping to concerts on the grass. It’s also priced quite reasonably for the quality and the rocker feature. We’ve used it for eating meals, watching the alpenglow, and typing away on the laptop.
At 3.5 pounds, the Helinox Sunset Chair($170) is easily the lightest camp chair in the lineup and borrows heavily from the brand’s backpackable options. With a much more supportive high-back design than anything you could toss in your daypack, however, the Sunset has comfort for entire evenings of lounging.
Setting up in the same style as the backpackable Helinox Ground Chair and Chair One, the DAC aluminum poles clack together in seconds, and timing myself, I could snap this chair together in 30 seconds flat — so don’t let the DIY nature steer you away.
The seat is a deep swaddle to settle into at camp, and while it doesn’t incorporate any padding, you can stuff the storage sack with a few soft items (I used a down puffy) and nestle that into a sleeve behind the neck for some extra support. Very nice.
You won’t find an integrated cupholder on the Sunset (minimal, remember?), but one is available as an add-on that snaps into place. On-chair storage is pretty sneaky (many didn’t even realize it existed) and comes in the form of two stretch-mesh pockets that cling tight to the right side. Big enough for your phone, headlamp, and keys.
What’s the rub with the Sunset? Well, the armrests — or rather, the lack thereof, and the desire to still rest your arms on something. This led to some uncomfortable imprints in my forearms where the binding on the seat pressed into them. Eventually, I got the picture, but old habits die hard, and it’s a little annoying in the meantime. If this proves untenable, the ENO Lounger DL Chair is a similar option with some padding.
If your camping load is becoming a bit too hefty to contend with, the Helinox Sunset Chair is a keen way to trim down on the bulk while still bringing comfort along with you. Its size isn’t even too big to bring on the occasional day hike, so consider it a multi-purpose item.
Cupholders:
Single pocket serves as a cupholder or as a pocket for small trinkets in the right armrest
Pockets:
No additional pockets
Weight Capacity:
125 lbs.
Pros
Light, portable mini version of the adult chair
4 pound weight isn't too heavy for tikes to carry themselves
Locking mechanism prevents chair from shifting
Cons
Best for kids 9 and under
Nick Belcaster
Make s’more time even more fun for your kids with this pint-sized REI Co-op Camp Chair – Kids’($40). Our little campers love that they can carry their own chair and easily climb in and out of it without help. This design remains a top seller for kiddos.
At 4 pounds, it’s light enough for even young children to drag into place. And with a seat height of 11 inches off the ground, it works well for a range of children. The kid testers in our group especially seemed to like having a miniature version of the adult chairs around the fire.
Thankfully, this chair has a locking mechanism that keeps it from shifting as young ones wiggle around in it. It’s also easy enough for small fingers to operate once it’s time to pack up camp. There are even round pinch guards where the chair folds together to ensure that nobody gets nipped accidentally, and this kind of thinking really puts this chair above the rest when it comes to camping with tykes.
It proved impressively sturdy and stable as well, even as a 3-year-old repeatedly climbed in and out. We found that it was best for kids under 9 years old, but that will depend on each kid’s height and weight. The taller and heavier they are, the more comfortable a bigger seat like the Campwell Chair will be. Overall, we’re confident it’s the best camping chair for kids.
While better known for its excellent coolers, Dometic has expanded its range to include smart car camping accessories, and the Go Compact Chair ($150) is no exception. This elegant camp chair leverages a stout aluminum frame, beechwood armrests, and a stylish design to become one of the best-looking camping chairs I’ve seen.
Springing from a sleek clamshell-open carrying sack (much nicer than drawstring bags), the Go Compact Chair was a breeze to set up in testing — unfolding quickly with a single motion. The aluminum frame utilizes strong hinges and presents no pinch points that you could easily snag yourself on. Rounding out the chair is a 600-denier fabric that is a tough weave and liable to stand up to abuse for many campouts.
The angle of the seat is a laid-back bucket that’s certainly made for lounging, though it isn’t so deep as to limit your hotdog-roasting abilities. Some of our shorter-legged campers did find that the outer edge of the seat was a bit taut, and that this could pinch the backs of their legs from time to time. This was the main reason this chair didn’t receive universal approval in testing, though the incidence was fairly rare.
All that style will come with a bit of a functionality ding, as well, and while the Go Compact does sport a large pocket on the back of the chair, it doesn’t have any cupholders to speak of, so you’ll have to find a coozie for that frosty beverage. That being said, those of us who loved it loved it, and the extra dollars that go into its construction will mean that the Go Compact chair will be around for many years into your camping future.
For a chair that’s very similar in design, consider the REI Co-op Wonderland, which slides in at a bit less weight and $50 less out the door. But if you’re a sucker for the OG, the Dometic Go Compact has all the style you’ll need.
New mesh back version is more breathable for warm days
Padded armrests and head pillow
Two elevated sitting heights
Cons
Complicated to set up
May be too low for some campers
Nick Belcaster
Hammock hangers rejoice; this is the camp chair for you. The ENO Lounger DL Mesh ($150) slings low and cradles you when you sit down, making for one very comfortable seat. And it’s no one-trick pony either, with impressive storage pockets, a lightweight and compact design, and a hefty 300-pound weight limit.
The design sits somewhere in between a camping and a backpacking chair, and its name gives away precisely what this chair is made for: lounging. A breathable, water-friendly mesh seat and back also make it a good choice for a hot day at the beach or river. Add in the hammock-inspired swaddle and padded head and armrests, and it’s siesta time.
The Lounger DL Mesh is as comfortable to carry as it is to sit in. It has backpack straps and an aluminum frame weighing 5.5 pounds (which makes it the second-lightest adult chair in the lineup, just behind the Helinox Sunset Chair). The frame assembles with shock cord construction, so it might take a couple of minutes to figure out how to set it up for the first time, but after that, it’s only a 30-second job.
The chair itself is height adjustable with a high and low option, allowing you to accommodate terrain differences. It also brings an impressive amount of storage space, which comes in the form of two stretch elastic cargo pockets big enough to fit a tablet (in the same style as the Helinox Sunset Chair) and a single hanging cup holder. This storage ability surpasses many of the other camping chairs we’ve tested to date.
If you want a warmer version of this chair, ENO makes a non-mesh version, the Lounger DL. While the Lounger is a chilling-out champion, I found it a little too laid-back to be the perfect all-around camp chair (for similar reasons as the NEMO Stargaze EVO-X). If you tend to spend time sitting at a table eating or playing dominoes, you might get weary of leaning forward to get to the action.
Otherwise, it’s a perfect, compact, lightweight-yet-sturdy choice for kicking back after a long day on the trail, or even setting up for an afternoon concert. The Lounger DL Mesh chair was easily one of the most comfortable camping chairs I’ve tested to date.
Let’s get this out of the way first: this isn’t the cheapest chair. But if you’re looking for an incredibly comfortable, durable, and stable chair, you’re in the right spot.
At 13 pounds, the top-rated YETI Trailhead ($300) falls in the middle ground of acceptable camp chair weight. The FlexGrid fabric is uniformly supportive and UV-resistant. It’s also pleasantly breathable on hot days.
It folds up easily and packs into a carry bag complete with backpack straps. The Lockdown feature on the back of the chair ensures it won’t accidentally fold up on you. And we like the wide, grippy feet.
In addition to camping, we’ve used this chair for many months as a daily office spot. It shows no signs of wear, and we’ve been comfortable throughout. In our minds, this would be the chair to invest in kitting out the lake cabin with: it’s robust, comfortable for dang-near anyone, and will be around long into the future.
It may be overkill for a quick, casual campout, but if you want a super-comfortable, super-stable chair, the Trailhead is it. While it doesn’t look as sleek, the REI Co-op Campwell Chair is another fantastic, breathable, packable option, although its weight capacity is a whole 200 pounds lighter than the YETI.
When grilling out with Grandpa or offering Mom a spot to relax by the fire, this is the chair we reach for. It’s one of the best camping chairs money can buy.
The new REI Co-op Wonderland Chair($100) elevates the average camping chair to the next level. Absent are the mesh and metal construction of your run-of-the-mill camping chair, and in their place is a design-forward, comfortable camping chair with sturdy construction, pleasing colorways, swivel-out cupholder, and glazed wooden armrests.
It’s clear that this chair is made with high-quality materials. Its recycled polyester seat fabric is also treated with a durable water-repellent finish, allowing it to stand up to the elements. Its frame is constructed of coated aluminum to keep the total weight of the chair down, and the chair feels sturdy and well-constructed overall. REI boasts a 300-pound weight capacity to boot.
Weighing 7 pounds, 13 ounces, this isn’t the lightest camp chair on the market. It is large and arguably cumbersome, and it takes some time to get used to figuring out how to collapse it with its strap.
The Dometic Go Compact Chair is a slightly smaller chair with a similar design, but it admittedly lacks the features that come with the Wonderland. It does come with a sleek carrying sack, however, which could be preferable to messing with the strap system of this chair.
Although the Wonderland has a high price tag and is a bit on the bulky side, I loved this chair for its versatility. It can complement your patio, be taken to the beach, or deployed by the campfire on your next overnight stay.
No matter the season or the reason, there’s a camp chair to settle down into; (photo/Miya Tsudome)
How We Tested the Best Camping Chairs
For half a decade now, we’ve been parking our behinds in camp chairs of every stripe, looking for the best seat in the house for kicking back in the great outdoors. Since 2019, we’ve personally researched, toted, and tested close to 25 different camping chairs in the wilds, comparing each and weighing their specifications against our idea of the perfect seat.
Our travels have taken us from the dark understories of the temperate rainforests of Olympic National Park to the granite crags of Southern California, and after a hard day of playing in the dirt, a good seat makes all the difference.
But it’s not just our opinions, either. We polled our crew to determine their absolute favorite camp chairs and why. We gather every year for a group campout to test a new collection of camping chairs side by side, and we use these camp chairs throughout the year, from season to season and sport to sport.
(Photo/Miya Tsudome)
Our Testing Process
The majority of our camp chair testing takes place exactly how you think it might: with butts in seats around the campfire. We’ve also used these chairs while crewing ultramarathons and enjoying slam poetry and concerts at the park, as well as at home for outdoor birthday parties and sitting around portable fire pits. Anywhere you could imagine toting a good chair for the occasion, we’ve made it happen and compared notes on relative performance.
Of the important metrics I look at, ease of set-up is primary among them, as a difficult-to-assemble camp chair is quickly sidelined for something easier to get into. Beyond set-up, our team also compares notes on general comfort, beverage and essentials storage, and ease of transport. Every chair is rotated around to our selection of experts, as well to ensure that a variety of body shapes and sizes have had their fair share of time in each seat.
I also take a hard-data approach here as much as we do with any other type of kit, and have pulled together a few in-house tests to ensure that manufacturer claims are confirmed. Primary among them is an honest weigh-in, as well as measuring important metrics such as seat height and packed sizes.
Before we’re through with them, these chairs also have their stated weight capacities challenged, a not-so-easy task when it comes to some of the more stout chairs out there (and a test that has resulted in at least one catastrophic failure). Piling in plate weights and then ourselves, we’re happy to announce that dang-near every chair so far has met the challenge up to their claimed capacity.
GearJunkie editors sitting around the campfire; (photo/Eric Phillips)
Our Expert Testers
Primary testers for this guide are Miya Tsudome, Karuna Eberl, and myself, Nick Belcaster — all consummate outdoors folk from various ends of the West. Tsudome has over 10 years of experience with testing outdoor equipment and covers the California side of the equation, camping and adventuring around the Sierra Range for much of the year. Her search for the best camping chair out there has her testing new additions on a rolling basis.
Eberl hails from the Colorado High Country, and grew up living in a tent and chasing her mountaineer father up the side of mountains. Decades later, the outdoors part of her life hasn’t changed much, except that she eventually convinced Dad that it’s more fun to have a chair to sit in at basecamp, and now he brags on endlessly about his GCI Outdoor Rocker.
I, Senior Editor Nick Belcaster, hail from Washington State and, after a long walk on the Pacific Crest Trail in 2018, am pretty ready to kick back in a comfy seat. Our camp chair testing team pulls together all of our experiences to form one opinion on what seats are worth the money and which are better left on the shelf.
(Photo/Miya Tsudome)
Our Camp Chair Rating System
I’ve identified four different rating metrics that each camp chair can be scored on, and can be compared side by side to see where these seats stack up.
Comfort
Comfort is king in camp chairs, and I value it the highest when comparing these different seats. Our testers are all different sizes and statures, and we aim to get a balanced opinion on comfort, including cushioning, seat height, armrest angles, and more.
Portability
While not as important as in backpacking chairs, the ease of portability is important in camp seating, and I look for a compact packed size, an easy carry solution — whether that’s a shoulder sling or stuff sack — and a weight that doesn’t wear us out too quickly while porting the chairs around.
Capacity & Stability
The weight capacity of any camp chair should be enough to fit your average camper, plus some wiggle room to ensure everyone has a seat at the camp table. I also judge stability over uneven ground, and look for adjustable feet, robustly constructed legs, and a seat that ties into the frame firmly.
Ease of Use
Finally, the overall ease of use is a crowd-sourced metric from all of our camp chair testers, who are asked to rank these seats based on how simple they are to assemble, stash essentials and drinks in, and put away at the end of the trip.
Buyer’s Guide: How to Choose a Camping Chair
The low-slung style of the ENO Lounger DL makes it perfect for kicking back after a long day; (photo/Nick Belcaster)
Here are the primary factors I use when testing camp chairs. Scroll through to help ensure that you pick the best camping chair for your individual needs. I’ll note that these choices are specifically for kicking back during car camping and the like. If you’re looking for a more packable and lightweight option, take a look at GearJunkie’s in-depth review of backpacking chairs.
Comfort
Nobody wants an uncomfortable camping chair. When considering comfort, I looked at seatback height, width, height off the ground, materials, amount of cushion, rigidity versus flexibility, overall shape, and ergonomics. Comfort varies from person to person and depends a lot on your size, build, and mobility.
If you’re looking for a traditional chair, the ALPS Mountaineering King Kong sports a pleated seat that was high on my list of the most comfortable. And for a slung-back style of chair, look no further than the hammock-inspired builds of the NEMO Stargaze EVO-X and ENO Lounger DL Mesh.
Weight and Packed Dimensions
Folding camp chairs won’t be the most compact, but oftentimes will sport backpack straps to make for an easier carry; (photo/Miya Tsudome)
This is paramount if you’re backpacking, semi-important when packing the rig for car camping, and not very important when setting up in the backyard. Camping-style chairs won’t pack up as small as backpacking chairs, but will typically collapse to a more travel-friendly form for moving around.
Traditional collapsible chairs like the REI Co-Op Campwellor Coleman Broadband Mesh Quad Chair have a classic stow technique that most everyone has seen before and only require a simple pulling together of the legs to collapse down into a more compact package.
Then, there are folding-style chairs like the GCI Outdoor Kickback Rocker Chair, which fold along a central axis and create a flat package for moving about. And finally, there are the DIY-style chairs, such as the ENO Lounger DL Mesh, where some assembly is required, though at a great benefit to overall packability.
It’s nice to have a strap or bag that accompanies your chair, like on the REI Co-op Wonderland, for easier transport; (photo/Miya Tsudome)
Carrying Style
When considering the packed dimensions, also consider how exactly you’re going to be toting your favorite camp chair around. Many are familiar with the fabric sleeves that encase collapsible chairs for travel, but there are few other options available.
Folding-style chairs typically don’t come with a carrying bag, so you’ll have to wrestle them around yourself. Collapsible chairs, like the ENO Lounger DL Mesh, will come with a bag that packs away everything needed to set them up once you hit camp. Finally, a few chairs, such as the REI Co-op Wonderland, will sport integrated straps directly on the chair for shouldering them.
Ease of Setup
Camping chairs range from small and packable to large, yet comfortable; (photo/Eric Phillips)
No one wants to spend 20 minutes fighting to set up their camp chair — or worse, trying to wrangle it back into its carrying bag. I want to be able to set up and take down the chair without instructions or excessive time dedicated to the task.
All of the chairs included here are easy to set up. Some simply fold open, whereas others take a couple of minutes to assemble. The NEMO Stargaze EVO-X used to take some significant time, but has now been updated to be quick and easy. We were able to do it without reading the directions, and the tradeoff for the fun rocking chair feature is worth it.
I wish the REI Co-op Wonderlandwere a bit more intuitive to fold out, but once you figure out its strap system, it won’t take much time at all. And it’s hard to deny the ease of inflating the BOTE Inflatable Aero Chair XL, which pumps up in minutes.
Height
Various camp chairs gathered at camp during sunset; (photo/Eric Phillips)
The height from the ground to the bottom of the seat is an often-overlooked yet extremely important consideration. This dictates not only how bent your legs will be but also makes a chair easier or more difficult to get out of. While most chairs don’t offer multiple heights, I will note that the ENO Lounger DL Mesh does — with the choice of deploying either 3- or 10-inch legs.
In general, those with knee issues or mobility concerns will have an easier time getting out of taller chairs. If you fall into that category, consider something like the Coleman Broadband Mesh Quad Chair or the YETI Trailhead.
Stability
Sitting around the campfire should be a relaxing time. And that means not having to worry about falling out of your chair (especially if you’re enjoying a few campfire cocktails) or the chair toppling over when you move to get out of it. A wider leg base provides extra stability but often comes at the cost of weight and pack size.
Besides a wide base, also look for broader feet at the end of those legs. These will better distribute the load across the surface you’re sitting on and will avoid sinking into soft soils.
Feature Set
Cupholders are great, and pockets are even better. We love the stash pouch on the REI Co-op Campwell, which is the perfect size for our phone and keys; (photo/Miya Tsudome)
Drink holders, pockets, carrying bags, armrest coolers, user-adjusted heat settings, and more — these extra features may seem inconsequential, but they can help take a camp chair from OK to awesome.
When I’m looking for a good camping chair, I like to balance the features it has with the overall complexity. It’s easy to pile on extra features, but annoying to have to extract yourself from a cocoon of cupholders, pockets, and straps. In general, one cupholder will do you, as well as a single accessory pocket to securely stash your keys.
Whether you choose the tiniest camp chair, the biggest camp chair, the cheapest camping chair, or something in between, don’t forget what it’s really all about: getting outside. Throw a fresh log on the fire, pull up a chair, and enjoy an evening under the stars.
Proper beverage containment is high on our list of important features; (photo/Miya Tsudome)
Price & Value
Are you looking for a chair that works for both backpacking and camping? Do you plan to use it once a month, once a week, or every day? These factors will all play an important part in finding the right camp chair for you.
These factors will also affect the price and can help you determine if it’s worth spending more for a chair that pairs comfort with packability (like the ENO Lounger DL Mesh). Or perhaps a budget pick like Coleman will suit your needs better without emptying the wallet. For the best of both worlds, we are partial to the top pick, the REI Co-op Campwell chair, which pairs an affordable price with comfort and quality.
Budget
While there are plenty of cookie-cutter cheap camp chairs out there, I find little reason to settle for these options when some smart shopping can net you a chair that’ll be more comfortable, last longer, and all at nearly the same price. Budget camp chairs will mostly be of the standard collapsible tube frame design, and make use of simple fabric seats with typically one integrated cupholder.
For less than $100, you can get into a real budget chair like the Coleman Broadband ($30) and still have plenty left over to snag a few more to pad out your camping furniture set. Even my best overall pick finds itself in this price range, and for $60, it’s tough not to recommend the REI Co-op Campwell.
Mid-Tier
Between $100 and $200, you’re generally paying for either higher quality materials and design or a specialist chair that aims to offer up something that most chairs don’t. For the money, you can slide into double seats, quilted or insulated seats, and reclining systems or adjustable heights.
The Dometic Go Compact Chair ($150) is a great choice in this price range, as you get a chair with a robust aluminum structure and beechwood armrests that feels more deluxe than budget models. The KUMA Aurora Heated Chair ($150), too, offers up a much deeper seat than most other chairs, and added electric insulation for colder nights.
Premium
For around $200, you can get the BOTE Inflatable Aero Chair XL, YETI Trailhead Camping Chair, or NEMO Stargaze EVO-X. This expensive category enters even more into the specialty category, with inflatable chairs and rocking recliners, or will get you high-quality materials and accessories such as UV-rated breathable fabric or included soft coolers and cupholders.
Consider these types of chairs if you’re looking to make a long-term investment, where you’ll get an extended amount of use out of the seat. The YETI Trailhead is a great straight-ahead camp chair for just about anything, while the BOTE Aero or NEMO Stargaze EVO-X are both experts in their fields and award-winners in their own right.
The REI Co-op Campwell is comfortable and versatile in a variety of outdoor settings; (photo/Miya Tsudome)
Frequently Asked Questions
What is the most comfortable camping chair?
The most comfortable camping chair varies from person to person and depends largely on your body type and height.
The REI Co-op Campwell is among the most comfortable — it’s malleable yet supportive but not too rigid. I also gave the YETI Trailhead extremely high marks for comfort and stability, although that does come with a price tradeoff. And if you want to lay back and take a nap, the GCI Zero Gravity chair is a winner.
How do I choose a camp chair?
First, think about how you’re going to use the chair. If you plan on backpacking or hiking into camp, then a small, lightweight chair will serve you best. If you’re car camping or hanging in the backyard, go for maximum comfort and features.
You may also want to consider your mobility and height. Lower chairs can be more challenging to get in and out of if you have knee issues or any other mobility concerns. Taller people also tend to prefer a chair with a bit more height to it.
Last, think about the features you would enjoy. Is a cupholder important? Or maybe you really want a rocking camp chair? Whatever it is, chances are you can find a camp chair that perfectly suits your outdoor-loving needs.
Choices, choices, choices; (photo/Eric Phillips)
Can camping chairs get wet?
Yes. All the camping chairs on this list can get wet. Some will dry more quickly than others, but none of them will be damaged by a little rain.
Do the weight and packed size matter for a camp chair?
The weight and packed size relate to how portable a chair is. For car camping, this mainly matters for fitting everything in your vehicle and carrying it short distances. The packed-down size can also be important for those with limited storage space.
If you’re spending a lot of time at the ball field, you may want a camp chair you can carry hands-free. Many of our top choices for camp chairs come with an included carry case for convenience. Most of those bags have a single strap to sling over your shoulder, but the ALPS Mountaineering King Kong carry-case has two backpack straps for even more aid.
If you plan to backpack or hike a longer distance with your chair, the weight and packed size are very important.
What should I look for when buying a camping chair?
First, consider the type of trips you’re looking to take your camp chair on. If you’re more of the light and fast type, you may be better suited to a backpacking chair. But if settling down in front of a campfire sounds like your type of evening, a camping chair is likely right up your alley. We will note that there are a few chairs on the market that will do both, and these can be considered if you want one chair to do it all.
Then, think about the type of relaxing you’re looking to do. Some chairs are more suited to reclining, which while the ideal angle for star gazing, likely isn’t going to work great for roasting marshmallows. A chair like the ENO Lounger DL Mesh is certainly among this camp, while the ALPS King Kong offers a more upright position.
Finally, consider the features you’re looking to use while camping. Some chairs offer ample storage, while others are particularly sparse. Some come with multiple cup holders, while others let you cradle your beverage.
From packable sleeping pads to ultracomfortable air beds, we tested and found the best camping mattresses and sleeping pads to fit every adventure and budget.
Our experts have been strapping on fitness watches of all kinds for close to a decade now, testing more than 50 of the best devices and pulling together the winners for every situation in this guide. Whether you’re a marathoner tracking every BPM or just casually interested in your weekly workouts, there’s something here for you.
These watches have been tested and compared for sensor accuracy, battery life, functionality, durability, and fit. Beyond that, we’ve also taken them everywhere — from the summits of volcanoes in the Pacific Northwest to the depths of the canyonlands of Utah — and pushed these devices to the limit to see what breaks.
If you’re new to fitness tracking and want something to tally up your active minutes, options like the COROS Pace 3 are impressive for the price. Alternatively, we’ve been blown away by the feature density in top-tier watches like the Garmin fenix 8 Solar Sapphire. Whatever your specific needs, read on for the best fitness watches, GPS watches, and fitness trackers based on our testing.
Editor’s Note: We updated our Fitness Watch guide on August 18, 2025, to add the Garmin Forerunner 570, an updated version of our beloved 265 and the new award-winner when it comes to a running-focused fitness watch. We added new rating details to each watch to help explain our testing process.
If you’re looking to track every activity, stretch the limits of wrist-bound battery life, and integrate your fitness watch into your daily routine, the Garmin fenix 8 ($1,100-1,200) is the device to do it with. We’ve worn iterations of the line since we first reviewed the fenix 3, and they’ve only gotten better with every update.
So what’s new on the fenix 8? Plenty. For one, a depth sensor that operates down to 40 m and performs as an EN13319-certified dive computer. There’s also a new speaker and microphone, leaning into the realm of smartwatches and providing access to voice assistants. Finally, the updated solar screen increases battery life by ~25% in the different power profiles.
Besides the new, the 8 brings forward all of the activity tracking profiles we loved about the fenix 7, along with a selection of new ones to bring the total number to an impressive 112. These range from standards like hiking, biking, and skiing to the more niche XC skate skiing, wakeboarding, and table tennis (really). All of these profiles are tweakable, meaning you can change your data screens to suit how you use the information.
The general user interface is also spruced up a bit, and the watch is available in three different bezel sizes: 43, 47, and 51 mm. We put the fenix 8 into the hands of editor Seiji Ishii, a self-proclaimed data dork and exercise physiology graduate who shook it down for 4 months while cycling, rucking, and climbing. “It can do everything, and I mean absolutely everything, with precision, and it has proven durable in doing so,” he reported.
The big question is whether to go with the vibrant AMOLED screen or the solar-charging MIP option. We’re wearing the solar screen for several reasons. For one, the trade-off in recharging is too great to ignore for extended trips outside. Second, the MIP screen will be a more efficient option, even without the added solar cells. It is tough to ignore how good the AMOLED screen looks, however, so if your usage is more day-to-day, give it a look.
Breaking the $1,000 ceiling on fitness watches is a high bar, but we think if any watch is worthy, it’s the fenix 8. If you’re more of a single-activity person, a watch like the Garmin Forerunner 570 may be a wiser choice. But if your weekends take you from the mountains to the shoreline on marathon adventures, a do-it-all option like this is the way to go.
You’re going to have a hard time finding a more feature-packed fitness watch at this price. A line-by-line comparison to Garmin, Polar, or Suunto watches would suggest a $300 price point, so $229 for the COROS Pace 3 is a steal. There are some sacrifices you’ll make to get there, but we’ll get to that later.
Freshly updated, the Pace 3 builds on the previously awarded Pace 2, but jams in a new slate of features — namely, a redesigned chipset that adds Dual Frequency reception, a more accurate heart rate monitor, on-device music storage, and maybe most impressive of all: an added 8 hours of battery life.
Let’s start with that dual-frequency tech. Normally seen on higher-end watches, this functionality siphons location info from multiple generations of GNSS systems, meaning the Pace 3 has a higher fidelity view in areas where tracking typically suffers, such as dense cities or canyons. When tested side-by-side with other watches not running dual-frequency, we found the Pace 3 holding tight to the trail while others dropped out momentarily.
COROS also raided their tech closet and added the same next-generation heart rate monitor that the Apex series sports, and squeezed in a 236 mAh battery, which adds 8 hours of run time in the standard GPS mode. That 38-hour run time is longer than any of the Garmin Forerunner line, and the watch does so while also only weighing 1 g more than the previous Pace 2. Impressive.
So what’s been left off? For one, the lesser glass in the screen, which is scratch-resistant (read: not scratch-proof), and the polymer bezel, which won’t be indestructible. While easy to use, the mapping functionality is a bit limited and lacks the detail of many mid-tier watches. Finally, it’s tough to match the workout planning metrics that the Garmin ecosystem brings to the table, but COROS has made big improvements as of late.
Sliding in at an impressive $229 (only $30 more than the previous iteration), the Pace 3 is nigh impossible to deny for the price. This watch touts many of the same features of watches that demand hundreds more, and is very likely the best watch available currently for anyone looking to dip their toe into the fitness watch game.
The new COROS Pace 3 is light on its feet and your wallet, but heavy on functionality; (photo/Nick Belcaster)
While other giant-bezel watches can cram in more longevity, when it comes to a watch that is a common-sense size, has all the bells and whistles, and still trudges on with incredible battery life, the COROS Apex 2 Pro ($449) ticks all of our boxes for the best mid-tier fitness watch available today. If you need a bit more functionality than watches like the COROS Pace 3 or Amazfit Cheetah Pro offer, this is the watch to bump up to.
Newly updated, the Apex line from COROS is its middle-of-the-road offering, but you wouldn’t know that from looking at it. Within the 46mm bezel is the full complement of activity tracking profiles, ABC (altimeter, barometer, compass) sensors, and antenna for a newly expanded five Global Navigation Satellite Systems.
Compared to the Apex 2, the Pro version got an extra infusion of satellite tech in the form of a Dual-Frequency chipset, which, during recent testing, we found made a tangible difference in old-growth forests and canyons. It also bumps up the internal storage from 8 GB to 32 GB and tacked on even more battery life.
When put to the test, we verified that the Apex 2 Pro simply goes and goes. At a stated (and confirmed) 75 hours of battery life in the GPS-only mode, this watch can’t be touched by watches of the same size when it comes to longevity. Other watches, like the Garmin fenix 8, can eke out more time by utilizing the sun, but command much more wrist real estate.
And while Garmin has consistently led the pack in terms of efficient app integration, we can now say that COROS has caught up. The COROS app is an enjoyable interface to use, and does an excellent job of displaying our recorded activities, tracks, and daily stats such as active energy, heart rate, and sleep metrics.
So, how could the Apex 2 Pro be better? For one: we did miss the helpful fitness stats, reports, and workouts from the Garmin ecosystem. Garmin has made a big push toward synthesizing all of the data their fitness watches soak up, and we do wish that COROS will make the same pivot. Beyond that, in the age of mega-bright AMOLED screens, the colors of the Apex 2 Pro were a bit muted compared to watches of a similar caliber.
Ideal for the adventurer or fitness devotee who wants it all without carrying a calculator on their wrist, the Apex 2 Pro lands as just about the perfect balance in our books.
Global satellite networks:
Multi-band GPS, GLONASS, QZSS, BeiDou, and Galileo reception
Screen/Bezel:
1.4" Gorilla Glass 3 and aluminum
Navigation Capable:
Yes (breadcrumb tracks)
Barometric altimeter and compass:
Yes
Water resistance:
5 ATM
Pros
Dazzling and brighter AMOLED touchscreen display
Smart Garmin health stats and reports
Speaker and microphone for voice commands and assistants
Multi-band GNSS reception with SatIQ tech
USB-C charging
Cons
Battery life is lesser than previous Forerunner 265
Price is tough to justify for some
No ECG support
Basic breadcrumb mapping
Cory Smith
In an update to the brand’s uber-popular running watches, the Garmin Forerunner 570($550) adds a brighter AMOLED screen, speaker and microphone combo, and additional triathlon training that make this one of the best running watches out there.
Building on the Forerunner 265 (a watch that we’ve previously hailed as the running watch), the 570 got more than a name change, and is now a better daily driver for runners. Comparing the 265 to the 570 side by side, the new screen is noticeably brighter (as well as slightly larger across the two offered sizes), but still minimal enough as to not weigh us down on runs.
The new speaker on the 570 is loud and will prompt you with things like lap reminders, while the microphone allows you to use Voice Commands, and ask the watch to set things like timers or begin activities. In a surprising (but appreciated) function, the 570 will have you to turn the watch upside down after a water activity and pulse sound to clear the speaker — smart.
New multi-sport modes have been added to the watch to make it a better triathlon watch, narrowing the gap between the 570 and the top-tier 970. Building workouts with multiple components is now possible, and we had good success with constructing multi-sport days that combined swimming with cycling and running.
Due to the brighter screen, battery life on the 570 does take a hit compared to the older 265 (a tested 9 days with a daily run, compared to the 11 days we could get with the previous model). This is certainly a watch for those who run and train for fitness (and are home every night to plug in), instead of endurance athletes. For those folks, bumping up to the Forerunner 970 or Enduro 3 makes much more sense. Those watches also add on ECG support and better mapping abilities (the 570 supports basic breadcrumb navigation).
To be sure, we still think that the Forerunner 265 is an excellent watch — and as long as it’s available, we recommend snagging it if the upgrades to the 570 don’t woo you. The price jump from the 265 to the 570 was a large one, and the added $100 might be tough to swallow for the relatively minimal feature additions. That said, if the latest and greatest in running watches is what you’re after, the Forerunner 570 is it.
Apple is the bestselling smartwatch worldwide, and it’s clear why — it’s undeniably the best smartwatch (not GPS watch; we’ll get to that later) on the market. Everyone we spoke with who had one gave glowing reviews. “After literally decades of not trying a smartwatch, I recently bought an Apple Watch. I love it,” said one initial skeptic.
Now tuned for the outdoors and fitness market, the new Apple Watch Ultra($799) is upgraded to take on the rough and tumble in your day-to-day, and boasts a larger 49 mm titanium case, brighter 2,000 nits screen, increased water resistance (up to 100 m), and an extended 36-hour battery life. You’re obviously going to pay for all those upgrades, but we’re convinced that it’s well worth it.
As with all the watches tested, the Apple Watch Ultra can track sleep, steps, and calories and puts it in an easy-to-understand format. Further sports integration offers up structured workouts in nearly everything from running to swimming to strength training and kickboxing.
These modes can be customized (choose your warm-up and recovery periods, etc.), and it logs most all of the metrics we’ve come to expect in a fitness watch, such as heart rate, pace, distance, elevation, and more. For runs after work or a weekend strength training session, the Ultra has everything we need.
Having coached many runners who wear an Apple Watch, our resident trainer can say two things with certainty: The GPS is not great, and the battery life just isn’t there to compete with flagship watches. But now that the Ultra version brings on board a multi-GNSS chipset with multi-band technology, the location reception is tack sharp and on par with the rest of the field high-end watches, such as the Garmin fenix 8 and COROS Apex 2 Pro.
The battery life issue, however, continues to be a ding, and with Apple’s large 49mm always-on AMOLED screen, it’s tough to squeeze much more out of it without compromising greatly on functionality. While the battery life of the Apple Watch Ultra is given as 35 hours in normal smartwatch mode, that number goes down to about 12 hours in GPS tracking mode.
Still, if daily convenience and smartwatch features take precedence over a detailed fitness activity, the Apple Watch Ultra is for you. One big caveat — it only works with iPhones. If you don’t have an iPhone, we suggest the Garmin Venu 2 or Samsung Galaxy Watch 5. Both are similarly focused on fitness tracking while offering a wide array of apps and smartwatch features. But for the MacBook crowd, the Apple Watch Ultra is an easy go-to.
Global satellite networks:
GPS + GLONASS reception
Screen/Bezel:
1" glass, aluminum, and resin
Navigation capable:
No
Barometric altimeter and compass:
No
Water resistance:
5 ATM (50M)
Pros
GPS tracking without phone connection
Health-tracking metrics
Google apps built in
Affordable
Cons
Very basic sports tracking
Small screen
No non Google app controls
Cory Smith
Adorning the wrists of workout enthusiasts everywhere, the Fitbit Charge 6($150) takes the crown for the best fitness tracker. The sixth iteration is less expensive than the fifth when it was introduced and features a few useful upgrades.
The Charge 6 reintroduces the haptic side button to the Charge line of trackers, which brings you back to the main screen when pressed. It also has a slightly curved AMOLED touchscreen, and the battery life lasts up to 7 days — the perfect tracker to wear all week.
An optical heart-rate monitor for 24/7 monitoring is standard and provides accurate calorie-burn calculations, sleep and stress data, and heart-rate zones for working out. It tracks daily steps, calories burned, and active minutes to help you make informed health decisions based on hard data.
The Charge 6 has 40+ different sports modes for tracking, including running, walking, biking, swimming, HIIT, yoga, skiing, surfing, indoor climbing, and golf. If you’re looking for finer details such as cadence, power, or rep-counting for weight training, you’re out of luck — one of our most notable issues with the Fitbit. A built-in GPS tracker allows you to go without your smartphone during an outdoor workout.
The Charge 6 also now connects with third-party platforms such as Peloton, NordicTrack, and Tonal to integrate heart rate data with your workouts.
A few bonus features not usually seen on trackers are the ability to get notifications (call, text, email, and calendar), control YouTube Music (since Fitbit was purchased by Google, Spotify is no longer controllable on Fitbit devices) use Google Maps and Google Pay. If you don’t need these features and you’re OK carrying your phone during activities that require GPS (such as walking, running, and cycling), we suggest the cheaper Fitbit Luxe.
Our resident fitness trainer and ‘bio-hacker’ put the Whoop Band ($239) to the test for an entire year before rendering our verdict, and we’re sold. This low-key wearable isn’t quite all the watch that the rest of our suggestions are, but it also has a different purpose: recovery. Aimed at monitoring a few simple metrics and comparing them against your ‘stress’ level, the Whoop Band is a tool developed that athletes can use in training programs.
Unlike most fitness watches, which mainly track activities and workouts, the Whoop Band tracks health metrics that lend insight into your overall recovery state. These include sleep — Slow Wave Sleep (SWS), Rapid-Eye Movement Sleep (REM), light sleep, and time awake are all measured — as well as skin temperature, respiratory rate, blood oxygen saturation, resting heart rate, and heart rate variability (HRV).
Whoop also tracks daily activities (through smart tracking or customizable entries) and caffeine or alcohol intake. All of this is synthesized on the Whoop app and provided as raw data and a ‘Recovery Score,’ which can be used to know when to lean into your workout plan and dial it back.
The Whoop Band is a simple device with a dense optical sensor on the back of the device for siphoning up your biometric data. Otherwise, there is no screen and a simple textile band that stretches with you. After one year of use, our trainer found the Whoop to provide fascinating insights into his daily and weekly training efforts, and while the novelty faded after about 3 months, he still found utility for the whole year.
We did find that the device does underestimate the stress effect related to strength-related activities, such as climbing or weight lifting, which didn’t put as much of a ding in the recovery metric as we thought it should. The recovery status can be tweaked by adding data yourself after the workout, but we found it to be a bit annoying to have to adjust the data.
If you’re a high-level athlete locked into an intensive training program, the Whoop Band may be an excellent tool for measuring recovery. It’s a minimal device for those uninterested in full-on fitness watches who still want the data to inform fitness planning. You’ll need to pay for the subscription (ranging from $199 to $359 a year), but if you’re invested in your health, that might only be a blip on the radar.
(Photo/Seiji Ishii)
(Photo/Seiji Ishii)
(Photo/Ash Duban)
(Photo/Seiji Ishii)
Other Fitness Watches to Keep Track With
The seven awarded watches above are highly capable fitness trackers, and we think they’re the best in class in their respective niches. However, we’ve tested the entire range of fitness watches today and identified some additional options to consider.
Single-band GPS Battery Life:
320 hours (with solar charging)
Global Satellite Networks:
Multi-band GPS, GLONASS, Galileo, BeiDou, and QZSS reception
Screen/Bezel:
1.4" fiber reinforced polymer and titanium bezel with Power Sapphire lens
Navigation Capable:
Yes
Barometric Altimeter and Compass:
Yes
Water Resistance Rating:
10 ATM
Pros
Incredible battery life (when the sun is shining)
SatIQ tech makes smart satellite choices to limit battery consumption
Operating system is smooth and bug free
6-LED heart rate monitor with HRV capability
Cons
Watch is a bit tall on the wrist
Textile watch band won't be everyone's favorite
Cory Smith
320 is a lot of hours. That’s how long Garmin specs its Enduro 3 ($900) watch to run with GPS running — and the sun shining. This big-battery watch is made to go the distance, and if you’re after the longest running fitness watch out there, we think this is the one to snag.
We took this watch to Patagonia to test those claims, and while the sun was often in short supply, the watch did last the entire 2-week trip off the cord, and tracked more than a few multiday treks in between. The UI is the same version used in our top pick watch, and Garmin delivers in the personal tracking metrics as always.
In fact, the only real UI differences between this watch and the fenix 8 are the lack of a microphone/speaker and no dive functionality. Otherwise, it’s the same watch (just in a different case).
On a day that the sun was shining, we got the watch to charge at a rate of around 1% per 15 minutes — if you set the watch in a prime position. This seems to be the hack needed to really leverage your solar watch, and considering the watch only uses 1% per day when run in the battery saver mode, it’s easy to understand how this watch could run indefinitely, given perfect conditions.
The Enduro is more than a big battery, too: it has Garmin’s latest six-LED optical heart rate monitor, tracks almost 100 activity profiles, and puts it all behind a Power Sapphire glass and titanium bezel. We tracked an entire four-day trek along the Patagonian Icefield, and the watch easily led us over remote passes and through glacial labyrinths.
Satellite reception is top-notch and dialed in with both Multi-Band tech, which improves reception in deep recesses like canyons or cities, and Garmin’s SatIQ, a smart functionality that toggles between satellite modes to keep battery usage as low as possible. On-device mapping is the leading edge of the current generation and almost lag-free when scrolling quickly.
That battery does take up some wrist real estate, and the watch itself is a little over 1.5” thick, though we found it easy to get used to. The $900 price tag is also on the high end, though not as high as you’ll pay for the current generation Fenix 8. The Enduro 3 is instead for folks who simply need a watch to last and can sacrifice the latest and greatest features to get it.
Suunto has jettisoned itself squarely among the leaders in the GPS watch world with the new Vertical($629-839), a watch that hits almost all the marks when it comes to a feature-packed wearable with plenty of horsepower under the hood.
The Vertical salves all of the things that didn’t quite make the grade for us with the Suunto 9 Peak Pro (still an excellent watch, read below), including brightening up the screen, adding Wi-Fi, and incorporating dual-band GNSS reception, and cements itself as a true flagship watch — landing among the Garmin fenix 8, and COROS Vertix 2.
Then there’s the new mapping functionality, something that Suunto hasn’t incorporated into a device since their Suunto 7 watch. The company has taken the time to perfect it as well because, in the Vertical, it’s an excellent rendition.
From the Suunto app, users are able to download (for free) shaded topographic maps for essentially the entire globe — directly onto the watch. These maps are sufficiently detailed for phone-free navigation, and can have routes uploaded to them from the app for course-making on the go.
And if all that wasn’t enough, Suunto also was able to boost its battery numbers by a substantial amount over the 9 Peak Pro, stretching the life in ‘Performance’ (all systems go) mode to an impressive 60 hours. We tested the Titanium Solar version of the watch, which leverages a solar watch face to juice up the Vertical on the go. This added feature will cost you (to the tune of $210), but it greatly extends your untethered time.
While the Vertical does not have any music-storing abilities on the device (a functionality the Garmin fenix 8 boasts), it can control the music playing from your phone. This is a small ding in an otherwise iron-clad GPS watch, and the Vertical would be an excellent timepiece for anyone who lives on the cutting edge.
The Garmin Instinct 3 AMOLED ($450) is an update on a previous favorite of our team, and it’s only better now. Newly optioned in a beautiful AMOLED screen, the Instinct 3 is still just as get-er-done as the previous version — it just looks even better now.
The Instinct line keeps things accessible by holding back on a few metrics but leaning into the rugged durability and styling that appeal to many. Notably, the satellite reception is limited to three systems, and the battery life isn’t as dazzling as the upper-tier watches, but there’s considerable tech trickle-down from other Garmin watches that make this updated version a worthy one.
The big deal here is the AMOLED display, which is just as brilliant as the ones we’ve used on the Forerunner series. The touch sensitivity also appears to be better on this version of the watch, and the screen scrolls beautifully. There’s still a solar-charging MIP version of the Instinct 3 for loyalists, but we’ve been enjoying the deeper colors and better contrast.
On-watch mapping won’t blow you away (you get the standard breadcrumb-tracking style screens), but the watch does use Garmin’s SatIQ technology, which decides which GPS mode is ideal for the terrain you find yourself in. This means that the watch will toggle into Multiband mode when you’re in a city or tight canyons, which is a boon for battery life.
The new Instinct is also tougher, with a new metal band set into the bezel as reinforcement. The watch still meets MIL-STD-810 mil-spec standards and is rated to 10 atmospheres of water immersion. We found that the fiber-reinforced polymer bezel tended to glance off things we hit instead of scratching, and while the screen is only chemically strengthened glass, the raised bezel protects it well.
There’s impressive value in Instinct 3, too. For the same price as the COROS Apex 2 Pro, you get an AMOLED screen that pops in all conditions, whereas the COROS could, at times, be a little harder to see. That said, the battery life on the COROS when running single-band GPS is 75 hours, and while the 32 hours the Garmin can manage is decent, it’s the reason we think the Apex 2 Pro is a slightly better mid-tier watch.
If your workouts keep you closer to home (and you tend to get dirty doing them), we don’t see any reason not to stick with the rugged Instinct 3 AMOLED.
While your Garmin, COROS, and Suunto options dominate the fitness watch space, there’s always room for some friendly competition, and the Amazfit Cheetah Pro($300) angles directly at the big dogs with a suite of features more often seen in watches hundreds of dollars its senior.
With dual-band multi-GNSS reception, a 1.45” AMOLED screen, and navigation capabilities, the Cheetah Pro checks all of the boxes we’re looking for in a fitness watch that we can use for everything from days in the gym to long events outdoors. The watch also tracks 156 (!) different activities, and shuttles that info over to its app for post-workout breakdowns and training suggestions.
In practice, our testers found that while the feature set of the Cheetah Pro is exhaustive, the polish and execution left a little to be desired. For example, when tester Ian Atkinson ran a 24-mile route in the Canyonlands Needles District recently while comparing the Amazfit to the proven COROS Pace 3, the Cheetah lost satellite connection a number of times, while the COROS held strong.
While it’s no death knell, connection quality is certainly something we look for, and with watches getting just so good these days, we’re eager to see some improvement from Amazfit in this space. Further, while the Zepp app — used to provide training insights and plans — is a detailed offering, the AI training provided is a bit lacking, and advanced functionality is limited to paid subscriptions.
So, can the Cheetah Pro hack it? “I would say yes,” says Atkinson. “I was not gentle in my testing, and the Cheetah Pro withstood both ample amounts of sand and gritty rock. It just depends on what your standards are for a fitness watch.” For hundreds less than the competition, there’s much to enjoy on the Cheetah Pro, and if you’re willing to forgive some rough edges, it’ll track everything you get up to.
Global satellite networks:
GPS, GLONASS, Galileo, BeiDou, and QZSS reception
Screen/Bezel:
1.4" Gorilla Glass and aerospace aluminum
Navigation capable:
Yes
Barometric altimeter and compass:
Yes
Water resistance:
WR50 (50m)
Pros
Outstanding battery life
Heart rate monitoring
Strava Live Segments
Cons
Expensive
Weak and delayed button action
Dull and simple app
Unintuitive interface
Cory Smith
The Polar Vantage V3 ($600) is once again one of our preferred picks for running, even in a field dominated by Garmin. It’s not as jam-packed with features as most Garmins, but what it does offer, it does very well — especially heart-rate monitoring.
The biggest new feature since the last model is the addition of offline topographic maps, bringing this watch closer in features to a Garmin adventure-focused watch. It also has over 150 customizable sports profiles.
In addition, the battery life has been extended to 61 hours in continuous GPS mode with the option of 140 hours in battery-saver mode. The screen has been updated to an AMOLED display. Sensors for SpO2, ECG, OHR, and skin temperature have been added to the Vantage V3.
Like all watches, you get training and recovery insights based on your unique physiological data to help you make more informed decisions about when to push and recover. It comes with built-in, step-by-step running and cycling performance tests to establish training zones via heart rate, speed, and power (meter required for cycling), as well as test recovery.
If you’re a Strava Segment-hunter, the watch will notify you as you approach your starred Segments and give real-time performance data so you can crush your Segment PRs.
Polar Precision Prime sensor fusion technology “combines optical heart-rate measurement with other sensor technologies to rule out involuntary movement that might disturb the heart-rate signal and produce unreliable readings.”
We weren’t, however, as impressed with the Polar Flow app that is used to sync your activities online — which is a bit simple and often has issues syncing data between the watch and your phone. Additionally, the buttons and interface were not as intuitive as other watches we tested. But these issues aside, the Vantage V3 is rightly up there with the Garmin Forerunners for our suggestion of the best running watches.
Global satellite networks:
GPS, GLONASS, and Galileo reception
Screen/Bezel:
1.2" Corning Gorilla Glass and anodized aluminum
Navigation capable:
No
Barometric altimeter and compass:
No altimeter, yes compass
Water resistance:
5 ATM (50m)
Pros
More affordable than comparative watches
Competitive training/health data for the type of watch
Smart lifestyle trackers and apps
Cons
Buttons are not very responsive
Cory Smith
The Garmin vívoactive 5 ($300) combines basic fitness, health tracking, and performance statistics with classic smartwatch features like music, smart notifications, and texting.
For the everyday athlete who doesn’t need all the features or the price point of a watch like the fenix 8, but wants data more than your average fitness tracker or smartwatch, the vívoactive 5 is a good option. If you’re looking for more outdoor-specific features like navigation and more in-depth training features, a higher-end watch would be a better pick.
Some of the updates from the previous version include nap tracking, a new Morning Report, and an AMOLED screen compared to the MIP screen on the vívoactive 4. It also includes a new wheelchair mode, which tracks pushes and workouts. The vívoactive 5 also starts at a lower price point ($300) than the vívoactive 4 ($350).
With features like sleep scores and tracking, energy monitoring, and basic training statistics, the vívoactive 5 keeps you aware of any changes in your health or activity levels. The vívoactive 5 has up to 11 days of battery life in smartwatch mode and up to 5 days, with the AMOLED touchscreen in always-on mode. For those looking for a smartwatch with a little extra under the hood, the vívoactive 5 is an excellent option.
Hot on the heels of the already-impressive Vertical, the Suunto Race ($449) slides in hundreds less and better suited for the runners out there — all while boasting Suunto’s first AMOLED screen. This beautiful display is a showstopper and it’s not difficult to call this the best watch Suunto has ever made.
Like the split between MIP and AMOLED screens on otherwise similar watches, the Vertical and Race also share a lot of like features, but there’s also a good bit new on the Race. For example, the new digital crown bezel makes navigating through maps a breeze and moves away from the three-button layout for the Vertical.
HRV tracking has also been expanded to nightly surveying, and integrates with the newly added Suunto Coach functionality — synthesizing your workouts and providing feedback and suggestions.
The AMOLED screen can’t be ignored, however, and is a 466 x 466-pixel resolution unit that blows MIP screens out of the water when the light starts to wane. We especially noted this during map navigation, which is sharp when viewing turn-by-turn directions or zooming in or out of maps.
The processor on the Race is also top-notch, with none of the lagging that we’ve unfortunately dealt with on previous Suunto watches. Map and compass rotations are smooth, menu switching is clean, and post-workout screens flip through easily.
Like the Vertical, the Race has onboard map storage in either 16 GB or 32 GB capacities, depending on the variation you choose. These are non-routable maps, meaning your turn-by-turn route won’t update should you miss a fork in the trail, but the definition is still top-notch. The Suunto app allows for quick shuttling of maps over to the watch over Wi-Fi, and uses a smart map area picker that only downloads the sections you’ll need.
Stacked up next to the Garmin Forerunner 570 and Polar Vantage V3, the Race makes a compelling case for itself, with a much longer comparative battery life than the 265, and a more user-friendly button interface and app than the Vantage.
That beautiful screen will ding the battery life on the Race compared to the Vertical, however, with a 20-hour difference between both in the Endurance mode. Still, a full 40 hours in the highest-demand GPS mode is nothing to shake a stick at, and most runners will find this more than enough for weekend ultras.
For those engaged in endurance events, the Vertical’s longer battery life and available solar watch face may prove more tempting, but for casual and spirited runners alike, the Suunto Race has everything we’ve been wanting from a Suunto watch and more. It’s easy to say that this watch is well competitive with top-tier Garmin and COROS options, and we’re excited to see it.
There are plenty of fitness watches on the market today, but some important differences will dictate which to go with; (photo/Matthew Tangeman)
Our top three award winners for 2025 — the Garmin fenix 8, COROS Pace 3, and COROS Apex 2 Pro; (photo/Matthew Tangeman)
How We Tested the Best Fitness Watches
Comparing fitness watches can be a fairly complicated task, as there is a blizzard of different sensors and metrics to compare. To truly get a good understanding of each watch, it takes a solid week or more to build up the logged data. Thankfully, this is what we’re here for, and our in-house experts have the know-how to compare everything from the differences in optical heart rate monitors to dual-band satellite reception and tracking.
Our Testing Process and Testing Grounds
Our experts have crafted a detailed testing regimen that aims to compare these watches on a level playing field. It’s not uncommon for our testers to wear three or more watches at once to give them a fair shake.
From the start, we aim to use these watches in two broad field testing categories: gym work and outdoor activities. Our time in the gym provides us with deep insights into the nitty-gritty comparisons between watches when it comes to heart rate tracking and training suggestions, as well as the finer details, such as which watches count our reps the most accurately and which have the best sense of when we need to recover.
Comparing watches head-to-head provides a great insight into their accuracy and user interfaces; (photo/Nick Belcaster)
When we truly hit the field, our testers aim to get each of these watches out for at least three different types of activity tracking modes — running, cycling, and swimming are our most commonly used. After this, we compare track lengths, measure heart rate data against dedicated chest-strap devices, challenge the satellite reception with difficult terrain, and run each of these watches completely dead — all in the name of winnowing out the chafe and finding the best fitness watches available today.
Finally, we switch things up and rotate watches out to different testers, as everyone has different fitness goals and, along with them, different needs when it comes to a fitness watch.
Our comparisons also get down to brass tacks, with a selection of bench tests meant to ground truth manufacturer specifications and ensure their accuracy. We do this out of the field to give each watch a fair chance and to get the maximum result possible.
Recharging times from dead flat are timed, as are discharge rates with watches in their lowest power consumption modes. Water resistance, too, is challenged with the help of our garden hose. Finally, we compare the little details between watches, such as the ease of replacing the band or the tactile feel of buttons or dials. This may seem minor, but when you’re looking for something that will live on your wrist every day, we’ve found these things to matter.
We logged big miles (and elevation) while testing these watches, ensuring they got a fair shake during our testing; (photo/Nick Belcaster)
Our Expert Testers
GearJunkie knows fitness, and our testers know their watches. The team includes Cory Smith, an online running coach and freelance journalist with over 25 years of running and rock climbing experience. He’s an expert, from treadmills to shoes.
Our most recent fitness watch update saw contributor Ilana Newman saddled with more watches than she has wrists to put them on, putting them through the paces in southwest Colorado while trail running, backcountry skiing, and working through daily fitness regimens. The San Juan mountains provided the perfect testing ground for this new generation of watches, and Newman is obsessed with training data and staying up to date on the newest outdoor gear.
Beyond their personal expertise, GearJunkie has solicited the opinions of fellow runners, hikers, and climbers. When the dust settled and the final grades came in, the list above represented the best fitness watches we could drum up. But know that fitness tech is constantly improving, and new functionalities are being added daily to some of these watches. As they improve, so does our coverage, and we’ll continue to test them.
Our Fitness Watch Rating System
We’ve identified a handful of specific rating metrics to really dial in our fitness watch rating, and better allow you to compare the options out there based on what’s important to you.
Activity Tracking and Accuracy
The variety, accuracy, and types of data collected during your activities is the whole point of a fitness watch, and we rank it highly whenever we run a unit through the paces. Besides looking at overall activity types and the information collected, we compare the watches against known standards such as running on a track or counting reps.
Battery Life
We specifically look at battery life when using GPS tracking to compare run times, and aim for at least a solid day’s worth of battery power to earn a high score in this metric. Anything more than this puts the watch in the endurance category, and anything less means it’s likely a smartwatch with fitness features.
Training Data and Planning
Most fitness watches will use the data from your fitness activities to pull together training plans for you, but the style and complexity of these plans can vary greatly. We look for advanced metrics that take into account your whole body health, such as sleep tracking, as well as assosciated apps that allow you to input additional data, such as food intake or adjust tracked activities.
Build Quality
Finally, we look at the overall build quality of these watches when rating them. Bezels and watch faces can vary in construction, with those sporting sapphire glass and titanium earning higher scores. We also look for high-quality optical heart rate monitors, straps, and charging solutions.
Whether the watch is tracking your progress or leading the way, these little wrist-mounted units pack a lot into a small space; (photo/Matthew Tangeman)
Buyer’s Guide: How to Choose the Perfect Fitness Watch
The fitness watch market can be overwhelming. There are so many options — all of which might seem similar — that it can feel as though you need a college degree to tell them apart.
While finding the best fitness watch for you does require some thought and research, this handy how-to-choose guide has all the essential information compiled so you can make the best decision for your fitness watch needs.
We go into everything from GPS reception to how training data is used to provide health and performance predictions. Each brand of watch uses slightly different data and provides different features, each of which is more or less important to consumers. We’ll spell it all out for you so you can make an informed decision that works for your specific fitness, health, and performance goals.
Smartwatches, GPS Watches, and Fitness Trackers
The Garmin fenix series lands squarely in the GPS watch realm, leveraging broad satellite reception and impressive battery life; (photo/Erika Courtney)
There are three very distinct categories of watches, each with strengths and weaknesses. Smartwatches are basically small smartphones for your wrist where you can add apps and take calls without your phone.
The most popular smartwatches are Apple and Samsung Galaxy watches. Functionally, they’re geared toward convenience and health tracking, but they tend to fall short on battery life, GPS accuracy, and workout functionality.
GPS watches such as Garmin, COROS, Suunto, and Polar are designed primarily for workouts that require GPS functionality (running, cycling, hiking, swimming, etc.). They tend to have over triple the battery life of smartwatches and are very strong with workout features, metrics, and tracking.
While most will allow text and email messages, and many provide storage for music or access to streaming apps like Spotify, they’re limited in the scope of apps you can add and will not replace your smartphone.
Fitness trackers have the least functionality and only track health and fitness metrics such as resting and variable heart rate, sleep patterns, and steps. Most will need to stay connected to a phone for features like GPS tracking.
Activity Tracking
A good fitness watch will have specific activity profiles and associated information to display; (photo/Matthew Tangeman)
Today’s fitness watches can track just about any activity imaginable, ranging from running to indoor rock climbing and even surfing. We’ve found that watches labeled as “outdoor” or “multisport” not only tend to be able to track the more obscure activities but also do so with more detail and granularity. As a result, this increased level of functionality tends to come with a higher price tag.
Some more entry-level watches do allow you to create new activity profiles for sports that are not built-in, but most of the time these only allow you to track the basics like heart rate, time, etc.
For example, while you could track rock climbing with the Garmin vívoactive 5, it does not have a specific profile for it, so you would only get basic data logged for that workout by using a different activity profile, such as cardio. The Garmin fenix 8, however, has specific rock climbing (indoor climbing, climbing, and bouldering) activity profiles that allow you to track each route, the grade of the route, and the length of each climb.
Backcountry skiing is another specific activity that testers found lacking on some of the lower-end watches, as a session includes both uphill and downhill travel, logging it without a backcountry skiing-specific activity profile creates an inaccurate representation. Even using cross-country skiing as a substitute on the Fitbit Charge 6 did not provide the same overall picture as using a backcountry skiing profile on a watch like the Polar Vantage V3.
(Photo/Matthew Tangeman)
Depending on the brand and the activity being tracked, you will be able to see different data both during the activity and in the activity summary after completion. If the watch supports navigation, and you’re tracking an activity that involves moving, one screen will feature a map with your location.
High-end Garmin watches like the fenix 8 series feature over 80 activity profiles with the ability to add more. The Polar Vantage V3 can hold up to 14 profiles on the watch and requires the Polar Flow app to edit or add more. COROS watches have about 30 activity profiles, but veer more toward technical outdoor activities instead of gym activities like Fitbit fitness trackers do.
All the watches we tested tracked common activities such as walking, running (outdoor, trail, treadmill), outdoor and indoor cycling, yoga, elliptical, general strength, and cardio sessions. If there’s a less-common sport you’d like to track, we suggest checking the watch’s spec sheet to see if it’s covered.
Training and Coaching
Of all the watches we tested, we found the heart rate sensor on the Polar Vantage V3 to be one of the most accurate; (photo/M.T. Elliott)
As fitness watches have gotten better at tracking health and fitness data, companies have been able to use that data to give guidance on training. As a full-time running coach, our tester Cory Smith finds this particularly interesting.
He sees most runners struggle because they overtrain or undertrain. Garmin and Polar seem to have the best training and coaching insights, with COROS right behind them.
Garmin, as the leader in the field for training data and even coaching through the watch interface, has a few statistics that seem to be included across its newest watches, no matter how high-end it is. Even these baseline stats can provide a good overview of training readiness and recovery.
Recovery time, for example, is included on both the vívoactive 5 and the fenix 8. Garmin’s recovery time uses data from your past workouts, including your recent and long-term training load and VO2 max. Other data, like sleep and stress tracking, can also impact recovery time.
Another now-standard piece of training data for Garmin is Heart Rate Variability Status (HRV), which tracks the time in between heartbeats to determine the level of stress your body is currently under, due to training load, life, lack of sleep, and more.
Burly ski tour in the morning? Your watch will probably suggest a longer recovery time to ensure you’re 100% again; (photo/Matthew Tangeman)
Garmin also uses all of the data it constantly gathers during the day and activity tracking to provide workout suggestions. High-end watches, like the fenix 8 or Enduro 3, provide a specific workout each day in the Morning Report, with specific goals like “base building” based on past activities and current training status.
There’s also the option to set up Garmin Coach on any Garmin Watch, which uses the Garmin Connect app to choose a training goal — such as training for a half marathon — and Garmin Coach will provide a training plan over an allotted time.
Polar uses similar data to provide data like Cardio Load Status, which looks at short-term training load (strain) versus long-term training load (tolerance) to determine the effect of your training (detraining, maintaining, productive, or overreaching).
Health Tracking
More in the realm of smartwatches and fitness trackers, even GPS watches offer insightful health tracking info; (photo/Matthew Tangeman)
Health tracking is standard across fitness watches, from the most basic fitness tracker to the highest-end GPS watch.
Technology for health tracking has advanced a lot over the past few years, and certain features that used to be considered high-end are now available on just about every fitness watch, like SpO2 (blood oxygen saturation — measured through red and infrared light) and Heart Rate Variability.
Every fitness watch measures heart rate and sleep, while some, like the Whoop Band 4.0, focus intensely on it. Additional health data, such as calories and hydration, are available on most watches we tested, but must be tracked manually.
The Apple Watch provides heart health alerts for low or high heart rates and also allows for medication reminders. All fitness watches provide menstrual cycle tracking, and many have integrated mindfulness into their interfaces, like the Garmin vívoactive 5.
Garmin watches now also track naps, along with overnight sleep. Each brand has its own way of summarizing a night of sleep, but most use a scale of 1-100 to rate the night of sleep while also tracking time asleep and sleep cycles.
Health tracking features are generally standard across brands, but each brand has features that synthesize data in unique ways, like Garmin’s Body Battery and Fitbit’s Daily Readiness.
Garmin’s Body Battery, for example, uses data from sleep, stress, rest, and physical activity to provide a score from 1 to 100 for physical energy. Your Body Battery will be highest upon waking and ebbs throughout the day, depending on activity and stress (measured through heart rate variability).
Some Garmin watches additionally provide insights such as “Easy Day: Your day has been easy so fa,r and you have plenty of energy left for exercise or activity.” Other brands have similar features with different interfaces.
Navigation and Mapping
On-device navigation has come a long way, and is now very impressive on flagship watches such as the Garmin fenix 8; (photo/Matthew Tangeman)
If navigation and mapping are important to you, you’ll have to shell out some cash. You can get some basic navigation features like waypoint markers and tracking integrated into your phone without needing to go for top-of-the-line watches. But if you’re going to be using your watch off-grid and want to upload your own .gpx tracks, you’ll need to go for a higher-end Garmin, COROS, or Polar watch.
Entry-level Garmin watches like the vívoactive 5that include GPS but lack navigation often feature a back-to-start mode that allows you to use an on-screen compass to return to where you started recording without an on-screen map.
Watches with full GPS navigational capability and onscreen maps, like the fenix 8, Polar Vantage 3, orCOROS Apex 2 Pro all allow you to download maps and .gpx tracks for navigation. They all come with basic maps installed, and the ability to add maps is available through each brand’s app or website.
Garmin’s high-end watches like the fenix 8 have a navigational feature called ClimbPro that shows the remaining distance for a section of uphill travel. Garmin watches also include pre-downloaded ski resort maps for 2000 ski resorts worldwide.
Garmin, as well as COROS, includes off-track alerts as well as turn-by-turn directions to a predetermined location.
Associated watch apps can enhance your navigation, even offering on-the-fly route creation; (photo/Erika Courtney)
Smartwatch Features
If you want the most smartwatch features, an Apple Watch or similar will be the way to go. But most fitness trackers and GPS watches also include an assortment of smartwatch features.
After Apple and Fitbit, Garmin has the best smartwatch features. Other brands, like Polar and COROS, forgo features like contactless payment for better heart rate tracking and outdoor-focused features.
Pretty much all fitness watches sync with your phone and provide notifications for texts and other alerts — if you want. You can also turn this off if you’re in the camp that seeks fewer distractions.
Many Garmin and COROS watches also feature offline music storage, while lower-end watches have compatibility with music streaming apps like Spotify and have music controls. All Garmin watches now feature Garmin Pay and have the ability to download many third-party apps for various additional features through the Garmin ConnectIQ store. Some watches, like the vívoactive 5, even allow you to respond to Android phone texts through the watch’s onscreen keyboard.
Accuracy and Sensors
Multi-band GNSS reception can provide the best location data available by communicating with different generations of satellites; (photo/Erika Courtney)
Global Navigation Satellite Systems
Most GPS devices are accurate within 1-3%. In our testing, all GPS-focused brands (Garmin, COROS, Polar, and Suunto) performed equally in GPS connection and accuracy. Connection time varied from 10 seconds to a couple of minutes, while distance was within the 1-3% margin.
It’s important to remember that location has a lot to do with GPS connection and accuracy. Accuracy depends on multiple satellites communicating with each other freely and reporting back to the watch.
Distractions such as buildings, trees, cliffs, and clouds can affect the satellites’ ability to pinpoint the watch sensor. We suggest asking fellow athletes in the area where you’ll be working out to find out how their watch’s GPS performs.
Every watch will utilize a different selection of satellite systems, with more generally offering better fidelity; (photo/Nick Belcaster)
GPS isn’t the only game in town when it comes to satellite navigation systems, and many new fitness watches are integrating other global systems to increase fidelity in their location technologies.
GLONASS is a Russian satellite navigation system that provides global positioning data in the same way that the GPS system does, and can provide more definition in high latitudes. Galileo is operated by the European Union and also offers full global coverage.
The BeiDou Satellite Navigation System is operated by China, and while originally only providing coverage to eastern Asia, it went global in 2020. And finally, QZSS, a Japanese system, provides coverage over the Asia-Oceania regions.
Because different satellite systems have undergone multiple generations of satellites, each operates on a different frequency than the last. These older satellites are still functional and provide more data that leads to a much higher fidelity signal when combined with one another. This is multi-band GNSS (Global Navigation Satellite System) technology, and more and more fitness watches today are incorporating it into their builds.
Even without full-blown GPS reception, a good altitude and compass reading can assist in basic navigation; (photo/Matthew Tangeman)
Barometric Altimeter and Compass
Most outdoor-focused fitness watches now come with barometric altimeters and compasses that support their navigational capabilities. This is where the older term ‘ABC’ watch comes from.
Barometric altimeters measure elevation through air pressure. They can also predict incoming storms and weather patterns.
Polar and Garmin both have options to set their watches to one of three settings: Automatic, Barometer, and Altimeter. ‘Barometer’ locks the watch in a mode where all changes in pressure will be considered due to weather and changes in ambient pressure, while ‘Altimeter’ considers all changes in pressure to be due to elevation change. Automatic determines the best mode for your current activity.
Pretty much all fitness watches that include GPS, even without full navigational capabilities, include a compass. This allows for back-to-start navigation and basic orientation without service.
Heart Rate Monitors and Pulse Oximeters
Heart rate and pulse oximeter technology can differ between devices, with better data coming from units with more photodiodes; (photo/Matthew Tangeman)
Monitoring heart rate is one of the most basic features of any fitness watch or tracker, and pulse oximeters have become standard over the past few years. These two sensors allow users to monitor training strain and overall health.
Each brand of watch uses a slightly different technology to analyze and interpret heart rate data, but they all use similar ways of measuring optical heart rate, known as photoplethysmography (PPG). A green light shines from the back of the watch, through your skin, and reflects off of red blood cells in your veins, measuring blood flow.
Pulse oximeters measure blood oxygen content, which is most useful at high elevations to determine adjustment to altitude and performance ability. Fitness watches use red and infrared light to estimate the percentage of oxygen in your blood. While useful, especially for altitude training, watch pulse oximeters are not as reliable as fingertip pulse oximeters.
Battery Life
Fitness watches with solar screens can greatly increase their time off the cord; (photo/Matthew Tangeman)
This is the most notable difference between smartwatches and GPS watches. On average, smartwatches need to be recharged every 24 to 48 hours, whereas GPS watches can last 5 to 20 days between charges.
These times are ever-increasing, thanks to the integration of solar charging on some of the more premium models. Solar charging, like with the Garmin fenix 8 or Enduro 3 uses a Power Sapphire lens to convert sunlight into power, extending the charge of your watch, depending on sun exposure.
Many factors influence how long your watch’s battery will last, including what you’re using it for. If you’re using GPS tracking (and single GPS versus multi-GNSS mode matters), your battery will die faster. Most watches advertise battery life with and without GPS.
For example, the COROS Apex 2 Pro advertises 75 hours in GPS mode (GPS + QZSS) and 45 hours with five satellite systems (GPS, GLONASS, Galileo, Beidou, QZSS), and 30 days for daily use without GPS tracking.
Charging time is relatively quick, with most offering a full charge in around 2 hours. If you’re like us and hate having to constantly charge yet another device, we recommend a GPS watch with a longer battery life.
Design
Bezel size can be important when you’ve got to tote the watch around all day; (photo/Matthew Tangeman)
Size
Outdoor and multisport watches are often larger and heavier because of the sheer number of features (and extended battery life), so much so that they can look too big and awkward on small wrists. If you prefer a smaller size, most brands (including Garmin, COROS, and Polar) offer smaller versions of flagship models.
Buttons and Dials
The physical design of watches varies across brands, with some using a two-, four-, or five-button layout, others using a dial and buttons, and others using no buttons at all.
Garmin tends to have two-, four-, or five- buttons on its watches. Its lower-end watches tend to have fewer plastic buttons, and premium watches feature more metal buttons. Each button can be programmed as hotkeys (press and hold) to access various screens such as music controls, settings, timer, alarm, and more. In our testing, we found that the Garmin buttons feel intuitive, but the left-side buttons can be hard to reach.
Good button ergonomics can be important when you’re mid-run and want to access a different screen; (photo/Matthew Tangeman)
Polar uses a similar layout of buttons to Garmin, but we found the material used for its buttons to feel less satisfying and reliable when in use.
COROS and Apple use a combination of buttons and dials. The dial is useful for looking through lists at a glance, while buttons help make choices and find more in-depth information.
Most watches have ways to lock the button use, which can be convenient when you don’t want your watch to change screens. Fitbit, however, has mostly eliminated buttons and uses haptic sensors on one side of theFitbit Charge 6. Testing found this to be much less reliable compared to buttons on other watches, but it does provide a simple design.
Displays and Touchscreens
The difference between AMOLED (left) and MIP (right) screens is obvious when viewed in direct daylight; (photo/Matthew Tangeman)
Nowadays, most fitness watches feature touch screens, although some are still button-only. The type of screen depends on the watch and the brand.
There are two types of displays found on fitness watches — AMOLED (Active Matrix Organic Light Emitting Diodes) and MIP (Memory in Pixel). AMOLED displays are brighter and perform better in low light, but are not always great under direct sunlight. These are your smartwatch screens that look more like a smartphone. They also use up battery quickly when always on, so they usually are ‘lift’ or ‘tap’ to wake.
MIP screens look duller at first glance, with colors showing up differently than on your phone. They use reflective LCD technology that depends on ambient light for visibility. This allows them to be always on and show up brighter in bright sunlight. They use less power than an AMOLED display.
Outdoor-focused watches typically feature an MIP screen since this is the battery-friendly option and allows for better visibility outside, while smartwatches tend to have AMOLED displays. Some watches are even offered in both styles, such as the Garmin fenix 8.
The actual material used for a screen also matters, especially if you’re going to be using it for high-impact activities, or just tend to beat up your belongings. Sapphire glass is one material used by Garmin, Apple, and other watch brands that is incredibly crack and scratch-resistant. Another common material for fitness watch screens is mineral glass, which is cheaper but scratches more easily.
Watch bands can often be customized, and most often are available in textile or silicone versions; (photo/Matthew Tangeman)
Watch Bands
Most fitness watches come with silicone watch bands that are easy to swap out. Depending on the type of watch, alternative watch bands can be found through the manufacturer or, depending on the type of watch, through third-party sites. You can choose between various textile, rubber, or even leather watch bands.
Silicone is the best for active use, although some designs do need to be cleaned and dried often to avoid the build-up of sweat and grime. Textiles or leather can look nicer.
User Experience, Ecosystem, and Apps
Associated apps can offer up custom workouts, more detailed navigation, or even on-device route creation; (photo/Matthew Tangeman)
Perhaps as important as the fitness watch itself is the depth and strength of its ecosystem. An ecosystem is composed of the watch’s application, web portal, and supported third-party apps such as Strava and Spotify. To view your data, you’ll need to download an app on your phone.
As Garmin is the largest fitness watch company, it has the broadest and strongest sport-specific ecosystem. Garmin’s app and web portal, called Garmin Connect, displays just about all the performance and health metrics you need. Polar’s Flow app and web portal follow close behind Garmin, with COROS and Suunto following Polar. Amazfit’s Zepp app is a bit of an outlier, though it shows function and promise.
Price & Value
Price can give you a good measuring stick of the features of a watch, and there’s a pretty wide range when it comes to fitness watches, especially among different styles. Fitness trackers tend to be the cheapest, with smartwatches asking a bit more and GPS watches commanding the most.
Budget
The universe of fitness watches is a big place, but that doesn’t mean you have to drop a grand to get some solid fitness tracking ability. This is the realm of fitness trackers and light-duty smartwatches, as well as some budget-minded GPS watches that trim some of the extra functionality to hit a more approachable price. Expect these devices to track everyday metrics such as heart rate, calorie burn estimates, sleep data, and a number of different activities.
Entry-level fitness watches tend to cost between $150 and $300 and will typically track in GPS mode for between 20 to 40 hours. The COROS Pace 3 ($229) is at the top of the heap and leverages an energy-sipping MIP screen to do it. The Garmin vívoactive 5 ($300) won’t track for as long, but the sharp AMOLED screen is far better for folks using the watch indoors as much as outdoors.
The Amazfit Cheetah Pro asks a budget price, but provides a number of high-end features; (photo/Ian Atkinson)
Mid-Tier
If you’re an active person interested in more detailed fitness metrics such as your VO2 max and activity intensities, a mid-tier watch is likely the way to go. These watches tend to cost between $400 and $600 and will open up a great deal of training ability, as they often incorporate adaptive training programs that synthesize your tracking data and use it to inform your progress.
Spending a bit more opens up more software power and greater hardware. Heart rate sensors will have multiple LEDs to obtain a more accurate reading, and satellite chips will tap into a greater number of global satellite networks and sometimes additional satellite bands as well.
The COROS Apex 2 Pro ($449) is our favorite mid-tier watch at the moment, as it piles on the functionality with a built-in barometer, altimeter and compass, on-watch navigation, and some mapping features.
Premium
If you’re an ultra-racer who needs extended battery life for into-the-night endeavors or a multi-sport athlete who needs extended specialized functionalities like depth alarms for diving or heart rate variability, then spending the dough to get a one-and-done watch can make a lot of sense. These watches often have larger bezels to accommodate bigger batteries, and with them, GPS-tracking times between 60 and 90 hours. Solar screens are also available, helping to keep your watch topped off.
The Garmin fenix 8 ($1,100) is near the top of the price range, but for good reason — it’s got nearly anything you could want. Flagship watches like this sport the most activities tracked (80+), receive dual-band GNSS data, and have user-programmable buttons and touchscreens. The Apple Watch Ultra ($799) is certainly premium when it comes to smartwatches, and the Garmin Enduro 3 ($899) boasts huge battery life numbers.
The COROS Pace 3 (left) is a steal at $229, and offers many of the same features as the COROS Apex 2 Pro; (photo/Matthew Tangeman)
Frequently Asked Questions
How does a fitness tracker work?
A fitness tracker’s primary purpose is tracking health data such as heart rate, sleep, steps, and calories. It uses sensors in the band or watch to monitor. Most fitness trackers need to be connected to your smartphone to access the data.
Fitbit vs. Apple Watch Ultra — Which is better?
If you have an iPhone, we would recommend the Apple Watch Ultra. It’s the bestselling smartwatch, and everyone we spoke with absolutely loves it. If you don’t have an iPhone, the Apple Watch will not work.
Fitbit is a great choice, but with Google’s recent acquisition in limbo, the future of Fitbit as we know it today is in question.
What fitness watch is the most accurate?
This is a tough question to answer. It depends on what features you’re talking about. In general, we found Apple watches to have the best health tracking, Garmin to have the best GPS tracking, and Polar to have the most accurate heart-rate monitor.
Whether you’re going on a short overnight trip or a months-long thru-hike, finding the best backpacking backpack is fundamental to success. It not only needs to hold all your necessary gear, but it should also be comfortable enough that you don’t spend the day fidgeting or thinking about your pack.
As a thru-hiker, climber, and packrafter, my experience wearing a pack is deep. After loads of research and miles upon miles of rigorous testing, I found the best packs for every use and budget, whether that’s a do-it-all winner like the Gregory Paragon and Maven or something a bit more spend-wise like the REI Co-op Flash 55.
Because no single pack works for everyone, I’ve also broken the list into categories to help you find the perfect fit. Check out our team’s suggestions below, and load up for the weekend.
Editor’s Note: We updated our Backpacking Backpacks guide on August 18, 2025, to add the REI Co-op Flash Air 50 — a lighterweight, more advanced version of our best budget pick — and update our impressions of the Hyperlite Mountain Gear Southwest, as the pack received a big update including a woven Dyneema fabric.
Gregory makes many backpacking packs (sometimes it’s tough to keep track), but the Gregory Paragon 60 and Maven 58 ($300) are my favorite all-arounders from the brand. They’re not quite as rugged as the Baltoro or Katmai/Kalmia, but more refined than the Zulu or Jade series, and overall, these packs are just about the Goldilocks option for most backpackers.
The carry is the big deal on the Paragon, which uses the brand’s nicest tech with an ‘AirCushion’ mesh back panel and dynamic hip belt support that pivots with your hips. The suspension is as plush as you’d expect from a $250+ pack these days, and many on our team got it to fit well, including 5’9” to 6’4” hikers. During my initial hike with the pack into a remote alpine lake in Washington’s North Cascades this summer, it carried my entire overnight kit, as well as a packraft, paddle, and fly fishing setup — all without any awkward rubbing or sore spots.
Like the brand’s Katmai packs, the Paragon sports a huge side zipper access that makes rifling around in those 60 liters of space much easier. Notably, this pack still retains a bottle pocket on that side of the bag, whereas the Katmai only has the one opposite the zipper access. The sleeping bag access at the bottom of the bag feels redundant compared to this opening, but it’s still a solid space to stash your sleeping insulation otherwise.
Then, the finer details: The stretch-mesh pocket on the left shoulder strap has a head-smackingly clever intended use of clipping your Garmin inReach devices into it. This keeps the messenger from bouncing around, and it’s an aspect that you’ll actually use, unlike many ‘tack-on’ pack features these days. Like the rest of the pack, I also appreciate how pockets like this lay flat on the pack when not in use, giving the bag a trim profile (for when you’re scrubbing around off-trail).
Something I would have loved to have seen is a rain cover lid to run when you strip off the floating lid, like the one on the Osprey Exos. I’ll also note that the back panel on the Paragon won’t be as breathable as the fully suspended panel of some other packs. That said, this pack will carry heavier loads better, and if you like a few luxury items while camping, I think the Paragon/Maven will suit you well.
Material:
100-denier ripstop nylon main body; 210-denier nylon bottom
Outside Storage:
Removable hip belt pockets, 2 side water bottle pockets, 2 larger side mesh pockets, ice axe attachments, breathable mesh front pocket
The recently updated REI Co-op Flash 55 ($199) is the co-op’s take on mid-weight packs like the Osprey Exos/Eja line, and I think they nailed it. This is one approachable pack that, after testing, our team agreed is the near-perfect entry point for new hikers looking to jump into backpacking with both feet.
The Flash 55 is a modular pack, and various features can be added or removed to increase storage or shed weight. With all the organizational features included, this pack weighs around 2 pounds, 12 ounces. By removing all of the modular features, the user can reduce the total weight by almost half a pound.
At the top entry point of the main compartment, a roll-top, dry bag-esque closure system helps keep the pack compressed and the contents dry. Thanks to this roll-top, users can also choose to leave the pack’s top lid behind if desired.
Other useful features include a front mesh pocket, hydration bladder compatibility, and an ice axe attachment loop. The newest iteration hosts a beefier daisy chain with multiple attachment loops for more exterior lashing options.
For a backpacking pack, the Flash’s 100-denier ripstop nylon body feels thin and potentially fragile. Although this pack doesn’t seem to wear or tear faster than other packs in its class, users should avoid rubbing the sides of the pack against rocks and rough surfaces. On the bottom of the pack, burly 210-denier nylon offers supreme protection from the ground.
At $199, the Flash 55 is one of the best values on the backpacking market. If you’re looking for a reliable, durable pack that won’t break the bank, this could be the bag for you. Want something similar but a bit lighter to grow into as you backpack? The REI Flash Air 50 cuts almost a full pound from the pack by going with a techy UHMWPE ripstop nylon. You’ll spend an extra $100 to save the weight, but for some, it’s the ideal upgrade.
Tested Weight:
2 lbs., 13 oz. (S/M); 2 lbs., 15 oz. (L/XL)
Volume:
58 L (S/M); 61 L (L/XL)
Material:
100- and 400-denier high-tenacity recycled nylon (both Bluesign-approved)
Outside Storage:
Two zippered hip belt pockets, two dual-access stretch mesh side water bottle pockets, ice axe attachment with bungee tie-off, and stretch mesh front shove-it pocket
Pros
Extremely comfortable for its low weight
Efficient suspension system
Great ventilation on the suspended back panel
Adjustable fit dials in the comfort for most folks
Cons
Some extra features seem gimmicky and unneeded
Compression system is somewhat awkward to use and impacts the usability of the hip belt pockets
The Osprey ExosandEja 58L ($280) packs have been top lightweight picks for long-distance backpackers and weekend hikers for years, and the newest iterations don’t disappoint. Offering an extremely well-built, breathable design, the Exos/Eja series is packed with thoughtful features but still manages to keep the pack’s overall weight surprisingly low.
Coming in at almost half the weight of many traditional backpacking bags and approaching the weight of some frameless models, the Exos/Eja delivers supreme comfort in a lightweight, simple package. There’s certainly a tradeoff for the lower pack weight (for example, I tend to think the max capacity on the Exos series is around 35 pounds), but the tradeoff is certainly in overall comfort if you stay below that weight.
The Exos/Eja uses Osprey’s AirSpeed suspension system, which keeps the pack’s weight off your back and maximizes ventilation with an alloy frame and a tensioned, breathable-mesh back panel. During testing on multiple overnights, I found the beefy, perforated shoulder straps and seamless, layered mesh hip belt really worked to balance the load out.
Some additional, helpful features of the pack include a removable lid with an integrated flap protecting gear when the lid is off, Osprey’s Stow-on-the-Go trekking pole attachment system, and ice axe attachments with bungee tie-offs. The new Exos addresses a couple of complaints users had with the older model, adding a simple torso adjustment system, and bringing back the cherished hip belt pockets.
For the weight-conscious adventurer seeking a mega-light setup, without skimping on comfort or moving to a frameless model, the Exo and Eja packs may just be the perfect compromise.
The core line of HMG packs has finally received an update, and it’s a big one. My favorite, the Hyperlite Mountain Gear Southwest 55 ($399), along with the Windrider and Junction packs, are all now trimmed out in brand new Dyneema Woven Composite fabric. The packs also have a redesigned exterior that makes accessing your kit even easier.
I’ve used a Southwest pack since I hiked the PCT in 2018, and it’s held up well since then, but it’s gathered some bumps and bruises along the way. I took the new Southwest pack to Patagonia for a few weeks to rub some dirt in it and see how the new version compares to my old one, and I came away very impressed.
The new fully woven Dyneema 3.9 fabric is the answer to the rise of Ultra fabrics and has very impressive durability, given its weight — 132 grams per square meter. This is the same as the older 50D white Dyneema that the packs previously used, but now the woven face is 200D. Hyperlite worked with the Dyneema manufacturer to develop this new textile. My verdict: After 50 miles of rugged off-trail use in Patagonia, there’s not a scratch on it.
Hyperlite also somehow heard my grumbles mid-PCT about the need to strip the compression straps from the pack, as they are now attached with larkshead knots. The outer pocket, too, is now pleated to gain some extra real estate. The bottle pockets have been lowered for easier access to bottles.
This revised ultralight pack is simple in the best way possible. It is supported by twin aluminum stays and a sewn-in foam back panel. Without load lifters, I believe these packs are best enjoyed at the 55-liter mark and below, but many will find utility in the 70-liter version as well.
Trimmed out in the new fabric, the Southwest 55 is going to put other UL packs on notice. I’ve got the bag in regular rotation through the summer to test long-term durability, with a section of the PCT on the books. We’ll see how it holds up, but my hopes are high.
(Photo/Erika Courtney)
(Photo/Erika Courtney)
(Photo/Erika Courtney)
The updated Hyperlite Mountain Gear Southwest excelled in Patagonia; (photo/Erika Courtney)
ULA Equipment has rightfully earned its reputation for comfort and durability the hard way — on the backs of thru-hikers over thousands of miles. Based on a classic design but trimmed out in a new ultra-rugged material, the ULA Circuit Ultra ($380) is one tough backpack and even accomplishes it at a lower weight than our top pick.
ULA packs already lean toward the overbuilt side, but the use of Ultra 400X in this pack (a composite fabric similar to Dyneema — only tougher) really puts a thumb on the ‘burly’ scale. This textile claims to be 15x stronger than steel by weight, and after dragging this pack down into and out of the Grand Canyon, we’re liable to believe it. This version of Ultra is tougher than the 200X used in the Durston Kakwa and has double the tested abrasion resistance.
Weighing in at just 37 ounces, the Circuit can still handle loads up to 35 pounds, making this pack a go-to choice for the weekend hike with a bear bin and fishing pole, or a summer-long adventure on the Appalachian Trail. When canyoneer guide Jackson Sims-Myers recently used this pack to tote all the technical equipment he needed to rappel into the Grand recently, he reported it swallowing it with ease.
The Circuit Ultra carries weight with a remarkable 1.2-ounce carbon fiber and Delrin suspension hoop, a dense internal foam frame, and a single aluminum stay. It’s not totally perfect — Sims-Myers took issue with the lack of internal seam taping and price — but if you’re after a pack you can wail on, it’s tough to go wrong here.
Outside Storage:
2 zippered hip belt pockets, 1 stretch mesh side pocket, 1 SideWinder bottle holster that tucks away when not in use, dual front zippered pockets, front shove-it pocket
Pros
Solid suspension system that balances heavy loads well
Durable fabric
Comfortable cushion on the hipbelts and shoulder straps
Cons
Quite heavy at nearly 5 pounds
Tall side pockets can be difficult to access when pack is loaded
Nick Belcaster
Loaded with days of camping gear, multiple tents, and a full trad climbing rack, Editor Chris Carter recently took the Gregory Baltoro 75 ($380) on a serious test drive in the Appalachian Mountains. As much as a pack weighing 60 pounds can float behind you … this one floated. If you’re hauling some weight, this pack is one of the first we recommend.
True to its reputation, Gregory carries on the Baltoro’s legacy with the newest iteration of this crowd-favorite beast. Super stable, cushioned to the max, with a solid suspension system, this pack bears massive loads with about as much ease as you could ask for.
The Baltoro has always distributed heavy loads evenly. The full-perimeter metal frame and compression straps offer phenomenal structure and work well with its 3D Air hip belt and shoulder straps that rotate to your body’s geometry for a dialed-in fit. This allows the pack to move with you without feeling sloppy and unbalanced. A layered, breathable back panel with multi-density foam affords stellar breathability on sweaty missions.
This is undeniably a clunker of a 5-pound bag, with more straps, cinches, zippers, and buckles than we’d like to count, so if lightweight minimalism is what you’re after, you should look elsewhere. It can get overwhelming at times, but without all the extras, it wouldn’t be the workhorse it is. Carter did have some concerns about the tall side pockets that flank the pack. When it is full, these are difficult to access and make grabbing stuff on the go quite a chore.
All in all, Gregory’s flagship Baltoro remains one of the most reliable heavy-haulers on the market. If you need to carry everything imaginable without breaking your back, this could be the perfect choice.
Other Backpacks That’ll Carry Your Kit
While the six packs above are my top choices when it comes to backpacking bags, there’s certainly more out there. We’ve been testing packs for almost two decades now, and in that time, a number of excellent alternatives have risen to the top.
Outside Storage:
2 zippered hip belt pockets, 2 dual-access stretch mesh side water bottle pockets, ice axe attachments, and fabric-reinforced front shove-it pocket
Pros
Quite comfortable at a wide load range
Customizable sizing
Tough 420D exterior fabric
Lots of options for outside storage
Pretty much any accessory feature you could want included
The Osprey Aether and Ariel 55 ($325) are recently updated versions of two of Osprey’s bestselling styles. Packed with features and thoroughly well-designed, the functionality and comfort of these supportive packs make them one of our first choices when packing a few extras along with us.
Although these packs are classic-style top-loaders, a large front zippered access point allows you to get into the depths of your gear without having to fully unpack. For heavy loads, the burly materials and easy, on-the-go adjustability make the Aether and Ariel strong and reliable carriers.
I like that Osprey has combined some tried-and-true backpack design elements with clever and innovative features of its own creation. For quick access to bits of essential gear, these packs offer dual-zippered hip belt pockets, stretch-mesh water bottle pockets, and a front “shove-it” pocket. The suspension system is also classic Osprey, and is super adjustable and supremely padded.
Although Osprey also makes a 65L version of the Aether and Ariel, I like the 55L version for its compact profile and slightly reduced weight. For long weekend trips, these packs will offer plenty of space for most users.
They can also handle longer trips with some thoughtful packing. Yes, the Aether and Ariel are heavier than other packs of their size, but they are ultrareliable and feel stable on the trail. While I’m more likely to recommend the Osprey Exos and Eja packs for most folks, if you’re carrying heavier loads more often, this may be the perfect fit.
Made to shoulder the weight on your back and not your wallet, the REI Co-op Trailmade 60 Pack ($179) isn’t st??? with features, but it easily carries a full weekend’s kit. If you’re dipping a toe into the activity (or have a whole flock at home to outfit), this pack is for you.
Designed to be approachable, the Trailmade 60 has no patented tech, just years of REI know-how in building a good backpack. Starting with the frame, the pack is surprisingly accommodating, with an adjustable torso that fits 17-21″ torso lengths. Two broad hip belt size ranges back that up, meaning just about anyone should be able to saddle up.
The pack body is a classic top-loading and drawstring-closure design, and it has a capacity of around 60 liters of space. The separate zippered sleeping bag compartment feels a bit dated, but thankfully, the internal divider can be dropped to open up the main compartment to full capacity. There’s also a hydration reservoir sleeve inside, keeping water weight close to your back where you want it.
The external organization on the Trailmade 60 is fairly spartan, but you still get the classics. You’ll find a large front stuff pocket for things like a rain jacket or tent fly, and two angled water bottle pockets that provide easy access on the go. When outdoorsman Ian Graber-Stiehl tested the Trailmade extensively on the trails of the Southeast recently, he didn’t feel shortchanged by the setup.
Sized up against the REI Co-op Flash 55, there are a number of reasons you might elect for the hardier build and extra $20 investment. For one, the Flash packs are built with more durable nylon, which will mean a longer trail life. There’s also a bit more external storage, adding side stuff pockets and a removable brain. But if you’re saving for lunch, the Trailmade 60 makes the grade in our book.
Outside Storage:
Hip belt pockets, 1 side mesh pocket, 1 SideWinder water bottle holder that can be put away when not in use, ice axe/trekking pole attachments, front shove-it pocket, large zippered front pocket with mesh divider
Pros
More durable exterior fabrics than most Gregory packs
Extremely breathable back panel design
Comfortable design carries heavy loads well
Deep feature set
Side zipper panel access is large and easy to use
Cons
On the heavier side
Only one side mesh pocket
Best used with a full pack, and isn't the most mobile for off-trail use
Nick Belcaster
The Gregory Katmai 65 & Kalmia 60 ($330) are comfort-first backpacks with well-padded straps and belt, as well as a suspension system that adjusts to your natural movement when walking, especially under load. Flex panels and rotating shoulder straps move independently with the shoulders and waist while walking.
With its FreeFloat 360 ventilated back panel, it almost eliminates the inescapable problem of lower back sweat. Gregory even added Polygiene odor treatment to the moisture-wicking back panel, so if you do sweat through it, your pack will stay smelling fresh.
The Katmai has side and bottom access zips to the storage for quick access, which also helps you see inside more of the bag. That’s a bit of a love/hate feature, but we leaned toward love. The lid has a large zippered pocket on the top and a smaller one inside for stashing valuables away from the elements.
A large, shallow, front compartment makes a good place to store meal packets, maps, or guidebooks, and is covered by a stretchy mesh pocket for a layer. Additionally, it has long-trip essentials you’d expect, such as a hydration sleeve with a hanger, trekking pole loops, and a sleeping bag compartment.
The shoulder harness and hip belt are easy to adjust and stay in place. It has an adjustable steel alloy internal frame, ranging from 18 to 22 inches in the M/L size (15-19 inches for the S/M).
If weight isn’t your biggest concern and you’re looking to maximize comfort on the trail, the Katmai 65/Kalmia 60 could be a great addition to your arsenal. The Gregory Paragon and Maven packs are exceptionally similar to this duo, save for the fact that they use slightly less burly exterior fabrics and are a pound lighter in the same volumes. You’ll save $40 by pivoting, but if long-term durability is key to you, best to stick with these.
Tested Weight:
4 lbs., 10 oz. (men's M/L); 4 lbs., 7 oz. (women's S/M, tested)
Volume:
60 L
Material:
210D and 400D ripstop nylon exterior, and lining: 200-denier recycled polyester lining
Outside Storage:
Two hip belt pockets, four stretch mesh side pockets, one rear stretch pocket, and two floating lid pockets
Pros
Solid performance for the price
Inclusive sizing
Floating lid doubles as a hip pack
Included rain cover
Side bottle holders are easy to access with the pack on
Cons
A bit on the heavier side
Doesn't carry heavy loads the best
Nick Belcaster
For balancing comfort, capacity, and affordability, it’s easy to see that the REI Co-op Traverse 60($249) was designed by backpackers for backpackers. Crafted for rugged days on the trail when organization is essential, this pack should be on the radar of adventure enthusiasts looking for a pack that combines comfort and streamlined features.
With 60 liters of capacity, this pack comfortably hauls heavy loads — 35 to 45 pounds felt solid in testing. The FreeFlow ventilated back panel kept air moving away from our backs on long, sweaty days, while the thickly padded hip belt minimized pressure points.
We dragged this pack through dense brush and into damp alpine conditions (thanks to the included rain cover), and it held up well, resisting abrasion and moisture from snow and mist. We ended up rigging splitboards to the outside of this pack, and though it was able to hold the added external weight without jeopardizing durability, we did notice discomfort as the shoulder straps began to slide out toward our armpits.
We loved the multi-divisional pockets in the brain, which doubles as a day pack. The only downside of this system for us was that we had to constantly empty gear from the brain that we didn’t use on day trips, as opposed to packs like the Mountain Hardwear PCT, which comes with an independent daypack system.
Even though this pack has all the features we love, like top-loading, bottom-loading, and front-loading access, as well as a large front stuff pocket and trekking pole/ice axe loops, we still consider the Traverse streamlined as it doesn’t have the bulk other similarly decked out packs have. That said, with these features, the Traverse weighs in at 4 pounds 7 ounces and certainly isn’t an ultralight pack.
Backpackers who prioritize comfort over weight savings will love this pack, especially for heavier loads on multi-day treks or gear-heavy adventures. We think it’s a great contemporary to REI’s Flash pack line, and better for those who might want to carry a bit more weight or head out on longer adventures with more time in between towns.
The Durston Kakwa 55 ($260) is our newly anointed top choice in our Best Ultralight Backpack guide, and it’s easy to see why: It’s made from light (but tough) Ultra fabrics, has enough frame to carry it through extended thru-hikes, and keeps the feature-set to just what you need — no bloat here.
At 1 pound, 14 ounces, the Kakwa is the lightest pack in the lineup by a magnitude. However, it accomplishes the feat while still offering a healthy 55 liters of space for your kit. While thru-hiker Ian Atkinson still had to be discerning when loading this pack for testing, he also didn’t have to forgo warm meals to make it work. It’s no sub-1-pound frameless sack, but it nails the average load range well, and there’s plenty of room for bulkier kit in winter if you need it.
The Ultra 200X material (also available in a cheaper UltraGrid) is the latest vogue fabric in ultralight packs. It goes beyond Dyneema to shore up its main deficiency: abrasion. Suffice it to say, the new stuff accomplishes this, and when I inspected a Kakwa that had recently walked the entire Pacific Crest Trail, it had held up great. Atkinson’s own long-term testing is ongoing in the deserts of Colorado, and we’ll update our review as the seasons tally up.
Unlike some ultralight packs, the Kakwa retains load lifters in its suspension system, which makes carrying a full load out comfortable. Atkinson found the Kakwa to be a versatile multisport pack with this capacity and has used the bag to carry everything from quick trail-running overnight kit to full trad racks for southwest tower climbing.
As a cottage industry brand, you still might deal with the occasional stock delays, but the upside is worth it, in our opinion. Durston has proven itself to be a nimble brand with an ear to the ground, and the small design tweaks that the Kakwa has benefited from seem to be community-driven. At $260, the Kakwa also ducks almost all comparable UL packs by about $100.
If you want to keep the weight on your back to a minimum, the Kakwa 55 is one of the better options currently available.
Outside Storage:
Two hip belt pockets, two side bottle pockets, one rear stash pocket, and two floating lid pockets
Pros
Breathable suspended back panel
Rugged CORDURA fabrics make this pack tough
Front stash pocket opens very wide for stashing items like wet tent flies
Hydration pack converts into daypack
Cons
Front stuff pocket can be overloaded and pop open
Buckles for lid and compression are very similar, and can be confused
Nick Belcaster
For backpackers who like organization, the Mountain Hardwear PCT 50&55 ($280) are dialed-in, feature-heavy packs that shine on longer treks. These bags are built to carry every knick-knack without feeling like a total brick, thanks to well-padded straps, a ventilated back panel, and a solid internal frame. Plus, there are enough pockets to keep even the most gear-obsessed hikers happy.
At 65 liters, the PCT is made for the long haul, whether that’s a week in the backcountry or a gear-heavy thru-hike. The durable CORDURA nylon shrugged off rough terrain, including sliding down a slope en route to a ski hut during testing, and the front stretch pocket swallowed wet gear with ease. Inside, a removable day bag was a great bonus — perfect for quick side quests or heading to a nearby river for the day, without hauling the whole pack with us.
While the storage is great, we did find that the sheer number of pockets and straps can make the pack feel bulky when fully loaded, as opposed to packs like the Osprey Aether or Gregory Katmai, which still feel sleek when packed. Thankfully, pockets like the side bottle sleeves compress down quite a bit when not filled, and we appreciated that no compression straps run over this area.
That being said, the buckling straps for the lid are almost identical to the side compression straps, leading to some fumbling on our end. And while the splittable front pocket is super handy, the button closure had a habit of popping open when overst■. This didn’t happen on packs that closed with a side-release buckle, so consider if the trade-off is worth it.
If you prefer a sleeker, more streamlined setup, this might not be your best bet — but if pockets, comfort, and a built-in day bag sound like your kind of thing, the PCT 50 & 55 is ready to hit the trail.
Outside Storage:
Two zippered hip belt pockets, two side water bottle pockets, two exterior side pockets, one front stash pocket, ice axe/trekking pole tether
Hip Belt:
Non-removable
Frame Style:
Spring steel stays
Sizing:
Small, medium, large
BV500 Bear Can Fit:
Inside vertically or strapped on top
Pros
Pre-curved frame provides excellent comfort
UHMWPE fabric is uber tough
Water bottle pockets are front-angled and easy to snag
Top Y-strap wrangles bulky items like bear canisters
Compatible with REI Packmod accessories
Cons
Back panel doesn't have the best ventilation
Not fully waterproof design — will need other waterproofing solution
Not the lightest option out there at nearly 2 pounds
Take the popular Flash 55 pack, strip out a pound of weight, the floating lid, and lose a few liters of internal space, and you’ve got the REI Co-op Flash Air 50 Pack ($299). This ultralight-leaning backpack takes cues from the best UL bags to produce something that will make your transition to lightweight backpacking a breeze.
REI hit all the high notes with this pack, getting it under 2 pounds while still building out a well-padded suspension system supported by spring steel stays. The UHMWPE (a Spectra laminate) ripstop nylon pack body is certainly a nod to big-name ultralight packs and is more durable than the nylon used in the Flash series.
Those 50 liters of space are enough to fit an ultralight loadout and food for a week, reported Samuel Martin, who took the Flash Air into North Carolina’s Linville Gorge Wilderness for a proper shakedown. Comparing against his beloved Hyperlite packs, Martin found the pack’s suspension to be quite comfortable at 18 pounds, and reckoned it could take another 10 pounds with no problem.
The main pack rolltop entry is easy to load through and compresses unused space down to keep your load well centered. The Flash Air also has multiple external pockets, including forward-facing bottle sleeves between the pack body and hip belt that make grabbing your bottles easy.
REI rates the load capacity at 25 pounds, which is a bit limited for a pack of this size. The bag also has removed a number of the niceties that those coming from a kitchen-sink pack like an Osprey Atmos will miss, such as a floating lid or adjustable torso lengths, and so it lands in a bit of an awkward spot.
We think the Flash Air is best for ultralight-curious people who are not ready to fully commit to a pricey bag made of the latest and greatest materials.
Outside Storage:
2 side pockets, 2 zippered hip belt pockets, front mesh stash pocket, ice axe attachments
Pros
Lightweight for its carrying capacity
Well-ventilated
Carries heavy loads comfortably
Cons
Takes some time to figure out how to adjust shoulder straps and hip belt
Still uses a DWR finish with PFAS
Nick Belcaster
The Granite Gear Blaze 60 ($300) is a lightweight pack that can easily carry heavy-duty loads. It’s difficult to find a pack that remains comfortable even when fully weighed down with a week’s worth of gear, but with tons of classic and innovative features and pockets, the Blaze 60 is one of the true gems of the backpack market.
At 3 pounds, this pack is slightly lighter than average for its capacity. Although it performs well across the board, the Blaze 60’s most striking characteristic is its phenomenal suspension system.
No matter what you need to carry, this pack will handle it with stability and grace. The internal frame that enables the pack’s stability is designed with effective airflow channels that help keep your back cool. Of all the packs with breathable back panels out there, the Blaze 60 stands out.
The shoulder and hip straps are mesh-free and tend to feel a bit sweaty. This pack features durable material in high-wear zones, and it saves weight with thinner fabric in areas of less concern. We’ll also note here that the Blaze 60 is still made with a PFAS DWR finish in 2025, and while the brand is pivoting to a PFAS-free design, the pack can’t be sold in certain states. We look forward to testing the next iteration once it arrives.
The ROBIC fabric that covers much of the pack’s body is both light and tear-resistant. For backpackers who plan to carry full and heavy loads but don’t want an ultra-bulky pack, the Blaze 60 is a top pick.
Material:
Ultra 200X laminate or UltraGrid 210D nylon
Outside Storage:
Two side bottle pockets, one rear stash pocket
Pros
Very modular accessory strap system can wrangle most anything
Robust T6 aluminum frame system
Made in USA
Lightweight at under 3 pounds
Choice of exterior fabric
Cons
Hip belt pockets are an add-on
Smaller company can have lead times on pack delivery
Packbags aren't interchangeable with different frame sizes, unlike the brand's Revolution frame packs
Nick Belcaster
The brand name might not be immediately familiar, but the Seek Outside Flight 3 Backpack($359) deserves your attention, specifically if you’re looking to haul a heavy load.
From the minds of backcountry hunters, the Flight 3 sports a beefy frame that uses 7075 T6 aluminum and little else. No fancy tensioned airflow designs here — just carrying ability. I loaded this pack down with 50 pounds (the recommended upper limit), and while that’s tough on any pack, the Flight didn’t wilt like some when I took it on a few training hikes this spring in Washington State. There are four different-sized hip belts available for the Flight, and I found the load transferred well with little carried on my shoulders (the hallmark of a properly-sized pack frame).
This recently updated pack also got trimmed out in updated Ultra materials: Ultra 200X, and UltraGrid — the style I tested. Both are Spectra laminations, with the latter being a woven ripstop with an 80/20 split between the 210D nylon and the ultra-strong UHMPWE strands. All this is to say: it’s tough, and I chucked the pack around with impunity. The 200X variation will run you an extra $46, but it will be nearly waterproof (a bit of seam sealing inside brings it home).
Overall weight isn’t that shabby at 2 pounds, 13 ounces (on our scales), putting it on par with an Osprey Exos 58 (and lighter than other load-haulers like the Gregory Baltoro or Osprey Aether). For the pack weight, it performs better than expected when hauling, and lands in an interesting spot between the big kit carriers and lightweight bags. It isn’t quite as lightweight as the UL packs like the Durston Kakwa or Hyperlite Southwest (which are both sub 2 pounds), but instead is closer to the ULA Ultra Circuit, just with a more robust frame.
Like pretty much any other Seek Outside pack, the Flight 3 is from a more refined era of backpacks that prioritized strap adaptability. It ships with a grip of pre-rigged accessory straps, spare buckles, and hook-and-loop strap wranglers. I took part of an afternoon to experiment with these straps until finding a system I liked, and enjoyed the fact that you can switch things up for different loads (such as those awkward paddles and fly rods). It’s also the type with the name of the person who sewed it inside, and every bag is made in Colorado.
You’ll pay for that cottage build (the Flight 3 is about $80 more expensive than the average we’ve reviewed here), and the packs aren’t festooned with features, but if you’re looking for a simple but versatile pack, this one is a great option to consider.
Testing backpacks this spring in the Sierra; (photo/Katie Botwin)
How We Tested the Best Backpacking Backpacks
Our Expert Testers
The GearJunkie team is made up of all sorts of backpackers. From weekend warriors to seasoned thru-hikers, we’ve collectively spent many years on the trail.
Staff writer Austin Beck-Doss has clocked countless miles under the weight of bulging backpacks. A prolific rock climber, hiker, and all-around outdoorsman, he knows the value of a cozy pack for schlepping heinous loads to the far-flung corners of the world. He led the charge with this guide, accruing our initial selection of nine packs in May 2021.
Tester Chris Carter has also contributed significantly to this guide. He has extensive experience putting various backpacks through torture and torment, having thru-hiked the Triple Crown of long trails in America: the Pacific Crest Trail, the Continental Divide Trail, and the Appalachian Trail. He’s navigated the sinking sadness of a mid-hike pack failure and knows the importance of choosing a model that fits your needs and will last the distance.
Finally, I, Senior Editor Nick Belcaster, now lead our backpack testing efforts. Also a veteran of the Pacific Crest Trail, I’ve racked up many trail miles since, and worked my way through a not small number of backpacks in the process — hiking long trails from Iceland to Alaska and Patagonia. My pack needs range from carrying ultralight load-outs to an entire packraft and 8 days of food, and I’m behind our current bench testing program.
Testing the Hyperlite Mountain Gear Southwest Pack in Southern Patagonia; (photo/Erika Courtney)
Our Testing Process and Testing Grounds
This list of product recommendations above results from thorough field testing. When testing packs, we pay careful attention to ease of use, long-term durability, comfort, and overall value. Impressive-sounding features might look good on paper, but they don’t always translate to actual performance.
Our testing has taken us pretty far. From the Huemel Trek in Argentina to off-trail bushwhacks deep in the Brooks Range, our team goes deep while testing these backpacks, aiming to get some serious trail miles on them before rendering our verdict. When out in the field, we’re looking at a few specific metrics: maximum comfortable weight, gear organization, suspension adjustability, and durability.
Beyond the field, we also dig into the nitty-gritty and conduct a series of bench tests. These include standard measurements such as pack weight and checking fit on several different body types, as well as our in-house volume testing, where we utilize ping-pong balls to confirm the volumes of these backpacks. Ground-truthing information like this allows us to stack packs head-to-head and cut through marketing claims.
Our Backpack Rating System
I’ve identified four different rating metrics that can be used to break down a backpacking pack into easy-to-compare parts. These cover the range of what we’re testing for in our field use and the bench testing we do to ensure accuracy around weights and volumes.
Comfort
A backpacking pack isn’t worth much if it’s uncomfortable, and carrying comfort is probably the most important metric when evaluating one. A good score here is earned by performing well at common backpacking loads (~30 pounds) and across a range of different tester body types. I look specifically for padding on hip belts and shoulder straps, as well as adjustable frames, load lifters, and good weight distribution.
Volume & Organization
Earning a good score here requires enough volume to fit an average backpacking load out, but also efficient organization within the bag, such as external pockets for small goods and floating lids or front stuff pockets. A pack that compresses well to a smaller volume will also rank higher than those that don’t.
Weight
All of the packs we’ve reviewed are below 5 pounds, but the highest scores in this metric went to the packs that slid in under 3 pounds. Some, like the heavy load haulers, aren’t penalized as heavily for weighing more, as it’s part of the territory for packs that carry quite a bit of kit.
Durability
Long-term durability is scored after at least a summer’s worth of use on these bags, and I look for stress across the pack body material, as well as webbing, plastic bits such as buckles, and the status of any zippers. Ranking high here means that a pack is ready to perform across multiple seasons and has good value for the spend.
Buyer’s Guide: How to Choose a Backpacking Pack
A solid backpacking backpack makes wild adventures all the more enjoyable; (photo/Chris Carter)
Purchasing a backpack — especially for the first time — can be challenging. Reliable gear is the foundation of a successful backpacking trip, and a good pack may be the most important item in your whole kit.
The ideal pack should feel balanced and comfortable while hiking. In camp, a well-designed pack helps keep your systems organized and efficient.
In this how-to-choose guide, I will discuss all the important considerations that will help you choose the right pack. Everything from padding and water protection to sizing and capacity is explained in detail. By the end, I hope that you’ll feel confident about choosing the perfect pack to support your backpacking adventures.
What Backpack Is Right For Me?
I’ve dug deep into backpacking packs in this guide, but there are a number of other pack designs out there that may potentially fit your needs better. Check out our Best Ultralight Backpacks Guide if you’re really trying to cut weight and carry less on your back, our Best Daypacks Guide if your trips into the woods are often confined by 24 hours, or GearJunkie’s general Best Backpacks Guide, a catch-all of all of our award winners from across the spectrum.
Capacity
The Osprey Exos has a 58L capacity; (photo/Eric Phillips)
Knowing roughly how much you plan on carrying in your backpack will go a long way in getting one that will cover all of your adventures. To do that, I suggest gathering up all of your backpacking kit for a volume test.
First, find a box that will fit all of your equipment (tent, sleeping pad and bag, cook set, etc.) and load it up. Then, measure the dimensions of the space occupied and multiply these figures together. Finally, a simple conversion of square inches to liters will provide you with a rough estimate of how much space you’ll need in a backpacking pack (remember to account for food).
I find the following guidelines apply to most backpackers:
35-45 liters: The realm of ultralight hikers with minimal equipment. In order to fit into a pack between 35 and 50 liters, you’ll need to invest in lightweight and non-bulky equipment, as well as be quick on your feet in order to avoid overpacking on food and fuel. Do that, and a pack this size can be a dream to carry. The 40-liter Hyperlite Mountain Gear Southwest has been one of our favorites for many years now.
50-70 liters: Most weekend backpackers will be best served by a pack within the 50 to 70 liter range. This gives you enough space to fit average backpacking equipment, as well as the occasional luxury item (such as a backpacking chair). Be mindful of the 20% rule: where your fully-loaded backpack should not weigh more than about 20% of your body weight. The Gregory Paragon 60&Maven 58 are prime examples.
70-90 liters: Big load haulers will need packs of 70 liters or larger, and these bags will sport more robust frames in order to carry the added weight. If you’re aiming at equipment-intensive adventures such as mountaineering or packrafting, or need to carry bulky winter gear, look for a larger bag. The Gregory Baltoro 75 is the pack we lean on most often when carrying heavy loads.
The duration and intensity of your backpacking trip will play a role in determining which pack size to go with; (photo/Chris Carter)
Pack Sizing
When deciding which pack size is right for you, you’ll need to complete a few quick self-measurements. Because torso size can be very different even for two people of the same height, you should not choose your pack size simply because you are tall or short. Instead, you’ll want to determine your torso and waist measurements.
Torso measurement is the most important factor for pack sizing. To figure out yours, you’ll need a friend and a cloth tape measure. If you don’t have one, a length of rope or string and a measuring stick will also work.
Begin by resting your chin against your chest. Have another person locate your C7 vertebra at the base of your neck (it tends to protrude more than the others). Place your hands on your hips so that your hands are sitting on top of your hip bones and your thumbs are pressed against your lower back.
Finding the appropriate pack size for your body type and adventure is essential for a smooth, comfortable trip; (photo/Honey McNaughton)
Ask your friend to measure the length between your C7 vertebra and the center point of your spine at the level of your thumbs. This distance is your torso measurement.
Your waist size is the circumference of your waist at your iliac crest, which is the highest point of your hip bones. The middle of your backpacking hip straps should be positioned directly on top of your iliac crest. While hiking, 80% of your load should be carried by the hips and lower body, so it is essential that your hip straps fit properly.
If you are unable to find a pack that fits both your torso and hip measurements, you will likely be able to find one with replaceable hip straps. Some packs are more adjustable than others, and it is certainly a good idea to try a pack and ensure that it properly fits before purchasing.
Pack Weight
Contemporary backpacking packs are designed to be lightweight and capable of carrying heavy loads. Most packs come with a recommended weight capacity range. Pack features that contribute to weight capacity include the frame, suspension system, and padding.
When these features become more robust, the maximum load capacity increases. For this reason, bulkier packs tend to be best for carrying the heaviest loads. Still, many modern options, such as the ULA Circuit or Durston Kakwa 55, stand out as impressive haulers even though their baseline weight is relatively low.
Some manufacturers provide load ratings for their packs. Before purchasing a pack, estimate the total weight of the loads you plan to carry.
Suspension
A good suspension system greatly improves comfort — especially while hauling heavy loads; (photo/Eric Phillips)
Suspension is a system of frames, hip belts, straps, load lifters, and harnesses that keep you securely connected to your pack. Overall, a pack’s suspension system transfers the weight of your gear onto the appropriate structures of the human body.
If fitted properly, a good suspension system allows the wearer to move freely and maintain a natural sense of balance while hauling the pack. Effective suspension relies on a combination of fit and design to maximize comfort and efficiency while hiking.
Different pack manufacturers utilize slightly different suspension features. Generally, your pack should be carried by the structure of your hip bones and the strength of your legs and lower body.
The remaining weight should be transferred between your chest, shoulders, and other parts of the upper body. Fitting your pack properly is all about fine-tuning the suspension system.
Breathability
Many packs aim to increase breathability with a mesh back panel; (photo/Eric Phillips)
Because your pack will be in direct contact with your body during strenuous physical exercise, it’s important that it breathes properly. Without sufficient breathability, you are likely to sweat uncomfortably and potentially overheat while hiking with your pack.
The two primary areas of a pack that should have effective ventilation are the back panel and the hip straps. Your back panel conforms to your back, and there should not be too much negative space between the panel’s surface and your back. Some contemporary packs feature a fully suspended mesh back panel that maintains airflow along the length of the back.
Other packs simply utilize a pattern of offset mesh and foam panels to create channels of airflow across the surface of the wearer’s back. Generally, suspended mesh back panels will allow for more ventilation than the offset mesh/foam styles.
Hip straps should also be designed to allow for breathability and airflow. Excessive sweating beneath a hip strap can lead to discomfort and blisters.
Organization
You’ll want to make sure you’re comfortable and familiar with how your pack is organized before setting off on any extended trip; (photo/Honey McNaughton)
Not all backpackers have the same organizational preferences. There are many ways to organize a pack, and certain styles will be better suited to certain users based on these preferences.
Traditional backpacks use what is called a top-lid closure, which usually consists of a large opening that cinches closed, covered by a brain. Rolltop bags, on the other hand, are streamlined, no-frills backpacks that close like a dry bag on top, though usually aren’t entirely waterproof.
The rolltop system, used on wildly popular packs such as the Hyperlite Mountain Gear Southwest 55, has become a very common design on ultralight models. It makes it easy to eliminate unneeded backpack volume by rolling up the excess fabric.
This is especially helpful for thru-hikers whose pack volume tends to vary significantly over the course of a 5-month excursion through different climates and environments, or even between town stops. These also help compress the pack’s contents for a less bulky, more compact load. Something thru-hikers are always after.
Main Compartment
The main compartment of a backpack is the largest storage space. Some backpackers prefer a simple pack with no more than a giant singular main compartment (such as many rolltop models), and others prefer packs with lots of separate pockets and pouches. Usually, the main compartment is where your bulky and heavy items will go, including a tent, sleeping bag, and clothes.
Nearly all backpacks have a large opening at the top where users can access the main compartment. Some packs, such as the Osprey Aether & Ariel 55, have additional entry points into the main compartment, allowing users to access items within the pack without removing everything on top.
Hipbelt pockets are ideal for storing items that must be readily accessible, like a phone or granola bar; (photo/Eric Phillips)
Hip Belt Pockets
Many packs include some small pockets integrated directly into the hip belt. These are convenient places to store items that you will want to access without removing your pack, like lip balm, granola bars, or a GPS device.
Top Lid Pockets
A pack’s top lid usually sits above the main compartment access point. Zippered top lid pockets are a good place for lightweight items that you will want to easily access, including a headlamp, rain layers, or alightweight puffy jacket.
In most cases, you’ll need to remove your pack to access the top lid pockets, or you can always ask your hiking buddy to help you out.
Top lid pockets are perfect for carrying a map, sunscreen, hydration tablets, and snacks; (photo/Eric Phillips)
Hydration Pocket
Some packs come with an integrated hydration pocket. Typically, a hydration pocket is a sleeve-like space where a water bladder or hydration pouch will fit easily and stay out of the way of your other gear.
A thoughtfully designed pack will also have a simple way to secure and access a water bladder drinking tube. If you prefer to drink out of bottles while hiking, look for a pack with exterior water bottle holders for easy access.
Compression Straps
Compression straps help compress and condense the load in your pack and keep the bulk of the pack’s weight close to your body. Without properly tightened compression straps, a pack can swing and sway while hiking, which can throw off your balance and cause discomfort or fatigue.
Cinch the compression straps each time you put on your pack to ensure a stable and comfortable load. Smaller items can also be clipped to or stored underneath the straps for easy on-the-go access.
Compression straps really only make sense on backpacks with frames, as they serve to pull the load into the frame to hug it closer to your back. Frameless packs, like many ultralight models, may have straps on the side, but those are generally only used for lashing things to your pack, like trekking or tent poles. They can serve to snug the load in a bit to prevent it from swaying around, but they won’t provide the same advantage as straps on a fully framed pack.
Rain Protection
A solid rain cover, like this one that comes with the Osprey Aether, can be a good option for keeping gear dry; (photo/Emily Malone)
When backpacking, you’ll need to be prepared to keep your kit dry in case of rain. Many backpacking packs come with a rain cover, which is usually a form-fitting piece of waterproof nylon with an elastic perimeter. The cover should fit over your entire pack and cinch securely in place.
When not in use, the rain cover can be stored in an accessible place, such as the pack’s top lid pocket. Certain styles also have fully integrated rain covers that are sewn or stitched directly into the pack.
Many backpackers prefer to use a waterproof pack liner instead of (or in addition to) a rain cover, as a rain cover leaves the back of the pack open to water seeping through to the gear inside. This method works best with backpacks with only one big, main compartment.
This is the best and cheapest way to ensure that your gear stays completely dry. And you don’t have to waste time desperately fitting a rain cover over your pack as a freak storm sweeps in, as the inside contents are already protected.
While you can just opt to use a burly trash bag, many manufacturers have come up with more durable, backpacking-specific pack liners that are designed to last for months. The two most popular waterproof pack liners are Nylofume bags, such as this one sold by Waymark Gear, and polyethylene bags, such as this one sold by Gossamer Gear.
Materials
The CORDURA nylon used in the Mountain Hardwear PCT series is super tough stuff, and up to side quests like ski touring; (photo/Katie Botwin)
You usually see backpacking packs utilizing one of two types of fabric: Woven Spectra laminates or some form of solid ripstop nylon. The tougher the fabric, the more durable it is likely to be, but often at the cost of increased weight. Packs like the Osprey Rook boast stellar 600- and 1,000-denier nylon packcloth, and could be carried into battle.
On the other end of the spectrum, ultralight models such as the Hyperlite Mountain Gear Southwest 55 use abrasion-resistant Dyneema or Ultra fabrics, like the Durston Kakwa 55. These need to be babied a bit more and are catered to hikers sticking to on-trail travel with minimal bush bashing. Generally, woven Spectra laminates are lighter and repel water better, but come at a higher price point.
Ultralight Backpacking Packs
The HMG Southwest 40 is among the most even-keeled ultralight packs on the market today: (photo/Erika Courtney)
Some backpackers prefer to shed weight from their kit by just about any means necessary. Because packs are one of the heaviest items in a backpacking kit, the ultralight crowd has developed and popularized a range of super-lightweight backpacking packs.
Though it sounds great to reduce weight and feel lighter on the trail, ultralight packs certainly have some drawbacks. Most of these models have reduced storage space, minimal padding, and a less substantial frame. As long as you keep your base weight to a minimum, this isn’t a problem. But if you tend to go over 15-20 pounds with your base weight, a sturdier, more supportive pack is probably the move.
Also, an ultralight pack’s general construction is thinner and less robust. This keeps weight to a minimum, but results in a significant decrease in durability. Still, for those who are all about going light and fast — and don’t plan on doing a lot of bush-whacking — ultralight packs are a viable option.
Packing Your Backpack
Packing your backpack correctly before your trip — and each morning on the trail — will greatly improve carrying comfort on the trail; (photo/Darwin Rakestraw)
Though backpacks vary in design and construction, there are a few reliable methods of efficiently packing any backpack that will maximize comfort and load distribution on your forays into the mountains. A well-packed bag will feel a lot lighter than a poorly-packed bag. And it will help reduce stress and discomfort over the long haul.
Starting at the bottom of the pack, it’s a good idea to pack lighter, fluffier items such as a sleeping bag. This creates something of a pillow on your lumbar, on top of which the heavier items can sit.
Additionally, you probably won’t be needing your sleeping bag until the end of the day when you are setting up camp, so there is no problem with shoving it to the bottom.
On this same note, it’s helpful to put the other elements of your sleep system, such as a sleeping bag liner and sleeping pad, in the bottom of the pack. These items are also relatively lightweight and won’t be needed throughout the day.
Next, you want to pack the middle section of the bag, which will house the heaviest items in your kit. You want to pack this gear (such as your food bag, cooking system, and backpacking tent) as close to your back as possible.
When packing your backpack, think about which items you’ll need readily available, while still focusing on weighting the load evenly; (photo/Honey McNaughton)
By putting these items in the middle of your back, you alleviate a significant amount of stress from your shoulders or lower back. You can also use spare clothes that you probably won’t need throughout the day to fill in the gaps between these items. This will keep them from shifting around while you are hiking, and help prevent irregular items from poking you uncomfortably as you plod along.
Finally, at the top of your bag, you want to pack lighter items that you may want to use throughout the day, such as a midlayer or rain jacket. Once the main compartment is filled, you can put smaller items that you may want to easily access in the outside compartments of the pack. This could include a headlamp, first-aid kit, or maps.
While packing your bag, you want to think of what you’ll need throughout the day, how the weight is distributed, and if you can quickly protect all of your gear from sudden changes in weather.
If you use a rain cover as your primary protection, every pocket will be protected. But, if you rely on a pack liner, you need to make sure that the items in external storage are in additional waterproof containers or dry bags.
For more information about how to pack a backpacking pack, check out our complete guide on how to pack a backpack.
Price & Value
Quality packs can often be tough on the wallet, but it’s an important investment for reliable comfort in the backcountry; (photo/Chris Carter)
Backpacking packs vary in price and value. High-quality options range from around $200 to well over $500. More expensive packs may include higher-quality materials or extra features, but sometimes, simpler is better when weight is the biggest concern.
Budget
You’ll typically pay between $150 and $200 for a budget backpacking pack, and while you’re likely to get fewer features, these packs can still do some serious work. The REI Co-op Trailmade 60 ($179) is widely adjustable to a number of body types, and while there are scant bits of flash, its 60 liters of capacity will carry our overnight kit and then some. Value-oriented packs like the REI Co-op Flash 55 ($199) do a lot for the money, and we think this is one of the best packs for new hikers looking to invest a bit more.
Mid-Tier
Spending a little bit more on your backpacking pack will net you not only a few more features, but also undoubtedly some comfort and adjustability, too. The $260 you’ll pay for the Osprey Exos&Eja 58 is common in this range, and for the money, you’ll get into a nicer suspended back panel frame and enough pockets and lash points to secure dang near anything.
This price range will also host most specialized packs, like the Gregory Katmai 65 & Kalmia 60 ($330), which are both comfort-first packs with extra padding to accommodate heavier loads. The tradeoff, of course, is weight.
Premium
Spending north of $350 on a pack means it’ll leave little on the table, or you’re chasing ounces and after an ultralight pack. The Hyperlite Mountain Gear Southwest 55 ($399) is certainly in the latter camp, and weighs in at an impressive 1 pound 15 ounces. The Dyneema Composite Fabric used on this pack is the reason for the price, but if you’re headed out on a thru-hike, we think it’s worth it.
The ULA Circuit Ultra ($380), on the other hand, uses another cutting-edge textile, Ultra 400, and gains durability for it. Here, too, the material is the main driver of price, but you’re also paying a bit of a premium for going with a cottage industry brand. The attention to detail is unmatched, in our opinion, so it’s well worth it.
A solid backpacking backpack can make or break a long trek through the woods; (photo/Honey McNaughton)
Frequently Asked Questions
What is the best backpacking backpack?
The best backpacking pack is the one that fits your body and your backpacking objectives. We’ve included lots of excellent packs on this list.
For most people, comfort is paramount. You’ll be hiking great distances with your pack on, and you don’t want to dread doing what you love because of uncomfortable gear.
Measure your torso length and waist size carefully before choosing a pack. Determine a capacity range that allows you to pack everything you’ll need on your backpacking trips. If you like certain features or have organization preferences, seek them out when it’s time to make a purchase.
The GearJunkie team testing packs in western Colorado to determine the best one; (photo/Eric Phillips)
What is a good-sized backpacking backpack?
The ideal size of your pack depends on your own dimensions, as well as on the amount of gear that you plan to carry. For trips up to 3 days, a 50-70L pack is usually enough. For longer trips, look for a pack that can carry at least 60 L.
Is a 40L backpack big enough for backpacking?
Some backpackers have truly mastered the art of thinning down their kit to the bare essentials. However, for most people, a 40L pack will not be large enough for trips longer than a single overnight excursion.
The Aircontact Ultra is quite light, yet extremely comfortable and well-featured; (photo/Honey McNaughton)
How should I pack my backpack?
Packing your backpack properly will help you maximize its capacity and ensure that you feel balanced while hiking with a heavy load. The more organized your initial packing process is, the less you will have to rummage around looking for stuff during your trip. Knowing how to pack properly and efficiently is an essential part of a successful adventure.
Generally, you’ll want to pack items that you won’t need while hiking near the bottom of your pack. This includes your sleeping bag and extra clothes. The middle of your pack is where you should keep heavier items like food and water. The closer the heavy items are to your back, the better.
Keep frequently used items like rain layers and toiletries near the top of your pack where they will be easily accessible. In your hip strap and top lid, you’ll want to keep things like maps, lip balm, a GPS device, etc.
Packing your backpack correctly is key for all-day comfort on long, uphill slogs; (photo/Chris Carter)
We interviewed thru-hikers and dedicated weekend warriors, putting loads of models to the test to narrow in on the top ultralight backpacks for any adventure.…
Purifying plenty of water for an entire campsite or a small group of people just got a lot easier. On August 5, LifeStraw launched its Escape Purifier, a 5.25-gallon water jug with an integrated three-stage purification system. It allows you to pump up to 1 L of water per minute, eliminating 99.99% of viruses, bacteria, parasites, microplastics, and heavy metals.
Most of LifeStraw’s water filters and purification devices are designed for backpackers and individual use. They’re generally light and small enough to fit in a pack. The Escape, by comparison, is large, durable, and weighs 16 pounds on its own. It’s not a packable purifier. However, for groups of people or emergency use, the Escape fills a different niche.
“The Escape is designed to be both rugged and intuitive — powerful enough for serious emergencies, and simple enough for weekend basecamps or overlanding trips,” Alison Hill, CEO of LifeStraw, said in a press release. “It reflects our commitment to thoughtful design and innovation that meets real-world needs. And like all our products, it helps bring safe drinking water to communities who need it most.”
LifeStraw Escape Purifier: 5+ Gallons, Years of Clean Water, Endless Applications
(Photo/LifeStraw)
GearJunkie has seen 5-gallon filters before, like the LifeSaver Jerry Can, which we reviewed in 2019. So what’s the big deal here?
Filters only prevent protozoa, bacteria, and particulates from passing through their hollow fiber membranes. Purifiers, by contrast, also stop pathogens like Cryptosporidiosis (Cryptosporidium), Giardiasis (Giardia), and hepatitis.
The Escape uses a three-stage filter that includes a pre-filter, a 0.02-micron ultrafilter, and an activated carbon + ion exchange filter. LifeStraw claims that the Escape will remove “99.99% of viruses, 99.999999% of bacteria, 99.999% of parasites, and 99.999% of microplastics.” According to the brand, the ultrafilter will last for 18,000 L of water, and the carbon + ion exchange filter will last for 600 L.
When in use, the Escape can purify up to a liter of water a minute. Users simply pressurize the chamber using the hand pump and then open the nozzle, and purified water flows out — no gravity or electricity necessary. A built-in pressure release valve prevents over-pressurization.
Because of its volume, the LifeStraw Escape may appeal to more than just backcountry users and outdoor enthusiasts. Outdoor professionals, humanitarian workers, and survivalists could also find a use for it. The Escape could just as easily provide enough purified water for a group campsite or hunting camp as for trail workers, remote villages, off-grid living, or during an emergency.
It’s a cool product with many potential uses across different outdoor activities. That’s why, when GearJunkie’s editor in chief, Adam Ruggiero, stumbled upon the Escape at the recent Switchback gear event, he named it one of the Best-in-Show products.
LifeStraw Escape: Value in Volume
(Photo/LifeStraw)
The Escape Purifier retails for $330 on the LifeStraw website, while the Escape Replacement Filter costs $26. According to the brand, the Ultrafilter will last up to 5 years for a household before it needs to be replaced. The Carbon + ion exchange filter will last “about two months of daily use” under the same circumstances, the brand said.
Compared to other filters and purifiers on GearJunkie’s guide to the Best Backpacking Water Filters, the Escape’s price tag is significant. It’s bigger than all but one other water purifier on that list (the MSR Guardian).
However, the Escape’s most notable feature — its volume — is what sets this purifier apart from the pack. It allows groups of people to share a single purifier that works like a faucet. Stay tuned for a full GearJunkie review of the LifeStraw Escape in the coming months.
As we hit August, there’s not much of summer left, so it’s time to get outside and get after it while we can. This week’s Emerging Gear helps us do just that, with running vests and basewear to hit the trail, power stations to energize camping adventures, and protein-packed snacks to fuel long expeditions.
Other finds include dinosaur-themed biking gloves and a commuter-friendly backpack. One of the most intriguing products comes from Des Moines, Iowa. Yonderbound’s new Trail Mix packets deliver THC and CBD in the convenience of a portable, powdered drink mix.
Make the most of summer and check out this week’s Emerging Gear.
Nestout Portable Power Station 700N
(Photo/Nestout)
Nestout made our favorite power bank of 2025, and now the brand is back at it with a new portable model, the 700N ($750). This device only weighs 13.7 pounds, making it 40% lighter and 50% more compact than other comparable models. It can charge up to seven devices at a time, with USB-A, USB-C, and AC outlets, plus a car socket.
Power banks can easily overheat or degrade in their ability to keep a charge over time, and Nestout kept this in mind while designing the 700N. This power station boasts a smart thermal temperature control; the internal fan will automatically adjust its operation to keep it cool. A removable, washable air filter keeps out dust and debris, prolonging the life of the product.
Topo Designs Commuter Backpack
(Photo/Topo Designs)
Colorado-based brand Topo Designs is known for its packs, bags, and luggage, and now it’s added another bag to its lineup: the Commuter Backpack ($119). This sleek, professional-looking backpack delivers on functionality, with a padded laptop compartment that fits computers up to 15 inches. It has pockets on pockets, with an easy access pocket on the exterior and multiple inside for maximum organization.
The Commuter is ready to take on whatever the bus, subway, or train throws at it, with durable recycled nylon, heavy-duty zippers, and a water-resistant finish.
Kiprun Vests
5L Vest; (photo/Kiprun)
Kiprun is a popular French running brand. Although it’s not fully launching in the U.S. until next spring, it has released some vests stateside. Four different vests are now available, in 5L, 8L, 10L, and 15L sizes. The 5L version ($70) is ultralight, weighing in at just 6.3 ounces, making it great for everyday training.
Kiprun tested its 15L Ultra Vest ($150) at the famously difficult UTMB race across the Alps, and it held up. The wraparound design adds stability, and it comes with a 2L water bladder to help keep you hydrated.
Velotric Triker
(Photo/Velotric)
E-bikes aren’t just for commuters looking to cut down on the time it takes to get to the office. Velotric’s new model, the Triker ($2,399), is a three-wheeled e-bike that’s suitable for seniors and those with limited mobility. The low center of gravity and differential rear axle make for a smoother, more controlled ride where tipping over is much less of a risk.
The Triker is designed for maximum comfort, with an extra-wide seat with a backrest. It has multiple modes, including beginner and cadence, to help new riders feel safe and comfortable on the road.
Anker Nano Power Bank
(Photo/Anker)
Anker’s newest power bank, the Nano ($55), is almost too thin to believe. The 4.3-ounce device is only 0.34 inches thick and has a magnet to seamlessly attach to the back of your phone.
This sleek power bank delivers juice when you need it, with 20 W of bidirectional fast charging. It can boost your smartphone’s battery 25% in just 42 minutes, perfect for when you’re on the go and your battery’s about to die. Overheating is a common issue with power banks, but Anker’s designed this one to always stay under 104 degrees by using graphene, a kind of carbon that quickly disperses heat.
Patagonia Bison Sticks
(Photo/Patagonia)
Fans of Patagonia’s gourmet tinned fish take note: The brand just added a new snack to its lineup: Bison sticks ($48 for a 12-pack). This grown-up version of a Slim Jim is made with meat from free-range bison from South Dakota, and it doesn’t contain any fillers or artificial flavors. Bison is a lean, protein-packed meat; each stick contains 8 g of protein. The sticks are available in three flavors: original, jalapeno, and ranch.
And as with all Patagonia products, this snack is good for the planet too. According to its website, “Free-range bison help to restore the Great Plains grasslands by building soil health with their nutrient input and ‘roto-tilling’ hooves.”
Roverlund Carry-On
(Photo/Overlund)
If your dog has its own frequent flier mileage account, Roverlund is a brand to know. It makes a variety of travel-friendly bags and accessories so your pup can come along for the ride. Its newest release, the Ready-to-Roll Cabin Carry-on ($289), is oriented horizontally, so you can easily and securely place your pet carrier on top of it.
The skateboard-inspired wheels ensure a smooth ride, even over bumpy terrain, and are built to withstand any bumps and bruises. Bundle the carry-on with Roverlund’s pet carrier for a travel-ready setup that saves you 20%.
HandUp Dino’s End Gloves
(Photo/HandUp)
Channel the energy and ferocity of a T-Rex on the trails with HandUp’s Dino Gloves ($29). This pair has a multi-colored lightning bolt and dinosaur design that also spells out “Rawrrr” on the back when you put your hands together.
HandUp’s gloves aren’t just about looks, however. This model, the Most Days, is made with a four-way stretch fabric that also has UPF 50+ sun protection. They’re touchscreen compatible and include a portion of cloth on the thumb to dry sweat.
Yonderbound Trail Mixer
(Photo/Yonderbound)
Powdered drink packets can have everything from electrolytes to vitamins to caffeine, and now there are ones with THC. Yonderbound’s Trail Mixers ($13 for a four-pack) contain an unflavored, THC-infused dissolvable powder that you can take anywhere. The THC is derived from hemp; states’ laws vary, but this Delta 9 variant is legal in most places.
Each packet contains a 1:1 ratio of THC and CBD for a balanced, low-dosage experience. Yonderbound designed the product to be fast onset, with full effects setting in within 30 minutes. Pour a packet into a soda or lemonade for an alcohol-free camp cocktail.
Tera Kaia Basewear
(Photo/Tera Kaia)
Finding a good sports bra or a good swimsuit is a challenge enough; finding a product that can be both is a whole other ordeal. That’s where upstart brand Tera Kaia comes in. It was founded by women who were looking for bras that were durable and supportive, but didn’t restrict movement or cut into their shoulders.
Its product line includes bras and underwear in a variety of cuts that are made with sustainable, quick-dry fabric. Options include boxers, briefs, and shorts, as well as crop tops and high- and low-cut bras.
The brand says you can swim, backpack, ski, climb, and shred in these versatile pieces. Tera Kaia wants to make sure its customers get exactly what they want; with its Perfect Fit Guarantee, you can return any product at any time.
Montana Knife Company is exactly the kind of American business that President Trump claims to support. The brand’s founder, Josh Smith, founded the company in his garage during the pandemic, with a dream to sell quality knives made in the U.S. Smith’s business grew like a “rocket ship” during the Biden administration, though Smith still described the former president’s economic policies as “horrendous.”
Smith “adamantly supported” Trump during the 2024 campaign. But, with Trump’s trade war causing higher taxes on imported goods and general confusion for U.S. businesses, Smith slammed the president’s tariff policies in a lengthy video explaining his company’s situation.
“Punish the guy making the knives in Taiwan and in China. I’m fine with that,” Smith said in the latest episode of his podcast, The Josh Smith Show. “But I’m the guy making knives in America, Donald Trump. Don’t punish me for making knives in America by tariffing my equipment and my steel supply. Tariff the guy that’s doing absolutely jack shit in America. That’s called nuance in your policies, and that’s what I’m asking for.”
Several outdoor brands have issued statements in recent weeks pleading with lawmakers for an end to the tariffs. But few of them illuminate the tariffs’ negative impact on U.S. businesses better than Montana Knife Company (MKC).
Tariffs Impede U.S. Manufacturing
The reasoning behind Trump’s trade war is simple: Increase taxes on imports to encourage U.S. businesses to bring back manufacturing jobs. For businesses already making products in the U.S., those increased taxes (also called tariffs) often result in increased prices for products made overseas. That, in turn, is meant to encourage American consumers to buy U.S.-made products.
But, according to Smith, that’s not what’s happening, and it’s because the Trump administration’s implementation has been ill-considered.
MKC makes its knives in the U.S., but must rely on imported steel. Smith would prefer to buy American-made steel, but New York–based Crucible Industries — the country’s last major steelmaker — declared bankruptcy in December. It was later bought for $17.3 million by French company Erasteel.
So, for the moment, Smith is closely watching the recent deal that Trump made with the European Union (EU). That resulted in 15% tariffs on most European imports, with several major exceptions. Steel is one of them.
All steel imports from the EU will continue to receive the 50% tariff that Trump levied last month — a significant cost increase for small businesses like MKC.
Eventually, EU steel and aluminum makers will be granted a quota system with minimal or zero tariffs to replace Trump’s 50% import tariffs, Reuters reported Tuesday. However, that system has yet to be finalized. In the meantime, the tariff poses another obstacle for MKC’s plans for continued growth.
“Every other material we use is sourced in the U.S.,” Smith told GearJunkie. “Unfortunately, our steel manufacturer went bankrupt last November, and it was purchased by a European company. The supply of the highest quality knife steel is no longer produced in America.”
Trump’s tariffs may add hundreds of thousands of dollars to the cost of finishing MKC’s new facility; (photo/MKC)
Impacts on MKC’s New Facility
MKC’s knives are very popular. The brand’s limited-edition drops, smart marketing, and endorsements from celebrities like Joe Rogan have quickly made them one of the country’s most visible knife brands.
That rapid growth led Smith to start construction in October 2024 of a new 51,000-square-foot facility right outside of Missoula, Mont. Plans for the building include corporate offices, a coffee shop, and a viewing area to observe the knife-making process. By expanding from the brand’s previous site, Smith hopes to create jobs for 150-200 people.
“It’s going to be a place where people can walk in and witness that the American dream is still alive and real,” Smith told a local news station last year after breaking ground for the new facility.
But Trump’s tariffs have created a major problem for Smith’s planned expansion. He still needs to buy large machinery that’s only available overseas, like a bevel grinder, which refines the sharpness and shape of blades. Without tariffs, he was looking at a $400,000 price tag to import one from Germany. But Trump’s 50% tariffs don’t exempt machinery, so now Smith is looking at potentially paying $600,000.
It’s another example of the lack of nuance in Trump’s tariff policies, Smith said.
“A tariff of any amount puts an additional burden on U.S. manufacturers that rely on materials and specialized machinery sourced from other countries,” Smith told GearJunkie. “The extra expense for tariffs will likely just slow down how much labor we can hire and how aggressively we can speculate on buying extra materials, which caps our potential growth.”
MKC’s knives, like the Traditions Collection seen here, usually sell out quickly; (photo/MKC)
The Only Certainty? Unpredictability
When asked about the impact of tariffs, outdoor business leaders almost invariably say the same thing: It’s impossible to make decisions in an economic environment defined by instability.
During his first 6 months in office, Trump has changed tariff policies many times, and without informing American business leaders what to expect. The latest deal with the EU is another example: Even after a deal is struck, many of the details remain unclear, leaving business owners ignorant about what is actually happening.
Any modern brand plans its financials at least 1 to 2 years in advance, said Kent Ebersole, president of the Outdoor Industry Association.
“Sixty percent of the people in D.C. like the outdoors. We have friends on both sides of the aisle,” Ebersole told GearJunkie. “But the chaos and inconsistency with which this is delivered, it makes it hard to plan. Not just for this year, but next year — and that’s the hardest thing.”
As the trade war drags on, more outdoor brands have taken MKC’s rare step of going public about their financial difficulties, in hopes of swaying political leaders to do something about it. That includes Wild Rye founder and CEO Cassie Abel, who wrote a column for the Idaho Capital Sun about how Trump’s tariffs “undermine the heart of Idaho’s economy.”
“Let me put it plainly: We’re facing up to $1.2 million in tariffs on a $700,000 order for our upcoming Fall/Winter line — up from the $200,000 we budgeted,” Abel wrote.
“The uncertainty of where these tariff rates will land are paralyzing, and could even eclipse the cost of the product itself. But here’s the kicker: Wild Rye is thriving. Our business is one of the fastest-growing in the outdoor industry and in Idaho. But this tariff burden is a death sentence — because we’re succeeding in an economy rigged against small businesses.”
In other words, Trump’s supposed aim to promote American manufacturing is actually doing the opposite, Smith said. The MKC founder is worried about outdoor brands going out of business, especially if the tariffs continue into the end of the year.
“I don’t need Donald Trump’s help,” Smith said in his podcast. “I just need him to stay out of my way.”
Backcountry sleep comfort starts from the ground up, and the best backpacking sleeping pads ensure that your nights under the stars are restful, not restless.
Leveraging the collective experience of some of the best backwoods snoozers out there, we’ve pulled together the most solid options in 2025, along with our trail-worn opinions on each. Triple Crown thru-hiker Chris Carter has curated our list, and while testing each model, we focused on a number of key metrics.
To merit any real estate in this guide, every pad we blew up had to demonstrate outstanding durability, comfort, and insulation. We paid special attention to pack size, warmth-to-weight ratios, and ease of inflation. Rest assured — we would depend on anything in this roundup for our backcountry beauty sleep.
No stone was left unturned in an effort to narrow in on the most deserving pads for this guide. Right off the bat, the Therm-a-Rest NeoAir XLite NXT proved to be our favorite combination of warmth and packability, and the Klymit Static V emerged as a great budget compromise.
Editor’s Note: We updated our Backpacking Sleeping Pad guide on July 30, 2025, to add the winter-ready Therm-a-Rest NeoAir XTherm NXT along with the NEMO Quasar 3D Insulated, a pad that gives our top comfort choice a run for its money.
The classic pick for thru-hikers or backcountry adventurers who need ultralight simplicity in a durable package, the time-tested NeoAir lineup gets a treasured update with the new Therm-a-Rest NeoAir XLite NXT ($210). Thru-hiker Chris Carter used the previous model alone for all three thru-hikes of the Triple Crown (AT, PCT, and CDT), and while most accrued their fair share of patches along the way, they kept him warm and cozy through all sorts of terrain and climates.
The XLite NXT uses a unique technology called a Triangular Core Matrix, which stacks two layers of triangular baffles to create a super stable surface while trapping as much heat as possible. This is merged with a material called ThermaCapture, which keeps the pad at a featherlight 13 ounces, while still boasting a comparatively stellar R-value of 4.5 (up from 4.2 in the last model).
The obvious question when you see such a light, warm pad is, “How long will it survive”? While it’s not as durable as some of the heavier denier pads we cover here, we can say from personal experience that if you take care of it, it’ll fend off punctures and slow leaks over months of torture.
This pad packs up tiny and disappears in your pack, yet offers superior comfort and warmth. It’s perfect for light or ultralight backpacking kits in pretty much any temperature you may encounter on a three-season thru-hike.
We recently took the new NXT pad on a winter backpacking trip through the Grand Canyon and were impressed by the comfy 3-inch height (a boost from its previous 2.5 inches) and improved insulation. For side-sleepers who tend to bottom out pads, this is a welcome change.
The WingLock valve used to inflate/deflate the pad is brilliant. A larger opening than previous iterations allows it to inflate fast, and a one-way flap means you can pause between breaths without having air escape. Opening the valve and twisting the wings deflates the pad swiftly — that’s the worst part of each morning.
Negatives? The biggest con to the XLite used to be how darn loud it was, but the NXT update targeted that directly, reducing the noise by 83%. We’ve taken this on several backpacking trips already and even slept in a small cave with three other campers. They all agreed that the noise was next to none, and it didn’t wake anybody up, no matter how much we squirmed around in the tight space. Nailed it, Therm-a-Rest!
In short, the NeoAir XLite NXT is one of the best lightweight, durable, and streamlined pads you can buy for long treks across the country or sporadic adventures into the mountains where weight and warmth are paramount.
The Klymit Static V ($65) is an incredible value. For less than 70 bucks, you can get a super-packable and quite comfortable backpacking pad. At a little over a pound, it’s not ultralight, but it’s certainly on the light end of the spectrum.
It packs down easily and only takes a few breaths to inflate. We’ve had one in testing that wore out after 6 months of hard use and stopped holding air, but we’ve had another in testing for more than 18 months with no durability concerns.
For the summertime backpacker on a budget, the infrequent camper, or someone looking to pad out their whole family, Static V is a killer value. It offers a significant bump up in comfort from a closed-cell foam pad. While not as light or plush as our pads from Therm-a-Rest or Big Agnes, we can confidently say you can get a good night’s sleep in warmer conditions.
Since the Static V isn’t as thick as some of its competitors, you’ll be able to inflate it more quickly. Your tent mates won’t need to worry about noise, as we could toss and turn in silence all night while testing.
If you sleep cold or camp during the fall or winter, you may want to consider a pad with a higher warmth rating. The Static also comes in a long and wide version if you need a little more wiggle room. They weigh and cost a bit more, but they’re a little more comfortable and still clock in under or around $100.
The new NEMO Tensor Extreme Conditions ($250) (EC) pad boldly claims to have the best warmth-to-weight ratio on the market. And well — objectively — they’re not wrong.
We were lucky to get an early look at this pad, and have been throwing it at some seriously gnarly adventures over the past few months. But, as a disclaimer, we haven’t been able to test it in the arctic conditions it was designed for — and therefore, can’t speak with total authority on its claims. Make no mistake, this pad yearns for far-flung adventures on the very fringe of life-threatening conditions.
We brought the EC on several chilly fall backpacking trips, overnight climbing excursions in Appalachia, and even a frigid five-day ascent of El Cap in Yosemite to truly test its mettle. While a few qualms arose during testing, the Tensor EC undoubtedly sets a new bar in ultralight sleeping pad innovation.
Capitalizing on NEMO’s established sleeping pad tech, Thermal Mirror Insulation, and new Apex baffles churn out serious heat without packing on pounds. For stellar warmth at an ultralight weight, this is quite literally as good as it gets.
Let’s start with the cons. During our first night with the EC, we quickly realized we very much disliked its stuff sack. You have to roll it up with factory precision if you want to stow it easily, and it’s more difficult if you dare to add the included pump sack. Considering the EC is designed for use in ungodly temps, this is the last thing you want to fumble with as you try to retain the feeling in your fingers on freezing alpine starts.
Additionally, the fabric is on the slippery side, and the pad is a bit narrow compared to its competition, resulting in limbs sliding off occasionally at midnight. Also, the valve construction isn’t our favorite. It can be a pain to inflate or top off by mouth.
In light of what this pad accomplishes, however, those quibbles seem downright trivial. An 8.5 R-value at an impressively low 17 ounces — with a 3.5-inch stack height — is plenty to blow the pad’s competition out of the water. No existing pad touches these stats. And, in our experience, it’s not all talk.
We were stunned at how warm it kept us on near-freezing nights and how well it protected us from cold seeping in from granite stone while sleeping on ledges in Yosemite. This is due to a new, unique tech called “Apex Baffles” within the pad.
In basic terms, Apex entails four layers of thermal film placed over trapezoidal trusses (flexible, vertical supports within the pad), reflecting body heat back at the user, and guarding against radiant heat loss, while also deflecting cold from the ground. This design cuts weight, boosts heat, and is shockingly quiet.
We also found the Lay-Low valve to afford some of the easiest micro-adjustments of any pad we tried, even while fully weighted. Finally, the 20D and 40D nylon fabric held up to more abuse than we expected for a pad in this weight class.
For the ultralight madmen braving arctic temps on hunting excursions or winter thru-hikes, you may have just stumbled across the backcountry bed of your dreams. We’ll be sure to update our review as we test it in the temps it was made for. But frankly, as it stands, we’re finding the NEMO Tensor Extreme Conditions hard to beat.
Since the discontinuation of the Therm-a-Rest NeoAir UberLite, we’ve been on the hunt for a pad that focuses on shaving ounces without compromising too much on comfort. Now, the NEMO Tensor Elite ($230) is the lightest inflatable sleeping pad in the lineup at 8.3 ounces, and it has many of the same comfort-centric features found on other pads in the NEMO Tensor line.
The Tensor Elite is 3 inches thick. Even if you like a soft pad and don’t inflate it tightly, you’re not going to feel the ground. NEMO’s baffle construction distributes weight evenly, and while not totally silent, the 10D shell material is much quieter than the crinkly Therm-a-Rest pads from a few years back.
This pad has an R-value of 2.4, which is plenty for the summer and shoulder seasons. We’d recommend a pad with a higher R-value, like the NEMO Tensor Extreme, for backpacking in winter.
Inflation and deflation are a breeze with the two-stage valve that allows you to adjust the firmness of the pad by pushing on the valve. NEMO includes a pump sack, but we suspect the type of backpacker that’s into this pad will be leaving the pump sack at home.
The Therm-a-Rest UberLite that once held our top ultralight accolade was 2.5” thick, weighed 0.3 ounces more, and had an R-value of 2. Spec-wise, the Tensor Elite bests the UberLite in every way. A lot of the weight savings comes from the Tensor’s 10D nylon shell material, whereas the UberLite uses a slightly thicker and arguably more durable 15D nylon.
That being said, one tester used the Tensor Elite for over 100 nights on the Appalachian Trail. While he took care not to damage the pad, 100 nights without getting a hole and deflating is still mighty impressive for an 8.3-ounce pad.
The Tensor Elite is expensive, and there are warmer pads out there. Our top pick, the Therm-a-Rest NeoAir XLite NXT, is a better choice if you want one pad to use year-round. But for those who want to be so fast and light that they’re willing to cut off the handle of their toothbrush, the Tensor Elite is the way to go.
At 8.5 ounces, the NEMO Tensor Elite practically disappears in your pack, making it a true ultralight upgrade; (photo/Sam Schild)
The Laylow™ valve allows for quick inflation, fine-tuned firmness, and rapid deflation when packing up; (photo/Sam Schild)
The NEMO Tensor Elite’s 3-inch thickness provides stable support for back, side, and stomach sleepers; (photo/Sam Schild)
The Therm-a-Rest NeoLoft ($240) emphasizes warmth and comfort while barely compromising weight savings. If you’ve been intrigued by the superior packability of the NeoAir XLite, but need the cushion and comfort of a larger, thicker pad, the NeoLoft is twice as thick, has a 4.7 R-value, and only weighs 12 ounces more. That’s adding the equivalent of a beer can to your ultralight kit, and if it means better sleep in the backcountry, then it’s well worth the extra weight.
The brand has been the king of sleeping pads for a long time now, but it isn’t a stranger to innovation. The NeoLoft is constructed from a soft, stretchy knit fabric that’s quiet and comfortable and conforms to the body. It’s 50 denier on the top and 75 on the bottom, adding some durability compared to the NeoAir’s 30-D ripstop nylon. It’s also a main culprit contributing to the added weight. We found it to be very comfortable, with one tester describing it as supple and gel-like.
This pad is a whopping 4.6 inches thick — that’s an inch and a half more than the NeoAir, and an inch thicker than the Exped Dura 8R (the warmest pad in our guide). It’s only available in the rectangular shape, eschewing the weight savings of the mummy design, but that only makes it more comfortable.
If you’re a larger person, a pad this thick is going to feel awesome compared to the typical ultralight fare. The only complaint we have comfort-wise is that you don’t roll off this pad — you fall off. 4.6” is kind of a long way down, something serious toss-and-turners should consider.
Inflation with the included pump sack takes around a minute. There’s a lot of pad here to inflate, but using the pump sack won’t leave you breathless, and it will keep moisture out of the pad. A two-valve system borrowed from the brand’s camping mattresses allows for fast inflation and deflation. If you’re OK with the extra weight, we recommend the Flextail Tiny Pump 2X to speed up the process.
Comfort and weight savings are always going to be a compromise, but at least with the Therm-a-Rest NeoLoft, you’re compromising less. If you’re just not getting the sleep you need on an ultralight pad, the NeoLoft is the way to go.
MAX version is ideal for longterm basecamps in cold places
Cons
Not the absolute warmest pad out there
Still some crinkle noise while sleeping
Chris Carter
The Therm-a-Rest NeoAir XTherm NXT($240) has an impressive 7.3 R-value, making it among the best winter-ready pads available. Borrowing a bit from the NeoAir XLite, the XTherm adds reflective layers to bounce your body heat back at you, and this pad is ready to sleep directly on snow.
We’ve used the XTherm on many cold-weather trips and expeditions, ranging from ski tour overnights to expeditions in the Brooks Range, and it always kept us warm. The 3″ pad thickness is just right for balancing weight and comfort, and the XTherm is offered in five different sizes (choose the mummy shape for cold-weather backpacking, and the rectangular ‘MAX’ for long-term expeditions when sleeping purely on snow).
Feedback from previous versions of the XTherm noted loud crinkling when moving around on the pad, but the most recent version significantly dampens this. The XTherm’s shell material is tough, with a 70D bottom textile mated to a 30D high-tenacity top. Senior Editor Nick Belcaster has used the same XTherm for 1,500 miles and still hasn’t put a hole in it!
A good pump sack is essential in sleeping pads used in below-freezing conditions, as any moisture from your breath will condense inside the pad. The XTherm has a solid option that securely attaches to the WingLock valve and inflates the pad with about 12 bagfuls of air.
The XTherm differentiates itself from the NEMO Tensor Extreme Conditions pad in a few ways, with overall warmth going to the NEMO (8.5 vs. 7.3 R-values). When comparing valves side by side, we prefer the WingLocks on the XTherm for its usability and the fact that the pump sack won’t disengage if inflated too high.
Overall, the NEMO edges out the XTherm in pure warmth, while the XTherm is more durable, lighter, and offered in a broader range of sizes. Both options are solid all-season choices, so consider your needs before deciding between them.
It’s hard to add even more innovation to the simple design and concept of an accordion-style foam pad, but the NEMO Switchback ($50-60 depending on length) continues to impress backpackers and campers with each new design and update.
Their latest iteration offers even greater plushness via taller nodes in a smaller pack size for a cozy, warm pad that will hold up to the wear and tear of weekend use or a months-long thru-hike. Plus, at $55, it’s a nice break for your wallet.
For years, the Therm-a-Rest Z Lite has been the industry’s foam pad standard, without much competition. Now, with the Switchback making a name for itself in the backpacking world, it’s not the only slab of foam seen strapped to hikers’ packs on the trail.
Though it’s 0.5 ounces heavier than the Z Lite and has the same R-value of 2, it’s a tad bit thicker, and we feel like it offers just a little more cushion and comfort. It’s definitely one of the best foam pads we’ve slept on.
A metalized thermal reflective film bounces heat back to your body, while dual-density Axiotomic foam provides a soft layer of comfort, paired with a tougher layer for support. This makes the pad a solid insulator on its own in milder temps, or a great way to add more comfort, protection, and warmth when paired with an inflatable pad on colder adventures.
While we haven’t had the chance to put it through a 2,000+ mile trek yet, it’s shown little wear and tear as we’ve tested it, and a plethora of online comments praise its durability and comfort over the length of a taxing thru-hike. We’d say you don’t have to worry about this falling apart any time soon.
As an ultralight standalone pad for fast and light missions or another addition to your sleep system for freezing expeditions, the NEMO Switchback will have you in a deep, comfortable slumber every night.
(Photo/Chip Fieberg)
(Photo/Chip Fieberg)
(Photo/Darren Steinbach)
Other Trail-Worthy Pads We Tested
While the following pads aren’t our editors’ absolute favorites, they’re all good options depending on your specific needs. If none of our award-winning picks pique your interest, check out these field-tested pads.
Heavier compared to a few pads on our list with a similar R-value
Chris Carter
Tough, warm, and quiet, the Sea To Summit Ether Lite XR Pro ($229) can’t edge out our top pick spec for spec, but it has a few advantages over the Therm-a-Rest XLite NXT when used in the field. Mainly, it’s much quieter and feels more comfortable to a few of our testers. If your hiking buddies or partner can’t stand the crinkle of the XLite pads, the Ether Lite Pro keeps the noise down while you snooze the night away.
With an R-value of 7.4, the Ether Lite XR Pro is well suited for winter camping, at least in most lower 48. Other versions of the Ether Lite have elicited some complaints about cold spots due to the way the TMR layers are welded together. Our tester spent a night at 8,000 feet with temps in the upper teens and didn’t experience any cold spots. He also tested the Therm-a-Rest XTherm that night and was asked by his partner to switch to the Ether Lite since it’s so much quieter and doesn’t crinkle when he shifted positions.
Inflation bags are standard in the modern sleeping pad, and the Ether Lite Pro arrives with one built into its stuff sack. The valve can be adjusted from one to two-way operation. This pad is almost 4 inches thick when fully inflated, so there’s plenty of wiggle room for adjustment. You can let out some air for a softer pad and still have plenty of insulated space between you and the ground.
Weight is the only issue we have with the Ether Lite Pro. The regular mummy-shaped version we tested has an R-value of 7.4 and weighs 19.8 ounces. Compare that to the NEMO Tensor Extreme Conditions, with an R-value of 8.5 at just 17 ounces. Or the Therm-a-rest Neo Air NXT, weighing in at 15.5 ounces with an R-value of 7.3. We may be splitting hairs here, but ounce for ounce, the Ether Lite doesn’t come out on top.
Where are those ounces coming from? Multiple layers of TMR reflective insulation certainly add some weight. But we suspect most of the “heft” can be attributed to the 30-denier nylon used on the top of the pad and the 40-denier on the bottom. You don’t want your pad to pop. Consider that many ultralight tents use 10-denier nylon, as does the Mountain Hardwear Ghost Whisperer down jacket. 40-denier is substantial and durable. And anecdotally, the Ether Lite Pro feels more durable than other pads we tested.
Big Agnes is no stranger to the sleeping pads scene, and comfort has always been a top priority of the brand’s ethos. The newly re-tooled Rapide SL($149) is super comfortable due to its supportive offset I-beam construction, 4.8 R-value, and quiet shell material.
We tested this pad on rocky terrain and weren’t at all careful with it. We saw no punctures and experienced no midnight deflation events, though Big Agnes does include a handy repair kit just in case. The kit includes some 3M patches and glue, and we’ve found them to be quite effective in the past. Locating leaks can be tricky, but a well-placed patch can make the pad as good as new.
On the warmth-to-weight spectrum, the Rapide SL has a respectable balance, with a weight of 18 ounces and a 4.8 R-value. Compared to the NEMO Tensor Insulated (15 ounces, R-value 5.4) and the Therm-a-Rest NeoAir XLite NXT (4.5 ounces, R-value 4.5), the Rapide looks pretty competitive. It’s also less expensive.
Big Agnes provides a pump sack to inflate the pad without introducing moisture to the inside, or you can just throw caution to the wind and use your mouth. Either way, it inflates in under a minute. The dual valve system makes it easy to make micro-adjustments and find the firmness to your liking.
One of our testers found the standard 20” x 72” size less than spacious, even for her 5’6” frame, and recommends purchasing a larger (heavier and more expensive) size if you’re a side sleeper or prone to tossing and turning.
If you’re under six feet, the standard size presents an undeniable value thanks to its impressive warmth-to-weight ratio, and while the Rapide SL is on the tippy top of our list, it’s very much worth your consideration if you’re on a budget.
The NEMO Quasar 3D Insulated ($160) is a versatile backpacking and camping pad with a larger-than-average surface area and thickness. It is a comfort-first option for those who want a bit more luxury in the backcountry.
At 3.5” thick, this rectangular pad has plenty of space to spread out on, and it builds in a unique 3D architecture to add a curve side-to-side and at the head end to cradle your body. If you’ve ever had trouble falling off smaller mummy-shaped pads, this shape may be the ticket for you, and we found it kept us smack-dab in the center all night.
There are both an insulated and a non-insulated version of the pad, though we think only the insulated version is worth considering, as even at an R-value of 3.3, it’s a little on the cooler side. That lower R-value can be a bonus if you’re after a hot-weather sleeping pad, but for sneaking into the early spring or fall, you’ll want an extra foam pad to use beneath it.
Stacked up beside the new Therm-a-Rest NeoLoft, the Quasar 3D unfortunately just can’t catch much of a break. Not only is the NeoLoft larger in every dimension (1” longer, 2” wider, 1” thicker), but it weighs the same, and has a higher R-value of 4.7, due to the ThermaCapture reflective layers.
Price, however, is where the Quasar 3D has got the Therm-a-Rest licked, and you’ll need to shell out $70-80 more for the comparable NeoLoft pad. This price difference is significant; for some, the savings will make the difference in specifications. You’ll get the same pad, and so long as your trips don’t take you far into the shoulder season, the Quasar makes a value-heavy alternative.
A great balance of weight and comfort, theBig Agnes Zoom UL ($179) is just an ounce heavier than the lightest pad in our guide, and it has a larger surface area. Unlike the Therm-a-Rest NeoAir Xlite NXT, this pad is only available in a wider rectangular shape. While this isn’t the “optimal” shape for weight savings, it’s definitely a more optimal shape for comfort.
Continuing with the comfort theme, this pad is 3.5” thick and a little thicker on the sides to help you stay on it through the night. Two layers of heat-reflecting film help the pad achieve a respectable R-value of 4.3. This is warm enough to use as a 3-season pad in most of the lower 48. Our tester used the Zoom UL camping all over the U.S., from Bryce Canyon to southern Illinois, sleeping in temperatures ranging from the high 70s to the low 20s.
The main gripe we have with this pad involves the valve system. We have no trouble inflating this pad, but when it comes time to deflate the pad to pack it away, the two-way valve proves a bit finicky. To deflate the pad, you stick a little tab on the side of the valve cover into the valve to hold it open while you squeeze the air out. A clever design that shaves some ounces for sure, but the tab would frequently fall out of the valve, making the packing process cumbersome compared to Big Agnes’ Rapide SL, which has a second valve dedicated to deflation.
Folks who are willing to carry just a few extra ounces than our top picks in exchange for more real estate and a slightly more comfortable sleep experience should put the Big Agnes Zoom UL on their short list. Sometimes “light is right” goes a little too far, and we’d argue that better sleep can equate to more miles hiked.
The NEMO Tensor Sleeping Pad ($200) has always been wide, supportive, quiet, and relatively warm. The original Tensor was somewhere between good and great. It was upgraded in 2022, and the results are top-notch. Sharing similar tech with the toasty Tensor EC above, this pad is plush and comfortable.
The pad’s improvements come from the inside out. NEMO redesigned its Spaceframe — what the brand calls the structural baffles inside the pad that give it support and stability — to make both the insulated and uninsulated pads warmer.
The new baffle design still has individual tack points that prevent the pad from feeling like a raft underneath you, and the insulation is still woven between the baffles in a way that keeps it quiet. There’s no pad squeaking or crinkling while rolling around.
The pad comes with the NEMO Vortex Pump Sack, which inflates all sizes of the pad quickly and efficiently without filling the pad with moisture from your breath.
It’s available in mummy and rectangular shapes, two lengths, and as both insulated and uninsulated options. Though the NEMO Tensor Trail pad is light and compact enough to use for backpacking, it’s plenty comfortable and durable for car camping too. The only drawback here is weight.
The larger version of this pad is approaching a pound. All that comfy real estate has to weigh something, though, and it only weighs a few ounces more than the NeoAir XLite. Folks who typically have trouble sleeping in the backcountry should consider the Tensor Trail over our top pick.
The NEMO Flyer ($140) combines the best of foam-core comfort with air bed packability. At 1 pound, 6 ounces, it’s not the lightest, most packable option, but the added comfort is worth it if you don’t mind a few more ounces.
As one of our reviewers noted, “The NEMO Flyer is a lightweight, three-season pad that hits the sweet spot between an air pad and a self-inflating foam pad. The unique air-filled foam baffles create stable, cushioned thickness with more durability and resistance to bottoming than an air pad, with a slight weight and bulk penalty. But it’s lighter and packs smaller than a self-inflating pad.”
We got to take a look at the updated Flyer for 2023, and can confirm that it is still worthy of the pad’s stellar reputation. This popular hybrid design is now made with Bluesign-approved fabrics and is produced in a resource-conserving way that greatly reduces its impact on the environment. We’re big fans of that.
Right out of the bag, we were initially impressed by how quickly the Flyer inflates, whether you want to let it fill up by itself or top it off with your own breath. This thing deploys fast, which is a welcome reprieve from the light-headed task of inflating full-on air pads.
The low-profile valve is pretty easy to use and allows you to make micro-adjustments to the pad’s firmness. We did find it a bit difficult to let small amounts of air out while making adjustments, though, as air would sometimes continue to seep out of the two-way valve until blowing into again or putting the cap back on.
The 3.3 R-value is a solid boost from a dedicated foam pad like the NEMO Switchback, but the added bulk may not be worth it for some. We also appreciate how soft and quiet the outer fabric is, which contributes to a restful night of sleep.
Overall, this is a great option for those who love the reliability and ease of a foam pad but may want a bit more of the loft and comfort found in air pads.
If durability, warmth, and comfort are more important to you than carrying around a little bit of extra weight, then you should give the Exped Dura 8R ($250) a serious look. Although it weighs between 30.2 ounces (medium) and 36.9 ounces (long wide), the added weight may well be worth it for those seeking a backpacking sleeping pad that can handle the abusive conditions of winter mountaineering, river trips, or camping with pets.
The added heft of the Dura 8R pad is due primarily to the use of the super-tough recycled 75D/170D ripstop fabric. Not only is this material resistant to punctures, but it has a surprisingly pleasant face feel that avoids feeling plasticky or unpleasant against the skin.
Inside, Exped uses its Downmat Technology, with 700-fill down lining the full-length air chambers. This gives the Dura 8R a 3.5-inch thickness, a high R-value of 7.8, and a temperature rating down to -40 degrees F.
The Dura 8R has a rectangular shape, and it comes in three sizes. The medium and medium-wide sizes are 72 inches in length, while the long wide inflates to 77 inches long. The standard width medium is 20.5 inches wide, and the wide versions expand to 25.6 inches in width. The sizing options make it so most users can find an appropriate size for their body and preferences.
With the included Schnozzel Pumpbag, inflating the Dura 8R is relatively easy. It takes a couple of practice runs to perfect the process, but once you do, the pad is easy to inflate without the need to tax your lungs by blowing it up.
The marked “in” and “out” valves also make it pretty foolproof. Once inflated to your liking, the full-length air chambers provide excellent support, and the thickness of the pad allows you to choose the ideal level of firmness for your preferences.
Given its durable construction and plentiful insulation, the Dura 8R packs down to a reasonable size, about the same as a Nalgene bottle. That’s not bad, and well worth the pack space if a warm and comfortable night’s sleep is something you want. If you’re not heading out on an extended mission, this pad is also tough enough to handle duties as a truckbed or car camping pad given its durable exterior.
The Dura 8R doesn’t make the top of our list because the NEMO Tensor Extreme is lighter and has a higher R-value than the Dura 8R for the same price.
The quality of your sleeping pad can make or break your backpacking trip; (photo/Eric Phillips)
How We Tested the Best Backpacking Sleeping Pads
From weekend warriors to fast and light thru-hikers, the GearJunkie team is made up of avid backpackers. We’ve spent hundreds of hours blowing air into sleeping pad nozzles, and we’ve repeatedly experienced the sadness of a mysterious midnight deflation.
We tested the pads on this list while backpacking in the Desolation Wilderness, the Appalachian hills, and the Rocky Mountains. Simply put, we’ve logged our fair share of nights on glorified balloons.
Contributors Mallory Paige and Austin Beck-Doss led the charge in the creation of this guide back in May 2021, accruing our initial selection of 10 sleeping pads. Seasoned pros in the backpacking realm, both authors have paid their dues on rough backcountry trails, and are intimately familiar with the necessity of sound sleep on any demanding adventure.
Senior Editor Chris Carter took over this guide in August 2022 and has been rummaging through his gear closet, bugging the pros, and combing the interwebs ever since to bring you the streamlined selection of 14 pads you see today.
Chris has significant experience sleeping atop various inflatables, having thru-hiked the Triple Crown of long trails in the United States: the Pacific Crest Trail, the Continental Divide Trail, and the Appalachian Trail. He knows the importance of consistent Zs on trail and is meticulously choosy about the portable beds he picks for the wild. A solid pad can truly make or break a backcountry adventure and is key to having enough energy to keep pushing day after day.
Our primary considerations while testing are packed size, comfort, warmth, and ease of use. When backpacking, the ratio between weight and comfort is all-important, so we paid extra attention when examining these two specs.
Secondly, we looked at durability and value. These pads were carefully inspected and repeatedly slept on inside tents and directly under the stars. If you are mainly car camping and aren’t concerned about weight, we focus on our critical eye on comfort-focused pads in our guide to the best camping mattresses.
Our Testing Grounds
Senior Editor Chris Carter has tested sleeping pads on the PCT, CDT, and AT, giving him a firm foundation for evaluating new models as they’re released. These days, he resides in Chattanooga, Tenn., where he can compare multiple pads at the same time, switch from one to another in the same night, and utilize the perspectives of his friends and other outdoors folk.
A southeastern outdoor hub, the Chattanooga area is actually a very diverse place for gear testing, despite its relatively low elevation. Thousands of miles of trail crisscross the nearby Smoky Mountains and Pisgah National Forest, making for excellent weekend trips.
The terrain can be steep, and even the good camping spots have plenty of roots and rocks ready to puncture a sleeping pad. The summers are hot and humid, and winter temperatures can hover in the teens, so it’s a great area to compare and test pads with different R-values.
Bench Testing
Testing in the field gives us a great big-picture view of how each pad feels and performs as we unpack, inflate, sleep, deflate, and pack them back up again. But taking these pads inside, weighing them, counting breaths to inflate, and comparing them side by side is what helps us distinguish the best of the best.
It’s not easy, as all the brands covered in this guide make high-quality pads, but by breaking out a scale and a ruler, we can distinguish them more easily. The NEMO Switchback and the Therm-a-Rest Z Lite Sol might look like the same pad, but our measurements revealed that the Switchback is a little thicker, making it a touch more comfortable and earning it a spot closer to the top of our list. Rest assured, we leave no stone unturned so that our reviews are as accurate as possible and our recommendations are solid.
A solid, reliable sleeping pad is essential for maximizing comfort while sleeping, or just hanging around camp; (photo/Honey McNaughton)
Buyer’s Guide: The Best Backpacking Sleeping Pads
A restful night’s sleep sets you up for success on a full day of backpacking adventures. In the past, people rightfully assumed sleeping on a pad on the ground could simply never match the comfort of a real bed.
However, in recent years, sleeping pads have improved significantly. Now, with advancements in cell design and baffling, many high-quality sleeping pads offer exceptional warmth and comfort.
While comfort standards have increased, packed size and weight have also dropped, and the resulting pads are light, easy to use, and wonderful to sleep on.
Because there are so many great pads on the market, it can be difficult to make a selection. In this guide, we break down some of the most important considerations for purchasing the perfect sleeping pad.
From weight and thickness to durability and price, we hope to answer all of your sleeping pad-related questions in this buyer’s guide.
Types of Sleeping Pads: Foam, Self-Inflating, and Air Pads
Air pads that you inflate with your mouth or a pump sack are usually on the lighter, more packable end of the spectrum, but can be more prone to punctures; (photo/Chris Carter)
There are three types of backpacking sleeping pads: air pads, foam pads, and self-inflating pads. Each category has its own list of pros and cons, and it’s important to understand the differences between them.
Air Pads
Air pads are the lightest and most compact type of sleeping pad. When not in use, these pads are deflated and able to pack down into a small stuff sack about the size of a water bottle. Because most of their insulation comes trapped in air, they can become quite thick without excess weight or bulk.
Compared to other categories, air pads are the most vulnerable to punctures and air valve issues. Usually, punctures are fixable with the proper supplies, but some people stay away from air pads due to the puncture risk.
Air pads tend to be the lightest and most packable of the three types of backpacking pads; (photo/Honey McNaughton)
Most pads come with their own repair kits for punctures or tears, but our testers have had good luck with trusty Tenacious Tape in a pinch, or even super glue for fixing issues around the valve.
Self-Inflating Pads
Self-inflating pads have been around for many decades. Most pads in this category combine inflation with open-cell foam to decrease puncture risk and increase durability.
However, self-inflating pads do not pack down as small as air pads, and they tend to be a bit heavier. If these pads do puncture or deflate, you’ll still have some padding between you and the ground, but it won’t be a super comfortable night’s sleep.
Foam Pads
Foam pads such as NEMO’s Switchback are nearly indestructible and can be deployed in seconds; (photo/Honey McNaughton)
Closed-cell foam pads are the original backpacking sleep system technology. Although these tend to be the least comfortable pad style, they are extremely reliable and can last for decades if treated with care.
On a foam pad, you can sleep soundly without worrying about punctures. Usually, foam pads fold or roll to pack away, but they take up far more space in your pack than other types of pads and often have to be strapped to the outside.
Weight
For backpacking, the goal is always to minimize the total weight of your pack, particularly when hiking with ultralight backpacks. These days, thick and comfortable pads that are also lightweight offer an ideal solution for backpackers.
Some single-person pads can be as light as half a pound, while heftier options may weigh 2 full pounds. For a good balance between weight and durability, consider a pad that weighs around 14-18 ounces.
Truly ultralight fiends will often carry a torso-length pad, and use their backpack or foam back panel as the insulation for their legs. This greatly cuts base weight but can be a gamble in chilly conditions. Figure out your threshold of comfort, and dial in on a comfort-to-weight ratio that allows you to cruise the miles with ease while getting a full night’s rest when the sun goes down.
Thickness
On uneven or rocky ground, a thin pad will feel only slightly better than lying on the bare earth. As a general rule, thicker pads are more comfortable. However, thickness does add weight and bulk, so we suggest you aim to find a happy medium.
If you are a back sleeper, your weight will be a bit more evenly distributed, and you may be able to get by with a thinner pad. Side sleepers tend to prefer thicker pads, such as the Therm-a-Rest Neoloft.
Any inflatable pad over 3.5 inches thick will be on the more plush side, whereas most foam pads are less than 1 inch thick.
Comfort
Generally, pads made for backpacking will be less plush than pads made for car-based camping. Because backpackers aim to minimize weight, pure comfort is not the priority.
Still, many modern pads offer a generous combination of insulation, padding, and sleeping area all in a lightweight package. For some backpackers, a bit of extra weight is a small price to pay for added comfort.
While stack height isn’t the only determining factor in how comfortable a pad is, it plays a large role. The pads on this list range from under 1 inch to 4 inches thick. Thicker pads obviously land on the heavier, bulkier fringe of the spectrum, but offer plush comfort compared to thinner pads, which bottom out easily. This is particularly true if you are a chronic side sleeper.
R-Value Explained
The higher the R-value a pad has, the warmer it will be for cold, windy nights under the stars; (photo/Honey McNaughton)
The R-value of a pad describes the amount of insulation between the user and the ground. Insulation prevents your body heat from escaping into the earth below. Without a well-insulated pad, sleeping on the ground is very chilly, even when the air temperature is reasonably warm.
In warmer conditions, a sleeping pad with an R-value of less than 3 should be sufficient. However, if you plan to backpack in the shoulder seasons, you’ll be better off with a higher rating (between 3 and 5). For winter camping or mountaineering, an R-value of at least 5 (like the Exped Ultra 7R at 7.1) is the way to go.
Higher R-values are attained in a number of different ways depending on the design but generally involve suspending various layers of reflective film within the pad on vertical “trusses” (flexible supports within the pad). These sheets reflect body heat back at the user, and guard against radiant heat loss — all while deflecting cold seeping in from the ground.
As insulation technology develops, manufacturers are able to attain better and better warmth-to-weight ratios and dial in on impressively high R-values while keeping weight to a minimum. NEMO’s new Tensor Extreme Conditions is a prime example of this.
Boasting an absurdly high 8.5 R-value, it has a modest minimum trail weight of 17 ounces. Similarly, the Exped Dura 8R has a high R-value of 7.8. Models like these allow backpackers to maintain an ultralight loadout while adventuring in truly arctic conditions.
While most backpackers won’t need such high R-values for their backpacking trips, it can be nice to have for the occasional winter excursion, or stretches of chilly, high-altitude trail on longer journeys like thru-hikes.
Sleeping Pad Dimensions
You want to make sure that the pad you use is big enough for your comfort, but also packs down small enough for a lightweight backpacking trip; (photo/Chris Carter)
Sleeping pads typically come in various sizes, and users can choose the option that best suits their body and preferences. Common sizes include regular, which is usually around 6 feet long, and large, which tends to be closer to 80 inches. Pad width also varies, but anywhere between 18 and 26 inches is fairly standard.
When deciding on the best width for your needs, consider how voluminous your sleeping bag is, and if you tend to wear bulky cold-weather clothes while sleeping. Trying to balance on a narrow pad while bundled up in a bulky cocoon can result in a poor night of rest.
Most backpacking pads are semi-rectangular in shape, and some taper down and become more narrow toward the feet. Two-person sleeping pads are also available, but they’re quite cumbersome and generally not ideal for backpacking.
If you are consistently hiking with a partner, however, they can be a feasible, streamlined option, if one partner carries most of the weight of your two-person tent, and the other carries the two-person pad. Whatever pad you decide to go with, make sure it fits comfortably inside your backpacking tent.
Packed Size
A pad’s packed size depends on construction, materials, and the amount of insulation. Air pads with minimal additional built-in insulation tend to pack down smaller than all other types of pads. Most air pads fit easily into a backpacking pack — some are no larger than a football.
Packed size can be an issue for foam and self-inflating pads. Once fully rolled, these pads can be quite cumbersome, and they often have to be carried on the outside of your backpacking backpack.
Inflation and Deflation
While foam pads do not require inflation to use, all other pad types are built with an integrated air valve. Historically, valves have been the weak point of sleeping pads, and they can be difficult to replace once broken.
But now, high-quality backpacking pads come with reliable valves that are airtight and offer quick and easy inflation and deflation.
Most air pads have flat valves, which include an internal flap that prevents air from escaping in between inflation breaths. These valves are simple and durable, and most pads with flat valves can be inflated with somewhere between 10 and 25 breaths.
These types of valves will also often include the ability to make micro-adjustments to the amount of air in your pad, even while fully weighted. This can be nice if you decide you want a bit of a cushier feel mid-sleep.
Self-inflating pads are designed to fill up on their own once the valve is open, but they usually need some regular inflation breaths to fully pump up and become firm.
Its innovative WingLock valve makes inflating and deflating the XLite a breeze; (photo/Honey McNaughton)
Durability
With proper maintenance, a good backpacking pad can last for many years with regular use. Foam pads can take lots of abuse and last forever, but inflatable pads are fragile and must be handled with care.
Punctures are the main threat to air pads. As with all outdoor gear, abrasion resistance, and fabric thickness are measured with a denier rating. Thick fabric is more resistant to punctures. Air pad denier ratings vary widely, from around 15-denier to 80-denier.
As a rule, always clear away any potentially sharp objects from underneath your sleeping surface before setting up your tent. When sleeping on your pad, the use of a tent footprint creates an extra barrier between your pad and the ground. It’s also wise to keep your pad away from fires that may spit sparks and bits of hot ash.
As the standard has moved toward lightweight backpacking pads, many companies are using thin and potentially vulnerable materials. As with all ultralight gear, durability is not the priority. The lifespan of a lightweight pad will depend on how well it is cared for, and the precautions you take when setting up camp.
The Z Lite Sol foam sleeping pad is so durable that it can be carried on the outside of your pack without concern; (photo/Eric Phillips)
Caring For and Storing Sleeping Pads
Best practices for storing a pad depend on the type of pad you own. Self-inflating pads should be stored unrolled with the valve open to maintain the loft of the insulation. Air pads can be stored rolled up, but always keep them in a stuff sack and make sure they are fully deflated.
For foam pad storage, avoid leaving heavy items on top of the pad. Also, if you store a foam pad rolled up, it may be difficult to get it to lay flat in the future, though the z-pad design prevents this.
While you are rolling your pad up in the morning, make sure to wipe any leaves, twigs, or dirt off your pad. Storing a tightly rolled pad with debris in it could cause small abrasions in the face fabric, and even holes in extreme cases, as the pad jostles around inside your backpack or car.
Also, using a pump sack to inflate your pad will help prolong its life, by reducing the amount of moisture buildup in the pad from your breath. If you can, try and use the often included pump sack to inflate your pad each night instead of your mouth.
Properly caring for your pad will allow you to enjoy many years of camp comfort; (photo/Eric Phillips)
Pump Sacks: Do They Work?
Some air pads come with pump sacks that allow you to pump up your pad without breathing into a valve. Pump sacks decrease inflation time and prevent breath moisture from getting inside your pad (which can lead to a variety of problems). It also helps you avoid getting light-headed by having to blow it up with your mouth after a long hot day in the sun.
Also, many pump sacks double as stuff sacks, and they generally don’t add much weight to your setup. Some of our testers like to fill them with spare clothes and use them as makeshift pillows.
Pump sacks come in all different shapes and sizes, and some are better than others. During testing, we found the sacks that come with the Sea to Summit Ether Light and NEMO Tensor Extreme Conditions to be the most efficient, easiest-to-use models for swiftly inflating your pad.
However, many backpackers feel pump sacks have solved a problem that didn’t exist in the first place. While some people swear by them, they are not a necessary item in most instances. You can prolong the life of your pad by using a pump sack, though, particularly with pads like the Exped Ultra 7R and the Dura 8R, which have a down filling that could be damaged by excessive moisture buildup.
Several pads, including Exped’s Ultra 7R, come with a pump sack that helps with inflation speed, saves your breath, and keeps moisture out of the interior; (photo/Chris Carter)
Women’s-Specific Sleeping Pads
Some sleeping pads have a women’s version or are designed specifically for women. They often look quite similar to their unisex cousins, but there are some differences that many female adventurers may appreciate.
For starters, they will sometimes be wider and more cushioned at the hips, and will often have a greater R-value overall than the unisex version. Many are also made a little shorter. While these are minor changes, they could provide a significant comfort boost for certain people.
Price & Value
What’s the price of a good night’s sleep? The answer takes us back to good old supply and demand. Some of us could sleep like a baby on a $40 closed-cell foam pad (or just in the dirt) in our 20s. Now, older, wiser, and nursing a lifetime of aches and pains, we’re willing to cough up a bit more for a thicker, more comfortable inflatable pad.
A few of us are even willing to carry a little more weight for comfort. When considering how much you’d like to spend, keep in mind that sleeping well means you’ll be more alert and adept at whatever you’re trying to accomplish out there, be it crushing miles, summiting peaks, or making powder turns.
Budget
The simplest, cheapest pads available are made with closed-cell foam. The venerable Therm-a-Rest Z Lite Sol and the slightly thicker NEMO Switchback ($50) are trail staples that can be used alone or combined with an inflatable pad for more insulation and protection from the ground. They’re also pretty much indestructible.
While we’ve seen critters snack on the edges of foam pads, they can’t pop since they’re not inflatable. You’ll never have to worry about waking up in the middle of the night with just a deflated pad between you and the hard, cold ground.
Inflatable pads are undeniably more comfortable, and the Klymit Static V ($65) is a solid budget choice that’s thicker and more packable than foam pads. It has a pretty low R-value of 1.3 and weighs just over a pound. You’ll need to spend quite a bit more for a lighter, warmer pad, but if most of your outdoor recreating happens in the warmer months, the Static V will do the trick.
Mid-Tier
Spending $100-200 will get you an inflatable pad with substantially more insulative properties and better comfort. These pads often include some type of synthetic insulation lightly spread throughout, puncture and tear-resistant fabrics, and sometimes a pump sack. While not considered “ultra light,” they’re still very pack packable and most weigh around a pound to a pound and a half.
At the upper end of this tier is the Sea to Summit Ether Light XT ($189). Weighing just under a pound with an R-value of 3.8, it’s much more versatile than the budget pads and will allow you to stretch your season a little longer into the fall.
It also has a pump sack so you can inflate the pad without blowing moisture in. The NEMO Flyer ($140) also sits in this tier and uses a combination of air and foam for a plush feel. Unpack it, and the expanding foam will draw in air, making it nearly self-inflatable.
Premium
Pay more, and you’ll compromise less when it comes to weight, warmth, and comfort. At $200 and above, the premium pads employ the latest technical fabrics, insulation, and designs.
The Therm-a-Rest NeoAir XLite NXT ($200) is our top choice for sleeping pads due to its excellent balance of warmth and weight, weighing a scant 13 ounces with an R-value of 4.5. At the extreme end of the warmth scale is the winter-ready NEMO Tensor Extreme Conditions ($250) with an R-value of 8.5 while only weighing 15 ounces.
Using lighter fabrics also allows you to go bigger while keeping the weight down, and the largest rectangular version of the NEMO Tensor Trail weighs around a pound. If you tend to toss and turn at night, this pad has room to sprawl.
Getting ready for a chilly fall night on the Exped Ultra 7R; (photo/Honey McNaughton)
Frequently Asked Questions
What is the most comfortable backpacking sleeping pad?
Different backpackers have different comfort preferences. The most comfortable pad is the one that allows you to sleep soundly after a full day of hiking. Before you purchase a pad, make sure that it meets your criteria for size, thickness, materials, price, and above all else, comfort.
What is a good weight for a backpacking sleeping pad?
On the low end, lightweight air pads can be as little as 8 ounces. Heavy foam pads may weigh well over a pound. A four-season pad will contain more material and insulation, and a total weight between 12 and 18 ounces is normal.
Foam pads are quick to set up, lightweight, and durable, but don’t offer quite as much comfort as inflatable pads; (photo/Chris Carter)
What is the best sleeping pad for side sleepers?
Side sleepers will want a thicker pad than back sleepers. If you consistently sleep on your side, consider purchasing an air pad that is at least 3 inches thick. The Therma-a-Rest NeoLoft scored high marks from our side sleepers.
In a world full of flashy features, hybrid fabrics, and techy gear names, the Smartwool Classic Thermal Merino Crew Top and Bottom take a refreshingly straightforward approach. Formerly known as the Merino 250 base layers for women, these all-wool essentials don’t bother with bells and whistles — and they don’t need to.
What they do offer is warmth, comfort, and reliability across everything from powder days in Aspen to long-haul travel in the Italian Dolomites. They fit well, don’t stink, and keep you warm without ever getting in the way.
In short: The Smartwool Classic Thermal Merino CrewTop($115) and Bottoms ($115) are high-quality, high-performing women’s base layers that excel in cold-weather comfort without overcomplicating things. The fit is trim but forgiving, with enough length in the top to stay tucked and a wide, flattering waistband on the bottoms that doesn’t dig or slide. They’re warm enough for 20-degree ski days, breathable during activity, and impressively odor-resistant: I wore them 5 days straight in the Dolomites without a whiff of regret.
See how these thermal layers compare to our other favorites in the Best Base Layers for Women buyer’s guide.
Testing Conditions: Smartwool Classic Thermal Women’s Base Layers Review
I’ve tested dozens of women’s base layers over the years, from ultralight blends to fleece-lined synthetics and thermo-regulated options. While many try to stand out with high-tech gimmicks, few deliver on the everyday reliability of Smartwool’s Classic Thermal Merino set.
I wore the top and bottom constantly this winter — from skiing deep powder in Aspen to layering up for long travel days in northern Italy. The latter included a 5-day continuous stint in the Dolomites without regret. Whether I was chasing warmth, mobility, or all-day comfort, these layers delivered without fail.
(Photo/Heather Balogh Rochfort)
Trim, Long, and Flattering
Let’s talk about fit because base layers for women can go either way. If they’re too loose, you feel like you’re wearing a baggy diaper beneath your snowpants. But if they’re too tight, you feel like you’ve been rolled into a sausage casing that may pop at any moment. Luckily, Smartwool nailed it with this set.
The Classic Thermal Merino Crew is cut close to the body so it has a flattering, trim aesthetic, but it’s not clingy — and it doesn’t latch onto skin rolls in weird ways. And, it’s long enough to stay securely tucked into snow pants all day, which is a huge win. No pulling, no bunching, and no surprise lower-back breeze when you reach for a ski boot buckle.
The bottoms feature a wide, flattering waistband that doesn’t dig into your stomach or roll when you’re on the move. It’s high enough to feel secure but not restrictive, which makes it comfortable under ski bibs and equally easy to lounge in at après. Functionally, they fit the way you want a base layer to fit: like a second skin you don’t need to think about.
Tradeoff: I tested a set in the Winter Sky Heather color, and it’s beautiful … but transparent. It’s fine on the shirt, but I quickly realized I couldn’t run into the grocery store without flashing my friends. I’d recommend a darker shade.
(Photo/Heather Balogh Rochfort)
Reliable Warmth in Cold Temps
I wore this set on multiple ski days in the low 20s in Aspen, Colo., and felt toasty every time — even during windy lift rides, shaded tree runs, and cold transitions in the parking lot. The fabric does a great job of regulating body heat, keeping sweat from turning into a post-run chill, and drying quickly once you’re inside, peeling off layers while devouring a slice of pizza or sipping a mid-morning coffee.
Technically, this is a 250-weight base layer, which Smartwool rates at 218 grams per square meter (gsm), putting it firmly in the midweight category. That makes it heavier and warmer than lightweight wool, but not as thick or insulating as heavyweight layers. That said, it feels a bit toastier than your typical midweight, likely due to the dense knit and full merino construction.
It became my go-to on a wide range of ski days because it struck a sweet spot between warmth and mobility. Whether I was carving groomers, hiking with our puppy, or chasing my daughter through an icy trailhead parking lot, the fabric moved with me without overheating.
That said, when temps dipped into the low teens or single digits, I needed to add another layer or opt for something heavier. It’s not the warmest base layer in my closet, but for the majority of winter adventures, this one was the most versatile.
(Photo/Heather Balogh Rochfort)
Odor Resistance That Works
Smartwool’s merino has long been praised for its natural odor resistance, and this set continues to uphold that reputation. Thanks to the 100% merino wool construction, these layers resist stink far better than synthetics.
That’s because merino fibers naturally trap odor molecules and lock them in until the garment is washed — a built-in defense system that keeps you from smelling like a locker room, even after days of wear. Plus, wool is breathable and moisture-wicking, which helps reduce the sweaty environment bacteria need to thrive.
I put this to the test on a ski trip to Italy, where I wore the same top and bottom for five consecutive days at Dolomiti Superski. The conditions ranged from snowy and cold to hot spring-skiing sunshine, meaning I was sweating, layering, and stripping down constantly, especially when I tried — and failed — to race my daughter through the terrain park! And yet, no smell.
After each day, I’d peel them off, let them air out, and toss them back on in the morning like the dirtbag I am. Even after ski-to-après transitions at a fancy hotel (where I wore the crew top like a regular long-sleeve shirt at the bar), I never felt like I was that person. In fact, I even wore the top on the flight home — no shame, no stink, and no need to change in an airport bathroom.
(Photo/Heather Balogh Rochfort)
Room for Improvement
While I love almost everything about these layers, the bottoms did stretch out slightly after a few days of use. The butt was a bit saggier by day four or five, and I noticed it more when I wore them off the mountain. I think sitting is what really stretches them out. It wasn’t enough to cause any technical issues, but it was noticeable and made the fit feel less polished by the end of the trip.
As I mentioned, the light color is too transparent — especially on the bottoms — for conservative errand-running sans snow pants.
The only other sticking point is the price. At full MSRP, the top and bottom run at $115 each. That’s a hefty investment for women’s base layers, but it also reflects the high-quality merino and dependable performance you’re getting. If you live in wool base layers all winter (like I do), they’re worth it.
(Photo/Heather Balogh Rochfort)
Final Thoughts
There’s nothing flashy about the Smartwool Classic Thermal Merino Base Layers — and that’s exactly why I love them.
They do what base layers should: keep you warm, wick sweat, resist odor, and disappear under your outerwear so you don’t even think about them. No frills, just function. And when you’re halfway up a mountain or 5 days into a ski trip, that’s exactly what I want.
Trends often dictate a brand’s next product, but not always. Over the last year, a slew of small pocket fixed-blade knives dominated the knife market. Generally less than 6 inches, they’re designed to be discreet and effective.
But even as this sub-segment continues to grow and thrive, Leatherman opted to design its new line of “Built Different” fixed-blade knives as full-sized, conspicuous, and suitable for tough outdoor work. A 10-inch-long, full-tang, MagnaCut, saber-ground tanto blade, the Pioneer looks like a knife Rambo would take with him on a weekend camping trip.
This wakizashi-like blade dominates without being overbearing. It aims to be a knife that allows users to leave their hatchet and folding saw at home.
In short: Leatherman bucks the trend toward pocket-sized fixed blades with an oversized belt knife aimed at life outdoors. Some people may find it to be too much knife, but purists and folks looking for a hard-working blade capable of survival tasks will find it to be just right.
The people complaining about Leatherman making new knives and not a new multitool
Nick LeFort
Leatherman Pioneer Review
Design & Features
MagnaCut, G10, and stainless steel mean you can use the Pioneer anywhere; (photo/Nick LeFort)
The Leatherman Pioneer is a hard-use, oversized fixed-blade belt knife made from a solid piece of MagnaCut Steel. It has a saber-ground tanto blade shape, simple ergonomics, and a track of jimping on the spine for increased blade control. For handle scales, Leatherman chose G10.
The combination of MagnaCut and G10 is synonymous with premium, durable, and reliable. MagnaCut steel’s popularity over the last couple of years owes to its balance of toughness, abrasion resistance, and corrosion resistance. It’s also easy to sharpen when the time comes.
Leatherman’s choice of a saber grind keeps the blade strong while thinning it out toward the edge for prolonged sharpness.
G10 scales are known for their resilience and provide a decent, consistent level of grip. If you were looking to buy an outdoor knife in 2025, MagnaCut and G10 would be a popular pairing. Aside from performing well in dry conditions, both do really well in wet and gritty conditions and clean up exceedingly well.
The hybrid leather/Kydex sheath keeps the Pioneer from feeling bulky on your hip; (photo/Nick LeFort)
For a sheath, Leatherman went with a full-grain leather and Kydex hybrid. This not only looks great hanging off your hip, but performs well, too.
The Pioneer will sit low on the hip and shouldn’t interfere with pack hip belts. Additionally, Kydex allows you to index the knife into the sheath without having to stop and look to make sure your aim was on point.
First Impressions
My very first response to unboxing the Pioneer was, “Wow, that’s big.” At 10 inches, it is a big knife, maybe even too big for some. However, when you consider where this knife is capable of, its size may be just right. This isn’t a knife you wear around town. This is utility tool, a blade to hang off your hip when you head off-grid for a few days.
Even more incredible than the saber-ground, impressively sharp tanto blade is the fact that Leatherman invested in an entirely new facility to make this line. That meant new machines, new people, new ideas, and new challenges.
So the Pioneer is, quite literally, “built different.” And it shines through in the overall quality of the design and build.
(Photo/Nick LeFort)
Comment on Blowback
In all the years I have been into knives, tools, outdoor gear, and gadgets in general, I have never heard so many people complain about a new product. Considering brands like Benchmade and TOPS Knives constantly come under fire for their “Made in the USA” knives being too expensive, I can’t say I am completely surprised.
I am not sure if people are unaware of what goes into manufacturing finished goods in the U.S., or if they’re simply accustomed to paying lower prices for foreign manufacturing.
However, from materials to labor to marketing and distribution, it’s just more expensive to manufacture quality products in the United States.
Tariffs only exacerbated this issue. With steel that more than likely came from Canada and G10 scales from overseas, the Pioneer could easily have been a $400-500 knife. To help offset this, Leatherman invested in new facilities focused on knife-making and allowed Leatherman to complete more manufacturing steps in-house.
The oversized Pioneer with its standard-sized sibling, the Trac; (photo/Nick LeFort)
This is an American company that just made itself even more domestically capable. We should be praising Leatherman right now for investing in the country.
As for complaints that a multitool brand doesn’t need to make knives, Leatherman has been a knife brand for as long as it’s been a multitool brand.
In the Field
Ten-inch belt knives tend to run bulky, but not the Pioneer. It does make an obvious impression hanging off a belt, but it stays in place and is fairly streamlined. This stems from the knife not being overly thick, along with the hybrid leather/Kydex sheath.
In use, though, it has blade-forward design, the Pioneer is well-balanced and performs with ease. Considering it can replace a hatchet, its purpose starts to come into focus. Not only is the flat saber grind great for this tanto-style blade, it also lets it slide through wood and other materials easily.
One interesting aspect is that the Pioneer does not have a hard transition from the front of the blade edge to the belly like a traditional tanto blade. Instead, Leatherman kept the transition on the blade edge round and fluid. This makes the Pioneer easier to use and resharpen.
The rounded transition between the front edge and belly of the blade increase the Pioneer’s abilities; (photo/Nick LeFort)
More than a month into my relationship with the blade, I can honestly say I am more than satisfied with its form, function, and capabilities. It batons and chops with aplomb, and it still slices well for a knife with such brutish capabilities. And it does it all without being unruly.
And because it’s one solid piece of tough-as-nails MagnaCut steel, Leatherman has no issues recommending the Pioneer for prying tasks. Remember, this knife comes with a 25-year warranty! It’s a camp knife on steroids and is going to take sales away from both folding pocket saws and hatchets.
Conclusion: Who’s It For?
While the Pioneer might be overkill for an evening walk with the dog or light day hike, there’s almost no limit to tasks it can handle. Nomads: this is a knife for you. For life in the woods or at the cabin, the Leatherman Pioneer requires very little maintenance. Just make sure you wipe down the blade when you switch between tasks. Pine sap tastes horrible on camp potatoes.
Hunters: A knife like this could field dress a deer and harvest meat on the spot. With MagnaCut’s edge retention, you won’t have to resharpen it until you get back home.
Finally, the Pioneer makes a great choice for those who want to keep their packs light. At 12 ounces overall, it certainly weighs more than a pocket knife, but nowhere near as much as a hatchet or folding saw. For me, it’s my camp kitchen prep knife and also a kindling splitter. This knife can easily be your everything knife.
Rotomolded coolers, like YETI, RTIC, and countless others, aren’t exactly cheap. So you might ask, “Why not just buy a $40 cooler at Walmart?”
But odds are, you won’t realize you really want a high-quality cooler until you’re lounging on the beach, camping, or relaxing at the cabin, and your ice-cold beer has all turned lukewarm.
High-end coolers are an investment, but that’s because they are built for durability and performance. Plus, the ice retention of rotomolded options guarantees you will always have a frosty beverage, even on a hot, sunny day.
Two of the biggest players in the market are YETI and RTIC. But with near-identical designs, understanding which is better for you can be tough.
No fear! We’ve compiled the pros and cons of each brand based on research, testing, and customer reviews. We’ll also compare a couple of the brand’s bestsellers to help you make the move to rotomolded! And if you want to shop around, take a look at GearJunkie’s roundup of Best Coolers.
YETI vs. RTIC
On the surface, the product lines from both brands look — cough, cough — similar. Both RTIC and YETI carry almost all of the same sizes of soft-sided and hard-shell rotomolded coolers.
They also have comparable features like drain systems, heavy-duty handles, anchor point molded tie-down slots, and bear-resistant certifications. However, the brands have two key differences: price and quality.
YETI
YETI offers a wider range of rugged and burly (read: overbuilt) products; its price tags reflect this. If there’s been one knock against the brand, it’s in its manufacturing. There’s a lot of speculation over how much of its products are sourced and built in the U.S. versus overseas.
On its website, YETI asserts, “Our Tundra coolers are manufactured in the USA at facilities located in Iowa and Wisconsin as well as at a facility located in the Philippines. Our Hopper coolers are manufactured in China.”
It’s still unclear where the materials originate. However, if you value U.S. manufacturing, you can contact the brand directly at (512) 394-9384 to order a cooler from American soil.
If you’re shopping for other product accessories, YETI has even more to choose from. The Austin, Texas–based brand makes seat cushions, beverage-holder attachments, ice packs, waterproof gear bags, dog bowls, and much more. It even offers a wide range of customization options.
RTIC
If you’ve ever researched high-end rotomolded coolers, you’ve undoubtedly been hit with social media suggestions for RTIC coolers. The brand, which YETI sued for imitating its products, has legions of followers. Why? Well, its prices are a fraction of YETI’s.
And RTIC stakes its name almost in direct opposition to YETI with its slogan, “Overbuilt — Not Overpriced.” RTIC sells its products for around half the price of YETI — a significant difference for a seemingly similar product.
For its part, RTIC manufactures all of its products in China. Based on several online reviews, many RTIC owners rate the brand’s quality as comparable to YETI, potentially making RTIC a great option if you’re on a budget and looking for a cheaper rotomolded cooler.
Brand History
YETI
Born in Austin, Texas, YETI has been around since 2006, when the company basically revolutionized the cooler market. Brothers Ryan and Roy Seiders, who were tired of their coolers breaking, founded YETI with quality in mind and an outdoor junkie target market, including hunters, anglers, and campers alike.
When it was founded, YETI commanded the high-quality, durable cooler market and boasted the longest ice retention. Priced at $200, its rotomolded coolers were significantly more expensive than the $40-50 coolers then on the market. However, consumers soon realized that the premium price bought them a long-lasting premium product, and the company took off.
Many have called RTIC a carbon copy of YETI. Funnily enough, RTIC was also founded by two brothers in Texas. John and Jim Jacobsen began their company in 2015 in Cypress, Texas, intending to make similar products as YETI but at a cheaper price.
Because it sells almost exclusively directly to consumers (DTC), RTIC can sell its products at a much lower price while still making a profit. You won’t find RTIC products at local retail shops. The brand uses social media to promote its wares instead of traditional marketing methods. RTIC’s model has proven so successful that it has become one of YETI’s biggest competitors.
Coolers can get pretty heavy pretty quickly. Why not stick some wheels on them and roll them to your destination instead of carrying all that weight? It works for luggage, and it works very well for coolers, too.
Both YETI and RTIC offer their own versions of roller coolers. They have extendable handles and roll on rugged wheels that can handle all kinds of terrain. This is an easier way to get your food and beverages where you want them to go.
YETI 32 Wheeled Cooler
(Photo/YETI)
YETI’s roller coolers are becoming just as popular as its standard wheel-less versions. Whether you’re tailgating or camping in the backcountry, having wheels rarely hurts. The YETI 32 Wheeled Cooler is one of the brand’s Roadie models and is equipped with an extendable periscope handle and single-piece tires that can take a beating.
The YETI 32 Wheeled Cooler can fit 50 cans and is wine bottle–friendly. It latches closed with an interlocking lid system that holds the cold in, and it can be opened with just a single hand.
On its site, YETI uses the term “almost indestructible” numerous times. This cooler’s “RockSolid Strength” construction makes it just as durable as any of YETI’s others.
According to RTIC, the wheels on its Ultra-Light Wheeled Cooler are puncture-proof, and the 2.3 inches of closed foam insulation will retain ice for up to 4 days. It is made with RTIC’s ultra-light construction, supposedly making this cooler 30% lighter than traditional rotomolded coolers. It’s a relatively lightweight, all-terrain cooler for all of your camping, hiking, and beachside chilling needs.
RTIC used T-latches and a freezer-style gasket to lock in cold air. The Ultra-Light Wheeled Cooler has an extendable handle for easy hauling, a mesh net on the underside of the lid for storage, and even a bottle opener built into one corner.
These coolers are made for a day trip or a weekend. Both are easy to transport and can be carried with one hand. Both coolers will keep drinks and food cool and work for most everyday uses.
YETI Roadie 24 Hard Cooler
(Photo/YETI)
The Roadie 24 ($250) is an improved version of YETI’s previous Roadie 20. It is lighter and bigger, and it boasts better thermal performance. It can fit a standard upright wine bottle, 18 cans, or 24 pounds of ice.
Its empty weight is 12.8 pounds and comes with a comfortable carry strap. YETI removed the drain plug on this cooler, but users say this rotomolded cooler is light enough to flip over easily. You can also add a dry goods basket, a tie-down kit, and ice packs.
We’ve done a little initial testing on this new Roadie 24, and we are impressed. The lighter-weight, improved latches and soft handles are big upgrades compared to the original version. The Roadie 24 was named GearJunkie’s Best Small Cooler of 2025.
This RTIC 20 cooler ($130) is slightly bigger and around $70 cheaper than the Roadie 24. And though it’s wider than the Roadie, it is not taller. So, while it can hold 24 cans or 25 pounds of ice, it’s not tall enough for a wine bottle.
The handle is stainless steel, and its empty weight is 17.5 pounds. It does include a drain plug, making it more convenient to drain water.
If you’re looking for a heavy-duty, large rotomolded cooler made for hunting, camping, or fishing trips, look no further than these two hard-sided coolers.
Both rotomolded coolers carry similar designs that reviews confirm are still manageable for one person to carry. They both have T-latches, drains, nonskid pads, molded handles on both sides, and comparable ice retention.
YETI Tundra 65 Hard Cooler
(Photo/YETI)
TheTundra 65 ($350) might be the most iconic rotomolded cooler on the market. At $100 more than the RTIC 65 cooler, the YETI Tundra 65 has slightly better ice retention but less internal capacity. It holds 42 cans or 52 pounds of ice, and its empty weight is 29 pounds.
This cooler has a 5-year warranty and comes with a dry goods basket. We’ve beaten the heck out of the YETI 65 cooler and would be surprised if many people ever need to use the warranty.
You can also purchase accessory add-ons through YETI, such as sliding feet, a rod holster, a beverage holder, ice packs, and seat cushions. Yeti also makes the Tundra 45, which we named the Best Overall Cooler of 2025.
The RTIC 65 ($250) gives you a bit more internal storage, but its ice retention is slightly less than the YETI 65. When empty, it weighs in at 36.5 pounds and can hold 64 cans or 75 pounds of ice. This rotomolded cooler only has a 1-year warranty, and the dry goods basket has to be purchased separately.
YETI M12 Backpack Soft Cooler vs. RTIC Backpack Cooler
Lugging hard coolers around over long distances (even those with wheels) can be a pain. Luckily, both YETI and RTIC offer a solution: backpack coolers. These soft-sided, super-portable insulated containers make it easy to cover ground and carry your chilled goods in comfort.
YETI M12 Backpack Soft Cooler
(Photo/YETI)
The YETI M12 Backpack Cooler ($275) is built with all the features that made people love the brand’s soft coolers in the first place. They’re extremely durable, made with YETI’s high-density Dryhide Shell fabric.
The top closes with a magnetic strip that seals cold air in. These backpack coolers are thoughtfully designed with a kangaroo pocket to easily stash keys, phone, or wallet.
And, on top of all of that, the M12 has two comfortably padded EVA foam shoulder straps so you can carry it like a backpack.
It’s a perfect way to carry a picnic or beverages from the car, down the trail, to your spot on the river, or from the parking lot, down the beach to your towels. The YETI M12 is designed to fit 20 standard 12-ounce cans “for days in the summer sun.” It’s also big enough to fit wine bottles.
The RTIC Backpack Cooler ($160) takes a very similar approach to hands-free cooler carry as the YETI M12, above. It’s got a 24-can capacity (RTIC also sells a version that carries 36 cans), and uses a durable material for the outer shell. Slip your arms through the shoulder straps and wear your RTIC Backpack Cooler while you hike it in.
Unlike YETI’s version, the RTIC Backpack uses a leakproof zipper closure for the top. RTIC claims it will keep food and drink cold for 2 days (if you follow the brand’s Cooling Tips).
Soft packs are ideal for on-the-go activities such as picnics and sporting events. They are very easily transported, much lighter, and take up less space than hard-sided coolers. These coolers are leakproof, made from extremely tough material, and have good ice retention.
YETI Hopper M30
(Photo/YETI)
Contrary to the designs of many soft packs, YETI has created a tote-shaped cooler instead of the normal box shape. In our review, we found the tote comfortable to carry, resting on your side when you use the shoulder strap.
The Hopper M30 ($350) design is modern. It has a new magnetic closure and two quick-release buckles instead of a zipper, creating a powerful leak-resistant seal. You also won’t have to worry about accidentally leaving the cooler open as the lid snaps shut.
The only downside is that it can be difficult to open, especially with one hand. The cooler’s empty weight is 7 pounds and holds 20 cans or 28 pounds of ice.
At almost one-third the price of the YETI Hopper M30, the RTIC Soft Pack 30 ($120) is functionally similar. It has a conventional box shape, is smaller, lighter, and can hold more. The YETI’s ice retention is slightly better, but depending on your needs, it’s perhaps not enough to make a huge difference.
RTIC’s soft pack can hold 30 cans or 30 pounds of ice. Although the design isn’t as modern, it remains practical and much cheaper than a YETI.
So, what do you sacrifice with a less-expensive RTIC cooler? A big point of differentiation is the closure. While some YETI Hoppers still use a zipper, the Hopper M30 uses an extremely stout HydroLok zipper, which greatly adds to the product’s cost. RTIC’s zipper is also waterproof, but it’s a much smaller-toothed model that will likely survive less abuse.
Bonus: YETI Daytrip Lunch Bag vs. RTIC Ice Lunch Bag
We don’t care how old you are; having a good lunch box on hand is useful. YETI and RTIC both make lunch boxes that retain cold temperatures and can even be chilled themselves. They’re durable, they’re portable, and they keep your food cool from morning to lunchtime.
YETI Daytrip Lunch Bag 6 L
(Photo/YETI)
Sometimes you don’t need a whole cooler. You just need a lunch box to carry your midday meal and keep it nice and cold for when you get your break. That’s why YETI decided to apply its soft cooler expertise to a soft-sided Daytrip Lunch Bag ($80). It uses Coldcell Flex to keep your food cold, is food storage compatible, and uses a YETI MagSnap closure.
The YETI Daytrip Lunch Bags have two external pockets and can be used with a shoulder strap. If you want to use it for beverages instead of food, the Daytrip 6L lunch bag can hold up to nine 12-ounce cans.
Compared to the YETI Daytrip Lunch Box, RTIC’s Ice Lunch Bag ($20) is almost minimalist. It has no exterior pockets, no shoulder strap or loops for attachments, and is notably just a quarter of the price.
The RTIC Ice Lunch Bag folds flat. It can be frozen before storing food in it, keeping your lunch cold for hours. The exterior is made with durable, abrasion-resistant fabric, and the interior is waterproof, so it won’t start leaking even if your ice melts.
In the simplest terms, rotomolded coolers are any cooler with hard polyurethane plastic sides. Rotomolding is a process where plastic is melted down and poured into a mold. It’s spun so that the centrifugal force evenly disperses the plastic before it cools and hardens.
It’s a cost-effective method that’s particularly useful for making hollow parts and double-wall containers, like coolers. It also uses fewer resources and is more environmentally friendly.
Companies like YETI and RTIC usually use thick polyurethane foam to fill the space between the mold’s walls. This creates an insulating barrier that keeps beverages icy for hours and even days. Some coolers, like the Oyster Tempo, use vacuum insulation instead of foam, meaning the air between the inner and outer walls is actually removed, making them even more thermally efficient.
Why are rotomolded coolers so expensive?
It all comes down to materials. Rotomolded coolers are made from premium rotomolded polyethylene, which is far more durable than cheaper alternatives. Brands like YETI and RTIC also tend to make thicker walls in their rotomolded construction, which requires more polyurethane plastic.
It also has to do with the pricing standard YETI set when it introduced its first rotomolded product in 2006. Since then, coolers have become notably more expensive, almost across the board, despite rotomolding being one of the most cost-effective ways to manufacture a hard-sided cooler.
Looking for the best down jackets for hiking, backpacking, camping, or everyday wear? Over the past five years, our expert team tested more than 50 puffies to find the warmest, comfiest, and most adventure-ready options.
Current authors Ryan Kempfer and Chris Kassar have donned over 20 models on a range of wild escapades in the past year alone. From snowy alpine ascents in the Tetons to chilly windblown nights on Colorado fourteeners to dog walking and snow shoveling, we put these jackets to the test worldwide in almost every environment imaginable.
Our top pick is the Arc’teryx Cerium Hoody because it offers the ideal balance of performance, weather protection, durability, and warmth. For a true value, the REI Co-op 650 Down Jacket delivers warmth and style in a simple, affordable package. Whether you’re looking for a technical piece or one suited for strolling around town, we have you covered.
Editor’s Note: We updated our Down Jacket Buyer’s Guide on July 20, 2025, by revising all reviews based on further testing, adding fit and relative warmth information to each review, and updating our purchasing advice to make it more helpful.
At the Appalachian Trail Days festival in Damascus, Virginia, we were struck by how many hikers were wearing the Arc’teryx Cerium Down Hoody ($400). When thru-hikers choose a jacket as their go-to insulator for a five-month trek, it’s clear the jacket delivers.
Weighing just 12 ounces in a men’s medium, the Cerium offers a strong balance of warmth and packability. It’s not as light as classic ultralight synthetic jackets favored by die-hard trekkers, but its excellent loft, warmth, and sleek design quickly put it on our radar. It kept us warm on cold-weather backpacking trips, ice climbs, and alpine missions, and even held up during sunset photo shoots in freezing temps.
Arc’teryx uses ‘Down Composite Mapping’, placing 850-fill down in the core and synthetic Coreloft in areas prone to moisture, such as the shoulders, cuffs, and collar. This hybrid design helps the jacket stay warm even when conditions turn damp.
Compared to more casual options like the REI Co-op 650 Down Jacket, the Cerium has a much more athletic, performance-focused fit. Our tester, who is 5’11” and 185 pounds, used to fall between a medium and a large in Arc’teryx jackets. With the newly revised fit, the large now wears like a premium, slim-cut piece. It layers well over a base layer or under a shell and looks sharp enough for town or campus wear. The only real drawback is the stuff sack, which is separate rather than integrated into a pocket.
In short, the Arc’teryx Cerium Down Hoodie is one of the best down jackets you can buy for lightweight epics across the country or weekend outings to your favorite alpine lake. Boasting a stellar warmth-to-weight ratio, durable fabric, and a stylish fit, you really can’t go wrong with it.
Key features:
Durable and recycled shell fabric, slimmed down simple design looks good around town
Pros
Affordable
Quite durable given the price
Simple and sleek design looks good around town
Cons
Somewhat heavy for the lack of features
Not much adjustability
Ryan Kempfer
The REI Co-op 650 Down Jacket ($129) is a reliable, all-around performer that impressed us with its solid warmth, durability, and unbeatable value. It’s not flashy, but it delivers where it counts. It’s one of the more versatile jackets we tried, so it works well for many situations, including hiking, backpacking, and camping. It’s stylish enough for wearing around town, yet not too simple to be ineffective.
We took it camping, and while making coffee outside our tent on a summer morning, it kept us warm enough despite temperatures hovering in the high 30s.
With 650-fill down, it has the lowest fill power in our lineup, so it doesn’t insulate as efficiently as premium options like the Arc’teryx Cerium or Rab Mythic Alpine. It’s not ideal for deep winter or extended cold-weather trips, but for shoulder-season hikes, casual wear, and backpacking on a budget, it gets the job done.
At 11 ounces, it isn’t the most packable jacket out there, and it lacks technical features like a hood or waist cinch, which limits its ability to trap heat. However, the recycled nylon shell with DWR has proven impressively durable through heavy use.
Made to fit comfortably, the REI 650 runs slightly large. Our tester, 5’10” and 170 pounds, usually wears a large but preferred the medium here. The smaller size offered a better silhouette without sacrificing room for layering. With up to 10 men’s sizes and eight for women, dialing in your perfect fit is easy.
For the casual weekend warrior or even the dedicated backpacker on a budget, this REI staple will disappear in your pack and keep you warm when you need it most. Its simple, slimmed-down design means you’ll look great at your local coffee shop and be able to charge into the mountains after work if the opportunity arises.
Key features:
Recycled ripstop polyester fabric and liner, interior chest pocket doubles as a stuff sack
Pros
Simple, classic style
Comfortable fit
Includes an adjustable hood and hem
Includes 5 total pockets
Cons
On the heavier side for a technical piece
Ryan Kempfer
The Patagonia Down Sweater Hoody ($329) is a classic, all-purpose down jacket that delivers reliable warmth, wind resistance, and clean style. With 800-fill down and a durable NetPlus shell made from recycled fishing nets, it’s built for both performance and sustainability.
The latest version is noticeably warmer, now packed with 5.3 ounces of down. We wore it on hikes, bike rides, and winter walks in Colorado’s Elk and Sangre de Cristo mountains with a light baselayer in temps down to 5 degrees. One tester even used it as his only insulator during a full Pacific Crest Trail thru-hike, and it held up through weeks of drizzle, snowy whiteouts, and heavy use.
It’s slightly warmer than the Arc’teryx Cerium Hoody, Rab Microlight Alpine, and Fjallraven Pack Down, and it layers better, too. The fit is more tailored than previous versions. Our tester, who usually wears a large size, found it true to size, allowing for full movement and mobility through scrambles and climbs. It felt more comfortable and relaxed than the Arc’teryx Cerium Hoody, but still streamlined enough for backcountry skiing, hiking, resort days, or even city wear over a dress shirt. The hood is snug and wind-blocking, though a bit tight over a helmet.
For everything from mountain adventures to city commutes, the Down Sweater Hoody remains one of the most versatile, dependable, and stylish down jackets out there.
This is an excellent everyday down jacket with great style and protection for all four seasons. It’s awesome to throw on at the summit of a peak or top of a run — anywhere you need a bit of protection. For demanding adventures or chilly strolls around town, the Patagonia Down Sweater Hoody is one of the more versatile, reliable, and stylish down jackets on the market.
Key features:
Stitch-free baffle construction for non-restrictive flexibility, meets RDS
Pros
Extremely durable
No stitches or glue to degrade or restrict movement
Sheds water and resists winds like no other
Versatile
Zippered hand and chest pockets
Super stylish
Cons
Not as packable as others
Ryan Kempfer
The Mountain Hardwear Stretchdown Hoody Down Jacket ($300) is one of the most flexible and comfortable down jackets we’ve tested. From backcountry ski tours and high alpine climbs to bike commutes and daily errands, it moved with us through it all, even temps below freezing (thanks, wind chill!) at 10,000 feet.
One aim of the Stretchdown line was to blend the warm insulation of down with the range of motion and versatility of a softshell. When we lean over the handlebars, make a big climbing move, or shovel snow, it’s easy to move in without restriction. The Stretchdown is the first-ever jacket with stitch-free baffle construction and is made from a single fabric, eliminating the need for glue.
With 700-fill RDS-certified down, it’s slightly less warm than the Patagonia Down Sweater but more breathable and comfortable during active use. After a year of testing, from summer camping to snowy Tetons ski days, it remains a go-to.
No matter the conditions, it performs better than a standard down jacket. On the super windy summit of Static Peak, we were unfazed. A surprise spring rainstorm while out on a chilly bike ride didn’t come close to stopping us.
The Mountain Hardwear Stretchdown Hoody stands out for its rugged durability and weather resistance — water beads off the surface, and the jacket shrugs off snow, wind, and abrasion thanks to its tough 20D stretch nylon shell. Unlike many down jackets, it’s built to take a beating, whether you’re carrying skis, bushwhacking, or scrambling on rock.
It also packs in thoughtful features: a roomy stretch hood, three fleece-lined zip pockets, an inner drop pocket, elastic cuffs, and an adjustable hem. While it doesn’t pack down as small as ultralight options like the Ghost Whisperer, the tradeoff in durability and comfort is well worth it for high-output, all-season use. The fit is trim and low-profile, making it easy to layer under a shell or wear as a standalone.
For those who prioritize mobility, durability, and all-day comfort over ultralight packability, the Stretchdown Hoody is a dependable layer built to handle it all.
When the Black Diamond Deploy Down 0.5 Pullover Hoody ($499) was announced as the lightest down jacket in the world, we were skeptical. At just 5.2 ounces, half the weight of our longstanding ultralight pick, the Ghost Whisperer, how warm could it really be?
Turns out, impressively warm. Packed with 1,000-fill down, it kept us comfortable on adventures where the weather changes multiple times in a few hours, including windy fall hikes in the Tetons and spring ascents in Colorado. It’s not built for long belays or deep winter cold like the Patagonia Fitz Roy, but it excels during high-output missions and shoulder-season alpine days.
The slim, half-zip pullover design works seamlessly with a pack or harness and fits true to size and layers cleanly under a shell but still allows enough room for a light layer underneath.
That said, it’s extremely minimalist. All ultralight gear has some tradeoffs, and this jacket is no exception. The outer fabric is extremely delicate; it’s only 4-denier compared to the rest of our jackets, which are 10-denier and up, so we were nervous about snagging it on a branch or brushing up against rocks.
We haven’t had any unusual signs of wear and tear yet, so we will keep an eye on this during continued testing. It also lacks pockets or hood adjustments. And $395 is a steep price for such a stripped-down piece.
The Mountain Hardwear Ghost Whisperer offers a more durable alternative. It’s $35 less expensive but twice as heavy, and it includes features like pockets and a drawcord hem to help block out the cold.
All gripes aside, the Deploy Down Hoody is an ideal addition to any mountain athlete’s jacket quiver. It shines during summer alpine ascents, shoulder-season climbs, and long, challenging routes where memories are made and speed is of the essence.
Key features:
Hydrophobic down, packs down small, ultralight ripstop fabric
Pros
Lightweight & packable
Comfortable
Perfect fit
Stellar warmth-to-weight ratio
Solid weather-resistance
Cons
Needs more pockets
Too warm for high-output activities
Ryan Kempfer
The Rab Men’s Mythic Alpine Down Jacket ($390) combines premium materials, technical features, and an exceptional warmth-to-weight ratio in a sleek, 11-ounce package. It’s stuffed with 900-fill RDS-certified down, treated with Nikwax for water resistance, and wrapped in an ultralight 10D Pertex Quantum shell that’s soft, durable, and sheds light moisture with ease.
Box baffles in the core and hood eliminate cold spots, while slimmer baffles on the arms preserve mobility. The athletic fit wears close without feeling restrictive, and our tester’s usual men’s large is true to size with room for a light midlayer.
This jacket includes many features, including two zippered hand pockets, an adjustable hem, elastic cuffs, and fleece lining in front of the chin, which increased comfort exponentially when we were fully bundled. Though this jacket is extremely warm, it isn’t bulky. It fits more like a minimalist piece, articulates well with every move, works under a shell, and has room for a couple of layers. And, it’s stylish, so we often wore it out for drinks and errands.
We used it for everything from snowy ski transitions to high-elevation backpacking and chilly alpine starts. It’s so warm, light, and packable that it became our go-to for multi-day trips.
That said, the jacket lacks a hood adjustment and could use more storage. A zippered chest pocket or internal stash pockets would add function. Still, for anyone seeking a minimalist yet mountain-ready down jacket that performs across seasons, the Mythic Alpine stands out.
Key features:
Adjustable hem, packs down small into hand pocket, ultralight ripstop fabric
Pros
Stellar warmth-to-weight ratio
Packs down ridiculously small
Ultralight
Cons
Cuffs aren’t elasticated, making it hard to seal in warmth
Somewhat boxy fit in the torso
Ryan Kempfer
No down jacket roundup is complete without the legendary Mountain Hardwear Ghost Whisperer ($360). This updated version adds a bit of durability and warmth while staying impressively light at just 8.8 ounces with 3 ounces of 800-fill RDS-certified down. It also gets major points for sustainability, using entirely recycled face and trim fabrics.
The warmth-to-weight ratio is excellent, and it packs down smaller than just about any other jacket we’ve tested. The hem is adjustable, and the shell fabric is quite durable and wind and rain-resistant, a fact we discovered firsthand while on a snowy, early spring bike ride and hiking adventure through Grand Teton National Park.
If every ounce counts for you, then you might want to try the ultra-ultralight Ghost Whisperer UL ($420), which weighs 2.1 ounces less. (That’s a 25% reduction in weight!) The Ghost Whisperer has a slim, minimalist fit that’s best for light layering. Our tester’s usual size, large, fit true, but it felt snug over anything more than a thin midlayer.
We wish Mountain Hardwear had fixed a couple of long-standing issues that garnered complaints from previous models. The cuffs are still loose, and the fit could be a bit more athletic. The Ghost Whisperer is one of the lightest down jackets out there, and while it offers decent warmth for its weight, it’s best suited for mild conditions or as a midlayer. It’s noticeably less warm than heavier options like the Patagonia Down Sweater or Mountain Hardwear Stretchdown.
For fast-and-light missions, mild conditions, and anyone counting ounces, the Ghost Whisperer remains a go-to, now with an added nudge toward sustainability.
The Mountain Hardwear Ghost Whisperer is so light yet its ideal for hikes or bike rides during spring, summer and fall; (photo/Elk Raven Photography)
The North Face Summit Series Breithorn Hoodie ($430) is a warm, lightweight, and incredibly soft jacket built for high-alpine use. Packed with 800-fill ProDown, a water-resistant insulation that absorbs less water and dries faster than traditional down, it retains loft and warmth even in wet conditions, which is something most down jackets can’t claim. During misty hikes, sweat-soaked climbs, and snowy wildlife tours in the Tetons, it kept us warm without wetting out.
The recycled ripstop shell with non-PFC DWR adds solid water repellency, and the jacket moves well during high-output activity. Five well-placed pockets, including two large internal drop-ins, plus a helmet-compatible hood and water-resistant zippers, make this a great technical piece that still feels right at home in town.
The “slim fit” makes layering challenging, decreasing the jacket’s overall versatility. And although the outer material holds up well to the elements, it’s less durable than some of our favorites. We noticed some down escaping after just a few wears, which isn’t ideal for a $430 jacket. If you ski in the trees a lot or plan to use it for climbing jagged rock, we’d recommend a different choice, like the Mountain Hardwear Stretchdown Hoody.
Still, for alpine missions where comfort, mobility, and weather-resistance matter, the Breithorn Hoodie is a standout. For your next big day, throw on the Breithorn Hoodie as a midlayer or on its own; we guarantee that when you head to the brewery afterward, you’ll want to keep this cozy jacket on.
The North Face Breithorn Hoodie is a super warm, comfy jacket that employs water-resistant down; (photo/Elk Raven Photography)
Key features:
Wind, water, and abrasion resistance plus waterproof shoulders and hood
Pros
Responsible Down Standard (RDS) certified down
Five pockets: two external hand pockets, chest pocket, dual internal stash pockets
Cons
Cozy but not built for supreme warmth
Ryan Kempfer
When testing several down jackets, the surest way to know which one is best is to look at which one you wear most often. That’s exactly what put Outdoor Research’s Helium Down Hoodie ($299) so high on this list.
Its athletic cut has made it ideal for early winter getaways, allowing this tester to toss a big wool flannel on over it when things get especially frosty. But it was still great by itself when things didn’t dip below a little chilly.
The quality and feel are everything you’d expect from a brand like OR — and then some. The brand dubs it the “most durable, lightweight, and technical down hoodie” in its arsenal. That durability comes from a strategic hybrid construction.
The hood and shoulders use Pertex Quantum Shield 30-denier ripstop that fights abrasion and adds a waterproof barrier where you need it — head and shoulders, exactly where rain hits.
But the toughness doesn’t stop there. Pertex’s Diamond Fuse ripstop shell covers the Helium Down Hoodie’s 800-fill down, affording the jacket enhanced durability without any significant weight penalty.
By no means the warmest puffy we tested, this one wound up in the backseat, at the ready for just-in-case adventures. If you need a puffy to grab that can handle a range of elements, the Helium Down Hoodie fits the bill.
Key features:
Tougher ripstop fabric over high-use areas, two-way zipper with storm flap, over-the-helmet hood with stiffened peak for increased protection
Pros
Superior warmth-to-weight ratio
Anatomical shape that allows the jacket to move with you during activity
Durable
Cons
Hood is pretty large and floppy unless you are wearing a helmet
Ryan Kempfer
For marathon belays or cold-weather missions where warmth and weight matter, the Rab Neutrino Pro ($400) delivers. It’s one of the comfiest and most well-designed jackets we’ve tested, ideal for cold climbing days or winter expeditions when durability and packability are key.
We wore it on everything from big wall climbs in Yosemite to chilly nights in the Appalachians, and it lived up to the hype. What surprised us most was how well it moves. Rab’s “twisted arm baffles” may sound like marketing fluff, but the freedom of movement is real.
The Neutrino Pro has a roomy, expedition-ready fit designed for layering in cold conditions. Our tester, who typically wears a men’s large, found the fit true to size with room for heavy layers underneath, making it perfect for alpine use or frigid belays. Thoughtful features include a two-way zip for belaying, an over-the-helmet hood with a stiff brim, and reinforced fabric in high-wear areas. Despite its alpine focus, the sleek profile looks sharp around town, too.
Our only gripe? The hood feels oversized without a helmet, but that’s a small tradeoff for its mountain-ready design.
With 7.5 ounces of 800-fill down and a total weight of just 20 ounces, the Neutrino Pro hits a sweet spot for serious warmth without bulk. For the dedicated mountain athlete who needs a durable, high-performance, mega-warm-down jacket for the toughest adventures, this one’s a standout.
Outer fabric showing wear and tear with little use
Ryan Kempfer
We all want to look great while crushing it, right? Well, that’s exactly what the versatile Stio Pinion Down Hooded Jacket ($285) delivers. Ideal for everyday and active use, we tested the Pinion Down in its rugged birthplace of the Teton backcountry.
To date, we are as impressed with its performance in the high alpine as we are with how it works in our driveway. With its soft handfeel, small baffles, fun colors, and flattering fit, the Pinion transitions seamlessly from trail to town. It has all the essentials: an adjustable hood, zippered hand and interior pockets, and it packs into itself. We wore it on a spring ski tour up Taylor Mountain, while shoveling snow during a January storm in Jackson, and even on a windy, sleet-filled Nordic tour. The recycled 20D Pertex Quantum shell blocked wind well, but it did soak up some moisture — something we’ll monitor with more use.
The fit strikes a sweet spot between casual and athletic: roomy where you want it, trim where you don’t. It’s great for sub-zero sunrise uphill ski tours at Snowking Mountain and stylish enough to head straight to the coffee shop or a work meeting. But, it’s not warm enough for long breaks or summit hangs, and it weighs a few ounces more than some competitors. If you want something warmer and lighter, consider the Black Diamond Approach Hoody.
We also noticed some small abrasions early on, which raises durability concerns. The fabric is billed as ripstop, but after only a few uses, it’s showing more wear than our year-old Mountain Hardwear Stretchdown Hoody, which still looks brand new. Time will tell if the Pinion holds up, but for now, it’s a solid pick for active use with serious style points.
Key features:
Synthetic insulation placed in areas prone to getting wet, construction allows down to mold to body for efficient thermal performance
Pros
Large baffles hold more heat
DWR repels wet snow
Outer materials resist abrasions, cut wind
Insulated hood with high neck protects face
Big durable zippers you can grab with gloves
Cons
High price tag
Hem length felt short/skin exposed with certain movements
Ryan Kempfer
A toaster oven of warmth wrapped up in a nylon shell, complete with DWR that provides ultimate protection in any winter weather scenario; this is the Arc’teryx Thorium Jacket ($500). It’s a true winter workhorse, a cozy, weather-resistant puffy we’ve reached for in everything from -20°F wolf watching to stormy ski transitions. With large baffles and a hybrid insulation design, hosting 750-fill down in the core and synthetic Coreloft in moisture-prone areas, it stays warm even when conditions get rough.
We’ve worn it in heavy wind and accumulating snow without needing a shell, and thoughtful updates like fleece-lined hand pockets, a high collar, helmet-compatible hood, and glove-friendly zippers make it even more capable. Two internal dump pockets hold climbing skins, and the two-way zip plays nicely with a harness.
The Thorium uses Arc’teryx’s regular fit, and our tester’s usual size, large, felt true to size with enough room to layer. It’s roomier than the Cerium Hoody (which is a slim fit) in the same size, with no restriction through the shoulders or back. The jacket does have some bulk, which limits mobility slightly, and we found it a bit short when reaching overhead.
It’s not the best choice for ounce-counters or high-output missions, but for cold-weather comfort and daily use, the Thorium delivers. Just be ready for the steep price tag.
Key features:
Soft to the touch down with a great feel and look, comfort
Pros
Reasonable price point
Silky soft to the touch
Very comfortable
Packable
Cons
Lack of mobility limits movement in activities like climbing or scrambling
Wets out quicker than others
Ryan Kempfer
The Outdoor Research Transcendent Down Hoodie ($279) has long been a fan favorite, and after finally testing it, we can see why. Right out of the box, we noticed the airy feel and silky-soft fabric, inside and out. It’s one of the most comfortable puffies we’ve worn, with cozy hand pockets and a relaxed fit that feels great over everything from a T-shirt to layers.
Our tester, who usually wears a men’s large, found the fit true to size but noticeably roomier than more technical jackets like the Cerium or Stretchdown. We wore the Transcendent backpacking in the Winds, skiing in the Tetons, and running errands in town, and it felt at home in all of them.
The latest version is now filled with 800-fill responsibly sourced down, giving it a boost in warmth, comfortable down to around 40°F, but still not as warm or technical as jackets like the Patagonia Down Sweater or Rab Neutrino Pro.
Thoughtful features include a stash pocket, an internal zip pocket, and an insulated hood. It also packs into its own pocket, compressing down smaller than a Nalgene. That said, it’s not great in wet weather. During ski tours and misty hikes, it absorbed moisture more quickly than expected, especially compared to OR’s own Helium Down Hoodie. And while the fit is relaxed, mobility felt restricted during climbs and pole use.
If you need a rugged, technical layer, there are better options. But for casual outings and everyday warmth, the Transcendent is an excellent value.
The Rab Mythic Ultra ($495) is one of the most technically impressive jackets we tested, packing 8.5 ounces of 900-fill down into a lightweight package. The men’s size large weighs just 17.4 ounces on our digital scale, and with its ultra-light 10D Pertex Quantum shell, it delivers one of the best warmth-to-weight ratios out there. It still includes essentials like zippered hand and chest pockets, a two-way front zip, fleece-lined chin, and an adjustable hood and hem.
Box baffles help eliminate cold spots, and a heat-reflective inner lining (that Rab claims can reduce radiant heat loss by 30%) really does feel warmer when worn over just a base layer. While we’re not able to quantify radiant heat loss, this is a noticeable feature when you’re wearing just a single layer underneath, but we’d expect less of a direct impact with the more layers you wear underneath.
So why didn’t it rank higher? Jackets in this warmth and weight range will probably be used for belaying or for alpine missions as an outermost insulating layer. Compared to other similar models like the Rab Neutrino Pro or the Mountain Hardwear Stretchdown, the Mythic Ultra has much thinner face material (10-denier versus 20-denier) that may not withstand abrasions as well and has a very slim fit in the torso, making it more difficult to dial in the right fit over other layers.
One tester (5’10”, 170 pounds) found the size large tight in the torso, even with just a T-shirt, so we sized up. That improved the fit through the waist but left the arms and shoulders a bit loose. For belaying or alpine use, we’d recommend sizing up.
Bottom line: the Mythic Ultra is featherlight and seriously warm, but unless you’re counting every ounce, the more durable and better-fitting Neutrino Pro is the smarter buy, and nearly $100 less.
Key features:
Water-resistant goose down, DWR-treated nylon face fabric
Pros
Packs into its own pocket
Increased bust circumference on women’s jacket for improved fit
20-denier ripstop nylon liner
Cons
Not premium construction for rugged outdoor play
Ryan Kempfer
Of all the down jackets we tested, the Cotopaxi Fuego ($295) received the most “ooh, that’s a nice jacket” comments. Not really surprising, as Cotopaxi has built its reputation on flashy, devil-may-care designs, coupled with ethical and sustainable manufacturing processes.
The Fuego carries on that identity, albeit with a more toned-down, intentionally retro aesthetic. As a puffy, it’s a great around-town choice with some ready-to-party chops. The 800-fill down makes it acceptably lightweight and packable, though if you take it out enough, you’re bound to scuff up those pretty stripes.
The 20-denier shell construction adds a little extra defense against feather loss and daily abuse. Two internal stash pockets and hand pockets round out the build.
The Cotopaxi Fuego has a regular, slightly boxy fit that runs true to size, roomy enough for layering without feeling oversized. Our tester wore their usual size, large, and had no issues with range of motion.
The Fuego is plenty warm for autumn wind and some light precipitation (thanks to a DWR treatment), and it can even fend off some winter bluster, keeping you comfortable down to the low thirties with a base layer. It’s warmer than casual puffies like the OR Transcendent but not as toasty as more alpine-focused options like the Rab Neutrino Pro.
The Cotopaxi Fuego strikes a solid balance of warmth, style, and everyday versatility, making it a great go-to for shoulder-season adventures and around-town wear.
Key features:
Ethically sourced down, long stitchless panels on underarm and sides
Pros
Great warmth-to-weight ratio
Trim fit but can still layer underneath
Durable design
Cons
No internal drop-in pockets
Separate stuff sack to keep track of
Ryan Kempfer
Weighing in as one of the lightest options on our list without sacrificing warmth, the Feathered Friends ($409) is designed for ounce counters. With four ounces of 900+ fill premium down, this jacket is our go-to for speedy trips where warmth and minimal weight are crucial.
Feathered Friends has been perfecting down insulation since its 1972 beginnings, maintaining a utilitarian appeal that prioritizes function over fashion. That said, the Eos looks and feels darn good, and is no slouch around town.
A slim, contoured fit gently hugs your body without being constricting or limiting its layering ability, and two long stitchless baffles run down the sides, giving it a slight, unique flair. These vertical baffles aren’t just for looks, though, and make the jacket more mobile and form-fitting.
They also limit fabric bunching, and we feel noticeably unrestricted while contorting our bodies on hikes or rock climbs. Though there is an inner liner that helps prevent cold spots from the horizontal baffles’ sewn-through stitching, the stitching on the vertical baffles is exposed inside, affording a slight amount of ventilation where it counts.
The Eos packs down small, but the chest pocket doesn’t double as its stuff sack. We’ve already almost lost the separate one it comes with multiple times. The two zippered handwarmer pockets are spacious enough for trinkets or bulky gloves, though internal drop-in pockets would have been a nice addition.
True to Feathered Friends’ ethos, this jacket is highly durable, showing little wear after extensive use on various backcountry climbs and backpacking trips across Colorado and Appalachia. We’re big fans of this lightweight, packable wonder that seems to worm its way into our luggage on most chilly adventures.
Senior Editor Chris Carter putting the Patagonia Down Sweater through its paces on a thru-hike of the Pacific Crest Trail; (photo/Conor McNamara)
How We Tested the Best Down Jackets
Our team has tested, reviewed, and published down jacket Buyer’s Guides across several seasons. For this guide, we considered the most durable, highly acclaimed, well-constructed, and environmentally responsible down jackets. These layers are made for a variety of conditions and present a range of prices.
Our Expert Testers
Editor-in-Chief Adam Ruggiero led the charge in curating and testing our initial lineup of over 20 down jackets in 2020. A seasoned, well-rounded outdoorsman, he knows what to look for in the insulation he depends on in the backcountry and used his years of experience to lay the framework for this comprehensive guide.
Senior Editor Chris Carter took the reins of this guide in August 2022 and has been sifting through mountains of these puffy layers ever since to bring you the streamlined selection you see today. He left no feather unturned. A long-distance thru-hiker and rock climber at heart, he tested countless down jackets in every concoction of conditions imaginable and won’t settle for anything but the best on his escapades.
In spring 2024, Lake Tahoe resident Nick Bruckbauer contributed his testing experience to this guide, adding two new lightweight models that he tested on fast and light hikes in the Tahoe backcountry, chilly forest and neighborhood walks and runs, and while shoveling and plowing Tahoe’s famous Sierra Cement snowfall.
In 2025, along with editor Chris Kassar, Ryan Kempfer, an avid backcountry skier, hiker, biker, and overall gear nerd, took over this guide and added jackets he had tested in the Tetons and Rockies high country.
Ryan Kempfer testing the Stio Pinion Hooded Jacket in its rugged birthplace, the Tetons; (photo/Elk Raven Photography)
Our Testing Grounds & Process
To challenge and determine the top designs, we enlisted a number of other staff authors and editors to get as diverse a perspective as possible, and test these puffies across a broad range of outdoor pursuits. Our testers donned these jackets in all seasons, from snowy environments in the Rockies, to chilly big wall ascents of El Cap in Yosemite.
The crew has used these jackets for camping and urban commutes, as well as alpine and rock climbing, backcountry skiing and splitboarding, bikepacking, and alpine skiing. The testers ranged from AIARE-certified backcountry venturers to lifelong recreationists.
Finally, this is an organic, constantly evolving guide. We work hard to stay on top of new trends and novel technologies, and closely examine updated jackets and new models the moment they hit the market to bring you the most up-to-date choices possible. If you’re looking for women-specific recommendations, check out our guide to the best women’s down jackets. If you’d prefer something better for wet climates, check out our guide to the best synthetic insulated jackets, or if you’re in the market for something cozy, check out our guide to the best fleece jackets.
We traveled far and wide to test the best down jackets on the market; (photo/Tucker Adams)
Understanding Down Warmth: Fill Power vs. Fill Weight
Unlike sleeping bags, down jackets don’t come with standardized temperature ratings, which makes comparing warmth tricky. Most people are familiar with fill power, a measure of down quality and loft, but fill weight is just as important when it comes to real-world warmth.
There are certainly other factors that contribute to a down jacket’s warmth, like baffle shape, design, construction, jacket materials, size, fit, and other features like hood, hem, or cuff closures. All things being equal, however, the down fill power and fill weight will have the most direct impact on a jacket’s warmth.
Author Chris Carter and his climbing partner hanging out in a couple of mega-warm Rab Neutrino Pro jackets on a portaledge high on El Cap; (photo/Ryan Bode)
Fill Power
Fill power measures the loft of down in cubic inches per ounce. Higher fill power means fluffier, lighter, and more compressible insulation:
400–500: Fair
600: Good
700: Great
800: Excellent
900+: Premium
Higher fill power traps more air per ounce, offering better warmth for less weight. But, fill power is only part of the equation.
The Patagonia Down Sweater Hoody is a solid jacket for everyday use that editor Chris Kassar loves because it delivers enough warmth and performance for burly ski adventures; (photo/Elk Raven Photography)
Fill Weight
Fill weight is the total amount of down inside the jacket, measured in ounces or grams. To get a reasonable estimate of a jacket’s overall warmth, you can multiply the down’s fill power (expressed in cubic inches per ounce) by the jacket’s fill weight (expressed in ounces), which will yield a number that represents the three-dimensional volume of the jacket’s insulation, or loft, in cubic inches.
On paper, we can, therefore, estimate that the Patagonia Down Sweater Hoody (5.3 ounces of 800-fill-power down) will be warmer than the Feathered Friends Eos (4.0 ounces of 900-fill-power down). Even though the Eos has a higher fill power of 900, the Down Sweater has a higher fill weight of 5.3 ounces.
Patagonia Down Sweater Hoody: 800 cubic inches per ounce x 5.3 ounces = 4,240 total cubic inches of insulation Feathered Friends Eos: 900 cubic inches per ounce x 4.0 ounces = 3,600 total cubic inches of insulation
While the Eos uses higher quality down, the Down Sweater is warmer overall due to more insulation.
The Rab Neutrino Pro has an excellent warmth-to-weight ratio; (photo/Tucker Adams)
Warmth-to-Weight
The Eos is lighter (10.8 versus 15.0 ounces), so it offers a better warmth-to-weight ratio. But if you’re prioritizing warmth alone, especially for long belays or cold alpine starts, heavier jackets like the Rab Neutrino Pro (7.5 ounces of 800-fill down) are the way to go.
Lighter jackets like the Mountain Hardwear Ghost Whisperer (3 ounces of 800-fill, total weight 8.8 ounces) are great for fast-and-light missions but fall short in prolonged cold or when you’re standing still.
Fill weight isn’t always advertised as readily as fill power. But, fill weight is — in our opinion — a much more crucial stat to consider when gearing up for any adventure. While other factors, such as face fabric, sewn-through seams versus box baffles, and other features, play a role in how warm a jacket is, a higher fill weight will almost always indicate a toastier puffy. Note: We would like to include fill weight in our specifications for each product, but have found it challenging to find for most products, even when asking brands.
Bottom line: Fill power tells you how efficient the down is. Fill weight tells you how much insulation you’re actually getting. Together, they’re your best indicators of how warm a jacket will be.
Editor Chris Kassar loves our most durable pick, the Mountain Hardwear Stretchdown Hoody, thanks to its outer shell made of 20-Denier Durable Stretch nylon that’s nearly indestructible; (photo/Elk Raven Photography)
Durability
The shell fabric is an important factor for both durability and packability. Ultralight jackets tend to be made with a lighter, thinner shell material. Denier is the measurement used here. A lower denier rating means the outer fabric is lighter and, therefore, more prone to tears.
For backcountry excursions, the lower weight can be a worthy tradeoff. But for daily use, we recommend a higher denier like we see in the Mountain Hardwear Stretchdown Hoody. Most of the jackets we tested have a 10-denier or 20-denier shell fabric, with some 30-denier models. And if you do get a tear or campfire burn hole, there’s always the reliable duct tape, Tenacious Tape, or Noso Puffy Patch repair options.
Most of the jackets we tested have a 10-denier or 20-denier shell fabric, with some 30-denier models.
Down does not perform well when wet. And this is one of the places synthetic jackets tend to win out. In the past decade, there has been a growing use of hydrophobic down. Essentially, the down feathers are coated in a water-resistant polymer. It still doesn’t match the water resistance of synthetics, but for light precipitation, hydrophobic down like the kind used in the Black Diamond Approach Hoody can’t be beaten.
Manufacturers treat the face fabrics of some jackets, like the Patagonia Fitz Roy Hoodyand the Patagonia Down Sweater Hoodie with DWR, to help block light moisture, too. Our pick for the most weather-resistant down jacket, The North Face Summit Series Breithorn Hoodie, has both water-resistant down and an outer made of recycled nylon that has both a DWR coating and Pertex Y Fuse, which increases the down-proof and water-beading properties of the fabric.
The Black Diamond Approach Hoody employs water-resistant Allied HyperDRY goose down, so it doesn’t lose loft if it gets damp from light precip or sweat; (photo/Elk Raven Photography)
Fit: Finding the Right Jacket for the Job
The way a down jacket fits should match how you plan to use it. Some are trim and athletic for layering and mobility, while others are boxier or longer for casual use and added coverage.
Technical Pursuits
For technical pursuits like climbing, ski touring, or alpine travel, a trim, athletic fit works best. Jackets like the Rab Mythic Alpine and Black Diamond Deploy Down Hoody are designed with movement in mind. The Mythic Alpine fits close to the body but still allows room for a midlayer, making it perfect for backcountry missions and high-alpine backpacking.
The Deploy Hoody is even more minimal, incredibly light, and form-fitting; it shines on fast-and-light peak pushes where every ounce matters. The ultralight Mountain Hardwear Ghost Whisperer is ideal for day hikes where you don’t want a ton of added weight, but need the protection of an extra layer.
The Mountain Hardwear Ghost Whisperer is so light yet its ideal for hikes or bike rides during spring, summer, and fall; (photo/Elk Raven Photography)
If comfort and mobility are a priority, the Mountain Hardwear Stretchdown Hoody stands out. With its flexible fabric and more forgiving cut, it moves effortlessly through big reaches, shoulder rotations, and scrambles. It’s ideal for hiking, climbing, and everyday wear where breathability and freedom of motion matter.
Trail-to-Town
For more casual use or mixed urban-to-trail wear, the Outdoor Research Transcendent Hoody and Stio Pinion Down Hoody offer relaxed fits with solid warmth and style. Both look good enough to wear around town but are built to handle shoulder-season hikes or winter campouts. The Patagonia Down Sweater Hoody also nails the balance, as it is more fitted than previous versions but still roomy enough to layer, and works equally well on snowy trails or under a shell at the resort.
The fit and style of the Stio Pinion Hooded Jacket mean it transitions seamlessly from trail to town; (photo/Elk Raven Photography)
If you’re looking for maximum warmth and space to layer underneath, the Rab Neutrino Pro delivers. It has an expedition-ready fit with extra room in the torso and arms, making it a great belay jacket or outer layer in truly frigid conditions. On the flip side, the Arc’teryx Cerium Hoody has a much trimmer fit, ideal for high-output activities or minimal layering.
Why Fit Matters
Fit also impacts warmth. A jacket that’s too loose will let heat escape, while one that’s too tight might compress the down and limit mobility. Try to find the sweet spot for your body type and activity level, and if in doubt, check whether the jacket is designed as a midlayer, outer layer, or standalone insulator. Whether you’re hiking ridgelines, commuting by bike, or sipping coffee after a tour, choosing the right fit makes all the difference in comfort and performance.
Finding a jacket like the Arc’teryx Cerium that moves with you and fits well is essential, particularly if using it during high-output activities; (photo/Honey McNaughton)
Down vs. Synthetic
Most of the jackets in this guide are made with down, though a handful are filled with synthetic insulation that mimics down or a blend of the two. For example, both Arc’teryx models we tested, the Ceriumand theThorium, use synthetic insulation in places that tend to get wet, so they stay loftier and keep you warm even when you get wet.
Synthetic insulation, on the other hand, is made from polyester fibers and designed to imitate down clusters and properties with a few key differences. If you compare two jackets of equal weight, down is warmer than this alternative. But synthetic insulation retains warmth even when wet. It’s also easier to wash and usually comes at a lower price point.
Pros of down: Excellent warmth-to-weight ratio, comfort, compressibility, lightweight, high inherent warmth
Cons of down: Inability to insulate when wet, not super breathable, more difficult to wash, pricier
Testing down jackets during long, cold belays in Yosemite; (photo/Chris Carter)
Within synthetic jackets, active insulation is another progressive subcategory to know. These technical garments are designed to dump extra heat and dry fast, so you don’t have to remove the jacket during vigorous activity. But these layers also need to be durable, warm, and wind-resistant. It’s a tricky balance.
Overall, synthetics can be a better, safer choice in wet or mixed weather and when weight isn’t an issue. Active insulation is best for high-output action. If it’s cold and dry, down is optimal despite its higher cost. This guide lists a wide variety of the best down jackets to keep you covered in the cold.
Sustainability
Many down jackets now balance performance with eco-conscious design. Look for certifications like the Responsible Down Standard (RDS) or Patagonia’s Traceable Down to ensure ethically sourced insulation. Without them, animal welfare in the supply chain isn’t guaranteed.
Brands are also stepping up with recycled fabrics, PFC-free DWR coatings, and Fair Trade Certified sewing. The Mountain Hardwear Ghost Whisperer uses fully recycled materials and RDS down, while the Patagonia Down Sweater uses recycled down and responsible labor practices. These thoughtful choices make it easier to stay warm while treading lightly.
The Ghost Whisperer/2 is made with completely recycled face and trim fabric, and stuffed with RDS-certified down, scoring high points in the sustainability department; (photo/Honey McNaughton)
Weight
The down jackets in this guide range from 6.7 ounces at the low end to more than 30 ounces on the heavy side. The median weight is around 15 ounces, and the most common weight is closer to 20 to 23 ounces.
As you might expect, the warmest down jackets are typically also on the heavier end, as the down fill weight has a big impact on overall warmth. This is where fill power comes in. Jackets with a higher fill power can achieve an equivalent warmth level at a lighter overall weight.
The Rab Mythic Ultra, with its 900-fill-power down insulation, really stands out for its excellent warmth for the weight. We weighed the men’s size Large that we tested at 17.4 ounces — and this jacket is as warm or warmer than many others in the 20- to 23-ounce range.
The Rab Mythic G packs a lot of warmth and weighs just 17.4 ounces Note: the included stuff sack weighs 0.32 ounces; (photo/Nick Bruckbauer)
Super-lightweight down jackets typically come with a premium price tag, but the investment can be worthwhile for adventurers with limited space looking to trim ounces. Models like the Black Diamond Approach Hoody and Feathered Friends Eosstrike a solid balance between lightweight simplicity and premium performance.
If speed and efficiency are of utmost importance, jackets like this won’t hold you back. Make sure to research the full range temperatures you will encounter on your trips before leaving, however, and don’t prioritize an ultralight base weight so much that you put yourself in danger.
Storing and Caring For Down Jackets
Some of these down jackets can compress to the size of a water bottle or smaller, while others are bulkier — influenced by the fill, face fabric, and overall design. A tiny pack size can allow you to carry a smaller, lighter load on lightweight excursions, but make sure to not leave your down jacket smushed up for long periods of time. This can greatly impact the down’s lofting and insulating abilities, and reduce the jacket’s overall lifespan.
The packed sizes of some of our favorite down jackets in their stuff sacks. Some pack into their own zippered pockets, while others come with a separate pouch; (photo/Chris Carter)
It’s fine to keep your jacket in its stuff sack for one or two days at a time, but try to pull it out of the sack regularly and let it loft up fully over the duration of your trip. When storing your jacket after you get home, hang it in your closet — and don’t mash it too tightly between your other clothes. Washing your jacket with down-friendly detergent can also prolong its life. We gravitate to Nikwax’s Down Wash Direct for this purpose.
Other Key Features
The finer details of a down jacket can have a big impact on performance. Look for helmet-compatible hoods or tall collars for weather protection, and wire-brimmed hoods for improved visibility in wind and snow. High-quality zippers (like YKK), adjustable hems, and secure cuffs — whether elastic, Velcro, or with thumb loops — help seal in warmth.
Most jackets include zippered hand pockets, often placed high for harness compatibility, along with chest or internal stash pockets. Some stuff into their own pocket for easy packing. Technical options may also offer pit zips, powder skirts, or two-way zippers for belaying.
These small features add up, especially when you’re active in the mountains or layering up for cold-weather missions.
You want to make sure that the features on your jacket, such as hood size and elasticized hem and cuffs, are a good fit for your adventure; (photo/Chris Carter)
Price & Value
It’s easy to spend $250-500 on a down jacket. And that’s no small investment. The main thing to consider when looking at your budget is the end use.
Budget
There aren’t many options in this category. If you’re regularly packing into the backcountry, an ultralight, super-packable, rather expensive jacket may be necessary. If you’ll mostly wear it around town or for light trail use, something like the budget-friendly REI 650 Down Jacket will keep you warm for just over $100.
Price will play a role in which jacket you choose; however, there are budget-friendly options, like the REI 650 Down Jacket, which gets the job done at just over $100.
Mid-Tier
Most down jackets on our list range from $280 to $400. With this increase in price, you’ll typically see an increase in fill power and fill weight, which translates to an increase in warmth. Even our best warmth-to-weight ratio pick, the Black Diamond Approach Down Hoody ($380), and our warmest midweight, the Rab Neutrino Pro($400) fall in this range.
Mid-tier jackets like our most durable pick, the Mountain Hardwear Stretchdown Hoody ($300), also have more features, including added pockets, adjustable hoods, weather-resistant materials, and more. While this may seem like a ton to pay for a jacket, with proper treatment, jackets in this tier should last long enough to be worth the investment.
The Black Diamond Approach Hoody, which we use for everything from ski tours to wildlife watching, falls within the middle of the price range for a solid down jacket; (photo/Elk Raven Photography)
Premium
These jackets, which range from $409 and above, tend to be designed for adventures or expeditions in frigid temperatures. The RabMythic G Down Jacket ($525), the Rab Mythic Ultra ($495), the Arc’teryx Thorium ($500), and the Feathered Friends EOS ($409) have some of the highest fill powers on this list, which means they have an excellent warmth-to-weight ratio.
They are often weather-resistant and more durable, as well. However, if you’re going to throw down this much for a jacket, you’ll want to be sure you have the need for it. We typically grab these jackets atop high peaks in mid-winter before skiing down or when we’re tackling technical objectives in Nepal or Alaska. They’re also ideal for when you’re going to be stationary in freezing temps; think ice fishing, ice climbing, your kid’s football game in December, or belaying. An exception to this rule is the The North Face Summit Series Breithorn Hoodie ($430). It was a unicorn of sorts: light enough for moderate activity on cold days, but warm enough for standing around, too.
The Rab Mythic Ultra falls in the premium price range, but a solid down jacket is an important investment for comfort and warmth during chilly adventures; (photo/Tucker Adams)
Frequently Asked Questions
When should you wear a down jacket?
A down jacket holds heat around your body’s core in order to maintain a comfortable level of warmth when the temperatures drop. A spectrum of down jackets exists from plush and stylish for everyday use to lighter, packable designs for year-round backcountry adventures.
What’s the difference between a down jacket’s fill power and fill weight?
A jacket’s fill power is the down’s quality and amount of loft. You’ll see jackets labeled as 600-fill or 800-fill, for instance. The fill weight, which we measure in ounces, reflects the density or amount of down stuffed inside the jacket.
So when two 700-fill jackets have different weights, we know the heavier one is warmer.
On the other hand, if two down jackets weigh the same with different fill power (two 15-ounce jackets with 650-fill and 800-fill), the higher fill jacket is going to be less bulky, lighter, and more compressible.
It’s tricky to compare jackets with differing fill power. But in general, the lower the fill power, the less loft and warmth.
The Rab Neutrinois one of the warmest jackets on our list with a high fill weight, but is consequently on the heavier side; (photo/Chris Carter)
What warmth should I choose for a down jacket?
Down jackets have a huge variance of warmth. Some jackets are constructed to withstand freezing or sub-zero temperatures, while others are a match for summer, spring, and fall backpacking trips. Here are the broad categories of jackets, depending on their fill weight:
Lightweight: 3-4 ounces of down fill, three-season jacket, skiing midlayer
Moderate weight: 5-6 ounces of down fill, more warmth for sub-freezing temperatures
Heavyweight: More than 6 ounces of down fill, tenacious design for winter conditions
The combination of the fill weight and fill power, which is the loft and quality of the down, changes how warm a jacket is. The higher the fill power and higher the weight, the more heat the jacket retains.
A lightweight jacket makes cold miles go by with ease; (photo/Chris Carter)
How heavy should my down jacket be?
Lightweight down jackets are very compressible and a great choice for cramming into your pack for emergency use. But they often cost more. Those weights range from close to 8 to 15 ounces. Midweight options bump up to the 20-ounce range, and heavier down jackets are around 30 ounces.
What is the best down jacket to buy?
The best down jacket for you is based on where and how you’ll use it. If the weather is relatively dry and super cold, a down jacket with greater down fill that will retain more heat could be worth the investment. If you’ll be in a really wet environment, a synthetic down jacket might be a better choice.
The Arc’teryx Ceriumis our top pick for down jackets, but it truly does boil down to personal preference; (photo/Emily Malone)
What qualities should I look for in a down jacket?
As you search for a down jacket, pay attention to the fill power, overall fit, and price. Be sure the warmth and features match your needs, like whether or not the jacket has a helmet-compatible hood, underarm zippers, and harness-compatible hand pockets.
Examine the level of weather resistance, like DWR-treated material or down, and if it matches the exposure you’ll be in. Some jackets are even reinforced in high-use areas, like in the shoulders for pulling on and off a pack. If you plan on venturing into the backcountry, weight and compressibility make a difference, too.
A cozy, durable down jacket makes evening fireside hangs all the better; (photo/Chris Carter)
We tested the best women’s down jackets, from hefty technical layers to lightweight puffers, including Rab, Patagonia, Mountain Hardwear, Arc’teryx, and more.
Adventure is for everyone. That’s the driving belief behind Retrospec’s high-quality, yet affordable gear — including a full line of e-bikes — built to encourage people of all ages and abilities to enjoy the outdoors.
With durability at the core of its designs, Retrospec delivers a wide range of adventure-ready e-bikes that don’t compromise on performance or style. From familiar frame designs and comfort-forward styles to sleek, moto-style rides and space-saving models, Retrospec has something for every kind of rider.
Considering adding a little pedal assist to your life? Find the right ride to add to your outdoor toy collection with this handy guide to Retrospec’s bestselling e-bikes across every category.
The moto-style Retrospec Valen Rev Fat Tire E-Bike; (photo/Retrospec)
A flagship model in Retrospec’s e-bike line, the Beaumont Rev 2 is by far the brand’s overall bestseller. The convenient, step-through frame adds to the bike’s vintage look while supporting an upright riding position.
With a 350W rear hub motor, five levels of pedal assist, and a throttle that bumps the bike up to a Class II, the Beaumont Rev 2 can reach speeds up to 20 mph. A maximum range of 38 miles per charge has riders covered for shorter commutes and cruising through town on mellow terrain. Other features that city riders will love: a handlebar-mounted LED control panel, fenders to protect from splashes, front and rear lights, and a rear rack for carrying extra gear.
Tackle all types of terrain with the Valen Rev 2 moto-style fat tire e-bike. A 750W rear hub motor with a single-speed drivetrain offers five levels of pedal assist plus a throttle to help this Class 2 bike reach speeds up to 20 mph. Extra-wide, 20″ x 4″ tires with puncture protection let you confidently venture off the pavement.
More moto-style features to love: a hydroformed aluminum frame, an elongated custom saddle, and Tektro mechanical disc brakes with 180mm rotors. At just under $1,500, the Valen Rev 2 is one of the most affordable moto-style e-bikes on the market.
For a longer range with the same classic moto vibe, upgrade to the Valen Rev+ or Valen Rev+ ST. This Class 3 e-bike’s 750W motor with a full throttle and six levels of pedal assist let riders crank up the speed to 28 mph or go for an extended ride with a maximum range up to 68 miles.
Puncture-protected 20″ x 4″ fat tires and a 100mm suspension fork are primed for smooth off-road exploration, even at high speeds. A versatile Shimano 8-speed drivetrain lets you handle inclines as well as chunky flats.
Enjoy the same Tektro hydraulic disc brakes, e-bike-specific rotors, and elongated seat as the Valen Rev 2 model. Available in traditional and step-through frame styles.
The Chatham Rev 2 and its step-through model are the most popular Retrospec beach cruiser e-bikes. These designs are all about comfort so riders can enjoy hours of fun on two wheels. Both frame styles feature no-slip grips and pedals, a plush saddle, sweptback handlebars, and a geometry that promotes an upright riding position.
Pedal assist and a throttle let you push this Class 2 e-bike to 20 mph, or conserve the battery to travel up to 38 miles on a single charge. Three-inch tires offer a smooth ride over sidewalk cracks or uneven boardwalks. Additionally, this e-bike comes with battery-operated front and rear lights.
Extend your maximum range with the Chatham Rev+, which can travel up to 52 miles per charge. The 500W Planetary Geared Hub Motor and Shimano Tourney seven-speed drivetrain bring a higher level of performance to the experience. Additionally, the Chatham Rev+ includes a center-mounted high-contrast display screen, integrated lights, and an integrated battery for on- and off-bike charging.
Riders can still expect the casual comfort of 3-inch-wide tires, a cushioned saddle, and Class 2 speeds featured in the original design.
Tricycles aren’t just for kids. If you’re looking for added stability, the Boca Rev e-trike delivers. In addition to three 20″ x 3″ tires, the tricycle has a cushioned seat with a backrest for even more comfort and confidence as you ride.
This Class 2 ride offers six levels of pedal assist and a throttle to max out the 500W motor at 14 mph. Conservative riders can stretch that power to a 49-mile range per charge.
Rear-wheel drive, hydraulic brakes, and a parking brake all let you confidently haul up to 150 pounds in the roomy rear cargo basket.
Light, fast, and foldable, the Judd Rev is a great option for a stowable e-bike that can get you to where you need to go without taking up too much space once you’re there. Including the battery, the Judd Rev weighs 42 pounds, so you can easily load the bike into the trunk of a car or tote it upstairs.
But the compact design is just the start of the features that make this bike a top seller. A 350W rear hub motor, throttle, and pedal assist let you reach speeds up to 20 mph. Or, stretch the charge to cover a maximum range up to 38 miles.
Tektro mechanical disc brakes with upgraded semi-metallic pads and 160mm e-bike-specific rotors offer reliable stopping power for safer handling.
If you need to cover a longer distance, opt for the Abbot Rev. Offering a maximum range of 72 miles, this e-bike can travel the farthest distance on a single charge of all the e-bikes in the Retrospec line. Whether you have a long ride to the office or want to hit the farmer’s market on the other side of town, the bike’s powerful 720Wh integrated battery can help get you there.
Adding to the comfort and dependability of your ride is the 65mm front suspension fork, a torque sensor to smooth out acceleration, and 3-inch-wide puncture-protected tires. Other commuter-friendly features like fenders, a rear rack, and integrated front and rear lights. The Abbot Rev is available in traditional and step-through frame styles.
Retrospec’s jack-of-all-trades, the Napa Rev hybrid e-bike, gives you just enough boost without taking the workout away from your ride. A peppy 500W motor with six levels of pedal assist lets this sleek, Class 3 e-bike reach up to 28 mph.
Note: It ships as a Class 2 bike, with Class 3 speeds unlockable. The built-in torque sensor helps ensure smoother speed boosts, while 27.4″ x 2.4″ puncture-protected tires handle off-pavement diversions with ease.
Other commuter-like features include a padded saddle plus plenty of mounting points to add a trailer, fenders, rear rack, or any other customizations. The bike is available in a range of frame sizes to accommodate nearly any rider.
Yes, Retrospec even builds electric BMX bikes. The Joe Rev BMX’s 750W motor provides the power to get you to your favorite spots at a top speed of 20 mph. Meanwhile, the integrated battery offers an extended range of 48 miles.
The bike has five levels of pedal assistance and full throttle. Feel free to bring that extra juice into your tricks because the e-bike’s all-weather mechanical disc brakes will stop you on a dime in any conditions. Lastly, it comes with 27.5″ x 3″ extra-wide BMX tires.