Normal view

Received before yesterdayCamping | GearJunkie

The Best Coolers of 2025-2026

22 October 2025 at 15:28

(Photo/Miya Tsudome)

Whether you’re headed to the beach or a backyard barbecue, finding the best cooler means balancing ice retention, durability, and price. Lucky for you, we’ve tested dozens of coolers in real-world scenarios to help you find the right pick.

We’ve put coolers through the wringer: loading them with ice and drinks, hauling them on camping trips, stashing them in hot cars, and dragging them along to swimming holes. Standouts include the indomitable YETI Tundra 45, which continues to set the standard for durability and multiday performance, and the new Igloo Recool, a compostable cooler made from recycled paper pulp that offers a sustainable alternative for shorter outings.

Every cooler we field test also goes through a standardized ice retention test, giving us objective results to compare alongside our real-world use. From premium hard-sided builds to lightweight, eco-friendly options, we dig into cooling performance and accessories to help you choose the right one for your next adventure.

Editor’s note: As of October 22, 2025, we’ve added the newly-updated model of the Yeti Roadie 24 2.0 to this guide. We also added detailed rating metrics to each product in an effort to explain how we tabulated each testing score.

The Best Coolers of 2025-2026

Best Overall Cooler

YETI Tundra 45

9.4/10 Rating

Best Budget Cooler

Igloo ECOCOOL

6.2/10 Rating

Best Wheeled Cooler

RovR RollR 45 Wheeled Cooler

8.7/10 Rating

Best Lightweight Cooler

RTIC Ultra-Light Hard Cooler

8.0/10 Rating
See more picks

  • Ice Retention
    9.5
  • Build Quality
    9.5
  • Portability
    9.0
  • Capacity and Organization
    9.0

  • Capacity: 37 quarts
  • Materials: Rotomolded polyethylene/urethane foam insulation
  • Dimensions: 25.75" x 16.125" x 15.4"
  • Weight: 23 lbs.

Pros

  • Rotomolded design
  • Retained ice for the full 10 days of testing
  • Dry goods basket included
  • IGBC-certified

Cons

  • Expensive
  • Heavy

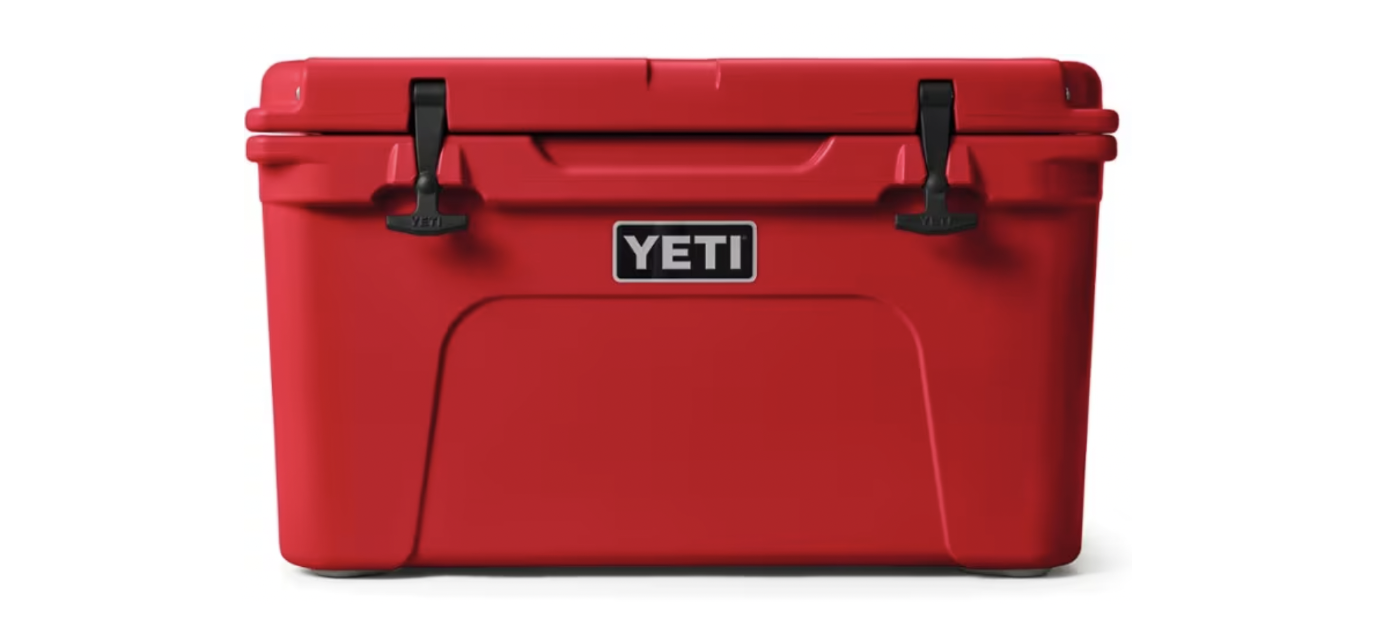
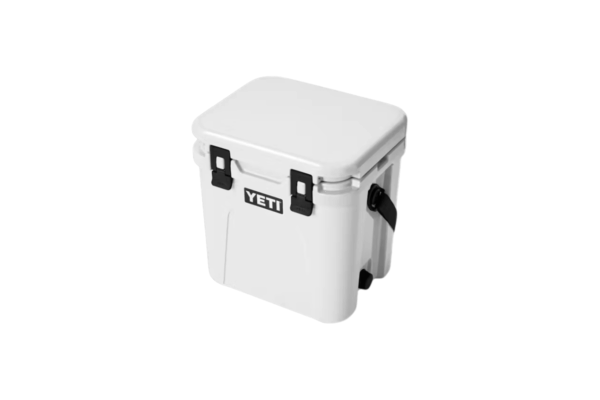
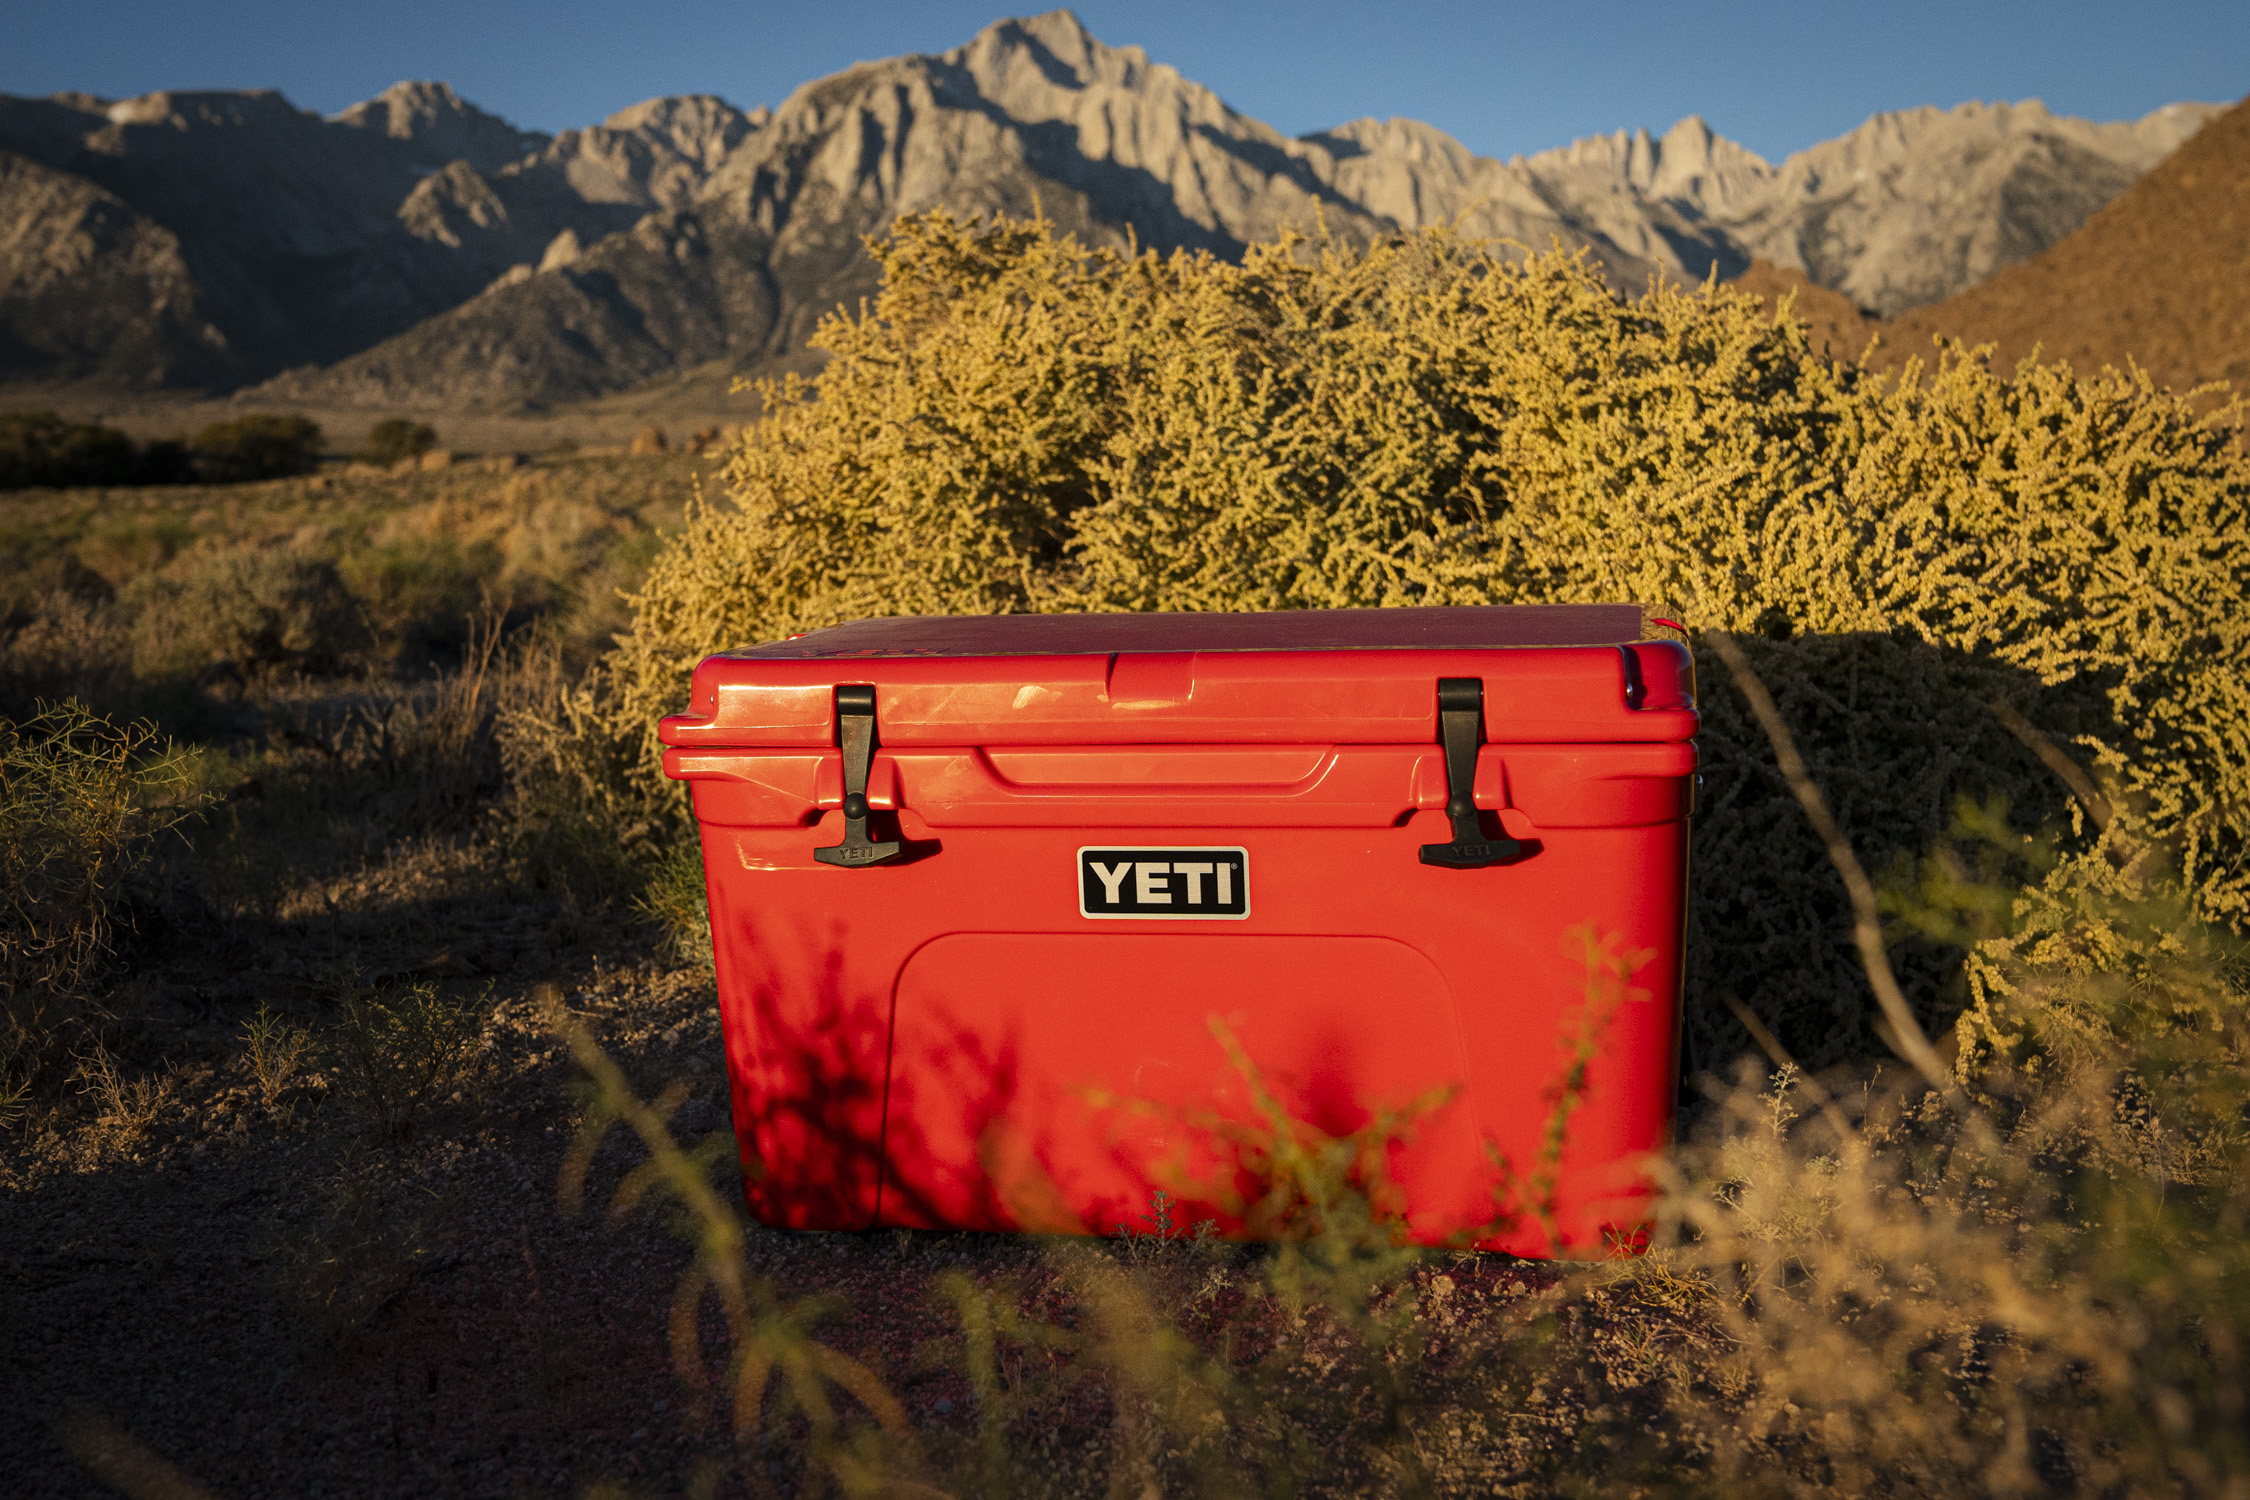
YETI has long since made a name for itself in the cooler world, and the Tundra 45 ($325) is popular for good reason. This mid-sized cooler is the perfect companion for a family weekend getaway, is a reliable road trip companion, and is definitely built to last. With superior insulation qualities and a robust design, this cooler is our top pick with the only downside being the hefty price tag.  

The Tundra 45 actually only has a 32.9L capacity. This size will hold 28 cans, and plenty of ice, and is designed to fit long-neck bottles. It will not fit a 750mL wine bottle standing upright, however. A dry-goods rack keeps items you don’t want to get soggy lifted above the ice, and this cooler’s extra thick walls will retain ice for days.

A rotomolded polyurethane construction, a freezer-quality gasket, burly haul handles, tie-down slots, a drain plug, and a certification of bear resistance from the Interagency Grizzly Bear Committee all help to explain the $325 price tag. 

YETI is the brand that pioneered the rotational molding or “rotomolding” technique which has become the gold standard in premium cooler construction today. This design process ensures perfectly uniform thickness, extra durability, and superior ice retention. The cooler walls are filled with polyurethane foam, which is superior to the lighter-weight styrofoam used in more basic coolers, and 2 inches of insulation make YETI coolers the best at retaining cold air.  

So, the big question: How did this cooler measure up when GearJunkie contributor Miya Tsudome put it through our ice retention test? Well, the Tundra 45 retained ice for the full 10 days we tested it, to no surprise. Some ice melt occurred, of course, but plenty of cubed ice remained, attesting to YETI’s gold standard of ice retention. 


  • Ice Retention
    8.0
  • Build Quality
    5.5
  • Portability
    8.0
  • Capacity and Organization
    7.0

  • Capacity: 52 quarts
  • Materials: Recycled post-consumer resin
  • Dimensions: 24.95" x 14.58" x 15.21”
  • Weight: 9.84 lbs

Pros

  • Inexpensive
  • Ultra lightweight
  • Made with post-consumer plastic

Cons

  • Lower quality insulation
  • No drain plug
  • Low durability

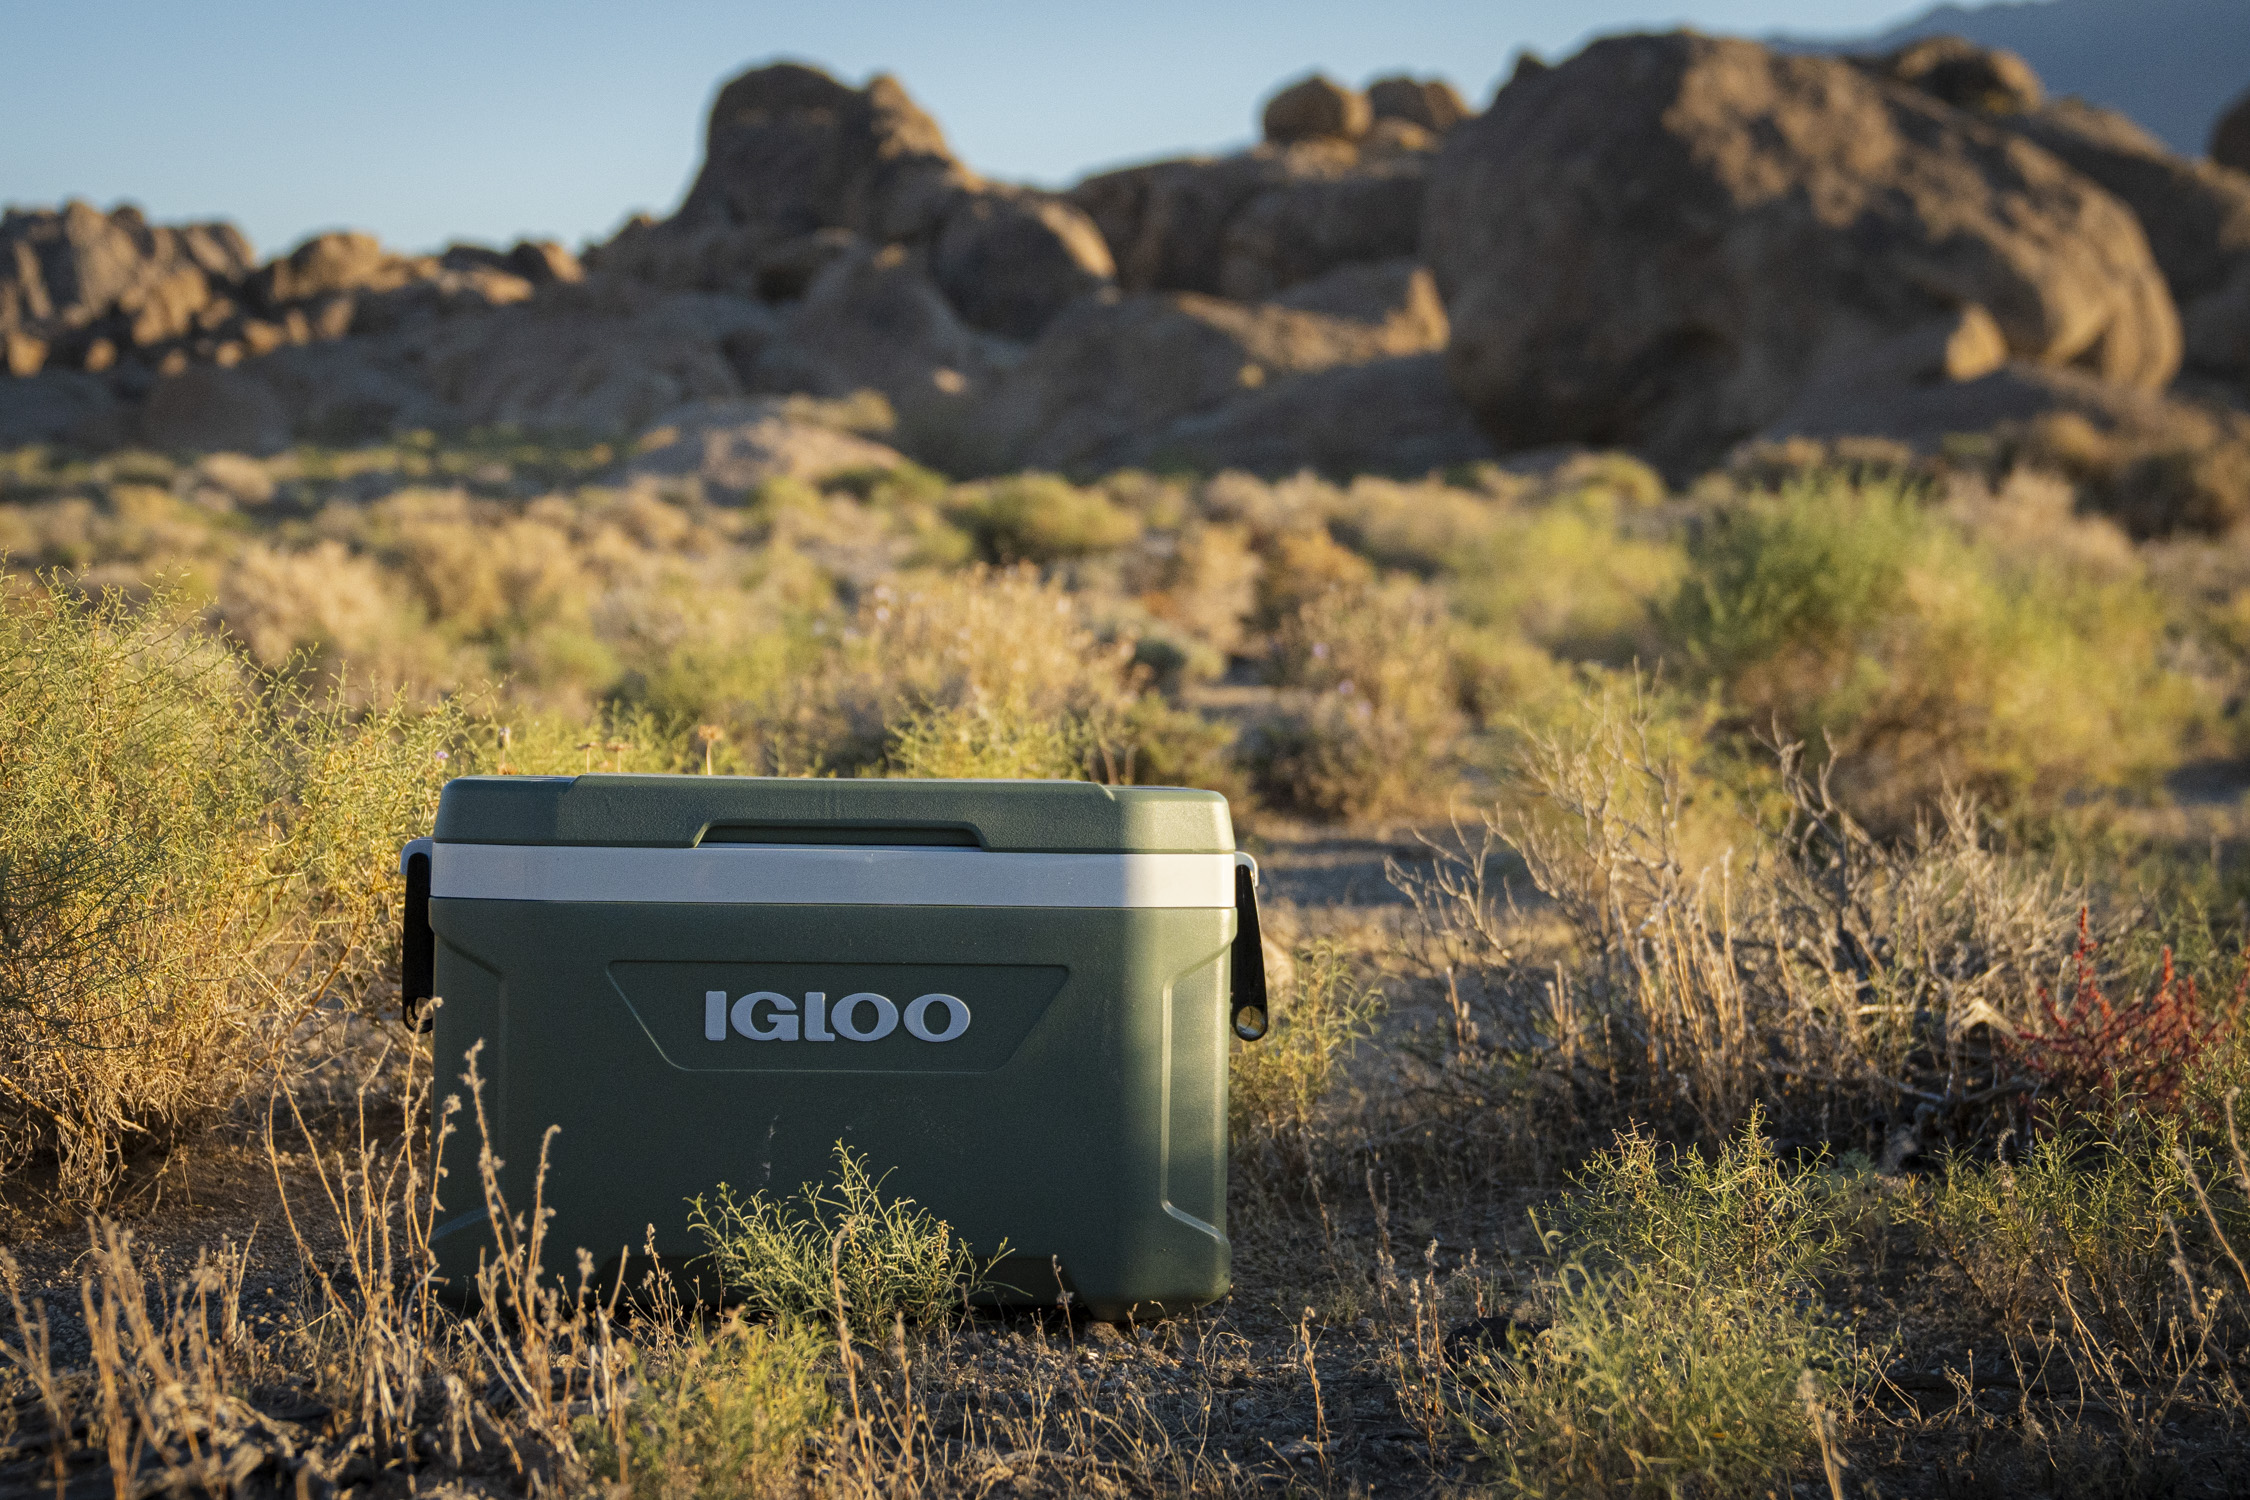
Some folks out there aren’t looking for the latest and greatest, most expensive cooler on the market. That’s why something like the Igloo ECOCOOL ($60) is the perfect budget pick for those who use a cooler for the occasional day trip, keeping groceries cold, or going on an overnight camping trip.

This cooler is not roto-molded like many of the others in our lineup and instead has a plastic frame injected with an insulated foam layer. The ECOCOOL is extremely lightweight at 9.84 pounds., which is over 75% lighter than many of the other coolers we tested. This also makes it a good choice for someone who might not want to throw out their back picking up a fully loaded 30-pound cooler. 

This cooler is not the most durable we tested, and while we used all the others as a step stool and a seat, we wouldn’t want to do the same with this one. The lid flexes considerably when weighted, making us wary of its strength.

The plastic handles are also flimsy and don’t inspire confidence when lifting the cooler fully loaded. This ample cooler also doesn’t come with a drain plug. This is typical of smaller coolers, but for a 52-quart cooler with inferior insulation properties, there is going to be a lot of water to drain. 

Despite these setbacks, one of the biggest selling points of this cooler in our tester’s opinion is that it is made with recycled post-consumer resin, and its foam layer is made in such a way that decreases CO2 and VOC emissions. Surprisingly, it retained some ice at the end of our 10-day ice retention test. This was especially surprising because at 48 hours in it had the highest interior temperature of all the coolers at 34.6 degrees F.

While this might not be the best-performing cooler, nor is it as high-quality as our top pick, the ECOCOOL remains a great choice for the occasional cooler user who wants something to keep items cold for a day or two, and doesn’t want to break the bank. 


  • Ice Retention
    8.0
  • Build Quality
    8.5
  • Portability
    9.5
  • Capacity and Organization
    8.0

  • Capacity: 45 quarts
  • Materials: Plastic/polyeurethane foam
  • Dimensions: 22.5” x 21” x 20.5”
  • Weight: 37 lbs.

Pros

  • Big, sturdy wheels for easy transport
  • Comes with removable dry bin
  • Compact but still has decent capacity

Cons

  • Expensive
  • Very heavy
  • Ice doesn’t last as long because there is less room for ice

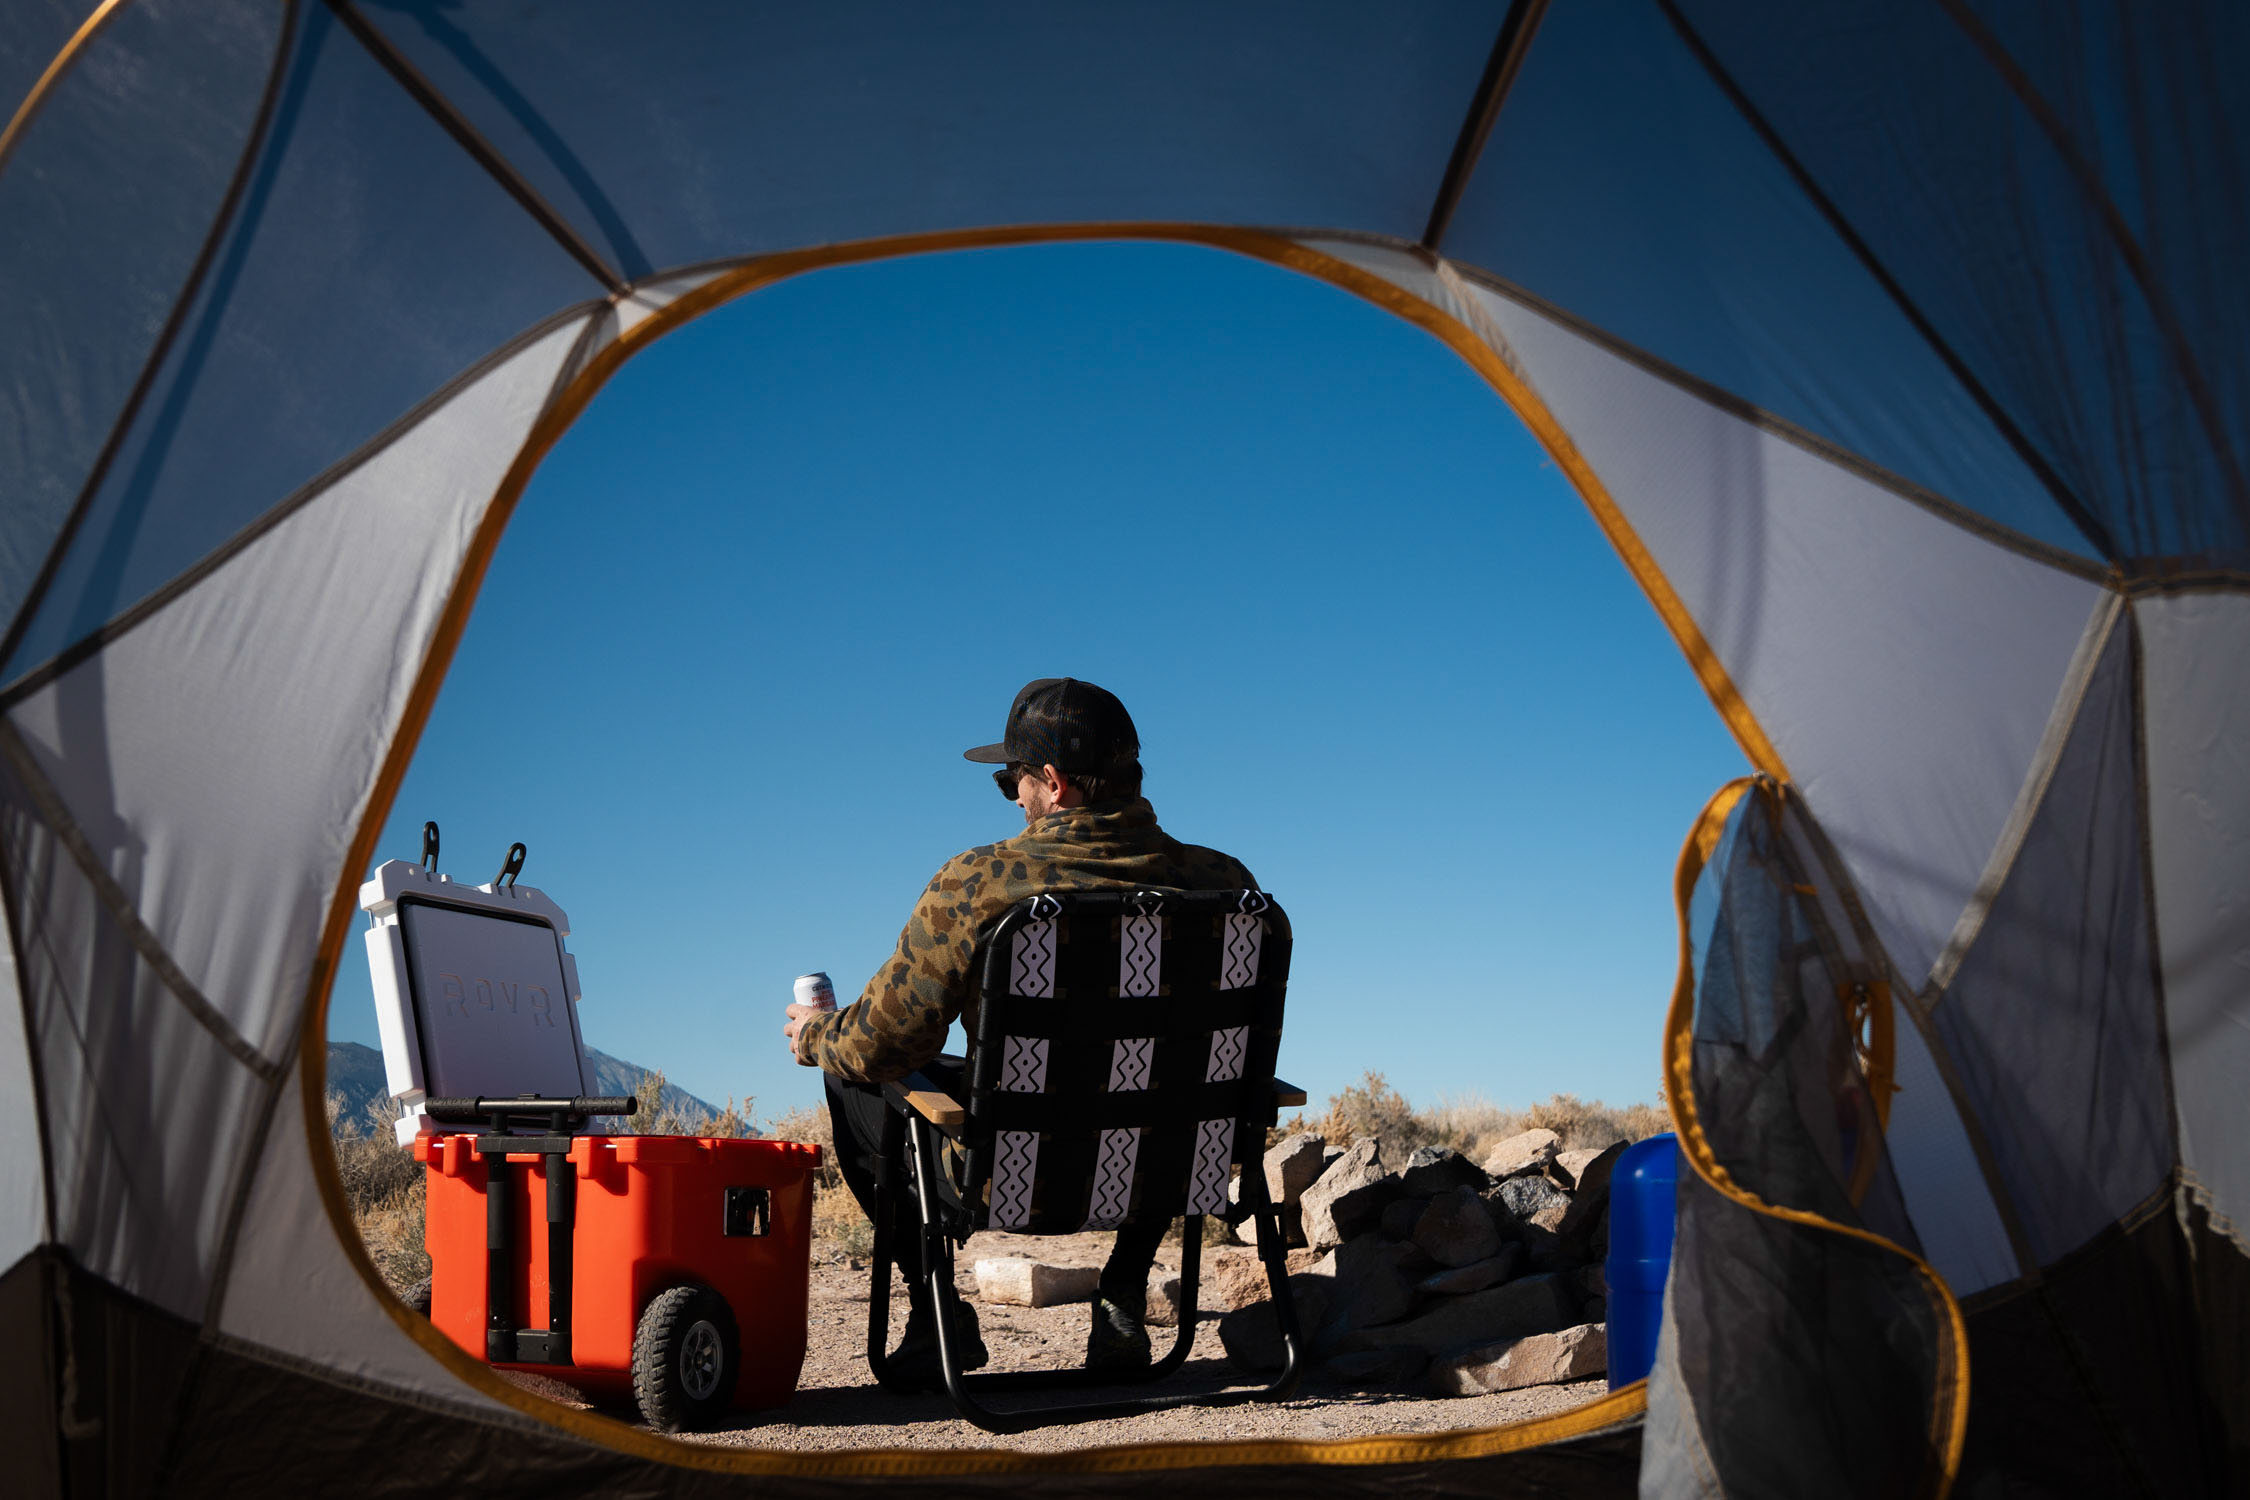
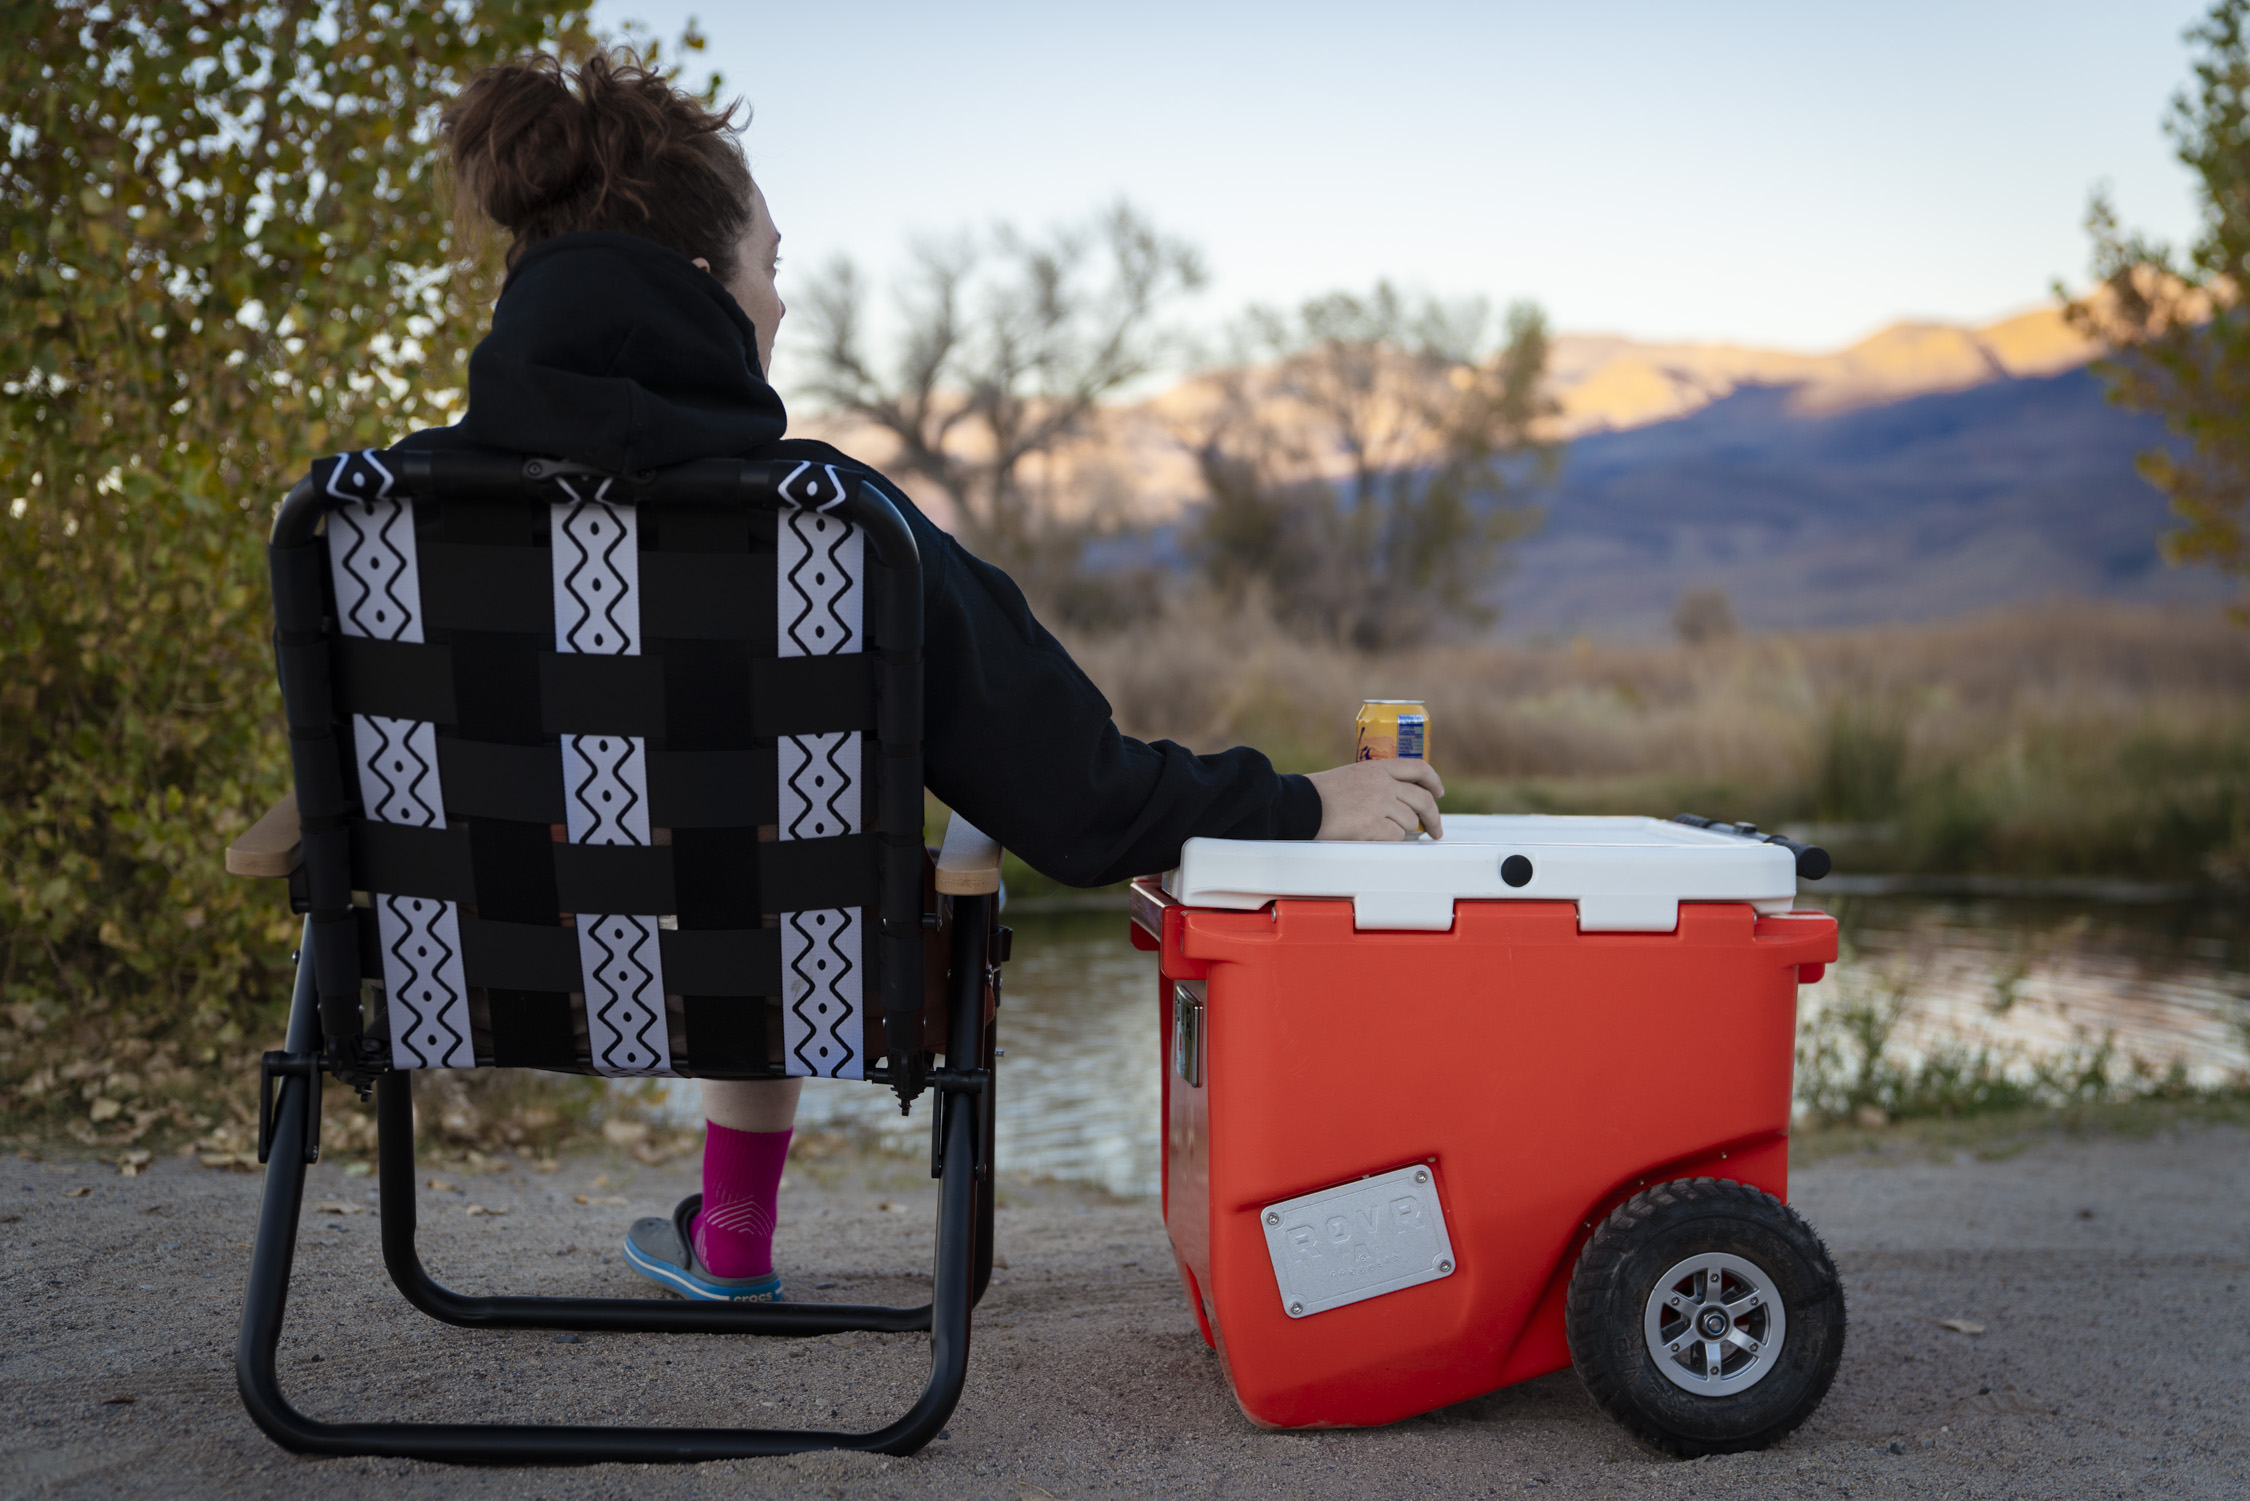
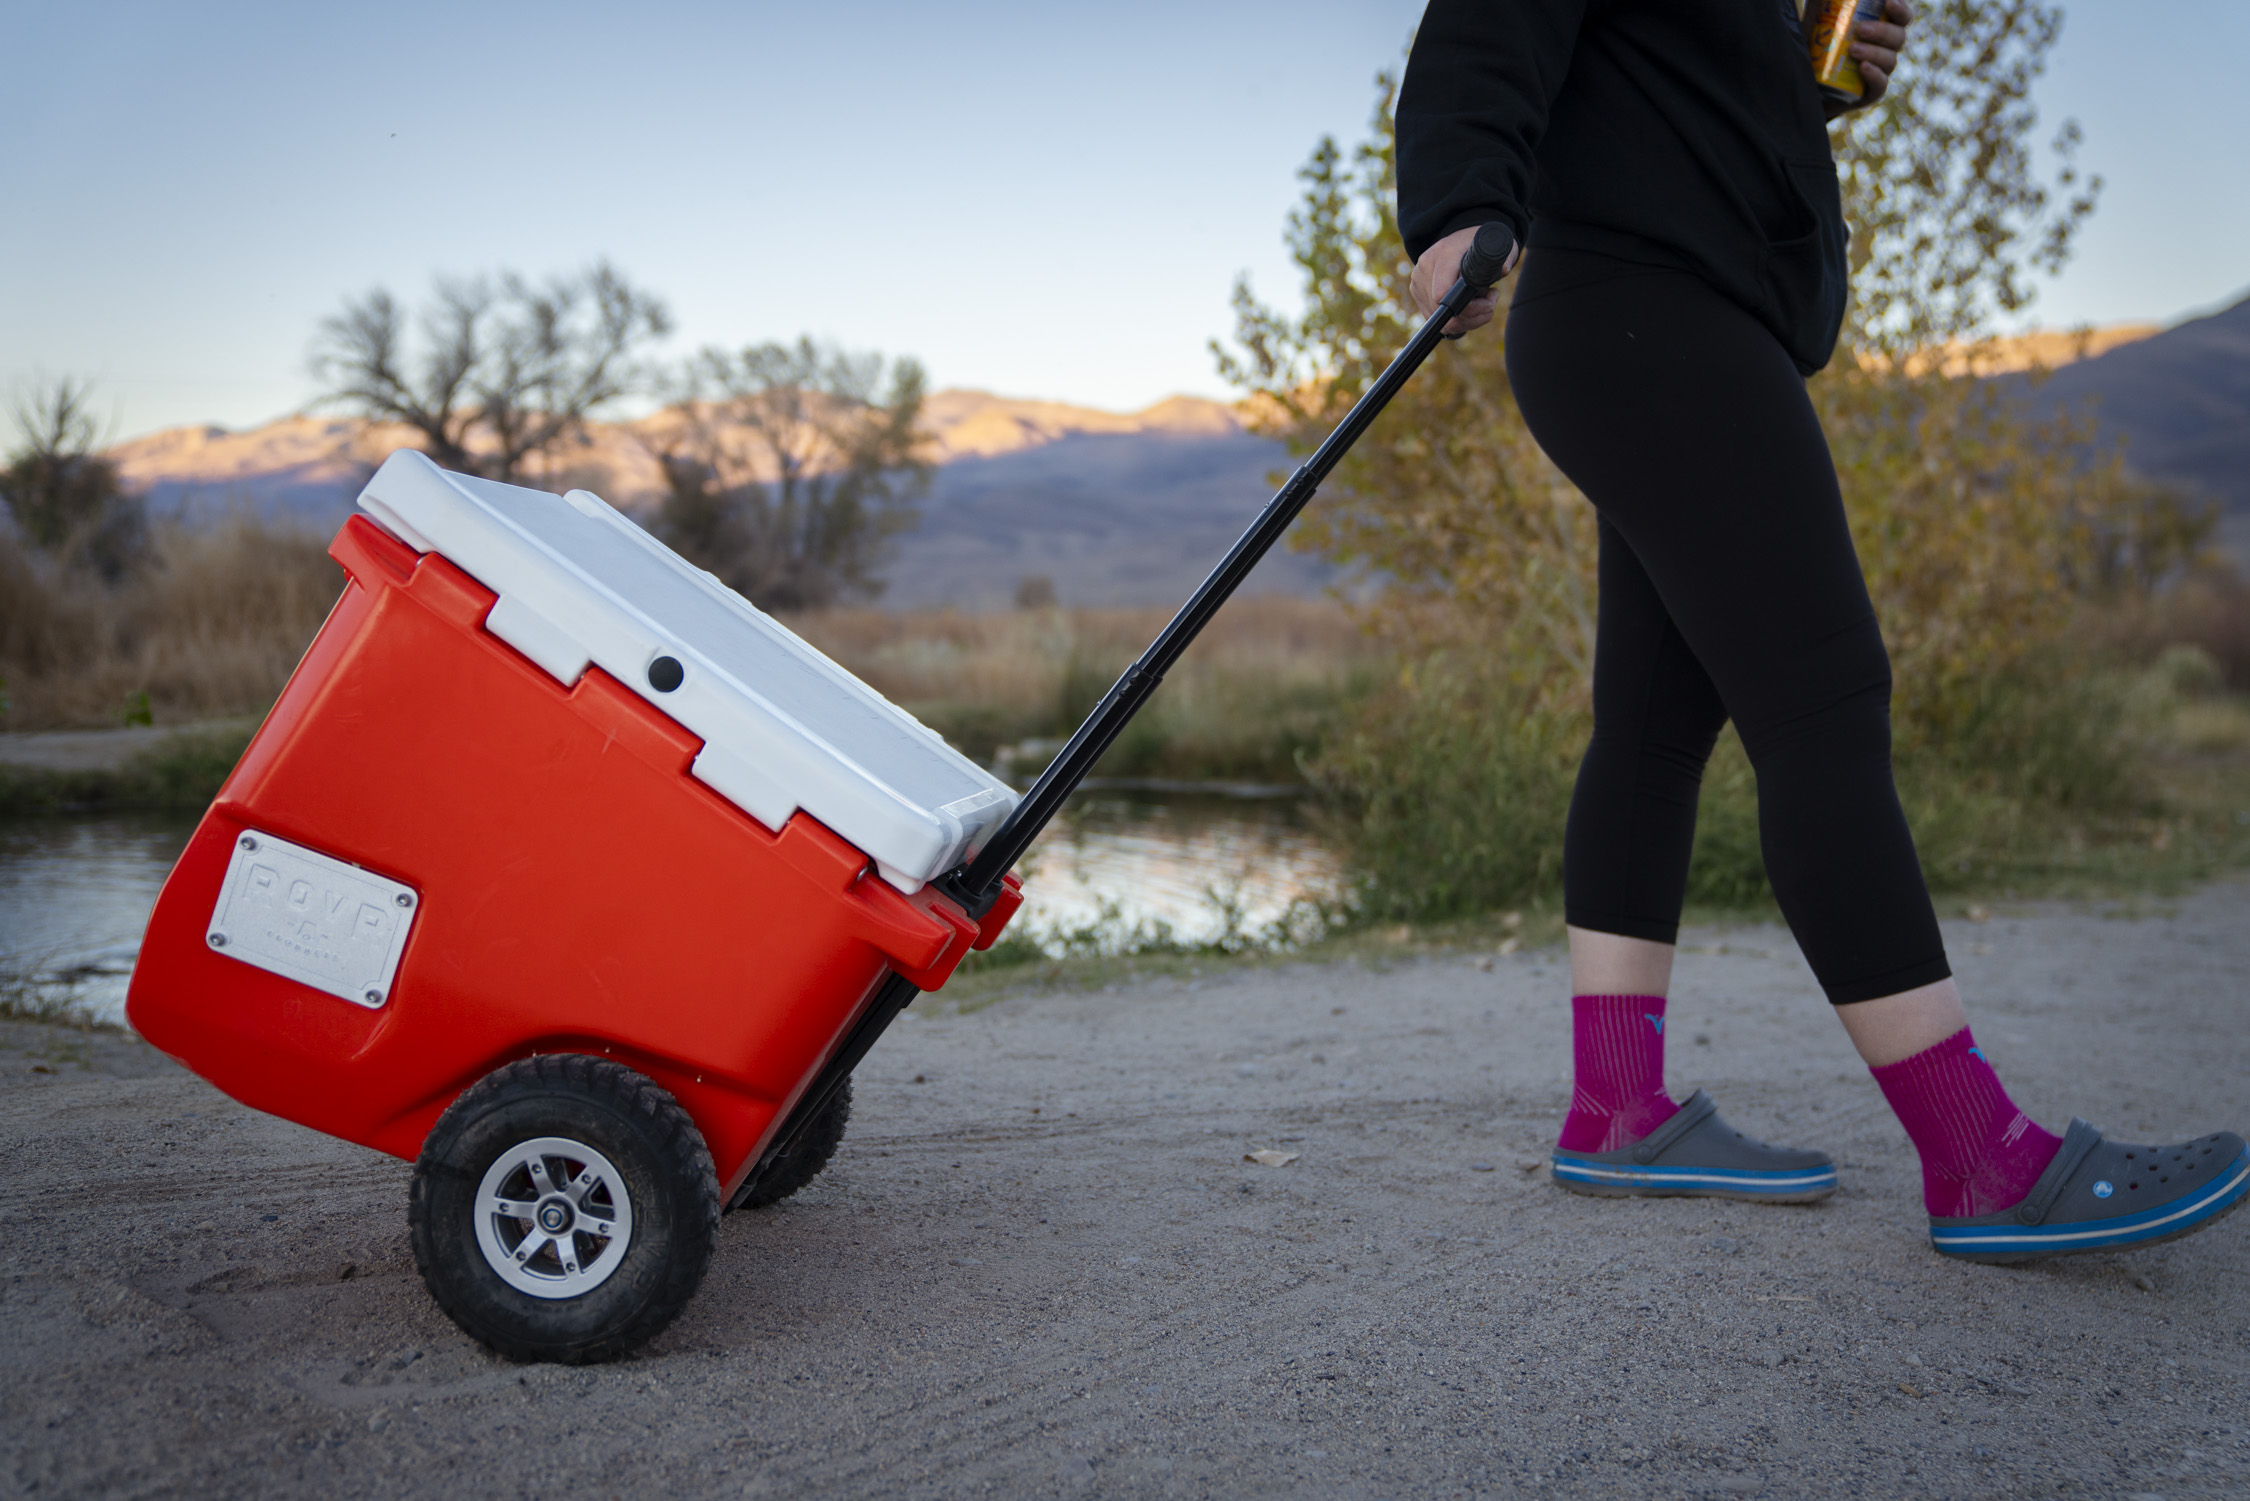
Read Review: Review: RovR 45 Cooler With All-Terrain Wheels

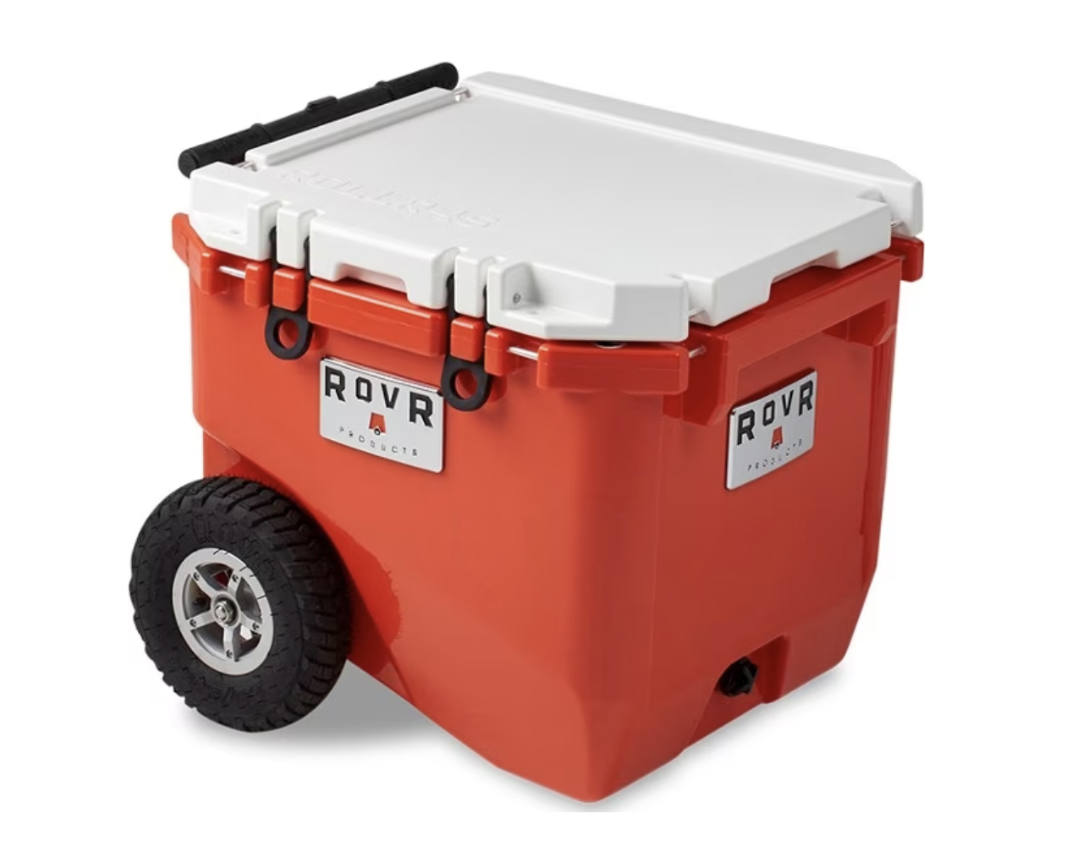
The RovR RollR 45 ($349) is nothing if not an impressive-looking specimen. With beefy, all-terrain wheels, a bear-resistant, roto-molded body, several different places to attach accessories, and a deep main compartment with a dry bin, this roller makes the most of being a medium-sized cooler. 

The first thing that struck GearJunkie tester Alex Kirk is the almost comically large wheels. While they may look overbuilt for a medium-sized cooler, they performed impressively over rocky and sandy terrain on a desert camping trip in the Alabama Hills of California, and make transport overall a much easier affair. Getting from point A to point B lugging a heavy cooler can be the least enjoyable part of a camping trip. But the RovR couldn’t make it easier to roll your perishables to wherever you need them to be. 

Another noticeable feature of this cooler is that it ditches the typical rectangular shape typical of most models in favor of a taller, cubic one. This makes it convenient to pack into the trunk of a car because it takes up less space and is also easier to handle as one person. 

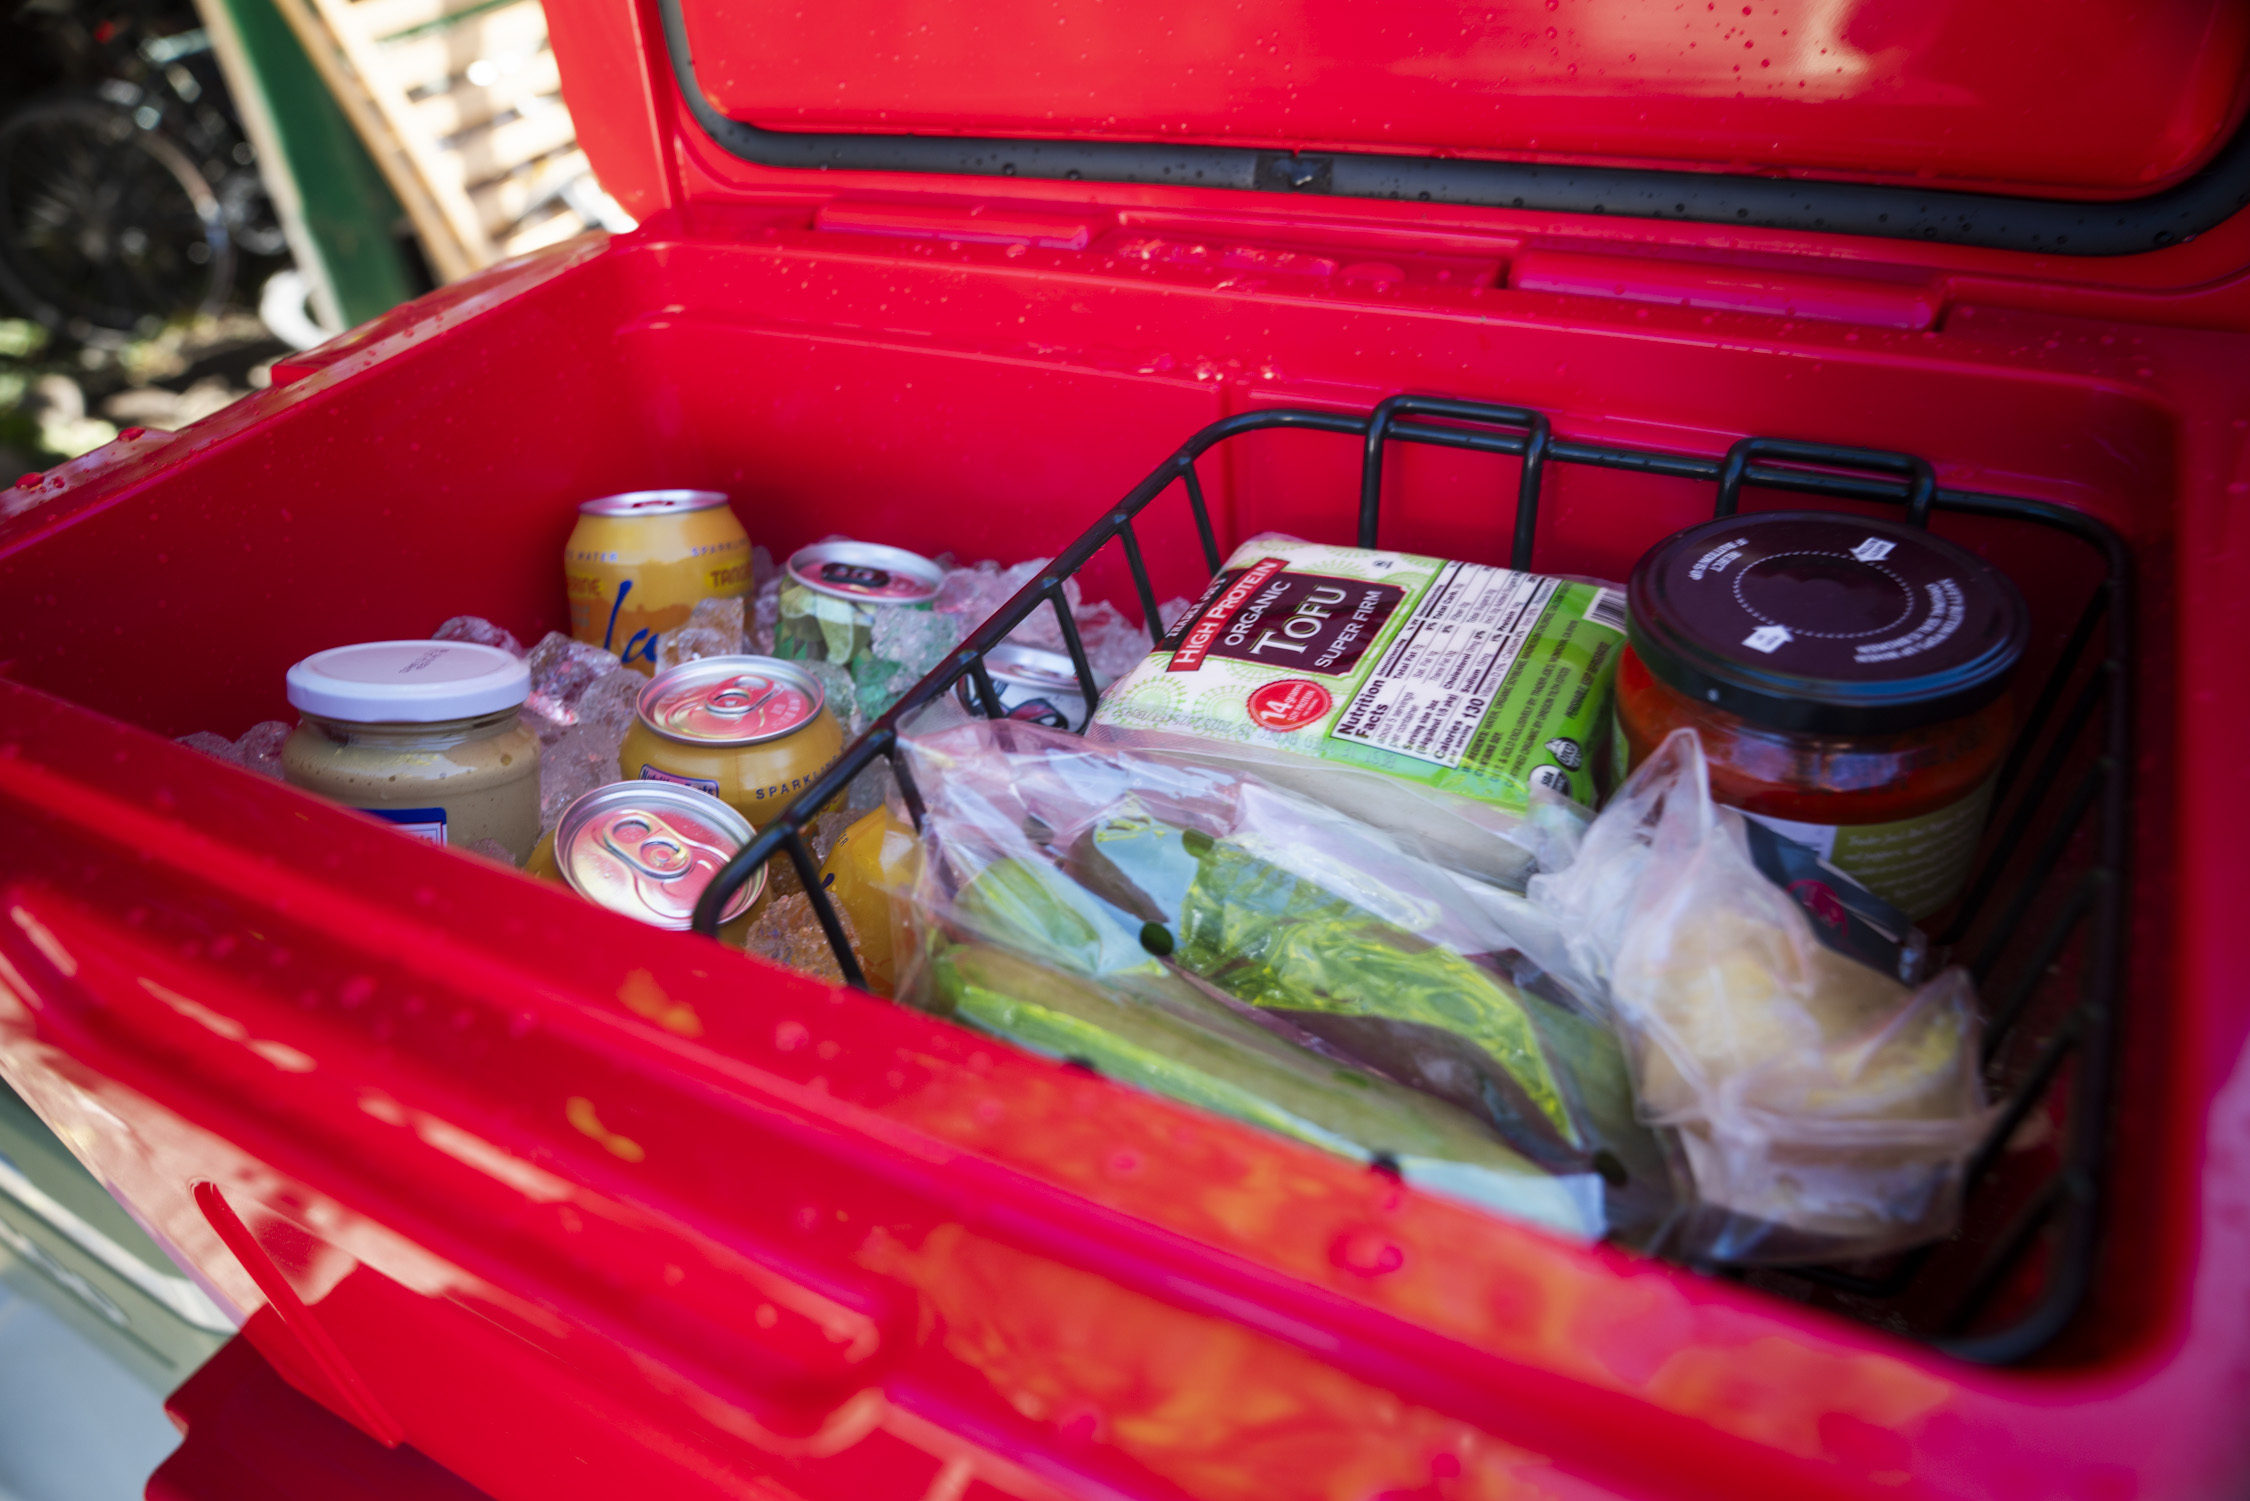
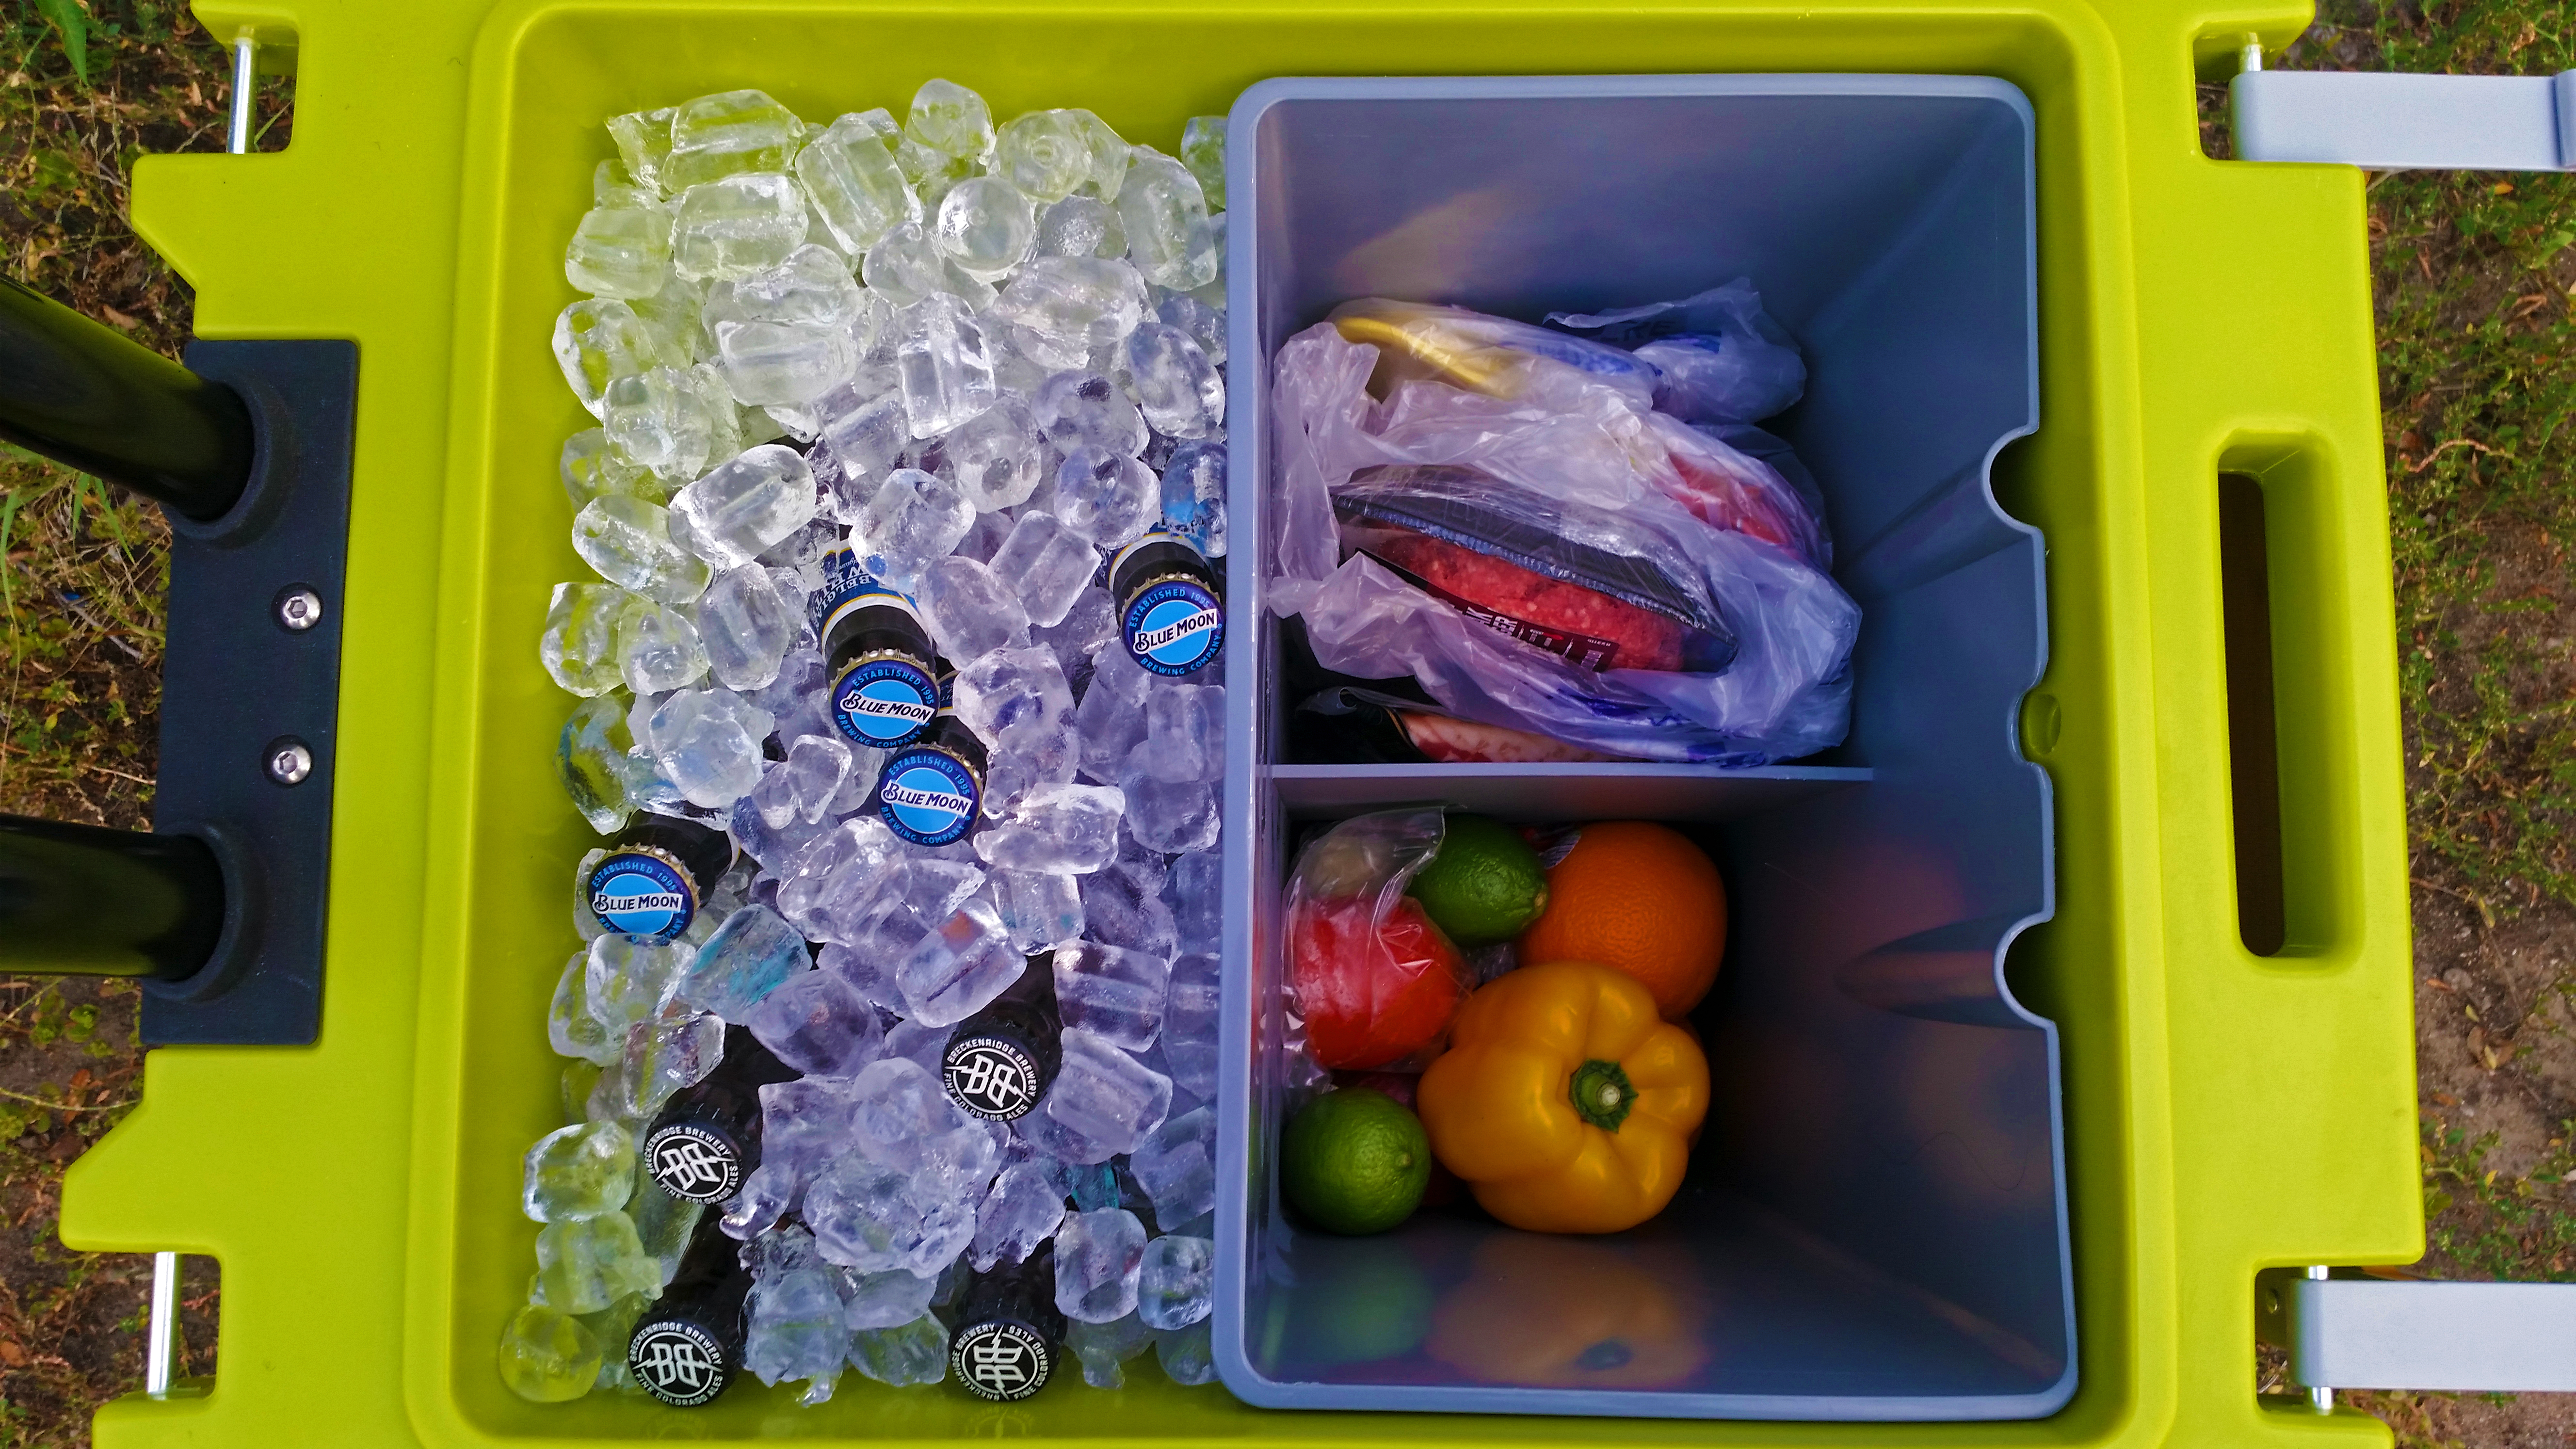
The interior is deep and spacious with a 42L capacity and has a removable dry bin that makes organizing food and drinks much easier. With the bin inserted, however, there is only enough room to fit 16 lbs of ice. The ice in this cooler lasted 6 days compared to YETI’s 10. 

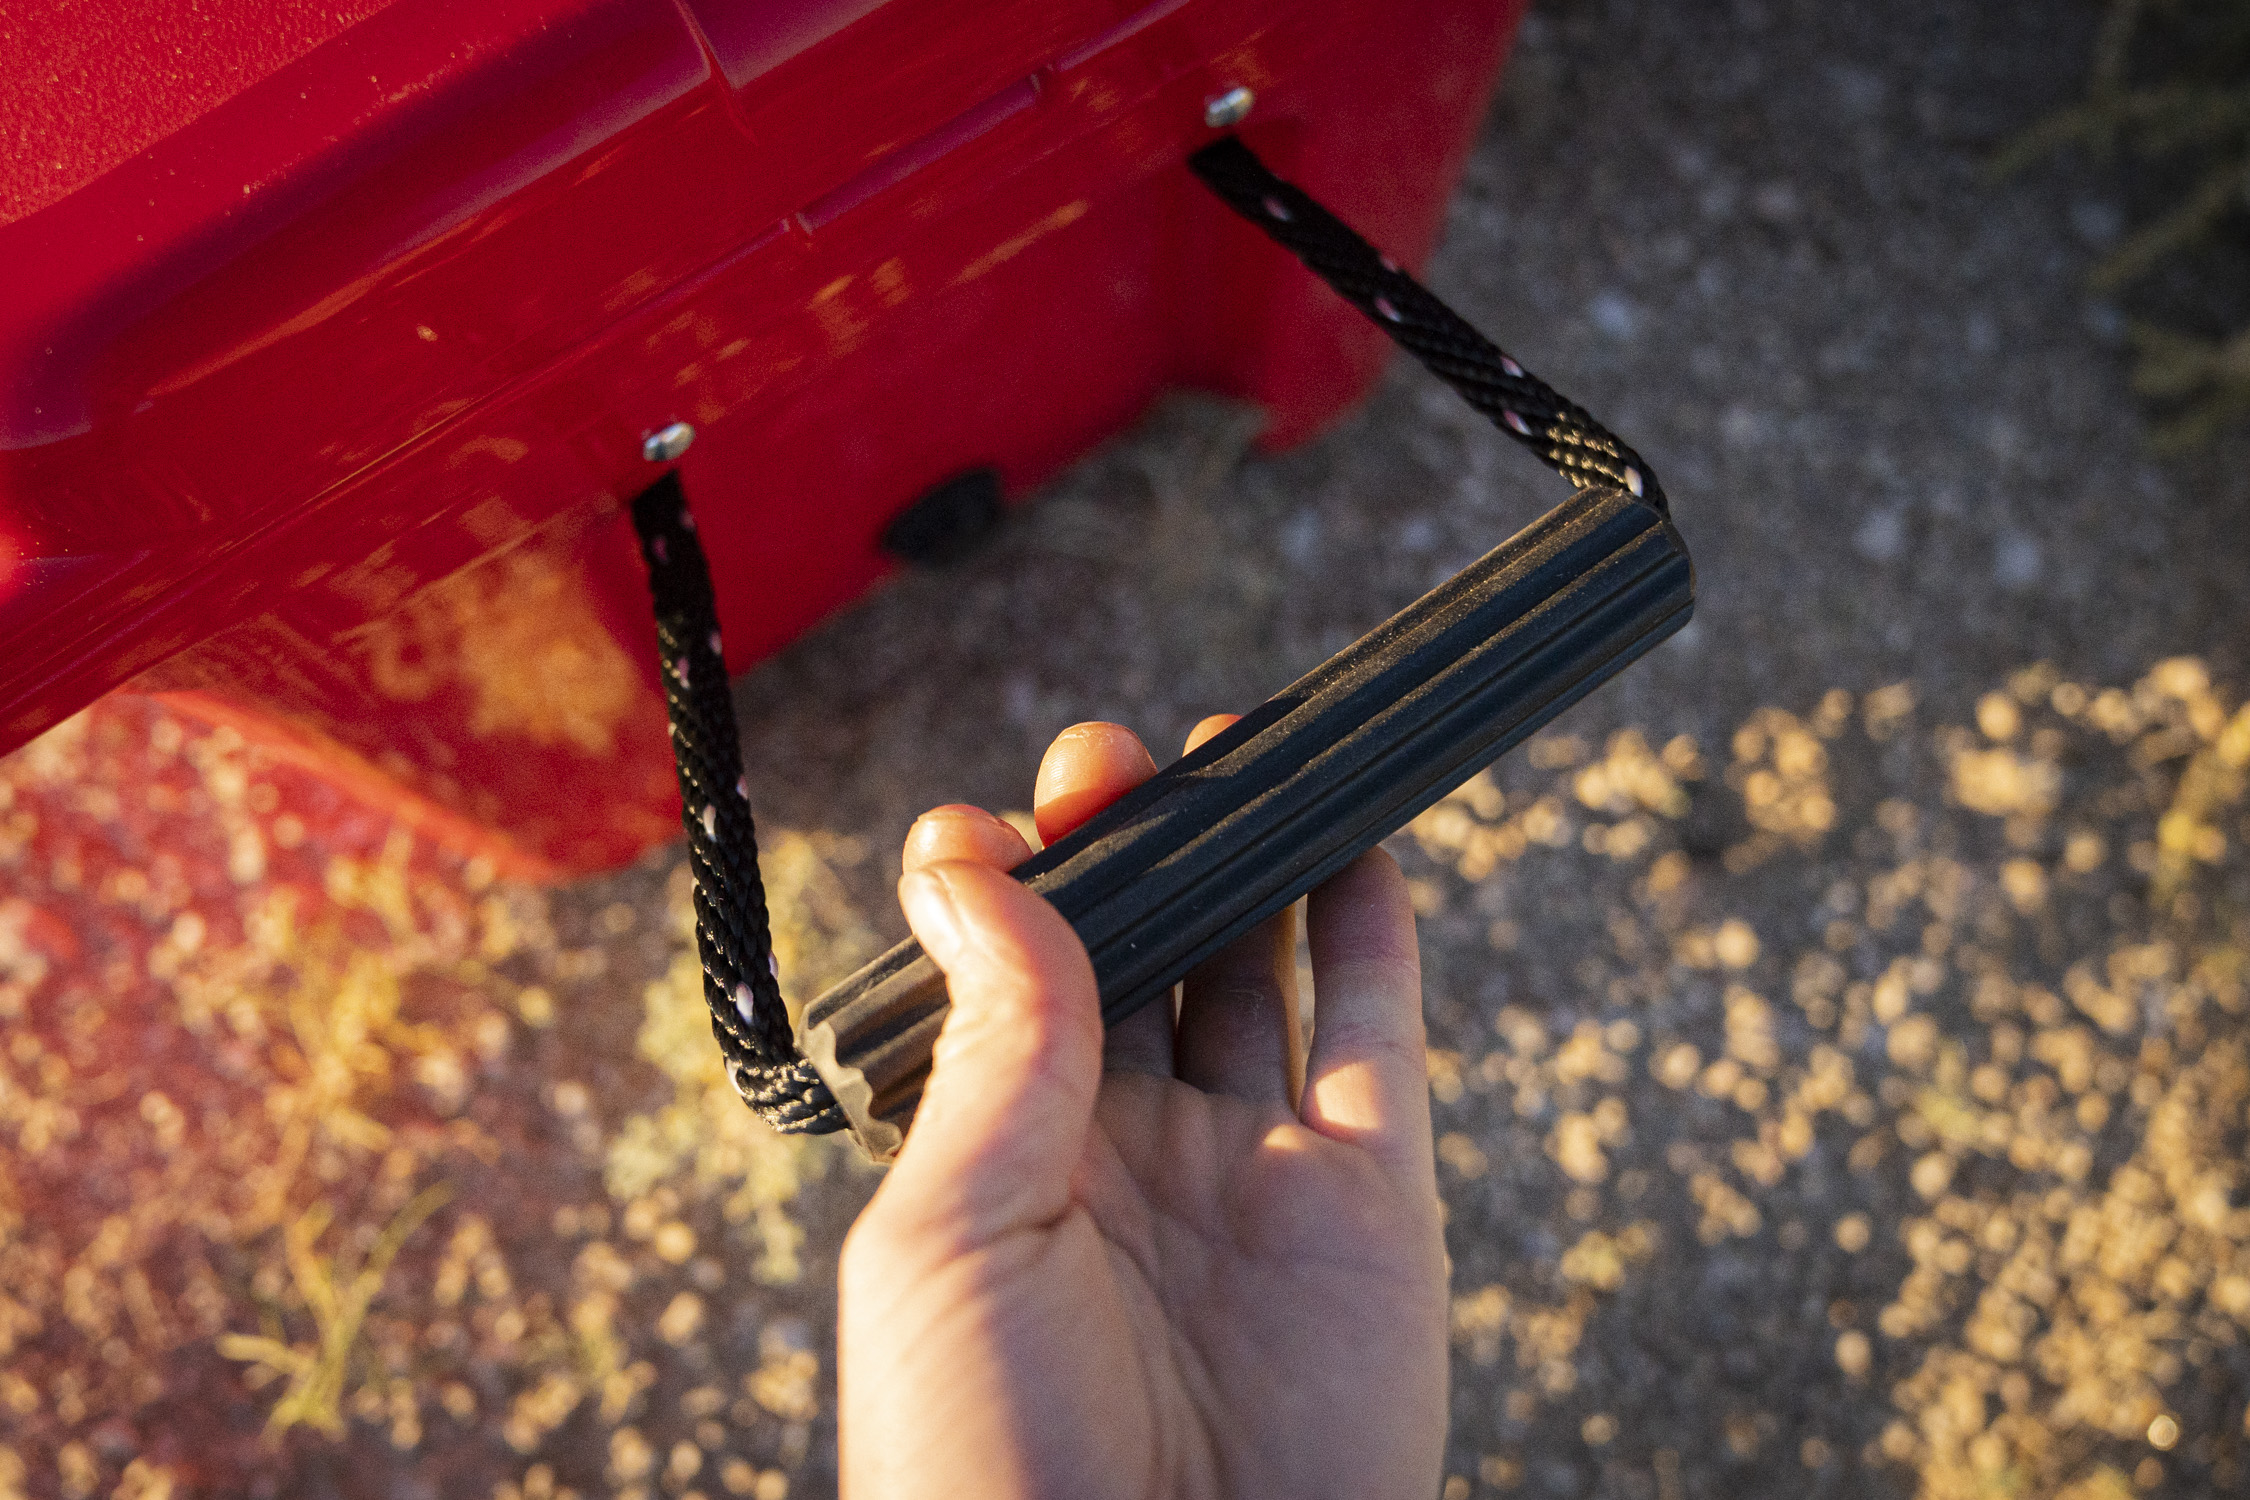
The telescoping handle is also noticeably lacking in quality compared to the rest of the cooler. It isn’t very smooth to deploy, and feels flimsy, especially considering the $400 price tag. While the Bullseye latches work just fine, our testers preferred wider rubberized pull tabs that you can grab and pull with your whole hand, rather than just using one or two fingers.

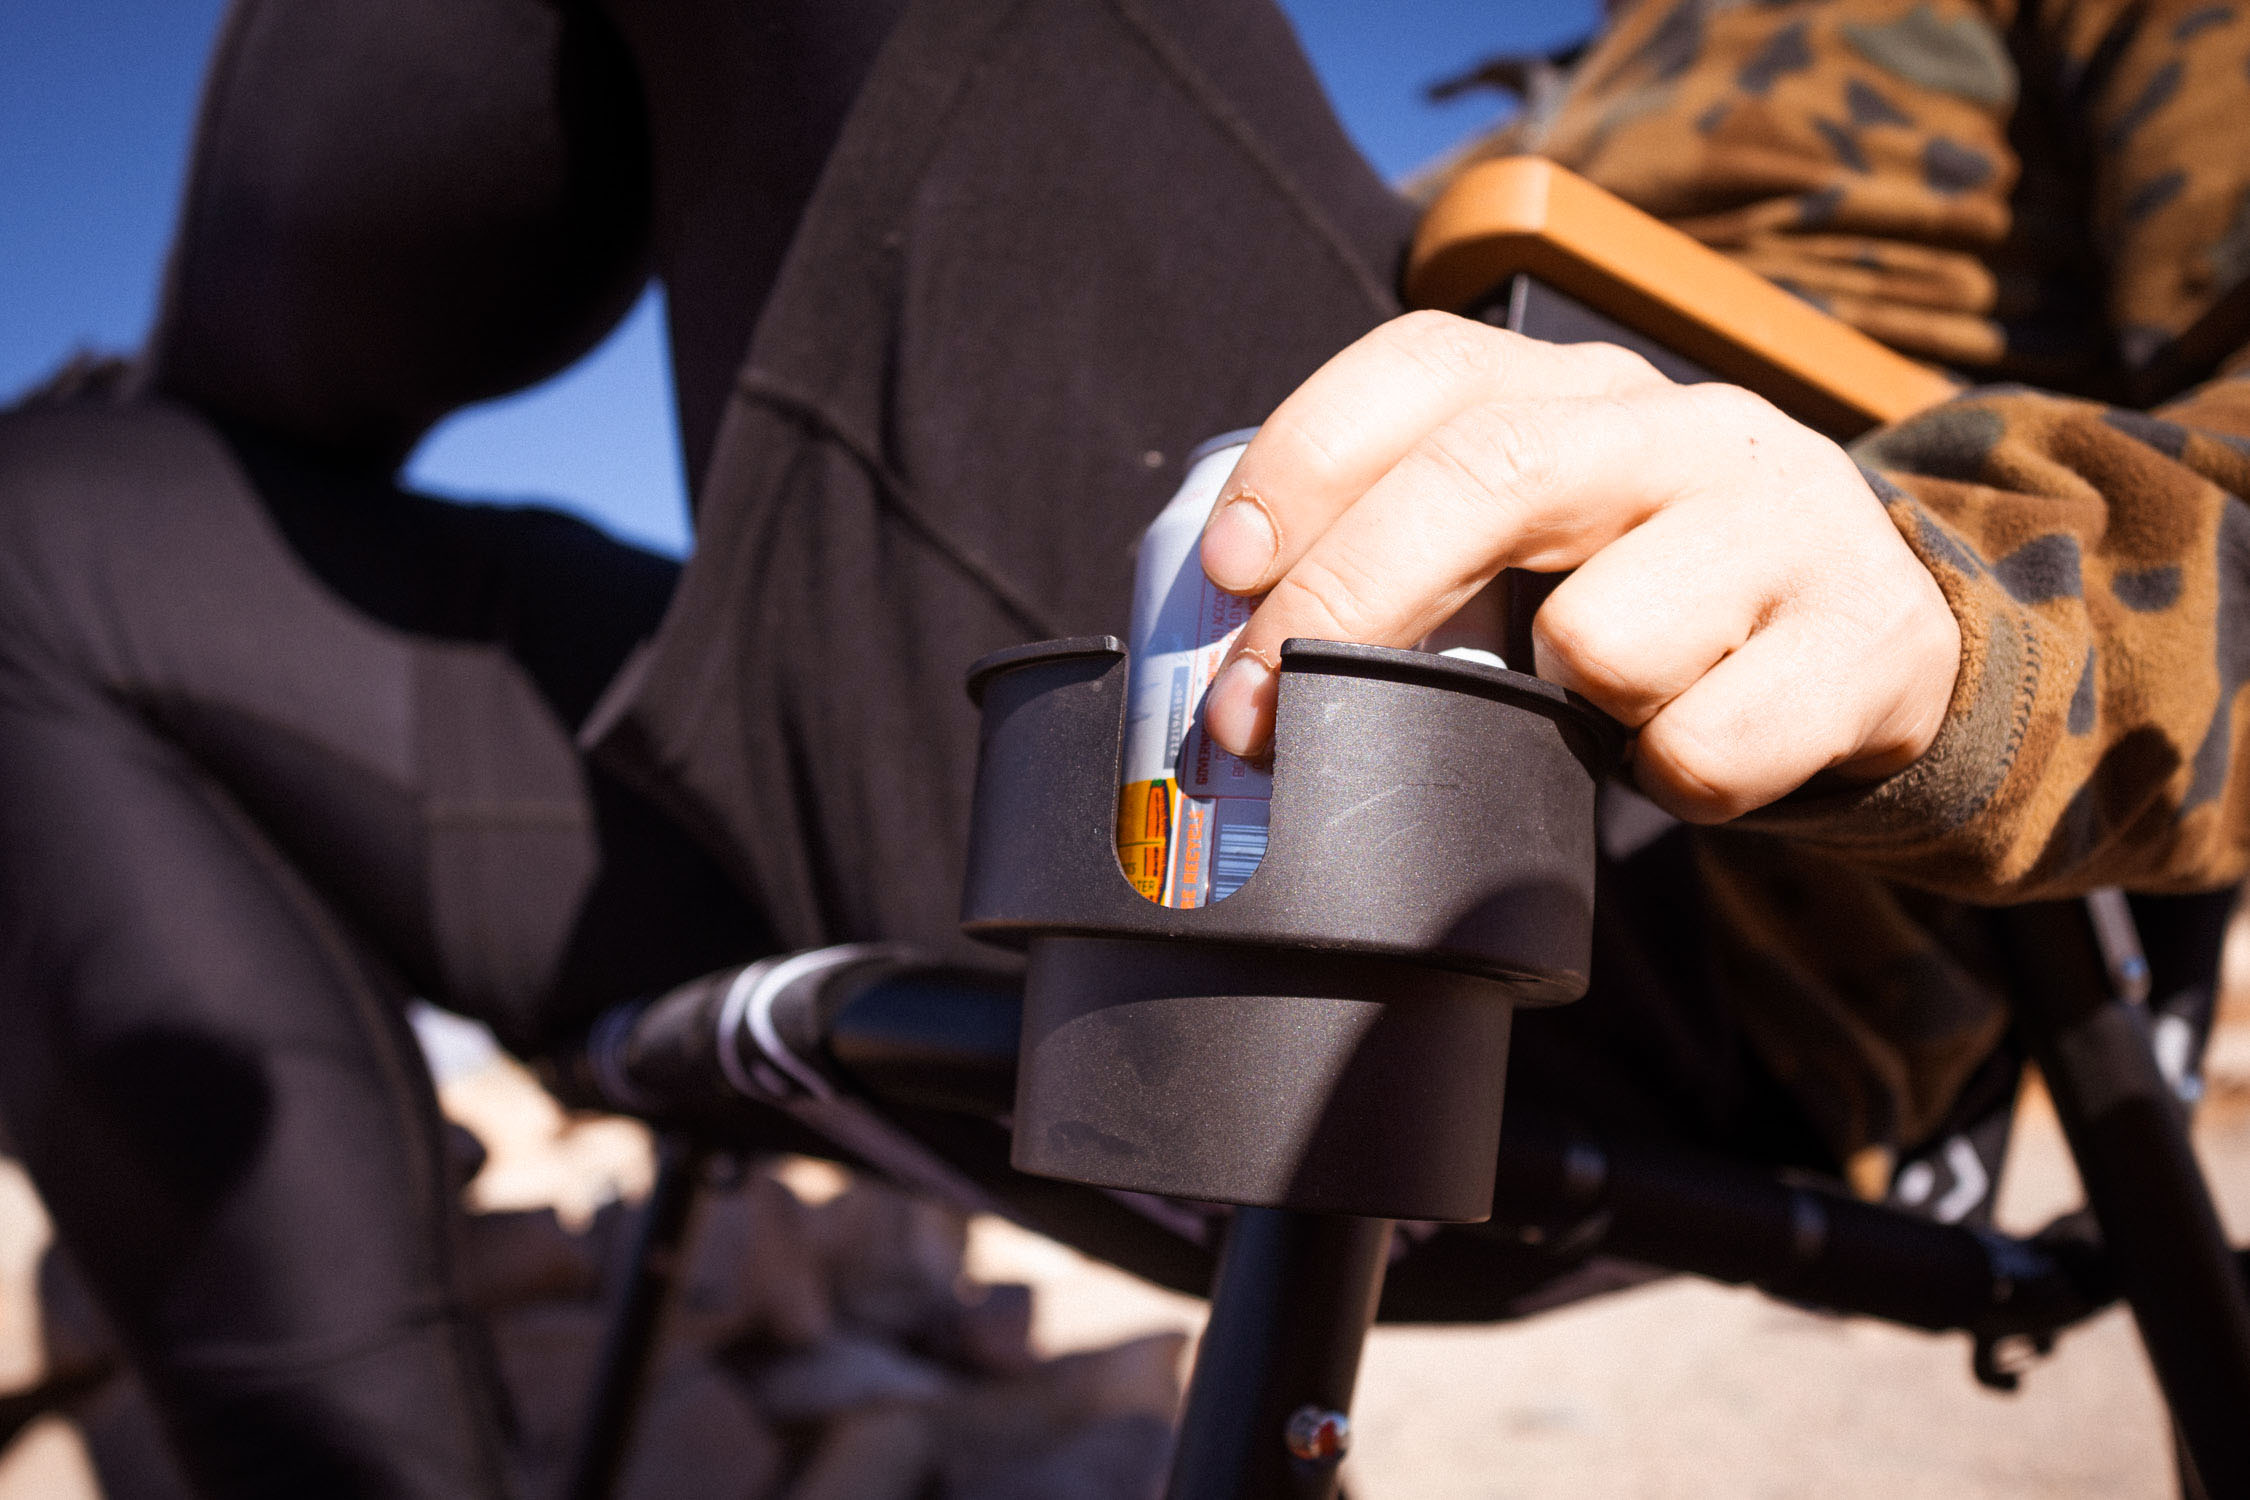
It is also one of the heaviest coolers we tested, at 37 pounds. Despite these setbacks, the outer rim of the cooler has attachment points for accessories such as a prep board, cup holders, and an umbrella rod holder, making this cooler the most customizable out of any other in our lineup. If you are looking for a cooler that can really go places, the RovR is our top pick for its ease of transport. 


  • Ice Retention
    5.0
  • Build Quality
    5.0
  • Portability
    9.5
  • Capacity and Organization
    8.0

  • Capacity: 16 quarts
  • Materials: Recycled paper and AKD (alkyl kitene dimer)
  • Dimensions: 15" x 11" x 11.38"
  • Weight: 1.6 lbs.

Pros

  • Compostable and biodegradable materials
  • Ultra-lightweight
  • Far more durable than expected
  • Delightfully affordable

Cons

  • Decent ice retention but still limited compared to pricier, hard-sided options
  • Holds fewer cans than reported

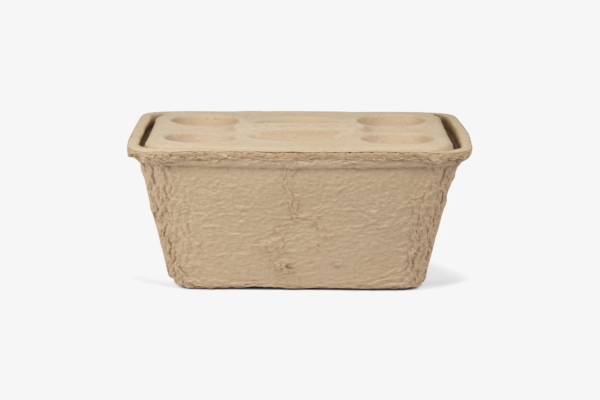
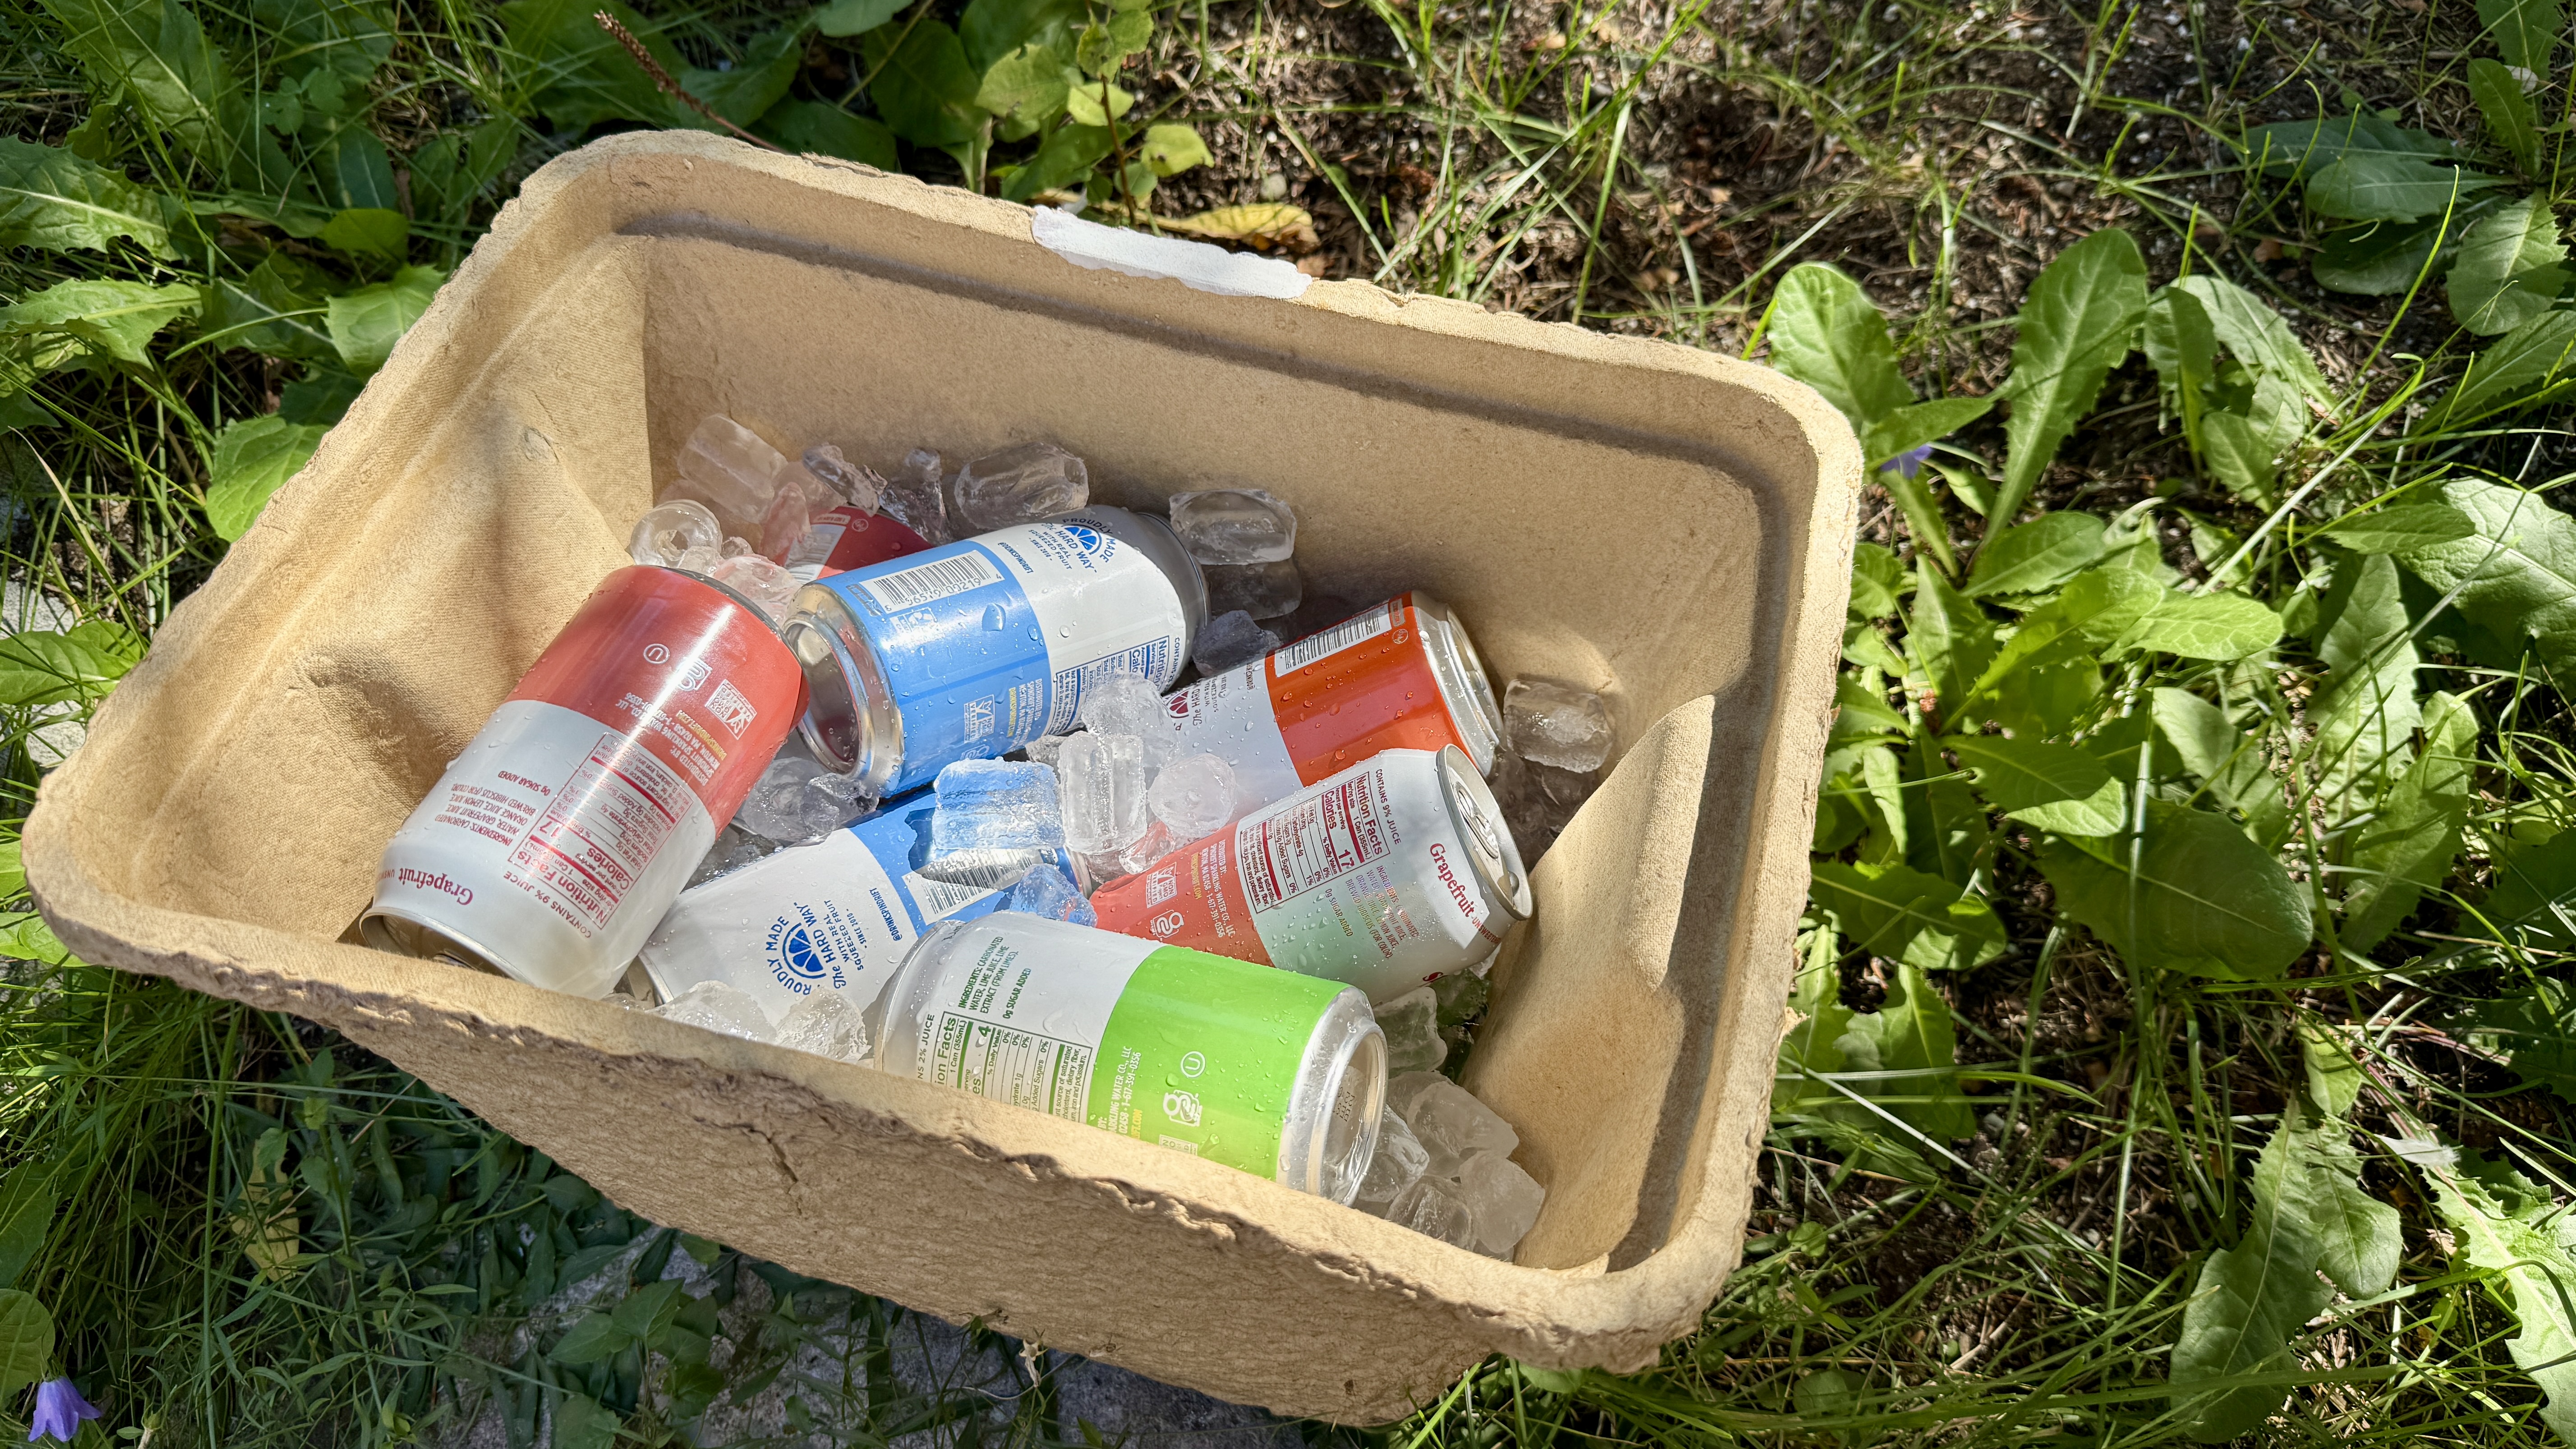
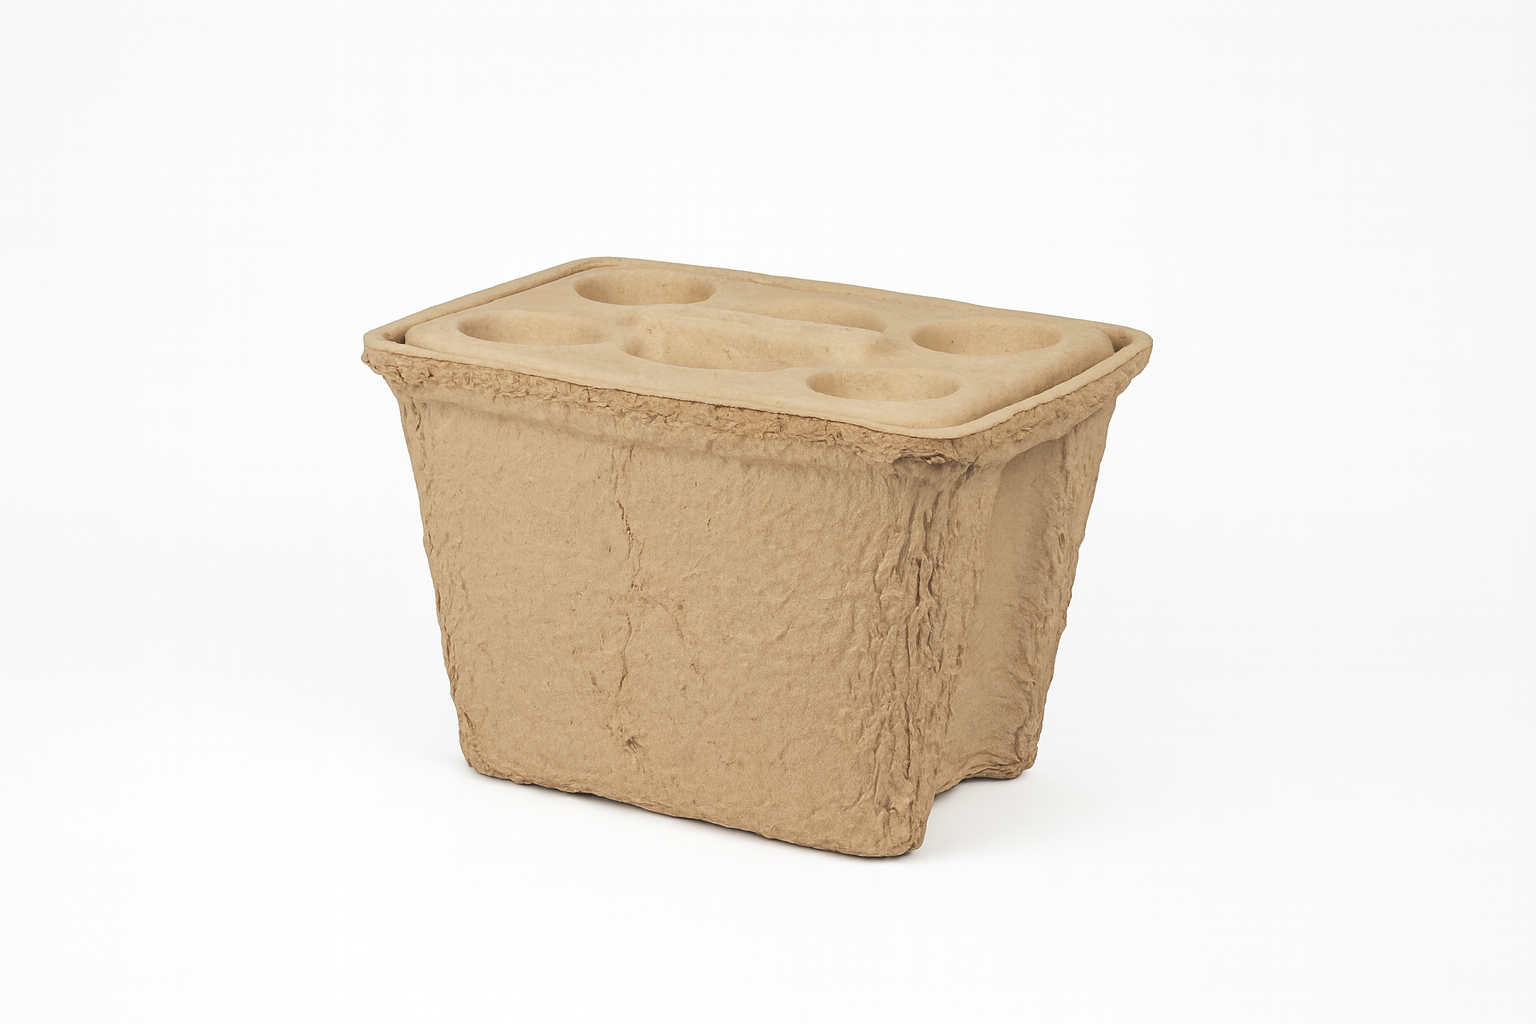
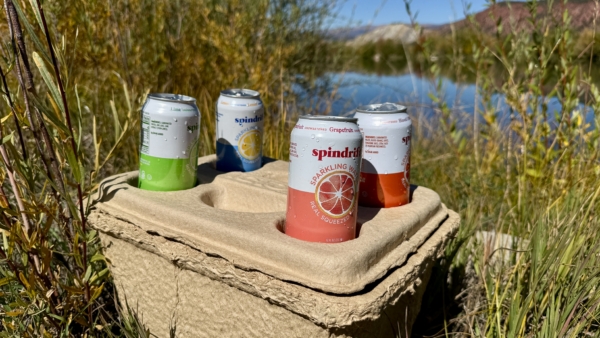
The Igloo Recool Cooler ($10) stands out in today’s gear market for what it isn’t: another hunk of styrofoam destined to live forever in a landfill. Instead, this 16-quart cooler is made from recycled paper pulp and a plant-based binder, making it fully compostable and biodegradable after use. While that might suggest “single use,” in testing, the Recool proved surprisingly sturdy.

To test whether it would collapse faster than a house of cards, GearJunkie contributor Heather Balogh Rochfort loaded a 50-pound dumbbell into the Igloo Recool and carried it around her house. Surprisingly, the hardest part was the carrying itself; it didn’t crack, bend, or even warp. Honestly, she could have gone heavier, which is not what she expected from a recyclable paper cooler.

At just 1.6 pounds, the Recool is ultralight and incredibly easy to carry when it’s not loaded with gym equipment (or cans, too). It’s also delightfully affordable, making it a great grab-and-go option for casual daytime adventures or last-minute picnics. The lid features four built-in cup holders and doesn’t squeak, crumble, or leak water all over your car.

Of course, there are always some trade-offs with a $10 cooler. Ice retention is moderate — you can easily get a half day — but it can’t compete with pricier hard-sided coolers. And while Igloo advertises space for 20 cans plus ice, we found the real-world capacity to be closer to a dozen cans. Still, for single-day outings and laid-back affairs where you don’t want to lug around a behemoth, the Igloo Recool Cooler is an easy win.


  • Ice Retention
    8.0
  • Build Quality
    8.0
  • Portability
    8.0
  • Capacity and Organization
    8.0

  • Capacity: 52 quarts
  • Materials: Injection-molded plastic
  • Dimensions: 27.01” x 17.28” x 16.54”
  • Weight: 31 lbs

Pros

  • Lightweight
  • Affordable
  • Two drain plugs
  • Good ice retention

Cons

  • Still less ice retention than the rotomolded Yeti or Orca
  • Injection-molded therefore less durable than rotomolded models

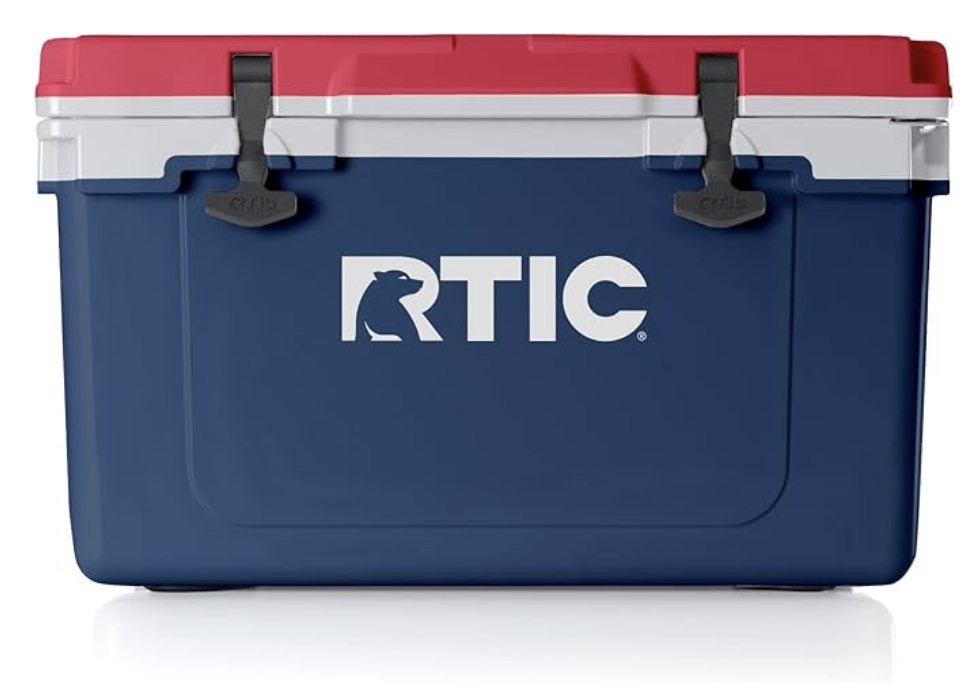
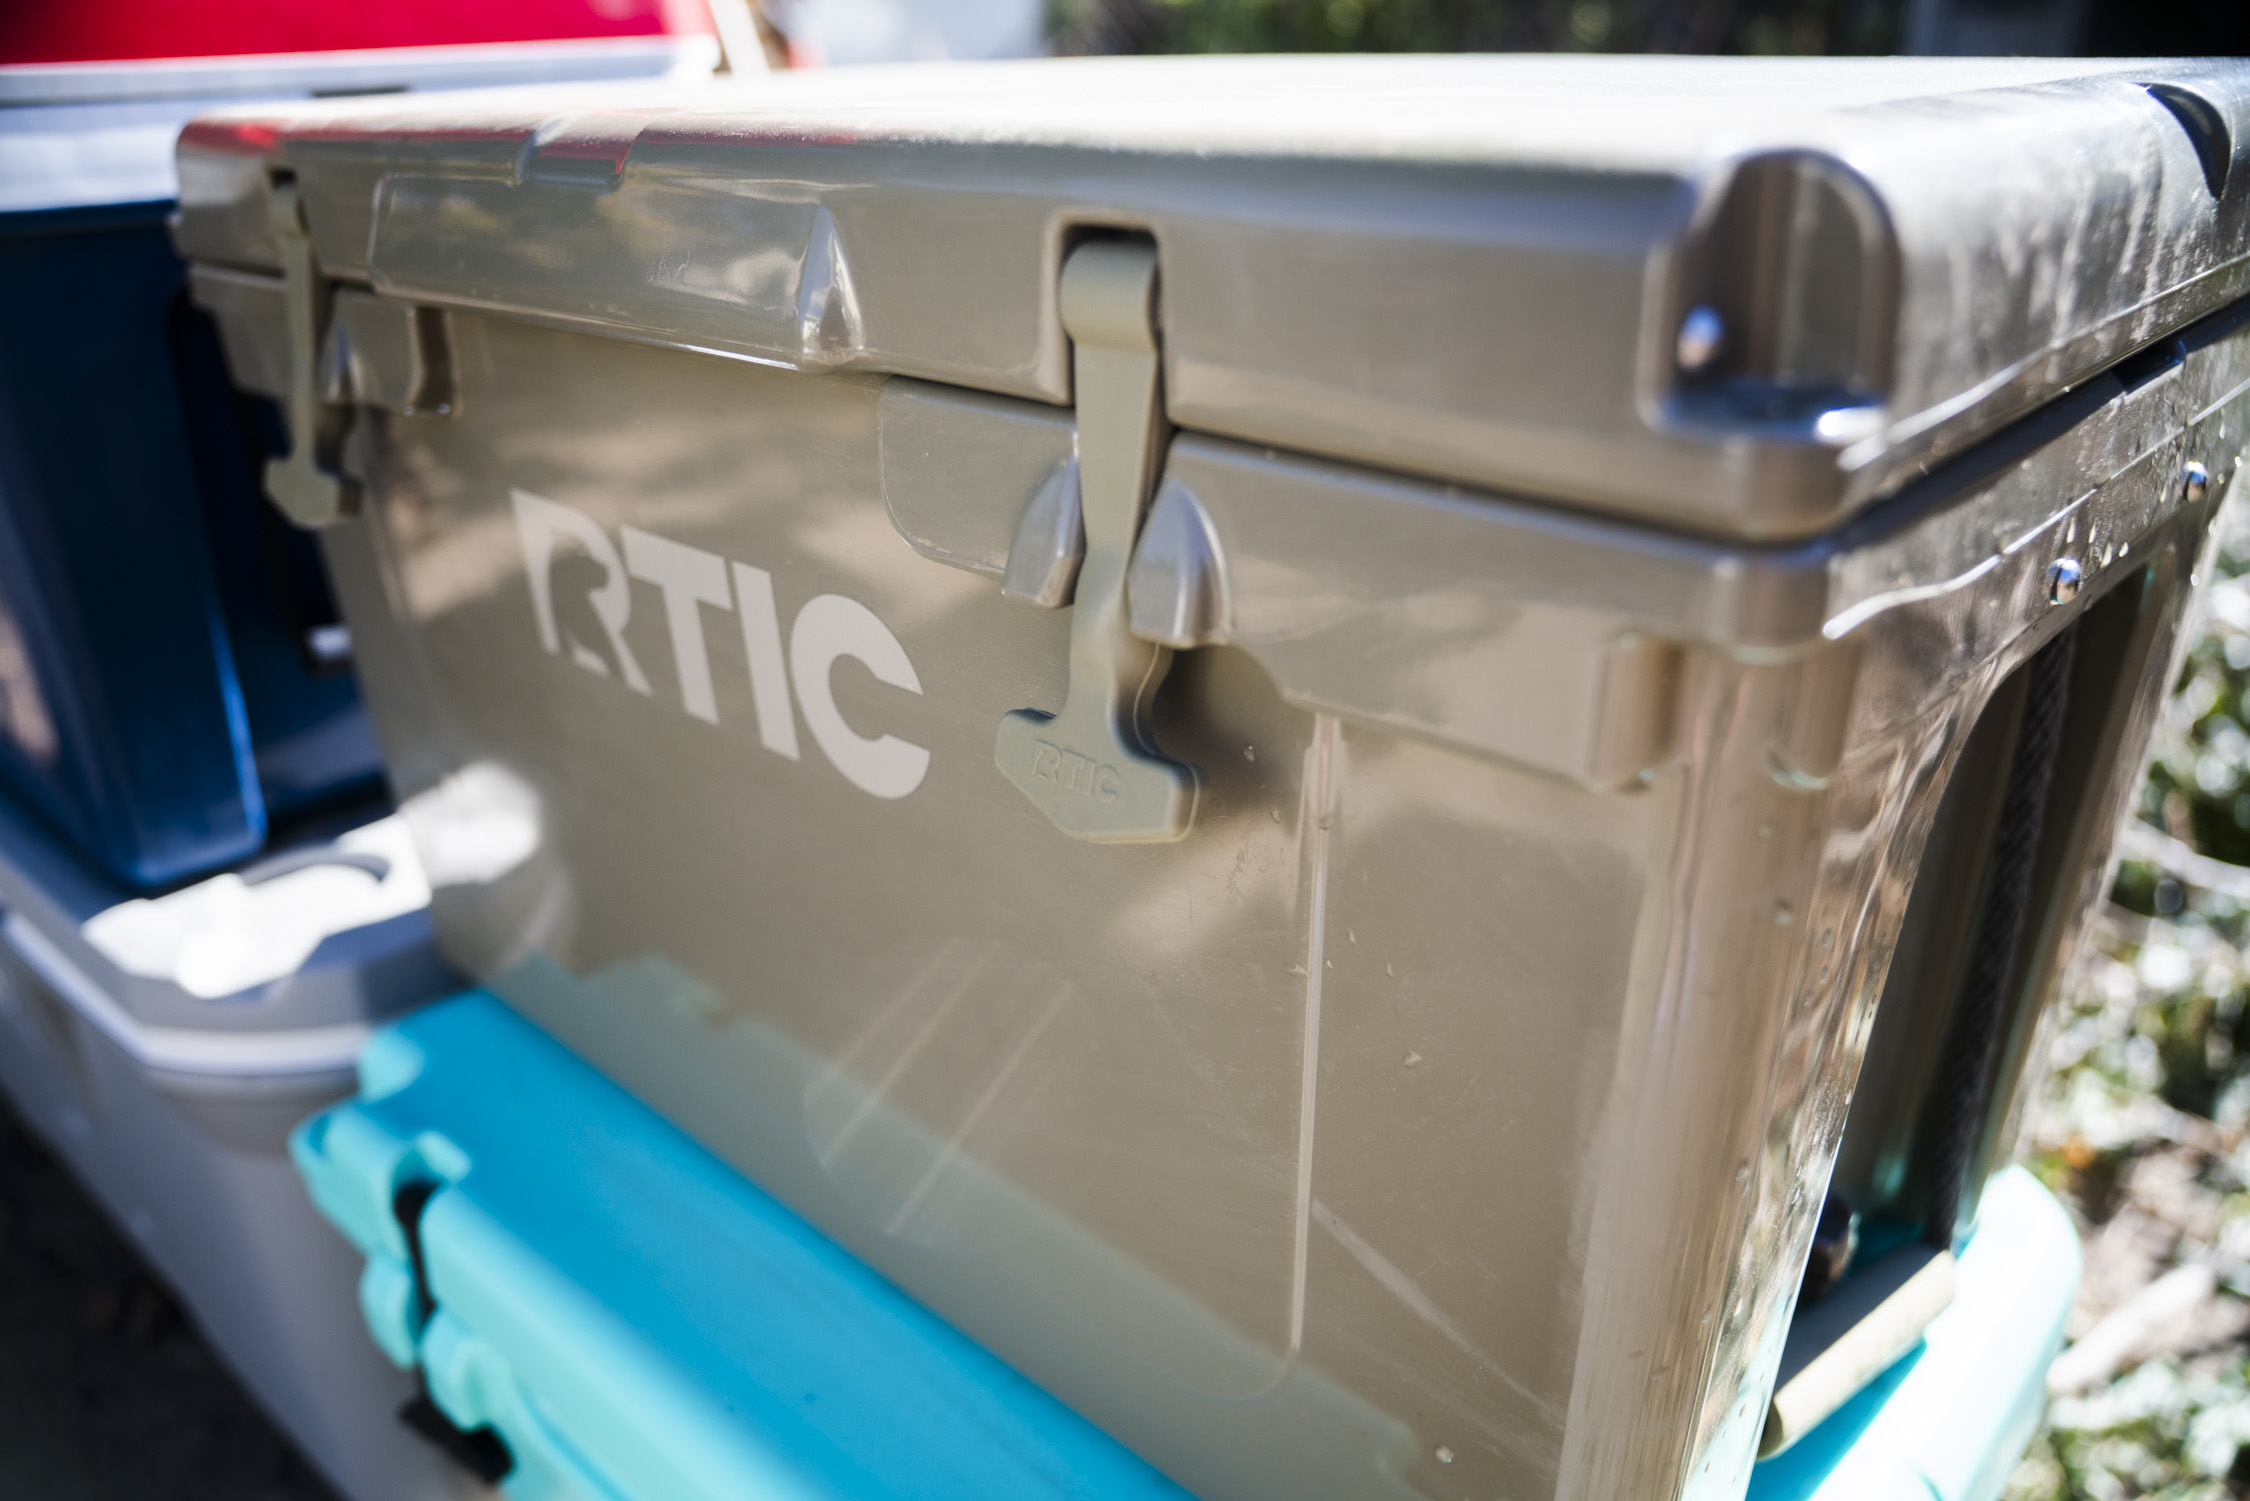
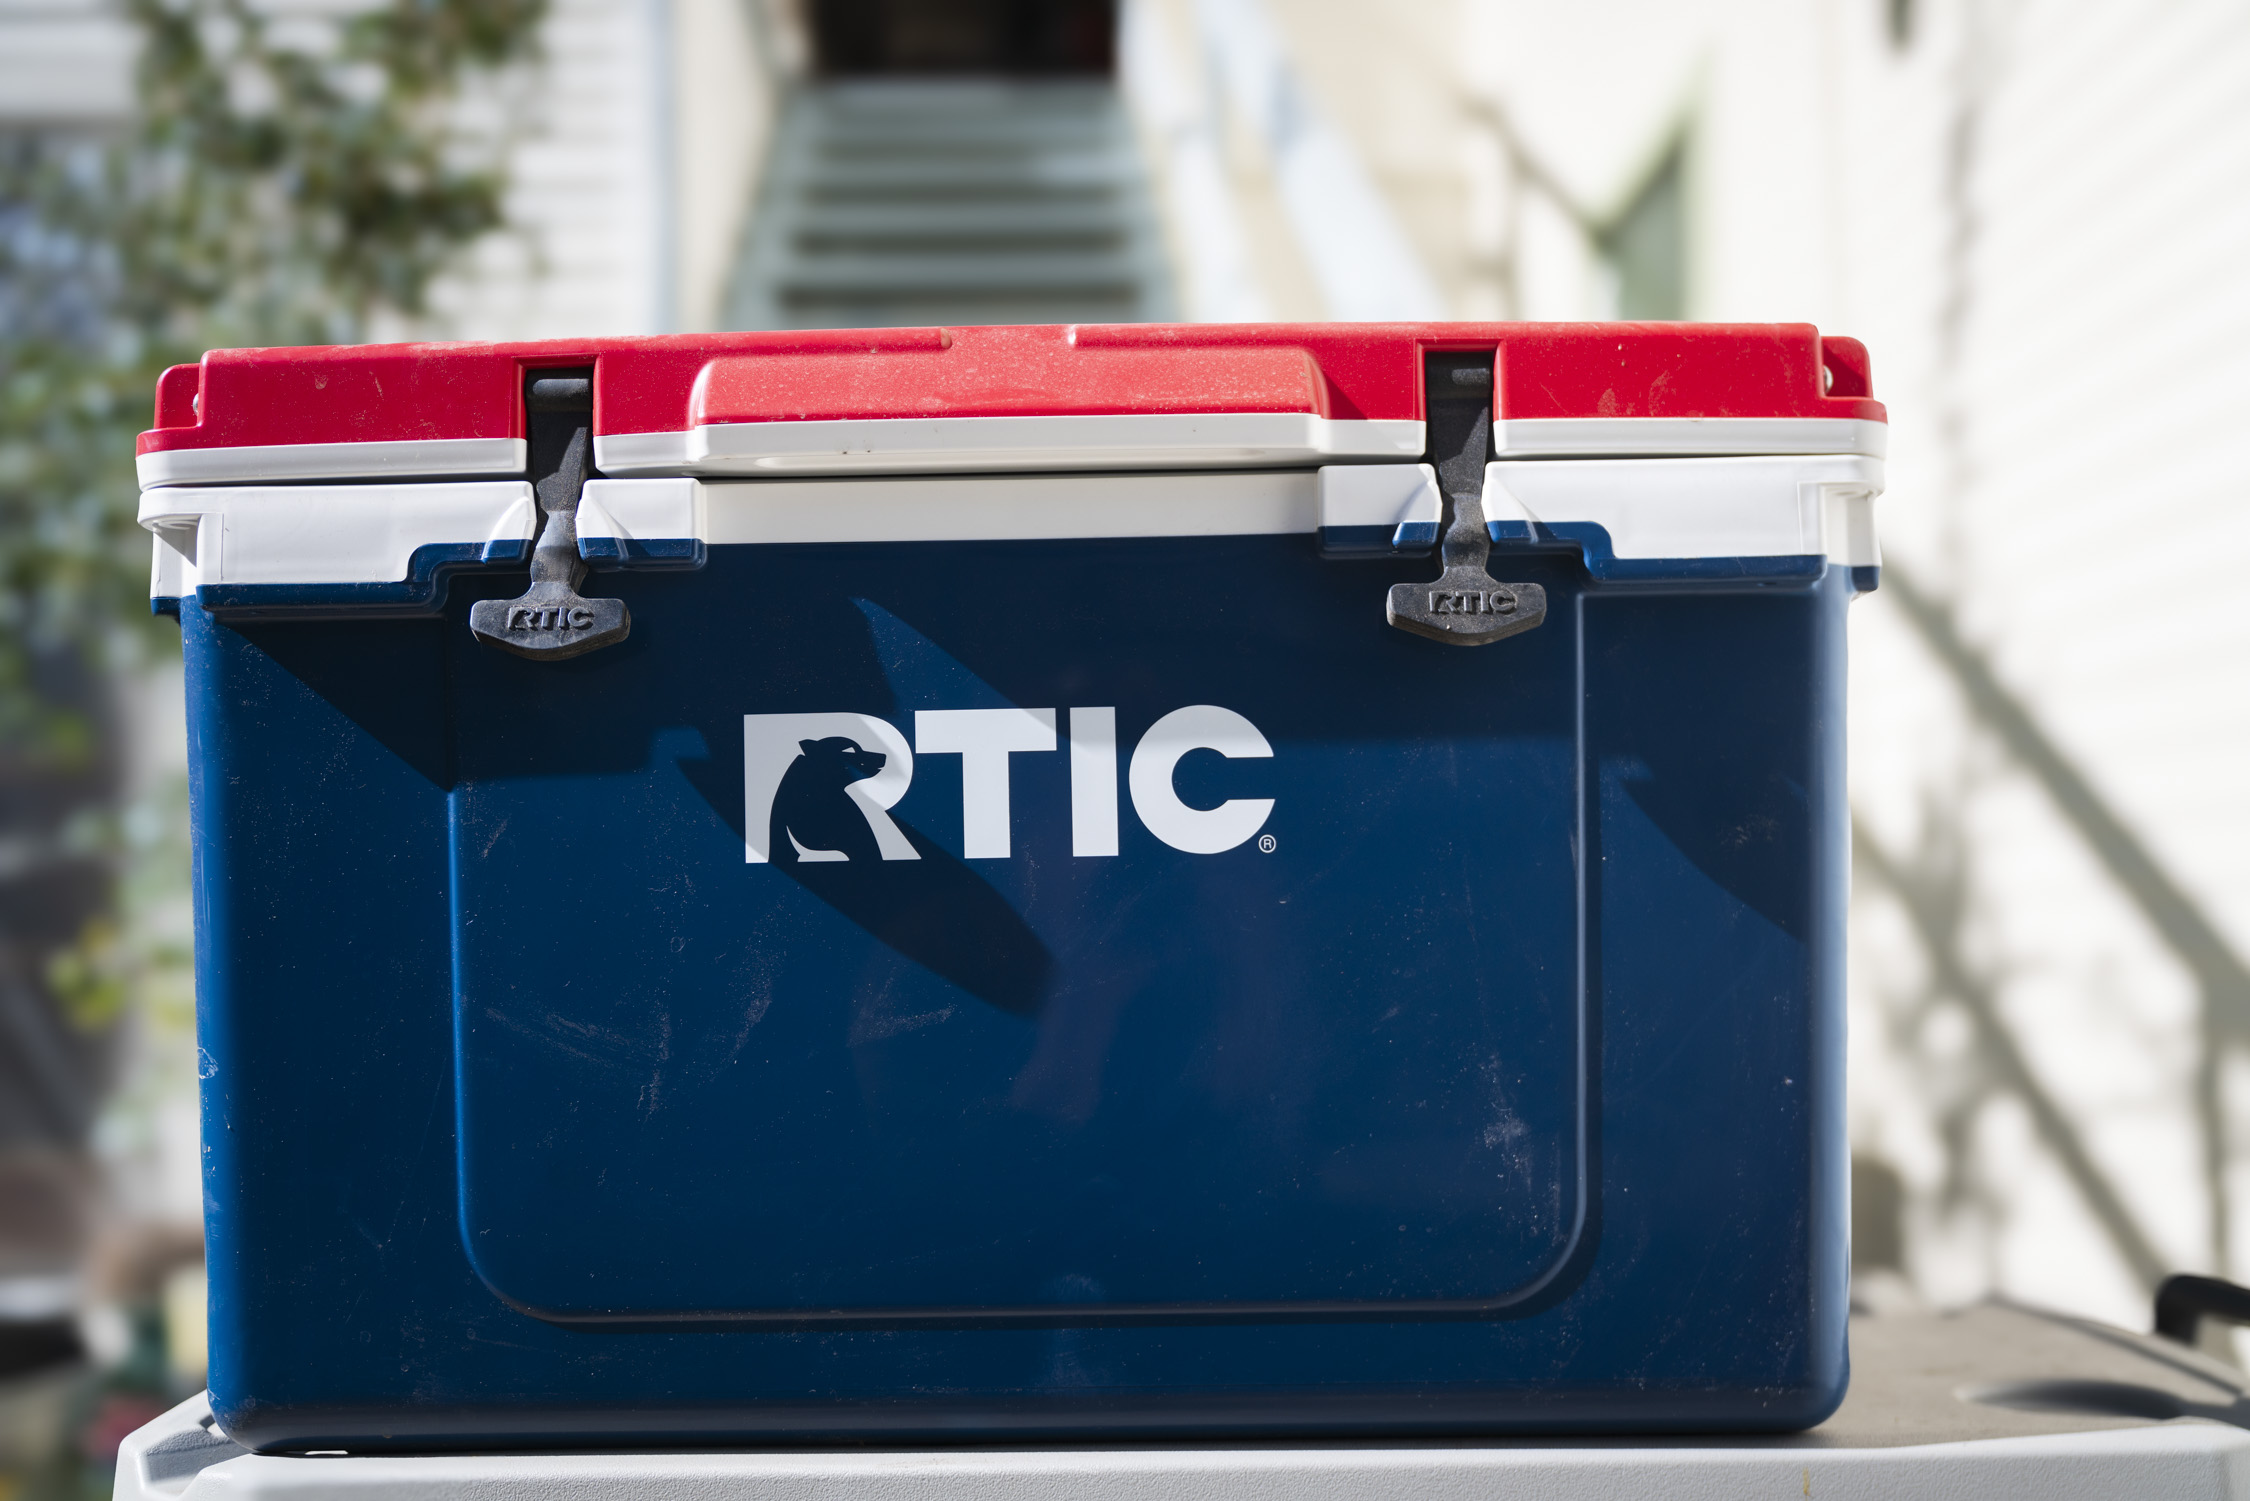
Tired of dragging a fully loaded cooler that could weigh up to 50 pounds in and out of the back of your car? Enter the RTIC Ultra-Light Hard Cooler ($219) — a premium cooler that is 30% lighter than other coolers of the same capacity.

Three inches of foam insulation and an O-ring gasket for the lid keep your items cold despite the lighter weight. However, this cooler is injection-molded instead of rotomolded, and therefore, its ice retention will be a bit less overall than that of heavier, rotomolded models. 

The ice retention of the ultra-light RTIC cooler ended up actually being pretty comparable to its rotomolded counterpart. This, however, could be due to the fact that it was filled with more ice because of its larger size, and the more ice a cooler can hold, the longer it will retain that ice. But with 8 solid days of ice retention, the RTIC Ultra-Light Hard Cooler really measured up.  

Having a large cooler that is easy to carry around may also be very advantageous for some. This cooler additionally has many of the same features as its rotomolded counterpart, the RTIC 45, with secure rubber latches, two drain plugs, non-skid rubber feet, tie-down slots, molded in side handles, as well as marine-grade nylon rope handles on either side. It also comes in a smaller 32-quart size, as well as 52-quart and 72-quart wheeled versions.


  • Ice Retention
    9.5
  • Build Quality
    9.5
  • Portability
    8.0
  • Capacity and Organization
    8.5

  • Capacity: 24 quarts
  • Materials: Rotomolded polyethylene and pressure-injected polyurethane foam
  • Dimensions: 17.4" x 16.6" x 14.1"
  • Weight: 13 lbs., 1.6 oz.

Pros

  • Great insulation
  • Retained ice for the full 10 days of testing
  • New carrying strap makes the 2.0 much easier to tote around
  • New drain plug is a huge upgrade

Cons

  • Pricey

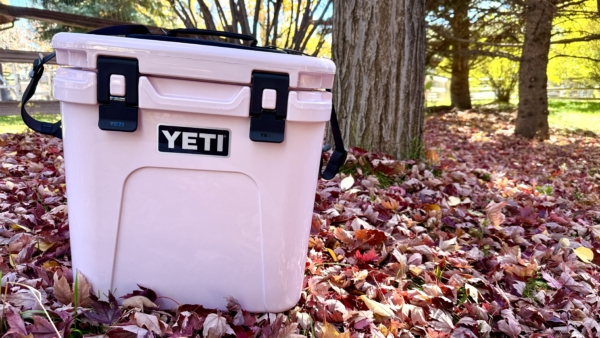
The YETI Roadie 24 2.0 ($250) may look familiar, but this isn’t the same cooler that launched in 2020. For 2025, YETI gave its beloved mid-size hard cooler a small but critical upgrade. Not only did the brand add a much-needed drain plug (the main knock on the OG version), but it also added a carrying strap in place of the old handle. These two changes may sound minor, but they make the Roadie 24 virtually unstoppable.

At 24 quarts, the Roadie is perfectly sized for one or two people for a weekend trip. It fits a standard bottle of wine upright, holds more than two dozen cans and ice, and slides neatly behind a car seat (Note: This only works if you’re short. GearJunkie contributor Heather Balogh Rochfort had no problem driving the car with the Roadie behind her, but her 6-foot-tall husband couldn’t make it work in their Subaru Outback).

The real change, however, is how you carry it. The old rigid handle made it feel like you were hauling a bucket full of ice. Not only was this awkward and uncomfortable when fully loaded, but it was also really heavy. The new strap design makes a world of difference, distributing weight more evenly and making transport far more comfortable.

Another long-overdue upgrade: a drain plug. Previously, you had to tip the whole cooler to empty melted ice water, a task that was both messy and cumbersome. Now, the new BestDam Drain Plug allows quick, easy drainage without sacrificing performance. Balogh Rochfort tested the updated cooler for 10 days, assuming the new port might compromise insulation. But nope. The Roadie 24 2.0 still crushed ice retention, with plenty left after 10 days of just….chilling.

Like all YETI hard-sided coolers, the Roadie 24 2.0 features rotomolded polyurethane construction, a freezer-quality gasket, and burly T-latches designed to withstand years of abuse. With these upgrades, it’s practically perfect for a small cooler….but yes, you’re still going to pay for it.


More Coolers, Field Tested

The following coolers didn’t make the top of our list, but we’ve included them for their unique features or superior ice retention, and a few are great budget alternatives.

  • Ice Retention
    8.0
  • Build Quality
    7.5
  • Portability
    7.5
  • Capacity and Organization
    8.5

  • External dimensions: 23.94" L x 17.07" W x 18.78" H
  • Internal dimensions: 13.3" L x 11.57" W x 9.7" H
  • Drawer dimensions: 9.8" L x 10.8" W x 3" H
  • Capacity: 48 12-oz. cans (only); 28 cans w/15 lbs. ice
  • Weight: ~20 lbs.

Pros

  • Dry Zone storage helps separate and protect food items
  • Perfect size for single-day events
  • Competitive ice retention performance

Cons

  • Do not forget items left in drawer
  • Cleaning drawer is a necessity
  • Higher end price

Ninja — yes, of blender fame — brings a novel feature to its cooler, at a nice price. The Ninja FrostVault ($200) has a bottom drawer that lets you store anything from produce to deviled eggs, so your chow doesn’t get wet from ice in the main compartment while it stays cool. Though it doesn’t insulate quite as well as its roto-molded competitors, its performance is respectable, especially considering it’s $100 less than a Yeti Tundra 45.

The single latch design and the lack of an air-tight seal impair the overall insulation performance, but don’t write off the FrostVault just yet. The single latch is durable and keeps the lid closed just fine, and a little air leakage prevents a vacuum so that the lid won’t get stuck. It’s a compromise, but if you’re using your cooler for a day trip or an overnight, the FrostVault will suffice.

The unique sliding drawer on the bottom, known as the DryZone, is about 10x11x3 inches. It keeps food dry and Ice-free. It also protects fragile food items like strawberries, pie, or the aforementioned deviled eggs from getting smashed during transit. A latch keeps the drawer from opening unexpectedly, and the drawer can be completely removed for easy cleaning. Don’t forget to empty the drawer. GearJunkie editor-in-chief Adam Ruggiero found out the hard way that it’s easy to forget about the drawer after emptying the main compartment; he was left with a pretty smelly mess a few days later. 

The FrostVault is not a heavy-duty grizzly-proof cooler, and we’re willing to bet plenty of folks looking for a good cooler aren’t going to be in bear country. Leave this one at home for multi-day rafting or fishing trips. For a few days on the road or at a drive-in campsite, the Ninja FrostVault will serve you well. And if you dig the design and would like more space, you can get the 50-quart version for about $50 more.


  • Ice Retention
    8.5
  • Build Quality
    7.5
  • Portability
    7.0
  • Capacity and Organization
    8.0

  • Capacity: 55 quarts
  • Materials: Rotomolded kayak plastic with pressure-injected foam insulation
  • Dimensions: 28.5 x 15.5 x 16.75
  • Weight: 26 lbs

Pros

  • Rotomolded construction
  • Easy-to-use latches
  • Light for its size

Cons

  • Hard to carry for one person when fully loaded
  • Easy-to-use latches don’t seal in air as well as other coolers we tested
  • Not IGBC certified

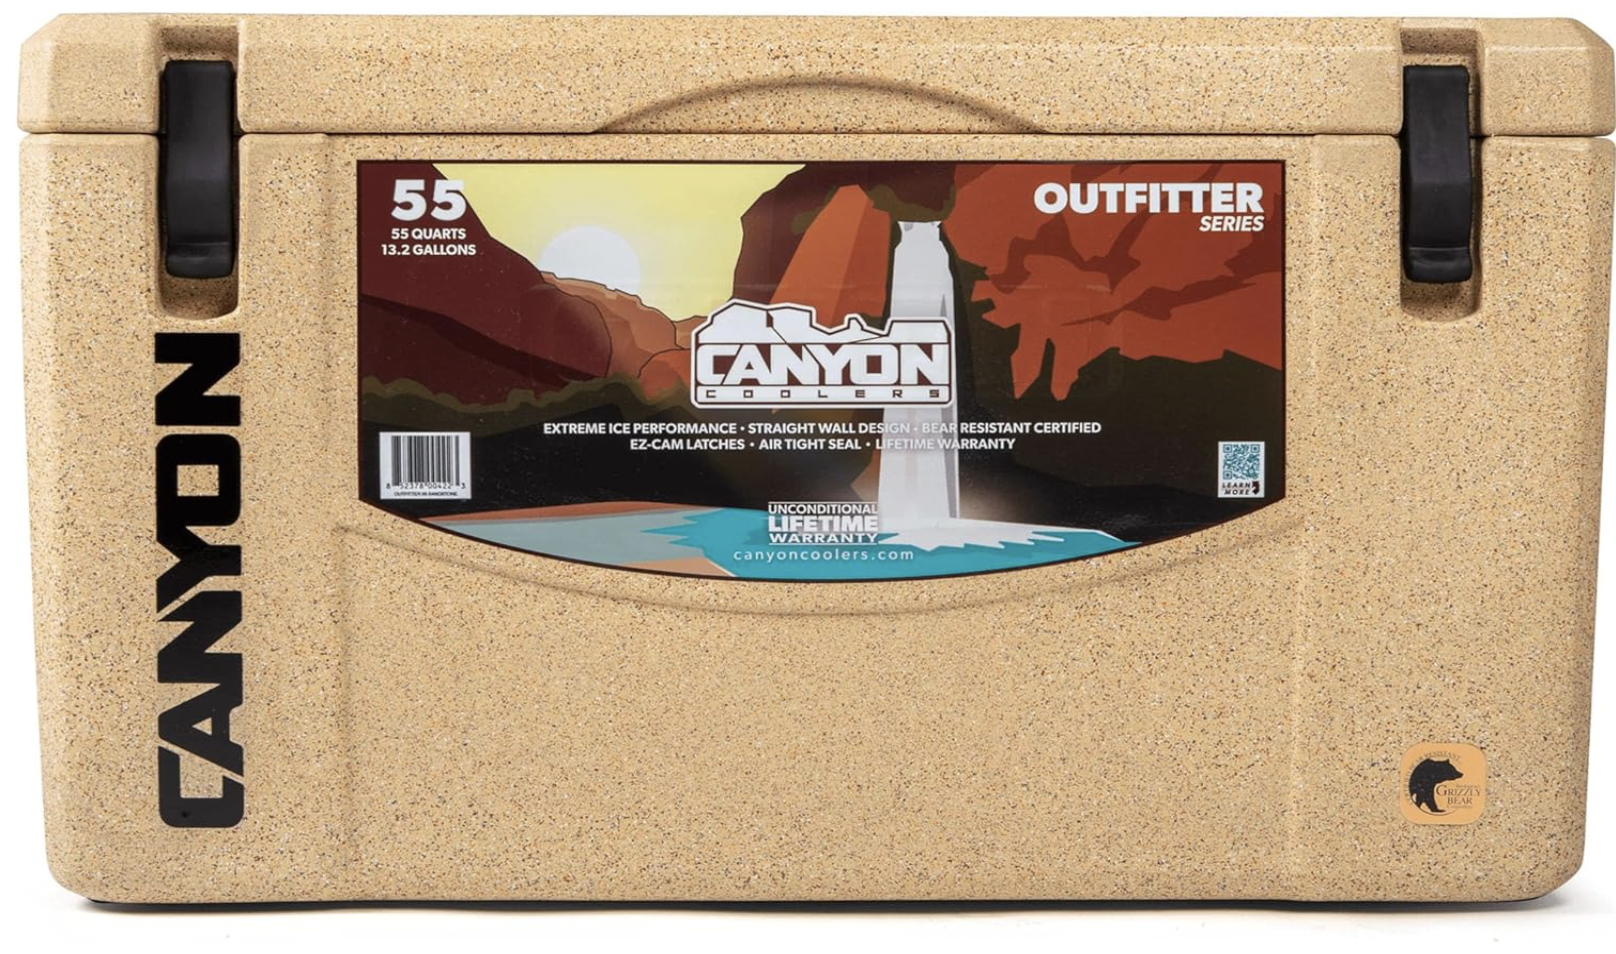
A robust, family-friendly cooler, the new Canyon Coolers Outfitter 55 ($300) offers a blend of convenience, performance, and durability in its V2 design. Its robust, rotomolded body ensures quality ice retention and durability, making it a solid companion for outdoor adventures. The easy-to-use latches provide effortless access, while its straight-edged shape allows for efficient packing in your vehicle without consuming unnecessary space.

We put the Outfitter 55 to the test in the scorching summer heat, subjecting it to extensive evaluations in comparison to our lineup of the best coolers of 2025. This Arizona-made cooler did very well in our testing metrics, including size, volume, weight, ease of transport, durability, and ice retention.

During our ice retention test, the cooler maintained usable ice for four days under extreme conditions of 100-degree heat, suggesting it could perform even better in more typical outdoor environments.

Our lead tester, Miya, took this cooler camping with us on a weekend trip to Tuolumne Meadows in Yosemite National Park and found it hard to handle as just one person due to its size, width, and weight when fully loaded. It would be nice to have a cooler of this size with wheels to make it even more convenient.

But it is also unlikely that you would buy this cooler for just one person, therefore you’ll be sure to have a helping hand for loading and unloading on your next vacation. 

Overall, the Canyon Coolers Outfitter 55 stands out as a family-friendly cooler with a spacious 55-quart capacity, ideal for weekend trips or longer excursions for two to four people. It is lightweight for its size, weighing only 26 pounds while the Yeti Tundra 45 weighs 23 pounds with only a true 37-quart capacity.

Its latches are its standout feature, though they don’t quite suction in air as much as the thick rubber latches found on Yeti and other premium coolers. But this cooler’s performance and usability make it a great value for your next family excursion. 


  • Ice Retention
    8.5
  • Build Quality
    7.5
  • Portability
    7.0
  • Capacity and Organization
    8.0

  • Capacity: 60 quarts
  • Materials: Rotomolded body and polyurethane insulation
  • Dimensions: 28.2" x 17.9" x 18.2"
  • Weight: 31 lbs.

Pros

  • Lots of features
  • Drain plug with tether
  • Rotomolded design

Cons

  • Not IGBC-rated
  • Heavy
  • Latches not as airtight as other brands

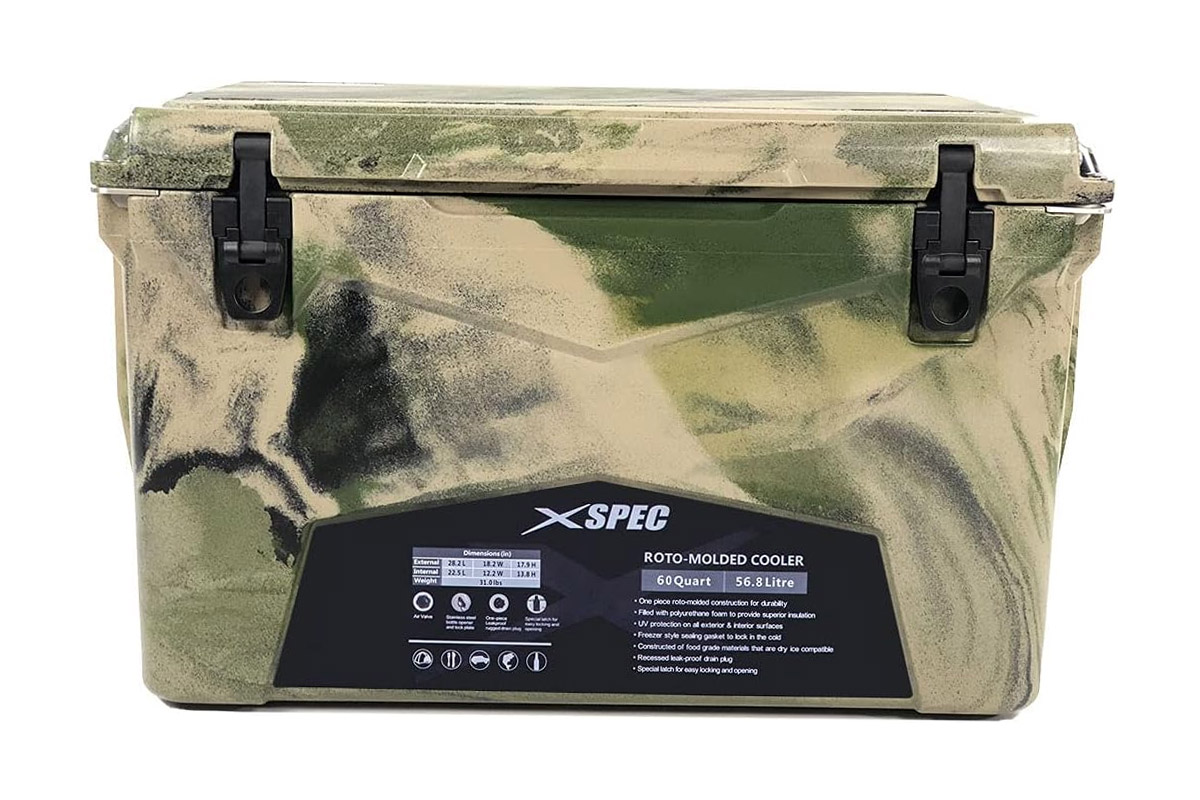
The Xspec Pro 60 Quart Cooler ($230) is nothing if not impressive and is the most feature-filled cooler we tested. A heavy-duty, rotomolded construction with a reasonable price, this 31-pound cooler gives some other more expensive models a run for their money.

This 60-quart cooler actually has 60 quarts of usable space, unlike other brands which end up having less capacity than they claim due to their thick, insulated walls. It faired quite well in our ice retention test as well, holding usable ice for a total of 6 days while outside in a mix of shade and direct sunlight. 

The Xspec is dry ice compatible for even longer periods of cold retention. It also features a drain plug with a tether for safe-keeping, heavy-duty grab handles, a molded ruler on the lid, a built-in compass, bottle opener, non-slip feet, and molded tie-down slots — making this a burly cooler for overlanders and other adventurers.

And, this cooler is the only one in our lineup to have an air release knob as well, so you’ll never have to worry about your lid getting suctioned to the cooler body while you’re just trying to grab a cold one. No one likes that. 

While the Xspec is a worthy competitor in the world of rotomolded coolers, it’s worth mentioning that while its plastic latches are infinitely easier to open and close than the thick rubber ones you have to use two hands to pull down to secure, they don’t keep the cooler quite as airtight.

With the thick rubber latches found on the Yeti Tundra 45, you can feel the air being suctioned out of them as you pull down the latches to essentially “engage” the rubber gasket on the inside of the lid. 

While many of these premium brands hold a certification from the International Grizzly Bear Committee, the Xspec does not. Although it does have stainless steel locking plates to keep the cooler secure, we don’t know if it would withstand a curious grizzly. 

All in all, this feature-laden, rotomolded cooler has decent ice retention and a spacious capacity for a pretty affordable price. So, if you’re looking for a larger cooler that has some more bells and whistles than your average ice box, you may love the Xspec Pro 60. 


  • Ice retention
    8.5
  • Build Quality
    7.0
  • Portability
    5.0
  • Capacity and Organization
    7.5

  • Capacity: 120 quarts
  • Materials: Injection-molded plastic
  • Dimensions: 37.9” x 19” x 17.95”
  • Weight: 20.7 lbs.

Pros

  • Inexpensive
  • Large capacity
  • Lightweight

Cons

  • No wheels
  • Requires two people to carry when loaded
  • Cheap materials

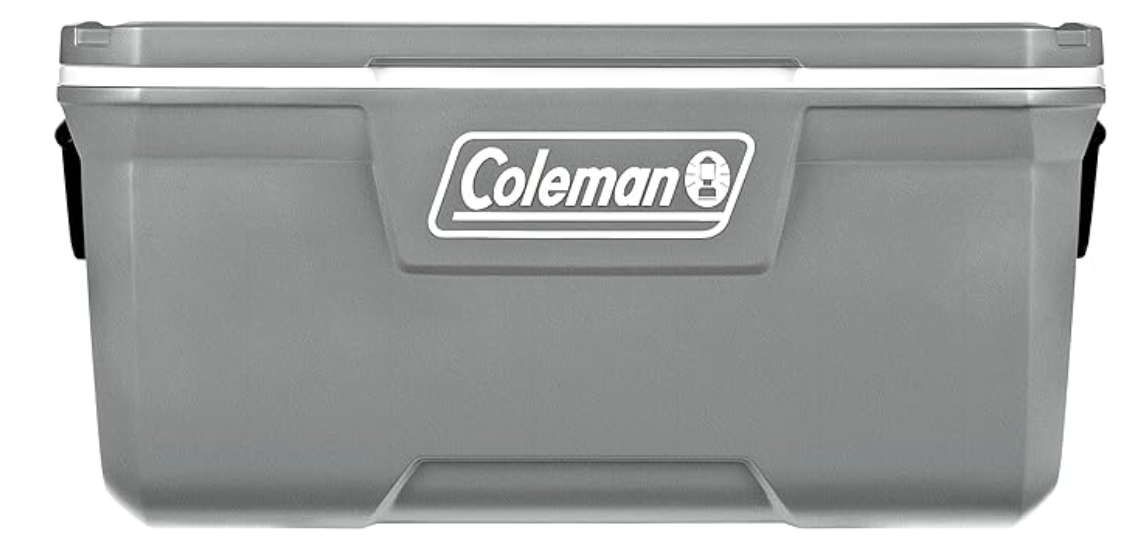
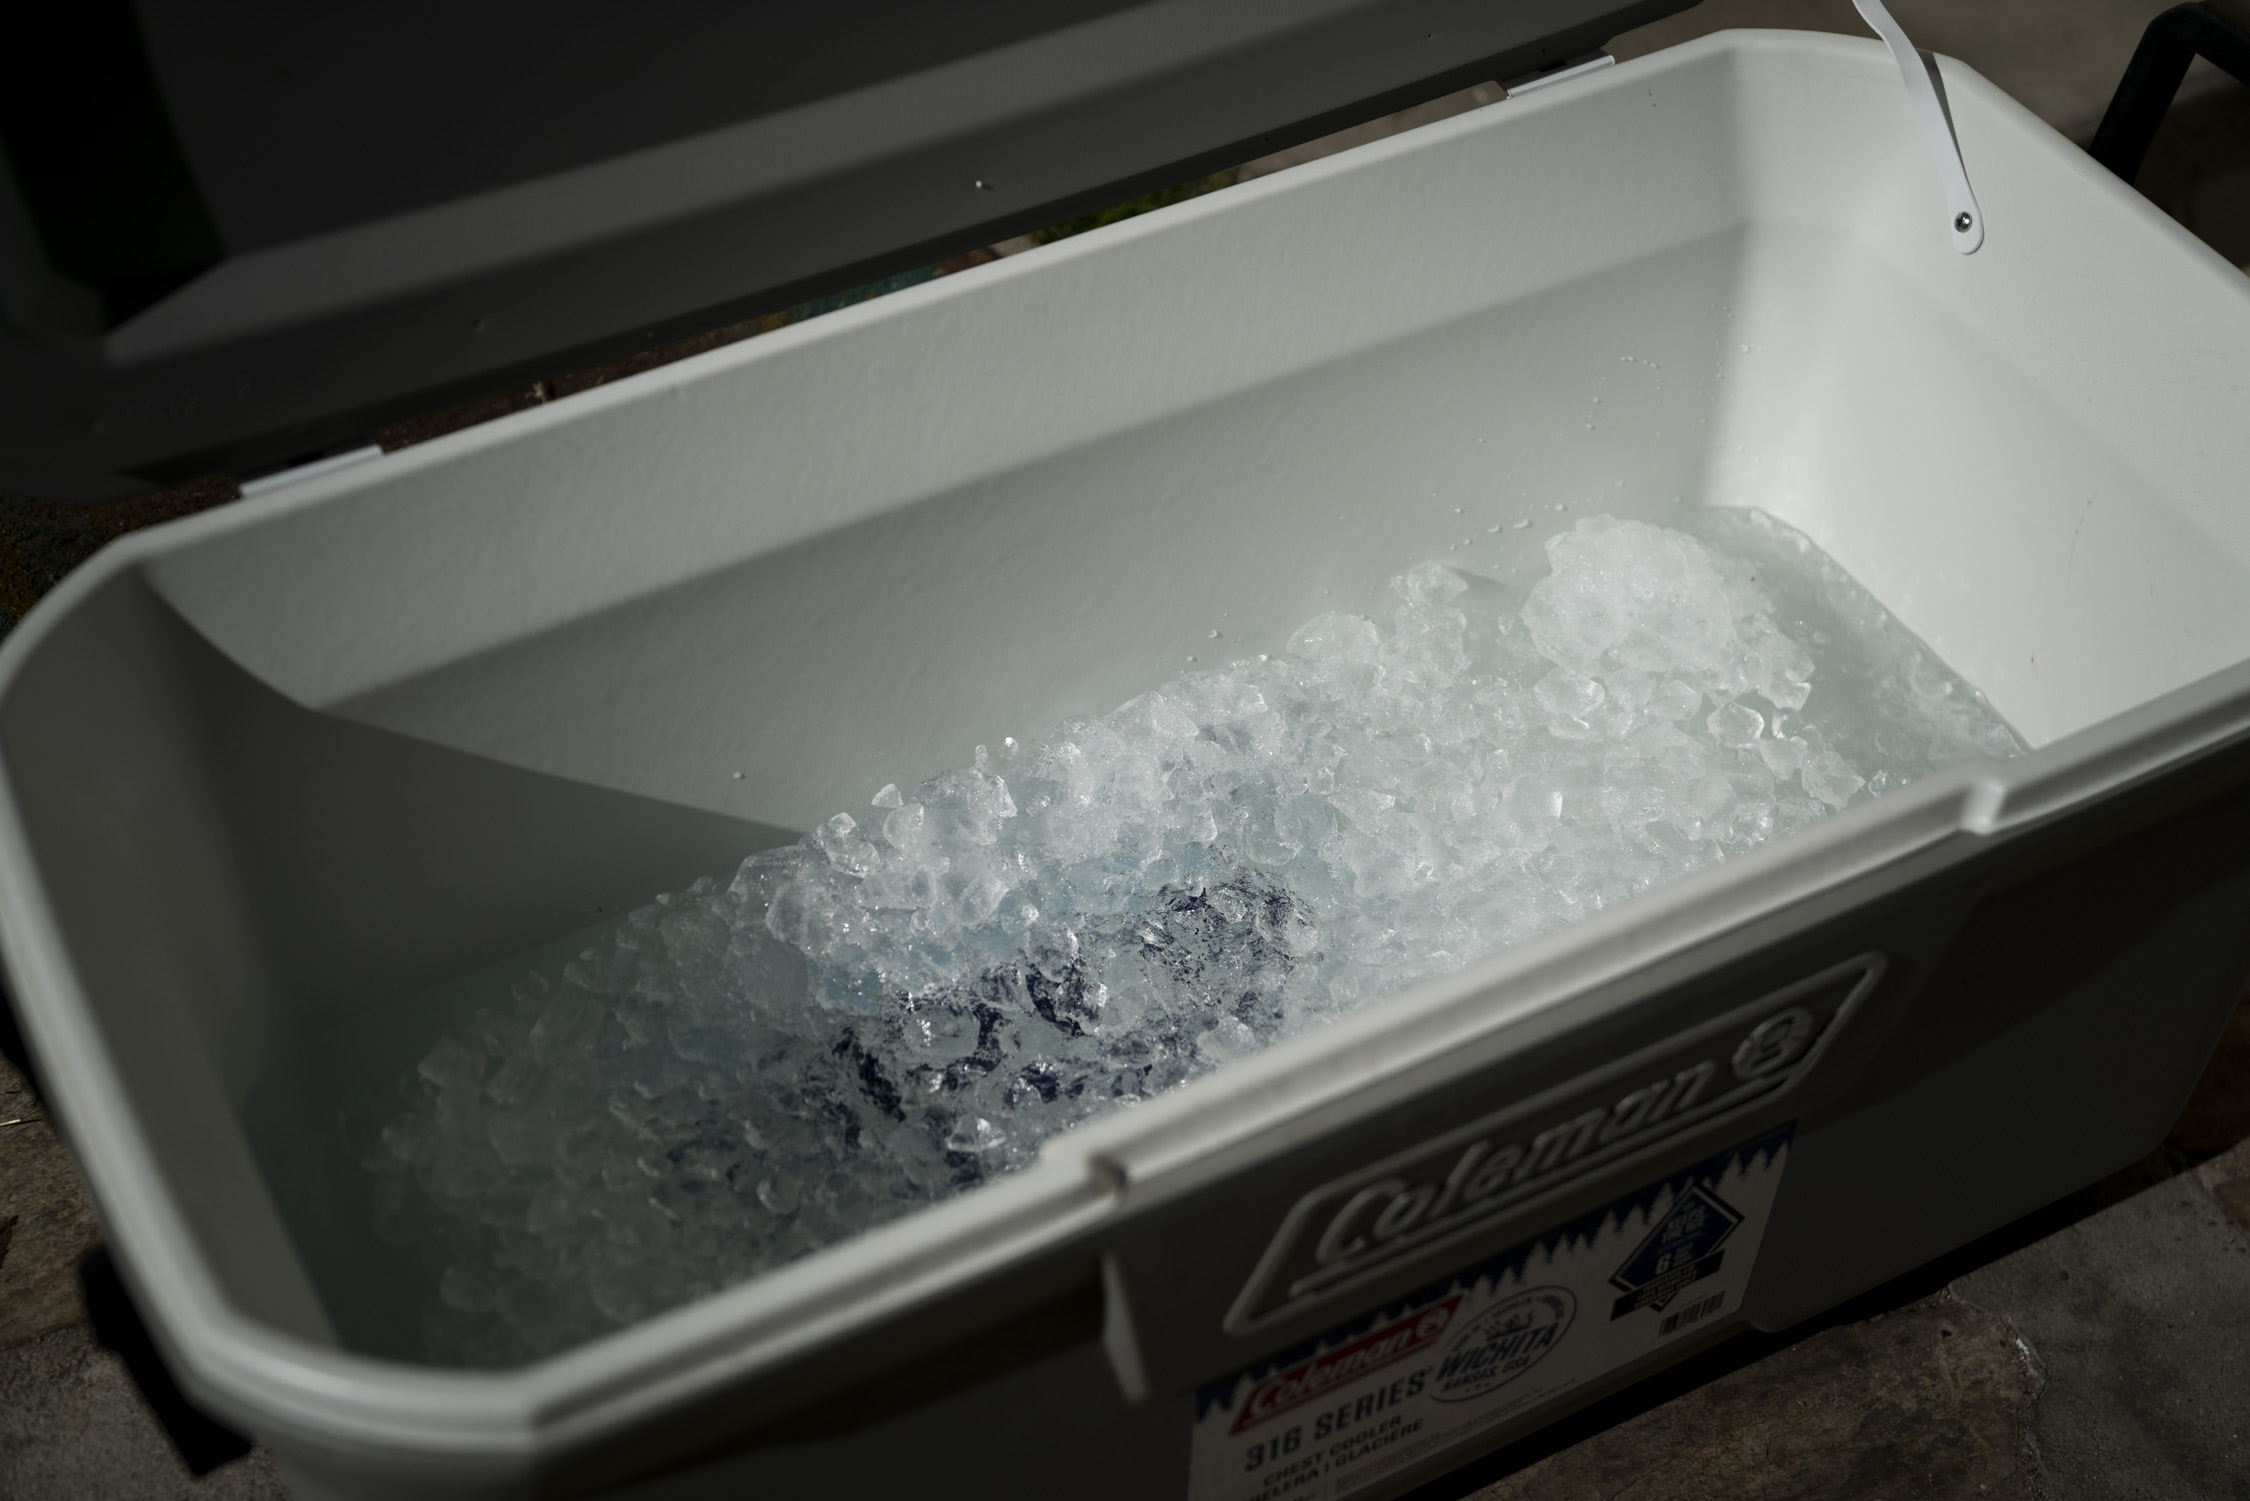
Sometimes a standard cooler just isn’t big enough. Enter the Coleman 316 Series Chest Cooler ($110). 120 quarts of space at only 20.7 pounds, this oversized ice box is great for birthday parties, barbecues, sporting events, and the like. 

Built-in cup holders and a lid that can double as a seat and support up to 250 pounds make this cooler more versatile than it seems. While the injection-molded design and relatively thin walls make multiday ice retention less viable than more expensive models, the Coleman 316 is a great choice for single-day events. 

While we think that any cooler of this size should come with a pair of wheels for easier transport, the Coleman 316 is, unfortunately, wheel-less. Its plastic side handles are also not the most confidence-inspiring, and the size of the cooler, when fully loaded, necessitates another person to lend a helping hand.

For only $6 more, you can get the slightly smaller, 100-quart Coleman 316 Series Insulated Portable Cooler with Heavy Duty Wheels, which solves the wheels issue though sacrifices 20 quarts of space. 

This cooler did quite well in the ice retention test, lasting the full 10 days with ice. This, however, is partially due to the sheer quantity of ice we filled the cooler with. The more ice, the longer a cooler will stay cold. But we were quite pleased with its performance regardless. If you’re looking for an inexpensive, large cooler for the occasional event, it’s hard to beat the Coleman 316.


  • Ice Rention
    8.5
  • Build Quality
    8.0
  • Portability
    8.0
  • Capacity and Organization
    7.5

  • Collapsible Grab-N-Go Handle:
  • All-terrain wheels:
  • Airtight gaskets and seals:
  • Tie-down slots:
  • Utility port:
  • Dry ice compatible:
  • Chrome-plated lockable lid system with built-in bottle opener:
  • Non-skid feet:
  • Rapid drain system:
  • Dry basket & divider-ready design:

Pros

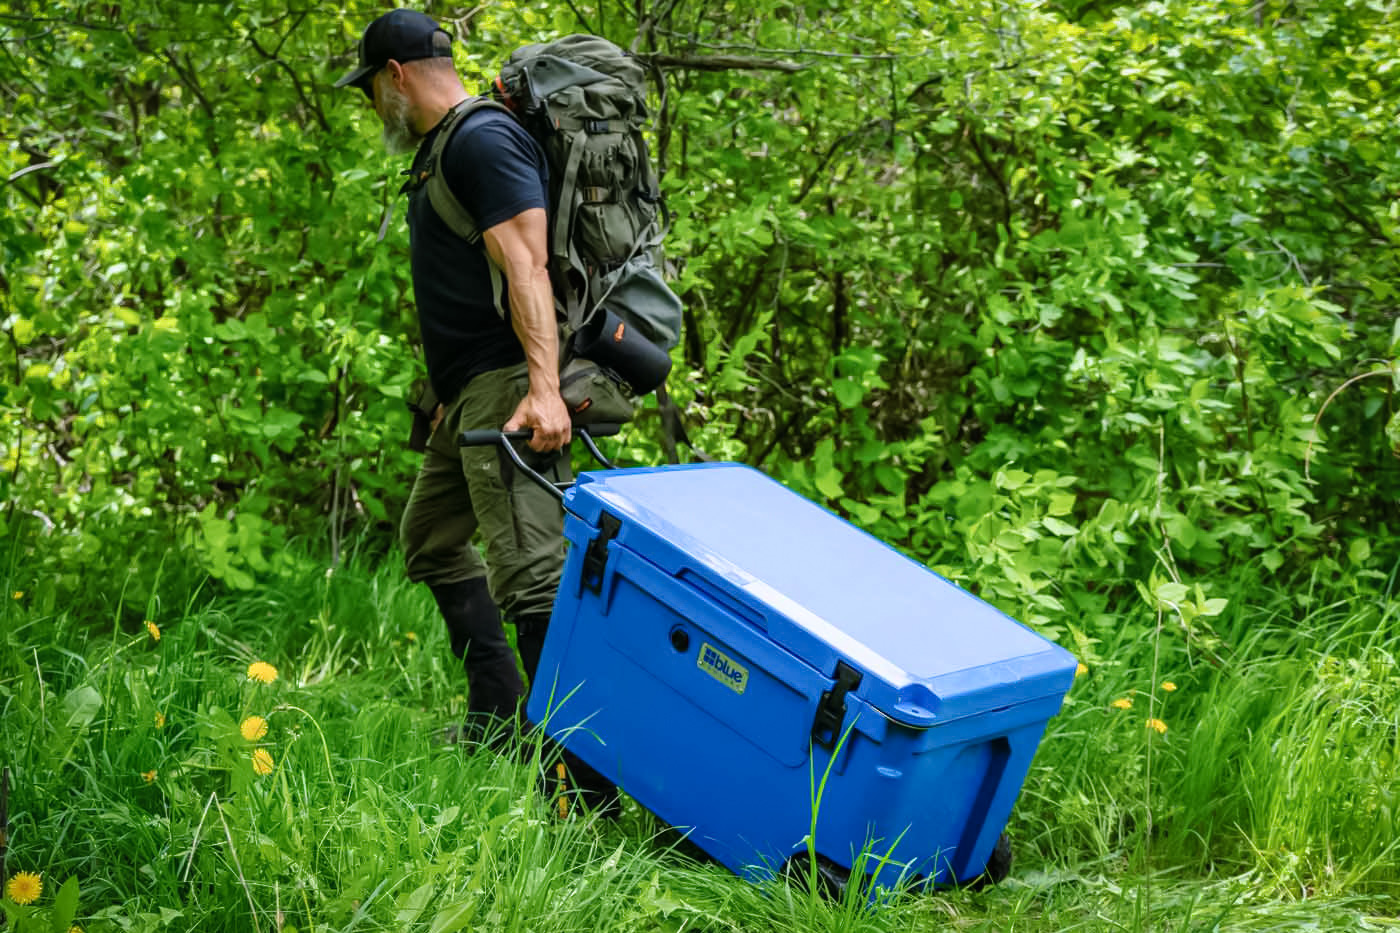
  • Keeps ice just as long (if not longer) than competition
  • Easy to move around, even when full
  • Latches securely
  • Nice chrome-plated corner details
  • Release port for draining while closed

Cons

  • Plug not attached
  • Latches get in the way of closing

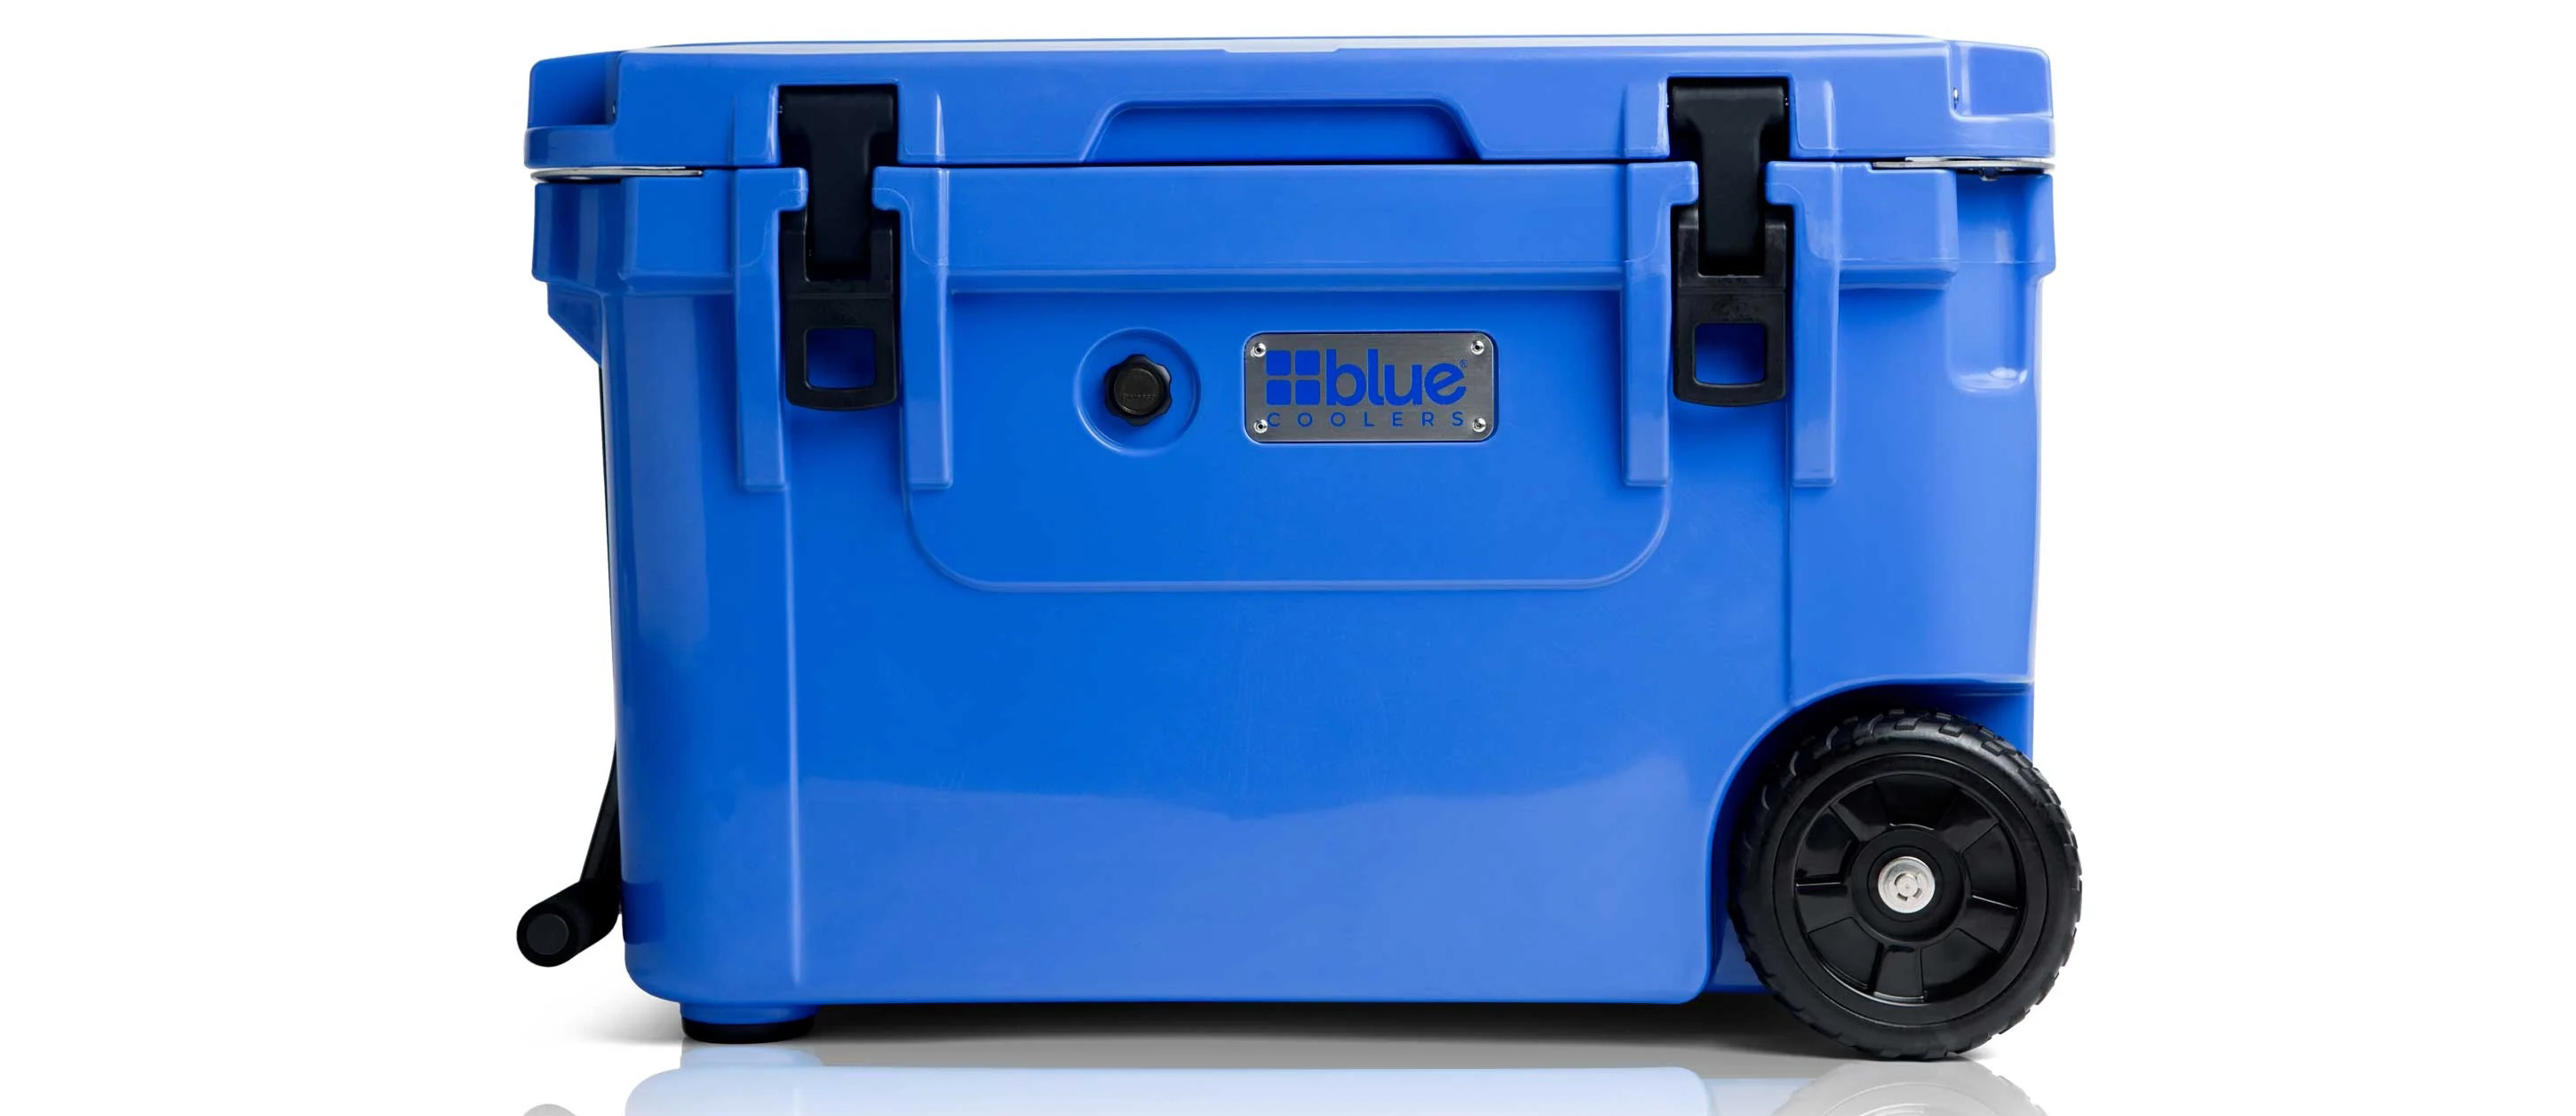
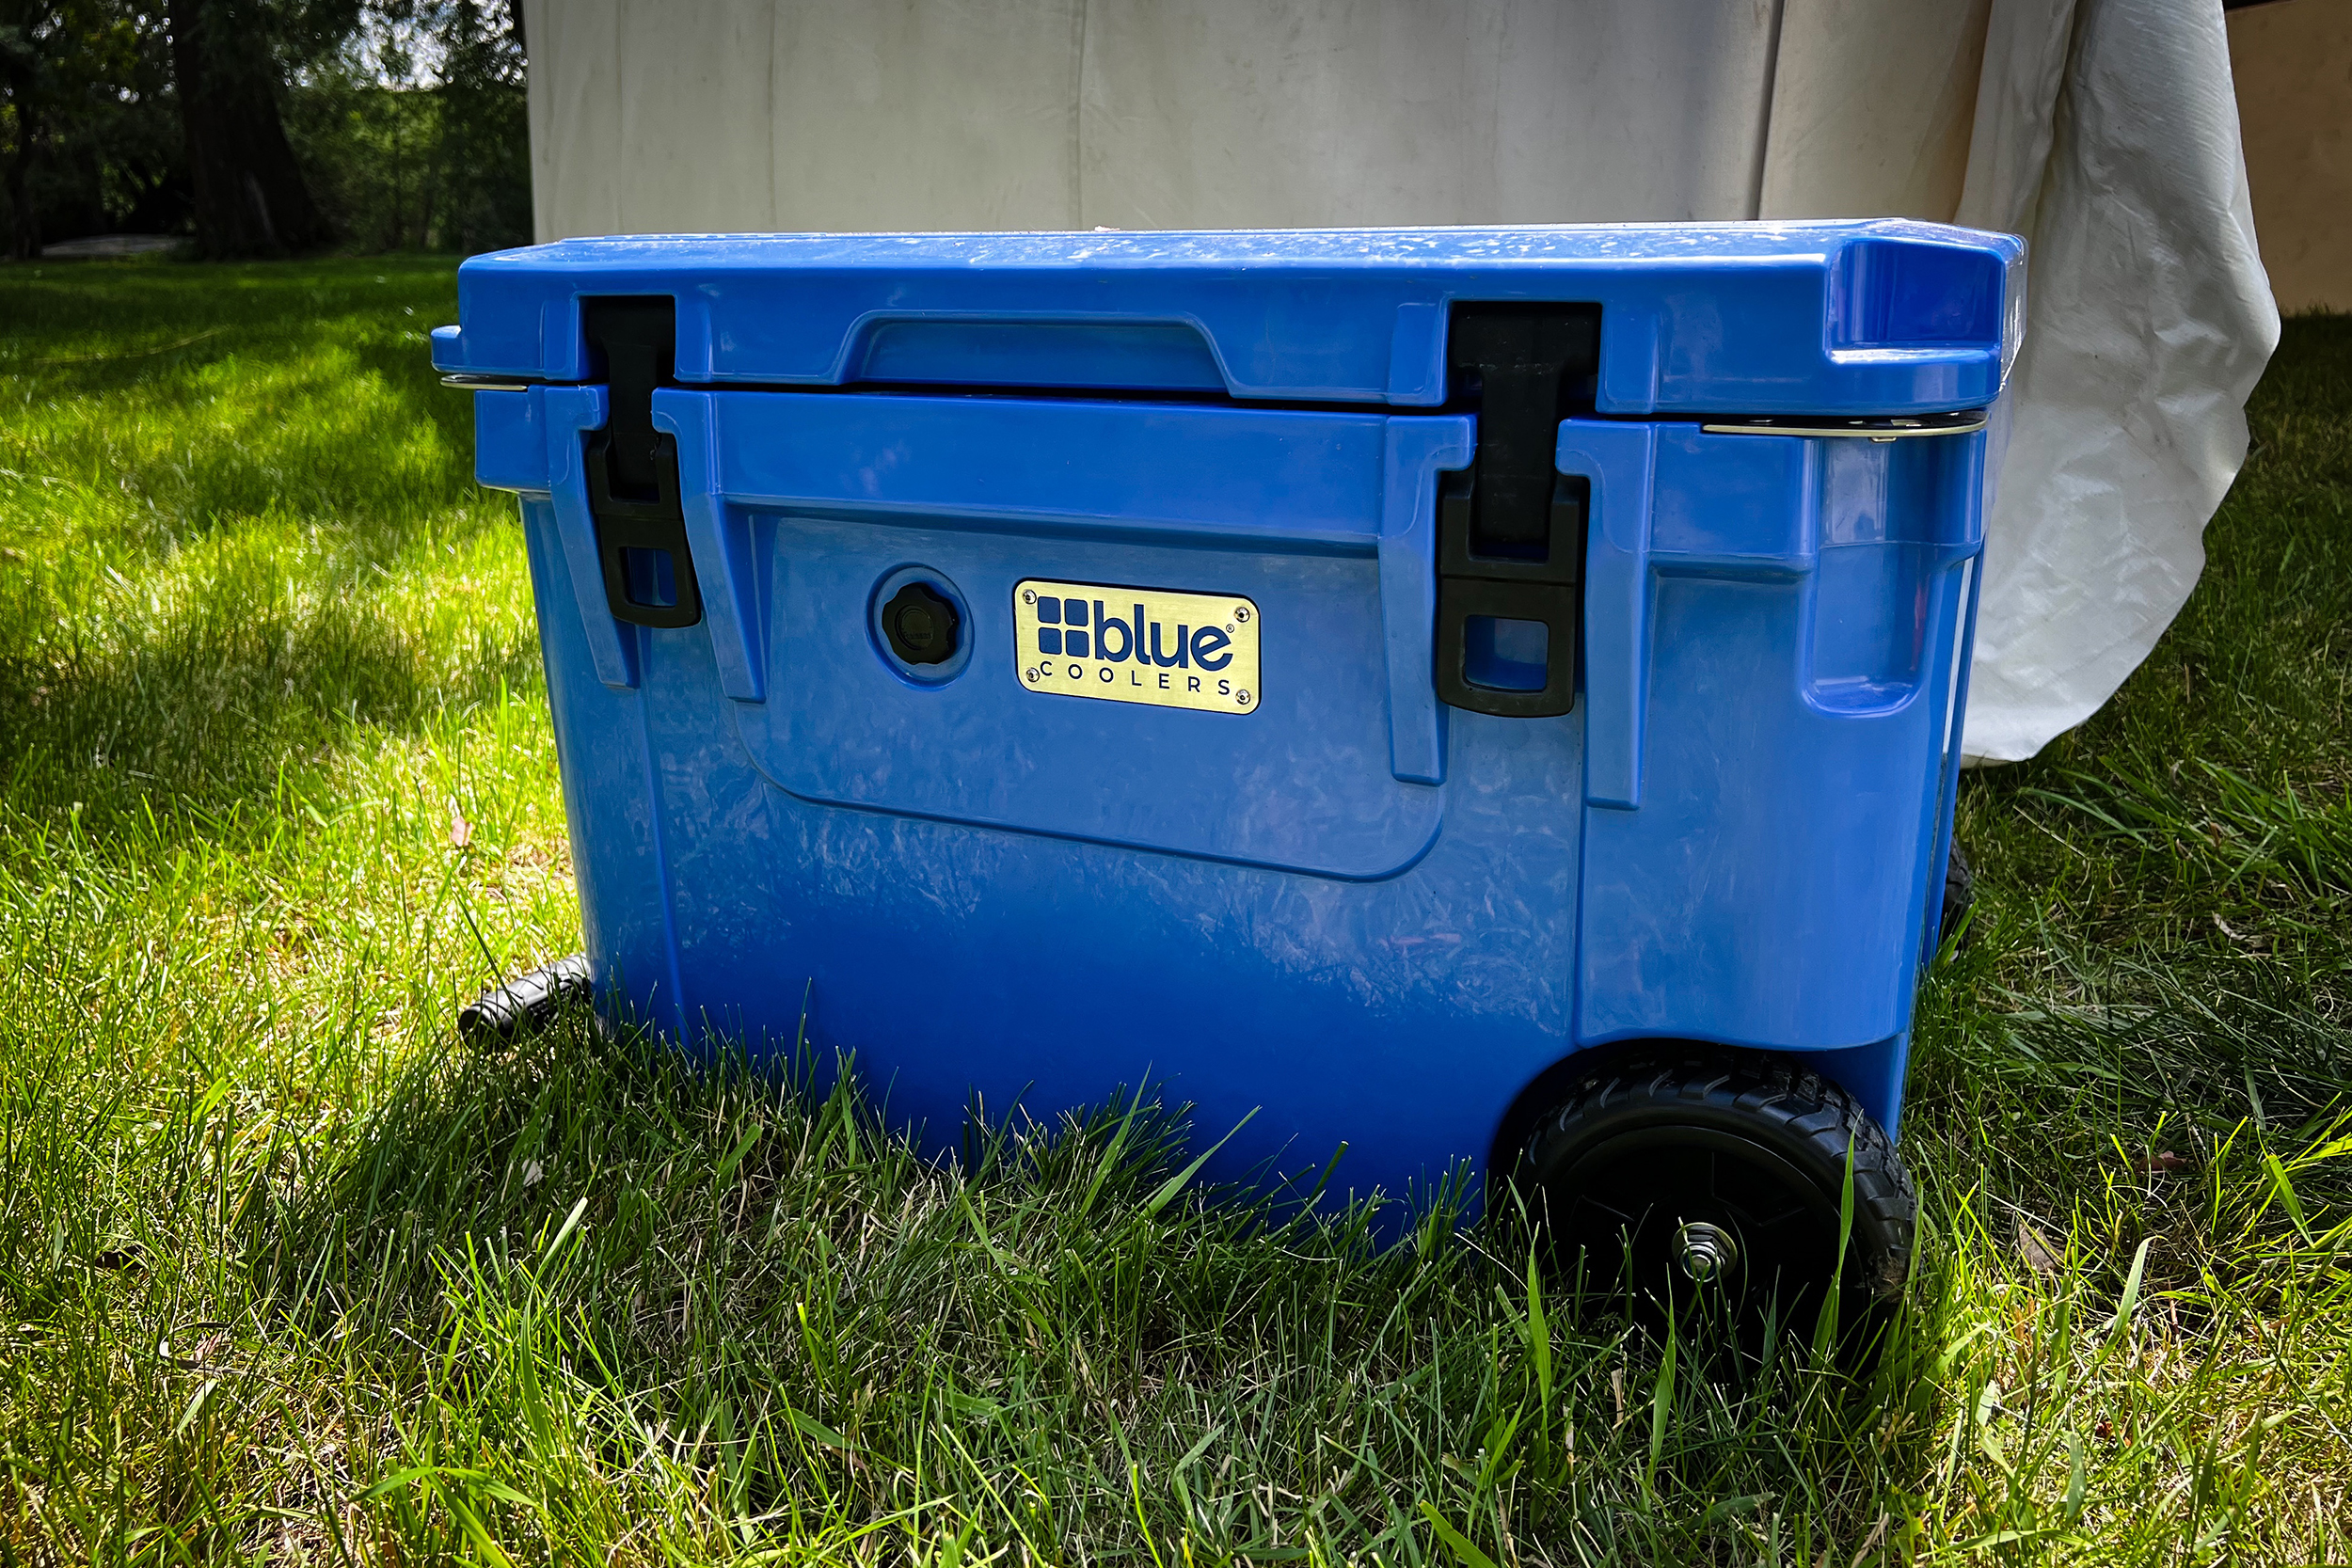
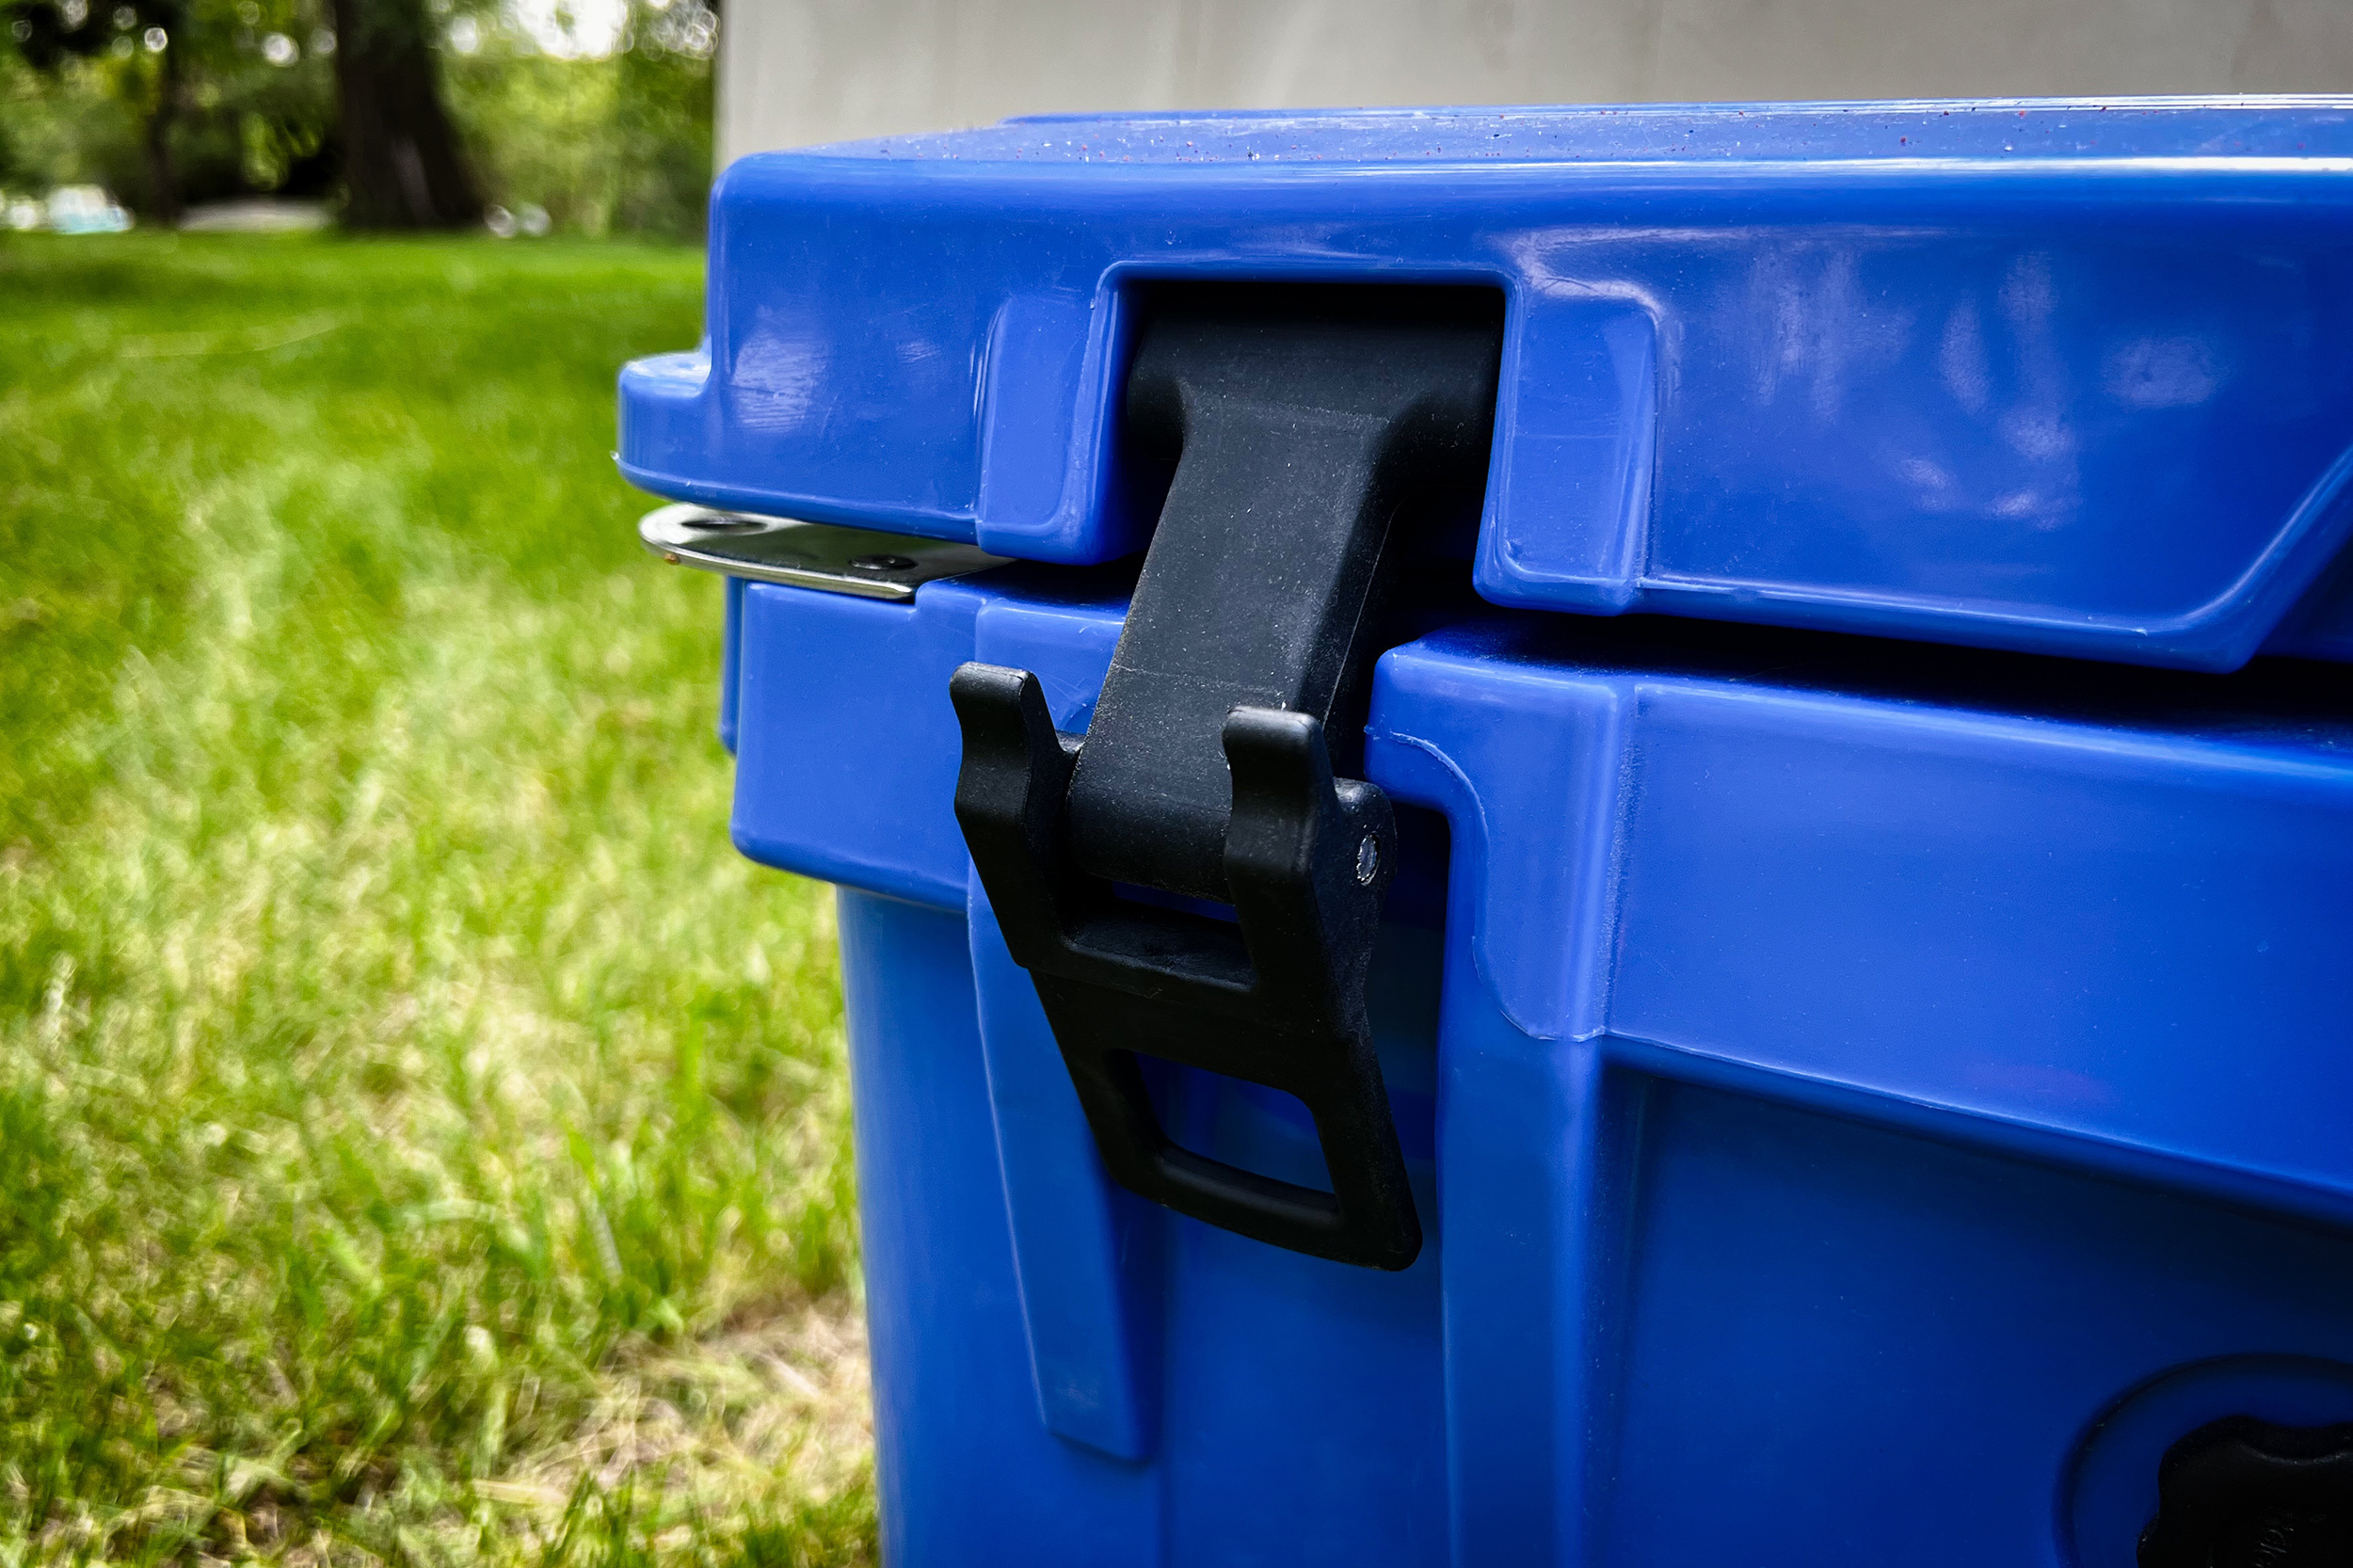
The Blue Coolers Ice Vault ($350) is a quality rotomolded cooler, that lends itself to comparison with (you guessed it) the all-might Yeti. Is it better than the closest YETI equivalent, the Tundra Haul? In some ways, yes.

In terms of capacity, the Ice Vault has an additional 8 quarts over the Tundra haul, despite having a smaller exterior size. What’s going on here? Well, the Yeti has a thicker roto-molded shell, which definitely gives it an advantage in terms of insulation. But if you value space savings in your tightly packed vehicle, the Ice Vault may work better for you.

This cooler doesn’t have any bear-proof certifications or locking points, so the YETI is a better choice if you’re in bear country and don’t have proper food storage options. Again, there are plenty of places to go camping in the lower 48 where you’re never going to run into a bear. The latches are a hard plastic that lever the lid into an air-tight seal. Using them isn’t less difficult than the Yeti’s rubber latches, just different.

The only real gripe that GearJunkie editor Rachelle Schrute had with this cooler is the drain plug cover. It isn’t leashed to the cooler and could easily get lost, rendering a $350 cooler much less effective. You chalk that up to user error, but still. All in all, this is a solid cooler that has a very similar performance to a YETI or an ORCA. Though its name may not reference a majestic sea creature or a beloved cryptid, it’s about $100 less than those coolers.


  • Ice Retention
    6.5
  • Build Quality
    7.0
  • Portability
    9.0
  • Capacity and Organization
    8.0

  • Capacity: 25 quarts
  • Materials: Injection-molded plastic
  • Dimensions: 13" x 20" x 13"
  • Weight: 5.5 lbs.

Pros

  • Super-portable
  • Budget-friendly

Cons

  • Short ice retention due to small size

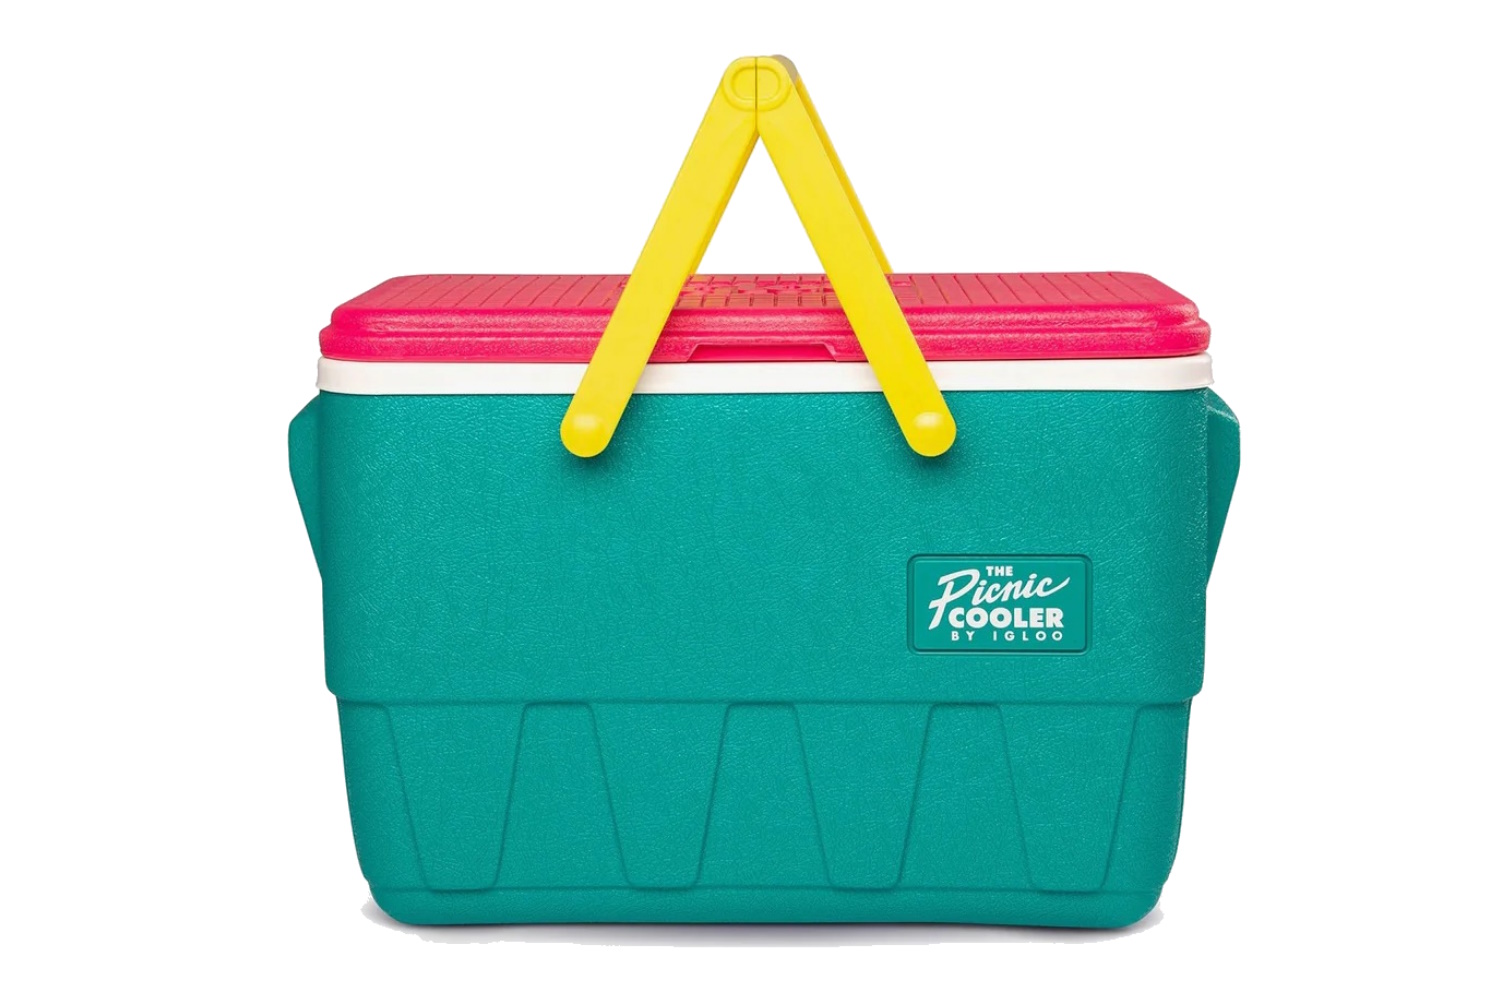
This cooler has no drain plug, but the smaller yet capable 25-quart size makes that OK. This Igloo Picnic cooler ($55) is not only a decades-old classic (now out in new “retro” colors), but it’s also a great size for day-trip outings like excursions to the park, city trailhead, beaches, or your favorite lake.

At a park picnic, we were able to fit bottles, cans, and flasks, as well as boxes, bins, and bags of snacks galore. If you aren’t packing food for snacking, it can hold 36 cans.

We used it for day trips and car camping and liked its size (it can fit in your passenger seat area), capacity, and convenience for a few days’ worth of food and drinks.

In testing, this cooler kept contents cold for 3 full days, and this was with us periodically opening it on occasion to check ice retention. (Igloo claims retention for this cooler at 1-3 days.)

Given all that, we give this cooler an A+ for not only living up to specs but also being a perfect, portable, budget-friendly option for shorter-length trips outdoors.


Cooler Comparison Chart

CoolerPriceCapacity WeightMaterials
YETI Tundra 45$32537 quarts23 lbs.Rotomolded polyethylene/urethane foam insulation
Igloo ECOCOOL$6052 quarts9.8 lbs.Recycled post-consumer resin
RovR RollR 45 Wheeled Cooler$35045 quarts37 lbs.Plastic/polyurethane foam
Igloo Recool 16qt Cooler$1016 quarts1.6 lbs.Recycled paper and AKD
RTIC Ultra-Light Hard Cooler$21952 quarts31 lbs.Injection-molded plastic
YETI Roadie 24 2.0$25024 quarts13.13 lbs.Rotomolded polyethylene/urethane foam insulation
Ninja FrostVault Cooler $20030 quarts20 lbsPlastic
Canyon Coolers Outfitter 55 $30055 quarts26 lbs.Rotomolded kayak plastic with pressure-injected foam insulation
Xspec Pro 60 Quart Cooler$23060 quarts31 lbs.Rotomolded body and polyurethane insulation
Coleman 316 Series Chest Cooler$110120 quarts5.5 lbs.Injection-molded plastic
The Blue Coolers Ice Vault $35060 quarts36.5 lbs.Rotomolded polyethylene/urethane foam insulation
Igloo 25-Quart Picnic Cooler$5525 quarts5.5 lbs.Injection-molded plastic
7 hardsided coolers from different brands that we put through rigorous testing outside
The YETI Tundra came on top after our ice retention test; (photo/Miya Tsudome)

How We Tested Coolers

Our expert gear testers have been reviewing coolers since 2014, meticulously researching dozens of the best coolers on the market to continuously update this review. This is an extensive look at seven of the best coolers you can find today.

Our Expert Testers & Testing Grounds

Contributor Heather Balogh Rochfort is an avid outdoor enthusiast based in Colorado who spends most of her waking hours hiking, biking, camping, trail running, or skiing. Coincidentally, she also loves food so toting a cooler along on all of her adventures is a given.

Miya Tsudome brings over 3 years of gear reviewing experience combined with over a decade of being a serious outdoor enthusiast to help bring this current review to life. Having spent many months living out of her car in pursuit of rock climbing adventures all over the country, she knows that having a good cooler during the hot summer months can make a world of difference. 

Our Testing Process

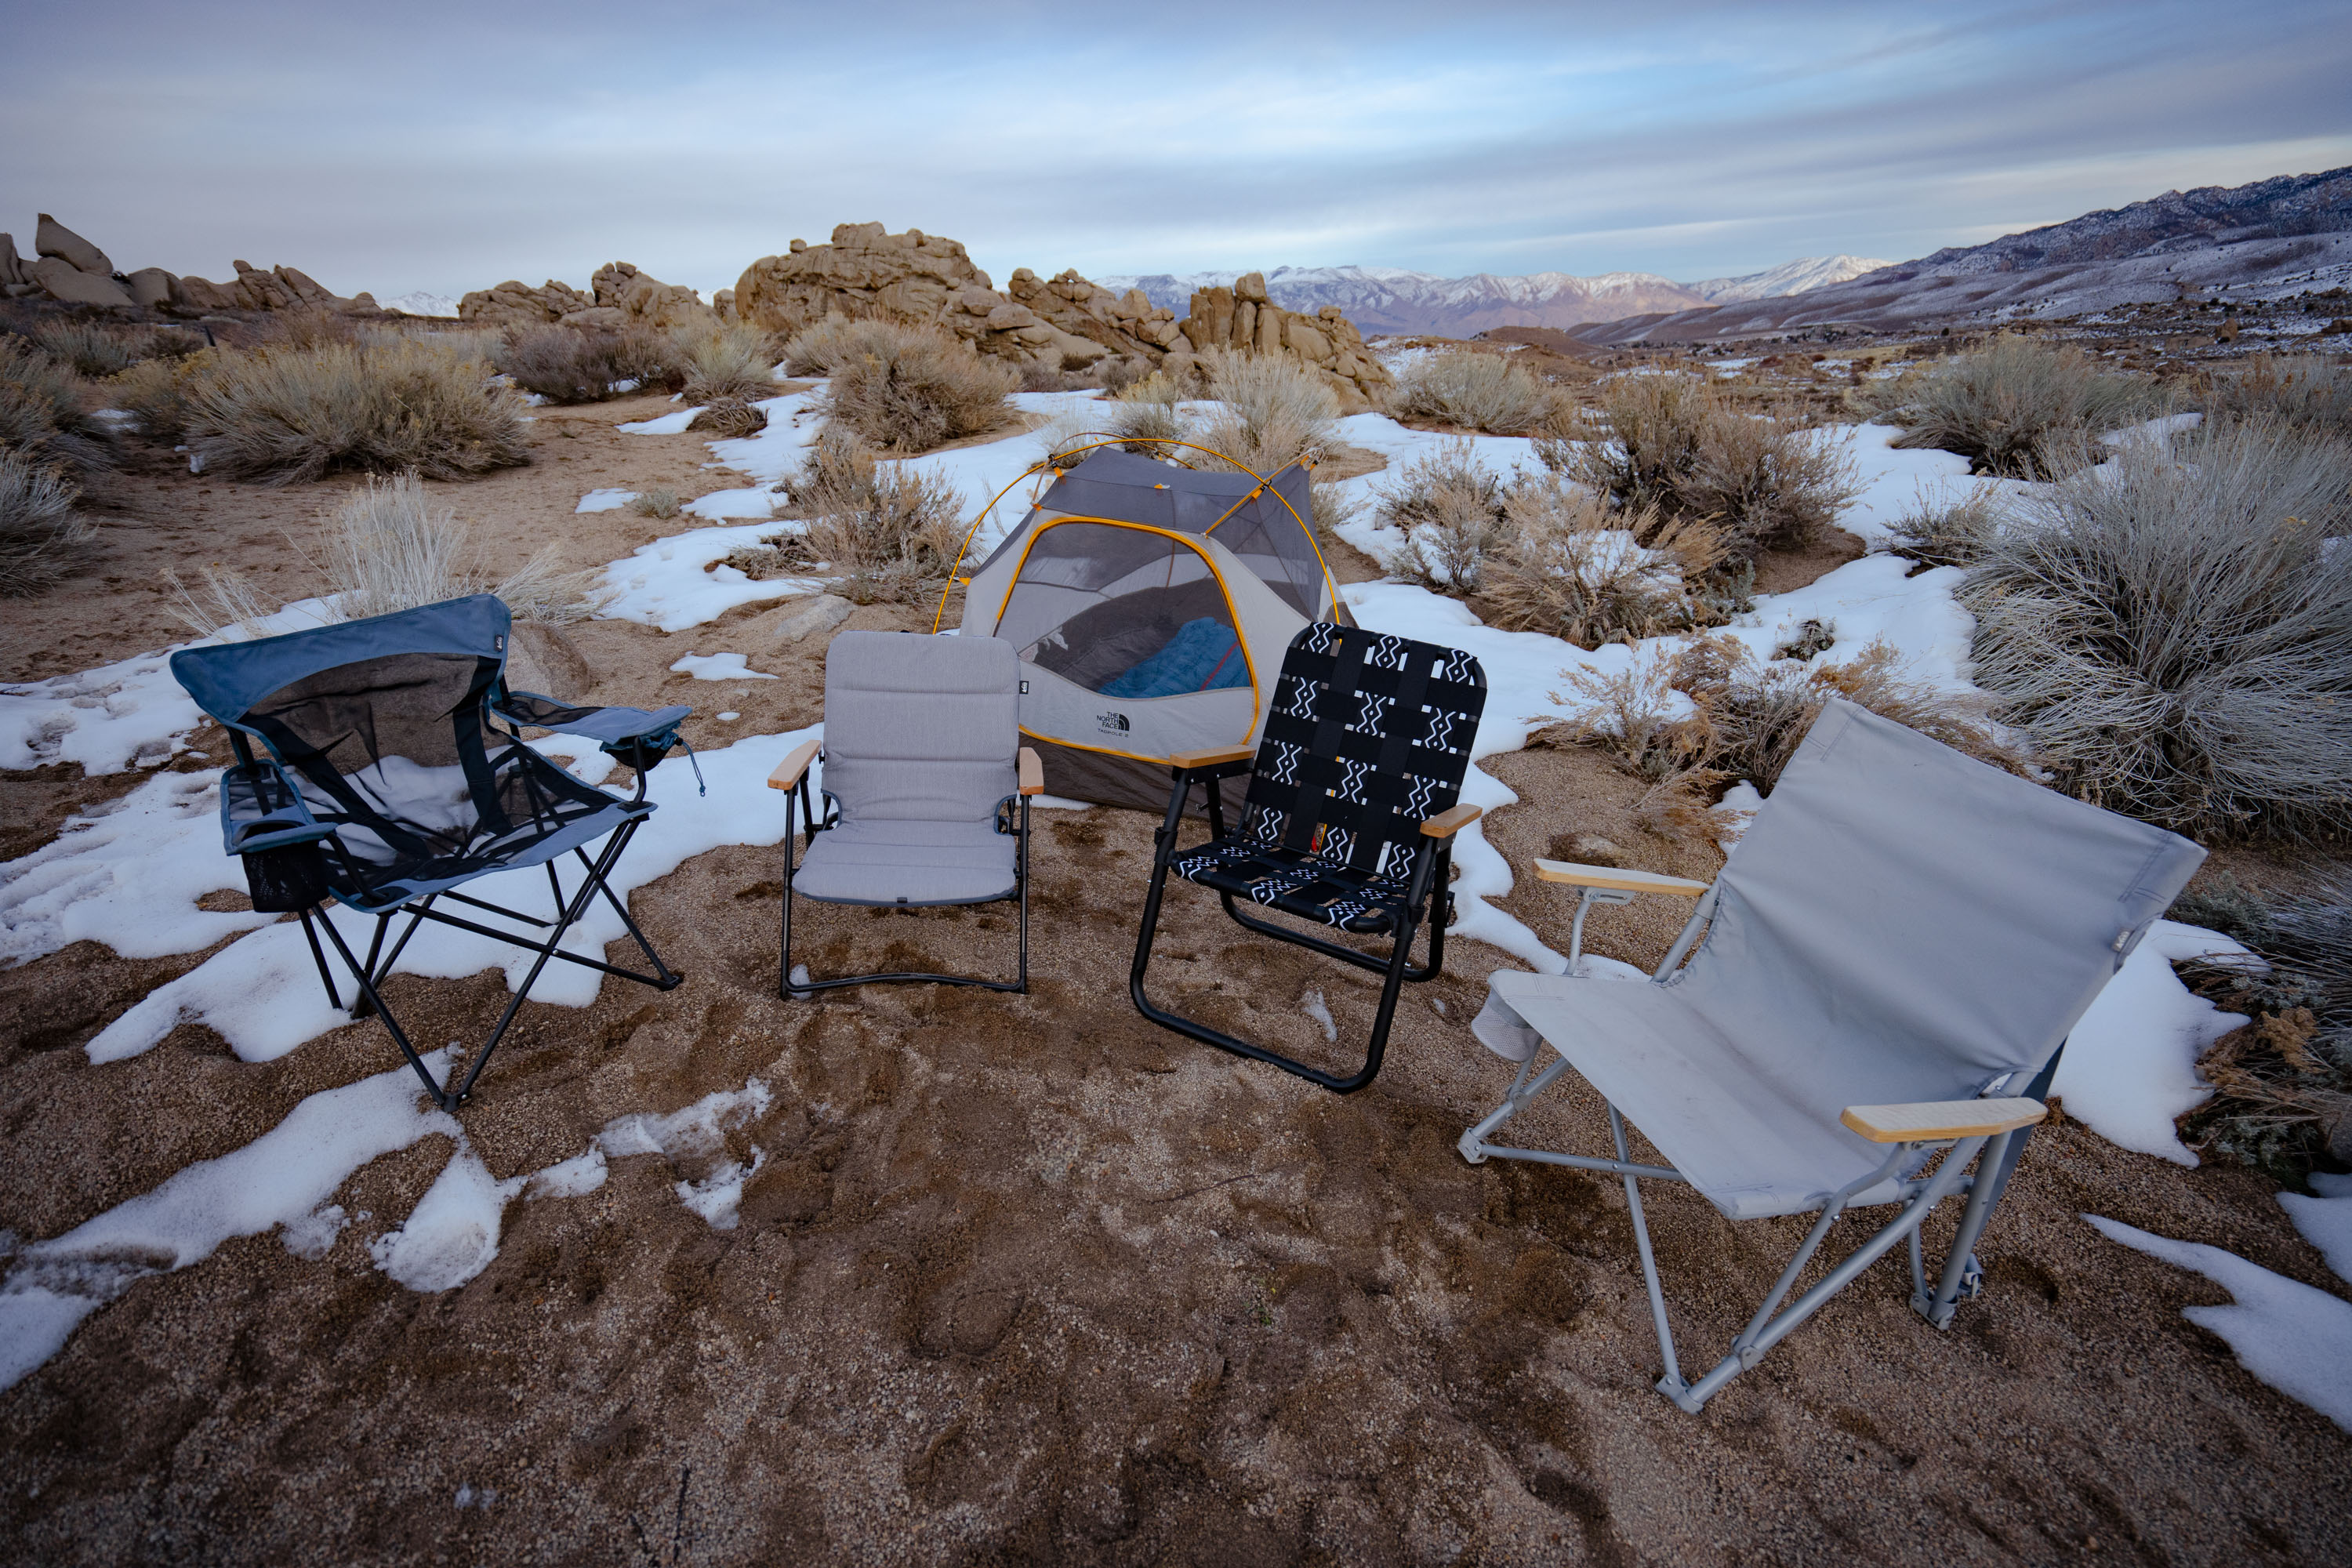
Each product was tested over several weeks, and taken out on different occasions for real-world applications — overnight camping trips, backyard barbecues, and day trips to the local swimming hole. The most recent lineup of coolers was tested in October in the high desert of Bishop, Calif. The average temperature was in the high 70s to low 80s for the majority of the month.

Each cooler was rated based on its performance in our ice retention test, its insulation and materials, durability, extra features, weight, ease of transport, and ease of maintenance and cleaning. The coolers that ranked the highest in specific categories were assigned an award in our top picks. 

Also, we did not include soft coolers, backpack coolers, or electric coolers in this test.
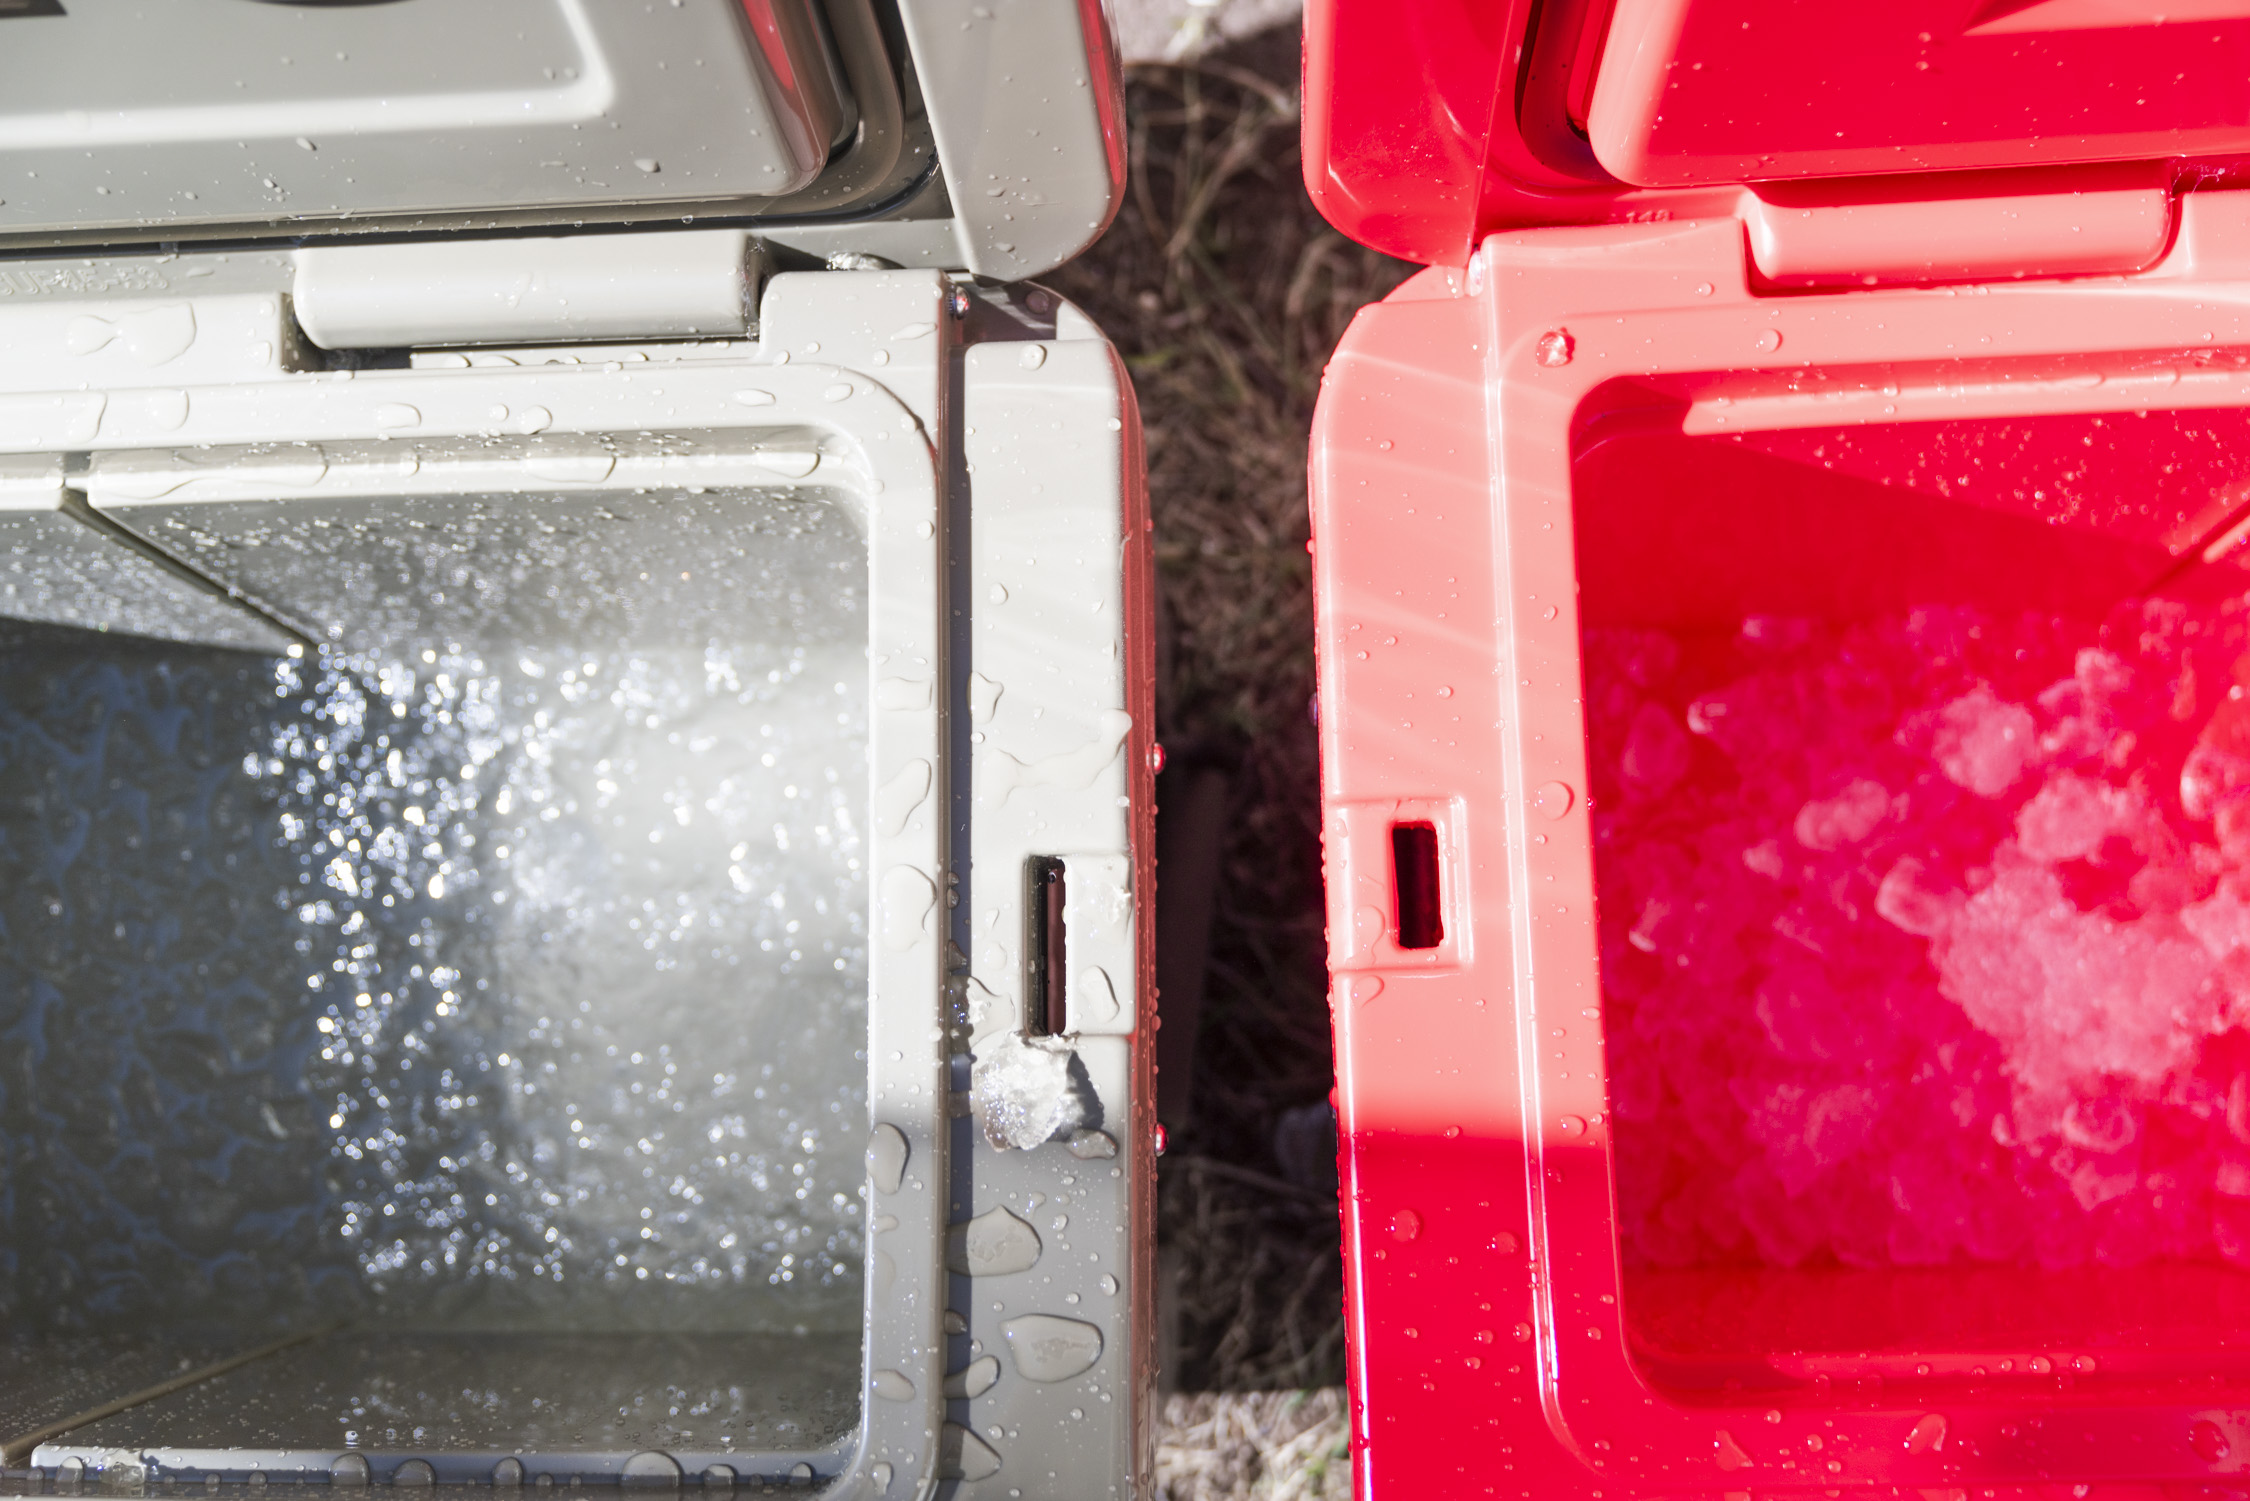
Ice retention test
The ice in the RTIC 45 (left) and YETI Tundra 45 (right) after the 10-day ice retention test; (photo/Miya Tsudome)

Ice Retention Test

For our ice retention test, we filled each cooler up 85% of the way with the same type of bagged, cubed ice. Each cooler stayed indoors before the test, to ensure that their starting temperatures were all about the same. It’s recommended to pre-chill a cooler for the best ice retention, we did not prechill any of the coolers to best mimic how we would actually use them.

For the actual test, we stored the coolers outside in an area that was mostly shaded during the day, with a few hours of direct sun exposure and temperatures that varied from 35 degrees overnight to 100 degrees in direct sun. This was also our idea of the best imitation of how these coolers would typically be stored outdoors. 

Variables that can affect ice retention include the ice quantity, outside environment and temp, exposure and amount of sunlight, type of ice (crushed, block, cube, dry), airspace, and more. In order to find the best of the best coolers, it was crucial for us to do a direct comparison. 

We checked each cooler’s ice retention/melt rate once a day and recorded the time and temp for each one. We also noted the time once each cooler’s ice was fully melted. The YETI Tundra 45 and the YETI Roadie 24 2.0 took first place, both retaining ice for the full 10 days.

The RTIC Ultra-Light came in next, retaining useable ice for 8 days with interior temperatures 48 hours in at 29.2 degrees F and 31.2 degrees F.

While the Igloo ECOCOOL had an interior temperature of 34.6 degrees F at the 48-hour mark, it surprisingly still had some ice left inside after 10 days. The RovR RollR 45 only lasted 6 days with useable ice, but it also had the least amount of ice inside out of all the coolers due to the useable space.

In contrast, the Coleman 316 still held a large quantity of ice after 10 days. This is more so due to the amount of ice that it holds in its 120-quart interior rather than due to its insulation properties. More ice = more ice retention. 

This test was not meant to be purely scientific, but rather to reflect the realistic use of a cooler outdoors and accurately compare cooler performance. To keep it fair, we made sure that all coolers were subjected to the same variables and criteria as much as possible.

It is worth mentioning that this test was not performed in the height of summer, but rather during a time when overnight temperatures dipped fairly low, causing the ice to melt much slower than if this test was done in July.

If you’re tired of ice and ok spending more money for an actual portable refrigerator, check out GearJunkie’s guide to the best Electric Coolers.

ice retention test
Ice left in the Coleman 316 after 10 days; (photo/Miya Tsudome)

Our Cooler Rating System

When comparing coolers side by side, we break our evaluations into four key categories. This system provides a balanced look at performance, usability, and design, all while helping us determine which coolers stand out — and which ones melt under pressure.

Ice Retention

Ice retention is the most important measure of a cooler’s performance. We evaluate how long each model keeps ice solid in real-world conditions, including during road trips, camping weekends, and multi-day tests in fluctuating temperatures. Coolers that maintain low internal temps for several days (even when opened frequently) earn top marks here. For this metric, please reference our ice retention test (above).

Build Quality

A cooler’s durability often determines how long it will last. We look closely at construction methods (rotomolded or injection-molded) along with hinge strength, latch reliability, and gasket design. We also consider overall sturdiness, resistance to dents or warping, and how well the cooler stands up to heavy use in the field. A cooler earns bonus points for quality and durability if it is bear proof but that isn’t a requirement, nor is it always worth your hard-earned cash.

Portability

From quick tailgates to long hauls across camp, portability can make or break a cooler’s usability. We assess handle design, strap comfort, weight when fully loaded, and balance while carrying. Coolers that feel awkward or strain our arms lose points here, while those with ergonomic grips or smart strap systems get high marks.

Capacity and Organization

A cooler’s capacity isn’t just about volume; it’s about usable space. We look at how efficiently each model stores cans, bottles, and ice, and whether its internal layout makes access easy. Features like baskets, dividers, and wine-bottle-friendly heights earn extra credit for improving real-world organization and versatility.

Buyers Guide: How to Choose the Best Cooler

Cooling Performance

Insulation & Materials

Coolers have a long and storied history. From a humble beginning as a wooden box with an interior tin chamber invented by Thomas Moore Jr. in 1802, to the decently insulating styrofoam boxes that came from the World War II era, to the plastic exterior coolers we know today pioneered by the Coleman company, coolers have come a long way.

Historically, coolers have been made with interior and exterior shells of plastic, with hard foam in between. Many basic coolers are still made this way today, such as the Igloo ECOCOOL and the Coleman 316

In 2006, two brothers named Roy and Ryan Seiders revolutionized the cooler market with their rotational molding or “rotomolding” design. This involves a heated plastic mold that is rotated continuously while powdered polyethylene is added to it to create a uniform thickness. They also pioneered the use of polyurethane instead of styrofoam as insulation, which created superior ice retention.

YETI was the company born from its design and is considered the gold standard in coolers today. Many companies have since adopted the rotomolding technique for their coolers. Now, a majority of premium coolers like the YETI Tundra 45 and the YETI Roadie 24 2.0 are rotomolded.

RTIC 45 cooler
Rotomolded coolers typically have thick, rounded edges which is a product of how they are rotated to be evenly molded, as seen here on the RTIC 45; (photo/Miya Tsudome)

Coolers use a few different sorts of foam or petroleum-based insulation, typically double-walled. YETI employs its pressure-injected polyurethane foam, while Igloo uses its proprietary THERMECOOL insulating foam.

While rotomolded coolers offer the best ice retention and durability by far, they are also considerably more heavy and expensive. The trade-off for lighter, less expensive coolers, however, will be in their performance and durability. 

More recently, manufacturers have introduced coolers made from recyclable or compostable materials. These models, such as the Igloo Recool Cooler, are built from molded paper pulp with plant-based binders instead of petroleum-derived foams. Their insulation is modest compared to plastic or rotomolded designs, but they offer a sustainable alternative to disposable Styrofoam chests. Best suited for short-term use like picnics, concerts, or day trips, compostable coolers trade multi-day ice retention for environmental responsibility.

Seals

The highest-performing coolers in our lineup all have heavy-duty rubber gaskets that work to seal their lids airtight. In order to keep your cooler as consistently cold as possible, you need to be able to trap that cold air inside and keep it closed.

The best coolers will implement the same materials and mechanisms as deep freezers will, with rubber gaskets that create airtight seals, and sturdy, thick latches that pull the lids tight. The Igloo ECOCOOL, the Igloo Recool and the Coleman 316 are the only coolers in our lineup that do not implement this feature.

The RovR with wheels
The white colored top of the RovR RollR 45 will reflect sunlight, making it less likely to overheat than darker-colored coolers; (photo/Miya Tsudome)

Exterior Color

Another thing to consider if you want the absolute best-performing cooler you can buy is the color you choose. When measuring the outside temperature of each cooler during our ice retention test, the lighter-colored coolers consistently had lower exterior temperatures. So although that dark grey cooler might be more your style, the white one might be the better choice.

Size & Volume

The sweet spot volume of all the coolers we tested was a 40- to 45-quart cooler. This medium size is the most convenient, providing enough space for 3-5 days’ worth of food for one or two people, plenty of room for a few six-packs of cold drinks for a backyard barbecue.

In terms of the different sizes that each brand offers, 30- and 60-quart capacities are also popular. The largest cooler we tested was the Coleman 316. It can serve a purpose for large events or gatherings and is a good value for its size. On the flipside, the smallest cooler we tested is the Igloo Recool 16qt Cooler that is best suited for day-long activities like picnics or small gatherings with friends.

The interior of the YETI Tundra
The Tundra 45 actually only has a 37-quart capacity. But this is enough for 1-3 days’ of food and a few drinks for two people; (photo/ Miya Tsudome)

You’ll want to consider not only how much cooler space you may want for different adventures, but also consider a cooler’s dimensions. You don’t want to buy the perfect cooler only to find out that it doesn’t fit in your car when packed, or in a spot on your storage shelf. Most coolers are rectangular in shape, and can be easy to slide into car trunks and stack other things on top of.

Some coolers have wheels, like the RovR RollR 45, which, while making transport easier, can take up more room in a trunk or on a shelf. It’s also a good idea to think about the items you’ll be keeping cool and make sure those (maybe wine bottles or a coffee press for camping) fit the internal dimensions as well.

Weight

Weight is also an important consideration when choosing a cooler. Rotomolded coolers with their thick, 2 inches of insulation and durable outer plastic layer will be the heaviest cooler you can buy. Coolers like the YETI Tundra 45 all weigh between 23 and 30 pounds alone. The RovR RollR 45 weighs a whopping 37 pounds. Granted, it has wheels, which means transportation won’t be as difficult an affair. 

The RTIC Ultra-Light Hard Cooler is a great innovation from RTIC that uses injection molding to create a lighter, midsized cooler. At 31 pounds, the 52-quart model is around the same weight as its 45-quart, rotomolded counterpart, resulting in a higher capacity for less weight.

The Igloo ECOCOOL weighs in at only 9.84 pounds, putting it on the lighter side for a hard-sided cooler (None of these coolers weigh less than the Igloo Recool Cooler at a featherweight 1.6 pounds). However, its lightness is attributed to its injection molding, thin walls, and noninsulated lid. Though lightweight, the ECOCOOL is not a premium cooler for the serious consumer but is a great budget pick or option for someone who has more trouble carrying heavier loads.

A light weight cooler
The RTIC Ultra-Light Hard Cooler is a lightweight and high-performing cooler; (photo/Miya Tsudome)

Ease of Transport

Handles or Wheels?

Some would say this is personal preference, but in our opinion, it all comes down to your cooler volume and what you’re hauling. So, if you are leaning toward a 20- to 40-quart cooler, you probably don’t need wheels.

These coolers aren’t so wide that it’s difficult to carry them on your own, and typically come with molded indentations as well as sturdy rope handles on either side. Our testers loved the YETI Tundra 45 with its military-grade nylon rope handles and comfortable, rubber grips.

If you are going to invest in a cooler with a capacity of 60, 70, or 100+ quarts, definitely consider one with wheels, or at least one with a few different carry options (tow handles, grips, two-person carry, etc). This is a flaw in the Coleman 316 we tested, which at a 120-quart capacity and 37.9-inch width does not come with wheels and pretty much requires two people to carry it fully loaded.

The RovR RollR 45 Wheeled Cooler, however, comes with beefy all-terrain plastic tires that can handle sand, gravel, and rough terrain with ease, making it the best of its class for ease of transport.

If you are frequently loading up on ice and filling that bad boy with cans, you may want something with wheels. Or maybe not, if you plan on rolling that cooler over rugged terrain. But, if you know you’ll be hauling your cooler around with family or friends, a two-handled one may work just fine.

A wheeled cooler
The RovR is heavy, but its huge wheels make it easy to move over uneven terrain; (photo/Miya Tsudome)

Durability & Build Quality

It’s also worth considering the durability and build quality of a cooler, especially when you start shelling out some more cash. A cooler can be an expensive investment, and if you are planning on using one a lot, it’s nice to know that it will hold up to years of use.

Rotomolded Coolers

Rotomolded coolers take the cake in this category again, with their continuous molding design creating a noticeably thick and robust exterior. This method creates a uniform thickness all around. These coolers have superior ice retention and can be a seat or footstool, not to mention withstand attempts at forced entry by grizzly bears. 

Yes, you read that correctly. Coolers such as the YETI Tundra 45 and RovR RollR 45 hold certifications from the International Grizzly Bear Committee that state that they successfully withstood attempts at entry from actual grizzly bears.

Not only is this a testament to their durability, but it also allows you to have peace of mind if you do any camping in areas where bears might be of concern.

A rotomolded cooler
YETI coolers don’t just look good, they also perform exceptionally well; (photo/Miya Tsudome)

Injection-Molded Coolers

Injection-molded coolers create two separate shells, fused together by insulated foam. They are lighter than their rotomolded counterparts. Yet they are more likely to crack or separate, causing their durability to be called more into question over time.

While you can sit on the lids of the Igloo ECOCOOL and the Coleman 316, the noticeable flex of their plastic will make you want to be more careful handling these coolers.

Recyclable & Compostable Coolers

Recyclable coolers (like Igloo’s Recool) take a completely different construction approach, using molded paper pulp rather than plastic shells. While they aren’t built to last for years like rotomolded or injection-molded coolers they’re sturdier than disposable Styrofoam chests and can handle the weight of food, drinks, and ice for a day. Their durability is best suited for occasional use, festivals, or day use where ruggedness isn’t the main priority.

Maintenance & Cleaning

After purchasing a new cooler, it’s important to keep up with some basic cleaning and maintenance to ensure its lifespan is as long as it can be. After use, you’ll always want to leave the lid open to let the cooler air dry. This ensures no moisture gets trapped inside, causing mildew or bacterial growth. It’s a great idea to wash the interior with some warm, soapy water, and then let air dry.

You do not want to leave a cooler with food and water in it for days, as this will ensure bacterial growth (and in coolers like the Igloo Recool, may cause disintegration). Most of the coolers in our lineup are relatively easy to clean. The lighter coolers, such as the Igloo ECOCOOL and the Coleman 316, can tip over easily when empty and the lid is open. This makes them a little more cumbersome as the lid can flop close on you while giving the scrub down.

An injection molded cooler
The affordable Igloo ECOCOOL won’t hold ice as long as a YETI, and its plastic components are more likely to break if mishandled, but it’s still a great budget pick; (photo/Miya Tsudome)

Price & Value

The best coolers are not cheap, but if you know what you need, it’s easier to find a model that can fit your budget and your food storage needs.

Budget

In general, the less expensive cooler will be smaller and have injection-molded plastic shell with some sort of foam insulation. They have thinner walls and don’t insulate as well as more expensive models. If you’re only going to use your cooler for day trips or brief overnight, then it’s totally possible to make an inexpensive cooler work for you!

The most affordable cooler in this guide is the Igloo Recool 16qt Cooler ($10), a recyclable and reusable featherweight. It’s quite different than all the other coolers listed here because it’s made of recycled paper and is not built for the long haul. Still, it does a great job of keeping drinks chilled for a day when portability is the priority.

The Igloo ECOCOOL ($60) gets you 52 quarts of storage for food and ice is lightweight, and even had a little ice left at the end of our 10-day retention tests. Its handles are a bit flimsy, it isn’t bear-proof, and there is no drain plug, but if keeping your food fresh for a day or so is all you need, it will absolutely do the trick. If you need even more space without breaking the bank, check out the Coleman 316 Series Chest Cooler ($110)

Mid-tier

The Xspec Pro 60-Quart Cooler ($230) sits smack in the middle of price and performance and is a great option if you need a cooler to last a week. Or, for a few more dollars, you can snag the YETI Roadie 24 2.0 ($250), a rotomolded option with fantastic ice retention and a newly-added drain plug.

Premium

The YETI Tundra 45 ($325) is our top pick and one of the more expensive coolers on our list. The Tundra is THE cooler that set off the roto-molded cooler wars and has pushed the competition to really up their game. The Tundra 45 is IGBC-certified (bearproof), has high-quality polyurethane foam insulation, and easily held ice for over ten days.

The Canyon Coolers Outfitter 55 ($300) isn’t bearproof, but does have better storage capacity, and the RovR RollR 45 Wheeled Cooler ($350) is easier to move around. All are excellent insulators, but it’s best to check the specs to make sure you’re getting exactly what you’re looking for if you’re going to pay top dollar.

Frequently Asked Questions

What is the best hard cooler?

There is no single best cooler. Really, what’s most important is what you’ll be using the cooler for and how often. If you plan on taking it out every week, a more durable cooler is probably the best pick.

We’ve listed the best cooler (based on our feedback and testing) but also the best budget, the best wheeled cooler, and a few others for you to choose from.

What is the best cooler for the money?

Out of the coolers we tested, you really can’t go wrong with Igloo or Coleman coolers. Both are great quality for the price.

Conversely, most people wonder if YETI is worth that high price tag. The answer is yes, but it’s also overkill for many people — do you really need a cooler to keep ice cold for 10 days? Are you beating up a cooler enough that you need rotomolded construction? Most of us aren’t off the grid in rugged environments for that long or very often.

What is the best type of cooler to buy?

If you’re looking for the best cooler to keep contents cold, a hardside cooler is much better than a softside one. They are also more durable.

But really, the answer to this question is personal. What’s the best type of cooler for you? If you need help answering that question or narrowing down your choices, we’d recommend comparing our best picks.

Are hard coolers better than soft coolers?

Hard coolers usually offer more insulation and much more protection (both inside the cooler and on the exterior). They also offer features that soft coolers can’t, like drainage plugs and wheels for easy transport. Many employ bear-resistant latches and locks so you don’t have to worry about leaving them outside at camp.

If you need a cooler that will live in your garage or vehicle — and that you can also take to the field, beach, or camp — a hard cooler is better. But if you’re concerned about carrying it longer distances or care about weight, a soft cooler might be better. The best option: Get one of each!

How long do coolers keep ice?

How long a cooler will hold ice depends on its construction, size, and the conditions you’re using it in; ice will last much longer in the high alpine than it will in the desert, for example. Premium rotomolded coolers, like YETI or RTIC, can keep ice for 5–10 days if packed properly and kept out of direct sun. More affordable injection-molded coolers, like Igloo or Coleman, usually hold ice for 1–3 days. Compostable or disposable coolers, such as the Igloo Recool, are designed for shorter outings and typically last up to 12–24 hours. No matter which cooler you choose, pre-chilling it and minimizing how often you open the lid will make a big difference in ice retention.

What size cooler do I need?

The right cooler size depends on how many people you’re packing for and how long you’ll be out. For day trips or solo use, a 20–30 quart cooler is usually plenty. Weekend camping trips for a couple of people often call for a 45–60 quart model. Larger groups, extended expeditions, or hunting and fishing trips might require 75+ quarts. Keep in mind that ice takes up a significant amount of space; usually around 30–40% of the cooler’s capacity. Size up if you’re planning on storing food and drinks for multiple days.

The Best Pocket Knives of 2025

16 October 2025 at 18:34

(Photo/Nick LeFort)

Pocket knives are flat-out handy. And they’re a ton of fun. Whether you’re a general outdoorsman, blue-collar worker, or someone who’s looking for an everyday practical tool, they can quickly turn into an obsession.

Obsessed would be a good way to describe the team at GearJunkie. We have backpackers, climbers, hunters, fishermen, and general outdoor enthusiasts. It’s safe to say that all of us see the value in a trusty pocket knife and use one regularly. Pocket knives transcend our differences in interests. They’re a piece of gear for everyone.

Fortunately, as a team, we have the opportunity to test, use, and abuse a ridiculous amount of knives. Below is our selection of favorites, all but guaranteed to make you feel the same excitement you did when you opened your first one. From high-end knives with advanced steels to some of the cheapest, most time-tested knives in history, you’ll find the perfect addition (or start) to your collection.

Editor’s Note: This guide was revamped on October 16, 2025, with all-new selections.

The Best Pocket Knives of 2025

Maybe the Bestselling Pocket Knife

Benchmade Bugout

9.0/10 Rating

A Timeless Classic for Less Than $20

Opinel No.08 Inox

8.2/10 Rating

Knife Expert Nick LeFort's Top Pick

Knafs Lander 2 Pocket Knife

9.0/10 Rating

A Really, Really Good Value

Kershaw Bel Air Pocket Knife

8.7/10 Rating

Best Multitool/Knife Combo

Victorinox Huntsman

7.0/10 Rating
BUY OPTIONS

Best Budget Pocket Knife

CIVIVI Yonder

7.9/10 Rating

A Heavy, Tough, Versatile Knife

Leatherman Glider

8.3/10 Rating

A Classic of the Modern Era

Spyderco Paramilitary 2

8.0/10 Rating

The Best Automatic Pocket Knife

Benchmade Auto Immunity

8.3/10 Rating
BUY OPTIONS

Best Tactical Pocketknife

DPx Gear HEST/F 4.0

8.5/10 Rating

Best-Dressed Pocket Knife

CRKT Crossbones

7.8/10 Rating

Nick LeFort's Favorite Automatic Knife

Benchmade CLA With MagnaCut

8.9/10 Rating
See more picks

  • Blade Shape
    8.9
  • Steel
    8.0
  • Handle
    8.0
  • Lock
    9.5

  • OAL: 7.46"
  • Blade Length: 3.24"
  • Blade Steel: S30V (other steels available)
  • Blade Shape: Drop-Point
  • Lock Type: AXIS lock
  • Weight 1.85 oz.:

Pros

  • Very light for a full-size knife
  • Versatile design can do anything
  • Virtually disappears in the pocket

Cons

  • Expensive relative to materials used

Read Review: Hiker’s Dream Knife: Benchmade Bugout Review

Benchmade crafts some of the best knives on the market, and the Bugout (starting at $180) is the top seller in the entire lineup. Any pocket knife list wouldn’t be complete without it. If you’re looking for a knife to be your trusted companion for the next decade, it should be high on your list, even if it is a bit cliché for those obsessed with knives from custom makers.

From an everyday carry standpoint, it’s one of the nicest carrying pocket knives available. It’s ridiculously light at 1.85 oz, and the handle is a mere 0.42″ inches wide. The knife slides into your pocket perfectly, and it’s easy to forget it’s there.

Despite the light weight, the knife isn’t too small for practical everyday use. The standard version is equipped with a 3.24-inch, drop-point, S30V stainless steel blade. Our tester used it to slice cord, cut food in camp, and do some carving, all without complaint. It’s a useful blade that maintains utility in a lightweight package.

And, with the popularity of the knife, Benchmade now allows you to customize the Bugout in virtually any way you want. Seriously, the options are limitless. Check it out here. You can upgrade steels, handles, put custom designs on the blade, you name it. If you want a high-performing, unique-to-you pocket knife to carry by your side every day, you’ll be hard-pressed to find a better option.

While testing, the lightweight, thin Grivory handle (which comes standard) did flex slightly under extreme pressure. But in reality, that was in situations a “pocket knife” isn’t really designed for. The thin, ultralight design is well worth the tradeoff, and the Bugout may be the quintessential, trusty pocket knife.


  • Blade Shape
    7.5
  • Steel
    6.8
  • Handle
    7.1
  • Lock
    7.0

  • OAL: 7.59”
  • Blade length: 3.28”
  • Blade Steel: Sandvik 12C27 stainless steel
  • Blade shape: Yatagan
  • Lock type: Locking ring
  • Weight: 1.6 oz.

Pros

  • Excellent out-of-the-box sharpness
  • Very lightweight at a mere 1.6 oz.
  • Locking blade is easy to use
  • Comfortable handle

Cons

  • Grit, dirt, and sand get jammed in blade-locking ring
  • Convex grind takes a bit more skill to sharpen compared to a flat grind
  • Sandvik 12C27 is a fine stainless steel, but not a premium choice

Nineteen bucks for a pocket knife? In today’s world? Surely, this has to be something from TEMU. But no, the Opinel No.08 Inox ($19) is actually from France, where it’s been manufactured for 135 years. People were relying on this knife as an everyday carry before humans had even taken flight.

The design has remained pretty much the same, hence the borderline criminal price. While not as fancy as some of the new knives at our disposal, it’s time-tested, and it clearly gets the job done. If it didn’t, it would have been discontinued in its more-than-a-century existence.

The blade is 3.28″ long and is made from Sandvik 12C27 stainless steel. Is the Swedish steel going to blow your socks off? No, modern steels are much better for holding an edge, but again, its $19. Give it a quick, easy touch-up, and you’ll be back in action. As far as corrosion resistance goes, GearJunkie contributor Matt Jancer said he’s never had a single spot of rust pop up on his trusty Opinel No.08, despite not babying it.

One of the few updates this knife has received since its inception is the inclusion of a locking mechanism. In the tradition of a more old-timey aesthetic, it’s a simple feature without fancy springs or small parts. Just rotate the locking ring at the top (called Virobloc), and the blade is literally blocked from closing on your hands. While it is prone to getting gummed up with dirt, its easy enough to clean out and is an upgrade that was much needed.

The out-of-the-box sharpness surprised Jancer, and the factory edge is better than some more expensive knives. Whether you’re on a shoestring budget or are looking for a timeless classic to add to your collection for a minimal investment, the Opinel delivers time-tested performance.


  • Blade Shape
    9.1
  • Steel
    8.5
  • Handle
    8.0
  • Lock
    8.0

  • OAL: 7.40”
  • Blade length: 3.25”
  • Blade steel: S35VN
  • Blade shape: Drop point
  • Lock type: Clutch lock (Crossbar Lock)
  • Weight: 2.9 oz.

Pros

  • Size-to-weight ratio
  • Clutch lock
  • The fat-bellied S35VN drop point blade

Cons

  • None

The Knafs Lander 2 ($129) is the hardworking answer to Benchmade’s Bugout ($180). Where the Bugout has been touted for being lightweight, the tradeoff is that it’s only good for light to medium-duty work. By adding only an ounce more of weight, the folks at Knafs created a pocket knife that can be used and abused at your discretion for years to come.

Available now in a variety of handle scale options and blade finishes, the Lander 2 makes use of S35VN steel. S35VN is one of the most popular premium steels because it’s easy to maintain and staves off corrosion and abrasion like a champ. It also hosts the strongest lock mechanism on the market today, the Clutch Lock, a branded version of the crossbar lock that first climbed to fame through Benchmade as its Axis lock.

From LeFort: “One of four different Lander models, the Lander 2 gets my top pick award because the balance between materials, size, function, and weight is hard to match. Since writing the original article in January of this year, I have swapped out my Blue G10 carry for the Green Micarta ($140) version. However, if you plan on adding a Lander 2 to your pocket, I would recommend you look at the brand’s expanded lineup of custom handle scales — or consider making them yourself.”


  • Blade Shape
    8.0
  • Steel
    9.0
  • Handle
    7.8
  • Lock
    9.0

  • OAL: 7.3"
  • Blade length: 3.1"
  • Blade Steel: CPM MagnaCut
  • Blade Shape: Reverse Tanto
  • Lock Type: Sliding bar lock
  • Weight: 2.3 oz.

Pros

  • Great steel
  • Easy-to-use and tough lock
  • Slim size and weight
  • Super-thin blade stock
  • Good handle design
  • Price

Cons

  • Umm … the clip sticks out from the handle about a quarter inch — does that count?

While the listed price ($249) of the Kershaw Bel Air doesn’t scream value, the kicker is that this knife is often available for considerably less. At the time of this writing, it’s available for around $150 in most places, and certain colors are available for $115 on Amazon. And it’s a MagnaCut blade.

Yep, that’s right, you can see what the MagnaCut craze is all about without feeling like you’re blowing a ridiculous amount of cash on a pocket knife. It’s a premium steel at a middle-of-the-road knife price. That alone makes it a super cool pocket knife.

But the benefits of the Bel Air don’t stop at just the steel. The Reverse Tanto blade is thin, at a mere .09″, something that is usually reserved for much more expensive, or hard to get knives. While thick blades used to dominate the market, thinner, much “slicier” blades are now possible due to improvements in steel technology. The Bel Air gives you that at a reasonable, mass-produced knife price.

Our tester took only this knife on a vacation, and used it to cut up snacks for kids, open cardboard beer boxes, carve driftwood, and process lobster for dinner. The only wear the knife showed was a slight diminishment of the blackwash on the blade. While some may view that as a negative, it actually gives it a cool, “trusty, used tool” vibe.

The handle is aluminum with grippy scales and a Cerakote finish. Even after being taken to the beach, the knife was in great shape, although our tester did admit to babying it a bit around sand. That was due to the Duralock locking mechanism. It is quite literally a replica of the Benchmade mechanism (the patent expired), and it can certainly be trusted. But it does have a lot of moving parts that can get gummed up with extreme use.

Honestly, this U.S.-made pocket knife is a steal for just about anyone. But its an especially good grab for those who are considering dabbling in the premium pocketknife world, just to see what the hype is all about. There’s hardly anything not to love.


  • Blade Shape
    8.0
  • Steel
    9.0
  • Handle
    8.4
  • Lock
    9.0

  • OAL: 7.87"
  • Blade length: 3.4"
  • Blade steel: CPM-MagnaCut Stainless
  • Blade shape: Reverse tanto
  • Lock type: Axis (Crossbar)
  • Weight: 2.72 oz. (confirmed)

Pros

  • Top-shelf steel
  • Light, easy to pocket and carry
  • Versatile blade shape
  • Comfortable handle

Cons

  • Not good for food prep
  • Expensive

Many of the knives on this list stand out as subtle, thin, easy-to-carry pocket knives. While the Benchmade Osborne ($300 Magnacut, $240 S30V) isn’t a heavy or bulky carry, it is built to withstand heavier-duty tasks than other knives on this list. That gives it a good position for those who demand more than opening packages or cutting up the occasional snack from an everyday carry.

The unique blade design, which is the antithesis of modern thin blades, allows it to withstand tougher tasks. The spine is 2.92 mm thick, and the grind shape creates an aggressive wedge rather than an ultra-thin profile. It’s very angular and beefy, making it great for some things and not so great at others, like thinly slicing vegetables.

But it excels at tougher tasks, like hacking branches from trees, and it wouldn’t be ridiculous to use it for heavier-duty fire-making activities. And after cutting 50 1-foot slices through a cardboard box, Editorial Director Sean McCoy found the knife still sharp enough to slice through paper, although not as cleanly as it did out of the box.

Like many of the knives listed, you can find an Osborne in different steel types to fit your exact needs and budget. All of them look really good though, and the knife demands attention from onlookers with a modern but rustic look.


Best Multitool/Knife Combo

Victorinox Huntsman

  • Blade Shape
    7.0
  • Steel
    7.0
  • Handle
    6.5
  • Lock
    3.0

  • OAL: 6"
  • Blade Length: 2.5"
  • Blade Steel: Stainless
  • Blade Shape: Drop Point
  • Lock Type: None
  • Weight: 3.4 oz.

Pros

  • Proven Victorinox build and materials
  • Excellent tool variety
  • Affordability

Cons

  • Tools do not lock

Almost everyone we know got into knives because they were given a “Swiss Army Knife (SAK)” when they were a kid, if not at some other impactful time in their lives. That said, this list wouldn’t be complete without having something from Victorinox on it. Last year, we had Victorinox’s Hiker ($36) in this slot. But, after a year of testing and toiling, we feel that the best tool for this category is the Huntsman ($50).

For roughly the same amount of pocket real estate as the Hiker, you get the added benefit of scissors and a multipurpose hook. Yes, you do lose a dedicated Phillips screwdriver, but we’ve found that the small screwdriver on top of the can opener gets the job done.

With 15 onboard tools, the Huntsman is well-rounded without any bloat. Even though we would love to see the tools lock on a SAK, it’s something you learn to work around and keep yourself aware of. That said, even when using some of the more demanding tools like the saw and awl, there was never an instance where they closed in on our hands.

Aside from the tools and blades being made from stainless Swedish steel, the shining star of the Huntsman is the multipurpose hook. At 3mm, it allows you to do such things as remove a hot pot from a fire and pull tent stakes out of the ground.

The scissors also came in handy for cutting fishing lines and excess cordage leftover from making knots and loops. For those of you who love a nice glass of Pinot Grigio at camp, you’re going to love the corkscrew.

For those of you looking for something fancy out of your SAK, Victorinox offers the Huntsman Wood ($64), which has Walnut wood scales.


  • Blade shape
    7.9
  • Steel
    7.8
  • Handle
    8.0
  • Lock
    8.0

  • Overall Length: 6.62”
  • Blade Length: 2.88”
  • Blade Steel: 14C28N
  • Blade Style: Spey Point
  • Handle Material: G-10
  • Lock Type: Crossbar
  • Weight: 273 oz.

Pros

  • Great balance between size and weight
  • Optimal grip options for all hand sizes
  • 14C28N

Cons

  • Crossbar lock has shorter pull than the industry standard
  • No obvious lanyard options

The CIVIVI Yonder ($67) is a mid-size folder with Micarta handles and a 14C28N stainless steel spey point blade. It has a crossbar lock and caged ceramic ball bearings around the pivot for fluid opening and closing, and locks up reliably when in use.

With an overall length of 6.62 inches, the Yonder is compact but well-suited for people of all hand sizes. For those folks with really big paws, you’ll enjoy the ability to move your thumb up the spine of the blade onto the jimping and use the grip in a three-finger configuration, wrapping your pinky up around the butt of the knife.

14C28N is considered a value steel, and it’s become prolific in the knife world over the past year as more and more brands look for ways to cut costs but still use a quality, reliable knife. It’s stainless steel, so corrosion won’t be an issue, and its abrasion-resistant qualities are also impressive. In terms of edge retention, you should expect the Yonder to hold an edge for a decent amount of time, and resharpening will be a breeze.

The Yonder won “Blade Show Best Buy of the Year 2024” days after it debuted in the summer of 2024. I think it’s the kind of knife made for anyone looking for a dependable pocket knife for years to come.

Note: In the original review of the Yonder, LeFort listed one of the cons as the crossbar lock’s shorter pull. He wants to take that back — in the last few months, he’s gotten used to it and recognizes that the shorter pull allows for quicker deployment.


A Heavy, Tough, Versatile Knife

Leatherman Glider

Leatherman Glider
(Photo/Leatherman)

  • Blade shape
    9.0
  • Steel
    9.0
  • Handle
    7.9
  • Lock
    8.0

  • OAL: 7.3"
  • Blade length: 3"
  • Blade steel: MagnaCut
  • Blade shape: Sheepsfoot
  • Lock type: Compression wedge
  • Weight: 3.7 oz.

Pros

  • Durable
  • Excellent steel
  • Versatile blade shape
  • Nice pocket carry

Cons

  • Edges, clip can feel sharp during heavy use
  • On heavy side for EDC

Leatherman has been synonymous with practical, affordable pocket knives and multitools. With the introduction of the Glider ($300) and a few other knives, Gerber jumped into the highly competitive premium knife space. The execution was excellent, and this is one tough, yet versatile knife.

As one of the heaviest knives on this list, the Glider isn’t a great option for those who prefer minimalism over practicality. One of the first things you’ll notice when you pick up this industrial-feeling knife is the heft of the Cerakoted aluminum handle and MagnaCut, 3″ Sheepsfoot blade. Where the knife lacks in weight savings, it makes up for it in a durable, rock steady, fixed-blade knife feel.

After 2 months of testing without being sharpened, Sean McCoy found it held a very sharp edge after regular, hard use. The wide blade, while unique for an EDC, is great at performing a variety of tasks, from spreading peanut butter, cutting vegetables, and whittling, to opening packages. The patented compression wedge lock is solid, and there is no blade play in this folder. It’s stout and built for hard work.

It’s not perfect, and the thumb stud opening is good, not great. It has a tendency to hang up when halfway open. In hand, it’s also not the most ergonomic knife, and the metal, angular handle can dig into your hand a little while making hard, aggressive cuts.

People may also find it annoying that over time, the Cerakote finish will start to wear. However in our opinion, that gives the Glider a unique character and a cool, industrial look.


  • Blade Shape
    7.9
  • Steel
    8.0
  • Handle
    8.0
  • Lock
    8.5

  • OAL: 8.26"
  • Blade length: 3.45"
  • Blade steel: S45VN (others available)
  • Blade shape: Clip Point
  • Lock type: Compression lock
  • Weight: 3.9 oz.

Pros

  • Compression lock
  • Slice-y blade
  • Tons of aftermarket upgrades

Cons

  • Weird blade-to-handle ratio

Read Review: Best Do-It-All Pocket Knife

The Spyderco Paramilitary 2 (starting at $199) was the premium pocket knife of the mid-2000s. It is still in production today, which makes it a timeless classic in the modern era. It feels like just yesterday that it was the knife you had to have. Yeah. You’re getting old.

But timeless classics are classics for a reason. Every once in a while, a brand stumbles on something that works and runs with it. That’s the case with this knife. In 2015, Editorial Director Sean McCoy labeled it as the “Best Do-It-All Pocket Knife,” and 10 years later, there’s still a case to be made for that statement.

The large thumbhole on the blade, while creating an unusual blade-handle ratio, is synonymous with Spyderco knives and creates an irresistible, “have to fiddle with” feel. It makes one-handed operation a breeze, and the compression lock is rock solid.

While the Benchmade Bugout can start to flex under pressure, the 3.44″ blade on the PM2 is built to handle tougher tasks, like cutting glued linoleum and thick tree branches. Yet it’s still thin enough to work as a passable kitchen knife in a bind.

With this knife being around so long, it’s hard to nail down an exact price. There are a ridiculous number of options available from S45VN steel with a G10 handle for around 200 bucks, up to a Maxamet version that often fetches over $400. Whichever you choose, though, you can trust the Spyderco Paramilitary 2 to be a lifelong companion.


The Best Automatic Pocket Knife

Benchmade Auto Immunity

  • Blade shape
    7.0
  • Steel
    9.5
  • Handle
    9.0
  • Lock
    8.5

  • OAL: 5.95"
  • Blade length: 2.49"
  • Blade steel: CPM M4
  • Blade shape: Wharncliffe
  • Lock type: Axis
  • Weight: 2.29 oz.

Pros

  • Excellent steel
  • Acute Wharncliffe tip
  • Small but very capable

Cons

  • The handle may be too small for bigger hands
  • Expensive, especially for its size

The Benchmade Auto Immunity ($325) was designed to meet or beat knife laws stating that knife blades on automatics must be under 2.5 inches to legally be carried. It’s also made from one of the best knife steels around. What it lacks in size, it makes up for in capability.

The steel we’re talking about here is one of the few ultra-premium, super steels: M4. On its own, M4 has very good corrosion and abrasion resistance. With the added Cerakoting found here on the Auto Immunity, it might be the best knife steel on the planet. It also holds a serious edge for a prolonged period of time.

This is good because, like S90V, it’s a beast to sharpen. Don’t worry, when the time comes, you can take advantage of Benchmade’s Lifesharp Guarantee, where they’ll resharpen it for you, for free.

In terms of overall size, some people might find the Auto Immunity a little small for more demanding tasks like kindling prep. However, due to its Wharncliffe-style blade, it’ll excel in precision tasks like carving, coring, and food prep.

In fact, after a couple of months of carry and use, our tester, Sean McCoy, didn’t even notice that it was an undersized knife. He stated, “It both carries and performs better than the venerable Bugout at a very similar weight. It has a much better and stiffer handle than the Bugout, and locks up stronger.”

The only thing keeping the Benchmade Auto Immunity from being closer to the top of this list is the fact that it’s going to run you $325 bones. But we couldn’t leave it off the list for proud pricing.


  • Blade Shape
    8.6
  • Steel
    9.0
  • Handle
    8.8
  • Lock
    7.5

  • OAL: 7.82”
  • Blade length: 3.15”
  • Blade steel: MagnaCut
  • Blade shape: Drop point
  • Grind: Flat
  • Hardness: 60-63 HRC
  • Lock type: Frame
  • Carry: Right or left, tip up, deep carry
  • Weight: 4.9 oz.

Pros

  • Flipper-style opening mechanism with a ball-bearing assist
  • Overall hand feel and knife control
  • Wirestripper jimping and hex bit driver
  • MagnaCut, titanium, and Micarta combo

Cons

  • Thumb stud opening is a bear
  • Wirecutter doesn’t do 12 AWG wire, which is more common in households in the USA

GearJunkie contributor Nick LeFort was a big fan of the show MacGyver growing up. The main character, and the show’s namesake, was always getting himself into bad situations and making contraptions to get out of them. The one tool he carried with him was a Swiss Army Knife. Now, the DPx Gear HEST/F 4.0 ($275) doesn’t offer the same variety of tools as a SAK as the Victorinox Huntsman, but it is built to get you out of a hostile environment. 

The HEST/F 4.0 is a knife that could be used and abused without having to worry about it getting wet, dirty, twisted, turned, torqued, or yelled at in an aggressive tone. With a 3/16-inch-thick MagnaCut drop point blade, titanium frame, and Micarta handle scale, all of which contribute to that. The flipper-style opening and caged ball bearings around the pivot are just an added benefit.

Aside from being a beefy knife that can pierce, cut, slice, shave, chop, and pry, the HEST/F 4.0 comes with a few other features that heighten its tactical ability. Built into the butt of the knife is both a glass breaker and a ¼ bit driver. Additionally, the spine jimping is sized for stripping electrical wire.

There’s also a notch on the spine in front of the thumb stud that’s designed to be a cap lifter and a means to lift a pot off a fire. To be the Best Tactical Pocket Knife on this list, you need to be ready for war. In making the HEST/F 4.0 (as well as its three predecessors), DPx Gear understood the assignment.


  • Blade shape
    8.5
  • Steel
    7.2
  • Handle
    7.0
  • Lock
    6.5

  • OAL: 7.38"
  • Blade length: 3.25"
  • Blade steel: Tru-Sharp Stainless
  • Blade shape: Clip point, spey
  • Lock type: Slip joint
  • Weight: 4.2 oz.

Pros

  • Price
  • Aesthetic
  • Two blades
  • Made in USA
  • Easy to sharpen

Cons

  • Slip joint lock not the most secure
  • Steel won't blow your socks off

The Case Trapper looks like the knife your grandpa, or maybe great-grandma, carried in the 1980s. And it still does everything today that it did back then.

It’s a beautiful, USA-made pocket knife that opens with a nail nick and is only held open with a detent. It’s a simple knife from a simpler time, drawing nostalgic references. It sits deep in the pocket with no clip, so it is a truly light EDC that won’t show on the outside of the pocket.

The trapper has been in continuous production for more than 100 years. And if that isn’t enough, it’s available in a huge variety of handle scales, from bone to chestnut wood to antlers. If you’re looking for a time-tested, yet timeless, design, the Case Trapper is a legend of a pocket knife that is instantly recognizable and perfect for light EDC tasks.


  • Blade shape
    7.8
  • Steel
    7.5
  • Handle
    7.4
  • Lock
    7.9

  • OAL: 8.06"
  • Blade length: 3.54"
  • Blade steel: AUS-8
  • Blade shape: Trailing point
  • Lock type: Liner lock
  • Weight: 2.4 oz.

Pros

  • Easy to carry
  • Luxurious appearance
  • Non-threatening

Cons

  • Blade will require resharpening after hard use
  • 3.54" blade may run afoul of the law in some cities

If you feel naked without a pocket knife but are unsure what to carry when wearing dress pants, look no further. The CRKT Crossbones is an excellent EDC knife that disappears into a pocket but still offers good performance with a spicy, thin blade.

The Crossbones is a very attractive, smooth-operating flipper. It’s very light at only 2.4 ounces, and has a deep carry that, coupled with the slim handle design, is barely noticeable even when carried in light fabrics of dressy clothing.

But the Crossbones still brings serious functionality. The 3.54-inch AUS-8 blade is great for everyday tasks like opening letters or boxes. But with an attractive satin finish and thin profile, it won’t freak people out when you flip it open to cut an apple at your office lunch.

It’s the ideal dress knife, with good looks and competent cutting power. Editor Sean McCoy grabs it when business-first attire is on call.


  • Blade Shape
    8.0
  • Steel
    9.0
  • Handle
    8.9
  • Lock
    8.0

  • OAL: 7.85”
  • Blade length: 3.40”
  • Blade steel: MagnaCut
  • Blade shape: Drop point
  • Grind: Flat
  • Hardness: 58-60 HRC
  • Lock type: Button lock
  • Carry: Right or left hand, tip-up, deep carry
  • Weight: 3.47 oz.
  • Price: $400

Pros

  • Great balance between size and weight
  • MagnaCut Steel
  • DLC Battlewash Blade Finish
  • OD Green + Coyote Tan = Epic

Cons

  • No indicator on the blade lock
  • People are going to freak out over the price

To be considered tactical, a pocket knife needs to have some features that aren’t necessarily found in other EDC pocket knives. In the case of the Benchmade CLA ($400), that feature is lightning-fast automatic deployment at the push of a button. That’s right — the CLA is an automatic knife, which makes this a restricted item in some states. But that doesn’t mean we can’t give it credit where credit is due. After all, in testing, all the CLA did was impress.

Considered a bridge between EDC knives and tactical knives, the CLA is composed of sculpted and contoured OD Green handle scales and a DLC-coated “Battlewashed” MagnaCut drop point blade. This color combination alone is stellar, but the materials used here make the CLA nearly indestructible. That’s not an exaggeration.

When the first version of the CLA launched almost 9 years ago, it was the first automatic knife from Benchmade with composite handle scales. The “Composite Lite Auto” became a very successful attempt to create an automatic knife for the people. It was less bulky and lighter than all of the other autos Benchmade had put out previously. This made the CLA a perfect fit for people looking for a reliable EDC knife.

This model of CLA is an upgrade from the previous model, which featured 154CM steel. The upgrade to MagnaCut became something of a theme for production knifemakers in 2025. For good reason, too — MagnaCut steel is probably the best EDC steel out there. This is due to its balance resistance qualities, edge retention, and ease of resharpening.


Pocket Knives Comparison Chart

Pocket KnifePriceOALBlade LengthBlade SteelBlade ShapeLock TypeWeight
Benchmade Bugout$1807.46″3.24″S30VDrop PointAXIS (crossbar)1.85 oz.
Opinel No.08 Inox$197.59″ 3.28″Sandvik 12C27 StainlessYataganLocking ring1.6 oz.
Knafs Lander 2$1297.40″3.25″S35VNDrop PointClutch (Crossbar)2.9 oz.
Kershaw Bel AirAround $1507.3″3.1″CPM MagnaCutReverse TantoSliding bar lock2.3 oz.
Benchmade Osborne$3007.87″3.4″CPM MagnacutReverse TantoAXIS (crossbar)2.72 oz.
Victorinox Huntsman$50NA2.5″StainlessStandard None3.4 oz.
CIVIVI Yonder$676.62″2.88″14C28NSpey pointCrossbar2.73 oz.
Leatherman Glider$3007.3″3″CPM MagnaCutSheepsfootCompression wedge3.7 oz.
Spyderco Paramilitary 2Starting at $1998.26″3.45″S45VN (standard)Clip pointCompression lock3.9 oz.
Benchmade Auto Immunity
$325
5.9″2.5″
Cerakoted CPM M4

Wharncliffe

Auto Axis

3.3 oz.
DPx Gear HEST/F 4.0$2757.82″3.15″MagnaCutDrop PointFrame4.9 oz.
Case TrapperAround $657.38″3.25″Tru-Sharp stainlessClip point, speySlip joint4.2 oz.
CRKT Crossbones$828.06″3.54″AUS-8Trailing pointLiner lock2.4 oz.
Benchmade CLA$4007.85″3.4″MagnaCutDrop pointButton lock3.47 oz.
Each one of these knives has been used and abused, but also cared for; (photo/Nick LeFort)

How We Tested the Best Pocket Knives

Out of all of the things we test around GearJunkie, pocket knives seem to get easier and easier every year — because everyone wants one. Suffice it to say, the knives we’ve recommended on this list weren’t just tested at a desk or in some random workshop in the Midwest, they were used, abused, loved, and carried for extended periods.

For this update, we enlisted our resident knife tester, Nick LeFort to take the reins to determine what knives out there were worthy of this list. He spent the fall and winter testing out a variety of knives in his day-to-day life, out on adventures, and in all conditions. LeFort believes that the best way to see what a knife can do is to rely on it in real life. He’s not wrong.

So, What Did They Do?

Where you can find YouTube and the internet peppered with people cutting rope and cardboard in their garage, you’re more apt to find Nick out in the woods, down by a river, or wherever his day takes them. Heck, you may see him wandering around Whole Foods with one of these knives (in their pocket, of course). To him, testing isn’t a 9-to-5 job; these knives are part of his life.

Having a keen sense of how a particular knife steel performs, or how a certain handle material’s grip could be impacted by inclement weather, as well as a vast knowledge of what’s going on in the market, he was able to act and react accordingly. On these few aspects as well as many others. The end result is the purest form of product testing: in the moment.

The bottom line is that our approach to testing is to make sure a product and its parts perform as expected. With marketing being what it is, with the intent to sell one particular knife above all of the others, it’s easy to buy into the hype. In this case, we look at that hype and see if it’s all just talk or the real deal.

Buyer’s Guide: How to Choose a Pocket Knife

Benchmade pocket knife with Axis lock
Benchmade’s Axis lock is a crossbar-style lock that is extremely reliable; (photo/Nick LeFort)

Knife Steel

The amount of knife blade steel and handle materials out there is pretty impressive. But, where the handle materials seem to have stabilized, there’s new steel coming out every year. As you can see from the above selection of eight knives, there are seven different knife steels. Our recommendation is to consider each steel on a case-by-case basis. But they should still meet or exceed the following requirements:

Corrosion Resistance

The last thing you want is your knife turning orange on you out in the field. Especially if you’re planning on using it to prepare food. All of the steel mentioned in this guide either has exceptional corrosion resistance or has been coated to eliminate the occurrence of rust.

Abrasion Resistance

Some people consider this property to be more form than function. But in all reality, if your blade can easily get scraped up that can lead to chipping, which then could lead to blade failure.

Edge Retention/Ease of Resharpening

No matter what knife you carry, the worst knife you could carry is a dull one. That being said, you want to look for knife steels that either excel in edge retention or can be easily resharpened.

You can learn more about specific knife steels here.

DPx Gear HEST
The DPx Gear HEST/F 4.0 exceeds expectations with its MagnaCut steel blade; (photo/Nick LeFort)

Handle Material

When it comes down to handle material it’s all about grip. Ergonomics play a part in this as well, as you could have great handle material in a weird shape that will cause fatigue. In the end, you won’t want to use the knife and you’ll have wasted your money. These are some of the more preferred materials on the market today:

G10 & Micarta

G10 and Micarta are both extremely strong materials. Both excel in grip whether your hands are wet or dry, which is why those two materials are so popular with EDC, Survival, Tactical, and Bushcraft-style knives.

Nylon & Plastic

Nylon and plastic also make for great handle materials because they’re durable and lightweight. They’re also generally textured. It’s this texturing and styling that increases the grip on a knife with these materials.

Note: Nylon and plastic handle scales carry a litany of names. Some of the more popular names are: FRN/Zytel (Fiber Reinforced Nylon), GRN (Glass Reinforced Nylon), GFN (Glass Filled Nylon), and Grivory (Injection Molded).

Carbon Fiber

A lot of folks think carbon fiber is just pretty to look at, but in all reality, this woven material is lightweight and strong. Depending on its composition, it could be the perfect balance between strength, weight, and durability. You can bet your bippy you’ll pay more for a knife with carbon fiber, but it’s worth it.

Aluminum & Titanium

Both aluminum and titanium are incredibly strong and lightweight materials, making them great for knife handle scales. But where aluminum has become relegated to budget knives, titanium is usually saved for premium and ultra-premium knives. The only drawback to both of these materials is that they can be slippery when wet.

Fox Knives Chilin
The Fox Knives Chilin benefits from the strength and grip of its Micarta handles; (photo/Nick LeFort)

Ease of Use

Ease of use is a big deal when considering what knife is right for you. It can come in many forms from ergonomics, to lock design, to the hardware used to keep the knife together and in good functioning order. All in all, the last thing you want to do is struggle with or be uncomfortable using your knife.

Accessibility

Aside from how a knife functions, your ability to access it plays a role in its reliability. After all, if you can’t reach it when you need it, then why carry it at all? The right knife for you will be easy to carry in your pocket or on your belt.

Ergonomics

A good knife will feel right in your hand. From the shape of the handle scales to the overall thickness, and even texturing, ergonomics can be the difference between you being confident with your knife or leaving it in your drawer at home. When you consider a knife, put it in your hand and give it a good squeeze. Then, push down hard on a hard surface. If everything feels right, that’s your next knife.

Lock Mechanism

Without fail, you will find yourself in a position where you need to rely on the lock on your knife more than you expected. 

Some of the more common lock types are liner/frame locks that use a bar that indexes into the back of the blade. There are also button-style locks that use a steel barrel to keep the blade engaged. However, the most popular lock type is the crossbar lock which also uses a steel bar to hold the knife in place.

In my time and experience, I have never seen a crossbar-style lock mechanism fail without some outside force, creating a major disruption in how the knife functions. Like a truck running it over.

Knife with pocket clip
How a knife carries is an important factor in picking the right one for you; (photo/Nick LeFort)

Pocket Clip

The right pocket clip will keep your knife in place in your pocket and will be easy to insert and remove. Generally, pocket clips are steel or titanium, designed to retain their shape, and be around half the length of the knife when they are closed.

However, there are wire pocket clips that can deform over time. There are also shorter pocket clips that, depending on the size of the knife, can cause it to float around in your pocket, or even come out of your pocket.

I would pick a wire pocket clip over a shorter clip any day.

Ball Bearings

Ten years ago, you needed to pay $300 to get a knife with ball bearings in it, but now you can find them for under $100.

Ball bearings assist in the opening and closing of a knife. In fact, there are some knives out there that are so fluid in operation, due to ball bearings, that they’re just as fast, if not faster than an automatic knife. They’re also legal in more places than an auto.

Liner lock in pocket knife
The liner lock on the CIVIVI Sendy is reliable and easy to actuate; (photo/Nick LeFort)

Price & Value

Knife pricing isn’t as cut and dry as I think most of us would like it to be. Yes, just like with any other consumer good, factors like materials, design, and function all play into the final price of a knife. However, as we’ve recently seen with a reliable and desirable $10 knife from Walmart, there are a lot of things going on behind the scenes that determine what we pay at the store for a knife.

How much material a knife manufacturer buys has a major impact on the price you pay for a knife. Material prices, in general, will fluctuate based on how much of each item a brand purchases overall. We’ve most recently seen this with MagnaCut, which became a popular steel seemingly overnight. As more brands adopted it in their knives, the overall price of the steel itself went down.

Another major factor is the country of origin. Within the last decade, the quality of knives made by overseas brands like WE Knife, CIVIVI, and most recently, OKNIFE has improved beyond anything we could have imagined. However, the brand’s prices are still comparatively lower than similar knives made in North America.

This brings up the brand name factor. Knives from brands like Benchmade generally retail for more than similar knives from other brands. It’s not outside the realm of reason that you’re paying into the brand as much as you are the product. In the case of Benchmade, you’re also buying free sharpening for life as well as a pretty significant lifetime warranty.

With that said, we’re going to break knives down into the following three categories based on pricing in general. But, to be fair, in the production knife world, there are no clear and defining lines between Budget knives, Mid-tier knives, or Premium knives. The following is a generalization of what you can expect from each category.

Budget

You can expect to pay less than $100 for budget knives, which usually have more affordable materials. Does this make the knife any less useful? No. A budget knife should do everything you would expect it to. However, it may require more maintenance to keep it up and running.

Knives like the CRKT CEO Microflipper ($60) and CIVIVI Yonder ($67) that use Sandvik 12C27 and Nitro-V are considered budget knives. Although both steels are stainless and will, therefore, stand up against moisture and stave off rust and corrosion, both steels require more sharpening to maintain their reliable edge.

Knife
The Rubato 2 from OKNIFE uses premium and mid-tier materials and is considered a budget knife; (photo/Nick LeFort)

Another great budget example is the OKNIFE Rubato 2 ($85). It has premium 154CM, Micarta handle scales, a stainless steel liner, and a crossbar lock. Ten years ago, this knife would have cost $150-175, but as other steels have taken precedence over 154CM, the price of that steel has plummeted. This is a major bonus for anyone looking for a heck of a knife on a budget.

Mid-Tier

A majority of people carry mid-tier knives around. Ranging from $100 to $200, they may feature a range of steels like 154CM, M390, S35VN or even MagnaCut. All four of those steels can also be found on premium knives, due to their corrosion and abrasion-resistant properties, toughness, and edge retention. Mid-tier knives tend to have a more robust build than Budget knives.

Knafes Lander
The Lander 2 is a prime example of a mid-price knife; (photo/Nick LeFort)

There also may be a heavier focus on ergonomics and knife weight. The Knafs Lander 2 ($129) is a great example of a mid-tier knife. It has S35VN steel, Micarta, G10, or carbon fiber handle scales, and a crossbar lock. These are all desirable materials and features at an easy-to-digest price

Premium

Premium knives are the cream of the crop and make up a small segment of the market. They may be priced higher due to the manufacturer or where the knife is made. They could also use new and innovative materials, or a combination of all three of these reasons.

Scharz Overland Sport knife
The Schwarz Knives Overland Sport is premium for a lot of reasons; (photo/Nick LeFort)

Another variable is availability. Some manufacturers make knives in smaller batches. Other knives are custom. In these instances, you can expect to pay more as well. The Schwarz Knives Overland Sport ($265) from Schwarz Knives is a small-batch, customizable, made-to-order knife. Due to its exclusivity, its price is reasonably high. 

Where a lot of people instantly think of Benchmade as their prime example of premium, there’s also DPx Gear, which is a smaller, boutique-style brand. They offer production knives like the HEST/F 4.0 ($275), which is hand-made from premium materials. So, again, like Schwarz Knives, there’s a hint of exclusivity here, although in the case of DPx, it’s on a larger scale.

Frequently Asked Questions

Why should I carry a pocket knife?

From opening packages to slicing up food, pocket knives offer a wealth of utility. Rather than using your fingernails, a car key, or half of a pair of scissors, pocket knives are a natural piece for people with a lot of tasks on their hands. This is especially true for outdoor enthusiasts, who deal with materials like rope, wood, and canvas all the time.

One reason you won’t see on this list is self-defense. Despite what some industry marketing material would lead you to believe, carrying a pocket knife doesn’t turn you into a commando or modern-day gladiator.

Unless you’re a trained weapons expert, you’re just as likely to injure yourself as any would-be attacker. If you feel the need to carry something for protection, you’re far better off with a can of pepper spray. Pocket knives are best treated as tools — not weapons.

What’s the best size for a pocket knife?

Although there’s no right answer that fits everyone and their needs, a folding knife with an overall length of 8-8.5” with a blade length of 3-3.5” is ideal. At these lengths, you can expect the knife to be balanced, able to complete most daily tasks and be carried comfortably.

That said, we always recommend you test fit the knife to make sure it fits your hand and you feel safe and confident using it. Beyond that, keep in mind that each state, and even cities, have specific laws and regulations regarding knives. Make sure to read up on your local laws before making a purchase.

Should I get a plain-edge or serrated-edge knife?

Plain edge blades are generally one continuous edge and they can be great for cutting, chopping, shaving, and slicing. 

Generally, a serrated blade is a combination of a plain edge and serrations, usually towards the back of the blade near the pivot. The benefit of serrations on a blade is that it can be used for sawing through limbs and rope.

Overall, when choosing between a blade with a plain edge and one with serrations you need to take into consideration if you really need it. Serrations take up space on a blade edge and are more complicated to sharpen.

How do I maintain my knife?

Your knife is only going to benefit you if it’s in good working order. With a fixed-blade knife, maintenance is generally focused on keeping the blade edge sharp and free of knicks or chips as this can lead to failure. With a folding knife, it can get a little more complicated as there are moving parts that need to be maintained to make sure the knife is safe to use for years to come.

Here are some basic tips that you should get into a routine of doing to make sure your knife is reliable and ready for your next adventure.

Make sure it’s sharp!

A dull knife isn’t any good to you. In fact, a dull knife can be dangerous. Thankfully, most knives on the market have steels that you can easily sharpen with the right sharpener and a little practice. That said, if you ever have any questions about the blade steel on your knife and how to sharpen it, we recommend contacting the manufacturer.

Pro Tip: Some knife manufacturers, like Benchmade, offer free knife sharpening for life.

Keep it clean and lubricated!

Water, dirt, and debris can all lead to your knife failing on you. Make sure to wipe your blade down and that the handle cavity is dry and free of debris. 

It’s perfectly fine to wash down your blade with dish soap and water, making sure to wipe it down and let it air dry. We also recommend coating your blade with any type of food-grade lubricant. 

Additionally, you want to make sure that the lock mechanism and pivot are free of debris and in working order as well. These can be cleaned with a Q-tip soaked in rubbing alcohol, or canned air. You should always re-lubricate these areas after cleaning your knife. 

If the knife manufacturer recommends a specific lubricant, it’s always best to use that.

Are automatic knives good for everyday carry?

There was a time when we would have told you no, but as more and more automatic knives arrive in the market, they can be.

Though they tend to be more expensive and can be a hassle to maintain, the stigma surrounding automatic knives is legality. Generally speaking, automatic knives are relegated to military and law enforcement personnel. Depending on where you live and where you plan on carrying an automatic knife, as a civilian you could be breaking the law.

That said, we recommend you check your local laws and regulations before carrying an automatic knife.

Coleman Cascade 18 Camp Stove Review: A Classic Cookset Gets a Minimalist Makeover

16 October 2025 at 16:25

The Cascade 18 is my solo cooking stove of choice; (photo/Ian Graber-Stiehl)

After a few years of using almost entirely canister, white gas, alcohol, or wood stoves, I’d forgotten the ease of just plugging a propane canister into a burner and scrambling up breakfast in a full-sized pan. That approachability is the very reason that Coleman’s Classic two-burner stoves are as popular as they are: open, plug in the propane, and get to cheffing it up.

Coleman’s Cascade 18 does forgo its predecessor’s built-in windscreens — a bold move. That shield is a large part of what has long made the old ones so easy to use. It also lowers the BTUs and goes lean with a single burner head. However, it’s a tradeoff for simplicity and better fuel economy in a smaller and lighter package. Here’s where I think this solo stove excels and where I see it fitting in camp kitchens.

In short: The Cascade 18 aims squarely at being the flex stove. For car camping, horseback camping, and paddling trips for one or two people, it’s more than enough. For larger group forays, it’s an excellent accessory stove — perfect for scrambling up the eggs while someone tends the steaks on the campsite grill. Simple, easy, and stowable, it lacks its bigger siblings’ oomph and shines most at a sale price, but is perfect for those looking for a moderate-use stove.

Looking to snag a new camp stove? Check out how the Cascade 18 compares to the rest of the options out there in GearJunkie’s Best Camping Stoves Buyer’s Guide.

  • Heat Output
    7.0
  • Simmer Control
    7.0
  • Wind Protection
    6.0
  • Construction
    8.0

  • Number of burners: 1
  • BTU output: 8,000 BTUs
  • Boil time: 6.0 min. per L
  • Fuel type: Propane
  • Weight: 5 lbs., 8 oz.

Pros

  • Simple design
  • Good fuel economy
  • Compact for a full-sized camp stove
  • Cools quickly

Cons

  • No windscreen
  • Relatively mediocre BTUs
  • Propane attachment can easily shake loose in storage mode
  • Relatively high price

Coleman Cascade 18 Camp Stove: Review

a cast iron pan holding chili sits on the cascade 18 camp stove
The Cascade 18 is perfectly sized for a large cast iron pan; (photo/Ian Graber-Stiehl)

Coleman’s two-burner stoves are certified classics, and the company’s combination of two burners, a built-in igniter, a propane preference, a wind screen, and a platform more than capable of handling even heavy cast iron has been iconic since the ‘70s. 

Given decades of iteration and performance, any variation has to do something markedly different than the rest of the lineup — and that the Cascade 18 does. 

Scaling down to a single burner makes this stove far more stowable and takes up less “counter space.” However, the BTUs do take a hit here. Whereas modern two-burners pack 11,000 BTUs for each burner, the Cascade 18 offers 8,000. It’s a clear tradeoff toward energy efficiency — a plus for longer trips. 

However, that efficiency doesn’t count for much if the wind is blowing. This makes the lack of a windscreen arguably the most controversial element.

Still, folding wind screens are a dime a dozen, and the ultralight zeitgeist has touched the camping world as well. Even for car campers, lighter, slimmer, and easier to stow is in vogue. To that end, nixing the built-in windscreen, more than half the weight, and nearly half the footprint makes plenty of sense for campers in 2025.

The Testing Grounds

the author using the coleman cascade 18 camp stove on a picnic table in a nevada state forest
The single-burner is ideal for smaller camp setups or quick lunches; (photo/Ian Graber-Stiehl)

Before we get too far down the rabbit hole of specs and cook times, it’s worth knowing what I’ve put this little burner through over the last 4 months. In short: A few thousand miles on the road, a few hundred on “roads,” a few dozen on the water, and plenty of meals cooked around the campground and wildland fire station where I work.

The Cascade 18 was my primary stove during my moving road trip from the suburbs of Chicagoland to a fire station in the Tahoe National Forest, Calif. By my count, it’s been rattling around relatively loose in my trunk for over 3,000 miles, with nary a scratch.

The Cascade cooked me a bevy of breakfasts in cheap motels. It rustled up dinners amid sagebrush-lined two-track. During a particularly adventurous paddling trip, the Coleman kept me sane by being well-fed. After all, what to do when a trip turns dicey? Get to working on lunch.

Since touching down in Tahoe, it only occasionally rears its head — equal parts excuser and enabler of cooking out on the picnic table, instead of in our barracks’ kitchen. Nevertheless, on the rare occasions that the fires here slow down enough to get a few days off, the Coleman Cascade has certainly earned its spot as my canoeing cooktop of choice.

A Classic (And Rugged) Build

the cascade 18 stove cooking a breakfast on a red rock scene
The aluminized steel build on the Casacade 18 is tough enough for almost any camper; (photo/Ian Graber-Stiehl)

Like its predecessor, the Cascade 18 is primarily constructed from aluminized steel — essentially steel coated with aluminum. The result is a cooktop with good heat conduction and radiation and considerable corrosion resistance. It would be tough to scratch through the coating or see any significant rust.

Likewise, it sports Coleman’s same old propane connection arm. Although now the grate itself is designed to hold this arm more snugly when in storage mode. It’s a nice touch, but a necessary one due to what’s bound to be one of the most divisive changes: the omission of the classic folding wind screen. 

I’ve lost track of the number of times I’ve seen car campers playing around with their Coleman stoves — trying to get them perfectly shielded. Hell, this was exactly the sight that greeted me when I was loading back up from the paddling trip where I first tested the Cascade overnight.

In addition to the diminished protection, this means that the Cascade 18 doesn’t have a storage mode that protects the burner and its components. You simply flip the grate upside down and slot in the propane intake arm. It’s a simpler process, but one that lacks a lid to keep you from losing the propane connection arm.

Still, the Coleman’s construction remains relatively bombproof. Even after months of chucking it around relatively carelessly, I’d yet to see a notable scratch, loose knob, or damaged propane intake. 

Space and Storage

The simplified construction does win major points on stowability. Compared to the 21″ x 13″ x 3.5″ footprint of their two-burner stove, the 13″ x 13″ x 3″ Cascade 18 is a far easier cooktop to stow. This may not be crucial for car campers with larger vehicles, but it was a boon for me on a number of occasions. 

On my kayaking trip, a two-burner stove simply would not have fit in my hull, between the bulkheads. Even on my road trip, my 4Runner was packed to the gills. It was hard enough finding space for me — let alone a large stove. Fortunately, I was always able to slot the small, slimmer Cascade 18 somewhere in my vehicle.  

Now, living in Forest Service barracks, where space is at a premium, I’m all the more glad for the Cascade’s slight size. It doesn’t pack down into nearly as rugged and self-contained a package as Coleman’s Cascade Classic Stove, but it always slots away easily somewhere. For someone who is only cooking for himself and perhaps a romantic partner, how much more stove could I need?

A Mild Heat

a detail image showing the burner head of the cascade 18 beneath a cast iron pan
The single burner of the Cascade 18 puts out 8,000 BTUs on max output; (photo/Ian Graber-Stiehl)

Stove output is measured in BTUs, or British Thermal Units. Your average stovetop burner produces 7,000-12,000 BTUs. Most two-burner stoves produce around 10,000-12,000 BTUs per burner, with some, like Camp Chef’s Everest 2X stove, producing up to 20,000 BTUs.

The Cascade 18’s wild card is its relatively low 8,000 BTUs. For reference, the MSR Pocket Rocket Deluxe, an ultralight backpacking stove, boasts 11,000 BTUs. Of course, the Cascade’s wide burner, nearly 4 inches in diameter, offers more even heating for actual cooking. At full blast, it throws flame in a ring over 6 inches wide. 

Whether cooking chili, sauteeing scrambled eggs, toasting bread, or frying fish, I noticed only a slight hotspot. Granted, I was using a wide-bottom steel pan: a Gerber ComplEAT Saute Pan. So, I had even heating and a consistently controllable cooking experience. 

Using a steel 10-inch pan indoors at around 4,000 feet of elevation, it took me around 6 minutes to boil a liter of room-temperature water. That’s a decent time, a little more than a minute behind most two-burner stoves. Additionally, ripping the stove at full blast, as I was, the Cascade boasts an impressive 2.5-hour fuel life for your average 16-ounce propane canister.

But that’s indoors. In windy conditions, with a wide and relatively low BTU burner and no built-in wind shielding, an aftermarket windscreen of some sort is a must-have. Even then, if your screen doesn’t wrap most of the way around the stove, you may well find yourself cranking the Cascade up to full throttle, chewing through its fuel advantage, still short on BTUs.

Coleman Cascade 18 Camp Stove: Conclusion

The Coleman Cascade 18 is a rugged single burner that saves on space, but doesn’t skimp on cooking power; (photo/Ian Graber-Stiehl)

Coleman’s Cascade 18 is far from the portability of backpacking/camping crossover stoves, but it boasts plenty over most dual-burner stoves in stowability. It lacks the higher output of its predecessors, but it offers enough oomph to fry, sauté, and boil up one- to two-person meals — with considerably better fuel economy.

Over the last few months with it, I’ve found four use cases where the Cascade stood head and shoulders above the rest: paddling, cramped car camping, as an accessory stove, and for minimalist mechanized camping. 

Sometimes, simply having an extra, accessory burner makes all the difference: in communal hostel kitchens, extended-stay hotels with tiny stovetops, or for larger group trips where two burners just might not cut it (at least not without being cramped).

Lastly, of course, sometimes you just want to simplify. Pull up to a campsite 2 hours after dark, and you might just want a stove that’s simple and gets the job done. On a cold day in winter, small fiddly stoves are annoying. Wood stoves are frigid work. Canisters and alcohol aren’t very efficient. Larger propane stoves can be a hassle. 

When you want something, you can just pull out the trunk and have dinner heating in 90 seconds flat — now that’s when you’re cooking with Cascade.

EXPED Launches New Line of Affordable, ‘Do-It-All’ Sleeping Bags

15 October 2025 at 16:35

(Photo/EXPED)

Popular sleeping pad maker EXPED is expanding its sleeping bag offerings with the Terra bags, three versatile, affordable sleeping bags. The Terra sleeping bags, which are available in 0 degrees, 15 degrees, and 30 degrees, have launched exclusively through REI. Here’s everything you need to know about this new entrant into the sleeping bag market.

Technical Specs

The unisex Terra comes in five sizes, so customers can find the fit that’s best for them. Compared to some of our favorite backpacking sleeping bags, the Terra is solidly in the mix when it comes to weight, with the medium size of the 30-degree bag clocking in at 1 pound, 9.5 ounces, and the medium size of the 0-degree bag weighing 3 pounds, 11 ounces.

The Terra 15-degree bag weighs less than Nemo’s 15-degree bag, the Disco (3 pounds versus 3 pounds, 5 ounces), and weighs 9 more ounces than REI’s Magma 15.

Unzipped sleeping bag in tent
The Terra 15; (photo/EXPED)

The bags’ warmth comes from 650-fill down, and they have an adjustable comfort hood and draft collar to keep heat in. The 3D footbox has 11 down chambers to keep feet warm while also providing ample room for movement.

A ripstop shell, made with fully recycled fabric, offers some light water resistance. Other handy features include an anti-snag zipper with glow-in-the-dark zipper pulls and an easy-access pocket inside.

Who Is the EXPED Terra For?

EXPED is aiming to attract customers who want a do-it-all sleeping bag. “[They’re] designed for the multi-activity customer who wants a single fully-featured sleeping bag that works for both backpacking and camping,” the brand said in a press release.

Two people asleep in sleeping bags in a tent
The Terra 15; (photo/EXPED)

EXPED might also attract people who are trying to avoid breaking the bank on a sleeping bag. The prices for the bags are as follows: Terra 30 ($200), Terra 15 ($250), and Terra 0 ($300). Unlike other brands that upcharge for larger bags, prices are the same for every size of a given model of the Terra.

Compared to other brands like Nemo Equipment or Mountain Hardwear, whose 0-degree bags cost $600 and $355, respectively, the Terra is definitely on the lower end of the price scale. For backpackers who are looking to save some serious change, the Terra might just be the ticket.

GearJunkie has yet to test the Terra bags, but stay tuned for the full review coming soon.

The EXPED Terra 30, 15, and 0 are currently only available at REI. In early 2026, the sleeping bags will become available through other major retailers.

The Best Camping Hatchets of 2025

14 October 2025 at 18:34

A solid camp hatchet can be a reliable tool in the backcountry, and we've found the best out there; (photo/Erika Courtney)

While there are a million ways to camp and as many tools for the job, there is a solid case for keeping things simple with a classic camp hatchet. Lightweight, capable, and just dang fun to swing, the best camping hatchets are versatile tools for outdoor adventures, and we’ve swung the most worthy of stocking your kit.

Whether you need a tool to pound tent stakes or split wood, take a look at our list before making your decision. There are perfect all-around choppers like our top pick, the Hults Bruk Almike, as well as cheaper options to chuck in your truck kit, like the Husqvarna Swedish Style Hatchet. Our experts have been whittling, chopping, and splitting for half a decade now, and have tested more than 30 different hatchets across the backwoods of the U.S.

And we’re not just talking wall hangers here, either. Every hatchet is put through our rigorous testing regimen in order to test its ability to process wood, do fine work while carving, clear trails, and be a backcountry companion. Our experts are backcountry trail crew leaders, blade-industry old hands, and just everyday outdoors folk, and we feel confident in every one of the tools below.

Editor’s Note: We updated our Camping Hatchets guide on October 14, 2025, to add a new section on hatchet maintenance, detailed rating attributes to each suggestion, and a shake-up to our award winners.

The Best Camping Hatchets of 2025

Best Overall Camping Hatchet

Hults Bruk Almike

8.8/10 Rating

Best Budget Camping Hatchet

Husqvarna Swedish Style Hatchet

6.4/10 Rating
BUY OPTIONS

Best Bushcraft Hatchet

Gerber Bushcraft Hatchet

7.8/10 Rating

Best Composite Hatchet

Fiskars X7

6.2/10 Rating

Best Carving and Whittling Hatchet

Gränsfors Bruk Wildlife Hatchet

8.9/10 Rating

Best Backpacking Hatchet

Hults Bruk Jonaker

6.9/10 Rating
BUY OPTIONS
See more picks

  • Cut Quality
    9.0
  • Swing Feel
    8.0
  • Ease of Maintenance
    8.0
  • Durability
    8.0

  • Weight: 1 lb., 12 oz.
  • Overall Length: 16"
  • Head Length: 3"
  • Steel Type: Hand-forged Swedish steel
  • Handle Material: American hickory

Pros

  • Functional design
  • Incredibly durable
  • Holds edge even after many uses
  • Exceptionally sharp blade out of the box

Cons

  • A bit long for a camp hatchet; not as portable
  • One of the most expensive hatchets on our list
  • Hand-forged steel can sometimes lead to uneven grinding

Read Review: Superior Hatchet: Hults Bruk ‘Almike’ Review

It’s hard to argue with a company that has been hand-forging steel in the same Swedish foundry since the late 17th century. And that’s why the Hults Bruk Almike ($199) makes our list as one of the better camping hatchets of 2025.

The hand-ground axe head on the Almike is struck multiple times throughout the process to increase the final product’s density and durability. Like Gränsfors or Husqvarna, the quality of hand-forged Swedish steel is undeniable, which helps to explain the high price here. The blackened finish on the head aids in protecting it from corrosion, while the bit is mirror polished to ensure clean cuts.

When combined with the curved hickory handle, you will be hard-pressed to find a camping hatchet more suited for chopping small trees and splitting wood around the fire. Not only is the handle comfortable to hold, but the curvature and overall shape are also hard to beat in terms of elegant design.

The rub is understandably the price, and at dang near $200, you’ve got to want to splurge on the Almike. For the money, we think the Gränsfors Bruk Wildlife ($185) is a slightly better carving tool with its narrower cutting profile, and if you really want to save (but still want Swedish steel), the Husqvarna Swedish Style Hatchet is a steal at $70.

That said, the Almike is smooth and sleek, and it’s accompanied by a beautifully crafted leather sheath to further the aesthetic appeal of this highly functional bushcraft tool. If you’ve got the dough, it’s an excellent tool that won’t disappoint.


  • Cut Quality
    8.0
  • Swing Feel
    6.0
  • Ease of Maintenance
    7.0
  • Durability
    7.0

  • Weight: 2 lb., 2 oz.
  • Overall Length: 15"
  • Bit Length: 3.3"
  • Steel type: Hand-forged Swedish steel
  • Handle Material: Hickory

Pros

  • Budget price with great value
  • Classic design and build
  • Hand-forged Swedish steel
  • Good handle ergonomics

Cons

  • Doesn’t come with a full sheath
  • Head-heavy swing weight, which takes some getting used to

Husqvarna has made a name for itself by offering a large range of forest, home, and garden tools — most of which run on gasoline. But on the other side of the business, they offer a wide variety of axes and hatchets. A fine example of this is the classically designed Husqvarna Swedish Style Hatchet ($70) — a killer value for the price.

Comprised of a 1.3-pound hand-forged Swedish steel head and a 15” hickory handle, the Swedish Style Hatchet looks as if it jumped out of the past. But we assure you, it’s ready to be a worthy companion on the trail, in the yard, and at camp. There’s no frills here, just hickory, steel, and a thoughtfully sharpened bit. Which, sometimes, is all you need.

Designed for cutting smaller limbs and splitting dried firewood, the Swedish Style Hatchet is on the heavier side (compared to the ~1.5-pound Fiskars Norden N7). However, that heft will help you get through as much wood as you can process before getting tired. The head is also noticeably thicker than some, meaning this hatchet is a better chopper than it is an all-arounder.

It’s hard not to see the similarities between this hatchet and Hults Bruk’s Agdor 15. Both are the same weight and length, and aside from some aesthetic differences, perform almost identically. The major difference between these two is that the Agdor is almost double the price of this budget-friendly forest tool.

Though the Swedish Style Hatchet doesn’t come with a full sheath, the bit cover allows you to lash it to your pack and transport it to and fro. Also, getting a hand-forged head at this price is a real steal. If you’re looking to save a few dollars without sacrificing quality, this is the hatchet for you.


  • Cut Quality
    8.0
  • Swing Feel
    8.0
  • Ease of Maintenance
    7.0
  • Durability
    7.0

  • Weight: 2 lbs., 6.4 oz.
  • Overall Length: 15.2"
  • Head Length: 5.5"
  • Steel Type: Forged & coated 1055 stainless steel
  • Handle Material: Synthetic polymer with rubberized inserts

Pros

  • Reliefs in head allow for easier penetration
  • Advanced handle ergonomics and shock reduction
  • Internal stash sleeve holds paracord and mini lighter survival tools
  • Hammer poll is well sized and accurate to swing

Cons

  • Much more of a splitter than a carver
  • Doesn’t come well sharpened from the factory
  • Fairly hefty at 2.5 pounds

Modern hatchets benefit from modern designs and materials, and the Gerber Bushcraft Hatchet ($70) is the finest example of that we’ve encountered yet. This tool is kitted out with materials and designs you won’t see on the more traditional hatchets out there, but it does so without going too tactic-cool.

Featuring an angled synthetic handle with improved ergonomics and grip and a refined, coated 1055 steel head for easier chopping and splitting, the Bushcraft provides excellent results with less effort compared to its traditionally designed counterparts. An additional benefit of the synthetic handle is its ability to reduce shock when chopping, splitting, and hammering.

The head has a pronounced beard to the bit, which means you get a bit more cutting down with every swing. Reliefs on either side of the cheeks decrease the resistance as the head passes through material. Smart. The head itself is also a thick wedge-shaped splitting profile, and we found that the hatchet’s heavier weight and angled handle aided in really cleaving rounds apart.

If that’s not enough, the hatchet leans further into the ‘bushcraft’ moniker and stashes a water-resistant compartment in the handle, designed to carry a small lighter, some tinder, paracord, and whatever else you think you can fit in there. We will note a slight vibration from this addition, though it is slight enough to not bother us, and you can also leave it behind without affecting the swing weight.

While the Bushcraft is much more of a smash and bash chopper, if you want a modern hatchet with a bit of a finer touch for cutting work, the equally modern Kershaw Deschutes is the easy option to turn to. We regretted there being no hammer poll on that hatchet, which makes the Gerber a better all-around tool, in our opinion, but it still absolutely looks the part and gets the job done.

Being that this hatchet can perform multiple tasks and has onboard storage, we think that the Bushcraft Hatchet is a superior multitool that can not only gather wood for camp but help you start the fire as well.


  • Cut Quality
    7.0
  • Swing Feel
    6.0
  • Ease of Maintenance
    7.0
  • Durability
    6.0

  • Weight: 1 lb., 6 oz.
  • Overall Length: 14"
  • Head Length: 5"
  • Steel Type: Hardened forged carbon steel
  • Handle Material: FiberComp composite

Pros

  • Highly affordable
  • Suitable for splitting kindling or small logs
  • Relatively lightweight design
  • Integrated handle protects bit during transport

Cons

  • Head-forward swing weight balance
  • Concerns about blade chipping
  • Requires more regular maintenance to keep in prime condition

Read Review: Finnish Budget Hatchet: 14 Inches Of Cutting Power

It’s hard to ignore when a brand gets something right. That being said, the Fiskars X7 ($35) remains on the list for the fifth year in a row. At less than $40, we’ve got backups of this hatchet riding around in our trucks, where it’s perfectly suited for managing the odd tree down across a forest road.

If money is tight, look no further than Fiskars X7. Like Gränsfors Bruk and Hults Bruk, Fiskars has been in the business for many years and has earned a strong reputation. The X7 holds to this longstanding tradition and provides buyers with an affordable option to keep around camp or throw in the backpack for longer adventures.

The all-composite handle is largely to praise here for the cost savings, and while most traditional hatchets use a hardwood such as hickory, the hollow FiberComp grip on the X7 both keeps the tool lightweight and simplifies hanging the hatchet head, as the handle is simply over-molded onto the bit. We found the swing balance on this tool is a bit head-forward, however, which is something to get used to (but easy to do).

Pricier hatchets from legacy European brands also deviate from the X7 by hand-forging hatchet heads, which is a premium touch, but not necessary for a bash-around budget option. The hardened carbon steel bit is well-built to split wood into kindling and is best suited for small to medium-sized logs. This light and portable hatchet has a sharp blade out of the box, and we found it easy to sharpen.

However, it does require a bit more regular maintenance than others on our list. Still, the power is strong enough to handle most basic splitting needs, and its light weight allows users to increase chopping speed. The composite handle may be a deal breaker for those after more of an old-school touch, and the hickory-handled and hand-forged Husqvarna Swedish Style Hatchet is the tool to look for as a pivot. You’ll need to pay double what you pay for the X7, however.

The Fiskars engineers created this hatchet with affordability in mind, and it truly performs without costing an arm and a leg (when used properly). There’s an undeniable place for tools you don’t worry about overworking, and the X7 puts up with the abuse better than most at the price point.


  • Cut Quality
    9.0
  • Swing Feel
    8.0
  • Ease of Maintenance
    8.0
  • Durability
    8.0

  • Weight: 1 lb., 4.8 oz.
  • Overall Length: 13.7"
  • Head Length: 4"
  • Steel Type: Recycled steel
  • Handle Material: Hickory

Pros

  • Blacksmith-forged head with stamped initials
  • Polished cutting edge
  • Quality vegetable-tanned leather sheath
  • Fine carving abilities

Cons

  • Price
  • Simple fit and finish
  • Can be more difficult to source on this side of the pond

Read Review: Gransfors Bruk Wildlife Hatchet: Worth The Hefty Price

Few brands enjoy the legacy that Gränsfors Bruk does, where creating fine hand-forged axes has been the bread and butter since 1902. The Wildlife Hatchet ($185) is close to the smallest in the brand’s lineup, but there’s little stopping this hatchet from doing big work, and becoming one of the best overall carvers in our testing.

When you can count the number of blacksmiths involved with a forge on both hands (plus a few toes), you know you’re getting a well-refined axe head. Each smith even stamps their initials into the head once they’re satisfied with the job, and we were very happy with the grind on this axe, even straight off the shelf.

We put this hatchet into the hands of a casual spoon carver and woodworker, who lauded its ability to do fine work that required a bit more finesse. The thinner profile on the head helps accomplish this, and its reminiscent of the profile on the Hults Bruk Jonaker. The beard on the Wildlife hatchet is a bit more pronounced, however, and the longer handle will also aid in taking bigger bites when needed.

At 1 pound, 5 ounces, this hatchet is one of the lightest made by Gränsfors Bruk, designed to be a lightweight companion on hikes into the bush. It finds itself among the ‘Forest Axes,’ which feature an elongated axe head and a long, rounded edge, and are designed to cut across the grain, as opposed to a splitting axe.

Swinging the Wildlife Hatchet, you can tell that a lot of thought went into the balance between the axe head and the handle. We especially appreciated that the handle had been pre-dried prior to having the axe head set, and the linseed oil and beeswax treatment had it wearing into our hands on day one.

A legacy hatchet from a legacy brand; there’s plenty of history to back up the choice of bringing this forest tool along. The price is pretty high, but for the name and detail, we’re willing to spend the bucks most of the time. We will note that getting your hands on the Wildlife can be a little more difficult on this side of the Atlantic, which means the more obtainable Hults Bruk Almike may be a better bet for some.


  • Cut Quality
    9.0
  • Swing Feel
    8.0
  • Ease of Maintenance
    8.0
  • Durability
    9.0

  • Weight: 2 lbs., 5 oz.
  • Overall Length: 16”
  • Bit Length: 3.75”
  • Steel Type: Black FNC-coated 4140
  • Handle Material: Hickory

Pros

  • Balance between size and weight
  • FNC coating on the head
  • Hammer size
  • Quality construction

Cons

  • Leather sheath can be very tight at first
  • Higher price than many

There are many do-it-all hatchets out there, which makes the title of best utility the hardest one to pick. So, why did the Hardcore Hammers Camp Companion ($200) receive the honor? The simple answer is that it’s the total package, but there’s a lot that goes into that.

First and foremost is how utilitarian it is. The Camp Companion is a well-balanced hatchet, hammer, and demolition tool. In fact, aside from the Flying Fox we tested, it’s the only other traditionally styled hatchet on this list that is rated for its poll to be used as a hammer. If there’s one thing we’ve learned in testing out hatchets, it’s that some heads do not have a poll that has been properly heat-treated to be used as a hammer.

Another boon for the Camp Companion is its 4140 FNC-coated 1-pound 10-ounce head. In terms of steel, 4140 is one of the toughest around. With the 3.75” bit, it dominates the competition by being a long-lasting brute. 4140 is carbon steel, so it’s susceptible to rust, but the FNC coating eliminates that issue. It also allows the head to slide in and out of wet and sappy wood without sticking.

Considering the list as a whole, the Camp Companion is most similar to the Hults Bruk Almike. In weight, length, bit size, and even price, the two hatchets are very similar in what they offer. However, it’s hard to beat black FNC-coated 4140 steel. The average user might not notice the difference, but over time, as you realize how little maintenance the head on the Camp Companion needs, it edges out ahead of the Almike.

Overall, through testing, we benefited greatly from how well the Camp Companion swung into branches, logs, and stumps, as well as its rugged hammer poll. It came in handy in breaking up knots in wood when splitting, hammering tent stakes, and tenderizing meat and poultry. In fact, we enjoyed the hatchet so much that we demoed an entire deck with it.

This is one versatile tool, and if you can only have one, we think the Camp Companion is the one to snag. The price is just about our only complaint about it, but we think it’s worth it.


  • Cut Quality
    7.0
  • Swing Feel
    6.0
  • Ease of Maintenance
    7.0
  • Durability
    8.0

  • Weight: 1 lb., 5 oz.
  • Overall Length: 9.4"
  • Bit Length: 2.8"
  • Steel Type: Hand-forged Swedish steel
  • Handle Material: Hickory

Pros

  • Hand-forged Swedish steel head
  • Leather sheath can be used to hook the Jonaker to your belt
  • Blackened finish that reduces friction and increases corrosion resistance
  • Enough heft behind it to get some good chopping power

Cons

  • Pricey for the size
  • Smaller size will be limiting for bigger jobs

Small but mighty, the Hults Bruk Jonaker ($189) isn’t here to split a cord of wood, but it sure will come in handy when you need it. From clearing brush on the trail to splitting kindling to limbing trees, the Jonaker is the right size to be carried around as a backup cutting tool as well as the only cutting tool you bring along.

Made from 1.5 pounds of hand-forged Swedish steel and featuring a 2.8” bit, the Jonaker’s head has been hand-blackened to help stave off corrosion and reduce friction. Additionally, the 9.4” hickory handle has a slight bend to increase the ease of impact and overall ergonomics so you don’t tire out too easily.

Compared to diminutive hatchets like the Gerber Pack Hatchet, the Jonaker’s bit profile has some real chopping power behind it, and most will find it to be a better tool for trips where you can afford a slightly bulkier hatchet. Like other Hults Bruk offerings, the Jonaker is also pretty pricey, and the near $200 price tag obviously rolls in some legacy value.

If you’re willing to get away from the classic steel and hickory handle, the more modern CRKT Chogan is a similarly small chopper with a 4″ longer handle that’ll allow for some higher swinging power to be generated. The $65 price also doesn’t hurt as much as the Hults Bruk option, but the tradeoff is obviously in looks and legacy. The Jonaker just looks like it’s meant for the backwoods.

Earlier in the fall this year, tester Nick LeFort used the Jonaker as a splitting wedge when dropping a larger tree up in Vermont. Based on its smaller size, it also makes for a great hammer for wedge-splitting logs and kindling with plastic wedges. It’s also incredibly easy to carry either in your pack, your belt, or anywhere else a full-sized hatchet won’t fly.


Other Hatchets We Trust in the Backcountry

We’ve swung a lot of hatchets in our time, and the lineup above are the tools we trust the most to get the job done — whatever that may be. That said, there are many others we’ve come to enjoy using at camp, on the trail, and while stacking cords of wood. Check out our runner-up options below.

  • Cut Quality
    7.0
  • Swing Feel
    7.0
  • Ease of Maintenance
    7.0
  • Durability
    8.0

  • Weight: 1 lb., 5 oz.
  • Overall Length: 13.2"
  • Bit Length: 3.2"
  • Steel Type: Manganese phosphate coated 1055 carbon steel
  • Handle Material: Glass-reinforced nylon

Pros

  • Lightweight but effective
  • Forged 1055 carbon steel head for long-term abuse
  • Glass-reinforced nylon handle is tough
  • Broad hammer poll surface area

Cons

  • Doesn’t come with a sheath
  • Ideally suited for splitting kindling, not much bigger

Small but effective, the CRKT Chogan Hatchet ($65) is one of the best hatchets you could have around the campground or cabin. Both practical and tactical, the Chogan is equally effective in breaking up kindling as it is hammering in tent stakes.

Made from a solid piece of manganese phosphate-coated 1055 carbon steel and featuring a glass-reinforced nylon (GRN) handle, the Chogan Hatchet can handle your camp tasks in any weather condition, year-round. The GRN handle is resistant to changes in temperatures in weather and absorbs the shock you get from chopping so it doesn’t transfer to your hand and arm.

At 13.2” long and weighing only 1 pound, 5 ounces, the Chogan might not be your first choice when it comes to chopping larger limbs. But when it comes to keeping the fire roaring back at camp, it’ll have no problem splitting those chopped limbs. In our opinion, this tomahawk plus a larger hatchet like the Gerber Bushcraft would make an ideal pairing. Suited for both wet or dry wood, this hatchet can easily chop the wet stuff and just as easily split the dry.

If we had to make one suggestion to CRKT, it would be to throw a sheath into the mix to make the Chogan Hatchet easier to carry and access out on the trail. Otherwise, the included rubber cover for the bit will allow you to throw the hatchet in your pack until you get to camp. This seems like a bit of an oversight to us, and keeps the TOPS Hammer Hawk on top for now when it comes to a fine tomahawk for camp use.


  • Cut Quality
    8.0
  • Swing Feel
    7.0
  • Ease of Maintenance
    7.0
  • Durability
    8.0

  • Weight: 1 lb., 7 oz.
  • Overall Length: 15"
  • Bit Length: 2.6"
  • Steel Type: Carbon steel with low friction coating
  • Handle Material: Hickory

Pros

  • FiberComp overstrike protection
  • Low-friction bit coating
  • Balanced weight
  • Palm swell on handle cradles the hand well

Cons

  • The recycled leather sheath isn't the nicest
  • On the pricier side for an everyday hatchet

The Fiskars Norden N7 ($120) is a traditional hatchet that incorporates some modern amenities that maintain its heritage but are updated to keep it swinging for the long haul. Fiskars usually shows up in our Best Budget Hatchet category because it’s known for making affordable tools with composite handles. But with its Norden Collection, it’s aimed at the premium category and has done a stellar job.

At 14 inches, the N7 is the smallest in the Norden line-up which includes a chopping axe and splitting axe. The N7 has a hickory handle with FiberComp Overstrike Protection. This unbreakable protective sleeve is made from the same material found in Fiskars X series of cutting tools and is reminiscent of the leather collars that have been traditionally used to keep the handle from getting damaged.

Swinging the N7 through Connecticut hardwoods this summer, we had no issues with glancing the handle on this protective sleeve and found we could swing like we meant it. Turning the hatchet over, a small but usable poll allows for the occasional clacking in of nail heads that have worked themselves loose.

The N7’s carbon steel head has been double-hardened and precision-ground to stay sharper longer. It has also been coated to protect it from corrosion and abrasion and reduce friction. Additionally, a casting shell reinforces the connection between the head and handle, holding the head in place. This blend of old and new materials makes this hatchet supremely versatile, but if you’re looking for a true new wave of polymer designs, the Gerber Bushcraft may be a better bet.

Aside from all of these great characteristics, the Norden N7 is lightweight and balanced. This not only allows for faster swings, but also a more powerful impact. We found this to be particularly appealing for clearing trails and brush as well as prepping wood for the fire.


  • Cut Quality
    7.0
  • Swing Feel
    7.0
  • Ease of Maintenance
    8.0
  • Durability
    9.0

  • Weight: 2 lbs., 3 oz.
  • Overall Length: 14.5"
  • Head Length: 4.5"
  • Steel Type: ⅜” 1075 carbon steel with tungsten Cerakote finish
  • Handle Material: Canvas Micarta

Pros

  • Single piece construction
  • Cerakote finish and Micarta handle
  • Massive 4.5” blade
  • Advanced ergonomics
  • Well balanced

Cons

  • The hammer could be thicker
  • Most of the knives we own are too big for the slot in the belt frog

TOPS is known for making over-built knives and tools with attention to materials and detail, and the Hammer Hawk ($530) exemplifies that exponentially. Not only is this power hitter the most expensive hatchet in this guide, but like the Kershaw Deschutes and Estwing Sportsman’s Axe, its made from one solid piece of steel. This full-tang style of construction ups the possibilities of what you can chop, slice, and smash with these tools.

Made from ⅜” thick 1075 carbon steel that’s been Cerakoted, the Hammer Hawk sports hand-machined Micarata scales for excellent grip as well as advanced ergonomics. These two traits allow the Hammer Hawk to be used for a multitude of chores — from chopping wood to processing big game to skinning — which makes it an ideal tool to keep around camp or take out on your next hunting adventure.

The Hammer Hawk comes with a full-grain leather blade cover and belt frog. The combination of these two separate pieces allows you to safely transport the Hammer Hawk on your belt and easily retrieve it on the move. By design, the belt frog keeps the Hammer Hawk from swinging around when you’re practicing parkour in the woods, and a small pocket in the front allows you to carry a small skeletonized knife like the TOPS Backup knife.

Price is obviously the big hangup with the Hammer Hawk, and at north of $500, we’re talking about an investment boutique piece from a brand that prides themselves on exceptional quality. This isn’t to say the hatchet is a wall-hanger — we put it to the test, and it excelled — but if the price is just too much to stomach, the $65 glass-nylon handled CRKT Chogan is an excellent tomahawk substitute. You won’t get the modern materials used in the TOPS tool, but it chops nearly as well.

If we had to describe our experience with the TOPS Hammer Hawk, we would sum it up by saying it’s a power hitter. What it can’t slice or chop, it can easily smash. Having tested it in winter, this allowed us to get through some ice and gather water, as well as break up some sticks and branches blocking the trail. With the tungsten Cerakote coating, corrosion will never be an issue with this modern take on a Native American classic.


  • Cut Quality
    7.0
  • Swing Feel
    8.0
  • Ease of Maintenance
    7.0
  • Durability
    8.0

  • Weight: 2 lbs., 4 oz.
  • Length: 15.5"
  • Bit Length: 3.88"
  • Steel Type: 1060 steel
  • Handle Material: American hickory

Pros

  • Hardened bit and poll
  • Ergonomic shape for prolonged use
  • Great balance
  • Under $75

Cons

  • Doesn’t come with a sheath as standard
  • Stickers on the handle leave a lot of residue behind

The name alone indicates that the Council Tool Flying Fox Woodsman ($67) will offer hours of good, clean fun. Thankfully, that indication is supported by the Fox’s incredible balance, curved handle, and fully hardened head. 

We loved the Flying Fox’s look from day one. It has a traditional shape that’s easy to admire. However, the curved hickory handle and clean shape on the 1-pound 11-ounce head quickly proved that this wasn’t just a hatchet you could hang over your fireplace. It could also make quick work of branched logs you were looking to process for a good fire. 

Lots of folks think that just because a hatchet head may have a flat poll, it can be used as a hammer. Those are the same folks that have rounded polls as well as misshapen eyes. Thankfully, that’s not an issue here because the Flying Fox is heat-treated on both the cutting bit and the poll, and in practice, it drove home every nail and tent stake we put in front of it.

The Flying Fox has a 1060 steel head. While it’s complementary to the 4140 steel used on the Hardcore Hammer Camp Companion, over time, you realize that 4140 is stronger. That said, aside from allowing the Fox to be used as a hammer, the hardening process of the head improved the strength and toughness of the 1060. Overall, you’re going to do more with the Camp Companion, but for $125 less, the Flying Fox isn’t that far behind.

In testing, we found that the Flying Fox performed flawlessly with dry wood but needed a good cleaning after chopping and hammering through wet and sappy woods. This can be eliminated by lubing or waxing the head. Any kind of beeswax will do. However, for long-lasting conditioning, we recommend the Hardcore Hammer Hardcore Tool Lube.

The one drawback to the Flying Fox is that it doesn’t come standard with a sheath, and you’ll need to pony up $15 extra for the privilege. With carrying ease being an important factor with hatchets, we would recommend you hop on this deal if you plan on picking up a Flying Fox.


  • Cut Quality
    8.0
  • Swing Feel
    6.0
  • Ease of Maintenance
    7.0
  • Durability
    7.0

  • Weight: 2 lbs., 2 oz.
  • Overall Length: 15.2"
  • Bit Length: 3.3"
  • Steel Type: Hand-forged Swedish steel
  • Handle Material: American hickory

Pros

  • Beautiful design
  • Ergonomic design promotes comfort and safety when in use
  • High-quality construction
  • 325 years of heritage

Cons

  • More expensive than other options
  • Heavier than many

Read Review: Hults Bruk 325-Year Anniversary Axe Review: A Collectible Designed for Abuse

There’s a lot to be said about heritage. There’s even more to be said about 325 years of heritage being baked into a single hatchet. But, with the Hults Bruk 325-Year Anniversary Axe ($184), the legacy Swedish forge found a way to pull it off, and it’s awesome. Awesome, right down to the green and red color schemes, indicating that this hatchet was meant to be admired when not being swung.

The 1.25-pound head has a Yankee pattern and a premium grind. The pattern, coupled with the extra attention paid during the sharpening process, provides an incredibly smooth hit that penetrates both wet and dry wood with ease. This, of course, is aided by an ergonomic 15” American hickory handle. 

In regards to the red paint on the handle and the green paint on the head, sure, it’s pretty to look at, but it also aids in the overall function of this hatchet. The red on the handle provides increased grip, while the green on the head reduces friction. After 325 years of making excellent hatchets and axes, you learn a thing or two.

That paint job doesn’t mean this hatchet is purely a decoration piece, however. Out in the field, the Hults Bruk 325-Year Anniversary Axe made quick work of both wet and dry limbs. We carried it all over the Green Mountain National Forest to help clear a couple of old trails, as well as prep and split wood for the fire. In the end, we were warm and fed, and we owe it all to three centuries of determination and knowledge. 

A good-looking hatchet can really spruce up the woodshed at the cabin, but if $184 is a bit much, we also quite like the good-looking Council Tools Flying Fox Woodsman — at a more palatable $65. The ‘325’ is certainly our splurge choice, however, as this hatchet chops as good as it looks.


  • Cut Quality
    7.0
  • Swing Feel
    7.0
  • Ease of Maintenance
    6.0
  • Durability
    6.0

  • Weight: 1 lb., 9 oz.
  • Overall Length: 14"
  • Bit Length: 3.5"
  • Steel Type: Black oxide coated 3Cr13
  • Handle Material: Glass-filled nylon with rubber overlay

Pros

  • 0.24” thickness makes for easy cutting
  • Innovative sheath with carry strap
  • Swing weight is balanced across the entire hatchet
  • Black oxide blade coating keeps it moving through material

Cons

  • Too thin to hammer with
  • 3Cr13 is a bit soft for a steel, and will need more upkeep to stay sharp

The Kershaw Deschutes ($103) almost usurped the Gerber Bushcraft for this year’s Best Modern Hatchet. But the Gerber edged ahead due to its ability to be used as a hammer. That said, if you’re looking for a hatchet with unsurpassed cutting capabilities, the Deschutes might just be the hatchet for you, and for your next adventure.

Made from quarter-inch-thick black-oxide coated 3Cr13, the Deschutes cuts more like a machete than it does like a hatchet, which makes it a great choice for limbing fresh, wet wood. 3Cr13 is an affordable stainless steel (also used in the Gerber Pack Hatchet) and is commonly found in knives. It has good corrosion resistance, though it is a bit soft for frequent action. Additionally, the glass-filled nylon handle benefits from its rubber overlays, as they provide an excellent grip.

Aside from being modern, technical, and tactical, the Deschutes also excels in carry. Its innovative sheath, made from the same material as the handle, indexes onto the head of the hatchet, protecting the bit when not in use. It also has an optional carry strap so you can wear the Deschutes across your back like a rifle. 

Additionally, the length-to-weight ratio makes the Deschutes a breeze to use over a longer stretch of time. Unlike traditional hatchets that tend to have a heavier head, the Deschutes is a uniform piece of steel and, therefore, is more balanced like a kukri or a machete. Ultimately the choice of steels means we still recommend the Gerber Bushcraft over the Deschutes much of the time, but if cutting is your priority over chopping, this is a great option.


  • Cut Quality
    6.0
  • Swing Feel
    6.0
  • Ease of Maintenance
    7.0
  • Durability
    6.0

  • Weight: 1 lb., 8.5 oz.
  • Overall Length: 9.5"
  • Head Length: 3.5"
  • Steel Type: Stainless 3Cr13MoV steel
  • Handle Material: Rubber/composite overmold

Pros

  • Compact packed size
  • Tall grind maintains sharpness
  • Finger grooves for choking up on fine detail work
  • Great for uses of all experience and dedication levels

Cons

  • Less durable sheath
  • Not meant for bigger jobs

While likely not the hatchet you’d want to use to split an entire cord of wood, the Gerber Pack Hatchet ($45) makes a compelling case for itself when it comes to light-duty work far from the trailhead.

With a full-tang build, we had no qualms truly swinging this tool right off the bat to test its chops. We were pleased to see that Gerber included finger grooves in the overmolded handle to allow for choking up on the hatchet — something that smaller tools like this excel at. With this, we were able to produce feather sticks with ease.

At 1 pound, 8.5 ounces, this isn’t the heftiest hatchet on our list, but we found it to generate enough swing weight to cleave small limbs and produce kindling for whipping up a quick campfire. The rubber grip felt confidence-inspiring — even for damp hands. This modern tool compares well with the Hults Bruk Jonaker, and while that hatchet is better at splitting and chopping, we found the Gerber excelled at fine work.

Unfortunately, we were let down by this hatchet’s sheath. It is only a simple fabric design with no embedded plastic lining to ensure it doesn’t degrade over time. The attachment straps were also not the most confidence-inspiring, though they certainly do get the job done. 

Even still, chuck it in your pack and forget about it — until it’s time to build the campfire, that is. The Pack Hatchet is a capable tool in a compact package that’ll make the case for bringing it along almost every time.


  • Cut Quality
    7.0
  • Swing Feel
    6.0
  • Ease of Maintenance
    7.0
  • Durability
    7.0

  • Weight: 1 lb., 14.4 oz.
  • Overall Length: 14"
  • Head Length: 4"
  • Steel Type: C45 steel
  • Handle Material: U.S. hickory

Pros

  • Beautiful design
  • Ergonomic design promotes comfort and safety when in use
  • High-quality construction
  • Eco-friendly manufacturing

Cons

  • More expensive than other options
  • Unique shape of axe head takes a bit getting used to
  • Heavier than other options
  • Not the best for backpacking

When it comes to purchasing tools, the most beautiful option might not be the most functional. Still, it’s hard not to acknowledge the classic good looks of the Adler Rheinland Hatchet ($98). Thankfully, this camping hatchet boasts incredible durability and ease of use as well.

While a bit more expensive than some competitors, the Adler Rheinland Hatchet backs up its price point in both function and fashion. The hickory handle was designed with ergonomics in mind, making it comfortable and safe to hold and use. In the same vein as the Hults Bruk 325, the painted handle also serves a purpose and increases the grip while swinging.

The axe head itself is a large, curved Rheinland profile blade, allowing users to maximize contact points on the logs they are splitting. This wider profile will be a bit cumbersome for those not used to it, but the tradeoff in bite size is worth the learning curve. The C45 steel used is similar to the 1055 seen in hatchets like the Gerber Bushcraft or CRKT Chogan, but it will be a bit softer and require a little more upkeep.

As a bonus, the wood waste created from manufacturing is used to generate energy that helps run the factory — making Adler an environmentally friendly choice. We think that there are a few other hatchets on the market that do the job better than the Rheinland, such as the Fiskars Norden N7 or Gerber Bushcraft — namely due to their more durable steels — but if you’re handy with a sharpening puck, this hatchet is a great alternative.


Gerber’s Bushcraft Hatchet
We did the test swinging, so you don’t have to; (photo/Nick LeFort)

Camping Hatchet Comparison Chart

Camping HatchetPriceWeightOverall LengthSteel TypeHandle Material
Hults Bruk Almike
$1991 lb., 12 oz.16″Hand-forged Swedish steelAmerican hickory
Husqvarna Swedish Style Hatchet$702 lb., 2 oz.15″Hand-forged Swedish SteelHickory
Gerber Bushcraft Hatchet
$702 lbs., 6.4 oz.15.2″Forged & coated 1055 stainless steelSynthetic polymer with rubberized inserts
Fiskars X7$351 lb., 6 oz.14″Hardened forged carbon steelFiberComp composite
Gränsfors Bruk Wildlife Hatchet
$1851 lb., 4.8 oz.13.7″Recycled hand-forged Swedish steelHickory
Hardcore Hammers Camp Companion$2002 lbs., 5 oz.16″Black FNC coated 4140Hickory
Hults Bruk Jonaker
$1891 lb., 5 oz.9.4″Hand-forged Swedish steelHickory
CRKT Chogan Hatchet
$651 lb., 5 oz.13.1″1055 carbon steelGlass-reinforced nylon
Fiskars Norden N7 Hatchet$1201 lb., 7 oz.15″Carbon steel with low friction coatingHickory
TOPS Hammer Hawk
$5302 lbs., 3 oz.14.5″1075 carbon steel with tungsten Cerakote finishCanvas Micarta
Council Tools Flying Fox Woodsman

$672 lbs., 4 oz.15.5″1060 steelAmerican hickory
Hults Bruk 325-Year Anniversary Axe
$184
2 lbs., 2 oz.15.2″Hand-forged Swedish steelAmerican hickory
Kershaw Deschutes
$1031 lb., 9 oz.14″Carbon steel with low-friction coatingGlass-filled nylon with rubber overlay
Gerber Pack Hatchet$451 lb., 8.5 oz.9.5″Stainless 3Cr13MoV steelRubber overmold
Adler Rheinland Hatchet
$981 lb., 14.4 oz.14″C45 steelAmerican hickory
We compared hatchets side-by-side in chopping and cutting tests to get a sense of their relative performance; (photo/Nick LeFort)

How We Tested the Best Camping Hatchets

GearJunkie’s camping hatchet testing covers both the real and the less-than-ideal situations in which you might find yourself with the tools.

  1. Field use: We use these hatchets to clear brush, process firewood, and make trails throughout an entire season before rendering a verdict. Our experts range from knife-industry experts to backcountry trail crew leaders.
  2. Balance and swing testing: Our method of testing a hatchet’s balance is to hold it at the base of the handle and let it swing down into a log or stump. If it glances off the wood, then the bit is either too dull or the head is too heavy and unbalanced against the length of the handle.
  3. Chop and edge testing: We process up to a dozen 3”-4” diameter logs and vary the species to hardwoods like birch and beech, and softwoods like pine and cedar. For half of the trials, the wood was wet and green. For the other half, we processed more seasoned wood.
  4. Weather resistance monitoring: All of the hatchets we’ve tested have been used hard and put away wet, and we monitor them for long-term durability from weather exposure.
  5. Our Hatchet Rating System: We take all of our in-field and bench testing feedback and use it to rate each hatchet on a set of four essential metrics:
    • Cut quality: 30% weighted. How well does the hatchet chop through hardwood? Softwood?
    • Swing feel: 30% weighted. Is the hatchet balanced? Does it have enough heft to clear cuts?
    • Ease of maintenance: 20% weighted. Is the steel used easy to maintain? The handle or any covers?
    • Durability: 20% weighted. Does the head come loose after a season of use? Has the bit chipped?

Our Testing Process and Testing Locations

Best Camping Hatchets — Wildlife Hatchet
In the hands of a trail crew leader, a good hatchet is an essential tool, and we sent many out on backcountry work spikes; (photo/Nick Belcaster)

Our approach is to prove or disprove manufacturers’ claims about their products. That covers form and function, as well as the materials being used. So, during field testing, we’re looking at specifics, such as whether certain steel holds up in wet weather conditions or whether synthetic handles absorb shock better than wood handles.

We’re also thinking outside the box to see what else we can do with these hatchets. We want to cover all the bases so that if you have questions, we have answers. This has taken us across the country’s woodlands, from the hardwood groves of the Northeast to the lumbering old-growth of the Pacific Northwest. We put these hatchets into the hands of trail crew leaders, casual campers, and survival experts to get the spread of opinions.

Beyond that, we’re following trends. We’re looking to see what’s new in the market that could be a game-changer; the next big thing. This allows us to keep our info up to date so that you can rely on us to help you choose the right hatchet for your next adventure. We also reviewed the Best Axes for Splitting Wood for those looking for a heavier-duty splitting tool.

It’s important to us that we’re using these tools in real-life situations. Because, after all, that’s where you’ll be using them. It also allows us to consider weather conditions, fatigue, and any other variable that can come up in life that may not be in a controlled environment.

We vary the type of wood we do our chop testing with to ensure we get the full picture; (photo/Nick LeFort)

Our Expert Testers

For our most recent update, we tapped contributor Nick LeFort to fill his backpack and head into the woods to see what this year’s batch would be. LeFort spent weeks in the woods of Vermont and Connecticut, as well as in his own backyard, discovering the current cream of the crop in the world of hatchets.

LeFort is an outdoor enthusiast, engineer, and knifemaker who has worked and played in the outdoor industry for more than 20 years. He brings with him a wealth of knowledge about materials, engineering, manufacturing, and marketing, and has nearly 30 years of experience in the outdoor world.

What’s more, he’s been testing and reviewing knives, tools, and gear for more than a decade. He’s dedicated to the cause, has a lot to say, and wants to make sure you’re getting the best information you can from us.

Three hatchets
(Photo/Nick LeFort)

Buyer’s Guide: How to Choose the Best Camping Hatchet

When seeking out the best camping hatchet, there’s a lot to consider. Ultimately, the best hatchet for you may not be the best hatchet for someone else, and it will take weighing some personal pros and cons before you gain full confidence in your decision.

You also should consider whether a hatchet is the best tool for the job. Processing wood outdoors can look pretty different depending on the size and scale of your endeavors, with full-sized axes being primed for tree felling, bushcraft knives working excellently for fine work, and hatchets landing somewhere in the middle.

As you shop around for hatchets, consider the following points of differentiation as you move closer to your final decision. If you’re stuck between a couple of options, there’s no harm in having multiple tools in the toolbox!

Gransfors Bruk Wildlife Hatchet
The Gränsfors Bruk Wildlife Hatchet is a high-quality camp hatchet that will process wood for many years; (photo/Anthony Sculimbrene)

Hatchet Head Anatomy

Where there are more than enough shapes and sizes for Axe heads, hatchet heads tend to all be similar; especially when we’re talking about traditional hatchets. When we get into modern hatchets, some — like the Gerber Bushcraft Hatchet and the CRKT Chogan Hatchet — may pick up attributes added in to make splitting wood easier.

But for the most part, a good hatchet head is forged, and not cast. This eliminates impurities that would weaken the steel. Additionally, a hatchet head will be at or under 2 pounds and have a bit that is less than 4”.

Best Camping Hatchets — Head Shape
The broader bit of the Gränsfors Bruk Wildlife will make it a better chopper, while the more narrow bit on the Gerber Bushcraft excels at splitting; (photo/Erika Courtney)

What’s a bit? Well, we’re glad you asked. A “bit” is the blade of the hatchet head. If you want to sound really on your game at a cocktail party, you could refer to your hatchet as a “single bit” as it only has one sharp edge. Here are a few other terms you should get to know:

  • Cheek: The cheek of the hatchet head is the side profile of the head. Unless the head has splitting attributes, this will be smooth and sometimes convex.
  • Butt: The back of the hatchet, which you can use as a hammer. Unless specified otherwise.
  • Beard: The beard of the hatchet head uses the bottom of the head in front of the handle. Depending on the shape, you can use the heel, or bottom of the bit, to roll and drag branches and logs. Additionally, the top of the bit is known as a toe.
  • Eye: The eye of the hatchet is where the handle slides through the head. If the butt isn’t hardened, you run the risk of deforming the eye, which will cause the head to fall off.
Best Camping Hatchets — Bit Profile
The Gränsfors Bruk (left) has a carving and felling cheek profile, while the Gerber Bushcraft (right) has a splitting profile; (photo/Erika Courtney)

Head Coatings

Another feature associated with most axe and hatchet heads is some form of coating. These coatings are added to stave off corrosion and abrasion and preserve the life of your tool. These coatings come in many different forms. 

For traditional hatchets like the Husqvarna Swedish Style Hatchet and the Gränsfors Bruk Wildlife Hatchet, these coatings can be oil-based and are added during forging or a secondary finishing process. They change the actual finish on the surface of the steel and could require recoating after years of use and abuse.

Some modern hatchets, like the Fiskars Norden N7 Hatchet, the TOPS Hammer Hawk, and the Gerber Bushcraft Hatchet, may use modern techniques similar to what we see on knife steel. This could range from a black oxide coating to a diamond-like coating (DLC) to ceramic Cerakoting. They act as a secondary layer bonded to the head steel and are noted to reduce friction and their years of resistance.

There are hatchets out there that do not have any coating and rely on their chemistry to stave off corrosion and abrasion. The Estwing Sportsman’s Axe doesn’t have any coating on its tool-grade steel head and handle. Though it will provide you with years of reliable cutting, you need to remember to keep it clean so that it doesn’t corrode. That said, you’ll note that Estwing does offer a special edition of their Sportsman’s Axe that adds a corrosion-resistant coating to the steel.

Best Camping Hatchets — Gerber Bushcraft
The Gerber Bushcraft has a PTFE coating that keeps it from getting hung up in wet wood; (photo/Nick Belcaster)

Head Weight and Handle Length

Two of the most important considerations when buying an axe are choosing its head weight and handle length. Both of these decisions can be almost entirely informed by determining the hatchet’s intended use.

The average hatchet handle length ranges from 12 to 18 inches. The average head weight ranges from 1.5 to 2.5 pounds. In order to determine the right combination of head weight and handle length, you want to find balance. To check that, you can lay the hatchet across your palm just below the head. If it balances in place, then the ratio is spot on.

The reason behind all of this is leverage. You want to let the tool do the work so you don’t get fatigued. It’s a tale as old as time and something that comes with using a hatchet over and over again. If it’s well balanced, the weight of the head and the length of the handle should work in synchrony to make chopping things energy efficient.

Where you plan on using your camp hatchet the most often is also worth consideration. If the majority of your camping is done on the roadside, weight shouldn’t matter much.

If you spend a lot of time off-trail or backpacking deep into the wilderness, weight matters. In this case, sacrificing some functionality to save some weight in your backpack may be required.

The balance between the head and handle can make or break a hatchet; (photo/Sean McCoy)

Ease of Splitting

The ease of splitting is a crucial thing to consider when purchasing a camp hatchet. If you are buying a hatchet with wood shaping and detail work in mind, wood splitting may not be a primary concern. If you envision yourself felling trees and splitting wood often, then the ease of splitting should move to the front of your mind. For heavy-duty splitting projects, check out our Buyer’s Guide of the Best Axes for Splitting Wood.

Again, longer handles and heavier axe heads generally lend themselves to easier splitting as does the head and bit shape. Consider the construction of the head and shape of the handle when shopping between similar models as well.

As you explore options, if you decide you need a tool fully dedicated to wood splitting, take a look at larger axes instead of hatchets. It’s entirely possible that the more compact camp hatchets on this list aren’t what you need after all, and you require a heavy-duty, full-size axe.

Gerber Bushcraft Hatchet - Blade
The reliefs on the cheek of this Gerber Bushcraft Hatchet allow for deeper penetration when chopping and splitting; (photo/Nick LeFort)

Durability

Both materials and construction play directly into the durability of the best camping hatchets.

When shopping and considering various options, pay special attention to the materials used to create the head and, to a lesser extent, the hatchet handle. The highest-quality hatchets will have forged steel heads, with a stronger preference edging toward those that are hand-forged.

It’s also worth noting how the head is attached to the shaft. Each user will have their preference, from full tang to separate pieces, and each style comes with its pros and cons.

Do diligent research on company websites and track down user reviews. These often provide excellent metrics when gauging the durability of a tool that will surely be put to use.

Fiskars X7 Hatchet
While hardwood is traditional, a composite glass-reinforced handle can be easily as strong and durable; (photo/Josh Wussow)

Carry

If you’re headed out on an adventure, you need to be conscious of how you’re going to carry your hatchet.

Most hatchets come with either a leather or composite sheath that allows you to lash the hatchet to the outside of your pack, or even throw it inside. The sheath also protects the bit from getting banged around and beat up and from cutting into anything it comes into contact with while traveling (including you).

Unless you’re buying a hatchet to leave in one place all the time, like your backyard, prioritize the hatchets with sheaths on your final list of what you’re considering buying.

Best Camping Hatchets — Belt Carry
The vegetable-tanned leather sheath on the Gränsfors Bruk Wildlife is snug and protective; (photo/Erika Courtney)

Maintenance

Like any other tool, preventative maintenance will prolong the life of your hatchet. In most cases, you’ll need to maintain the head more than the handle. But if your hatchet has a wooden handle, it’s going to need some sprucing up from time to time. Here are a few essentials we recommend for keeping your hatchet up and running for the long run.

Head and Handle Coating

Even with most hatchet heads having some sort of treatment to help with corrosion resistance, it’s still a good idea to either wax or lube the head. This will enhance any corrosion protection the manufacturer applied, or help protect an older or untreated head. We recommend the Hardcore Hammer’s Tool Lube ($20). Not only is this all-natural salve good on metal, but it can come in handy in treating wood and leather as well.

Bit Sharpening and Repair

Based on how they’re used, hatchet bits generally get dull fast. They can also get chipped if they hit something left behind in the wood. There’s a lot of old farmland peppered throughout the land, and you never know what tree may have had a bit of barbed wire wrapped around it or a nail hammer to it. Trees are resilient and will grow around anything that invades its fibers over time.

We recommend using a puck-style sharpening stone to fix a chip in a blade or sharpen your bit. Lansky Sharpeners offers its Puck Dual Grit Sharpener ($11), which has a 120-grit side for repairs and a 280-grit side for honing and sharpening. Similarly, Hardcore Hammers offers its Sharpening Stone with Leather Pouch ($60). It has a 100-grit side for repairs and a 220-grit side for honing and sharpening.

Tester Nick LeFort has been using the Lansky Puck for the last 20 years. As part of the testing process, he began using the Hardcore Hammers Sharpening Stone. Both are quality products that will restore or resharpen any axe or hatchet head. The advantage of the Hardcore Hammers Sharpening Stone is the leather pouch. Both stones perform the same, even with the differences in grits.

Price & Value

As with any outdoor gear, price plays a role in deciding between similar products. Most hatchets, and especially those on our list above, are fairly priced. But that doesn’t always mean the price determines what the best hatchet is. However, there are determining factors in the final price you will pay.

Consider what you’re getting for the price you’re paying: How many tools can it function as? What are the materials being used? Does it come with a sheath? Good camping hatchets can range from garden-section implements for limbing trees all the way to investment pieces from boutique manufacturers who use the finest materials and techniques.

Budget

If you’ve just got some kindling to split, a solid budget hatchet will get the job done. Expect to pay around $35-50 for a basic chopper like this, which will likely use a drop-forged steel head and commonly a composite handle (though some shellacked wood does exist). The Fiskars X7 ($35) is an excellent example, and it performed well in our chopping tests.

The lesser-quality tool steel used in the Estwing Sportsman’s Axe ($55) helps to explain the price there, and while the Husqvarna Swedish Style Hatchet ($70) is a bit beyond the budget tier, it is just about the most affordable you’ll find hand-forged Swedish steel and a hardwood handle, making it a killer value.

Gerber Pack Hatchet Whittling
The diminutive Gerber Pack Hatchet slides in under in competition in price, but you have to keep in mind its functional limitations; (photo/Nick Belcaster)

Mid-Tier

Paying $100-200 for a hatchet opens up quite a few more options, along with the frequent designation of “hand-crafted”. Nordic brands like Gränsfors Bruk and Hults Bruk make excellent hatchets for the money, and you’re buying into some serious history (some forges have been running since the 17th century). You’ll get mostly hand-forged steel heads here, along with hardwood handles and fine leather sheaths.

The Fiskars Norden N7 ($120) gives up a little in the steel department, but makes up for it with the composite overstrike protection built into the handles. If you’re after a more traditional example, the Gränsfors Bruk Wildlife Hatchet ($185) is a through-and-through classic, and the same can be said of the Hults Bruk Almike ($199).

Premium

Paying more than $200 for a hatchet means that you’re buying into a fine example of craftsmanship, with boutique brands that spend a lot of R&D on getting a design just right. The steels used here are high-performance, like CPM S90V or 1075, can be coated with Cerakote to provide added durability, and are mated to handles of fine hardwoods or pricey composite laminated grips.

The TOPS Hammer Hawk ($530) is a top-dollar unit but is a USA-made tool that is solid steel and swings like every bit of that price.

Frequently Asked Questions

What is the best camping hatchet?

Choosing the best camping hatchet is almost entirely dependent on the individual and its intended use. Some companies certainly have a stronger reputation than others, but choosing the single best camping hatchet for everyone is a nearly impossible task.

We did our best in outlining some of our favorites above and ultimately chose the Hardcore Hammers Camp Companion Axe (traditional) and Gerber Bushcraft Hatchet (modern) as our overall favorites. That said, that doesn’t mean these two hatchets are for everyone.

Sort your priorities and intended uses, and weigh some pros and cons of various options. You will soon find that the best camping hatchet for you may not be the best hatchet for your camping partner.

The FiberComp™ material on the Fiskars Norden N7 guarantees years of use and abuse; (photo/Nick LeFort)
Do I need a hatchet for camping?

While you certainly do not need a hatchet for camping, it does make our list as a top tool to have on any camping adventure. Hatchets are multifaceted tools; from instruments of survival to campground maintenance tools, hatchets can be used for many things in the woods.

We can say with almost full confidence that you will never regret having a hatchet with you when camping. Inevitably, someone will pick it up to split wood, make kindling, or tinker with a small bushcraft project around the fire. There is also something to be said about learning new skills and promoting self-sufficiency when out in the woods.

What’s more fun — having firewood delivered or using newly learned skills to gather your own?

(Photo/Nick LeFort)
Hatchet vs. axe: What’s the difference?

All hatchets are axes, but not all axes are hatchets.

In short, hatchets are just small, lightweight axes. Axes can and often should be used with one hand as an all-purpose tool.

The classic grip to use a standard axe requires two hands. These axes are less utilitarian and have a more focused design for tree felling, wood chopping, and other forestry needs.

What is a hatchet good for?

Depending on shape and construction, hatchets are good for quite a lot. Their most common purpose is for chopping and splitting smaller sections of wood. Hatchets excel at cutting green wood or chopping dead wood roughly the diameter of an average forearm and slightly bigger.

Given their smaller size, hatchets are excellent tools for more intricate bushcraft tasks. They are the perfect instrument for shelter design or carving and crafting woodworking projects. In a bind, hatchets work when cutting through bone and cartilage if you do not have a field dressing knife on you following a hunt.

For a deeper, expanded look at the possibilities a hatchet can provide, check out this article.

Hults Bruk Hatchet Test
(Photo/Sean McCoy)
Do I need to sharpen my hatchet?

A good hatchet will last for generations, but it will require some upkeep. Most of the hatchets on our list are sharp straight out of the box, but some may come from the factory without an edge. Either way, every hatchet will eventually need maintenance to keep it in good, safe, working order.

The frequency with which you sharpen your hatchet will depend on how often you use it and what you are using it for. If you purchased a high-quality hatchet, only go camping once or twice a year, and use it sparingly, you may not need to sharpen it frequently.

Many hatchets come with user manuals for guidance in sharpening, or you might consult the U.S. Forest Service Ax Manual. Some hatchets even include a file and sharpening stone with your purchase. We’ve relied on this Dual Grit Sharpener for years as it’s easy to use, can restore an edge quickly, and doesn’t take up much space in your pack.

Many professionals sharpen knives and axes for a living. If you don’t have the time to give your hatchet the proper maintenance it deserves, consider taking it to someone who does.

How should I store my hatchet when not in use?

Different manufacturers may have specific recommendations on how to store your hatchet when you’re not using it. You can always refer to the included manual or their website for specific instructions.

Beyond that, we recommend you clean up your hatchet before storing it. Any moisture and debris can impact the overall quality and reliability of your hatchet over time. Make sure to clean off the head of any debris and wipe it dry before putting it back in the sheath.

As wood handles start to age, over time they may require a rewaxing or sealing. There are a few different methods for doing this, but we recommend following the manufacturer’s instructions and using any products they offer to restore the handle to its original state.

With any piece of gear or clothing, it’s best to store it in a dry place. Hatchets are a little hardier than some of the other gear you take along with you on your adventures, but that doesn’t mean that they’re not susceptible to the elements.

The Ultimate Camp Recliner Just Got Better: NEMO Stargaze EVO-X Camp Chair Review

13 October 2025 at 19:47

The NEMO Stargaze EVO-X is now easier than ever to set up, and just as comfortable; (photo/Karuna Eberl)

Historically, my favorite chairs are those junk disposable ones that you can get at a box store for under $10. You don’t have to worry if an ember burns through the seat or if the legs rust off after lounging on a saltwater sandbar.

But as the years roll by, I am starting to appreciate a few elevated camp comforts, like a stove with fine simmer control, a portable fire pit, and, yes, fancier camp chairs. 

While I have tested a wide array of high-end camp chairs, only a couple have resonated enough to become part of my standard car-camping kit. After testing the newly updated NEMO Stargaze EVO-X Camp Chair, a frontcountry recliner that now unfolds to set up in seconds, it was clear it would also win a permanent seat there.

This hammock-chair hybrid masterpiece was developed with comfort in mind, whether kicking back with a copy of The Hitchhiker’s Guide to the Galaxy or fully reclined to take in the actual Milky Way. Here’s how I tested it and what I learned about its durability, shape, and more. 

In short: With its reclining strap system and gently swinging seat, the Stargaze EVO-X is great for stargazing, plus a well-rounded, versatile choice for everyday outdoor use. Whether you’re car camping, relaxing on the back porch, or watching community outdoor cinema, it’s an ultra-comfortable chair that’s now a snap to set up.

Looking for a new camp chair? Check out how the Stargaze EVO-X compares to the rest of our recommendations in GearJunkie’s Best Camping Chairs Buyer’s Guide.

  • Comfort
    9.0
  • Portability
    8.0
  • Capacity & Stability
    8.0
  • Ease of Use
    8.0

  • Weight: 14 lbs., 12 oz.
  • Dimensions: 29" x 37" x 41"
  • Cupholders: Two integrated
  • Pockets: N/A
  • Weight capacity: 300 lbs.

Pros

  • Lavishly comfortable
  • Easy setup
  • Good head support
  • One-of-a-kind suspension design
  • Cheaper than previous version

Cons

  • Heavy and bulky
  • No footrest
  • A bit tall for shorter people

NEMO Stargaze EVO-X Camp Chair: Review

the nemo stargaze evo-x camp chair set up at a campground
The new folding frame is a game-changer for the Stargaze EVO-X; (photo/Karuna Eberl)

NEMO markets this luxury camp chair as a necessary companion for dark skies camping. But if you’re going to plop down almost two bills for a seat, it better excel at more than that. Turns out, it does.

The first trial of the EVO-X was actually not camping, but rather on a month-long road-trip assignment across 12 states. My partner and I stayed primarily in motor courts along the way, and the chair proved perfect for hanging out on patios with a brew, watching the world go by, and chatting up strangers. 

Once we got back home to Colorado, summer was nearly half over, so we promptly disembarked for the high country. Over the course of the next 2 weeks, we took turns sharing the EVO-X and our rocker chair. Both are pretty luxurious, and I love how each lets you move gently back and forth. But when the campfire dwindled, the Stargazer’s reclining option delivered an extra level of versatility.  

Ridiculously Easy to Use

a tight image of the closure strap on the nemo stargaze evo-x camp chair
The closure mechanism on the Stargaze EVO-X is super-intuitive to use; (photo/Karuna Eberl)

Previous versions of NEMO’s Stargaze chairs had a slightly complicated setup. But with this new model, that has been eliminated with an updated folding frame that sits on a broad base.

It is remarkably quick from in-the-bag to butt down, opening in just one step. Pro tip: Make sure there’s no red showing at the locking tabs, or it might collapse; there are ample warnings about that all over the product, so it’s pretty difficult to get it wrong. Closing it back up is just as intuitive and fast.

Once seated, the reclining mechanism is also smooth and forgiving. Just lean back to get into stargazing position, or stop at any angle in between. The reclining straps also rebound well when you sit back up. Since they’re made from simple webbing, there’s also nothing mechanical that can go wrong or fail.

Made to Last, Wherever You Travel

the nemo stargaze evo-x chair packed into its carrying case
The padded travel case is well-sized and carries very well; (photo/Karuna Eberl)

The Stargaze EVO-X is crafted from quality materials and has an overall durable feel. Even the bag is padded and rugged, complete with a roll top and comfortable carrying strap. The chair sides include pockets for cans, bottles, phones, or whatever.

They’re positioned sideways, so they look like they’d spill a drink, but such a party foul hasn’t happened so far. The headrest is also padded, and there is ample padding on the armrests and front leg area.

The X-style frame is made from steel and has six points of ground contact. Although it’s a bit higher than standard chairs, the center of gravity feels low and stable. It is also rated to hold up to a 300-pound person, which is particularly robust for a reclining camp chair. 

Just Shy of Perfection

a camper kicks back in the stargaze evo-x
The Stargaze EVO-X could really use a footrest to round out the feature set; (photo/Karuna Eberl)

We do have one grumble with this chair, and that’s that it could really use a footrest. Leaning back and trying to keep your feet on the ground is not a very natural feeling. Of course, this is easily remedied by bringing along a footstool or using a wooden stump to prop up the stompers.

For such a well-thought-out beast, however, I’m surprised NEMO doesn’t offer an optional canvas footrest that integrates into the chair. Or, maybe it’s coming. There are two slits on the seat bottom, the purpose of which we’ve been baffled about. Perhaps they are in anticipation of just such a footrest. 

Of course, there is another elephant in the room with the EVO-X, and that is its weight. At around 14 pounds, you won’t want to lug it too far, and if you have limited car space, you might consider another option like the GCI Comfort Pro Rocker, which weighs 3 pounds less but still hosts a rocking mechanism.

Considering the level of comfort and versatility the Stargaze provides, however, its size is still decently modest and worth the weight for close-to-car camping trips.

NEMO Stargaze EVO-X Camp Chair: Conclusion

the author reclines back in the evo-x chair at a campground
It’s tough to get angles like this in other camp chairs; (photo/Karuna Eberl)

The NEMO Stargaze EVO-X Chair is a great all-around car-camping companion. It unfolds in seconds, and its shape and hammock-style suspension make it ultra-comfortable for sitting by the fire, grubbing on some pasta, and curling up with a good book. Oh yeah — and it’s also ideal for stargazing, since it reclines for optimal night sky viewing.

The new folding frame is a genius update, and creates a camp chair that gives little reason to leave it behind anymore. The base is broad and supportive, settling into pretty much any terrain with ease. You’ll need to haul the thing around, and the updated design is undoubtedly larger than the previous one.

As long as you can afford it and fit it into your vehicle, however, it’ll end up being a lifelong companion, not just at camp, but also in the backyard, tailgating, and wherever else you might want to sit down and chill like nobility. 

Kelty Wayback 20 Sleeping Bag Review: A Flannel Throwback for the Most Cushy Camps

13 October 2025 at 16:06

The flannel-lined Wayback is a sleeping bag time machine back to a simpler, cozier time; (photo/Ian Graber-Stiehl)

As a self-proclaimed maximalist, I adore ultralight equipment — because I can carry more of it. I’ve become accustomed to my various ultralight mummy bags, so testing the Kelty Wayback 20-Degree Sleeping Bag felt like being spoiled — like slipping into custom boots after years of rocking a size too small.

With a massive 82″x34” silhouette and thick flannel lining, the Wayback feels spacious and accommodating. On draftier nights, the blanket flap offers a nice extra bit of fabric to wrap around your neck. If you tend to turtle into your bag, you’ll be pleased to find that cotton interior and synthetic Cloudloft insulation are surprisingly breathable.

Normally, I test to the extreme: challenging hot tents well below zero, pushing sleeping bags to their limits, straining backpacks’ maximum carry limits, etc. For the Wayback, however, perhaps the greatest test has been working overtime as the best part of my “bed” system as a wildland firefighter. 

In short: With over 100 nights in, under, and on the bag, the Wayback has been one of the most comfortable and versatile options I’ve ever used. That said, its 20-degree temperature rating is more a matter of safety than comfort, and its heft and bulk will relegate it to car campers and paddlers.

Are you looking for a new sleeping bag? GearJunkie’s Best Camping Sleeping Bag Buyer’s Guide will help you compare the Wayback 20 to other options.

  • Warmth
    6.0
  • Comfort
    8.0
  • Feature Set
    7.0
  • Packed Size
    6.0

  • Shell fabric: Recycled 40D nylon ripstop
  • Available temperature ratings: 20°F (tested)
  • Available sizes: Regular
  • Tested packed volume: 37 L
  • Tested weight: 6 lbs.
  • Tested fill weight: N/A
  • Insulation: Recycled Cloudloft Eco

Pros

  • Classic rectangle shape with some modern features
  • Budget price
  • Separate blanket is soft and cozy
  • Flannel-lined interior

Cons

  • Not as thermally efficient as a snugger-fit bag
  • Packed size is a bit large
  • Blanket isn't fully removable

Kelty Wayback 20 Sleeping Bag: Review

kelty wayback pattern
The Wayback has recycled 40D ripstop nylon and a recycled synthetic Cloudloft insulation; (photo/Ian Graber-Stiehl)

What makes the Kelty Wayback a throwback? Let’s start with the lining. The flannel isn’t fully a rewind to the Sears catalog of the ’70s, but it’s got that vibe. However, the Wayback does opt for a more modern recycled 40D ripstop nylon shell and a recycled synthetic Cloudloft insulation. 

The end result is surprisingly breathable. It won’t dry as fast as a down bag, but even on cool mornings, the Wayback recovered quickly from summer night–induced back sweat. 

Zooming out, the name of the Wayback’s game is approachability. The flannel is incredibly soft and textured. The zippers’ design makes it easy to convert the bag into a blanket. There is a flannel flap toward the opening, which can be either buttoned into the top of the bag for extra insulation or unbuttoned on warmer nights.

The spacious interior, comfort, and multi-configurability make it an easy pitch for car campers. Need a bit of extra cushion to compensate for a less-than-ideal sleeping pad? You’ve got it. Need to lighten the insulation for those bright mornings where the sun starts heating up your tent by 7 a.m.? Turn the Wayback into a blanket.

Simply put, the Wayback is a comfy throwback to the days of cushy flannel-lined car camping bags. It’s light compared to canvas-coated bags, but it’s heavy for most modern car campers. Overall, it aims for a level of comfort and versatility that makes you not mind the 30-odd liters it’ll take up in your trunk.

100-Night Test

kelty wayback sleeping bag
I used the Wayback for more than just camping; (photo/Ian Graber-Stiehl)

I didn’t give the Wayback the most structured test, but I did give over 100 eclectic nights. And given that many camping sleeping bags play duvets for sofa-surfing friends and backyard blankets for chilly significant others, I like to think my tests were pretty representative. So let’s recap 100 nights spent with the Wayback.

Night 1: A hammock swinging betwixt the scrub outside Rifle, Colo., on a section of a Chicago–California road trip where pushing an extra 100 miles meant making camp by moonlight. Fortunately, a light breeze, low 40s temps, and the Wayback had me asleep in no time.

Nights 2 and 3: I found myself stranded on a desert island when a windstorm on Lake Powell turned a new kayak into a cliff-bound kite. Most of my slick backpacking sleeping bags would’ve become a grainy cocoon from the winds without a sleeping bag liner. The Wayback’s flannel inner remained plush.

Nights 4-40: The Tahoe National Forest. Wildland firefighting barracks are a toss-up. Some are shelter, and some are “shelter.” For that reason, these nights were spent in a hammock tent behind the barracks. The Wayback was oversized and used mostly as a blanket, but in temperatures down to the upper 30s, I found myself sometimes wishing for a bit more insulation.

The last 60 nights have been odd ones out. After dismantling my hammock bungalow, I started crashing on the barracks’ La-Z-Boy Pinnacle recliner sofa. Sixty nights atop a lumpy sofa wouldn’t usually be part of my testing procedure for a sleeping bag. However, wildland firefighters sleep when and where we can.

Creature Comforts

kelty wayback on wood
The Wayback keeps you cozy and warm; (photo/Ian Graber-Stiehl)

The Kelty Wayback is far from the fanciest or most technical option out there, but it does boast a few notable features. Easily the most defining is the flannel lining. Simply put, it makes the Wayback feel less like sleeping in a bag and more like slipping into a blanket cocoon. 

Another cozy addition is the tucked-in “blanket.” It can be buttoned closed to keep it in place or folded down on hotter days when you may want less fabric around your neck and head. 

Beneath that blanket is an adorable, flannel-lined pocket big enough to fit most larger smartphones. I may be a minority on this one, but a sleeping bag that is actually capable of holding my phone in a secure, out-of-the-way, and warm place — where the battery won’t drain from getting too cold — is a big plus.

The Wayback’s Cloudloft insulation actually has a decent bit of body to it. The amount of extra cushion I felt uncompressed beneath me was tangible enough to offer a bit of extra cushion. The downside of this, of course, is that the Wayback isn’t fitting into any sort of stuff sack smaller than 30 L. Even that volume comes with a fight.

kelty wayback spread out
The flannel-lined pocket that is big enough to fit most smartphones; (photo/Ian Graber-Stiehl)

Fortunately, even with some of the heavy materials, the relatively light 40D nylon ripstop exterior and the synthetic insulation dry pretty quickly. Straight out of the wash, I was able to dry the bag on a clothesline within a few hours. 

The Wayback sports a zipper running down one full side and bottom, and another partial zip on the other side, which makes maneuvering around in it easier. In fact, I’ve regularly alternated between using it as a bag and a blanket and turning it inside out to use it as a twin-sized topper on sofas.

At this price point, I do wish said zippers were YKK brand. Nevertheless, the ones included felt robust, snagged rarely, and were well-insulated with generous baffles along their full length.

Limits vs. Luxury

kelty wayback on a couch
This is one of the most comfortable bags I’ve used in my life; (photo/Ian Graber-Stiehl)

The Kelty Wayback 20 may be among the most comfortable bags I’ve ever used. However, that was well above its temperature rating. Once into the mid-30s, I found myself increasingly willing to trade the flap of flannel around my neck for a hood — removable or not. 

The Wayback is spacious and well-suited to all manner of sleepers. That comes with a degree of draftiness. The flannel flap up top isn’t nearly as effective as a hood at keeping heat from escaping around your head and neck. The extra space around the footbox and lack of an insulated panel on the bottom of the footbox make it feel drafty once you get into the low 30s.

The Wayback’s 20-degree rating is certainly a safety rating, not a comfort one. An exception might be if you’re sleeping with a warm hat and some thick wool socks. Then I might be comfortable taking the Wayback down into 20-degree nights. Otherwise, I would say that comfort-wise, the Wayback taps out at about 32 degrees.  

The Wayback also just isn’t practical for any human-powered carry that doesn’t involve paddles. At a minimum packable size of 30+ L, it’s just big all around. So, as versatile as it is, if you’re looking for the “if you could only have one” sleeping bag, a more minimalist down bag would be a better move. 

Kelty Wayback 20 Sleeping Bag: Conclusion

kelty wayback in a tent
The Wayback’s strongest points are comfort and versatility; (photo/Ian Graber-Stiehl)

The Wayback 20 sits in a strange place. It’s aiming for an approachable and budget-friendly niche: car camping and those general hangouts where you might need a blanket. However, at around $170, the Kelty isn’t the most competitive offering price-wise. It claws back plenty of value, however, by sheer force of comfort. The versatility doesn’t hurt either. 

This sleeping bag is a bold throwback meant to accommodate every type of lounge where you don’t have to carry it far. It lacks the “I don’t care if the dog walks on it or a campfire spark hits it” durability of a canvas bag. But it’s also more practical to carry on an overnighter or a paddling trip. It’s heavier and pricier than more modern camping bags, but offers a bit more cushion and a swaddling kind of weight.

It really boils down to whether comfort is king for your resident trunk sleeping bag. Do you want to feel more at home on a road trip for three seasons out of the year? Would you like to have a heavy blanket available for when you watch a meteor shower with a chilly significant other? Or: Do you just need something cozy to toss on the sofa?

Overall, for all the less arduous but no less grand adventures, the Wayback 20 is a well-rounded choice. Hence why you’ll find mine one of three places: On a La-Z-Boy Pinnacle sofa, on my canoe, or in my trunk.

The Perfect Backseat Bivy Pad: LUNO AIR Pro Vehicle Mattress Review

10 October 2025 at 22:15

The LUNO AIR Pro Vehicle Mattress is an updated version of an already excellent car-camping solution; (photo/Ian Atkinson)

We arrived at camp after dark, blissfully exhausted from a long day exploring the magical red rock of Sedona. Our only task was to set up camp and get to bed so we could do it all over again tomorrow. 

After shuffling our gear around, we unrolled our LUNO AIR Pro Vehicle Mattress and started the 12V air pump. Only a few minutes later, we were ready to lay down our weary bodies. I slept so comfortably that night, I truly couldn’t believe it was an air mattress — or that I was sleeping in the back of a car.

I’m so used to bad sleep on air mattresses that either feel too firm or underinflated to the point I’m rolling into the middle like I’m taco filling. The AIR Pro Mattress cultivated a top-notch recovery session. The fabric choice barely makes a peep when moving around, meaning your partner won’t be disturbed, and the baffling creates a supportive surface that almost makes it feel like you’re sleeping on foam. 

Needless to say, the LUNO AIR Pro is now my go-to when heading out for a long weekend of car camping.

In short: The LUNO AIR Pro Mattress is a dream for those looking to convert the interior of their vehicle into a sleeper’s paradise. The Air Pro rolls into a compact storage bag for folks looking to maximize space when not sleeping, is quick to deploy and fill with LUNO’s upgraded air pump, and breaks down in a flash so you get moving in the morning to your next adventure. It’s one to consider if you’re big on car camping.

Looking for a new car camping mattress? Check out how the LUNO compares to the rest of the options out there in GearJunkie’s Best Camping Mattress Buyer’s Guide.

  • Comfort
    8.0
  • R-Value
    5.0
  • Durability
    9.0
  • Weight & Packability
    8.0

  • Pad type: Air
  • Sleeping area: 2-person
  • Weight: 13 lbs.
  • Packed size: 8" x 26" rolled
  • R-value: 1.5
  • Thickness: 4"
  • Material: 300D Oxford fabric top, reinforced coating on bottom

Pros

  • Quick setup and breakdown
  • Comfortable sleeping area
  • Rugged construction with burly underside
  • Solo or twin configuration

Cons

  • Only fits certain vehicles
  • Higher end of the price range
  • Low R-value

LUNO AIR Pro Vehicle Mattress: Review

a car camper inflates the luno air pro vehicle mattress in the back of a honda cr-v at night
If the backseat bivy is your thing, the AIR Pro ticks a lot of boxes; (photo/Ian Atkinson)

While LUNO hasn’t been around long, it is certainly making an impact in the mattress space. The AIR Pro is also an upgraded version of the award-winning AIR mattress (which GearJunkie has reviewed in the past), featuring two key upgrades. First and foremost is the head support bridge attachments, which connect the air mattress’s head to the storage panels that hang off the front seats. 

This not only keeps the head of the air mattress level in that awkward gap between the front and back seats but also provides ample storage for each person. The second update is the solo zipper, which allows you to separate the AIR Pro into two individual mattresses.

This is an amazing feature if you’re going on a solo trip and want more space in your vehicle for gear or simply want to gift the second half of your mattress to your road trip buddy.

There are a lot of options out there for sleeping in your vehicle right now, from pop-up cots like the REI Co-op Trailgate Vehicle Sleeping Platform (GearJunkie has taken it for a spin) to plush foam pads like the HEST Dually, which Editorial Director Sean McCoy found perfect for sleeping in the back of his truck. The AIR Pro is likely the best inflatable version out there, and here’s what I found after a few months of testing it.

Set Up for Slumber

the air pump sitting on top of the air pro mattress
The included air pump is quick to inflate; (photo/Ian Atkinson)
the head support bridge keeps the head end of the air pro mattress from dipping behind the seats
The head support bridges support the pad over the footwells; (photo/Ian Atkinson)

The LUNO AIR Pro is a self-inflating mattress that utilizes your vehicle’s 12V port and an included air pump. With the upgraded pump, inflation to a comfortable level takes as little as 2 minutes, which I found to be an accurate assessment. 

Deflating in the morning is also simple by opening the release valve. I recommend continuing to sit on the mattress to expel most of the air. You can then roll it from the bottom up to get the last little puffs out before stowing it away. As long as you’re organized with the rest of your gear, this process is fairly painless.

The only consideration is your individual vehicle and its nuances. I tested the LUNO AIR Pro in a newer Honda CR-V, and I had to stuff some gear under the foot of the mattress in a dead space to make it level. Be sure to consider this during your first couple of setups so you’re not sliding around when trying to fall asleep. 

Room for Two (Or One)

the interior of the author's test vehicle, showing half of the AIR Pro pad being used in solo mode
The center zipper on the AIR Pro can be used to separate the pad; (photo/Ian Atkinson)

The ability to split the AIR Pro into two separate pads is a big deal. For one, it allows for a more versatile sleeping system that can accommodate storing gear beside you in your rig when you’re on solo missions. The joining zipper is a chunky slider that runs smoothly, and when divided, the extra pad is compact and easy to tuck away.

The other upside to having a two-in-one system is that both pads are inflated separately. This means that movement is far less translated between campers when the pad is joined up.

It’s also an extra safeguard if somehow you manage to put a hole in one side of the pad. This versatility is unique among car-camping pads, and for folks whose needs (and adventures) change constantly, it’s a huge plus.

Speaking of sleeping support, the updated baffle system (which LUNO calls CloudSupport Plus) makes the grade here. Its supportive feel makes you forget you’re sleeping on an air bed, and there’s little motion translated through it.

A Rugged Build

a close up image of the tough 300d fabric used on the LUNO Air Pro Vehicle mattress
The 300D fabric of the AIR Pro is leaps and bounds thicker than most camping mattresses out there; (photo/Ian Atkinson)

My AIR Pro received extensive testing in the high desert and mountain alpine environments surrounding southwest Colorado. Despite sand, rock, and even the occasional cactus needle, it showed true resilience with a strong lack of leakage. The 300D fabric used is more durable compared to similar pads that typically top out at 75 denier on the bottom.

That tough fabric is further reinforced with a TPU coating on the underside of the pad, making it even more resilient to punctures. While I (unfortunately) don’t have a lovely pupper to run his paws all over the fabric, I did leave my AIR Pro inflated with hundreds of pounds of gear on top while adventuring during the day. I was pleased to experience the same level of inflation that I left it at originally.

The valves aren’t complicated and are dual-purpose, being used for both inflation and deflation. The headrest support slings also inspire confidence that they won’t drop you during the night. This pad is built tough.

Room for Improvement

a tight image of the included luno air pump sitting on top of the mattress
The included air pump does a great job of inflating the pad, but isn’t the most secure connection; (photo/Ian Atkinson)

There isn’t much LUNO hasn’t thought of with the AIR Pro, but a couple of tweaks for future iterations could raise the bar even more. 

First would be the connection of the pump to the fill valve, as it will sometimes fall out if unattended. When this happens, it really shows how loud the pump can be, as it is not the friendliest sound for nearby neighbors who might already be snoozing. This can be mitigated by making sure your vehicle’s doors are closed or prefilling before you get to camp. 

The LUNO AIR Pro is also vehicle-specific, and while it fits many vehicles, it might not work for some. To be sure, utilize the drop-down compatibility menus on the product page to see if your vehicle is a match. The pad fits my 2021 Honda CR-V like a glove, and it’ll play nicely with many modern trailhead vehicles, such as Subaru Outbacks, Toyota Rav4s, and Jeep Cherokees.

If the AIR Pro won’t fit your vehicle, you can consider the simple rectangular AIR+FOAM PRO, which comes in three different sizes, but also includes the head support bridge system for use in vehicles. The added R-value insulation would also make this a great winter option.

LUNO AIR Pro Vehicle Mattress: Conclusion

bedding atop the luno mattress in the back of a honda cr-v
Add a few sheets, blankets, and pillows from home to really tune up the AIR Pro; (photo/Ian Atkinson)

The LUNO AIR Pro is a premium vehicle mattress option for those who like sleeping and dreaming in comfort while on a road trip, but don’t want the added expense of staying in a hotel every night. With the ability for a rapid setup and quick deflation, you can spend more time relaxing or adventuring. 

Designed for two, the AIR Pro easily unzips into two separate mattresses, so you can ride solo with a more minimalist setup. The durability is top-notch, and the design leaves little to be desired. There are a few other vehicle-specific mattress options out there at the moment, with the EXPED MegaMat Auto being notable for its supreme comfort.

GearJunkie has also reviewed the Auto and found that it’s an excellent option — if it fits your rig. The lack of support in the foot wells does mean you’ll have to get creative, and since it doesn’t split in two like the LUNO does, it either works or it doesn’t. For those reasons, the AIR Pro looks like the top dog when it comes to inflatable backcountry bivy mattresses.

For those who enjoy road trips and overlanding, the AIR Pro will bring a little extra excitement, knowing you’ll get a quality sleep experience.

Igloo Recool Review: A $10 Biodegradable Cooler Worth Trusting

(Photo/Heather Balogh Rochfort)

I wasn’t convinced when the Igloo Recool first showed up. At a glance, the recycled tree pulp walls looked flimsier than my daughter’s cardboard fort upstairs. But then, I gave it a shot — and quickly changed my tune.

I’ve driven it up Richmond Ridge above Aspen in our Jeep Wrangler, hauled it around for day hikes, and stashed it under the car on a 3-hour mountain bike ride in 80-degree heat. It swallowed 11 cans with ease (plus a few protein drinks), held ice long enough to keep drinks cool in serious desert heat, and survived my unique variety of testing in the form of a dumbbell. The sorcery is simple: no more styrofoam coolers for your next day trip.

What’s charming (and frankly rare) in the cooler world is this: Recool isn’t just a novelty. Yes, Igloo advertises this cooler as a better-for-the-environment solution. But you know what? It works, to a certain extent anyway.

You won’t rely on it for a weeklong expedition, but it earns a place in your gear lineup by being light, eco-friendly, and surprisingly capable when you need something in a pinch.

In short: The Igloo Recool 16-quart Cooler ($10) performs far better than you’d expect for a fully recyclable, reusable cooler. It keeps drinks cool for day-long adventures and boasts enough capacity that you won’t show up empty-handed to your next party. Sure, it has some flaws. But I’ll support any $10 paper cooler that can withstand a dumbbell.

See how the Igloo Recool Cooler stacks up against the competition in our buyer’s guide for the Best Coolers of 2025.

  • Capacity: 16 quarts
  • Materials: Recycled paper and AKD (alkyl kitene dimer)
  • Dimensions: 15" x 11" x 11.38"
  • Weight: 1.6 lbs.

Pros

  • Compostable and biodegradable materials
  • Ultra-lightweight
  • Far more durable than expected
  • Delightfully affordable

Cons

  • Decent ice retention but still limited compared to pricier, hard-sided options
  • Holds fewer cans than reported
Igloo Recool Cooler
The Igloo Recool is sturdy enough to carry a 50-pound dumbbell; (photo/Heather Balogh Rochfort)

Igloo Recool Cooler Review

The Igloo Recool launched in 2019 as the first mass-market, biodegradable cooler designed to replace the cheap white styrofoam boxes you find stacked in gas stations and grocery stores. Those foam coolers have long been the worst of both worlds: squeaky, crunchy, and prone to crumbling apart mid-trip. And, they linger in landfills for centuries.

Igloo’s answer was a molded paper-pulp design, made from recycled paper and a plant-based binder. Just like the gross styrofoam, the Recool holds ice and keeps drinks cold. But, it composts back into the earth when its job is done. In other words, it solves the very specific problem of “disposable” coolers … that never really go away.

Ice Retention and Cooling

I’ll be honest: I didn’t expect the Recool to actually work, but it impressed me with how reliably it kept drinks cool — within its limits.

On a recent desert mountain biking weekend in Fruita, Colo., my husband and I stashed a few protein drinks and bubbly waters inside the cooler before heading out to ride a few laps at 18 Road. It was the kind of hot you can only find in the desert in late September: 86 degrees, zero clouds, and merely a hint of a breeze. We put the cooler beneath our car so it would stay shaded and hoped for a deliciously cold beverage.

When we rolled back 2.5 hours later, I found cool protein drinks waiting for us. No one wants tepid chocolate protein, so this was a bona fide win. The following week, we used the Recool again for a full day of jeeping in our Wrangler high up in the alpine above Aspen.

I packed a few drinks, cheese and salami, and some fruit for my family for the day. Once again, the Recool delivered, and we all noshed on a tasty picnic high above treeline. Does it work as well as a YETI or other pricier option? No, but that’s not an apples-to-apples comparison.

The cooler’s ability to hold a chill comes from its dense paper-pulp walls, which trap air and slow the transfer of heat. Unlike styrofoam, it doesn’t crumble when damp; instead, the material firms up and holds together, even as it absorbs a bit of moisture.

Pair that with a lid that keeps cold air from escaping, and the Recool does a solid job of keeping ice intact for at least 4-5 hours. If you stash it in the shade like we did, you’ll stretch that performance even further.

Igloo claims the ice should last for about 12 hours, but I think that’s a bit short. In my testing, I was able to easily keep ice in there for 5 hours. At 7 hours, there was still plenty of ice, but also some water. I’m not sure about other samples, but the lid on mine doesn’t fit tightly. My guess is that the gaps around the lid are partially responsible for letting warm air in and increasing the melting rate.

Igloo Recool Cooler
With ice, you can easily fit a dozen cans that stay cool; (photo/Heather Balogh Rochfort)

Durability That Withstands Dumbbells

Once in a while, you get an idea that just won’t quit. That’s what happened with me in our garage gym. Sure, I could load up the Igloo Recool to review with a dozen cans of bubbly water. But where is the fun in that?

So, I beelined it for our dumbbell rack and started experimenting. At first, I put a smaller 10-pound dumbbell in the cooler to get a gauge on what happened to the integrity of the cooler while I carried it around our neighborhood. Nothing.

So, I tried a 12.5-pound dumbbell and did the same thing. Still nothing. Fifteen pounds. Twenty pounds. At this point, I was tired of walking in the world’s most awkward farmer’s carry. So, I jumped the weight up in 10-pound increments.

Finally, after walking over to our neighbor’s house and back with a 50-pound dumbbell loaded inside, I called an end to the test. After carrying 177 pounds of combined dumbbell weight, the Igloo Recool looked the exact same.

I don’t see any dents in the paper walls or cracks in the corners. The paper isn’t torn anywhere, and the bottom hasn’t fallen out like I honestly expected. Save for a few black smudges on the interior from the rubber jostling around, the cooler looks as good as new.

That said, the Recool is still made of paper. This isn’t a rotomolded plastic or burly aluminum cooler; it’s paper. While it passed the dumbbell test with flying colors, I don’t expect this cooler to be around in a year. With a few months of hard use, I’m sure I’ll notice dings, dents, and destruction. But since most folks are buying these as single or occasional-use options, I think there’s a lot of value.

Capacity and Real-World Fit

On the label that accompanies the Recool, Igloo says that you can fit up to 20 cans at max capacity. In my experience, that feels like a stretch. Yes, you can absolutely fit 20 cans in the Recool. But that doesn’t take into account anything else you may need — like ice.

During testing, I found the sweet spot for functionality to be around a dozen cans. I’d layer ice on the bottom first and then start piling the cans in. If I did this, there was plenty of room for cans, ice, and a little extra space for the occasional snack or treat.

The interior is basic; you won’t find any shelves, compartments, or dividers like you see in other, pricier coolers. It’s a big empty box. But again, it’s a $10 paper cooler designed for occasional use. When you keep that in mind, it makes a lot of sense.

Igloo Recool Cooler
Flip the lid over and find four cupholders; (photo/Heather Balogh Rochfort)

Sustainability and Environmental Edge

One of the Recool’s most compelling features is that it’s part of a broader shift away from single-use foam. With bans on styrofoam already in states like Colorado, Maine, Maryland, New York, Virginia, Washington, and Vermont, alternatives aren’t just nice to have. They’re necessary. The Recool was ahead of that curve.

Styrofoam is notoriously bad for the environment, taking more than 500 years to break down in landfills. Even then, it doesn’t fully decompose; it just crumbles into microplastics, which continues to be a problem. By contrast, the Recool is made from recycled paper pulp and a plant-based binder. This means it’s both compostable and biodegradable after use.

Instead of adding to the problem, it quietly disappears back into the waste stream. No, it’s not an immediate cure-all to an ever-growing problem, but it does help a lot.

Room for Improvement

The Recool lives in an in-between space: it’s designed to be reusable, but not forever. Some people will treat it like a single-use cooler, recycling or composting it after a weekend. Others will squeeze a few months of day trips and tailgates out of it.

What it’s not meant for is years of service like a hard-sided plastic cooler. The pulp material will eventually soften and show wear, especially if it’s stored damp or left out in the elements. And while the ice retention is better than I expected, it still doesn’t come close to hard-sided options like a Yeti. For $10, those compromises make sense, but it’s worth knowing where the line is between “pleasantly durable” and “temporary by design.”

Igloo Recool Cooler
The Igloo Recool: the world’s first biodegradable cooler; (photo/Heather Balogh Rochfort)

Final Thoughts: Igloo Recool Review

The Recool surprised me with how well it kept drinks cold, even on hot days. And, I loved knowing it wasn’t leaving behind a chunk of styrofoam waste. It’s not built for multiday trips or long-term use. But, as a $10 eco-friendly cooler for day adventures, it does exactly what it promises.

If you need something cheap, simple, and sustainable to keep a round of soda water cold, this is the one. And honestly, I’ll back any paper cooler that can survive a dumbbell test.

Comfy, Packable, Goose Down Sleeping Pad: Rab Hypersphere Ultra 7.5 Review

25 September 2025 at 17:57

(Photo/Mary Andino)

There is no task I hate more while backpacking than deflating my sleeping pad and getting it back into its stuff sack in the morning. Trying to roll one up with the military precision required for its tiny bag while under-caffeinated and tired is no easy feat.

So you can imagine my joy when, in the midst of a multiday backpacking trip, I did not have an issue getting the Rab Hypersphere Ultra 7.5 Down Sleep Pad back in its sack. A simple design change from the typical sleeping pad saves users time and effort while delivering top-tier insulation. 

I tested the Rab Hypersphere Ultra 7.5 for several days backpacking and during multiple camping trips this fall. I had no complaints about packing and unpacking this pad, catching Zs, and staying warm with it.

In short: The Rab Hypersphere Ultra 7.5 Down Sleep Pad is a user-friendly three-season sleeping pad for backpackers and campers. It has an R value of 7.5, uses goose down insulation, and weighs 1 pound, 5.5 ounces. While it isn’t the lightest three-season pad on the market, this sleeping pad delivers protection from the cold ground and offers comfort in a reliable package with smart design features. 

Compare the Rab Hypersphere Ultra 7.5 Down Sleep Pad to those on GearJunkie’s guide to the Best Backpacking Sleeping Pads.

Rab Hypersphere Ultra 7.5 Down Sleep Pad

rab hypersphere down sleeping pad
(Photo/Rab)

  • R-value: 7.3
  • Thickness: 3 inches
  • Weight: 1 lb., 5.5 oz. (Regular)
  • Available sizes: Regular (72×20), Regular Wide (72×25), and Long Wide (77×25)
  • Packed size: 9.4×5.5 inches (Regular) 
  • Price: Regular ($250); Regular Wide ($260); Long Wide ($280)

Pros

  • Easy to pack away 
  • Comfortable on rocky surfaces

Cons

  • Heavier than other similar pads 
  • Have to wait to use

Rab Hypersphere Ultra 7.5 Sleep Pad Review

I tested this sleeping pad for 3 days on the Superior Hiking Trail (SHT) in Minnesota, and while camping in France and southern Illinois. Temps at night got down into the low 40s, and I slept on rocky, uneven surfaces. 

I am 5’6” and found that the regular size (72×20″) was plenty long enough for me. As a stomach sleeper, I typically prefer pads with a bit more width. I appreciated that the regular wide size only costs $10 more, a pretty insignificant upcharge for 5 more inches of width. In comparison, Big Agnes charges an additional $50 to go from the regular to the regular-wide size of its Rapide SL sleeping pad.

Close up of sleeping pad on tent floor with sleeping bag on top
(Photo/Mary Andino)

Design & Materials

This pad relies on 800-fill goose down to achieve its three-season R-value of 7.3. On the Rab website, the brand claims that the pad “works to trap heat by minimizing convection currents within the mat.” As a bonus, the Hypersphere also uses lightweight recycled polyester fabric in its construction. 

This sleeping pad has a long rectangular shape with vertical air chambers. Larger chambers on the outside of the pad are meant to cradle you while you rest. They work like bumpers, helping keep you centered, so you won’t roll off in the night.

The mat inflates with a low-profile two-way valve situated on the back of the pad, near the top. It can be manually inflated with lung power or using the included pump sack.

In the Field: Rab Hypersphere Ultra 7.5 Sleep Pad

rab hypersphere down sleeping pad
(Photo/Mary Andino)

Inflation

As I do with most pads, I inflated this one the old-fashioned way, with my lungs. Blowing it up took around 2 minutes.

Because the pad uses goose down for insulation, Rab suggests allowing the feathers to distribute evenly after inflation. Users are encouraged to shake the pad up and down after it’s full, and then let it rest for around 30 minutes.

If the down is clumped up, or can’t attain full loft, its ability to trap warm air weakens. Redistributing the down and allowing it time to re-loft helps even out and improve the pad’s insulation.

When I get to camp, I usually set up my sleep system first and then make dinner, so the brief wait time was no problem for me. However, if you tend to crash the moment you get to camp or if you set up your sleep system right before bedtime, you may want to consider a different pad. This one requires some patience.

Rab Hypersphere 7.5 Sleeping pad
(Photo/Mary Andino)

Warmth

Insulation is measured by “R-values” in sleeping pads. The higher the R-value, the better the pad’s insulation. Higher R-value sleeping pads won’t keep you warmer, per se, but they will better protect you from the cold ground and retain warm air better than lower R-value pads.

A 7.5 R-value is pretty high. Anything above 5 is generally good for three-season camping. When you get into the 7s and above, the pad can even be used in winter.

The Hypersphere Ultra kept me warm throughout my testing. Even when I was camping in France and it rained so hard that my tent flooded, I was pleasantly surprised that the Hypersphere still kept me warm. The bottom got wet, but the top was dry to sleep on, and I didn’t feel like I was losing heat through it.

Close up of valve on sleeping pad
The two-way valve makes it easy to inflate and deflate; (photo/Mary Andino)

Comfort

While on the SHT, many of the campsites were rocky, uneven, or full of tree roots. It was almost impossible to find a totally flat, even campsite.

Still, I slept quite comfortably on the Hypersphere and didn’t feel any bumps or lumps while on it. However, the fabric is quite slick. I didn’t love the feeling when my sticky, sweaty skin touched the pad

Usually, pads have either a quilted design or straight up-and-down rails on the sleeping surface. I tend to prefer pads that are quilted, as I’ve found that those rails can press on my spine and be uncomfortable. However, I had no such issue with the Rab pad because the rails were sloped enough that they didn’t become rigid when inflated.

Some lightweight backpacking pads can be noisy (especially those made with Mylar components). However, I had no complaints about this sleeping pad. When I moved or rolled around at night, it was pretty quiet.

Person holds bundled orange sleeping pad
The burrito-style bag makes it a cinch to put away the pad; (photo/Mary Andino)

Packability

As previously stated, I had a significantly easier time packing this bag up than with other pads. Instead of placing it in a rigid stuff sack, which is what most brands offer, Rab has a rollaway bag with elastic bands on the outside.

In the morning, I would deflate the pad, lay on it to get the air out, fold it like a letter, roll it up, shove it in the bag, and then pull the cover and elastic bands over to secure it. Done.

This system is a lot more forgiving than typical stuff sacks. I never rolled it as neatly as it came in the packaging. However, I had no problem fitting it in the bag, which was stretchier than bags I’ve used from brands like Big Agnes or Sea to Summit. 

The pad’s two-way valve made it easy to deflate. Unlike some two-way valves, this one lies flat, so it has a low profile. It doesn’t jut out and add extra width to the pad when you roll it up. 

Rab Hypersphere Ultra 7.5 vs. Other Pads 

A sleeping pad costing $250 or more might seem pricey. However, for pads with R-values this high, prices in the $200-300 range are par for the course. In general, a pad with an R-value of 5 or above is considered suitable for three-season camping and colder weather.

The Sea to Summit Ether Lite XR Pro has an R-value of 7.4 and retails for $229. The Therm-a-Rest NeoAir XTherm NXT costs $240 with an R-value of 7.3.

When it comes to insulation for the price, the only standout competitor that beats this Rab pad is Nemo’s Tensor Extreme Conditions pad. This ultra-warm pad has an R-value of 8.5 but has the same $250 price tag as the Hypersphere. 

The Hypersphere Ultra is heavier than other sleeping pads with an R-value of 7 or above. It weighs 1 pound, 5.5 ounces, which is heavier than the Therm-a-Rest NeoAir XTherm NXT (15.5 ounces) and the Sea to Summit Ether Lite XR Pro (1 pound, 3.8 ounces). However, it is lighter than the Big Agnes Campmeister Deluxe (2 pounds) and the Exped Dura 8R (1 pound, 8 ounces).

Given the amount of insulation such a high R-value requires, it’s normal for these kinds of pads to weigh at least a pound. Compare the Rab Hypersphere 7.5 to other sleeping pads in GearJunkie’s guide to the Best Backpacking Sleeping Pads.

Rab Hypersphere Ultra 7.5 Down Sleep Pad: Conclusions

Person stands next to sleeping pad inflated next to tent
(Photo/Mary Andino)

If you’re looking for a warm pad that will protect you in cold temps, the Rab Hypersphere Ultra 7.5 is a solid choice. It isn’t the warmest or the lightest, but in terms of price, weight, and R-value, it’s pretty comparable to and even competitive with some of the Best Backpacking Sleeping Pads on the market.

What makes you choose this pad versus others from competitors like Sea to Summit and Therm-A-Rest? That might come down to personal preferences. If you already know you want to purchase a pad in a larger size than the standard one, this Rab pad is a great value.

If you prefer down to synthetic insulation and noisy Mylar, this pad is a great three-season option. It’s quiet, easily packable, warm, and comfortable.

Ultimately, I had no problem falling and staying asleep with the Rab Hypersphere Ultra 7.5 R Sleep Pad. And crucially, I also had no problem packing this pad up when it was time to break camp. If I were preparing for a thru-hike where I’d have to pack up every morning for months, this one would be high on my list.

The Best Camping Stoves of 2025

29 August 2025 at 19:26

Whipping up chow for an entire group? You're going to need a camp stove sized for the job; (photo/Nick Belcaster)

Camping and food go hand in hand, especially when car camping affords you the luxury of a two-burner stove. And when good grub is on the line, not just any stove will do. That’s why we’ve been testing the best camping stoves for multiple seasons in a row, and have fired up nearly 25 different options in our quest.

A good camp stove should fire up quickly, provide steady heat to get things rolling, and be able to dial it back for precision work. My top pick, the Camp Chef Everest 2X, has plenty of firepower to keep dishes rolling off the line, but you don’t need to spend the big bucks, either, with the budget Coleman Cascade Classic only running $100.

With years of combined experience with camp cooking, we used our collective knowledge to narrow down the best options today. For each stove in this review, we considered design, ease of use, BTUs, windy weather performance, simmer control, weight, cost, and boil time. On the surface, these stoves all have a lot in common, but each has unique features that stand out for specific uses.

If you’re still unsure which kind of camping stove is right for you, check out our Explainer Series article: How to Choose a Camp Stove.

Editor’s Note: We updated our Camping Stoves buyer’s guide on August 29, 2025 to add the Camp Chef Pro 14 as our new favorite option for cooking for large groups and families. We also added new Rating Attributes to each stove we’ve tested, allowing you to compare and contrast them before making your purchase.

The Best Camping Stoves of 2025

Best Compact Camping Stove

Primus Kinjia

7.6/10 Rating

Most Rough and Tumble Camping Stove

Camp Chef Mountaineer

8.1/10 Rating

Best Overlanding Stove

iKamper Disco Series Camping Grill

8.0/10 Rating

Best One-Burner Camping Stove

Snow Peak Home & Camp Burner

7.0/10 Rating

Best Large Group Camping Stove

Camp Chef Pro 14

9.5/10 Rating
See more picks

  • Heat Output
    9.0
  • Simmer Control
    8.0
  • Wind Protection
    8.0
  • Construction
    8.0

  • Number of Burners: 2
  • BTU Output: 20,000-BTU per burner
  • Boil Time: 3:06 min. per L
  • Fuel Type: Propane
  • Weight: 12 lbs.

Pros

  • Produces strong flames
  • Works well in windy conditions
  • Burner design evenly spreads out heat
  • Windscreen tabs stay secure with exterior locks, which is a nice touch

Cons

  • A bit heavier (12 lbs.) and bulkier than we'd like

The Camp Chef Everest 2X ($230) replaced the older Mountain Series Summit model from this brand. The Everest is definitely as high-powered as its predecessor (if not more so), with two 20,000-BTU burners, an auto-igniter, and a redesigned burner area and exterior.

Although the Camp Chef Everest has some of the strongest burners we tested, it still simmers well. And with the new burner and surface design, you get a few more cubic inches of cooking space for the same weight.

Tester Mallory Paige lives in an off-grid cabin and has been using the Everest 2X as her family’s primary stove. After cooking up to three meals a day on it for over a year, the stove has held up impressively well.

The striker still works, and the mix of high output settings and good simmer control meets the demands of any cook. From quickly boiling water at high altitudes to carefully toasting pine nuts, it does it all. This stove roars to life for heavy-duty use, but is delicate enough for finer cooking. The only negative we could rustle up was the weight and bulk.

At 20,000 BTUs per burner, this stove has power to spare compared to standard ~10,000 BTU burners like the Primus Kinjia, and while we typically find this to be enough to cook more camp meals, we can’t complain about having more knob to turn if needed.

The build is stout, and some may consider the 10-pound Primus Alika to be a better all-arounder. For a stove that’ll do most anything, however, it’s hard to ding the Everest.

The previous contender for the best overall stove, the Camp Chef Summit 2-Burner Camp Stove model, also had impressive heat output, but we had issues with the striker (and the price tag). Now, after multiple years of unfailing service, we found the auto-igniter on the Everest 2X to be much more consistent, and the redesign adds features that make it our overall best camping stove.


  • Heat Output
    7.0
  • Simmer Control
    6.0
  • Wind Protection
    7.0
  • Construction
    7.0

  • Number of Burners: Two
  • BTU Output: 10,000-BTU per burner
  • Boil Time: 7:00 min. per L
  • Fuel Type: Propane
  • Weight: 11 lbs., 14.4 oz.

Pros

  • Budget-friendly
  • Durable enough for the outdoors
  • Ease of use

Cons

  • Regulator control knobs could be better

The simplest option on the list is also one of my favorites. As a tried and true model that meets the basic demands of car camping, it’s been a go-to choice for our staff over the years.

The Coleman Cascade Classic Camp Stove ($130) might not have all the fancy features of the others on the list, but it’s hands down the most bang for your buck out of all camp stoves on the market. The windscreens do the job, and the flame pattern can be set from a simmer to a roar. It weighs just under 12 pounds, which isn’t much more than most more expensive options.

For as low as less than $100 on sale, you get two 10,000-BTU burners in a classic, trusted design. I’ve cooked up plenty of meals on the Coleman Cascade Classic and appreciate how simple it is. The cooking surface is a bit smaller than a stove like the Camp Chef Everest, but I found I could fit a cast iron skillet and pot for boiling water without a problem. The simmer control knob is a bit rough, which was one of the few downsides I could sniff out.

For the money, I reach for the Cascade Classic almost every time, but budget-hunters may also consider the GSI Selkirk 540+. That stove does bump up the output to 14,000 BTU burners but asks $50 more for it, and I found cooking performance to be close to the same. The windscreens on the Coleman do protect it a bit better, so consider where you’ll be cooking before deciding between the two.

If you’re camping on a budget, or want an extra two burners for large meals, the Cascade Classic would be a great addition to your outdoor kitchen setup.


  • Heat Output
    7.0
  • Simmer Control
    8.0
  • Wind Protection
    6.0
  • Contruction
    8.0

  • Number of Burners: Two
  • BTU Output: 10,200 BTUs per burner
  • Boil Time: 6:40 min. per L
  • Fuel Type: Propane
  • Weight: 8 lbs., 3.2 oz.

Pros

  • Compact packed size slides into tight storage spots
  • Fine simmer control
  • Black, brass, and wood details make for a classy look

Cons

  • No windscreens
  • Gas bottle stand is easy to misplace

Read Review: Smaller Than the Best, Lighter Than the Rest: Primus Kinjia Camp Stove Review

Small but powerful — the Primus Kinjia Camping Stove ($230) brings a light footprint to your camp kitchen and is perfect for those who want a capable stove but don’t want to renovate their campsite in the process.

With a base area of 19” x 12”, the Kinjia slides into spots where other stoves in our testing simply couldn’t, and isn’t much the lesser of a stove for it. The twin 10,200 BTU burner heads are sized more similarly to those on backpacking stoves but still performed admirably in our cooking tests. Where the Kinjia really shines, we found, was in the detail work.

Simmering is a breeze with this stove, and making more delicate dishes like omelets, fish, or crêpes can be whipped up with ease. Camper Bergen Tjossem whipped up a dinner of creamy polenta that required low and slow work and found the Kinjia to be more than up to the task. There’s no ignoring that this is just one good-looking stove, too. The black stove body is accented with brass rivets and topped off with a wood-trimmed handle that adds a bit of class to your next cookout. 

When it comes to fueling, the Kinjia takes an interesting approach with a metal propane canister stand that stands alone from the rest of the stove. This holds the fuel bottle at what we imagine is the optimal angle, but in reality, it was just another loose piece we feared losing track of. Tjossem also lamented over the lack of windscreens, but has gotten pretty good at building up DIY walls instead.

The Kinjia is undeniably a compact stove, but there are a few others to consider when camp kitchen real estate is in high demand. For $70 more, the unique Jetboil Genesis Basecamp Stove System folds both burners together to cut down on space, but has slightly less powerful 10,000 BTU burner heads.

Single-burner options like the Snow Peak Home & Camp Burner are a good bit cheaper at $120. However, you do miss out on the ability to cook two things at once. Most lightweight camp stoves leave out windscreens, and we certainly did miss them on this stove when things got blustery.

It’s tough to deny the packed size of the Kinjia, however, and if you don’t need the overbuilt quality of something like the Camp Chef Everest 2X, the Primus Kinjia is an excellent solution. Vanlifers — this is your stove.


  • Heat Output
    9.0
  • Simmer Control
    7.0
  • Wind Protection
    7.0
  • Construction
    9.0

  • Number of Burners: Two
  • BTU Output: 20,000 BTUs per burner
  • Boil Time: 3:25 min. per L
  • Fuel Type: Propane
  • Weight: 16 lbs.

Pros

  • All-aluminum build
  • Broad 302 sq. in. cooking surface
  • Add-on leg system makes the stove fully freestanding
  • Plenty of heat with twin 20K burners

Cons

  • Higher price
  • Adapter needed to run 1 lb. propane bottles

The Camp Chef Mountaineer ($470) may as well come equipped with a chow bell — this is one burly cook station that’s primed to feed the whole wagon train. The Mountaineer is ideal as an overlanding, river rafting, and base camping stove, and is a perfect option for those who cook outdoors often — and seriously. 

Sporting the same dual 20K BTU burners as our favorite Everest 2X stove, this stove has firepower to spare, and I love the integrated burner-head windscreens that help direct heat up toward your cookery. The major difference between the two comes in the fueling, and while the Everest ports up to your average green 1 lb. propane bottles, the Mountaineer sports a remote hose and regulator for 5-pound canisters. 

The build is also noticeably different between the two stoves, with the Mountaineer decked out in an all-aluminum body that helps to keep the weight down on this larger stove. The cooking surface is a larger 302 square inches and easily accommodates two 12” cast iron pans. During truck-assisted camping in Washington state, I used the Mountaineer to whip up Dutch oven nachos, kebabs, and salmon.

I tested the Mountaineer with the add-on leg kit ($44), and as the saying goes, if you have the means, we highly recommend picking them up. The height is just about perfect, and each of the legs is adjustable to hit the perfect balance. The stove performs equally well on a camp table; however, just be sure to remember the larger footprint it takes up.

The stove has its tradeoffs, one of which is the need for 5-pound propane tanks. An adapter is available to run the stove on more camp-friendly 1-pound bottles, but you’ll have to get your mitts on it separately. The 20,000 BTU burner strength is also hot to trot, and while the stove dials down nicely, I still suggest using slow-heating cookware like cast-iron skillets.

Finally, $470 is not a small amount to ask (the stove jumped in price late summer of 2025), but with no steel to rust out and high-quality burner heads, I’ve little doubt that the Mountaineer could last a decade or more. The price is exactly the same as what you’ll pay for a Partner Steel 18″ 2-Burner Stove, the all-aluminum stoves that Grand Canyon guides adore. With the Mountaineer being easier to snag, I think it’s the one to aim for.

Compared to other large-group stoves like the Camp Chef Pro 14, this stove is much more versatile with its option to be used on a table or freestanding, and while I loved the iKamper Disco for overlanding, those who want a more familiar cooking set-up would be well-served by the Camp Chef Mountaineer. Its rugged build will shrug off being jostled around in the back of a pickup and won’t blink at whipping up food for entire families.


  • Heat Output
    6.0
  • Simmer Ability
    8.0
  • Wind Protection
    6.0
  • Construction
    9.0

  • Number of Burners: One
  • BTU Output: 8,455 BTU
  • Boil Time: 7:00 min. per L
  • Fuel Type: Isobutane
  • Weight: 27 lbs.

Pros

  • All-in-one modular cooking system
  • Kovea-made burner head
  • Easy-to-clean enameled cast iron skillet
  • Campfire-tripod cooking mode
  • Burly anodized aluminum leg system

Cons

  • On the heavier side
  • Pricey

If car-based adventuring is your jam, you’re going to need a camping stove that’s dialed in for the task. And while I’ve tried many, none have made an impression more than the iKamper Disco Series Stove ($515) — an uber-modular cooking system that’s primed for van life, overlanding, or gathering around with friends.

Let’s start with the obvious: what’s the deal with the satellite dish? Traditionally made from plow discs, discada cookers are native to the American Southwest and Mexico and utilized by farmhands who need to cook up lunch quickly. The “cowboy wok” on the Disco stove is a 16” cast iron skillet that comes pre-seasoned, and I found it to be perfect for butter-basting steaks, cooking up chilaquiles, and making classic discada tacos.

Powering the Disco stove is a Kovea-made 8,455-BTU burner that nests solidly into the tripod stand — an impressive structure in its own right. The burner also sports collapsible feet, allowing it to be fired up on a camp table or tailgate. It runs off your standard-issue isobutane canisters. When coupled with the heat retention of the cast iron discada, this stove has enough power to shallow fry and can also be dialed back to keep things like tortillas warm. 

The tripod is really where the modularity of the Disco stove shines. Adjustable in height, the stove is meant to be used standing up, providing a real community cooking feeling. A slick little table rides side-saddle and keeps all of your utensils, spices, and beer at close hand. And the real hat trick: the discada can be suspended beneath the tripod and over a campfire, turning this stove into a dual-fuel cooker with built-in entertainment. Get your cowboy TV roaring and lower the skillet to the correct level with the built-in chain and pulley system. Genius. 

Other overlanding-style stoves to consider are the Camp Chef Mountaineer, a rough-and-tumble all-aluminum traditional stove that will pump out more BTUs than the Disco, but with a much larger — and less modular — footprint. The Primus Kinjia takes a different tack that will appeal more to car campers who are strapped for space, but ends up being just about the same packed size as the Disco, and that’s without the built-in cooking surface. 

It’s hard to overstate just how enjoyable this stove system is to use, and that’s not just my opinion. While testing, I fielded questions from almost everyone who passed by camp. Yes, this stove system commands a pretty penny (and became $25 more expensive in 2025), but in use, I struggled to identify any potential failure point that would keep the Disco Series Stove from lasting long into the future. Overlanders rejoice, your ideal stove has arrived.


  • Heat Output
    6.0
  • Simmer Control
    8.0
  • Wind Protection
    6.0
  • Construction
    8.0

  • Number of Burners: One
  • BTU Output: 8,333-BTU
  • Boil Time: 4:00 min. per L
  • Fuel Type: Butane
  • Weight: 3 lbs.

Pros

  • The legs and burner are low to the ground, reducing wind interference
  • Great simmer control
  • Highly responsive dials

Cons

  • On the pricier side ($120) for only one burner
  • Butane fuel can be less universal than propane

While full-fledged stove systems might get all the glory, counting out a good single burner would be foolish, and the Snow Peak Home & Camp Burner ($120) is just that: one heckuva good single burner. 

The utility of a single burner is that it can be used as either a cooking solution for a couple of campers, or added into a camp kitchen as an additional burner for more dishes. During my testing, I did this often, and to great applause — nothing is better than having all your food come out hot at the same time.

Simply open the top, slide out the legs, and engage the locking pin to swivel the burner out onto any surface. Then, slide in a butane gas canister. While minimal, I didn’t experience any durability issues and would expect this stove to hold up well to extensive use.

This is one of the only butane-fueled stoves on our list, highlighting propane’s relative supremacy on the camping stove scene. While it’s not difficult to get, it may not be as universal as going with a propane stove. Compared to single burners like the Jetboil Genesis Basecamp, the Snow Peak exhibits origami-like collapsibility, making it easily the most compact on our list.

At such a small size, the Home & Camp Burner is ideal for in-vehicle cooking (just please ventilate accordingly). With no included attachments, you’ll need to add your own windscreen in blustery weather. If you ride solo often or are looking for a quality camping stove that’s equally capable and compact, look no further.


  • Heat Output
    9.0
  • Simmer Control
    7.0
  • Wind Protection
    7.0
  • Construction
    9.0

  • Number of Burners: Two
  • BTU Output: 30,000 BTU
  • Boil Time: 2:50 per liter
  • Fuel Type: Propane
  • Weight: 48.5 lbs.

Pros

  • Lots of cook space
  • Powerful burners heat things up quickly
  • Portable
  • Compatible with host of accessories

Cons

  • Heavy
  • Takes up car space
  • Tricky to clean
  • Vulnerable to high winds

While the less-refined Explorer 14 has been our go-to get-together cooker for some years now, it was only a few minutes of using the Camp Chef Pro 14 ($380) before reckoning that the title had just been wrestled away. This three-burner 30,000 BTU brute has all the afterburner to boil stock pots of Dungies and whip up the sides — all at once.

The Pro 14 (which, we’ll note, is a name pivot from the previous Pro 60X — same stove) is Camp Chef’s flag bearer and is tricked out with all the bells and whistles you’d expect. All revolves around two huge burner heads that rival commercial units in size and churn out enough heat to get skillets ripping hot. During all of our testing, we never wanted more output.

Those burners are set inside a 14-by-32-inch cooking surface, which, in practice, we could fit two 8-quart stock pots atop. Protected by an ample windscreen and flanked by two folding side shelves that are stable enough for light prep work, the Pro 14 is the cookout battle station of choice for anyone looking to feed a lot of people. 

One of the biggest draws of the Pro 14 for most folks is going to be the suite of other Camp Chef 14-inch accessories that can be mated up to the stove. There are pizza ovens, grill boxes, and griddles, and since the Pro 14 is a two-burner stove, you can use a few simultaneously. Editor Will Brendza used the whole spread while testing, and found the 14-inch Pizza Oven to be the gotta-have-it accessory for the Pro 14. It gets hot quick, and turns out perfect pies.

At around 50 pounds, the Pro 14 is closer to portable grills than some of the lighter camping stoves on our list. However, that weight packs up admirably well and stows with a folding leg design (a definite upgrade from the screw-on legs on the Explorer series). Still, consider that this stove takes some considerable space to move, and plan accordingly.

For family get-togethers or simply aiming to feed a large number of people, the Camp Chef Pro 14 is the stove to do it with.


Other Camp Stoves to Get Cooking On

We’ve been testing and cooking on camp stoves for nigh decades now, and while the seven award winners above are my top picks for almost any situation outdoors, there are plenty of others on the market that’ll get it done. Consider the eight options below as excellent alternatives that we’ve vetted and would stand behind any day.

  • Heat Output
    7.0
  • Simmer Control
    8.0
  • Wind Protection
    7.0
  • Construction
    8.0

  • Number of Burners: 2
  • BTU Output: 10,000 and 13,300
  • Boil Time: 4 min. 30 sec. per L
  • Fuel Type: Propane
  • Weight: 10 lbs., 6 oz.

Pros

  • Compact
  • Fine simmer control
  • Flexible fuel hose
  • Removable lid
  • Sleek looks
  • Easy to clean

Cons

  • Could use better windscreen latches
  • Igniters are finicky
  • Pricey

If looks were the main consideration, the Primus Alika ($330) would take top honors with its sleek powder-coated lid, oak laths, and brass accents. But I also particularly like this stove because it hosts a number of unusual features, including a removable lid, which allows for larger pots and nimble cooking from all sides.

In Primus-land, aka Sweden (this stove is actually made in Europe), they envision the lid-off scene as a “360˚ gathering spot, and a place to connect over drinks and a steaming plate of food.” Needless to say, the company has embraced some new technology since then, and this stove is (almost) entirely well thought out.

A long, flexible fuel hose means you’re not married to canister placement. The regulator also stows neatly underneath, in a spring-action lock. It has a comfy webbing handle and two exterior locks for transport, which means it doesn’t rattle furiously in the car. It’s versatile, too, with an included butane adaptor kit. Oh, and those pretty oak laths aren’t just for show: with the lid removed, they function as a hot plate.

This stove also sports stout grates and two burner sizes: 10,200 BTUs and 13,300 BTUs. Both boil and simmer very well, though with a bit less overall BTU oomph than the Camp Chef Mountaineer or GSI Outdoors Selkirk. The Primus Alika is not as compact as the minimalist Primus Kinjia, but at 24” x 10.7” x 3”, it is a touch smaller and more streamlined than other two-burner models. It’s also easy to clean, thanks to a removable drip tray.

The windscreens work well, but could benefit from smaller gaps at the bottom, and the metal hooks that hold them in place are a rather chintzy design for such an otherwise superbly thought-out stove. Also, although Primus touts its snazzy piezo ignition, camper Karuna Eberl had little luck getting it to work well consistently. Finally, this stove is on the expensive side, though still considerably cheaper than the Camp Chef Mountaineer.

If you’re someone who likes to buy upper-end gear that will last a lifetime, the Alika is your stove. It’s highly innovative, and clearly a lot of thought went into the details of the design.


  • Heat Output
    8.0
  • Simmer Control
    7.0
  • Wind Protection
    7.0
  • Construction
    7.0

  • Number of Burners: 3
  • BTU Output: 28,000 total, all burners combined
  • Boil Time: 7:00 min. per L
  • Fuel Type: Propane
  • Weight: 18 lbs.

Pros

  • Three burners for multiple dishes
  • Good simmer control
  • Can hold larger pans
  • Good in wind

Cons

  • Bulky packed size
  • Rattles during transport
  • More expensive than most stoves

If you’ve been feeling cramped on your current two-burner setup, the Coleman Cascade 328 ($260) might be the beast for you. It has two standard burners on either side, then a rectangular one in the middle. All in all, you can nestle in three 8-inch or two 12-inch pots. It’s also deeper than typical two-burner models, which means it can handle a large cast-iron pan or spaghetti pot.

Otherwise, the Cascade 328 offers a fairly typical setup, kind of like a Coleman Cascade Classic on steroids. It has an attractive, burlier look and feel, with a beefed-up base and lid. More significantly, it has nicer grates that hold pots and pans a slight bit higher off the flames, which makes simmering more precise. Those grates also have a circular shape, which makes it obvious if the pot is not centered over the flame.

The windscreens work well and are decently tall, with only a small gap at the bottom. The burners are also amply recessed, but that design does create a large gap between the flame and the pot, causing water to boil more slowly. Overall, this stove feels like it can take a beating (like most Coleman stoves).

The knobs have a solid, quality feel to them, plus the whole kaboodle comes with rubber feet, so it can be slightly elevated. Also note that the ignition requires an AA battery. It comes with it, but it would be wise to bring a spare along.

On the downside, those three burners take up space and add weight. It’s more than seven inches deeper than the skinniest stoves we tested and weighs 18 pounds. Luckily, it includes a sturdy handle, which is handy for lugging it around. Otherwise, the only annoying bit is that it’s rattly when transported (stuff some towels inside to help fix that).

On that note, be sure to store the regulator in a camp towel, or it’s liable to roll into the ignitors and break them. Also, if you’re going to be using it with full guns-a-blazin’, bring extra propane canisters, as you’ll blow through your first one in about an hour when all three burners are on high.

Overall, for the price, the Cascade 328 is a great stove, especially for families or those cooking for a larger crew. Like all of the Coleman stoves we’ve used, it’s not particularly fancy, but it will likely be durable enough to be handed down through at least a generation or two.


  • Heat Output
    7.0
  • Simmer Control
    7.0
  • Wind Protection
    6.0
  • Construction
    7.0

  • Number of Burners: Two
  • BTU Output: 14,000 BTUs per burner
  • Boil Time: 4:25 min. per L
  • Fuel Type: Propane
  • Weight: 10 lbs.

Pros

  • Slim collapsed profile
  • Easy-to-clean cook area
  • Updated burners put out 14,000 BTUs

Cons

  • Not the best wind resistance

Newly updated, the GSI Outdoors Selkirk 540+ Camp Stove ($150) bumps up the BTUs from an original 10,000 to 14,000, greatly improving this stove’s performance in my cooking tests.

While it doesn’t blow any other stove out of the water, the Selkirk 540+ does its job admirably — easily boiling water or sautéing veggies for any camp meal you can dream up. Twin metering knobs provide a smooth output and twist a full 720 degrees, offering up great fidelity to fine-tuning your perfect stir-fry, and the piezo ignition was strong right out of the box.

MY testing has shown that higher BTU output is connected to worse fuel efficiency, however. Indeed, the Selkirk was thirstier than the typical 10,000 BTU stoves like the Coleman Cascade Classic. This was the main reason the stove didn’t find itself higher in the line-up.

I also greatly appreciated the stainless steel stove basin and easy-to-remove grate for when the time came to clean up. After a few quick swipes, the stove was clean and ready to be put away. Some stoves harbor more nooks and crannies, but there’s no such issue here.

The windscreens, while of ample height, unfortunately, leave a bit of a gap between the base of the stove and the grill supports, meaning that wind had a pesky tendency to skirt around these walls and interfere with the flame pattern. Careful setup can help alleviate this, and it’s something to be mindful of when arranging your camp kitchen.

A jack-of-all-trades type of stove, the Selkirk 540+ hit the high points in our testing and would make an excellent stove for anyone who needs a stove that just plain works.


  • Heat Output
    8.0
  • Simmer Control
    7.0
  • Wind Protection
    6.0
  • Construction
    8.0

  • Number of Burners: Two
  • BTU Output: 12,000 BTUs per burner
  • Boil Time: 4:30 min. per L
  • Fuel Type: Propane
  • Weight: 13 lbs., 8 oz. (21 lbs., 8 oz. with cast iron griddles)

Pros

  • Hotter than average burners
  • Quality fit and finish across the stove
  • Very versatile with the cast iron cooking surfaces
  • Deep carry handle

Cons

  • We wish the windscreens were slightly taller
  • Pretty hefty with included cast iron attachments

Read Review: The Classic Camp Stove Gets a Modern Makeover: Coleman 1900 3-in-1 Review

This camping stove comes with not one but two cast iron attachments for grilling and cooking on a griddle. Trust me, the Coleman 3-in-1 ($275) aspect is awesome. Thanks to the versatility, you can use two burners like any other camp stove, or one burner and a grill, or one burner and a griddle.

What I loved most about this stove in testing was its durability, heat output, and simmer control. The windscreens were even adequate for 20-30 mph winds. All of the features offer a quality feel, and it can cook just about anything.

The quality of the cast iron was also on par with more expensive options (though the cast iron components do make the stove fairly heavy). Still, the Coleman 3-in-1 (a two-burner stove, grill top, and griddle) weighs less than the only other camp griddle we tested, the Camp Chef Versatop.

One somewhat glaring error, however, was the short windscreens that this stove incorporates. Not only do taller windscreens limit heat loss, but they also cut down on the grease splatter that a griddle can emit. Build up those walls, Coleman!

Hybrid stoves like the 3-in-1 generally lag behind straight-ahead camp stoves in popularity, but can be an excellent way to divide up cooking space for a number of dishes. The main tradeoff comes when sharing cooking space with multiple pots or pans and not being able to remove griddle attachments, such as on the Camp Chef Rainier 2X.

Thankfully, the Coleman is modular, and while the Rainier is a bit cheaper, this ability, plus hotter burners, keeps the Coleman 3-in-1 in the top dog spot for hybrid stove options.

If you’re a fan of cast iron, or simply want an all-in-one option that performs well in every category, the 3-in-1 is one of the best camping stoves you can buy.


  • Heat Output
    8.0
  • Simmer Control
    4.0
  • Wind Protection
    7.0
  • Construction
    8.0

  • Number of Burners: One
  • BTU Output: 18,000 BTUs
  • Boil Time:  N/A
  • Fuel Type: Propane
  • Weight: 24 lbs.

Pros

  • Even cooking surface
  • Great option when cooking for large groups of people
  • You don't need additional pans

Cons

  • It takes a while to heat up fully
  • Can't boil
  • Weighs a hefty 24 lbs.

While not technically a stove, a griddle can bring a lot of joy and simplicity to outdoor cooking. The Camp Chef VersaTop ($190) has a nonstick cooking surface with a wide 18,000-BTU burner underneath, plus a grill accessory.

The unique part about the VersaTop is its versatile design. With separate attachments, you can cook on a flat top, grill, or even bake bread inside. You just pull off the cooking surface, place it on another, and start cooking.

While quite heavy (24 pounds), the size and weight make you feel like a real chef. During a previous GearJunkie campout, our editors had a blast cooking breakfasts, sandwiches, and large helpings of stir fry on this stove. The 17″ x 18″ cooktop of the VersaTop is much more spacious compared to other hybrid camp stove options, including the Coleman 3-in-1’s twin 13″ x 11″ griddles, and Camp Chef Rainier 2X’s 14″ x 9″ aluminum top, and we found the raised backsplash of the VersaTop better suited for piling on food and cutting down on splatter.

Of course, going with a dedicated griddle will mean that you’ll need to lean on another single burner for any of your boiling needs, but we’ve found that adding the Snow Peak Home & Camp Burner to the kitchen when cooking on the VersaTop makes for a perfect duo. You’ll also need to take care of the flattop as your cooking surface is integrated into the stove body, and scorching can be a real pain to get rid of.

At $190, you’ll need to calculate how many killer breakfasts you’ll need to turn out to justify the expense, but if you’re a griddle savant and don’t mind the extra weight in your rig, the VersaTop might be the best camping stove for you. We find that most folks are better served by a classic two burner, but as a breakfast powerhouse, this stove reigns.


  • Heat Output
    7.0
  • Simmer Control
    7.0
  • Wind Protection
    6.0
  • Construction
    7.0

  • Number of Burners: Two
  • BTU Output: 10,000-BTU per burner
  • Boil Time: 5:45 min. per L
  • Fuel Type: Propane
  • Weight: 6 lbs., 3 oz.

Pros

  • The clamshell folds down small
  • Great simmering control
  • Includes pot and pan
  • Can chain additional burners

Cons

  • More expensive than other stoves on the list
  • Hi-tech, modern look isn't for everybody

Read Review: Jetboil Genesis Basecamp Stove System Review: The Benchmark of Car Camping Stoves

The Jetboil Genesis Basecamp Stove ($450) brings one of the more novel (if not genius) designs to the classic camping stove. It functions with a clamshell design that unfolds to display the cooking surface. And, underneath each burner is a place to chain additional burners.

“Where the Genesis really shows through is its simmering ability. The burner knob can be spun in four full rotations from the lowest to the highest setting, and each slight movement of the knob makes fractional adjustments to the flame,” we wrote in our full-length Jetboil Genesis review.

This stove system packs up small, and with the ability to chain additional burners, you can turn this system into a full-fledged kitchen for large groups at a fraction of the packed size. It’s quite expensive, but the technology backs it up, and it also comes with a lightweight pot and pan.

It’s that price, however, that keeps us from signing the praises of the Genesis at full volume, as $400 can net you the Camp Chef Mountaineer, easily a more durable and capable stove unit. While the compact nature of the Jetboil stove is one of the highpoints, we actually end up leaning on the Primus Kinjia more often for the slightly hotter burners and low-profile design that slides into camping bins with ease.

If you’re cramped on space or want to tote a two-burner system into the backcountry, the Genesis could be the best camping stove for you. While the foldability isn’t necessary for the average car camper, it’s truly one of the most versatile setups we’ve tested.


Camping Stove Comparison Chart

Camping StovePriceBurnersBTU OutputBoil TimeFuel TypeWeight
Camp Chef Everest 2X$230Two20,000-BTU per burner3:06 min. per LPropane12 lbs.
Coleman Cascade
Classic Camp Stove
$130Two10,000-BTU per burner7:00 min. per LPropane11 lb., 14.4 oz.
Primus Kinjia$230Two10,200-BTU per burner6:40 min. per LPropane8 lbs., 3.2 oz.
Camp Chef Mountaineer
$470Two20,000-BTU per burner3:25 min. per LPropane16 lbs.
iKamper Disco Series Camping Grill
$515One8,455 BTU7:00 min. per LIso-butane27 lbs.
Snow Peak Home
& Camp Burner
$120One8,333-BTU4:00 min. per LButane3 lbs.
Camp Chef Pro 14$380Two30,000-BTU per burner2:50 min. per LPropane48 lbs., 8 oz.
Primus Alika$330Two10,000 and 13,300 BTUs4:30 min. per LPropane10 lbs., 6 oz.
Coleman Cascade 328$260Three28,000-BTU total7:00 min. per LPropane18 lbs.
GSI Outdoors Selkirk 540+$150Two14,000-BTU per burner4:25 min. per LPropane10 lbs.
Coleman 3-in-1 Stove$275Two12,000-BTU per burner4:30 min. per LPropane13 lbs., 8 oz.
Camp Chef VersaTop$190One18,000-BTUN/APropane24 lbs.
Jetboil Genesis
Basecamp Stove System
$450Two10,000-BTU per burner5:45 min. per LPropane6 lbs., 3 oz.
Scroll right to view all of the columns
Best Camping Stoves Review
Side-by-side testing is core to our process at GearJunkie, and we challenged these stoves together to see which came out on top; (photo/Mary Murphy)

How We Tested the Best Camping Stoves

You wouldn’t head out into the backcountry with an untested backpacking stove, and while the stakes might not be as high while camping, it’ll certainly put a damper on the evening should things fizzle out. Luckily, we’ve done the heavy lifting for you, and thanks to our crew of outdoors enthusiasts, we’ve field-tested the entire spectrum of camp stoves, from compact single burners to brew up your coffee to full-blown mobile kitchens that’ll feed 10 people with ease.

Our Expert Testers

Guide author Mary Murphy is a multisport athlete, and it wouldn’t be off-base to claim that camp cooking is also one of those sports. From her outpost in Denver, she assembled our initial slate of 12 camp stoves in 2021 and dreamed up our boiling and simmering testing regimen to ensure each stove was tested on an even playing field.

I, Senior Editor Nick Belcaster, have experienced the entire backcountry culinary spectrum, from cold-soaking ramen noodles on months-long thru-hikes to whipping up full-course meals for groups of friends while car camping, and my time on the hot side has earned him the title of honorary grill master among camping compadres. Based in Washington state, I continue to test the latest and greatest in camp stoves on forays into the mountains and out to the coast — typically in something a bit more casual than chef’s whites.

Our Testing Process

Besides just boiling water, we cooked meals on each of the camp stoves for this review (including mac and cheese, sautéed veggies, meats, rice, and more). I also conducted boil and simmer tests — both with and without a manufactured wind blowing — which are a consistent way of comparing stove performance. I believe this provides a good understanding of each stove’s technical cooking capabilities. And finally, as the green canisters started to pile up, I tallied our fuel consumption to figure out the relative efficiency of each stove.

When I test a camp stove, I’m also looking at the big picture, and pay special attention to functional differences in ease of use, packability, weight, and availability of fueling. All told, our team has put close to 25 different stove systems through our ringer, and have come up with a pretty good understanding of what makes a great camp stove the center of your outdoor kitchen.

Best Camping Stoves — iKamper Steaks
From ramen to strip steaks, we fired it up on meals across the country to test ease of use and versatility; (photo/Erika Courtney)

Boil and Simmer Tests

I subjected each propane stove to a substantial boil test. I boiled 1 L of water with the same GSI pot and lid on each stove. Before each test, I made sure the pot and water were at the same temperatures as in prior tests. I also checked the water occasionally to note when it began to boil.

Different air temperatures and altitudes will boil water differently, so I tested all of these stoves at the same altitude. Don’t buy one of these stoves and expect it to boil water at these specific times; instead, use this as a rough guide as to which stove heats the most effectively and gets the hottest. Some stoves might have faster boiling times, and others might have better simmer capabilities.

Simmer Test

To test how well a stove could simmer, I tested the knobs and saw how low the flame could go while still remaining active. I also placed a hand above the flame and lowered it to see how close we could get before it got uncomfortable.

The closer the hand could comfortably get (measured in inches), the lower I found a burner could go. Why does this matter? You don’t just want a stove to have hot and very hot settings; sometimes, you need less flame to cook on a low simmer.

I also tested each of the dials to see the range of control they allowed. The higher the degrees of rotation, the more you can turn the dial and change the heat output.

Generally, the higher, the better, as this lets you clearly know if you’re cooking on low, medium, or high. The highest were the Jetboil Genesis and Primus Alika, with 1440 and 1300, respectively, while a few only went 180, including the Camp Chef Pro 14.

Camp Chef Everest Simmer Test
Our simmer testing shed a lot of light on the pure performance of these stoves; (photo/Mary Murphy)
Camping StoveTime to Boil 1 LiterSimmer Test
Camp Chef Pro 142:50 minutes per L3 inches, 180 degrees
Camp Chef Everest 2X3:06 minutes per L1 inch, 360+ degrees
Camp Chef Mountaineer3:25 minutes per L1 inch, 360+ degrees
Snow Peak Home & Camp Burner4:00 minutes per L2 inches, 3 settings
GSI Outdoors Selkirk 540+4:25 minutes per L4 inches, 720 degrees
Primus Alika4:30 minutes per L1 inch, 360 degrees
Coleman 3-in-14:30 minutes per L2 inches, 360 degrees
Jetboil Genesis Basecamp Stove5:45 minutes per L2 inches, 1,440 degrees
Primus Kinjia6:40 minutes per L2 inches, 360 degrees
Coleman Cascade 3287:00 minutes per L1 inch, 830 degrees
iKamper Disco Series Camping Grill7:00 minutes per L1 inch, 270 degrees
Coleman Cascade Classic7:00 minutes per L2-3 inches, 270 degrees

Buyer’s Guide: How to Choose a Camping Stove

This list is for car camping stoves. If you want to eat hot food while hiking or backpacking, check out our review of the best backpacking stoves. Or, if a good char is your thing, take a look at our gear guide of the best portable grills. Otherwise, read on as I break down the nitty-gritty details of camping stoves.

While the camp stove might be the centerpiece of your camp kitchen, its not alone, and building out your perfect camp kitchen will require assembling the proper cook and tableware, utensils, furniture, and organizers. Check out our article on Dialing in Your Camp Kitchen for more details.

Types of Camping Stoves: Standalone Remote Fuel or Freestanding

Best Camping Stoves — iKamper Setup
A remote fuel stove like the iKamper Disco System means you can swap in canisters without disassembling the stove, and even use the burner remotely; (photo/Erika Courtney)

Camping stoves can be broken down into two main groups, and deciding what kind of camp cooking you’re aiming to do will help you narrow down which stove is better for you. The vast majority of camp stoves are stand-alone, remote fuel stoves, which differentiate themselves from backpacking stoves by not relying on the canister to support the stove. Weighing right around 10 pounds and packing down efficiently to be stowed away, these stoves are best placed on a camp or picnic table, with their outboard fuel canisters supported.

Freestanding stoves, on the other hand, are large group cookers and totally self-supporting. They have adjustable legs that make them easier to stand at while using, but also bulkier and harder to move around. These models typically have higher outputs to handle boiling large pots for things like crab boils or stews, and the 30,000 BTU Camp Chef Pro 14 is an excellent example. Freestanding stoves typically are fueled by the larger 20-pound propane canisters or can be used with smaller refillable canisters like the Ignik 5-pound Gas Growler.

Number of Burners

Jetboil Genesis Camp Stove Two Burners
Two burners are our recommendation for most everything you’d want to cook up while camping, but chainable systems like the Jetboil Genesis allow you to add on even more; (photo/Eric Phillips)

If you spend more than 2-3 months out of the year camping — even if you are a single household — I’d recommend going for a two-burner camping stove. Two burners mean you always have the option of cooking with a pot and pan or, for instance, making one entrée alongside a vegetarian or kid-friendly option, and you avoid the musical chairs of attempting to have everything hot at the same time.

Not to mention, two-burner stoves are the standard. However, for those wanting something different, there are now many single-burner (and even a few three-burner, like the Coleman Cascade 328) options on the market. For larger groups, consider a three-burner such as the Camp Chef Pro 16, which sports 30,000 BTUs across the cooking surface.

Another easy way to augment the number of burners available is to add a single-burner type stove, like the Snow Peak Home & Camp Burner, into the mix. I’ve often utilized combos like this to churn out pasta and sauce, while my sous chef whips up a hot side.

Chainable stove systems like the Jetboil Genesis Basecamp are another excellent way to add additional cooking surfaces and reduce the number of propane bottles you need to carry. Compared to bigger three-burner units, the beauty of a chainable system is that you can leave components behind if you’re going solo or don’t need to cook that much.

BTUs Explained

Camp Cooking Pinnacle Stove
The author camping and cooking along the Arkansas River; (photo/Eric Phillips)

BTU stands for British Thermal Unit. Basically, it’s a measurement of energy and, in the case of camp stoves, heat. A gas range stove you’d find in a home has about 6,000-8,000 BTUs per burner (on average), and for the curious, a single BTU is the amount of energy needed to raise the temperature of 1 pound of water by 1 degree Fahrenheit.

Lower BTUs generally mean lower-heat cooking (good for simmering and light cooking uses). Higher BTUs (anything above 10,000) indicate high-heat cooking (great for meals with longer cook times and essential for boiling lots of water quickly). The flame pattern that a burner head puts out will also affect heat transfer, but BTUs are a relatively clean way to compare stoves.

Most camp stoves today produce around 10,000 BTU, which is a perfectly functional amount of heat for almost all cooking purposes. This balances fuel efficiency well and will still boil a pot of water in a reasonable amount of time. Stoves like the Coleman Cascade Classic, Primus Kinjia, and Eureka Ingite all produce around this amount and worked admirably in our testing.

Bumping up the BTUs can certainly speed up the cooking process, especially when it comes to bringing water to a boil. The GSI Selkirk 540+ and Coleman 3-in-1 both pump out around 12-14,000 BTU, and were able to bring a liter of water to a boil in less than 4 minutes and 30 seconds.

This increase in performance does come with a cost, however, and in high-performance 20,000 BTU stoves like the Camp Chef Everest 2X, fuel consumption will take a hit. Consider bringing along multiple gas canisters when cooking with these higher-power options.

Time to Boil

Jetboil Genesis Basecamp Stove - For carcamping
Firepower is typically the quickest route to a fast boil, but other mechanisms are at play, such as wind shielding and burner head design; (photo/Sean Jansen)

Usually, when you go camping, you’re there to enjoy the outdoors. And yes, that also means enjoying hanging around camp and eating good camp food. One of the most essential criteria for a camp stove is its ability to boil water.

Some stoves can boil in 3 minutes, while others take as long as 10 minutes. The stove that boils the fastest marks a great stove, but doesn’t necessarily make it the best. If you are looking for certain features, say a lightweight stove or one with an igniter, you may have to sacrifice some boil time.

In my testing, it was no surprise that the 30,000 BTU powerhouse Camp Chef Pro 14 was hot to trot right out of the gate and boiled a liter of water in less than 3 minutes. Following that were the higher-end BTU stoves, including the Camp Chef Everest 2X, the Camp Chef Mountaineer, and the Coleman 3-in-1.

Interestingly, the glut of stoves with around 10,000-12,000 BTU shook out with a wide variance of times, and can likely be attributed to their burner size and shape. Bringing up the rear was the budget Coleman Cascade Classic, which took a full 7 minutes to boil.

All the stoves I reviewed were able to efficiently light/start, heat, and reach a rolling boil in 8 minutes or less.

Simmer Control and Flame Pattern

Afterburners are cool and all, but being able to dial back your heat will make much more enjoyable meals; (photo/Nick Belcaster)

I did a whole test on simmer control because, as I’ve mentioned, boiling water isn’t everything. In order to enjoy a good chef-quality camp meal, you want to be able to boil, but also bake, sauté, fry, simmer, grill, and more. I measured the simmering range on the flame of each burner/stove to see how they stacked up.

The pattern of the flame that the burner head puts out also has a good bit to do with how well a stove will simmer. Small burners like those present on the Primus Kinjia concentrate the heat in one area, and you’ll need to continue stirring to keep food from burning, or use cookware that dissipates heat, such as cast iron. This was one of the reasons I loved the Camp Chef Everest 2X so much, which has broad burner heads that distribute heat evenly and make for fuss-free simmering.

Performance in Wind

Eureka Ignite Camping Stove
Tall windscreens, like on the Eureka! Ignite, can greatly reduce the wind effect on your stove’s flame pattern; (photo/Mary Murphy)

Think about how often and under what conditions (such as in cold weather) you’ll be using your stove. The more you expand your horizons to travel, the more likely you are to encounter harsh weather and wind. Knowing whether or not your stove can hold up in windy weather isn’t something you want to learn on a 10-day camping trip on the blustery New England coast.

Camp stoves aim to protect themselves from the wind in three ways. The first is windscreens, which are typically attached to the lid of the stove and are deployed by folding them out. This creates a three-sided barrier from gusts that might otherwise attempt to snuff out your flame. Windscreens aren’t often very adjustable, so you’ll want to aim your stove with the lid pointing into the wind.

The second method of blocking wind is recessing the burners into the stove pan. This is fairly prominent on stoves like the Primus Kinjia or Coleman Cascade Classic but noticeably absent on the GSI Selkirk 540+, which likely contributed to that stove’s lesser ability to avoid being blown out. The final barrier against wind is only seen on the Camp Chef Everest 2X, and those are small metal dishes that surround each burner. These made the Everest extremely resistant to being blown out.

If you live somewhere windy, you can also ensure better stove performance in wind and cold by investing in more BTUs.

Fuel Types, Capacities, and Efficiency

Snow Peak Home and Camp Burner Set Up
While butane isn’t the most popular fuel type, it is still readily available and can make for an overall more compact stove setup; (photo/Mary Murphy)

The majority of stoves on this list use 1-pound propane canisters. However, a few, like the Snow Peak Home & Camp, use butane fuel, and the Primus Alika and iKamper Disco can use both. While it varies based on how long you take to cook your meals and what setting your burner is on, a 1-pound propane canister generally lasts about three or four meals, or about 1 hour of cooking time. If you’re headed out for a weekend, I recommend packing a few canisters, as multiple meals can start to chew through them.

Propane is generally considered an all-weather cooking fuel, but it will start to get finicky as the temperatures drop. You can help safeguard against this by keeping your canisters in a warm place before cooking and tucking them back away when you’re done. Butane, on the other hand, doesn’t do so well in the cold, and I don’t generally recommend it for shoulder-season cooking.

In testing, I timed each stove for how long it would run on a single 16-ounce propane canister and found that, in general, the higher the BTUs, the thirstier the stove and the quicker it would burn fuel. At full-blast the Camp Chef Everest 2X will always find the bottom of a canister before the 10,000 BTU stoves, and because of this I always recommend only running your stove as hot as you need to cook on.

While traditional 1-pound propane canisters are single-use, you may consider investing in a refillable propane tank like the Gas Growler from Ignik ($150), which will allow you to refill your camp canister from 20-pound propane tanks. This can greatly simplify your camp cooking needs and keep disposable tanks out of the landfill.

Or, if space is at a premium, the Flame King 1-pound refillable bottles offer the same convenience, at the same size as the single-use tanks. Take note that generally all camp stoves use a screw-on adapter that accepts 16-ounce canisters, but adapters can be purchased for running off bigger tanks.

Weight and Packed Size

Weight is one of the biggest differentiators between the stoves on this list. However, these stoves are built for car camping, so you won’t really be carrying them too far. If you know you want a capable and strong two-burner, weight might not matter as much as other features.

What matters more is the packed size. There’s only so much space in your car or truck or at your campsite, so compact stoves like the Jetboil Genesis Basecamp Stove or the Primus Kinjia can make a difference. 

Check to see if the stove packs down into a case, has a cover, and how the fuel line and grill can be stored. Is it all stored together? Do accessories take up more space? These are all factors to consider for your unique preferences and needs.

Ignition: Strikers vs. Matches

GSI Pinnacle Camp Stove Testing Detail
While packed size isn’t as important as with backpacking stoves, you’ll want to consider the overall size and weight for lugging around in your adventure-mobile; (photo/Eric Phillips)

Strikers, also sometimes known as auto-igniters or piezo igniters, are buttons that expel a spark using electricity to ignite a stove. (It’s a process similar to the button that ignites the pilot light on your stove at home.)

Over the years, I’ve had the pleasure of using some high-quality piezo igniters and felt the sadness of realizing that the built-in striker has bit the dust. Know that different qualities of piezo igniters exist, and that generally, you get what you pay for.

Other strikers that provide a spark can be flint or metal. I always opt for a camp stove that has an integrated igniter — as long as the igniter works consistently, this is the best option.

The last option for lighting your camp stove is the good ol’-fashioned match. However, matches can be wasteful and fragile, and not all are waterproof or can stand up to harsh weather. You can always bring flint or some matches as a backup method.

Extra Features: Griddles, Grates, Pots, and More

Best Camping Stoves — iKamper Fire Mode
The ability to switch to cooking over a campfire makes the iKamper Disco super versatile; (photo/Nick Belcaster)

Think about who you’re cooking for. Is your group size usually one to two people, three to four, or a larger family? Also, consider what you’re cooking.

Do you make a lot of one-pot meals, or do you like sautéing, simmering, slicing, dicing, and baking when outdoors? Do you want to invest in these features down the road? Or do you want a stove with a compatible grill top, or a stove big enough for say, a dutch oven?

Finally, consider your budget. If you see a stove on sale for less than the others, I recommend jumping on it.

If you need a little more information before making your decision, take a look through our Explainer Series article How to Choose a Camp Stove.

Price & Value

(Photo/Nick Belcaster)

Buy the right one, and a good camping stove can be a bit of a legacy item. But knowing which one is right more often comes down to how often you’ll be using it and what you’re looking to cook on it. From $100 budget burners to $500 specialist units with built-in cast iron, there’s a pretty wide range of options out there.

Budget

If camping is an on-again, off-again endeavor for you (or maybe you just backpack more than you car camp), there are not many reasons to splurge on the nicest stovetop in the campsite. Budget camp stoves will certainly get the job done, and even these options will come with two burners as standard. 10,000 BTUs is common in these frugal units, and you may have to give up the ease of a piezo ignitor. Expect to pay under $100 for these burners.

For a bit more than a C-note, the Coleman Cascade Classic Camp Stove ($130) is a dual-burner that just doesn’t quit in my experience. Yes, the build uses a bit thinner material than other stoves (and it weighs a bit more, somehow), but it’s proven to be a dependable cooker, even despite the budget price.

Mid-Tier

For between $100 and $250, you can get into a camp stove that’ll go the distance and bump up the firepower a bit for dishes that might require shallow frying. Burners of between 15 and 20K BTUs will get you there and are often shielded by better windscreens and set below larger cooking surfaces that can accommodate big frying pans. This is also where some more specialist stoves reside, such as 3-in-1 options with different cooking surfaces.

The Camp Chef Everest 2X ($230) has been our top pick for almost 5 years now, and I’m sticking with it. No other stove has the rugged build quality, 20,000 BTU burners, and reliable piezo ignitor as it does. There are a number of reliable dual-burners that perform just slightly less, however, such as the GSI Outdoors Selkirk 540+ ($150).

Premium

North of $250 are the premium options, which include large camp stoves with integrated legs and dual-burners with novel designs, such as all-aluminum constructions or collapsible configurations. These stoves are certainly investment pieces, but our testing has shown that they’re built to last.

The Camp Chef Pro 14 ($380) is my new stove of choice for feeding large groups, and the two 30,000 BTU burners have more than enough to do it with. The Camp Chef Mountaineer ($470) is everything I love about the Everest 2X — just lightweight aluminum — and if you’ve got the extra dough, I highly recommend it. At the very end of the spectrum, the $500+ iKamper Disco costs a pretty penny but jams in so much cooking ability that its tough to use it all in a weekend.

Frequently Asked Questions

What is the best small camping stove?

Small can mean compact or, in the case of camp stoves, slimmer and lighter. Each of the stoves on this list is designed with some form of portability and compactness in mind.

If you are tight on space and looking for a truly small stove to stash away in your camp kit or vehicle, I’d recommend the Snow Peak Home & Camp Burner (a one-burner option) or the Primus Kinjia (a slim and more budget-friendly two-burner).

What is the best camping stove for families?

By far, the best stove for families is the one that will fit your family’s needs. That being said, I’d recommend a stove that’s sturdy, versatile (can cook multiple meals), and easy to clean.

You can’t go wrong with any of our top picks, but the Camp Chef Everest 2X stands out for peak cooking performance and durability. The Coleman Cascade Classic Camp Stove, on the other hand, stands out for budget-friendly, simple, and durable use. Both are durable options that should last for years of family gatherings.

Which is better — a butane or propane camping stove?

Both butane and propane have their pros and cons. Both are pressurized gasses — gas that is compressed and stored as a liquid. Butane tends to perform less well in colder weather. Propane canisters can come in all types of sizes (a better variety to suit a wider range of needs).

It’s important to take note of what climate you’ll be using your camp stove in most. Also, propane is fairly easy to access — you can find it in a big city, in rural towns, even in general stores near state or national parks.

Does the stove have a fuel line adaptor to accommodate different types of fuel? Only a few stoves on the market can run on multiple fuels (Coleman even makes one that runs on gasoline), but the majority are designed for solely butane or propane.

Backpacking stove vs. camping stove: What’s the difference?

Backpacking stoves are very small single-burner units that can fit in a backpack (even the palm of your hand). Their weight is measured in ounces. Camping stoves, however, are used at “base camp” when you are car camping, truck camping, visiting National Parks, or traveling between.

Camp stoves are bigger and heavier (average 8-14 pounds), and they’re made to be set on a tabletop, truck bed, picnic, or camp table, converting your camp into a camp kitchen.

If you’re looking at the differences between both and are still stumped as to which to choose for your next outing, read up on How to Choose a Camp Stove in our handy guide.

What should I look for when buying a camping stove?

First, consider how you plan on using your camping stove. Someone who is looking to make a near-fixture of their camp stove in a van build-out is likely to have different requirements over someone who only needs to boil water during weekend camping trips. If you are in the first camp, look into your more substantially built stoves, such as the Camp Chef Everest 2X. For more casual use, consider the Coleman Cascade Classic.

Then, think about the types of meals you are looking to brew up. More substantial or complicated meals will require more cooking space, as well as potentially more heat output. Look for a twin burner stove with at least 10,000-BTU output if you’re the camp chef of your friend group. We find the Coleman 3-in-1 to be a versatile stove that is ready for any type of meal.

Finally, consider if you might ever utilize your stove in a hike-in capacity. There are a number of lighter camp stoves on the market, such as the Snow Peak Home & Camp Burner or Jetboil Genesis Basecamp Stove, that make packing them into camp a much easier chore.

The Best Camping Cots of 2025

26 August 2025 at 14:21

(Photo/Meghan LaHatte)

Our expert team has spent countless nights trying out the best camping cots, on the hunt for the perfect backcountry bed for any night outdoors. From summer nights stargazing to frigid alpine evenings at elk camp, we’ve put each of these 15 cots through an extensive testing process in which we scored them on comfort, ease of setup, durability, and packability. 

When it comes to deciding on a camping cot, there’s certainly more than meets the eye, and our expert campers have tested more than 30 cots in our search for the best. Whether you’re after a deluxe padded option like our top pick, the REI Co-op Wonderland Comfort Cot, or need something a bit more spend-wise, like the Mountain Summit Gear Horizon, we’ve found the best options for everyone.

Be sure to read up on each cot’s size, packability, comfort level, and purpose before making your final decision. A good night’s rest is out there, you just need the right bed to do it in.

Editor’s Note: We updated our Camping Cot guide on August 26, 2025, to add the Kamp-Rite Oversize Tent Cot, an all-in-one option that adds a suspended canopy to your cot along with a waterproof rainfly for a fully enclosed camping option. We also added rating details to each cot, further illuminating our testing process.

The Best Camping Cots of 2025

Best Overall Camping Cot

REI Co-op Wonderland Comfort Cot

8.9/10 Rating
BUY OPTIONS

Best Budget Camping Cot

Mountain Summit Gear Horizon Cot

6.2/10 Rating

Best King-Size Camping Cot

Klymit Cedar Mesa Cot

8.0/10 Rating

Best Lightweight Camping Cot

Helinox Lite Cot

7.0/10 Rating

Best Tent Cot

Kamp-Rite Oversize Tent Cot

7.9/10 Rating
BUY OPTIONS

Best Cot for Vehicle Sleeping

REI Co-op Trailgate Vehicle Sleeping Platform

7.2/10 Rating
BUY OPTIONS
See more picks

  • Comfort
    9.0
  • Ease of Set Up
    8.0
  • Portability
    6.0
  • Duability
    9.0

  • Weight: 20 lbs.
  • Weight Limit: 300 lbs.
  • Unfolded Dimensions: 82 in. x 31.5 in. x 14 in. (L x W x H)
  • Packed Dimensions: 33 in. x 32 in. x 8.5 in.
  • Best Use: Car camping or as an extra bed for guests

Pros

  • Very comfortable integrated sleeping pad
  • Spacious sleeping area
  • New carry strap included
  • Adjustable firmness
  • Easy to assemble (as easy as it gets, really)

Cons

  • Not as comfortable for stomach sleepers
  • Large packing size
  • Heavy

With a built-in plush pad, strong frame, and a super-easy set-up, the REI Co-op Wonderland Comfort Cot ($199) easily landed at the head of the pack as our best overall camping cot. This cot is nigh-identical to our previous top pick — the REI Kingdom Cot 3 — with only the name and an added carry strap being the difference.

In our testing, none could match the comfort that this cot brought, and it’s even adjustable, sitting atop a springy platform that utilizes an adjustable shock cord so you can dial in your preferred level of cushioning.

After an easy fold-out setup (comes fully assembled), this cot provides a very stable, confidence-inspiring base. The steel and aluminum legs are capped at the base with round discs that tilt to match the slope of the ground, and are safe to put on a tent floor without risk of tearing. 

For side and back sleepers, this feels like a really luxurious cot. The padding is ample, and the springy base absorbs weight without making you feel like you’re bouncing around. Weight gathers in the center of this pad, which makes it ideal if you like rolling from side to side, or simply passing out on your back. Stomach sleepers, such as senior editor Nick Belcaster, however, reported some trouble with the built-in cradling.

At 82” x 31.5” deployed, this pad was plenty large enough for a tall friend and is rated for 300 pounds. At 20 pounds, it’s not ideal for any type of pack-in camping, but it would serve as a comfortable, durable option for car camping. It’s so comfortable that we wouldn’t hesitate to use it as an extra bed in a hotel room or cabin. 

The packed-down size is a bit large (33” x 32”), so it may not be the best option if you’re low on space, and you might consider the REI Co-op Campwell — a full-sized cot that packs more compactly. If a good night’s sleep is your priority, however, we’d recommend making room for the Wonderland Comfort cot. It could even make an excellent spare room bed for guests.


  • Comfort
    6.0
  • Ease of Set Up
    7.0
  • Portability
    6.0
  • Durability
    6.0

  • Total Weight: 17 lbs.
  • Weight Limit: 300 lbs.
  • Unfolded Dimensions: 75 in. x 27.5 in. x 14.5 in.
  • Packed Dimensions: 6 in. x 10 in. x 5 in.
  • Best Use: Car camping and walk-in sites

Pros

  • Includes carrying case
  • Easy to maneuver around camp
  • Side pocket for headlamp and phone storage
  • Durable

Cons

  • Slightly narrow sleeping surface
  • Setup initially challenging due to stiffness
  • Not much storage space due to x-shape crossbars

Reasonably priced, the Mountain Summit Gear Horizon Cot ($100) is simple to set up, maneuverable, and plenty comfortable for sleeping under the stars. This cot is designed for all-season car camping, and its sleek carrying case helps with transportation from vehicle to site. 

The Horizon Cot is pretty simple to put together, taking a little over 5 minutes, thanks to its collapsible base frame that expands once placed on the ground. The only challenging part we found about this cot was getting the ends of the poles into the fabric corners. However, each time we set it up, this step got significantly easier as the fabric stretched out. 

Comfort is a standout feature on the Horizon. Thanks to its 600-denier polyester fabric, this cot is durable and flexible enough not to sag too much once in use. The sleeping platform can fit a sleeping pad and bag for added comfort and warmth if needed.

The cot’s durability makes it a reliable companion for multiday camping trips where resilience against wear and tear is paramount. The base frame’s puck legs help it stay flat on the ground without digging into your tent’s fabric. Once you’re finished using the cot, it easily disassembles into its carrying case that has an attached strap for simple haulage. 

At 27 inches wide, this cot was perfect for our petite tester’s size, but it may be too narrow for users who desire more surface area when they sleep. Wider cots like the Klymit Cedar Mesa Cot, which has a 31-inch width, may be better suited for folks wanting that extra wiggle room. However, its stability can hold up to 300 pounds, so as long as you don’t typically toss and turn too much in your slumber, this cot would probably be just fine for you. 

If you’re on the hunt for an uncomplicated cot that is well-suited for car camping, look no further than the Mountain Summit Gear Horizon Cot. For 100 bucks, you get a comfortable sleeping solution that has straightforward assembly and impressive packability.


  • Comfort
    9.0
  • Ease of Set Up
    8.0
  • Portability
    7.0
  • Durability
    8.0

  • Weight: 16 lbs. for L/18 lbs. for XL
  • Weight Limit: 400 lbs.
  • Unfolded Dimensions: 80 in. x 31 in. x 16 in. for L; 85.5 in. x 37 in. x 16 in. for XL (L x W x H)
  • Packed Dimensions: 19 x 13 x 7.5 in.
  • Best Use: Car camping for taller users, hunting camps

Pros

  • Packing case and size is convenient
  • Comfortable
  • Simple assembly
  • Capacity and length ideal for plus-size users

Cons

  • Long size may not fit in smaller tents or cars
  • Tough to fully insert sidebars into cot corners

New to the camping cot scene, Klymit really brought it all with the Cedar Mesa Cot ($250). Ideal for taller users, this cot in its regular Large size measures almost 6.5 feet, while the XL is a little over 7 feet. This spacious cot is perfect for throwing in your tent, truck bed, or by the bonfire for some cowboy camping action. 

The Cedar Mesa Cot took less than 10 minutes to put together the first time. Assembly is decently simple due to Klymit’s patent-pending Easy Lock technology on the crossbars. After mounting the side poles and legs to the crossbars, simply push down on each mechanism to lock it into place. This ensures the cot’s frame is secure without any unexpected wiggles or topples. 

Even though assembly was overall quite easy, one of our testers did struggle to fully place the side poles into the corner fabric seams. This step required some bracing using the ground and a little elbow grease. However, once completely put together, the cot was easy to maneuver and carry around camp. It even disassembled and neatly packed into its included briefcase-size carrying bag. 

For being so lightweight and packable, this cot is super comfortable to sleep on. While the cot itself is pretty firm, the 300D polyester ripstop PU-backed fabric stretches just the right amount once you’re lying on top of it. Despite being elevated several inches off the ground, our tester stayed warm on it while camping on a crisp Colorado mountain pass during the summer. 

This cot was also a dark horse surprise with the hunters among us. When Editorial Director Sean McCoy used it recently for a 14-day elk hunt in Colorado, he found it to be “very roomy, even for our 6-foot, 200-pound-plus testers, and it was a palace for smaller testers. Everyone agreed it was one of the best cots they’d ever slept on.” The overall compact packed size sealed the deal for McCoy, who hailed it as the best trade-off in comfort to carry-size in cots today.

Hunters should also consider the Cabela’s Big Outdoorsman Cot, a far cheaper but heavier and bulkier option, as well as the Teton Sports Outfitter XXL, a bit of a middle ground with more space to sleep on, but harder to fit in smaller tents. Overall, if you have a little more in your budget to spend on a cot or need something for your taller stature, look no further than the Cedar Mesa Cot.


  • Comfort
    6.0
  • Ease of Set Up
    7.0
  • Portability
    9.0
  • Durability
    7.0

  • Weight: 2 lbs., 12 oz.
  • Weight Limit: 265 lbs.
  • Unfolded Dimensions: 72.5 in. x 23.5 in. x 5 in. (L x W x H)
  • Packed Dimensions: 20.5 in. x 5 in. x 5 in.
  • Best Use: Backpacking and hut trips

Pros

  • Lighter than many camping mattresses
  • Packable compressed size
  • Comfortable sleeping area
  • Low sleeping height can be a benefit for sleeping in backpacking tents

Cons

  • On the pricier side
  • Lots of pieces (6 poles and cot)
  • Muscles necessary for setup/breakdown

Most of the cots you’ll see on the market are mainly for car camping, as their weight and packed size make them impractical for hike-in spots or backpacking. The Helinox Lite Cot ($300) is an exception to this rule, and it opens up the opportunity to inject a little luxury into your next short backpacking trip.

Weighing just 2 pounds, 12 ounces, and packing smaller than the size of a closed-cell foam pad, this cot can easily fit in a backpack or be strapped to the outside. With the above-ground benefits of 5 inches and a lightweight design, it provides more comfort per ounce than almost any other sleeping system on the market.

The DAC aluminum frame will hold up to 265 pounds, which is on the lower end for camping cots, but should still accommodate most hikers. The polyester material is taut and reliable, yet forgiving enough to cradle your body.

Compared to other ‘packable’ camping cots that are inflatable, we’re far more sold on the minimal frame design of the Lite Cot, as the dead air space of inflatable cots is tough to warm up, and balancing another sleeping pad on top can get a bit wobbly.

One warning: it is very hard to set up inside a small tent, as you need to use serious finger muscles to get the four leg extensions on. If you need more sleeping space, the Helinox One Max Convertible adds 8 inches of length and 3 inches of width.

In addition to its minimal weight, one of the best features of the Lite Cot is its versatility. Resting about 5 inches off the ground, it can fit into most one-person tents, yet you can still sit upright without hitting the ceiling. Honestly, however, we came to appreciate this cot most as the ideal cowboy camping platform, where it provides a small buffer between you and the ground.


  • Comfort
    8.0
  • Ease of Set Up
    6.0
  • Portability
    5.0
  • Durability
    7.0

  • Weight: 32 lbs.
  • Weight Limit: 350 lbs.
  • Unfolded Dimensions: 90″ L x 32″ W x 36″ H
  • Packed Dimensions: 36″ L x 34″ W x 7″ H
  • Best Use: Sleeping under the stars without a tent

Pros

  • Spacious
  • Breathes well
  • Circulates air well
  • Keeps you elevated off the ground
  • Easy setup

Cons

  • Bulky
  • Heavy

The Kamp-Rite Oversize Tent Cot ($330) is an all-in-one option that impressed outdoorsman Nick LeFort straight away, so much so that he called it ‘solo glamping’. This plus-size version of the brand’s classic tent cot sports a huge 32″ wide by 90″ long sleeping platform, and is covered by a suspended canopy that will keep you protected from most elements, all without a tent.

This is certainly the most involved camping cot in our recommendations, but if you’re after a do-it-all option, its the one to consider. Even with the more complicated build, however, LeFort was able to get the tent cot up in just two minutes, noting how the four legs secure into the frame. Then, all you’re left to do is add the two tent poles to get the canopy up.

The sleeping platform doesn’t sport a built-in cushion like our top pick, but it’s big enough to fit any camping mattress you want to use with it. The 90″ surface is long enough to bring some of your equipment with you, too, and once you zip yourself in, you’ve got a weather-proof zone to tuck away into.

LeFort broke this cot in on a frost-covered night in the Northeast, where he made good use of the numerous ventilation options in the rainfly. Doors on all sides of the cot (that’s right, there are four doors) are also complemented with mesh coverings, meaning you can get the full view when the weather is right (and the bugs are wrong).

Should the skies open up, the optional rainfly will need to be installed, and it’s not the easiest thing to get stretched over the tent cot solo. This is also one hefty cot system at 32 pounds, which makes it just about the heaviest we’ve reviewed. For pure versatility, however, the Oversize Tent Cot well makes the grade for those who just want to get camp set up and hit the sack.


  • Comfort
    8.0
  • Ease of Set Up
    6.0
  • Portability
    6.0
  • Durability
    8.0

  • Weight: 31 lbs. (25"), 45 lbs. (40")
  • Weight Limit: 250 lbs. (25"), 400 lbs. (40")
  • Unfolded Dimensions: 72" x 25" x 10.7-30.5" (25"), 72" x 40" x 10.7-30.5" (40")
  • Packed Dimensions: 31.5" x 19" x 13" (25"), 40" x 18.5" x 14" (40")
  • Best Use: Converting your daily driver into a comfortable nest for the night

Pros

  • Simple assembly for on-the-fly setup
  • Good adjustability to accommodate different seat and foot-well heights
  • Foam cushion is comfy and easy to clean
  • Available in both 25" and 40" widths

Cons

  • Won't adapt to every vehicle seamlessly
  • Not too much storage underneath

Car camping is hot right now, and even hotter is camping inside your car. For those lacking a truck bed (or the time/effort to construct a bed platform), the REI Co-op Trailgate Cot ($350-450) is a turnkey option that we found nearly ideal for transforming half of your car into a comfy bed for weekend trips.

We put this cot into the hands of our perpetually moving climbing guide and van-dweller to give us the low-down on performance, and she returned from a summer of van life a cot convert. Already built out with a sleeping platform, tester Katie Griffith swapped in the Trailgate and found that, for the most part, it ticked all of the boxes she’s after: easy set-up, enough storage space, and a stable sleeping surface.

The cot itself is made up of three legs, two of which are shorter at 7-10 inches for resting on your folded rear seats, and a third set that extends into the rear footwells. This adjustability means you can dial in the level of the platform, and for most wagons and SUVs, this cot should fit well. There is also a third set of shorter legs that can be used to create a cot in a totally level vehicle, such as a van or truck bed.

The mattress comes in a 25-inch width or a 40-inch width, so you can customize the cot to your sleeping and storage needs. The recycled polyester cushion is much more comfortable than many camping pads, but Griffith says “full-time van lifers will likely want to invest in a more substantial mattress.” It is, however, much more comfortable than the non-existent padding on the FLATED Air-Deck, an inflatable cot option designed more for truck beds.

We tested the Trailgate Cot in both sedans and a built-out van, and found that while the sleeping platform is designed to be amenable to more compact vehicles, it did just as well set up in the cargo area of our Ford Transit Connect.

Since the back legs only extend to a maximum of 10 inches, the cot doesn’t offer much storage underneath. A long-term road tripper with a truck or cargo van may want a more custom build-out to fit shelves or storage bins, or consider the Hele Outdoors Hele Box Solo, a car-camping platform with a bit more space below decks.

For car campers looking for a convenient sleeping arrangement that works with multiple vehicle models, the Trailgate Cot is a smart solution.


Other Camping Cots We Recommend

The cots we’ve listed above are solid options for just about any camper, but they certainly aren’t the only options on the market. Check out our list of cots that didn’t quite make the award cut, but are still high-quality and just might be perfect for your next trip.

  • Comfort
    7.0
  • Ease of Set Up
    8.0
  • Portability
    8.0
  • Durability
    7.0

  • Weight: 4 lbs., 9 oz.
  • Weight Limit: 320 lbs.
  • Unfolded Dimensions: 75 x 26 x 6.5" (L x W x H)
  • Packed Dimensions: 21 x 6.5 x 6.5" (L x W x H)
  • Best Use: Basecamping or car-supported camping

Pros

  • Ability to be used in a low height, or raised with optional legs
  • Extra-tight frame assembly is very supportive
  • Durably made components
  • Bluesign-approved materials

Cons

  • Sits fairly low to the ground without legs
  • Optional legs are $100 extra

The Helinox Cot One Convertible ($350) is almost 2 pounds heavier than the brand’s Lite Cot. But it makes up for the difference with a unique tensioning system. This Helinox also has a trick up its sleeve: Depending on your needs, this cot can be run at a low-to-the-ground 6.5-inch station or elevated up to a comfortable 15-inch height.

The levers tension and lock the legs into place with a single action. This design difference makes the cot platform much tauter than the Lite Cot can manage. And if you’re looking for support, this cot has it. Because you don’t need to muscle the legs in and out of place, the setup and takedown are quicker, too.

You’ll want to include a sleeping pad for optimum comfort. However, we tried it on its own and it’s comfortable enough, granted you have a warm enough sleeping bag. The added cushioning of a sleeping pad (we used Exped’s Dura 3R) was well-appreciated. The sleeping platform is a bit larger than other Helinox designs (2 inches longer and 2.5 inches wider than the Helinox Lite), which makes using modern-sized sleeping pads easier.

Even at the highest setting, it sits fairly low to the ground, so it isn’t a great choice for people who have trouble getting in and out of bed. That said, Helinox does offer additional legs ($100) to add on if you want to be situated higher off the ground. That adds to the weight and bulk of your pack, but if you do have the room, it might be the most comfortable sleeping experience you’ll have in a remote campsite.

If you’re planning on rucking the cot out with you (and don’t have space to bring a separate sleeping pad), go for the brand’s Lite Cot, which will also provide some built-in sag. But for building out a basecamp and providing your own padding? The more rigid (and adjustable) Cot One Convertible makes better sense in our minds.


  • Comfort
    7.0
  • Ease of Set Up
    8.0
  • Portability
    9.0
  • Durability
    8.0

  • Total Weight: 17 lbs., 13 oz.
  • Weight Limit: 300 lbs.
  • Unfolded Dimensions: 76 in. x 25 in. x 18 in.
  • Packed Dimensions: 8 in. x 37 in.
  • Best Use: Car camping, walk-in camping and festivals

Pros

  • Super easy assembly and disassembly
  • Packs into a sleek carrying bag
  • Sits high off the ground

Cons

  • Hard to maneuver around camp
  • Fabric on bag and sleeping area prone to wear and tear

When it comes to camping cots, it’s pretty hard to beat the ease and convenience of fold-out models. However, most folding cots tend to fold into larger flat shapes that are more cumbersome than collapsible models. This is where the REI Co-op Campwell Cot ($100) really takes the cake, as it is a fold-out option that collapses into a bag similar to that of a camp chair. 

The Campwell Cot takes less than 2 minutes to set up (yep, we timed it). It is perfect for those wanting a simple sleeping solution that isn’t complicated or too bulky once packed away. The carrying case even has a sling on it, so you can throw it over your shoulder while you move gear into camp. 

To construct this cot, start by folding it out from the carrying case. Once the legs are pushed up into the right position, tighten each suspension strap located at the four corner legs of this cot.  As a final step, you can flip it over upright, and voilà, you’ve got a fully functioning cot! 

We think this cot would be perfect for slumber during summer months as the fabric is thinner than most of the others listed. For winter camping, we opted to use a sleeping pad with this to help insulate and keep us warm. The base fabric is also more stretchy, so keep that in mind if you’re on the lookout for something stiffer. 

With no need for hassling with poles or putting in the extra elbow grease, the quick assembly of the Campwell Cot means you can get to your adventures even faster. However, we recommend setting this cot up in your tent, as it doesn’t retain its shape once picked up. The middle collapses when picked up, so it is a little awkward to maneuver. 

This cot’s height sits at a whopping 18 inches, making it perfect for storing bags and other gear underneath while at camp. Higher profile options like this and the Teton Sports Outfitter XXL Camp Cot make getting in and out of bed easier, but lower profile options like the Helinox Lite Cot are better suited for tent camping, especially if you’re backpacking and need to keep things lightweight. 

Overall, the Campwell Cot from REI Co-op truly impressed us during the cot testing process. We can’t help but give it praise for its effortless setup, sleek packing solution, and overall comfort while camping.


  • Comfort
    7.0
  • Ease of Set Up
    7.0
  • Portability
    6.0
  • Durability
    8.0

  • Weight: 26 lbs.
  • Weight Limit: 600 lbs.
  • Unfolded Dimensions: 85.7 in. x 41 in. x 19.2 in. (L x W x H)
  • Packed Dimensions: 42 in. x 12 in. x 7 in.
  • Best Use: Accommodating two sleepers

Pros

  • Huge sleeping space between a full and queen-sized mattress
  • Easy fold-out assembly
  • Pairs with Outfitter XXL Camp Pad
  • 600 pound capacity can accommodate two smaller campers

Cons

  • Large packing size
  • Heavy at north of 25 pounds
  • Doesn’t fit in smaller tents

If you want the roomiest cot available, the Teton Sports Outfitter XXL Camp Cot ($180) is the best bang for your buck. With a whopping 81 inches from head to toe, a 41-inch width, and a 600-pound (!) capacity, you could easily fit the average sasquatch in it for a good night’s sleep. Compared to average cots, that’s a good 35% more sleeping real estate.

If you don’t know any bigfoots (bigfeet?), we also found it’s great for larger folks or people who toss and turn in their sleep, as well as the bulky hunter-types we typically find ourselves bunking with at elk camps. Smaller couples who are fond of cuddling will also appreciate the roomy platform it provides.

The S-leg design is the first we’ve seen of its kind. The unique shape of these steel legs provides sturdiness and support. Plus, the brushed canvas is comfortable if you want to plop down on it for a midday nap.

We love the lever-arm setup as well, which we’ve only otherwise experienced on Cabela’s Big Outdoorsman Cot. Many sleeping cots are notorious for how hard it is to pull the last corner of canvas over the frame, but the integrated lever uses added leverage to make it easy for one person to set it up and break it down.

All that king-sized comfort does come with its downsides, as this camp cot is quite large, both packed and unpacked. That can be a drag in transport, and in ensuring it’ll fit into your tent! Those considering the XXL Camp Cot should also take a serious look at the Klymit Cedar Mesa Cot, which has a similarly plus-size sleeping platform and a more compact packed size thanks to its collapsible frame. You’ll need to shell out $70 more for the privilege, but for extended rucks into camp, the trade-off may be well worth it.

In our opinion, the choice to go with the XXL Camp Cot comes down to width and length. The extra 6 inches of headspace and 10 whole inches of room to toss and turn mean this cot lands somewhere between a full-sized and queen-sized mattress. It also pairs with Teton’s XXL Camp Pad, a 2.5-inch-thick closed-cell foam sleeping pad that makes this cot feel even more like your bed at home.


  • Comfort
    6.0
  • Ease of Set Up
    7.0
  • Portability
    9.0
  • Durability
    8.0

  • Weight: 4 lbs., 12 oz.
  • Weight Limit: 300 lbs.
  • Unfolded Dimensions: 75 in. x 27.5 in. x 6.75 in. (L x W x H)
  • Packed Dimensions: 7 in. x 17 in.
  • Best Use: Backpacking, hut trips, and camping in a truck bed

Pros

  • Quite small packed size
  • Only 5 pounds but can support up to 300 pounds
  • Aluminum legs aren't so slight as to seem fragile
  • Competitive price with budget models

Cons

  • Set up is a bit involved, with some muscle needed to seat the legs
  • Low height may not play nice with some folks' knees

We’ve seen several packable camp cot options in our day, but the reality is that it’s a tough nut to crack. Many err on the side of too light and are flimsy when used for multiple days. Not so with the Kelty Lowdown Cot ($150), which balances the scales well, and only tips them at 4 pounds, 12 ounces.

Only two other cots are lighter on our list, but they’re both more than double the price of the Lowdown, making this the budget-friendly lightweight option of the bunch. Packing down into a 7” x 17” roll, this cot disappears into our car camping kit, and didn’t do half bad in our overnight tests.

The 600-denier ripstop polyester fabric sling is tough enough for most anything, but like other more minimal cots, there isn’t much built-in cushioning here, so we frequently opted to run a thin camping mattress atop this cot. That said, bringing a lighter cot means you can run a thicker pad, and the combo of this and a 4” cushion makes for good sleeping.

The flipside of a low weight is a more involved setup, and the Lowdown does take a minute to get fully settled. You’ve got to thread the two long poles through the sleeping surface and then assemble each of the five leg assemblies before snapping them into place. We got this down to 5 minutes with practice, but it is more complicated than simply unfolding like some cots.

For $150, the Lowdown is perfect for those who want a lightweight and compact camping cot but don’t want to invest in the top-of-the-line option.


  • Comfort
    5.0
  • Ease of Set Up
    8.0
  • Portability
    6.0
  • Durability
    9.0

  • Total Weight: 17 lbs.
  • Weight Limit: 500 lbs.
  • Unfolded Dimensions: 72 in. x 53 in. x 4 in.
  • Packed Dimensions: 32 x 18 in.
  • Best Use: Truck bed camping

Pros

  • Very lightweight solution to truck bed camping
  • Impressive rigidity over a broad expanse
  • Inflation is a simple affair
  • Rugged deck material is silly tough

Cons

  • Non-adjustable height means you get the headroom you get
  • Side pockets too snug to get much into/out of

Behold, truck bed campers: we have arrived. The FLATED Air-Deck ($549-699) is the end-all solution to adding a sturdy sleeping platform to the back of your rig without having to break out the miter saw. Constructed using the same design and materials as inflatable stand-up paddleboards, the Air-Deck is the lightweight sleeping cot your truck has been dreaming about.

Available in five different platform sizes, the Air-Deck is sized to fit everything from a single occupant to the beds of modern full-size trucks, and provides a 4-inch-thick pad to set up camp atop. Relatively simple otherwise (truly, as it is only a platform with two support struts), the Air-Deck inflates with the same high-pressure pumps used for SUPs, and only tips the scales at a scant 25 pounds inflated. There are some single camping cots in this guide that weigh more!

Best thought of as the best boxspring you’ve ever camped on, the Air-Deck will require the addition of your favorite camping mattress to truly luxe out. In testing, we tossed on the Therm-a-Rest MondoKing 3D, REI Co-op Camp Dreamer, and the Hest Dually pads — all to great applause from our team. The Mid-Size 6-Foot Bed version fit perfectly in our Senior Editor’s Toyota Tacoma, and turned a Montana fishing trip into a stay in the pickup penthouse.

The real magic is in the drop-stitch construction, which slings thousands of polyester threads in between the fabric sandwich, and supports the high pressures needed to keep the platform rigid. FLATED gives the decks a 500-pound weight rating, and in testing, we easily could stand three adults atop it without bowing.

Due to its one-size-fits-most deck height, some with shorter truck bed caps may need to adjust the mattress they use to end up with sufficient head space. For example, on our very first night with the Air-Deck we attempted to use the 6” thick Exped MegaMat 15 Max, and needed to shuffle in to sleep atop it. And while the included mesh pockets are stationed at handy locations, we found in practice that they were a bit too snug to get much in and out of.

The FLATED Air-Deck is to the truck as the REI Co-op Trailgate Cot is to the sedan or hatchback, and offers a camping cot-like platform that transformed our truck beds into palatial camping setups. For those who want to avoid the hassle of creating their own sleeping platforms, or just need the flexibility of instant installation and removal, this is the ‘cot’ to do it with.


  • Comfort
    7.0
  • Ease of Set Up
    8.0
  • Portability
    7.0
  • Durability
    8.0

  • Total Weight: 31 lbs., 4.8 oz.
  • Weight Limit: 600 lbs.
  • Unfolded Dimensions: 85 in. x 40 in. x 20 in.
  • Packed Dimensions: 44.7 in. x 6.7 in. x 7.9 in.
  • Best Use: Cabin or yurt camping

Pros

  • Huge sleeping surface
  • Lever system helps with set up
  • Thick and durable fabric

Cons

  • Heaviest single-person cot on the list
  • Three pieces (2 extra poles)
  • It rocks back and forth a bit

This beast of a cot from Cabela’s, the Big Outdoorsman Cot ($130), could literally fit a grizzly bear from Alaska! In all seriousness, a 6’9” person weighing up to 600 pounds can use this burly cot. At 40 inches wide, it nearly matches the size of a twin bed, so you could even cuddle close with that special someone or sprawl out like a starfish. 

The water-resistant, 450-denier polyester top is thick and very supportive. Combined with the rugged, powder-coated steel frame, this portable bed is bombproof. The built-in tension lever arm, which helps snap the top and bottom crossbars in place, eases set-up. 

The tradeoff is that it is as heavy as a child. Weighing in at 31 pounds, this mammoth bed is not fun to carry from your car to the campsite, although it does come with a large carrying bag. It is also huge, so it fits best in a monster family tent, but is even better suited for a small cabin or yurt. 

If the Teton Outfitter XXL Camp Cot is a bit too rich for your blood, the Big Outdoorsman Cot from Cabela’s offers a more affordable option with much of the same appeal.


  • Comfort
    6.0
  • Ease of Set Up
    7.0
  • Portability
    6.0
  • Durability
    8.0

  • Weight: 21 lbs.
  • Weight Limit: 300 lbs.
  • Unfolded Dimensions: 73 in. x 35 in. x 17 in. (L x W x H)
  • Packed Dimensions: 40 in. x 8 in. x 5 in. (approx.)
  • Best Use: Car camping

Pros

  • Comfortable
  • Roomy
  • Side pockets

Cons

  • Large packing size
  • Heavy
  • Assembly requires some muscle

The Coleman Trailhead II Cot ($55) is spacious enough to fit sleepers over 6 feet tall and keeps all sleepers over a foot off the ground. The attached side pockets add a great touch of organization, holding your glasses, headlamp, and other smaller items.

The rails are slightly elevated to add security and prevent sleepers from rolling off. The canvas is firm and supportive, and it has a frame sturdy enough to withstand you and your tentmates fighting over who gets to sleep in it.

This cot’s steel X-shaped frame and double stitching add durability, giving you years of use before breaking down. It folds up and stores in the included carry case, so it’s easy to store and pack in the car.

At a whopping 21 pounds, from the house to the car is definitely the furthest it will travel, as there’s no way you’ll want to carry this bad boy in your backpack.

The biggest dig we’ve found with the Trailhead II is the assembly. We’ve had reports that the end braces are difficult to attach to the frame, making it likely that you’ll have to use some leverage to attach the second brace. But once you’re up and running, you’ve got one comfortable cot that won’t put too much of a hurt on your wallet.


Camping Cot Comparison Chart

Camping CotPriceTotal WeightWeight LimitUnfolded Dimensions
(L x W x H)
Packed Dimensions
REI Co-op Wonderland Comfort Cot$19920 lbs.300 lbs.82″ x 31.5″ x 14″33″ x 32″ x 8.5″
Mountain Summit Gear Horizon Cot$10017 lbs.300 lbs.75″ x 27.5″ x 14.56″ x 10″ x 5
Teton Sports Outfitter
XXL Camp Cot
$18026 lbs.600 lbs.85.7″ x 41″ x 19.2″42″ x 12″ x 7″
Helinox Lite Cot$3002 lbs., 12 oz.265 lbs.72.5″ x 23.5″ x 5″20.5″ x 5″ x 5″
REI Co-op Campwell Cot
$10017 lbs., 13 oz.300 lbs.76″ x 25″ x 18″8″ x 37
Klymit Cedar Mesa Cot$25016 lbs. for L400 lbs.80″ x 31″ x 16″19″ x 13″ x 7.5″
Kamp-Rite Oversize Tent Cot$33032 lbs.350 lbs.90″ x 32″ x 36″36″ x 34″ x 7″
REI Co-op Trailgate Vehicle Sleeping Platform$350-45031-45 lbs. 250 – 400 lbs. 72″ x 25″ x 10.7-30.5″31.5″ x 19″ x 13″
Helinox Cot One Convertible$3504 lbs., 9 oz.320 lbs.75″ x 26″ x 6.5″21″ x 6.5″ x 6.5″
Kelty Lowdown Cot$1504 lbs., 12 oz.300 lbs. 75″ x 27.5″ x 6.75″7″ x 17″
FLATED Air-Deck
$549-69925 lbs.500 lbs.72″ x 53″ x 4″32″ x 18″
Cabela’s Big Outdoorsman Cot$13031 lbs., 4.8 oz.600 lbs.85″ x 40″ x 20″44.7″ x 6.7″ x 7.9″
Coleman Trailhead II Cot
$5521 lbs.300 lbs.73″ x 35″ x 1740″ x 8″ x 5
Camping Cot and Tent Set Up
When you’ve got the space, camping cots are one of the easiest ways to boost the comfort of your camping trip; (photo/Josh Boulton)

How We Tested the Best Camping Cots

Jumping into a camping cot can be a quick one-and-done way to greatly elevate your camping sleep experience, but they certainly aren’t all built the same or meant for the same kinds of trips. Grandad’s G.I. cot might work in a pinch, but be a pain to figure out when you’re trying to get camp set up before sundown. That’s why we’ve put hours into understanding the best out there, all the way down to the nitty-gritty of fabric differences, weight capacities, and instruction-less ease of use.

This collective list of cot recommendations has been curated for a wide range of users over the course of almost three years. Since March 2021, our expert writers have slept innumerable nights in the desert, mountains, woods, cars, and apartments to narrow down what we think are the shining stars of the camping cot market.

Our Testing Process

To truly assess these cots, we created a testing regimen focused on the comfort, quality, and convenience of each option. Each cot was tested both indoors and out for a minimum of five nights (and often much longer) before we rendered any type of conclusion on them.

To truly understand how easy a cot is to assemble, we set them up without instructions and timed our efforts across a handful of testers. A similar timed test was completed for tear-down (and the sometimes difficult task of getting the cot back into its carrying sack). Then, as scientifically as we can muster, we got some well-earned shuteye.

Using a scale of 1-5 (1 being poor, 5 being exceptional), our testers scored the quality of their slumber and noted any specific highlight or issue they encountered throughout the night. Finally, to ensure accuracy, we rotated out cots to ensure our impressions were spot-on.

Our camping cot testing also extended to the finer details: We bust out the measuring tapes to prove the manufacturer’s claims about packed sizes and sleeping platform areas, weight entire cots to get an idea of how much muscle you’ll need to employ to hoof them from the car to the campsite, and measure the deflection from a 15-pound kettlebell when placed in the middle of the cot — in order to replicate the weight of an elbow or hip.

All of this data might seem extraneous, but with camping cots being so great these days, it’s more often than not that our recommendations can come down to a handful of ounces or a difficult stuff sack.

Camper Laying On Top of the Helinox Lite Cot Inside Tent
Testing camping cots is hard work, but someone has got to do it; (photo/Justin La Vigne)

Our Expert Testers

The GearJunkie team includes a broad spectrum of outdoor enthusiasts. From hunters and anglers to overlanders and rock climbers, there is one characteristic that we all have in common: a multitude of nights spent sleeping outside. Over many years, we’ve tried just about every sleep system for camping, and cots remain a tried-and-true favorite.

Lead camping cot tester Meghan LaHatte is no stranger to the camping scene and has lived in rural Colorado for the past 6 years. As an avid climber, hiker, and biker, Meghan knows the importance of a good night’s rest under the stars before those action-packed days.

Her most recent camping cot testing occurred during camping trips in Colorado’s late summer and fall, and involved the aforementioned testing process and camping during 50-, 40-, and 30-degree nights. To better judge each cot, she even set them up in her living room over a 5-week period in which she slept on them for further inspection. 

Buyer’s Guide: How to Choose a Camping Cot

Best Camping Cots — Interior Tent
If you already have a sleeping pad, it can make a great insulating companion to your camping cot; (photo/Meghan LaHatte)

The question of camping cots versus sleeping pads depends on how you plan to travel. Consider how you plan to use your sleeping system and look at the options below.

Camping Cots vs. Sleeping Pads

Camping Cots

Camping cots elevate you off the ground, providing a softer night’s sleep. They also help to prevent the cold ground from chilling you as you catch those zzz’s.

They also provide a much larger sleeping space. This makes it less likely that you’ll roll off of it in the middle of the night. However, cots tend to be heavy, and they’re much bulkier than sleeping pads. This makes the majority of them less than ideal for portable use.

For people who only sleep a short distance from their cars, camping cots are a great choice. Since they won’t be hauling their cots far, the added weight and bulk aren’t as much of an issue.

In this case, comfort and ease of setup are generally the biggest concerns. Because camping cots are generally a closer approximation to the average bed, they are usually more comfortable than sleeping pads.

Alps Mountaineering ReadyLite Cot
While sleeping pads boast built-in cushioning, they’ll always only be a few inches off the ground, while cots provide a more elevated experience; (photo/Nick Belcaster)

Sleeping Pads

Sleeping pads are much lighter and more compressible than cots. They are also generally softer than cots that don’t have integrated cushioning.

However, they do require you to sleep on the ground. This exposes you to the ground’s hardness and can let cold transfer from the ground into your sleeping bag.

Because backpackers have to carry all of their gear with them while they hike, weight and packed size are huge considerations. Many backpackers are willing to sacrifice the added comfort of a camping cot for lighter and more packable sleeping pads.

Many pads are also designed to add some of the amenities that cots provide. Insulated pads are built for cold-weather camping. The insulation within the pad absorbs some of the cold coming from the ground, preventing it from sapping heat from your sleeping bag.

Inflatable sleeping pads keep you off the ground and allow you to sleep on a cushion. These are softer than non-cushioned camping cots but are usually louder, as the lightweight material can make a crunching sound when you move on it. The most common description is that it’s like sleeping on a bag of chips.

Intrigued by sleeping pads? Check out GearJunkie’s full gear guide to learn more.

FLATED Air-Deck with Inflatable Mattresses on top in Back of Toyota Tacoma
Many cots won’t be quite as comfortable as we’d all like, and adding a foam or inflatable sleeping pad goes a long way to adding cushion; (photo/Erika Courtney)

Camping Cots & Sleeping Pads

If luxury is the goal and weight isn’t an option, a camping cot plus a sleeping pad is the way to go. A camping cot paired with a foam sleeping pad provides the best of both worlds.

The cot will elevate you off the ground and give you a bigger space to sleep on, while the pad adds a good amount of softness. It’s similar to the function of the box springs and mattress of your bed at home.

If you want to combine a cot and a pad, check to see if the cot you’re looking at has an add-on pad. Some companies offer pads designed specifically to work with certain cots. This ensures that your pad will fit perfectly with your cot.

Some also have securing systems to attach the pad to the cot, which prevents it from moving around or sliding off while you sleep. For a cozy, all-in-one pad and cot option, check out the REI Co-op Wonderland Comfort Cot.

Ease of Setup

Any piece of gear is useless if you can’t set it up. The bed of a cot is generally composed of a material that is stretched tight over a frame that supports your body.

Pulling the material tight enough to support your weight requires a good amount of tension. Many people find it challenging to pull the last section of material over the frame, often requiring help from another person to pull with enough strength.

In our experience testing these cots, we’ve found that the smaller a cot packs down, the more complicated it is to set up. Generally, there are more pieces to put together, and there are more parts that have to be secured to create and maintain tension. Also, there are often snap-together or folding sections that can pinch your fingers if you’re not careful.

Setting up Camping Cot
Putting together the Klymit Cedar Mesa Cot goes easy with the snap-down crossbars; (photo/Josh Boulton)

We’ve even had a tester make the mistake of trying to assemble a backpacking cot with his down sleeping bag lying on top of it. In the process, he snapped two pieces together over the sleeping bag material, causing a small tear in the bag.

The result was clouds of fine down puffing out and filling the air in the tent every time the bag moved, which led to a late-night search for duct tape (and a lot of swearing).

As is often the case when it comes to gear, there is always a tradeoff when it comes to how easy a camping cot is to set up. In general, the bigger and bulkier a cot is, the easier it is to set up. Smaller cots require more pieces to be broken down, but they weigh less and pack smaller. Larger cots are harder to carry around, but they usually require one or two steps to set up.

Some cots are engineered with state-of-the-art technologies that make them easier to assemble, especially for people needing more accessible designs and applications. These technologies include easy-lock mechanisms, adjustable springs, and pop-out assemblies.

Decide whether you prefer convenience or mobility, and choose the best cot for your needs. On this list, the REI Co-op Campwell Cot stands out for its simple camp chair-like setup.

Camping Cot Assembly
Some assembly is required with camping cots, but they are all the sweeter to sleep on; (photo/Josh Boulton)

Comfort

Again, there’s a tradeoff here. Larger camp cots with plenty of space and padding are universally more comfortable. However, they’re all but impossible to pack with you on a long hike or backpacking trip. Although smaller camp cots are a lot more mobile, they lack the frills and creature comforts of a larger cot. Below are a few ways you can consider your first or next camping cot in terms of comfort.

Some cots require you to pair your sleeping pad with them for optimal use, while others even have integrated pads attached to the cot itself. Adding a sleeping pad to your camping cot setup can help increase the warmth and comfort of your setup — especially if you are used to sleeping on your pad alone anyway. 

Cots that don’t necessarily require an added sleeping pad tend to have the feel of lying in a hammock. The fabric should be stretchy enough that your body is comfortably supported, but not totally lacking in structure that you feel like you’re sinking in. We felt that the Mountain Summit Gear Horizon Cot performed well in this instance. 

REI Co-op Kingdom Cot 3
With a simple flip, the REI Kingdom Cot 3 is ready for a night under the stars; (photo/Andrew Potter)

When considering the comfort of a camping cot, it’s also wise to think about its overall size. If you tend to toss and turn or sprawl out when sleeping, snagging a wider or double-size cot would probably be the best choice for you. King-size cots like the Teton Sports Outfitter XXL Camp Cot are crucial if you are planning on sharing your cot too. 

Finally, it is easy to forget about the height from the ground when shopping around for a camping cot. Because you’re elevated off the ground, you won’t feel any protruding rocks, sticks, or lumps as you normally would sleeping on the tent floor.

The airflow under your cot even helps regulate body temperature by keeping you cool when it’s warm and protecting you from the frosty ground during the winter. When considering height off the ground, keep in mind that a shorter cot would be better suited for camping in a car, whereas a taller one can work best inside a taller dome-style tent.

If you’re going backpacking, comfort is secondary to ease of transport. Ideally, you’re going to want to go with a cot that is lightweight and packs down to a manageable size. If you’re camping next to your car, comfort is a priority, so consider the additional details below.

Woman Reading on the King Camp Folding Cot Inside Cabin
Camping cots vary in comfort, and the length and intensity of your trip will determine what type of cot you can afford to carry with you; (photo/Justin La Vigne)

Warmth

It’s worth noting that sleeping on a camping cot is much like sleeping in a camping hammock. Without the insulation of the ground underneath, you’re more likely to become cold. It’s important to either bring an underquilt or pair your cot with an insulated sleeping pad.

Camping cots with integrated sleeping pads will typically be warmer than those without, as the extra cushioning helps you insulate your body temperature. These thicker pads, like the one found on the REI Co-op Wonderland Comfort Cot, paired with a warm sleeping pad, would keep you plenty cozy during some winter camping action, while the slimmer cushioning on the Mountain Summit Gear Horizon Cot would be perfect for summer camping without an additional sleeping pad.

Camping cots without attached sleeping pads are great for fully customizing your sleeping setup so you don’t get too frigid or toasty while trying to catch those Zs. What we love about the ALPS Mountaineering ReadyLite Cot is the option to insert a sleeping pad into the platform, making for a secure fit that will keep your body plenty insulated without slipping out from under you. 

Whatever you decide when considering warmth in a camping cot, it’s always wise to bring extra sleeping bags, blankets, and insulation, especially if you’re winter car camping. You can always shed a few layers, but there’s not much you can do if you haven’t brought the correct provisions to stay cozy.

Sleep Area

Before buying a cot, you’ll want to first ensure that the cot is big enough for you to sleep on without resting on the frame. Most cots are long enough to fit people as tall as 6 feet and run just over 2 feet wide.

If you’re on the taller or wider side, many cots, such as the Klymit Cedar Mesa Cot, offer XL or XXL versions. These cots are generally longer and wider to accommodate larger people. During testing while elk hunting in the highlands of Colorado, tester Sean McCoy brought along the Cedar Mesa for 14 days straight, and the extra space garnered rave reviews from even the largest 6-foot, 200-pound hunters.

On this list, the Teton Sports Outfitter XXL Camp Cot offers a whopping 81 inches from head to toe. If you’re not sure whether a cot will fit you, look for the specifications online. The specs page will show the cot’s dimensions, so you’ll be able to see whether it’s a good fit for you.

Best Camping Cots — Comparison on End
Some cots have wider sleeping areas, while others have more slender spaces for resting on; (photo/Meghan LaHatte)

Cushioning

Most cots don’t have cushioning — the sleeping area is a piece of material like polyester fabric stretched tight to provide support. Many campers find these cots to be too firm, so they’ll add a sleeping pad of some kind to provide cushioning.

If you’d prefer to sleep on something that feels like your bed at home or want an extra bed for visiting folks, look for a cot that comes with cushioning, which will typically be additional foam added to the sleeping surface. Cots like the REI Co-op Wonderland Comfort Cot go this direction, and while the packed size is a bit larger, the trade-off is certainly in comfort.

You’re also liable to save some money going the all-in-one route, as well. A solid budget-friendly sleeping mattress like the REI Co-op Camp Dreamer XL is still $179, so paying the $199 for the Wonderland Comfort Cot makes a lot of sense in our books.

Best Camping Cots — Platform Height
Most cots are made without included cushioning, while some others have extra padding; (photo/Meghan LaHatte)

Weight & Packed Size

Most of the camping cots are designed for car camping, where pack size and weight are less of an issue. Camping cots tend to be on the larger side, weighing anywhere from 12 pounds on the lower end to around 30 pounds on the higher end.

Elements such as material, fabric, and design factor into the weight of a camping cot. Camping cot frames made with materials like steel will be heavier than those made of aluminum. Cot fabrics like canvas and polyester tend to add on weight compared to lighter nylon and mesh. Consider where you’ll be using your camping cot and how the overall design may affect your ability to carry it to your campsite or backpack with it through the wilderness. 

Best Camping Cots — Stacked
Most camping cots collapse into camping chair-size bags, while others fold flat for easy packing and maneuverability; (photo/Meghan LaHatte) 

For hunting applications, packed size often is the make-or-break reason for whether a cot comes along to the yurt or not. Consider that you’ll need to be able to load up your cot onto whatever ATV you’ll be riding in on, and that most camping-style cots of the folding style are too large to accomplish this. Look to more packable cots like the Klymit Cedar Mesa Cot for the best hunting application, a cot that our elk-fanatic tester called “one of the best cots he’s ever slept on.”

Further still on the other end of the spectrum, some camping cots can pack as small as a camp chair or sleeping bag, making it worth it to throw in your backpack for a longer mileage excursion. The ultralight Helinox Lite Cot really soared on this front as it only weighs in at 2 pounds, 12 ounces, and fits superbly in our backpacks without taking up too much real estate.

The ultralight Helinox Lite Cot is gossamer enough to take on certain hike-in trips; (photo/Justin La Vigne)

Car Camping

If you plan on camping next to your car, the main thing to consider is how much space you have available in your mode of transportation, and whether you’ll have enough room for your cots and the rest of your gear. If you have ample space, comfort often becomes the first priority.

Choose the biggest, cushiest cot you can find, and don’t worry about the weight. Just make sure you have enough room in your car for it.

Our go-to choice for cushy car camping? The ultra-adaptable REI Co-op Trailgate Vehicle Sleeping Platform. And if you’re looking to shack up in the truck bed? Go for the set-and-forget ease of the FLATED Air-Deck.

REI Co-op Trailgate Vehicle Cot Side View
The adjustable legs of the REI Co-op Trailgate Cot are made to adapt to a variety of different vehicle backseats; (photo/Katie Griffith)

Hike-In Camping

People who camp in spots that require a short hike from the car have additional considerations. If you have to hike to your campsite, make sure that your camping cot is light enough to carry to the site. Also, ensure that the cot isn’t too bulky to carry alongside the other necessary gear.

Best Camping Cots — Packed Size
The Mountain Summit Gear Horizon Cot has an easy-to-carry case for those walk-ins to camp; (photo/Meghan LaHatte)

Look for a camping cot that is stowed in a bag, preferably one with handles or a shoulder strap. You’ll be thankful for details like this when it’s time to hike your gear from your car to the campsite.

The Klymit Cedar Mesa Cot is a superb choice if you’re looking for a camping cot that’s light enough to carry without getting winded. The included handled carrying case made setting up camp super easy and convenient without too many trips hauling gear from the car.

The Mountain Summit Gear Horizon Cot has an included sling bag that is roughly the same size as a champ chair. This made carrying it into the campsite a breeze while keeping our hands free for other gear, allowing for far fewer trips to the car. 

Backpacking

In general, camping cots are not very compatible with backpacking. Cots are heavy and bulky — two words that backpackers avoid at all costs.

If backpacking is your primary style of camping, and you absolutely must sleep on a cot, consider one of the lightweight cots we profile above. The Helinox Lite Cot or Kelty Lowdown Cot are light enough to take into the backcountry, but are still comfortable enough to sleep on if you occasionally go car camping.

Klymit Cedar Mesa Camping Cot in Tent
The Cedar Mesa Cot balances overall comfort with a compact carrying size; (photo/Josh Boulton)

Hunting

Remote hunting outposts accessed by truck, ATV, or pack animal can be made all the more livable with the addition of a few cots to your wall tent. Tracking can take it out of you, and that’s even before the real work starts, so investing in a comfortable, yet packable, cot will make your hunt all the better.

If you’re going light and rucking into your basecamp, many of the backpacking-style cots will make the grade, but for vehicle-assisted hunts, moving up to the comfort of a more well-rounded cot is well worth the weight.

Packability is the name of the game when it comes to cots for hunting, and you’ll need to aim for a cot that can fit in your side-by-side, or in the panniers of your trusty steed. The Cabela’s Big Outdoorsman Cot is our go-to for damn-the-weight endeavors for truly large hunters, but the cot we end up reaching for most often for a hunt is the Klymit Cedar Mesa Cot, a platform that collapses down impressively for the extra-large sleeping space it provides.

Durability

Best Camping Cots — Foot Pads
Cots made with these flexible pucks as feet are great for conforming to uneven ground and protecting your tent floor; (photo/Meghan LaHatte)

Durability varies widely with camping cots. We’ve found that there’s a proportional relationship between weight and durability with this type of gear. Generally, the heavier a cot is, the tougher it is.

Heavy car camping cots are made up of sturdy frames composed of steel or steel alloys. These heavier metals give the cot an exceptionally durable build. This makes them more resistant to drops, exhausted campers flopping down on them, roughhousing kids, and whatever other vigorous activities a bed might face.

Lighter cots have frames that are built with aluminum or some other lightweight material. The lighter weight is great for trekking it into the woods, but they’re often much more fragile.

Lightweight cot frames are sturdy enough to support campers’ weight while they sleep but must be treated with more respect. In our testing, we’ve found that these lighter-weight cots are best eased into when it’s time for bed.

When getting ready to snuggle into your lightweight cot, be sure to sit down in the middle first. Our lead tester made the hilarious mistake of sitting on the head end of one cot and quite literally somersaulted backward, albeit not very gracefully, landing with the cot on top of her.

If you’re camping next to your car and weight is no issue, you can opt for a heavier cot and rough it up a bit. On this list, the Coleman Trailhead II Cot is supremely durable, but it weighs a hefty 21 pounds. If a lighter, more packable cot like the Kelty Lowdown Cot better suits you, make sure that you’re more careful with it than you’d be with a 30-pound behemoth.

FLATED Air-Deck Camping Cot in Back of Toyota Tacoma
When it comes to durability, it’s hard to beat the extra-tough exterior material of the FLATED Air-Deck; (photo/Nick Belcaster)

Accessories 

If you want to elevate your camping experience and maximize the functionality of your cot, consider the accessories that come included or as add-ons for an extra price. These accessories can include side tables, storage compartments, pockets, sleeping pads, and other functional elements. 

Designed with hanging side pockets for your phone and headlamp, the Mountain Summit Gear Horizon Cot and Klymit Cedar Mesa Cot are perfect for those searching for minimalistic accessories for just the necessities.

Really want to go all out with the accessories? Consider the customizable bunk bed style Disc-O-Bed. You can order this puppy with extra fabric cabinets, organizers, and sleeping pads that heighten camping to an extra level of luxury. 

Best Camping Cots — Camp Set-up
Some camping cots are adjustable to various positions, while others remain flat; (photo/Meghan LaHatte)

Price & Value

The camping cots that we profile here represent an accurate sampling of the prices you’ll see when shopping for a cot. They vary in price from $45 to $80 for simple, no-frills models, but cots can reach $300 and above at the higher end. When shopping for a camping cot, weigh the features you need against how much money you have to spend.

Budget

If you want a simple cot to keep you off the ground when you sleep next to your car, start with the lowest-end cot and think about what you’d like to add to it. A simple car camping cot consists of a folding frame with material stretched over it and should cost somewhere south of $100. They often will sport steel or aluminum frames, with plastic hinges being common on lower-end models.

On this list, the Mountain Summit Gear Horizon Cot is our Best Budget pick at just $100, and offers up a good bit without sacrificing strength. With this cot, you’ll mostly lose out on a little bit of sleeping space, and the camping chair-like support structure doesn’t allow for much storage beneath it.

The REI Co-op Campwell Cot will run you the same amount and will trade off some added storage space below for a less user-friendly design that isn’t the easiest to pick up and move.

Mid-Tier

Want added cushioning or organization options? Be prepared to spend a little bit more on an upgraded option, somewhere in the range of $150-300. These cots also tend to add additional sleeping space and are often 30″ or wider — making them more comfy for spreading out on. Specialty cots like the Teton Sports Outfitter XXL ($180) and Helinox Lite Cot ($300) also show up in this price range and are made for those looking for a huge sleeping surface, or backpack-able weight and size.

The REI Co-op Wonderland Comfort Cot ($199) has been our top pick for three years running, and it lands smack-dab in the middle of the price range for cots. For the money, it offers up everything we think a cot sleeper is looking for.

Premium

Looking for a cot that is light and easy to carry into a walk-in campsite? Or a specialty-use option to add a sleeping platform to your vehicle? These options will cost a little bit more because of the lightweight materials and design that go into the construction. These generally cost north of $300 and above with add-ons like rainflies or integrated tents.

The REI Co-op Trailgate Vehicle Sleeping Platform ($350-450) is perfect for adding a level surface to the back of your daily driver, and for those who camp out of their pickups, there’s the FLATED Air-Deck ($549-699).

Klymit Cot Loading into Tent
At $250, the Cedar Mesa is at the top of the price range, but provides a durable sleeping surface and sturdy legs for the price; (photo/Josh Boulton)

Frequently Asked Questions

What is the most comfortable camping cot?

Comfortable is a subjective term. It can depend on many things, such as how firm or soft you prefer your sleeping space, as well as whether you sleep on your back or side.

The most common complaint about camping outside is how firm sleeping systems are, so a cot with some cushioning is ideal. Our choice for the most comfortable is the Coleman Airbed Twin Cot for its soft cushioning, contouring, and adjustable incline settings, as well as the REI Co-op Wonderland Comfort Cot, for a smaller-packing option.

Best Camping Cots — Pup on Cot
Cots are so comfortable that even your furry companions will want a taste of the luxury life; (photo/Meghan LaHatte)
Are cots good for camping?

Because they closely mimic the feel of sleeping in your bed at home, cots are an extremely comfortable option for car camping. Once assembled, most camping cots can easily be thrown in your tent, car, or under the stars. However, as we’ve stated above, traditional camping cots are too heavy and bulky for backpacking.

There are a few ultralight “backpacking cots,” but many backpackers choose sleeping pads because they are lighter and more packable.

Is a cot more comfortable than an air mattress?

A good full-size air mattress is the closest you can get to sleeping on your bed at home. However, they are bulky, and they usually require an external power source to fully inflate. They are also difficult to clean after a camping trip.

Camping cots are often less comfortable than an air mattress but are more durable, easier to transport, and easier to set up. A high-quality cushioned camping cot can come close to, or even surpass, the comfort of an air mattress, plus they take much less time to set up. The cushioned design of the REI Co-op Wonderland Comfort Cot stood out for us.

How wide is a camping cot?

Many of the camping cots that we have tested are generally around 25 inches in width. This is wide enough for most campers. If you need a wider cot, many cots offer larger versions for bigger sleepers. These can range from 30 inches to over 40 inches in width. The 40-inch Cabela’s Big Outdoorsman Cot is a perfect example.

How do I wash my camping cot?

If your camping trip had some unexpected moisture or your mud-covered pup hopped up on your camping cot for some snuggles, you’ll probably want to take careful measures to give it a good cleanup once home. 

Before attempting to wash your camping cot, be sure to check the manufacturer’s instructions first as there could be some guidelines or restrictions pertaining to your cot’s materials. If you’ve only got some small stains or dirt on your cot, we recommend spot cleaning prior to doing a full-on wash down. This can be accomplished by putting some mild dish soap on a cloth and lightly dabbing the material before applying some water. 

If spot cleaning won’t quite do the job, check to see if your cot’s fabric materials are machine or hand washable. Be sure to avoid using any harsh detergents, bleach, or high heat. When drying be sure to hang dry your cot out of any direct sunlight that could potentially cause the fabric to fade or damage the finishes. 

For cleaning the metal legs and hinges, we recommend wiping them down with a damp cloth and promptly drying them with a towel to avoid any rusting or long-term damage to the mechanisms. 

Keeping your camping cot clean and stored in a dry place will ensure its longevity for many camping trips to come.

The Best Camping Chairs of 2025

18 August 2025 at 13:59

(Photo/Miya Tsudome)

There’s no better way to end a day outside than to gather around the campfire. While we’ve all spent many an evening balancing on a log, it’s hard to beat the best camping chairs. That’s why our team has tested close to 50 over the last decade, and I’ve collected the top 14 on the market today in this guide.

In order to find the best, we’ve spent countless hours testing chairs in a variety of locations and weather conditions. From the wilds of the Desolation Wilderness to the swamps of Apalachicola, from birthday parties at the park to relaxing somewhere with a view, we’ve spent countless hours setting up, taking down, and, well, sitting.

While no single “best” chair will suit everyone, I’ve broken the list into categories that should help you identify the ideal chair for your needs. Look to the top-pick REI Co-op Campwell if you’re after the most well-rounded available, or snag a couple of Coleman Broadband Mesh Quad Chairs for the same price. Otherwise, read on for my other recommendations and buying advice.

Editor’s Note: We updated our Camping Chairs guide on August 18, 2025, to add the NEMO Stargaze EVO-X and KUMA Aurora Heated Chair — both excellent places to plant it with their own perks (the EVO-X is a rockin’ seat, and the Aurora sports Bluetooth-controlled heat!). We also added additional rating details to further explain our testing process.

The Best Camp Chairs of 2025

Best Overall Camp Chair

REI Co-op Campwell Chair

9.0/10 Rating
BUY OPTIONS

Best Budget Camp Chair

Coleman Broadband Mesh Quad Chair

6.0/10 Rating

Best Rocking Camp Chair

NEMO Stargaze EVO-X

8.9/10 Rating

Most Stable Camp Chair

ALPS Mountaineering King Kong

8.5/10 Rating

Best Beach Camping Chair

BOTE Inflatable Aero Chair XL

7.4/10 Rating
BUY OPTIONS

Best Heated Camping Chair

KUMA Aurora Heated Chair

7.8/10 Rating
See more picks

Best Overall Camp Chair

  • Comfort
    8.0
  • Portability
    7.0
  • Capacity & Stability
    8.0
  • Ease of Use
    9.0

  • Weight: 8 lbs., 2 oz.
  • Dimensions: 31" x 31.2" x 20"
  • Cupholders: One pear-shaped cupholder for a variety of beverage containers
  • Pockets: One smaller mesh drawstring pocket for small items
  • Weight Capacity: 300 lbs.

Pros

  • Simple, lightweight design
  • Made primarily of mesh for easy cleanup and breathability
  • Comes with a shoulder bag for easy transport
  • PFC-free DWR finish

Cons

  • Mesh could cause concerns for long-term durability
  • Not a tall seat height for ultimate lounging

The REI Co-op Campwell Chair ($60) is an ever-so-slightly updated version of the Skyward Chair — a popular but now bygone classic. As a part of the Campwell series that includes tents and other camping accessories, this camping chair is a no-frills seat that is easy to transport and pop open from backyard barbeques and soccer games to campgrounds near and far. 

The Campwell Chair is the same as my beloved Skyward, with the only notable difference being a non-PFC DWR finish and an extra inch of height gained. For the same price, I’ll take it. For ultimate all-around comfort, simplicity, and stability, I reach for the Campwell almost every time.

The price is moderate, the features are just what you need, and the weight is light and easily manageable for a variety of arrangements and activities, making it a solid choice for a daily driver.

A predominantly mesh seat makes this chair easy to clean and dry if it gets wet. A spacious cup holder and a drawstring pocket keep your favorite beverage, along with your phone and keys, close by. The four flat, sturdy, square-shaped feet stayed well-planted on the ground during my testing, making the chair level and secure while standing up and sitting down.

While the mesh back and seat make for easy cleanup and great breathability, I found that we were a little chilly in colder weather. While this could prove to be an advantage in warm summer months, it’s definitely a disadvantage in the wintertime or if there is a cool breeze. The Kuma Aurora Heated Chair or the Kelty Discovery Low Loveseat Nest would be better options for keeping your bum toasty.

Also, being primarily made of mesh and polyester, there could be concerns about durability. But I was satisfied with the chair’s durability during the testing period, finding that it could take a beating as I threw it in the back of the truck and tossed it around from backyard to campsite. It doesn’t provide neck support, and the seat height reaches 15 inches, so it’s not the ultimate or largest lounge chair like the GCI Outdoor Freeform Zero Gravity Lounger.

But the Campwell is my go-to choice for those who want a simple, hardworking, all-around camp chair.

REI Co-op Skyward Chair Beside a Campfire
(Photo/Miya Tsudome)
REI Co-op Skyward Chair Pocket Detail
(Photo/Miya Tsudome)
REI Co-op Skyward Chair Beside a Campfire
REI Co-op Skyward Chair Pocket Detail

Best Budget Camp Chair

  • Comfort
    6.0
  • Portability
    7.0
  • Capacity & Stability
    6.0
  • Ease of Use
    7.0

  • Weight: 6 lbs., 4 oz.
  • Dimensions: 35.8" x 31.1" x 21.3"
  • Cupholders: One mesh cupholder
  • Pockets: None
  • Weight capacity: 250 lbs.

Pros

  • Inexpensive
  • Breathable mesh back panel
  • Tried and true design that's easy to deploy

Cons

  • Less portability
  • Long-term durability
  • No storage pockets

Just $30 and it has a cooling mesh back? Yep, this Coleman Broadband Mesh Quad Chair is a bargain hunter’s dream. And to top it off, I found it impressively comfortable during the initial testing foray. There is an ocean of cheap camp chairs like this on the market, but let it be known: this is the top of the heap with a trusted brand name to rely on.

At 21 inches wide, it provides a roomier seat than the smaller backpacking options I’ve reviewed. It also has a taller seat height and a more upright back, which makes getting in and out easier. The fabric of the seat itself is actually a sturdy mixture of breathable mesh and solid fabric, which raises the comfort level when sitting in this chair for long periods of time. Most other options at this price point will be all solid fabric, so the mix here is welcome.

While the armrest does sport an integrated cup holder, your drinks will have to go koozie-less to be able to fit, which was a small price to pay considering the budget buy-in this chair commands. At $30, you very well could snag a cheap cooler to go along with the chair! Otherwise, there’s no storage on this sling, so you’ll need to find somewhere else to park your keys.

You’ll also need to consider that the Broadband Mesh Quad Chair won’t pack down quite as small as some of the other chairs in our review, like the ENO Lounger DL Chair, but for most campers, the walk from the car to the campfire is a short one. Thankfully, the chair comes with a simple carry bag with a shoulder sling. Good enough is good enough here.

You wouldn’t want to haul this chair for long distances, but the included carry bag eases transportation and helps prevent rust. The Broadband Mesh Quad Chair is a solid option for hanging in the backyard, sitting on the sidelines, or car camping.


Best Rocking Camp Chair

  • Comfort
    9.0
  • Portability
    8.0
  • Capacity & Stability
    8.0
  • Ease of Use
    8.0

  • Weight: 14 lbs., 12 oz.
  • Dimensions: 29" x 37" x 41"
  • Cupholders: Two integrated
  • Pockets: N/A
  • Weight Capacity: 300 lbs.

Pros

  • Lavishly comfortable
  • Easy setup
  • Good head support
  • One-of-a-kind suspension design
  • Cheaper than previous version

Cons

  • Heavy and bulky
  • No footrest
  • A bit tall for shorter people

The NEMO Stargaze EVO-X ($180) is the updated version of my favorite rocking chair from NEMO with a significant update: an easy-folding and deploying frame. No more setting tubes into hubs — this Stargaze unfolds similarly to most other camp chairs but keeps all of the rocking comfort I loved about the initial version.

Camping expert Karuna Eberl took this chair with her on a multi-month road trip across 12 states this summer. Through it all, the EVO-X impressed, even stacked up next to her trusty GCI Comfort Pro Rocker (the reclining functionality of the new NEMO helped edge it over the top). Eberl noted how the previous iteration of the Stagaze was plenty comfortable and rocking-ready, but required some assembly to get there.

The EVO-X, on the other hand, now unfolds in seconds and doesn’t give up any reclining action or capacity to do so. Eberl and her partner represent the opposite ends of the height spectrum, but both her 5’4″ and his 6’1″ frames found the seat to be comfortable, with the seat easy to recline even for smaller folks. The reclining mechanism is smooth and forgiving, with the ability to stop at any angle to get into perfect stargazing position.

The EVO-X’s materials are rugged, and even the carry bag is padded. The seat sling sports two elastic-hemmed cupholders, which probably aren’t the most secure, but we haven’t seen a spill yet. The padded headrest is extra comfortable when you’re really leaned back in this chair, and supports your head in ways that no other chair in our lineup can touch.

Eberl’s wishlist for the EVO-X was pretty short: a footrest would be appreciated on a dedicated camp recliner like this, and at 14 pounds, this chair is better suited for close-to-the-car camping where you won’t have to lug it around too much. Even still, the updated Stargaze EVO-X is a winner, and an excellent improvement on a now classic camp chair.

(Photo/Karuna Eberl)

Most Stable Camp Chair

  • Comfort
    9.0
  • Portability
    7.0
  • Capacity & Stability
    9.0
  • Ease of Use
    8.0

  • Weight: 13 lbs.
  • Dimensions: 38" x 20" x 38"
  • Cupholders: Two mesh cupholders
  • Pockets: Two hanging side pockets
  • Weight Capacity: 800 lbs.

Pros

  • Extremely sturdy at a rated 800 lb. capacity
  • Backpack-style carry case included
  • Not lacking in storage with two pockets and two cupholders
  • Impressive company support for replacement parts

Cons

  • Heavier than most chairs at 13 lbs.
  • Fabric not immune to fraying with extensive use

If you’re worried about your camp chair blowing away, this robust chair is your go-to choice. The ALPS Mountaineering King Kong ($100) has a heavy, rigid frame, and with super sturdy, tough feet, this chair is unlikely to topple over.

It’s the outsized weight capacity that got my attention first on this chair — 800 pounds is above any other camp chair I’ve encountered so far, even the sturdy YETI Trailhead that tops out at 300 pounds. The powder-coated steel frame and 600D quilted polyester sling are to thank here, as the design doesn’t take any special departure from other chairs.

Besides the impressive capacity, the King Kong also comes specced out with a number of niceties: Two pockets hang off each armrest, and the uppermost section on the backside of the chair back has a full-width hanging mesh pocket for miscellaneous stashes. With an adjustable fit, the angles of the arms can be tinkered with via two buckles — something that lesser chairs leave to the friction fit of the arm connection points.

I’ve also found company support for this chair to be above and beyond. After nearly 5 years of hard use, the seat fabric had begun to fray at the binding, and it was only an exchange of emails or two in order to have a discounted replacement seat sent out. Very nice.

This chair is one of the most supportive, stiff options out there, which is great if your back is achy or for folks who prefer an upright brace. The King Kong chair back is also relatively high, and I really appreciate that extra backing when feeling tired. Plus, the seat is deep, reinforcing hamstrings.

My budget pick, the Coleman Broadband Mesh Quad Chair, also has a supportive, upright back and could be a good alternative for those who want to shell out less cash.

If you don’t mind hauling a heavier-set chair in and out of your rig or on a short walk to the park, this is an excellent option, especially for breezy weather. If you do mind, the REI Co-op Campwell Chair is a similar design, weighing 3 pounds less. A shoulder bag with two backpack-style shoulder straps on the King Kong makes the trek easier, though. While a bit pricey, it’s one of the best camping chairs you can buy.


Best Campsite 'Couch'

  • Comfort
    10.0
  • Portability
    6.0
  • Capacity & Stability
    9.0
  • Ease of Use
    8.0

  • Weight: 17 lbs.
  • Dimensions: 59" x 31.5" x 27"
  • Cupholders: Two insulated cupholders
  • Pockets: None
  • Weight Capacity: 400 lbs.

Pros

  • Enough space for campfire snuggling
  • Adjustable cupholders for small or large beverages
  • Quilted seat fabric is lightly insulated
  • Now comes with two insulated blankets

Cons

  • Heavier at 17 pounds
  • Bulky to pack out to far campsites

The Kelty Discovery Low Loveseat Nest ($150) is the spruced-up version of our favorite camp couch with a fresh twist: a set of insulated blankets to snuggle up under with your camp compadres. While the ‘campsite couch’ idea isn’t the only option on the market, this is the one we keep having to fight our friends over for a spot in.

First, what’s remained the same: The 59″ wide seat is wide enough for two campers to park it, and the steel frame is strong and can handle up to 400 pounds. The quilted fabric is pliable, which is nice for multiple people sharing the same seat.

I like that the seat is slightly reclined for comfort, and I found the shorter 19″ height allowed for a more relaxed lounge. But tall couples may prefer the standard loveseat, which is a few inches taller off the ground. Small details also didn’t go untouched: The armrest cupholders have a divider so you can fit both larger and smaller bottles or even insulated mugs with handles.

And the new blankets? They’re certified cozy. They stow beside the chair with some quick toggles, deploy separately, and are even machine washable. We enjoyed many nights under the stars under these blankets, and their inclusion helped hedge against accidentally leaving camp hang-out insulation at home.

The addition of the blankets does raise the cost to $150 compared to $130 for the previous version, but I think they’re worth the money. Although it certainly isn’t the lightest chair on the list at nearly 16 pounds, I was still impressed with how easily it packed up. The Low Loveseat Nest rolls into a separate padded roll that buckles together like many tool or knife rolls.

You wouldn’t want to hike any distance with this, but for campfire nights or outdoor concerts, the Low Loveseat Nest is a top pick. Looking for a comfortable low seat, but don’t have a boo to share it with? The ENO Lounger DL Chair is a good choice with its comfy, low-slung seat.


Best Beach Camping Chair

  • Comfort
    7.0
  • Portability
    7.0
  • Capacity & Stability
    8.0
  • Ease of Use
    7.0

  • Weight: 7 lbs.
  • Dimensions: 20.5" x 25" x 23.5"
  • Cupholders: Available as accessory
  • Pockets: One stretch mesh
  • Weight capacity: 225 lbs.

Pros

  • Impressive rigidity for an inflatable
  • No moving parts to break or wear out
  • Simple to wash down
  • Stable to sit on most anywhere

Cons

  • Requires specialty pump to inflate
  • Can be a bit of a bear to pack away

This ain’t your grandpappy’s woven shore chair. Full inflatable, collapsible, and beach-able, the BOTE Aero Chair XL ($229) has turned the idea of the ideal beach camping chair on its head, and makes use of the same drop-stitch technology that inflatable stand-up paddleboards use in order to support entire days of kicking back in the sand.

The beach can be a pretty rough place for a traditional camp chair. Saltwater rusts hinges and legs, harsh UV degrades woven fabrics at an accelerated rate, and sand finds its way into any and all crevices. The Aero Chair’s monolithic design and PVC material shrug off all of this treatment.

Inflating is a cinch, and while the recommended max PSI of 10 was a bit too firm, the lower end of 7 PSI provided the slight cushion that won me over. The seat is low-slung, with a seating position ideal for digging your toes in. Because the legs are really rails, there’s no tipping when the ground isn’t level. I also dragged this chair from the beach to the forest and didn’t have any concerns with punctures. This seat is tough.

And for the curious: While the Aero Chair is inflatable, it isn’t balanced enough to float on in an upright position. Trust me, I tried. Best to plop this seat down in the whitewash where it’ll stay put.

The need for a special pump is certainly a ding, but for those who already own an iSUP or something similar, it’s an easy pivot. The only other thing I could complain about is the need to purchase the cupholder separately, which, when the chair is already a few bills, was a bit of a bummer.

But still, when compared to faded and ratty folding beach chairs, I’m never going back. The Aero Chair XL is just about the best thing going when it comes to kicking back in the sand.


Best Heated Camping Chair

  • Comfort
    8.0
  • Portability
    6.0
  • Capacity & Stability
    7.0
  • Ease of Use
    7.0

  • Weight: 12 lbs., 4 oz.
  • Dimensions: 28" x 28" x 37.5"
  • Cupholders: One insulated
  • Pockets: Underseat pocket
  • Weight Capacity: 280 lbs.

Pros

  • Warm, heated back and seat
  • Comes with 10,000 mAh battery bank
  • Heat adjustable from a phone app
  • Nice reclined back

Cons

  • Bulky packed size
  • Can be tough to get hands on

Bluetooth connectivity in a camp chair? Yep, we’re there, and the KUMA Aurora Heated Chair ($200) uses it to dial in the warmth you’re receiving to your backside. This camp chair is truly one of the most techy out there, and if you can get your hands on it, it’s a worthy spot to plant it for the night.

Heated camp chairs aren’t new, but integrating an app to control the heat level certainly is. The Aurora sports two heated zones in the seat and chair back to keep you toasted when temps dip, and the app can dial in the heat with 10 different levels. A 10,000 mAh battery pack comes with the chair, and can even juice up your phone if need be.

In practice, I found that the Aurora will run for about three nights in a row on a single battery charge, which was pretty impressive. Thankfully, the chair can still be operated without the app, although you’ll be limited to just three heat levels (Low, Medium, and High). 

The Aurora offers great comfort besides the heated experience. It closely mimics the brand’s Lazy Bear Chair, which has a broad padded sling and a high back that makes sitting back super comfortable. However, the chair’s collapsed size is a bit bulky, and the included cinch strap is necessary to reduce it to a packable size.

The rapid discharge rate of the battery bank makes us question the overall longevity of the included battery bank (I’ve got around 20 charge/discharge cycles on it so far, with no drop off yet), so we’ll continue to test and watch for overall durability. 

It’s also tough for campers in the States to get an Aurora Heated Chair, as tariff confusion has limited the Canadian company’s supply. But if you can find one, this is one comfy camp chair.

(Photo/Nick Belcaster)

Other Camping Chairs to Park It In

The seven camping chairs I’ve awarded above are excellent options for just about anyone (or any adventure), but they’re far from the only seats out there. Before you make your choice, check out the lineup of camp chairs ranked highly below. They might not be the best of the best, but they’re solid options and might be the best for you.

  • Comfort
    8.0
  • Portability
    7.0
  • Capacity & Stability
    9.0
  • Ease of Use
    8.0

  • Weight: 11 lbs.
  • Dimensions: 25 " x 36 " x 39"
  • Cupholders: One cupholder
  • Pockets: One smaller phone sleeve
  • Weight Capacity: 250 lbs.

Pros

  • Great rocking motion
  • New higher backrest
  • Compact packed size for a rocking chair
  • Not a bad price for the tech involved

Cons

  • Fairly heavy
  • No insulation in seat

This chair rocks, literally, making the GCI Outdoor Comfort Pro Rocker ($70) unique from any other chair in this lineup. Beyond that novelty, though, it’s also outstandingly comfortable, with a sturdy overall feel, breezy mesh panel, and a high back for good support.

The rocking aspect might sound like a front porch novelty, but beyond adding entertainment, it brings versatility to the activities this chair excels in. You can kick back and watch the stars in it, or use it as a more upright seat for eating and table activities. Camper Karuna Eberl found that it’s also great for people with knee problems since the rocking action makes it easier to get in and out of.

Additionally, on the comfort front, Eberl found the shape and seat height to be comfortable for a range of people with very different body shapes, which is somewhat unusual for a camp chair.

Also, the rocking action works well for both lighter-weight and heavier campers (it can accommodate weights up to 250 pounds). On the downside, that means that we’re always in competition for who gets to sit in it.

This is a newer version of the company’s beloved Freestyle Rocker. Differences include a higher backrest (24” versus 17.5”) and a more laid-back seating angle on the Comfort Pro. GCI still makes the Freestyle Rocker, plus several other rocking models, including those with flat-fold designs.

Rounding out the features on the Comfort Pro Rocker are a built-in carry strap, drink holder, phone pocket (though only big enough for small smart phones), and a lot of wild color choices.

Eberl’s only complaint is that it’s a bit of a lunker. Those spring-action rockers add some weight, topping the scales at 11 pounds total for the chair. But it has a quad-fold design, which means it doesn’t take up an excessive amount of room. The folding action is also a little stiff, but it gets easier as it breaks in over time. If you’re in a chilly location, bring a blanket to keep the breeze from freezing your backside.

All in all, the Comfort Pro Rocker is a really comfortable chair for every occasion, from car camping to concerts on the grass. It’s also priced quite reasonably for the quality and the rocker feature. We’ve used it for eating meals, watching the alpenglow, and typing away on the laptop.


  • Comfort
    7.0
  • Portability
    9.0
  • Capacity & Stability
    7.0
  • Ease of Use
    7.0

  • Weight: 3 lbs., 4 oz.
  • Dimensions: 38" x 28" x 23"
  • Cupholders: Optional add-on
  • Pockets: Two stretch mesh on right side
  • Weight Capacity: 320 lbs.

Pros

  • High-back design
  • Very compact packed size
  • Impressive weight-capacity for the design
  • Headrest flap can be stuffed fro added comfort

Cons

  • Cupholder only available as an add-on
  • No armrests

At 3.5 pounds, the Helinox Sunset Chair ($170) is easily the lightest camp chair in the lineup and borrows heavily from the brand’s backpackable options. With a much more supportive high-back design than anything you could toss in your daypack, however, the Sunset has comfort for entire evenings of lounging.

Setting up in the same style as the backpackable Helinox Ground Chair and Chair One, the DAC aluminum poles clack together in seconds, and timing myself, I could snap this chair together in 30 seconds flat — so don’t let the DIY nature steer you away. 

The seat is a deep swaddle to settle into at camp, and while it doesn’t incorporate any padding, you can stuff the storage sack with a few soft items (I used a down puffy) and nestle that into a sleeve behind the neck for some extra support. Very nice.

You won’t find an integrated cupholder on the Sunset (minimal, remember?), but one is available as an add-on that snaps into place. On-chair storage is pretty sneaky (many didn’t even realize it existed) and comes in the form of two stretch-mesh pockets that cling tight to the right side. Big enough for your phone, headlamp, and keys.

What’s the rub with the Sunset? Well, the armrests — or rather, the lack thereof, and the desire to still rest your arms on something. This led to some uncomfortable imprints in my forearms where the binding on the seat pressed into them. Eventually, I got the picture, but old habits die hard, and it’s a little annoying in the meantime. If this proves untenable, the ENO Lounger DL Chair is a similar option with some padding. 

If your camping load is becoming a bit too hefty to contend with, the Helinox Sunset Chair is a keen way to trim down on the bulk while still bringing comfort along with you. Its size isn’t even too big to bring on the occasional day hike, so consider it a multi-purpose item.


  • Comfort
    7.0
  • Portability
    8.0
  • Capacity & Stability
    7.0
  • Ease of Use
    7.0

  • Weight: 4 lbs.
  • Dimensions: 24.5" x 26.5" x 16.25"
  • Cupholders: Single pocket serves as a cupholder or as a pocket for small trinkets in the right armrest
  • Pockets: No additional pockets
  • Weight Capacity: 125 lbs.

Pros

  • Light, portable mini version of the adult chair
  • 4 pound weight isn't too heavy for tikes to carry themselves
  • Locking mechanism prevents chair from shifting

Cons

  • Best for kids 9 and under

Make s’more time even more fun for your kids with this pint-sized REI Co-op Camp Chair – Kids’ ($40). Our little campers love that they can carry their own chair and easily climb in and out of it without help. This design remains a top seller for kiddos.

At 4 pounds, it’s light enough for even young children to drag into place. And with a seat height of 11 inches off the ground, it works well for a range of children. The kid testers in our group especially seemed to like having a miniature version of the adult chairs around the fire.

Thankfully, this chair has a locking mechanism that keeps it from shifting as young ones wiggle around in it. It’s also easy enough for small fingers to operate once it’s time to pack up camp. There are even round pinch guards where the chair folds together to ensure that nobody gets nipped accidentally, and this kind of thinking really puts this chair above the rest when it comes to camping with tykes.

It proved impressively sturdy and stable as well, even as a 3-year-old repeatedly climbed in and out. We found that it was best for kids under 9 years old, but that will depend on each kid’s height and weight. The taller and heavier they are, the more comfortable a bigger seat like the Campwell Chair will be. Overall, we’re confident it’s the best camping chair for kids.


  • Comfort
    8.0
  • Portability
    7.0
  • Capacity & Stability
    8.0
  • Ease of Use
    7.0

  • Weight: 9 lbs., 6 oz.
  • Dimensions: 32" x 28" x 24"
  • Cupholders: None
  • Pockets: Single back of chair
  • Weight Capacity: 280 lbs.

Pros

  • High-quality materials and design
  • Comfortable sitting angle
  • Zip-up carrying bag

Cons

  • No cupholders
  • A bit on the heavier side

While better known for its excellent coolers, Dometic has expanded its range to include smart car camping accessories, and the Go Compact Chair ($150) is no exception. This elegant camp chair leverages a stout aluminum frame, beechwood armrests, and a stylish design to become one of the best-looking camping chairs I’ve seen.

Springing from a sleek clamshell-open carrying sack (much nicer than drawstring bags), the Go Compact Chair was a breeze to set up in testing — unfolding quickly with a single motion. The aluminum frame utilizes strong hinges and presents no pinch points that you could easily snag yourself on. Rounding out the chair is a 600-denier fabric that is a tough weave and liable to stand up to abuse for many campouts.

The angle of the seat is a laid-back bucket that’s certainly made for lounging, though it isn’t so deep as to limit your hotdog-roasting abilities. Some of our shorter-legged campers did find that the outer edge of the seat was a bit taut, and that this could pinch the backs of their legs from time to time. This was the main reason this chair didn’t receive universal approval in testing, though the incidence was fairly rare.

All that style will come with a bit of a functionality ding, as well, and while the Go Compact does sport a large pocket on the back of the chair, it doesn’t have any cupholders to speak of, so you’ll have to find a coozie for that frosty beverage. That being said, those of us who loved it loved it, and the extra dollars that go into its construction will mean that the Go Compact chair will be around for many years into your camping future.

For a chair that’s very similar in design, consider the REI Co-op Wonderland, which slides in at a bit less weight and $50 less out the door. But if you’re a sucker for the OG, the Dometic Go Compact has all the style you’ll need.


  • Comfort
    8.0
  • Portability
    9.0
  • Capacity & Stability
    7.0
  • Ease of Use
    7.0

  • Weight: 5 lbs., 8 oz.
  • Dimensions: 37" x 32" x 23"
  • Cupholders: Single hanging cupholder
  • Pockets: Two elastic sleeve pockets
  • Weight capacity: 300 lbs.

Pros

  • Comfortable sitting position
  • New mesh back version is more breathable for warm days
  • Padded armrests and head pillow
  • Two elevated sitting heights

Cons

  • Complicated to set up
  • May be too low for some campers

Hammock hangers rejoice; this is the camp chair for you. The ENO Lounger DL Mesh ($150) slings low and cradles you when you sit down, making for one very comfortable seat. And it’s no one-trick pony either, with impressive storage pockets, a lightweight and compact design, and a hefty 300-pound weight limit.

The design sits somewhere in between a camping and a backpacking chair, and its name gives away precisely what this chair is made for: lounging. A breathable, water-friendly mesh seat and back also make it a good choice for a hot day at the beach or river. Add in the hammock-inspired swaddle and padded head and armrests, and it’s siesta time.

The Lounger DL Mesh is as comfortable to carry as it is to sit in. It has backpack straps and an aluminum frame weighing 5.5 pounds (which makes it the second-lightest adult chair in the lineup, just behind the Helinox Sunset Chair). The frame assembles with shock cord construction, so it might take a couple of minutes to figure out how to set it up for the first time, but after that, it’s only a 30-second job.

The chair itself is height adjustable with a high and low option, allowing you to accommodate terrain differences. It also brings an impressive amount of storage space, which comes in the form of two stretch elastic cargo pockets big enough to fit a tablet (in the same style as the Helinox Sunset Chair) and a single hanging cup holder. This storage ability surpasses many of the other camping chairs we’ve tested to date.

If you want a warmer version of this chair, ENO makes a non-mesh version, the Lounger DL. While the Lounger is a chilling-out champion, I found it a little too laid-back to be the perfect all-around camp chair (for similar reasons as the NEMO Stargaze EVO-X). If you tend to spend time sitting at a table eating or playing dominoes, you might get weary of leaning forward to get to the action.

Otherwise, it’s a perfect, compact, lightweight-yet-sturdy choice for kicking back after a long day on the trail, or even setting up for an afternoon concert. The Lounger DL Mesh chair was easily one of the most comfortable camping chairs I’ve tested to date.


  • Comfort
    8.0
  • Portability
    7.0
  • Capacity & Stability
    9.0
  • Ease of Use
    8.0

  • Weight: 13 lbs.
  • Dimensions: 29.9" x 36.3" x 25.1"
  • Cupholders: One below the right armrest
  • Pockets: None
  • Weight Capacity: 500 lbs.

Pros

  • Durable all-metal build
  • Comfortable
  • Super stable platform
  • High weight capacity

Cons

  • Heavy at 13 pounds
  • Expensive

Read Review: Car Camping Comfort, Pain in the Bank: YETI Trailhead Camp Chair Review

Let’s get this out of the way first: this isn’t the cheapest chair. But if you’re looking for an incredibly comfortable, durable, and stable chair, you’re in the right spot.

At 13 pounds, the top-rated YETI Trailhead ($300) falls in the middle ground of acceptable camp chair weight. The FlexGrid fabric is uniformly supportive and UV-resistant. It’s also pleasantly breathable on hot days.

It folds up easily and packs into a carry bag complete with backpack straps. The Lockdown feature on the back of the chair ensures it won’t accidentally fold up on you. And we like the wide, grippy feet.

In addition to camping, we’ve used this chair for many months as a daily office spot. It shows no signs of wear, and we’ve been comfortable throughout. In our minds, this would be the chair to invest in kitting out the lake cabin with: it’s robust, comfortable for dang-near anyone, and will be around long into the future.

It may be overkill for a quick, casual campout, but if you want a super-comfortable, super-stable chair, the Trailhead is it. While it doesn’t look as sleek, the REI Co-op Campwell Chair is another fantastic, breathable, packable option, although its weight capacity is a whole 200 pounds lighter than the YETI.

When grilling out with Grandpa or offering Mom a spot to relax by the fire, this is the chair we reach for. It’s one of the best camping chairs money can buy.


  • Comfort
    8.0
  • Portability
    7.0
  • Capacity & Stability
    8.0
  • Ease of Use
    8.0

  • Weight: 7 lbs., 13 oz.
  • Dimensions: 21” x 24” x 35”
  • Cupholders: One that swivels out under right armrest
  • Pockets: None
  • Weight Capacity: 300 lbs.

Pros

  • Design-forward
  • Versatile
  • Comfortable, high seat

Cons

  • Bulky
  • Heavy
  • Expensive

The new REI Co-op Wonderland Chair ($100) elevates the average camping chair to the next level. Absent are the mesh and metal construction of your run-of-the-mill camping chair, and in their place is a design-forward, comfortable camping chair with sturdy construction, pleasing colorways, swivel-out cupholder, and glazed wooden armrests. 

It’s clear that this chair is made with high-quality materials. Its recycled polyester seat fabric is also treated with a durable water-repellent finish, allowing it to stand up to the elements. Its frame is constructed of coated aluminum to keep the total weight of the chair down, and the chair feels sturdy and well-constructed overall. REI boasts a 300-pound weight capacity to boot. 

Weighing 7 pounds, 13 ounces, this isn’t the lightest camp chair on the market. It is large and arguably cumbersome, and it takes some time to get used to figuring out how to collapse it with its strap.

The Dometic Go Compact Chair is a slightly smaller chair with a similar design, but it admittedly lacks the features that come with the Wonderland. It does come with a sleek carrying sack, however, which could be preferable to messing with the strap system of this chair.

Although the Wonderland has a high price tag and is a bit on the bulky side, I loved this chair for its versatility. It can complement your patio, be taken to the beach, or deployed by the campfire on your next overnight stay. 


Camping Chair Comparison Chart

Camping ChairPriceWeightDimensionsCupholdersPocketsWeight Capacity
REI Co-Op Campwell Chair$608 lbs., 2 oz.31″ x 31.2″ x 20″One pear-shaped cupholderOne drawstring pocket300 lbs.
Coleman Broadband Mesh Quad Chair$306 lbs., 4 oz.35.8″ x 31.1″ x 21.3″One mesh cupholderNone250 lbs.
NEMO Stargaze EVO-X$18014 lbs., 12 oz.29″ x 37″ x 41″Two integratedNone300 lbs.
ALPS Mountaineering
King Kong
$10013 lbs.38″ x 20″ x 38″Two mesh cupholdersTwo hanging side pockets800 lbs.
Kelty Discovery
Low Loveseat Nest
$15017 lbs.59″ x 31.5″ x 27″Two insulated cupholdersNone400 lbs.
BOTE Inflatable Aero Chair XL$2297 lbs.20.5″ x 25″ x 23.5″Available as accessoryOne stretch mesh225 lbs.
KUMA Aurora Heated Chair$20012 lbs., 4 oz.28″ x 28″ x 37.5″One insulatedOne underseat280 lbs.
GCI Outdoor Comfort Pro Rocker

$7011 lbs.25 ” x 36 ” x 39″One mesh cupholderOne smaller phone sleeve250 lbs.
Helinox Sunset Chair
$1703 lbs., 4 oz.38″ x 28″ x 23″Optional add-onTwo stretch mesh on right side320 lbs.
REI Co-op Kids’
Camp Chair
$404 lbs.24.5″ x 26.5″ x 16.25″Single pocket in the right armrestNo additional pockets125 lbs.
Dometic Go Compact Chair
$1509 lbs., 6 oz.32″ x 28″ x 24″NoneSingle back of chair280 lbs.
ENO Lounger DL Mesh

$1505 lbs., 8 oz.37″ x 32″ x 23″Single hanging cupholderTwo elastic sleeve pockets300 lbs.
YETI Trailhead
Camping Chair
$30013 lbs.29.9″ x 36.3″ x 25.1″One below the right armrestNone500 lbs.
REI Co-op
Wonderland Chair
$1007 lbs., 13 oz.21” x 24” x 35”One that swivels out None300 lbs.
No matter the season or the reason, there’s a camp chair to settle down into; (photo/Miya Tsudome)

How We Tested the Best Camping Chairs

For half a decade now, we’ve been parking our behinds in camp chairs of every stripe, looking for the best seat in the house for kicking back in the great outdoors. Since 2019, we’ve personally researched, toted, and tested close to 25 different camping chairs in the wilds, comparing each and weighing their specifications against our idea of the perfect seat.

Our travels have taken us from the dark understories of the temperate rainforests of Olympic National Park to the granite crags of Southern California, and after a hard day of playing in the dirt, a good seat makes all the difference.

But it’s not just our opinions, either. We polled our crew to determine their absolute favorite camp chairs and why. We gather every year for a group campout to test a new collection of camping chairs side by side, and we use these camp chairs throughout the year, from season to season and sport to sport.

(Photo/Miya Tsudome)

Our Testing Process

The majority of our camp chair testing takes place exactly how you think it might: with butts in seats around the campfire. We’ve also used these chairs while crewing ultramarathons and enjoying slam poetry and concerts at the park, as well as at home for outdoor birthday parties and sitting around portable fire pits. Anywhere you could imagine toting a good chair for the occasion, we’ve made it happen and compared notes on relative performance.

Of the important metrics I look at, ease of set-up is primary among them, as a difficult-to-assemble camp chair is quickly sidelined for something easier to get into. Beyond set-up, our team also compares notes on general comfort, beverage and essentials storage, and ease of transport. Every chair is rotated around to our selection of experts, as well to ensure that a variety of body shapes and sizes have had their fair share of time in each seat.

I also take a hard-data approach here as much as we do with any other type of kit, and have pulled together a few in-house tests to ensure that manufacturer claims are confirmed. Primary among them is an honest weigh-in, as well as measuring important metrics such as seat height and packed sizes.

Before we’re through with them, these chairs also have their stated weight capacities challenged, a not-so-easy task when it comes to some of the more stout chairs out there (and a test that has resulted in at least one catastrophic failure). Piling in plate weights and then ourselves, we’re happy to announce that dang-near every chair so far has met the challenge up to their claimed capacity.

GearJunkie Testers Sitting Around the Campfire
GearJunkie editors sitting around the campfire; (photo/Eric Phillips)

Our Expert Testers

Primary testers for this guide are Miya Tsudome, Karuna Eberl, and myself, Nick Belcaster — all consummate outdoors folk from various ends of the West. Tsudome has over 10 years of experience with testing outdoor equipment and covers the California side of the equation, camping and adventuring around the Sierra Range for much of the year. Her search for the best camping chair out there has her testing new additions on a rolling basis.

Eberl hails from the Colorado High Country, and grew up living in a tent and chasing her mountaineer father up the side of mountains. Decades later, the outdoors part of her life hasn’t changed much, except that she eventually convinced Dad that it’s more fun to have a chair to sit in at basecamp, and now he brags on endlessly about his GCI Outdoor Rocker. 

I, Senior Editor Nick Belcaster, hail from Washington State and, after a long walk on the Pacific Crest Trail in 2018, am pretty ready to kick back in a comfy seat. Our camp chair testing team pulls together all of our experiences to form one opinion on what seats are worth the money and which are better left on the shelf.

(Photo/Miya Tsudome)

Our Camp Chair Rating System

I’ve identified four different rating metrics that each camp chair can be scored on, and can be compared side by side to see where these seats stack up.

Comfort

Comfort is king in camp chairs, and I value it the highest when comparing these different seats. Our testers are all different sizes and statures, and we aim to get a balanced opinion on comfort, including cushioning, seat height, armrest angles, and more.

Portability

While not as important as in backpacking chairs, the ease of portability is important in camp seating, and I look for a compact packed size, an easy carry solution — whether that’s a shoulder sling or stuff sack — and a weight that doesn’t wear us out too quickly while porting the chairs around.

Capacity & Stability

The weight capacity of any camp chair should be enough to fit your average camper, plus some wiggle room to ensure everyone has a seat at the camp table. I also judge stability over uneven ground, and look for adjustable feet, robustly constructed legs, and a seat that ties into the frame firmly.

Ease of Use

Finally, the overall ease of use is a crowd-sourced metric from all of our camp chair testers, who are asked to rank these seats based on how simple they are to assemble, stash essentials and drinks in, and put away at the end of the trip.

Buyer’s Guide: How to Choose a Camping Chair

Man Sitting In ENO Lounger DL Chair in Joshua Tree National Park
The low-slung style of the ENO Lounger DL makes it perfect for kicking back after a long day; (photo/Nick Belcaster)

Here are the primary factors I use when testing camp chairs. Scroll through to help ensure that you pick the best camping chair for your individual needs. I’ll note that these choices are specifically for kicking back during car camping and the like. If you’re looking for a more packable and lightweight option, take a look at GearJunkie’s in-depth review of backpacking chairs.

Comfort

Nobody wants an uncomfortable camping chair. When considering comfort, I looked at seatback height, width, height off the ground, materials, amount of cushion, rigidity versus flexibility, overall shape, and ergonomics. Comfort varies from person to person and depends a lot on your size, build, and mobility.

If you’re looking for a traditional chair, the ALPS Mountaineering King Kong sports a pleated seat that was high on my list of the most comfortable. And for a slung-back style of chair, look no further than the hammock-inspired builds of the NEMO Stargaze EVO-X and ENO Lounger DL Mesh.

Weight and Packed Dimensions

Folding camp chairs won’t be the most compact, but oftentimes will sport backpack straps to make for an easier carry; (photo/Miya Tsudome)

This is paramount if you’re backpacking, semi-important when packing the rig for car camping, and not very important when setting up in the backyard. Camping-style chairs won’t pack up as small as backpacking chairs, but will typically collapse to a more travel-friendly form for moving around.

Traditional collapsible chairs like the REI Co-Op Campwell or Coleman Broadband Mesh Quad Chair have a classic stow technique that most everyone has seen before and only require a simple pulling together of the legs to collapse down into a more compact package.

Then, there are folding-style chairs like the GCI Outdoor Kickback Rocker Chair, which fold along a central axis and create a flat package for moving about. And finally, there are the DIY-style chairs, such as the ENO Lounger DL Mesh, where some assembly is required, though at a great benefit to overall packability.

Carrying the REI Co-op Wonderland Chair
It’s nice to have a strap or bag that accompanies your chair, like on the REI Co-op Wonderland, for easier transport; (photo/Miya Tsudome)

Carrying Style

When considering the packed dimensions, also consider how exactly you’re going to be toting your favorite camp chair around. Many are familiar with the fabric sleeves that encase collapsible chairs for travel, but there are few other options available.

Folding-style chairs typically don’t come with a carrying bag, so you’ll have to wrestle them around yourself. Collapsible chairs, like the ENO Lounger DL Mesh, will come with a bag that packs away everything needed to set them up once you hit camp. Finally, a few chairs, such as the REI Co-op Wonderland, will sport integrated straps directly on the chair for shouldering them.

Ease of Setup

Testing the Best Camping Chairs of 2023
Camping chairs range from small and packable to large, yet comfortable; (photo/Eric Phillips)

No one wants to spend 20 minutes fighting to set up their camp chair — or worse, trying to wrangle it back into its carrying bag. I want to be able to set up and take down the chair without instructions or excessive time dedicated to the task.

All of the chairs included here are easy to set up. Some simply fold open, whereas others take a couple of minutes to assemble. The NEMO Stargaze EVO-X used to take some significant time, but has now been updated to be quick and easy. We were able to do it without reading the directions, and the tradeoff for the fun rocking chair feature is worth it.

I wish the REI Co-op Wonderland were a bit more intuitive to fold out, but once you figure out its strap system, it won’t take much time at all. And it’s hard to deny the ease of inflating the BOTE Inflatable Aero Chair XL, which pumps up in minutes.

Height

Camp Chairs at Sunset
Various camp chairs gathered at camp during sunset; (photo/Eric Phillips)

The height from the ground to the bottom of the seat is an often-overlooked yet extremely important consideration. This dictates not only how bent your legs will be but also makes a chair easier or more difficult to get out of. While most chairs don’t offer multiple heights, I will note that the ENO Lounger DL Mesh does — with the choice of deploying either 3- or 10-inch legs.

In general, those with knee issues or mobility concerns will have an easier time getting out of taller chairs. If you fall into that category, consider something like the Coleman Broadband Mesh Quad Chair or the YETI Trailhead.

Stability

Sitting around the campfire should be a relaxing time. And that means not having to worry about falling out of your chair (especially if you’re enjoying a few campfire cocktails) or the chair toppling over when you move to get out of it. A wider leg base provides extra stability but often comes at the cost of weight and pack size.

Besides a wide base, also look for broader feet at the end of those legs. These will better distribute the load across the surface you’re sitting on and will avoid sinking into soft soils.

Feature Set

Cupholders and Stash Pockets on the REI Co-op Skyward Camp Chair
Cupholders are great, and pockets are even better. We love the stash pouch on the REI Co-op Campwell, which is the perfect size for our phone and keys; (photo/Miya Tsudome)

Drink holders, pockets, carrying bags, armrest coolers, user-adjusted heat settings, and more — these extra features may seem inconsequential, but they can help take a camp chair from OK to awesome.

When I’m looking for a good camping chair, I like to balance the features it has with the overall complexity. It’s easy to pile on extra features, but annoying to have to extract yourself from a cocoon of cupholders, pockets, and straps. In general, one cupholder will do you, as well as a single accessory pocket to securely stash your keys.

Whether you choose the tiniest camp chair, the biggest camp chair, the cheapest camping chair, or something in between, don’t forget what it’s really all about: getting outside. Throw a fresh log on the fire, pull up a chair, and enjoy an evening under the stars.

Proper beverage containment is high on our list of important features; (photo/Miya Tsudome)

Price & Value

Are you looking for a chair that works for both backpacking and camping? Do you plan to use it once a month, once a week, or every day? These factors will all play an important part in finding the right camp chair for you.

These factors will also affect the price and can help you determine if it’s worth spending more for a chair that pairs comfort with packability (like the ENO Lounger DL Mesh). Or perhaps a budget pick like Coleman will suit your needs better without emptying the wallet. For the best of both worlds, we are partial to the top pick, the REI Co-op Campwell chair, which pairs an affordable price with comfort and quality.

Budget

While there are plenty of cookie-cutter cheap camp chairs out there, I find little reason to settle for these options when some smart shopping can net you a chair that’ll be more comfortable, last longer, and all at nearly the same price. Budget camp chairs will mostly be of the standard collapsible tube frame design, and make use of simple fabric seats with typically one integrated cupholder.

For less than $100, you can get into a real budget chair like the Coleman Broadband ($30) and still have plenty left over to snag a few more to pad out your camping furniture set. Even my best overall pick finds itself in this price range, and for $60, it’s tough not to recommend the REI Co-op Campwell.

Mid-Tier

Between $100 and $200, you’re generally paying for either higher quality materials and design or a specialist chair that aims to offer up something that most chairs don’t. For the money, you can slide into double seats, quilted or insulated seats, and reclining systems or adjustable heights.

The Dometic Go Compact Chair ($150) is a great choice in this price range, as you get a chair with a robust aluminum structure and beechwood armrests that feels more deluxe than budget models. The KUMA Aurora Heated Chair ($150), too, offers up a much deeper seat than most other chairs, and added electric insulation for colder nights.

Premium

For around $200, you can get the BOTE Inflatable Aero Chair XL, YETI Trailhead Camping Chair, or NEMO Stargaze EVO-X. This expensive category enters even more into the specialty category, with inflatable chairs and rocking recliners, or will get you high-quality materials and accessories such as UV-rated breathable fabric or included soft coolers and cupholders.

Consider these types of chairs if you’re looking to make a long-term investment, where you’ll get an extended amount of use out of the seat. The YETI Trailhead is a great straight-ahead camp chair for just about anything, while the BOTE Aero or NEMO Stargaze EVO-X are both experts in their fields and award-winners in their own right.

Man Sitting in REI Co-op Skyward Chair Around the Campfire
The REI Co-op Campwell is comfortable and versatile in a variety of outdoor settings; (photo/Miya Tsudome)

Frequently Asked Questions

What is the most comfortable camping chair?

The most comfortable camping chair varies from person to person and depends largely on your body type and height.

The REI Co-op Campwell is among the most comfortable — it’s malleable yet supportive but not too rigid. I also gave the YETI Trailhead extremely high marks for comfort and stability, although that does come with a price tradeoff. And if you want to lay back and take a nap, the GCI Zero Gravity chair is a winner.

How do I choose a camp chair?

First, think about how you’re going to use the chair. If you plan on backpacking or hiking into camp, then a small, lightweight chair will serve you best. If you’re car camping or hanging in the backyard, go for maximum comfort and features.

You may also want to consider your mobility and height. Lower chairs can be more challenging to get in and out of if you have knee issues or any other mobility concerns. Taller people also tend to prefer a chair with a bit more height to it.

Last, think about the features you would enjoy. Is a cupholder important? Or maybe you really want a rocking camp chair? Whatever it is, chances are you can find a camp chair that perfectly suits your outdoor-loving needs.

Birds eye drone view of campers, camp chairs, and tables
Choices, choices, choices; (photo/Eric Phillips)
Can camping chairs get wet?

Yes. All the camping chairs on this list can get wet. Some will dry more quickly than others, but none of them will be damaged by a little rain.

Do the weight and packed size matter for a camp chair?

The weight and packed size relate to how portable a chair is. For car camping, this mainly matters for fitting everything in your vehicle and carrying it short distances. The packed-down size can also be important for those with limited storage space.

If you’re spending a lot of time at the ball field, you may want a camp chair you can carry hands-free. Many of our top choices for camp chairs come with an included carry case for convenience. Most of those bags have a single strap to sling over your shoulder, but the ALPS Mountaineering King Kong carry-case has two backpack straps for even more aid.

If you plan to backpack or hike a longer distance with your chair, the weight and packed size are very important.

What should I look for when buying a camping chair?

First, consider the type of trips you’re looking to take your camp chair on. If you’re more of the light and fast type, you may be better suited to a backpacking chair. But if settling down in front of a campfire sounds like your type of evening, a camping chair is likely right up your alley. We will note that there are a few chairs on the market that will do both, and these can be considered if you want one chair to do it all.

Then, think about the type of relaxing you’re looking to do. Some chairs are more suited to reclining, which while the ideal angle for star gazing, likely isn’t going to work great for roasting marshmallows. A chair like the ENO Lounger DL Mesh is certainly among this camp, while the ALPS King Kong offers a more upright position.

Finally, consider the features you’re looking to use while camping. Some chairs offer ample storage, while others are particularly sparse. Some come with multiple cup holders, while others let you cradle your beverage.

The Best Camping Mattresses of 2025

13 August 2025 at 15:05

Thicker camping pads offer increased warmth and comfort; (photo/Matt Granger)

For more than a decade, we’ve unfurled, inflated, and caught well-needed shut-eye on the best camping mattresses. After considering more than 100 mattresses and running them through our field and bench-testing regimens, I’ve keyed in on the 15 models to cover any camping situation with, from casual front country weekends to dirtbag bivies in the back of your rig.

We all have different needs in camping mattresses, so while there isn’t a single option that will suit everyone, I’ve broken them up into categories to help you find the right one for you. The choices aren’t skin-deep, either — in total, our team of experts has put in more than 400 hours of slumber over the seasons testing the best camping mattresses and sleeping pads on the market.

Whether you’re after the ultimate camping mattress (I highly recommend our top pick, the Therm-a-Rest MondoKing 3D) or need a more budget-friendly option to get the family kitted out, like the $179 REI Co-op Camp Dreamer XL, there’s something here for everyone. Read on for my top choices, as well as some additional options to consider.

Editor’s Note: We updated our Camping Mattresses guide on August 13, 2025 to add the LUNO AIR Pro Vehicle Mattress, our new favorite car-camping option. We also added expanded ratings to each pad for more insight into our field testing process.

The Best Camping Mattresses of 2025

Best Overall Camping Mattress

Therm-a-Rest MondoKing 3D

9.1/10 Rating

Best Budget Camping Mattress

REI Co-op Camp Dreamer XL

6.3/10 Rating
BUY OPTIONS

Best Basecamp Camping Mattress

NEMO Roamer XL Wide

8.8/10 Rating

Best Double Camping Mattress

EXPED MegaMat Duo 10

8.0/10 Rating

Best Crossover Pad for Camping & Backpacking

Therm-a-Rest NeoAir Topo Luxe

7.3/10 Rating

Best Car Camping Mattress

LUNO AIR Pro Vehicle Mattress

8.0/10 Rating
BUY OPTIONS

Best Mattress for a Truck Bed

HEST Dually

7.0/10 Rating
See more picks

Best Overall Camping Mattress

  • Comfort
    9.0
  • R-Value
    9.0
  • Durability
    8.0
  • Weight & Packability
    8.0

  • Pad Type: Self-inflating
  • Sleeping Area: 77" x 25" (Large)
  • Weight: 5 lbs., 8 oz.
  • Packed Size: 10.3" x 26" rolled
  • R-value: 7
  • Thickness: 4.25"
  • Material: Polyester, open-cell foam

Pros

  • R-value of 7 is warm enough for winter use
  • 4.25" thickness is a bit more than most
  • Open-cell foam interior distributes weight well
  • Durable exterior fabric

Cons

  • Not as easy to inflate initially as other comparable pads
  • Tube-style stuff sack requires extra work to fit pad into

When you first lie down on the Therm-a-Rest MondoKing 3D ($250), you realize what you’ve been missing. There’s room to spread out, all the warmth you could need, and tons of foam padding. The vertical sidewalls enhance the sleeping space by 20%, so you can roll around without falling off. This mattress has held the top spot in our list for five years running, and I’m still unconvinced there’s a better option out there for most folks.

For one, Therm-a-Rest has the valve game dialed. Compared to the flap valves on most other pads, the dual valves make inflation easier. I also like the way it completely opens up for faster deflation. However, it will take a couple of times to roll it up tightly to fit in the carrying bag, which was one of the only issues with it.

The vertical sidewalls were also frequently mentioned in our testing notes, as they maximize the sleeping area on this 25″ (or 30″) wide mattress. The 4.25″ thickness almost feels a bit cheeky, as most other pads in this arena max out at 4″, but hey — I won’t turn down an extra quarter inch when it’s offered up. It makes for a comfortable sleep, and the R-value of 7 keeps us toasty well into the shoulder seasons.

In addition to comfort and warmth, this pad stood out for its long-term durability. Our team has used it for more than 250 nights now, passing it through multiple testers’ hands, and it’s still going strong. It’s withstood a rowdy, jumping toddler, lying directly on gravel and other variable surfaces, and constant adult weight-bearing throughout the night. Through it all, it’s maintained perfect inflation and comfort.

At $250 for the large, this pad falls between the Therm-a-Rest LuxuryMap and NEMO Roamer in price, matches them in comfort, and beats them in warmth and longevity. So, you’ll have to decide which factor is most important to you.

If you choose the MondoKing 3D, rest easy knowing you’ll be ultra cozy all night long, and can bank on comfort for future trips you’ve yet to imagine. Overall, it’s still the best camping mattress out there. Available in large and XXL sizes.

(Photo/Erika Courtney)

Best Budget Camping Mattress

  • Comfort
    7.0
  • R-Value
    7.0
  • Durability
    6.0
  • Weight & Packability
    6.0

  • Pad Type: Self-inflating
  • Sleeping Area: 78" x 30"
  • Weight: 6 lbs., 6 oz.
  • Packed Size: 30" x 11" rolled
  • R-value: 6.6
  • Thickness: 4"
  • Material: Polyester, open-cell foam

Pros

  • Budget pricing
  • Plush comfort
  • Easy to use inflation and deflation valves
  • Updated pump sack makes inflation a breeze

Cons

  • Large packed size
  • Doesn't come with a patch kit

Newly revamped back in 2023, the REI Co-op Camp Dreamer XL ($199) is back, still sporting all of the large and in-charge camping pad energy I loved in its previous iterations. At a plush 4 inches, this comfort-to-cost ratio on this budget pad is off the charts, and it lands itself high on my list for not only ultra-comfortable but also affordable, camping mattresses. With an R-value of 6.6, it’s got the warmth to keep you going far into the shoulder seasons.

Gone is the previous foam-filled pad pump that doubled as a pillow, and in its place is a new pump sack, which, in testing, I found to be an improvement in terms of speed and packability. The reversible high-flow valve is simple, and deflating the pad at the end of a trip is quite easy. If you want something that rivals the comfort of the MondoKing 3D or NEMO Roamer XL but clocks in for a few dollars less, this is the pad for you.

All of that plush comfort has to come at some cost, and here it’s packed size, which is pretty dang bulky. Though certainly not as much of a concern with car campers, you should remember to leave space for the mattress when you’re playing packing games to get everything to fit. For a budget pad that’ll take up less space (but not be as comfy), check out the REI Co-op Campwell Mattress.

Unfortunately, my time with the Camp Dreamer was cut short when my cat (who promises he is otherwise a very good boy) decided he also wanted to check out the cushion and put holes in the mattress. This is when I discovered that no repair kit ships with the pad, and had to make do with Tenacious Tape. Not a long-term fix and tough to get to adhere perfectly to the stretch polyester upper, but it got me through the rest of the camping trip.

Best for those who want a comfortable pad but don’t want to part with an arm and a leg for it, the Camp Dreamer XL has all the luxury with little of the cost typically involved. Just make sure to accommodate your clawed camp pals elsewhere for the evening.


Best Basecamp Camping Mattress

  • Comfort
    8.0
  • R-Value
    7.0
  • Durability
    6.0
  • Weight & Packability
    7.0

  • Pad Type: Self-inflating
  • Sleeping Area: 78" x 30"
  • Weight: 5 lbs., 8 oz.
  • Packed Size: 10" x 16" rolled
  • R-value: 6
  • Thickness: 4"
  • Material: 75-denier polyester, open-cell foam

Pros

  • Distributes weight well across sleeping surface
  • Durable exterior 75D fabric
  • Connects to another Roamer pad to create a queen-size mattress
  • Micro-adjust valves bleed air to fine-tune your comfort

Cons

  • Bulky packed size
  • Valve can develop leaks over time

Read Review: Your Home Mattress Away From Home: NEMO Roamer Double Review

Anyone who’s ever called their car home will appreciate the NEMO Roamer XL ($250). This is the ultimate adventure mobile mattress. It’s thick, warm, and it’s seriously comfortable. With 4 inches of open-cell foam, you can sleep soundly wherever home happens to be. If you’re settling in for the long haul at a remote base camp, the Roamer XL is the mattress to do it with.

As with most self-inflating pads, you’ll need to top it off for maximum comfort. But the micro-adjust valve makes it easy to add air without worrying about losing any. And gear tester Nate Lemin liked how the one-way valves make quick work of deflating the pad fully when it’s time to pack up camp.

Traditional air mattresses are thin and more susceptible to tears, but with the foam construction and a 75-denier polyester bottom, the Roamer XL is truly built to withstand camping outside. As an additional perk, the loops and toggles on the side allow you to connect two Roamers to create a two-person mattress.

While it’s not ultralight by any means, it packs down fairly small for the added comfort it offers (about the size of a winter sleeping bag, or 10 x 16 inches).

Our team has put this camping mattress through extensive use, and after more than 150 nights, it finally stopped holding air. The valves developed a slow leak that left us needing to top it off every night. For a permanent van or car dweller, it may not be ideal. But, for someone who car camps when exploring, we’d highly recommend it.

NEMO Roamer Double Sleeping Pad Hero
(Photo/Nate Lemin)
NEMO Roamer Double in Stuff Sack
(Photo/Nate Lemin)
NEMO Roamer Inflation
(Photo/Nate Lemin)
NEMO Roamer Double Sleeping Pad Hero
NEMO Roamer Double in Stuff Sack
NEMO Roamer Inflation

Best Double Camping Mattress

  • Comfort
    9.0
  • R-Value
    8.0
  • Durability
    8.0
  • Weight & Packability
    6.0

  • Pad Type: Self-inflating
  • Sleeping Area: 72" x 41" (Medium)
  • Weight: 9 lbs., 14 oz.
  • Packed Size: 11" x 22" rolled
  • R-value: 9.5
  • Thickness: 3.9"
  • Material: 50-denier nylon top, 75-denier polyester bottom, open-cell foam

Pros

  • Supremely comfortable
  • Durable construction
  • Doesn't translate movement between sleepers
  • Generous sleeping area

Cons

  • On the pricier side
  • Large packed size can be tough to pack
  • Heavy at near 10 pounds

Read Review: Mega Size, Warmth, & Comfort: EXPED ‘MegaMat’

When comfort is your main concern, the EXPED MegaMat Duo 10 ($370-520) is your answer. What it lacks in packed size and affordability, it makes up for in size and comfort with 4″ of foam and air cradling you and yours off to sleep. And while some double camping mattresses or sleeping pads perpetually send one partner for a ride when the other moves, the MegaMat Duo is stable and quiet.

As with all self-inflating pads, expect to top it off after heavy use. But instead of having to blow into it, you can use the included mini pump, which simplifies inflation and minimizes effort. It also includes a repair kit should you ever get a tear (although I’ve found it impressively durable).

One of my favorite things about this pad is how level it is. Some camping mattresses pop up in the middle when filled, but thanks to the 3D construction, this bad boy stays flat even when fully inflated and being slept on. At 77.6 inches long and 52 inches wide, the MegaMat is large enough to snugly fit two adults or spaciously sleep one. For reference, a double-size fitted sheet fits almost perfectly.

The durable sidewalls provide support, and as we noted, “The vertical sidewalls increase the usable sleeping surface. This small addition compared to other mattresses and pads is instantly noticeable.” Apart from adding comfort and space, these impressive sidewalls also help keep you dry in really bad weather. “During one stretch, Mother Nature pounded us with rain for 3 days straight. The height and larger surface kept me dry and warm even over wet ground.”

Not lightweight, you’ll certainly notice the heft of the MegaMat among your camping supplies — it’s easily one of the heaviest reviewed that isn’t a full foam mattress design. Along with that will be a bulky packed size, which makes this a camping mattress best suited for close-to-the-car endeavors.

Durable, comfortable, and stable — this is the ultimate camping mattress for two people. It’s also available as a single. If you don’t mind the weight, it’s one of the best camping mattresses you can buy.


Best Crossover Pad for Camping & Backpacking

  • Comfort
    7.0
  • R-Value
    6.0
  • Durability
    7.0
  • Weight & Packability
    9.0

  • Pad Type: Air
  • Sleeping Area: 72" x 25" (Regular Wide)
  • Weight: 1 lb., 7 oz.
  • Packed Size: 9.5" x 5.7" (rolled)
  • R-value: 3.7
  • Thickness: 4"
  • Material: 50-denier polyester, nylon

Pros

  • Sleeping platform is generous for solo use
  • Packed size rivals some backpacking sleeping pads
  • Internal structure limits the amount of bounce
  • TwinLock valves make for easy inflation and deflation

Cons

  • Non-vertical sidewalls mean less usable space
  • Durability will be less than other sleeping pads

Therm-a-Rest followed the winning formula of its NeoAir XLite and XTherm pads to produce its most luxurious NeoAir pad yet: the NeoAir Topo Luxe ($180-230). At 4 inches thick, it’s also easily the most comfortable and fills an interesting niche between camping and backpacking better than any pad I’ve slept on thus far.

When I initially tested the Topo Luxe, I had reservations. Typically, when a pure air mattress reaches a certain thickness, it suffers from waterbed syndrome — an ailment where any movement translates into a bouncy ride.

My fears, thankfully, were unfounded, largely thanks to Therm-a-Rest’s use of its Triangular Core Matrix: a double-stacked layer of baffles that stabilizes the pad across its length. Now, 3 years into testing, I can confidently say that the Topo Luxe is tough enough to hang.

Because it’s the same recipe as other NeoAir pads, it doesn’t sport vertical sidewalls, which can make for less usable space for sleeping on. The pad also uses 50-denier polyester across the top and bottom, which is a thinner material than some of the pads on our list and will need to be treated as such.

The Topo Luxe isn’t the only pad that rides the fence between the front and backcountry. You might also consider the NEMO Quasar 3D. This pad is a bit shy of the Topo Luxe in terms of pure specs (it’s half an inch thinner and a bit less warm), but it does sport a different construction that builds a gentle cradle into the sleeping surface. For some, this will be worth the switch, though we’ll caution that the valve is a bit finickier.

No one-trick pony, this pad even slips into our packs on shorter backpacking overnights, where we can indulge in a few luxury items. As a real master of two domains, the NeoAir Topo Luxe would make an excellent pad for those who split their time between the front country and the back or who want to simplify their gear closet.


Best Car Camping Mattress

  • Comfort
    8.0
  • R-Value
    5.0
  • Durability
    9.0
  • Weight & Packability
    8.0

  • Pad Type: Air
  • Sleeping Area: 2-person
  • Weight: 13 lbs.
  • Packed Size: 8" x 26" rolled
  • R-value: 1.5
  • Thickness: 4"
  • Material: 300D Oxford fabric top, reinforced coating on bottom

Pros

  • Quick setup and breakdown
  • Comfortable sleeping area
  • Rugged construction with burly underside
  • Solo or twin configuration

Cons

  • Only fits certain vehicles
  • Higher end of the price range
  • Low R-value

This LUNO Vehicle AIR Pro Mattress ($349) recently supplanted the EXPED MegaMat Auto as the best Car Camping Mattress in our suggestions, and it’s easy to see why. This versatile vehicle pad bridges the gap between seats on awkward-sized cars and splits down the middle for solo car camping when you need more space for your gear.

Backpacking guide Ian Atkinson frequently needs a spot to crash between guided trips, and the AIR Pro provided just the ticket. Fitting perfectly into a 2021 Honda CR-V, this air mattress made full use of the backseat to convert it into a mobile backcountry bedroom.

Unlike the brand’s non-Pro version of the pad, which uses inflatable ‘Space Fillers’ to support the head end, this mat opts for ‘Bridge Attachments’ that hang from the back of the front seats and are much more adjustable for height. The supports host several pockets for wrangling small items and freeing up space to store an extra kit.

When you need even more space, the AIR Pro can be unzipped and split into two, creating a solo bed and enough space to store items as large as a cooler or stove. Atkinson found the mattress tough enough to chuck gear on, and the bottom of the pad is a coated 150D fabric. As for the sleeping comfort? “I truly couldn’t believe it was an air mattress,” said Atkinson.

The most significant difference between an air bed-style pad like this and a self-inflating foam/air version like the MegaMat Auto is warmth. The EXPED’s R-value is an impressive 8.1, while the LUNO is only 1.5. Sleeping in a vehicle doesn’t often require much added warmth, but if you want to stretch your car camping season, the EXPED is the way to go.

For a solid chunk of car camping season, the AIR Pro Mattress is a better option because of its versatility and adaptability to different vehicles. The bridge attachment system is genius, and it frees up valuable space. We’ll take as much as we can when car camping.

(Photo/Ian Atkinson)

Best Mattress for a Truck Bed

  • Comfort
    8.0
  • R-Value
    7.0
  • Durability
    9.0
  • Weight & Packability
    6.0

  • Pad Type: Closed-cell foam
  • Sleeping Area: 78" x 50" (Long)
  • Weight: 32 lbs.
  • Packed Size: 78" x 25" x 7.8"
  • R-value: Unavailable
  • Thickness: 3.9"
  • Material: Polyurethane-backed nylon, two types of polyfoam

Pros

  • Highly durable all-foam design
  • Ideal for truck bed camping; folds in half for quick storage
  • Two types of foam for both firm and soft support
  • Center fold design doesn't lack support

Cons

  • Expensive
  • Large overall packed size

Read Review: Sleep in the Bed of Your Truck? Try the HEST Dually Mattress

The HEST Dually ($549-599) is an incredibly comfortable mattress that sleeps two and folds in half for travel. But its remarkable comfort and durability are matched only by its hefty price tag. Despite the price, the Dually Mattress is an excellent purpose-built truck bed sleep system.

The mattress uses two layers of high-performance polyfoam to achieve great comfort at just 3.9 inches thick (open). It cradles your body for sleeping while providing effective insulation against the cold truck bed below. Editorial Director Sean McCoy has enjoyed wonderful nights of sleep on this mattress and would recommend it for anyone looking for a permanent, portable truck bed mattress.

The bottom and sides of the Dually mattress use heathered nylon woven with a polyurethane backing for durability. This tougher fabric can handle jostling around in the back of a pickup truck with other gear. When folded, we packed lots of gear on top of the mattress, and it showed no signs of wear.

Due to the seamless center-fold design, there’s also no noticeable seam where the mattress folds. Other cool features include phone pockets on each side and handles for easy carrying. This pad didn’t work as well when tossed into the back of passenger vehicles (where the LUNO AIR Pro and EXPED MegaMat Auto excelled), but for truck beds, it’s our top choice.

(Photo/Sean McCoy)

Other Camping Mattresses We Recommend

The mattresses above are the cream of the crop, as far as I’m concerned, and would make excellent choices for anyone looking for a solid night’s sleep outdoors. That said, there are a number of other excellent sleeping pads out there, and while they weren’t quite as impressive as our award-winners, we still think they’re worthy of consideration.

  • Comfort
    8.0
  • R-Value
    8.0
  • Durability
    7.0
  • Weight & Packability
    8.0

  • Pad Type: Self-inflating
  • Sleeping Area: 72" x 25" (regular)
  • Weight: 6 lbs., 7 oz.
  • Packed Size: 7" x 26" rolled
  • R-value: 11.4
  • Thickness: 4"
  • Material: Stretch polyester top, TPU-coated bottom, polyurethane foam

Pros

  • Novel head support bridge makes this pad easy to use in car camping setups
  • 11.4 R-value is super warm (and the warmest in our line up)
  • No stuff sack to wrangle, but instead uses a storage wrap
  • Stretch fabric on top is quite soft to sleep on

Cons

  • Inflation and deflation valves aren't very impressive, but work
  • Included pump sack is a bit low volume

The LUNO Air+Foam Pro Camping Mattress ($280) is a bit of a spur design for the car-camping mat company. Its dual-use design for in and out of a vehicle makes it a fairly versatile option for those who split time between camping styles.

The Air+Foam Pro hits all the high points of a good camping mattress. It’s 4” thick, wide enough at 25”, available in three different lengths, and actually compares quite well to my top pick, the Therm-a-Rest MondoKing 3D. The self-inflating design combines an air chamber and polyurethane foam to keep things cozy, and the pad will expand to about 70% full in around 5 minutes.

The storage wrap seems pretty standard until you realize that it does double duty as a ‘head-support bridge’ that attaches to your car headrests to span the gap between your rear seats and the front. This means you get full use of the entire space and really opens up a number of vehicles we previously couldn’t make work with other pads. Attaching the bridge to your seat is simple enough, and two loops beneath the pad interface to connect the two and create the support you need.

At an R-value of 11.4, the Air+Foam Pro has the warmest claimed rating in our lineup. My comparative testing in the Pacific Northwest this spring (with overnight temperature tracking) confirmed this. With this rating, you can take this mat all the way through winter.

The valves aren’t quite as refined as some other options out there (Therm-a-Rest comes to mind), and the included Air Roll bag is pretty low volume for getting the pad topped off quickly. This pad is about a pound heavier than our overall pick (material choices like the TPU-coated bottom add up), but even so, I was impressed by this new offering, and if you aren’t willing to fully commit to either the tent or car-camp setup, this go-between pad makes it easy.

If you’re not looking to convert your entire backseat into a bed (or just can’t stomach dropping the $400 it’ll take to get into the EXPED MegaMat Auto), this option from LUNO is an excellent pivot. I think that the novel head support bridge makes this pad dialed in for car camping (more so than the EXPED LuxeMat below), and it otherwise hits all the high points we’re after.


  • Comfort
    9.0
  • R-Value
    7.0
  • Durability
    8.0
  • Weight & Packability
    7.0

  • Pad Type: Self-inflating
  • Sleeping Area: 72" x 25.6" (Medium Wide)
  • Weight: 6 lbs., 12.3 oz.
  • Packed Size: 26.4" x 7.9" rolled
  • R-Value: 7.2
  • Thickness: 4"
  • Material: Organic cotton and wool cover, recycled polyester TPU core with open-cell polyurethane foam

Pros

  • Cozy knit cotton cover is insulated with wool, and is super soft next-to-skin
  • Added organization pockets on cover keeps essentials close
  • Zippers on edges to combine pads together with double-wide bed, or couch

Cons

  • Heavier than the similar MegaMat 10
  • On the pricier side

Read Review: Fancy Fabric Adds Camp Comfort: EXPED LuxeMat Duo Review

After testing this uber-comfortable mattress for a full fall-winter-spring cycle, the consensus was clear: You can pry the EXPED Luxe Mat ($350-400) from our warm, cozy fingers. For those building out a van, this is the pad I’ll recommend going forward as an ideal bed substitute.

Looking very much like EXPED’s MegaMat 10, the real difference is all in that knit cover, which is insulated with baffled wool and covered in an organic cotton stretch fabric that is luxuriously soft to the touch. Seriously, this is one cozy mattress to snuggle up on, and the cover is fully removable and launderable to keep it feeling fresh.

That cover also opens up a new degree of functionality that I haven’t seen in camping mattresses before, and that’s organization. At the head of the pad, two stretch pockets — one zippered, one not — are positioned to keep your essentials close at hand during the night. I found these perfect parking spots for our phones, keys, and headlamps.

The Luxe Mat also pairs up with other Luxe Mats, using zippers on the sidewalls to affix them together. This attachment system is easily our favorite among our tested pads to date, and it creates a strong connection with no cracks to slip into. With two pads zipped together, you can even set them up in couch mode — a function that garnered a number of fans during testing.

So why doesn’t the Luxe Mat rank higher in the lineup here? That added comfort does ding the overall weight — 6 pounds, 12 ounces compared to the 4 pounds, 9 ounces of the MegaMat 10 — but not much in bulk, which is just about the same. It’s also a luxury beyond what most campers are likely to want to expend on, and more aimed at van lifers investing for the long haul.

For high-comfort base camping, however, I’ll gladly tote the extra ounces of the Luxe Mat every time. 


  • Pad Type: Air
  • Sleeping Area: 72" x 20" (Regular)
  • Weight: 1 lb., 12 oz.
  • Packed Size: 8" x 4.5" rolled
  • R-value: 3.3
  • Thickness: 3.5"
  • Material: 30-denier polyester ripstop

Pros

  • Excellent packed size
  • Body-contoured pad baffles and elevated head
  • Vortex pump sack works great
  • Great option for side sleepers

Cons

  • Finicky valve system
  • Not quite as warm as comparable pads

Like several other mattresses on our list, the NEMO Quasar 3D Pad ($160-200) is comfortable playing double-duty as a camping mattress and backpacking pad. Compact, lightweight, and simple to set up, this pad covers the range for whatever you’re looking to get into.

Stacked up next to the Therm-a-Rest Neoair Topo Luxe, the Quasar takes the edge on a few facets, most notably the 3D baffling that creates a gentle curve to keep your body centered while sleeping, and slightly lifts your head. During testing our campers certainly noticed this feature, which helps make up for any inconsistencies in the ground you’re sleeping on.

At 3.5 inches thick, the Quasar is a bit thinner than the Topo Luxe, although I’ve found that pretty much anything over 3 inches thick feels about the same. The regular/wide version we tested provided ample sleeping space at 72 inches long and 25 inches wide, and other versions exist as well, including a long wide and a double.

Compared to Therm-a-Rest pump sacks, I did take a liking to the Vortex sack slightly more, as its narrow fill neck makes rolling down the bag easier. If you overinflate the mattress with the pump sack, however, the valve will eject on its own! This is the single reason that keeps this mattress from taking the crossover camping and backpacking title, and I hope that later iterations will come up with a new way to inflate/deflate.

The Quasar comes in both insulated and non-insulated versions (I tested the insulated), although both are a bit under-gunned when it comes to warmth. The Quasar will likely be relegated to summertime use at an R-value of 3.3 (and 1.8 non-insulated).

Comparatively, the Topo Luxe specs out at 3.7. Value warmth and weight over all else? The Topo Luxe is probably your pad. But if you’re looking for packable comfort that cradles you as you sleep, it’s hard to beat the Quasar 3D.


  • Pad Type: Self-inflating
  • Sleeping Area: 77" x 52/41" (head/foot)
  • Weight: 8 lbs.
  • Packed Size: 27" x 12" rolled
  • R-value: 8.1
  • Thickness: 4"
  • Material: Open-cell foam

Pros

  • Stows and travels easily
  • Two sets of inflate and deflate valves makes set-up easy from either direction
  • Well insulated and comfortable
  • Fits in most mid-size trucks, compact SUVs and wagons, and Tesla models

Cons

  • Not ideal for 5-foot truck beds
  • Takes a while to inflate (electric pumps don't get it very firm)

Car camping is more popular than ever, and the EXPED MegaMat Auto ($400) is one of the best solutions that GearJunkie Editor Will Brendza has used for setting up camp inside our SUVs and hatchbacks. Say goodbye to awkward gaps between the seats, as the Auto version of our beloved MegaMat spans a full 77″ before tapering down to fit into most trailhead-worthy rigs.

A true one-size-fits-all solution for every vehicle isn’t possible, but the Auto gets pretty close to covering most vehicles today. Brendza did find that it wasn’t quite the perfect fit in the 5-foot bed of his Tacoma, and for that, we’d recommend a true dirtbag foam crash pad like the HEST Dually. But for your Toyota RAV4s and Subaru Outbacks, the fit should be good (you should break out the tape measure before buying).

Essentially a MegaMat in all but shape, the Auto version hits all the high marks that we love about that pad, including a toasty 8.1 R-value (not as important when camping inside your rig, but appreciated), and a supremely soft 4-way stretch tricot sleeping surface — one of the coziest in our review.

A new update to the MegaMat Auto adds a second set of inflate/deflate valves to the sleeping pad’s foot end, meaning you can dial it in from either side of your car.

While we are big fans of those EXPED valves, we do wish that the stuff sack would double as an inflation bag. Self-inflating takes quite a while, and the included ‘Top-Up’ pump is a bit anemic in getting a fully inflated mattress. Since you’re car camping with the Auto anyway, we recommend checking a battery-powered pump in your gear box as well. The EXPED Mega Pump interfaces with the pad perfectly.

If a night at the trailhead is on tap, the MegaMat Auto is a great option for most car campers.


  • Pad Type: Self-inflating
  • Sleeping Area: 72" x 25" (Regular Wide)
  • Weight: 4 lb., 6.4 oz.
  • Packed Size: 7" x 26.5" rolled
  • R-value: 6.5
  • Thickness: 4"
  • Material: 30D polyester knitted upper, 75D polyester base, open-cell foam

Pros

  • Just right thickness at 4"
  • 30D stretch knit upper is soft to the touch
  • 6.5 R-value stretches use into winter
  • Vertical sidewalls increases sleeping area

Cons

  • Multi-direction valve isn't as refined as some out there
  • Can be tough to get back into stuff sack

The Sea to Summit Camp Deluxe Sleeping Pad ($249) is another great option for those looking for maximum comfort in a camping pad. With even the smallest offering starting out at 25” wide, there’s plenty of space to stretch out on, and it only goes up from there.

I tested the regular wide version, but all Camp Deluxes are spec’d out from the Oz brand at a plush 4” thick, which has proved to be the Goldilocks measurement in all my years of camping mat testing. Perfect for under-inflating just a bit to get that right squish and support where you need it.

Set up on the Camp Deluxe is easy-as, although I was sorry to note that the stuff sack doesn’t double as a pump sack, so you’re on your own to get the mattress fully inflated once the foam has expanded. The valve is a two-in-one job that can function as a one-way inflation valve, fine-tuning pressure release, or dump valve, depending on how to flip the valve around. After allowing the mat to do its thing, it was easy to get it topped off.

The Camp Deluxe also scored top marks for next-to-skin comfort. The 30-denier knitted upper fabric is soft to the touch, but is a bit thin when compared to other mattresses I’ve tested. I’ve used this pad directly on the ground and in tents without a ground cloth, and so far, it’s been holding up.

What keeps the Camp Deluxe from the top of our list? For one, the Therm-a-Rest MondoKing 3D has the annoying habit of being just a bit better in the metrics that count. The Camp Deluxe is 4” thick, while the MondoKing is 4.25”. Sea to Summit keeps you warm with a 6.5 R-value, while Therm-a-Rest squeezes out 7. That and $10 separate these two pads, so your choice may come down to which you can get hands-on.


  • Pad Type: Self-inflating
  • Sleeping Area: 78" x 30" (Long Wide)
  • Weight: 7 lbs., 9 oz.
  • Packed Size: 11" x 31.1" rolled
  • R-value: 10.6
  • Thickness: 6"
  • Material: 50-denier nylon top, 75-denier polyester bottom, open-cell foam

Pros

  • Air-mattress thickness without the bounce
  • Includes Exped Mini Pump for inflation top off
  • Durable 75D polyester bottom material

Cons

  • Packed size is a beast
  • Pricey

If the 4 inches of comfort of the MegaMat Duo 10 doesn’t quite do it for you, don’t stray far: The EXPED MegaMat Max ($350) bolsters the brand’s thickest camping mattress to a luxuriant 6 inches, and I’m here to say that bigger often is better.

With a thickness often only seen in purely air mattresses, the MegaMat 15 can be soft-inflated for the maximum of body cradling, and it avoids the typical bounce with the inclusion of channeled foam throughout the pad.

During testing, I had to often arm-wrestle my tent mate over who would get the ‘big mattress’ that evening. Such a large pad does take a while to fully expand, and once the foam has done its thing I needed to top it off with the included mini pump. Alternatively, EXPED does offer its Widget Pump ($50), an ingenious little electric pump that speeds up the process significantly. 

When it came time to roll, I greatly appreciated EXPED’s inclusion of a roll-top style stuff sack that opens on the long bias. This made storing the pad a breeze, which is saying something — this pad is a beast in its stored form. Easily one of the largest in our testing, you’ll want to ensure you’ve got space set aside to bring this one along.

Other large and in charge mattresses to consider include the Big Agnes Capitan Comfort, which at 5″ comes the closest to the MegaMat Max, and while it packs down smaller and lighter, its R-value of 8.3 can’t take a proper swipe at the 10.6 the Swiss mattress offers up. When comfort is king (and money is no object), the MegaMat 15 Max reigns supreme.


  • Pad Style: Self-inflating
  • Sleeping Area: 72" x 25" (Regular)
  • Weight: 3 lbs., 8 oz.
  • Packed Size: 6.2" x 26" rolled
  • R-Value: 7
  • Thickness: 2.5"
  • Material: Soft stretch polyester top, recycled polyester bottom, open-cell foam

Pros

  • Great value for the money
  • Toggle system for securing pads together or to cot is novel
  • Simple inflation and deflation valves
  • Impressive R-value for the price

Cons

  • Not as thick as many other camping mattresses
  • No included inflation sack

Another excellent budget option, the REI Co-op Campwell Mattress ($119) does a lot for a little, boasting an R-value of 7, a durable polyester build, and a simple inflation system that means you can hit the sack quickly. 

While it is the thinnest mattress in our lineup, the cored foam provides more cushion than you would expect. I’ve found that 2.5” is about the thinnest mattress that can be par-inflated for extra cushion, and the Campwell is cozy enough for multiple nights outdoors. The tapered sidewall design does eat into your total sleeping space, but at 72×25”, it is just as long and wider than the highly comparable Therm-a-Rest LuxuryMap.

Compared to the older-style Camp Bed (the closest extinct relative of the Campwell), the newer mattress sports a more modern two-valve inflation system. They aren’t quite as nice as the valves on many Therm-a-Rest pads, but are functionally similar to the valves of EXPED pads, with a dedicated inflation and deflation valve. Unfortunately, you won’t get an inflation sack here, but thankfully, there isn’t much space to inflate.

Along the pad’s perimeter are four grommets with corded toggles, meant to buddy up other Campwell pads and create a wider sleeping surface. This simple solution — albeit lower-tech than the integrated zippers of the EXPED Luxe — just plain works. The NEMO Roamer XL also uses a toggle system, and while I find those pads combine better (due to the vertical sidewalls), I’m glad to see the tech extend to a more affordable pad.

For the added $60, it’s hard not to recommend the Camp Dreamer XL, which nets you a full 4” thick mattress, as well as a broader sleeping surface at 78″ x 30” to the Campwell’s 72″ x 25”. However, if you’re kitting out the whole family or just simply dipping your toe into camping, the REI Co-op Campwell Mattress is a low barrier of entry. 


Best Camping Mattresses Comparison Chart

Camping MattressPriceWeightPacked SizeR-ValueThickness
Therm-a-Rest
MondoKing 3D
$2505 lbs., 8 oz.10.3″ x 26″ rolled74.25″
REI Co-op Camp 
Dreamer XL
$1995 lbs., 6 oz.32″ x 10″ rolled6.64″
NEMO Roamer$2505 lbs., 8 oz.10″ x 16″ rolled64″
EXPED MegaMat
Duo 10
$370-5209 lbs., 14 oz.11″ x 22″ rolled9.53.9″
Therm-a-Rest NeoAir Topo Luxe$180-2301 lb., 7 oz.9.5″ x 5.7″ rolled3.74″
LUNO Vehicle AIR Pro Mattress$34913 lbs.8″ x 26″ rolled1.54″
HEST Dually$549-57932 lbs.78″ x 25″ x 7.8″N/A3.9″
LUNO Air+Foam Pro$2806 lbs., 7 oz.7″ x 26″ rolled11.44″
EXPED LuxeMat
$350-4006 lbs., 12 oz.26.4″ x 7.9″ rolled7.24″
NEMO Quasar 3D
$160-2001 lb., 12 oz.8″ x 4.5″ rolled1.8 / 3.33.5″
EXPED MegaMat Auto$4008 lbs.27″ x 12″ rolled8.14″
Sea to Summit Camp Deluxe$2494 lb., 6.4 oz.7″ x 26.5″ rolled6.54″
EXPED MegaMat Max$3007 lbs., 9 oz.11″ x 31.1″ rolled10.66″
REI Co-op Campwell$1193 lbs., 8 oz.
6.2″ x 26″ rolled72.5″
Best camping sleeping pads of 2022
Relaxing with a book on the NEMO Roamer sleeping pad; (photo/Eric Phillips)

How We Tested the Best Camping Mattresses

Finding the perfect camping mattress isn’t always a cut-and-dry affair, and we aren’t the type to take bad advice lying down. That’s why we’ve spent hours researching and field-testing camping mattresses and sleeping pads for this guide over multiple summer seasons.

My selection is based on input from backpackers and campers across the country. During testing, I considered all facets of a proper camping mattress, including packed size, comfort, warmth, and ease of use. I also looked at long-term durability and the value you’re getting for your money.

Our Testing Process and Testing Grounds

Our camping mattress field testing takes us to some beautiful places, but the goal is always the same: formulate a real opinion on the comfort and ease of use of these pads. We take every pad we test out into the hills on multiple camping trips, cycling them between in-house experts and getting hours of slumber atop them to form our opinions.

Because a good night’s sleep is subjective, we also shove off camping mattresses and pads into the packs of talented gear testers and friends — ensuring that we have input from all types, including the tall to petite, side or back sleeper, and thru-hiker to the weekend warrior.

These camp mattresses have traveled in the backs of overlanding rigs to lofty pullouts above Colorado, been unfurled in the high-alpine fire lookout towers of the Pacific Northwest, and been toted to campgrounds across the country.

Actual usage is our main testing method, which means plenty of nights outdoors comparing relative comfort and ease of use; (photo/Erika Courtney)

We also aren’t afraid of getting a little techy here, and that boiled down to a few key bench tests when it came to camping mattresses. Ground-truthing brand measurements was an easy lift, and we stacked up claimed packed sizes and thicknesses against our trusty tape measurer to ensure accuracy.

Inflation and deflation times were also timed using the same inflation pump and in the customary fashion while deflating: with a sleepy, full-sized adult atop the pad. Finally, we measure cushion by inflating the mattresses to their maximum and placing a 15-pound kettlebell atop them, simulating a leaning elbow or hip.

The mattresses’ deflection is measured and compared, and all of our data is compiled to stack these pads side-by-side. Often, our recommendations come down to a few degrees of difference.

Our Expert Testers

I, Senior Editor Nick Belcaster, lead our current testing efforts, and am an itterant wilderness guide based between the mountains of the Cascades and the waters of the Salish Sea in Washington State. I’ve spent entire seasons sleeping outdoors while hiking the Pacific Crest Trail and have years of experience equipping outdoor enthusiasts to bed down in some of the most challenging terrain.

To date, our team has saddled up for sleep atop more than 25 different camping mattresses and have nearly 300 hours of shuteye logged in our search for the best of the best for any circumstances. We know that every camping trip may look a little different, which is why we’ve scanned the spectrum of options and tested everything from lightweight pads that’ll do double-duty in backpacking and camping, to mondo-sized 6-inch-thick mattresses that’ll rival your own at home.

At the end of the day, I’m confident these are the best camping mattresses available today. As new pads hit the market, we’ll incorporate them into our testing to ensure our line-up is hip to the latest trends in backcountry bedding.

From car-camping tents to the back of the pickup, we've tossed camping mattresses pretty much everywhere to give them a good shake-down
From car-camping tents to the back of the pickup, we’ve tossed camping mattresses pretty much everywhere to give them a good shakedown; (photo/Erika Courtney)

Our Sleeping Pad Rating System

I’ve identified four rating metrics that are the most important to consider when comparing camping mattresses. The combination of these scores forms the overall rating and can lend some insight into the strengths and weaknesses of these sleeping pads.

Comfort

Comfort reigns in camping mattress rating, and it’s the metric I weigh the most when considering a sleeping pad. Our team cycles these pads to different team members to get a relative score across several body types.

R-Value

The R-value of a camp mattress is a tested number that relates to warmth, with a higher number equating to greater heat retention. I look for a solid R-value of 4+ to award a high rating here, with pads over 7 gaining the highest scores.

Durability

Durability over the long term is important. I look for how the pad material holds up (top and bottom) and how the valves function after a full summer of use. A popped pad isn’t the end of the road, but it does result in a good score ding.

Weight & Packability

Because frontcountry camping doesn’t often require hiking too far, I rate weight and packability lower than other metrics when forming an overall score. However, I still look for a pad that can be compressed well for storage and transport and doesn’t weigh so much that kids can’t help move into the tent for the weekend.

Buyer’s Guide: How to Choose the Best Camping Mattress

Before reading our buyer’s guide, take a few moments to think about how you plan to camp and sleep.

Will you be driving up to a camp spot, sleeping in your vehicle, hiking a mile or so in, or heading out on a weeklong backpacking trip? Do you sleep on your back, side, or stomach? Is extra cushioning important, or do you care more about saving weight?

Understanding your sleep preferences will help determine the best camping mattress for you. Read on for the most important factors in choosing a camping pad. For this particular roundup, I focused specifically on pads made for car camping and similar applications. We did not test pads or mattresses designed to fit into a backpacking pack. If you’re looking for a backpacking pad, check out our favorite products here.

Camping Pads Comparison
Remember, camping pads are made for comfort! You’ll be hard-pressed to fit two of these mats in a backpacking tent; (photo/Eric Phillips)

Camping Mattress Types

Self-Inflating: Laid up with a hybrid air/foam construction, a self-inflating camp mattress is filled with open-cell foam that can be compressed and expanded with the turn of the valve. Once open, air fills the chamber and expands the mat to its full volume, with all of the benefits of the added cushion of foam.

This foam does make these mats a good bit less packable and heavier, but for most campers who don’t have very far to travel, a self-inflating mattress makes the most sense. Consider the Therm-a-Rest MondoKing 3D as the standard bearer for self-inflating mattresses.

Foam Pads: Large and in charge, all foam mattresses are made with different densities of polyfoam to support and cradle you as you sleep — just flop it down and you’re good to go. While most foam mattresses today, like the Therm-A-Rest Z-Lite or NEMO Switchback, are oriented more for backpacking, there are others still that bulk up on the foam and forgo the portability in favor of comfort.

The greatest benefit of a foam mattress lies in its simplicity and ease of use, along with the guarantee that it won’t pop when in contact with any errant pokies. The HEST Dually was the only all-foam design to gain high marks from our testing, but it did so with ease.

Air Mattresses: The most simple of all camping mattress designs, air mattresses are completely suspended by the volume of air they trap. This means that you’ll need to inflate them, either courtesy of your lungs, or with a pump sack or electric air pump. The payoff for your effort comes in the form of packed volume, which is often much more compact compared to their self-inflating and foam counterparts.

On the car-camping side of the spectrum, the ALPS Mountaineering Vertex Air Bed goes up easy, and if you need a sleeping pad that can do it all, the Therm-a-Rest NeoAir Topo Luxe or NEMO Quasar 3D are both equally at home in a backpacking pack or the back of your truck.

Camping Mattresses vs. Sleeping Pads

Hest Dually mattress in truck bed
The HEST Dually in the back of our 2010 F-150 on a Decked drawer system; (photo/Sean McCoy)

The difference between a camping mattress and a sleeping pad is a gray area. Consider the terms to exist on a continuum, with sleeping pads being more of your standard backpacking fare and prioritizing compressibility, and mattresses being thicker, cushier, and less portable.

These mattresses also very often incorporate more foam in their builds, and this can be a sure sign that a mattress prioritizes comfort over all else. At 32 pounds, the HEST Dually is definitely in the “mattress” category.

Sleeping pads are relatively thin, light, and portable. Though this list mostly focuses on car camping products, certain camping mattresses are portable enough to bring along on river trips and short backpacking missions. The Sea to Summit Comfort Deluxe is a prime example of a versatile sleeping pad.

Then, there are some options that buck convention and exist comfortably in between titles. A pad like the Therm-a-Rest NeoAir Topo Luxe is relatively thick at 4 inches, but due to its full air-pad design, it compresses down to a size that rivals many through-and-through backpacking pads.

Weight & Packed Size

The two welter-weight champs, the Therm-a-Rest NeoAir Topo Luxe and the NEMO Quasar, are equally at home car camping as they are on short backpacking trips; (photo/Erika Courtney)

If you’re mainly car camping, you can maximize comfort by going with a more padded, inflatable option like the NEMO Roamer or a deluxe foam mattress like the HEST Dually. The tradeoff is that these don’t pack down as small and are too heavy for backpacking.

If you plan on hiking into the backcountry, a pad that packs down small and weighs less is ideal. Just how small and light you want to go is up to you. The Therm-a-Rest NeoAir Topo Luxe packs down to the size of a Nalgene bottle and weighs just 1 pound, 7 ounces.

Consider also how you’re going to be transporting your camping mattresses around. Many manufacturers today are getting wise to the issues caused by tube-style stuff sacks, which, while they may work the first time, good luck returning a mat to its nylon sleeve after you’ve used it. Many camping mattresses today come with side-opening stuff sacks, which feature a wide mouth for easy storage, as well as compression straps to cinch down the whole affair for easy transport.

Camping Mattress Comfort

Stacked Camping Sleeping Pads
The thickness of your camping mattress will always correlate to the overall comfort; (photo/Nick Belcaster)

In general, the thicker the pad, the more comfortable it is. Additionally, having a bit of foam or extra insulation increases the comfort factor and decreases the noise (see below).

Since camping mattresses don’t need to often be carried far, they can afford to bump up the thickness in many cases. The average thickness across the pads we tested was 4 inches, with the thinnest of the bunch being the REI Co-op Campwell Sleeping Pad at 2.5 inches and the thickest being the luxurious EXPED MegaMat 15 Max at 6 inches.

Pads that rely on air alone for their structure can sometimes feel a bit bouncy if underinflated, which is why many will incorporate closed-cell foam in their construction. This gives the pad a self-inflating quality as the foam bounces back. 

I have found through testing that around 3 inches is about the minimum I’m comfortable sleeping on a mattress that features no foam at all — while a mattress with foam has the ability to keep me comfortable down to below this thickness.

If you’re a side sleeper, you understand the need for plenty of cushioning under your hips and shoulders. For a better night’s sleep, you’ll want to consider a thicker option.

Durability & Denier

Therm-a-Rest NeoAir Topo Luxe Fabric
The 50-denier polyester used in the Therm-a-Rest NeoAir Topo Luxe is a bit thinner than most camping pads, but greatly improves the packability of this dual-use mattress; (photo/Nick Belcaster)

Denier is a unit of measurement used to describe textile strength. The higher the denier, the thicker and stronger the fabric. When it comes to mattresses and sleeping pads, this is mainly important for puncture resistance.

On one end, the lightweight and packable Therm-a-Rest NeoAir Topo Luxe is made with 50-denier nylon. On the other end, consider that the NEMO Roamer is made with 75-denier polyester. As you can imagine, there’s often a tradeoff between durability, weight, and packability.

Consider also the durability of the components used elsewhere in the pad, such as the interior closed-cell foam, or the inflation valves. As in most things, the maxim of getting what you pay for applies here as well. We have used certain sleeping pads for entire thru-hikes and have been impressed by their tenacity and ability to shoulder abuse. As always, take care of your equipment, and it will pay dividends in longevity.

Repairing your camp mattress can be a stressful endeavor, but being prepared for the situation can greatly alleviate that. Many pads today will ship with a small patch kit, which can be utilized in the field to repair small leaks. For more serious issues, consider a more total solution like the Therm-a-Rest Permanent Home Repair Kit, which has a long-cure epoxy and fabric patches. Even certain valves today are user-replaceable.

Warmth & R-Value

Camper Placing Big Agnes Capitan Comfort Sleeping Pad Into Tent
At an 8.3 R-Value, the Big Agnes Captain Comfort provides a lot of warmth for year-round camping; (photo/Nick Belcaster)

In addition to comfortable cushioning, a good camping pad should provide some insulation from the ground. Enter the R-value: a measure of thermal resistance that can shed some light on just how warm a camping mattress might keep you.

R-value testing goes a little like this: inside a cold chamber, a mattress or pad is placed between two metal plates. An array of sensors measures the temperature flow between these plates and provides a numerical value relative to the mattress or pad’s ability to retain and reflect warmth.

Since testing can occur in different ways, many sleeping pad manufacturers have adopted the ASTM (American Society for Testing and Materials) R-value Standard. The higher the R-value, the warmer and more insulating the sleeping pad will be. Notably, the MegaMat and Big Agnes Captain Comfort clock in with whopping 9.5 and 8.3 R-values, respectively, making them both cozy for year-round car camping.

The R-value you need depends a bit on whether you tend to be a warm or cool sleeper, as well as the specific sleeping bag that you’ll be using. In general, you’ll want a mattress or pad with a value greater than 5 for comfortable winter camping. For summer, something in the 2 to 4 range should work for warmer nights.

Length & Width

Air beds are more often on the expansive size, so be sure to make sure it will fit in your tent; (photo/Erika Courtney)

Most camping mattresses come in regular and long versions. Some also come in short, wide, and extra-long varieties. The length and width you need depend not only on your dimensions but also on your camping goals. The pad you go with will also ultimately depend on the space that’s available to you to sleep in. Consider that typical backpacking tents more often have more space-efficient floor plans, while camping tents will provide more space for larger camping mattresses.

I’ve found that while backpacking sleeping pads begin at around 20 inches wide, many camping pads start at around 25 inches and expand from there. And while mummy-style profiles are popular in backpacking pads, most camping mattresses will afford the extra comfort and space that comes with a true rectangle design.

Valves & Inflation

Therm-a-Rest NeoAir Topo Luxe Sleeping Pad
The two TwinLock valves make for quick and easy inflation and deflation, with the ability to bleed off pressure to dial in the comfort; (photo/Nick Belcaster)

Up until recent years, almost all camping mattresses and sleeping pads utilized a twisting plastic valve. Turn one direction to open it for inflation, and (quickly!) turn the other to close and trap air inside.

While this system works, it’s not the easiest to inflate. Because air can freely move back and forth, you need to either create constant pressure while blowing it up or skillfully use your tongue to stop air from exiting the pad while inhaling. It can be done, but we prefer the new inflation technology when tired on the trail.

Luckily, many mattresses and pads now use flat valves with dedicated inflation and deflation settings. Best of all, a one-way flap keeps air from escaping during inflation.

While many pads feature separate valves for inflation and deflation, the Klymit Insulated Klymaloft has a valve that flips from one mode to the next. This makes achieving the perfect firmness possible, but these valves aren’t our favorite for the finnicky-factor.

An inflation bag can be a great way to save your lungs, and the Vortex Pump Sack included with the NEMO Quasar gets top marks; (photo/Erika Courtney)

In addition to valves, many pads now come with inflation bags. The Therm-a-Rest MondoKing 3D comes with an inflation bag integrated into the stuff sack. The Big Agnes Pumphouse Ultra ($35) is sold separately and works as both a dry bag and an inflation bag. Utilizing these pump sacks has multiple benefits, and they are easy to use once you get the hang of them.

Begin by attaching the sack to the valve of your mattress or sleeping pad, and then expand the bag so that it fills with air. We often find that a light breath will expand the bag quickly. Then, close off the opening and compress the bag so that it forces the trapped air into the pad.

The upside to this system is not only speedy inflation but also that no moisture from your warm breath enters the sleeping pad. At its most benign, warm air will contract overnight and lead to a saggy mattress, but there are also concerns of mildew to be mindful of.

Finally, many manufacturers are now coming out with diminutive electric air pumps to assist in getting your sleeping pad up and running. These include the EXPED Widget, the Klymit USB Rechargeable Pump, and the Therm-a-Rest NeoAir Micro Pump ($43). Bringing these along may seem trivial at the trailhead, but after a long romp in, we’ve happily borrowed many to get our camp set up quickly.

Self-Inflating

Big Agnes Capitan Comfort Sleeping Pad Inside the NEMO Aurora Highrise Tent
The open-cell foam of the Big Agnes Captain Comfort Mattress means it will expand to close to fully inflated; (photo/Nick Belcaster)

Self-inflating, also abbreviated as ‘SI,’ pads have been around the block for a number of years, and rely on a foam interior to rebound to their original dimensions to inflate the mattress. We have found that given enough time, these generally will get about 75% of the way to fully inflated, and will require a quick few breaths or pumps from a pump sack to fully inflate the pad.

Consider tossing your self-inflating mattresses into your tent early on in your camp setup to better ensure that it has enough time to fully reconstitute themselves. It’s also worth noting that these mattresses are less susceptible to cold contraction overnight, as the air they are filled with is ambient temperature, versus the warm air from your lungs.

Noise

NEMO Roamer XL Sleeping Pad
Waking up after a pleasant night on the NEMO Roamer XL, a top-notch sleeping pad; (photo/Eric Phillips)

The most common complaint about camping sleeping pads is the loud, crinkly noise. While packing less is great, sleeping on a pad as noisy as a potato chip bag is less than ideal. And having your tentmate toss and turn all night is even worse.

Fortunately, brands are taking note and making quieter sleeping pads. On this list, the EXPED MegaMat is noticeably crinkle-free. This is largely due to the inclusion of foam in the build, and any pad that utilizes it will see a definite reduction in noise overall.

Price & Value

We love a good value. But even more than that, we appreciate gear that performs well and lasts through several seasons of use. They say you should never compromise when it comes to things that connect you to the ground, and besides tires and shoes, mattresses are up there. That said, there’s a spectrum of worth to consider when making your purchase, and even budget pads these days are comfy enough to enjoy all weekend long.

Budget

If you only plan to sleep outside a weekend or two a year, a cheaper pad may get the job done just fine. Less material means less price, which means that budget sleeping pads will be thinner than pricier options, more often 2.5 to 3 inches thick. These pads will also often not use a vertical sidewall design, meaning your sleeping area will be a bit smaller. Expect to pay between $100 and $180 for these mattresses.

At just above $119, the REI Co-op Campwell Sleeping Pad is an impressive value, but it certainly won’t be winning any awards for absolute luxury. That’s why we suggest bumping up the extra $60 in order to get into the REI Co-op Camp Dreamer XL, an outlier at 4″ thick and vertical sidewalls that punches well above its weight.

Mid-Tier

We find that pads and mattresses in the $250-300 range are about the sweet spot when it comes to balancing price and features. These are most often around 4″ thick and feature self-inflating foam and air constructions. You tend to also get dual valve designs that will both hold air as you’re inflating, as well as when you’re deflating, making set up and packing a breeze. Different sizing options also exist in this price range, with wide and double versions available.

Our favorite all-arounder is still the Therm-a-Rest MondoKing 3D ($240), a 4.25″ thick pad with plenty of cushion to air down a bit and really sink in for a night of sleep. The NEMO Roamer ($250) is similarly a standby (with slightly less nice valves), along with the Sea to Summit Camp Deluxe ($249) — a great option for anyone looking to fill out their camp mattress stable.

Premium

Toward the upper end of the spectrum are the luxuriously thick and warm pads, such as the EXPED MegaMat Duo 10 and MegaMat 15 Max. These pads both will put a bigger hurting on your wallet at $300+, but offer up incredible comfort in return. The price increase on the Duo comes from the added space, while the MegaMat Max owes it to the 6 whole inches of insulation beneath you.

This is the foundation of your sleep, and getting enough rest at night will make spending all day outside that much more enjoyable. In general, forking over a few extra bucks will get you some combination of increased comfort, durability, and warmth.

Frequently Asked Questions

What is the most comfortable camping mattress?

We find that camping mattress comfort is very often directly tied to overall thickness, as well as the inclusion of foam in the build. Because of this, hybrid-style designs such as the NEMO Roamer or EXPED MegaMat Duo 10 will always be high on our lists of the most comfortable.

If price and weight are no concern, the HEST Dually is a unique foam mattress that provides top-tier comfort. For a more packable camp mattress, the Therm-a-Rest MondoKing is a winner.

How thick should a camping mattress be?

This depends entirely on your individual comfort level. Generally, we’d recommend 1.5 inches as the bare minimum.

And if price and space are not a concern, go with something in the range of 4+ inches. This not only offers increased padding, but also greater warmth and protection from the ground. If a camping mattress is purely suspended by air alone, it will need to be thicker than designs that use air and foam together to support your body.

How do you choose a camping mattress?

Finding the right camping mattress can make or break your camp trip. First consider, where, when, and how often you plan to camp.

Are you camping in the hot, humid South? Or do you camp a lot in the winter? And are you spending a lot of time outside or just getting started with a night or two camped out?

If you’re camping when it’s cold, you’ll want to prioritize a higher insulation (R-value) level. And if you’re just testing it out or on a tighter budget, go with something like the sub-$120 REI Co-op Campwell Sleeping Pad.

What is the best mattress for car camping?

The best thing about car camping is that you don’t need to obsess over the weight or packed size. As long as it reasonably fits in your car, you can focus more on comfort.

After more than a year of testing, we found the Therm-a-Rest MondoKing topped the charts for durability, comfort, and ease of use. If you’re looking for a foam mattress, the HEST Dually delivers traditional comfort that will never let you down overnight.

What is the R-value for camping mattresses?

The R-value, generally speaking, is a measure of the ability of a camping mattress to resist heat transfer. Because a mattress or sleeping pad is such a vital part of your camping sleep system, it’s important to match your pad and sleeping bag for the overnight temperatures you’ll be anticipating.

The higher the R-value of your mattress or sleeping pad, the greater it will resist giving away your hard-earned body heat to the ground beneath it. R-values in backpacking pads typically range from 1 to 6, while camping mattresses are often warmer, and can sometimes reach double digits. For 3-season camping, consider a mattress or pad with an R-value of between 1 and 4, and for shoulder season or winter camping, you’ll want a pad with a value greater than 5.

It’s important to note that this rating system has only recently become standardized, and is now set in place by the international regulating agency ASTM International. This levels the playing field when it comes to comparing different products.

How thick should a camping mattress be for side sleepers?

When it comes to side sleeping, having a thicker camp mattress can make or break your overnight experience. Throughout our testing, we have found 3 and 4 inches of cushion to be about perfect for ensuring that our hip bones don’t come in contact with the ground.

It’s important to note that mattresses that utilize a foam and air construction often support side sleepers better than pads that are only supported by air. This is because the foam helps to spread out the pressure points caused by side sleeping. Side sleepers should consider a mattress like the Therm-a-Rest LuxuryMap, which has body-mapped foam to better support the hips during sleep.

The Best Camping Sleeping Bags of 2025

11 August 2025 at 14:06

The best sleeping bags on the market, like the NEMO Jazz, bring all the camp vibes; (photo/Nick Belcaster)

While mummy bags are all the rage for backpacking, sometimes you need a bit more room to spread out. And where those bags prioritize weight and packability, the best camping sleeping bags are able to go fully luxe.

From the forests of the Pacific Northwest to the alpine of Colorado and the hills of Appalachia, we took to our tents and put bags to the test in order to find the top choices. Our testing team has collectively spent years sleeping under the stars using sleeping bags, and all of that knowledge went into our evaluations.

Whether you’re after the toss-and-turn-ready shape of the NEMO Jazz 30, the ultra-premium versatility of the Feathered Friends Penguin, or the wallet-friendly nature of the REI Co-op Siesta Hooded 20, we’ve got an option for most anyone. Tuck into our recommendations below.

Editor’s Note: We updated our Camping Sleeping Bags guide on August 11, 2025, to add the Sea to Summit Basecamp 15 — a super-comfortable and spacious down-filled bag, as well as the Teton Bridger, a solid rectangular option that slides in as a budget option. We also added additional rating attributes to every bag to further explain our testing process.

The Best Camping Sleeping Bags of 2025

Best Overall Sleeping Bag

NEMO Jazz 30

9.1/10 Rating

Best Premium Comfort Sleeping Bag

Feathered Friends Penguin YF 20

9.2/10 Rating

Best Classic Vibes Sleeping Bag

Kelty Wayback 20

7.1/10 Rating
See more picks

Best Overall Sleeping Bag

  • Warmth
    8.0
  • Comfort
    9.0
  • Feature Set
    9.0
  • Packed Size
    6.0

  • Shell Fabric: 50-denier 100% recycled polyester ripstop w/ C0 DWR
  • Available Temperature Ratings: 30°F
  • Available Sizes: Single, Double
  • Tested Packed Volume: 16.1 L
  • Tested Weight: 6 lbs.
  • Tested Fill Weight: N/A
  • Insulation: Synthetic 100% recycled Stratofiber

Pros

  • Absolutely plush
  • Capability to zip together 
  • Integrated sheet is quite soft
  • Large hood can fit pillow from home

Cons

  • On the heavier and bulkier side
  • Price

Read Review: Fully Recycled, Supremely Cozy: NEMO Jazz Double Sleeping Bag Review

One of our favorite brands is back with a car-camping delight for summer nights above 30 degrees Fahrenheit. The NEMO Jazz 30 Sleeping Bag ($300) sleeps like a dream, leaving us not too hot, not too cold, but just right. All told, this is still the best overall camping sleeping bag we’ve tested, and that’s after a solid 3 years of enjoying the top spot in our lineup.

That longstanding ability to be top dog is owed to a lot of features, but primary among them are the overfilled quilt design, along with a signature NEMO BlanketFold draft collar near your face, and a featherbed-style bottom for an incredibly cozy experience. A removable, washable sheet means the bag feels extra soft on bare skin. More akin to our own beds at home than many other sleeping bags — this bag just oozes comfort.

The Jazz sports a symmetrical rectangle cut, which means that zippers run down both sides and allow for customized venting throughout the night. We especially appreciated the integrated sleeping pad sleeve, which anchors the bag in place (and is sized perfectly for the NEMO Roamer pad — one of our favorites).

Topped off with a pillow pocket that’s large enough to wrangle our favorite pillow from home all night, the Jazz hits all the right notes when it comes to camping comfort. Know that you’ll want to share in the bounty? The Jazz is also available in a Double version ($350), which bumps the width out to 129 inches, and gives our pick for the best double sleeping bag a run for its money.

Negatives were hard to come by, but packed, this bag’s a hog. Thankfully, it comes with a duffel bag for easier storage. At $300, it’s also a bit on the pricey side for a purely car-camping setup, but the absolutely plush comfort it offers helps salve our wallets. The Big Agnes Echo Park is a worthy mention here, as it has a number of the same design features we love about the Jazz, but is $100 less and slightly warmer.

At the end of the night, we found the Jazz 30 so comfortable — we didn’t want to get out of it, even to make a piping hot cup of coffee. In terms of a bed-like camp sleeping experience, the Jazz is about the closest thing we’ve slept in so far.


Best Budget Camping Sleeping Bag

  • Warmth
    7.0
  • Comfort
    7.0
  • Feature Set
    6.0
  • Packed Size
    6.0

  • Shell Fabric: Recycled polyester, bluesign approved
  • Available Temperature Ratings: 20°F (tested)
  • Available Sizes: Medium (tested), Medium Wide, Long, Long Wide
  • Tested Packed Volume: 17.7 L
  • Tested Weight: 5 lbs., 5 oz.
  • Tested Fill Weight: N/A
  • Insulation: 98% recycled polyester/2% polyester

Pros

  • Budget price
  • Roomy headspace can accommodate a full-size pillow from home
  • Affordable price for the quality and warmth
  • Quilted design helps retain heat

Cons

  • Synthetic fill won’t compress as much as a natural down
  • Zippers have tendency to snag

There’s a lot to love about the REI Co-op Siesta Hooded 20 Sleeping Bag ($149) — especially with that price tag. This 20-degree-rated sleeping bag is not only affordable but feels like jumping into your own bed at home thanks to its silky soft material makeup and spacious, square-shaped hood. 

Meghan LaHatte tested this sleeping bag out while camping under the stars on the Western Slope of Colorado, where temps reached the low 40s and upper 30s at night. This bag kept her plenty warm, and the massive, adjustable hood made snuggling up super cozy. When she didn’t quite feel like using the hood for extra insulation, she put a pillow from home into the wide slot, which definitely helped her catch some proper z’s. 

The Siesta is constructed with polyester insulation — also Bluesign approved — that is baffled through the quilted stitching. Despite being a synthetic fill, this bag was perfectly insulating for the conditions we camped in. LaHatte tends to sleep hot, and wore fleece pants and a sweater in the bag. At no point did she feel too hot or too cold throughout the night. 

When settling in for the night and ready to read a few pages of our book, we used the mini side zipper to fold down the top portion of the bag. This gives the entire setup a “bed-like” feel and prevents any awkwardness in having just your arms sticking out. 

Truthfully, the only noticeable issues with this bag were some zipper snagging on the fabric, and it not being the most packable. However, since it is designed for car or walk-in camping, this really shouldn’t be an issue for most. 

There are plenty of other budget-minded sleeping bags out there, but we think that for most folks, the Siesta Hooded 20 is right on the money. Its hood places it higher than purely rectangular bags like the Kelty Wayback or North Face Wawona, and it expertly balances features with price.


Best Premium Comfort Sleeping Bag

  • Warmth
    10.0
  • Comfort
    9.0
  • Feature Set
    9.0
  • Packed Size
    7.0

  • Shell Fabric: Pertex YFuse nylon
  • Available Temperature Ratings: 10, 20 (tested), 30, and 40°F
  • Available Sizes: Regular (tested) and Long
  • Tested Packed Volume: 17 L
  • Tested Weight: 2 lbs., 10.8 oz.
  • Tested Fill Weight: 1 lb., 8.1 oz.
  • Insulation: 900+ FP Goose down

Pros

  • Impressively overstuffed with 1 lb. + of goose down
  • Can be converted into a sleeping bag for two
  • Option to take or leave hood based on needs
  • Pertex shell is slick and soft feeling
  • Twin zipper baffles locks out drafts

Cons

  • Quite pricey, with additional kit needed to turn into a two-person bag
  • Packed size is a bit large at 17 liters

The Feathered Friends Penguin YF ($560) is a bit of a departure from the lean and backpacking-savvy bags typical of the Seattle brand, but let us assure you, this bag has all of the same DNA in a camping-friendly envelope. This semi-rectangular cut is st■ to the brim with 900+ FP goose down and even tucks away a hidden ability: pair it with a groundsheet, and this bag sleeps two.

Available in four different temperature ratings (we tested the 20-degree version), the Penguin YF is dialed in for everything from staying cozy on summer nights to downright real cold. The roomy cut isn’t so roomy as to be difficult to warm — as it tapers in at the feet — but provides enough space to toss and turn as needed. When coupled with the optional hood, makes for a snug oasis on any evening.

When we brought the Penguin to an early spring in the high desert, temps were dropping precipitously, but that proved no match for the 7(!) inches of loft in the 20-degree version. This bag is one of the loftiest 20-degree bags we’ve ever slept in. Compared to the NEMO Disco 15, the Penguin YF 20 actually uses the same amount of down fill but because it is 900 FP compared to 650, there’s way more of it!

Backing up that loft are twin draft tubes that are equally ample, meaning no drafts snuck in. And when things got nippy, we unzipped the Penguin and attached the optional groundsheet to convert the bag to a twin-occupancy quilt. This groundsheet also interfaces with your sleeping pads, and the whole system worked a treat.

Granted, fully decking out this bag with two hoods and the optional groundsheet starts to run up the bill (to the tune of $817 — ouch), but when you look at the price of two decent camp bags together, the upsides begin to jive. Given the choice, whether or not to get the Penguin for co-sleeping will come down to whether you or your partner is a snuggler. If you’re after a dedicated double-sleeping bag, the Kelty Tru.Comfort 20 Doublewide is a tough option with plenty of space — and for far less out-of-pocket.

While most of the camp bags we recommend are synthetic (for budgetary and longevity reasons), going with a down bag like the Penguin YF truly cranks the dial when it comes to a premium camp sleep, and if you’re looking for the best sleep in the front country, dive into one. You won’t regret it.


Best Sleeping Bag for Women

  • Warmth
    7.0
  • Comfort
    8.0
  • Feature Set
    7.0
  • Packed Size
    7.0

  • Shell Fabric: 20-denier recycled nylon with non-PFC DWR
  • Available Temperature Ratings: 15, 30°F (tested)
  • Available Sizes: Regular and Long
  • Tested Packed Volume: 6.8 L
  • Tested Weight: 1 lbs., 15.5 oz.
  • Tested Fill Weight: 10.6 oz.
  • Insulation: 750+ fill Ultra-Dry down

Pros

  • Women's-specific fit has narrower shoulders and wider hips
  • Wearable design for easy camp cruising
  • Independent footbox zipper makes venting easy
  • Vertical baffles in torso helps mitigate down shifting

Cons

  • Pricier than comparable bags out there

Recently redesigned, the Sea to Summit Women’s Ascent ($429) still finds its way into the packs of our female testers who are after a women-specific fit sleeping bag. With both a wider cut and body-mapped extra down where you need it most, this bag is dialed in to provide where it counts.

We tested the 30-degree bag (there is also a 15-degree version), and it lived up to its temperature rating. The “oversized” draft collar and draft tube kept us wonderfully warm on a 28-degree night with some windchill. With its relaxed mummy shape and extra width, there is even enough room in this bag to make side sleeping possible.

And this thing has so many zippers — including a half-zip on the left side and an extra zipper on the foot box — that on warmer nights, you can control the ventilation effectively to keep cool. Snaps on the neck of the Ascent also mean you can pop your arms out, and when combined with that footbox zip, makes this bag fully wearable around camp. We’re never leaving the warmth to make our coffee again.

When it’s time to pack up, this bag is easy to get into its compact stuff sack, and the 750-fill power down is to thank for that. 750 FP is on the higher end for a down-filled camping sleeping bag, with many other bags like the NEMO Disco and Mountain Hardwear Yawn Patrol only using 650. That packability makes this bag easy to take backpacking when the need arises.

But don’t get us wrong, the Sea to Summit Ascent 30 is sweet for car camping, too. The only con we can think of is the price, which at $429-469 — depending on size — is north of what you’ll pay for comparable bags like the Rab Ascent 500 ($300) or Yawn Patrol ($275). But for what you’re getting in this bag, we recommend dropping the cash. It’ll be worth it.


Best Double Sleeping Bag

  • Warmth
    7.0
  • Comfort
    8.0
  • Feature Set
    7.0
  • Packed Size
    5.0

  • Shell Fabric: 75-denier polyester taffeta
  • Available Temperature Ratings: 20°F (tested)
  • Available Sizes: Double
  • Tested Packed Volume: 65.8 L
  • Tested Weight: 9 lbs., 8 oz.
  • Tested Fill Weight: N/A
  • Insulation: Synthetic

Pros

  • Fully removable top cover
  • Independent sheets for both sleepers
  • Generous sleeping space

Cons

  • Large packed size

The double sleeping bag can be an elusive creature, and one that’s tough to pull off well. But jumping into the Kelty Tru.Comfort 20 Doublewide ($200) this past spring with our partner, we couldn’t help but grin — this is the double bag done best. Double sleeping bags can be a great investment if camping with your tent-mate frequently is a sure thing, or if you tend to sleep cold and want to borrow some body heat.

First, let’s address the truth about double sleeping bags: everyone is liable to be a bed hog from time to time. That’s why we dug the built-in synthetic-filled blankets in the Doublewide so much — each person gets their own on either side of the bag, so there’s less fussing over who gets the covers. Very nice.

On top of that, the cover layer is entirely removable for those extra warm nights, or can be opened up just at the bottom to adjust for venting — a feature we employed often during our testing. This adjustability really addresses some of our top concerns with double bags typically, which is control over your temperature.

Speaking of temperature, one thing we tend to find with double bags is an overstated temperature rating, and this tracks with the Tru.Comfort. Anything below 45 degrees, and we started to notice the air space between our sleeping partners. Best to leave this bag for summer trips.

While it isn’t the lightest or most packable bag, we’ve found that the places we typically take a double sleeping bag just don’t require much hoofing into, and this bag certainly excels at car camping — and especially tossing in the back of a pickup bed. For a more packable doublewide bag, consider the down-filled Marmot Sawtooth Doublewide Bag ($429), or, as a premium and convertible pick, the Feathered Friends Penguin YF ($560) — a single bag that can be modded for two sleepers.

If you’re looking for some more snuggle time while camping, the Tru.Comfort Doublewide is easily one of the best we’ve found on the market today. It’s going to be less money than two single bags, and offer up a sleeping area comparable to a queen mattress.


Best Crossover for Camping and Backpacking

  • Warmth to Weight
    7.0
  • Comfort
    9.0
  • Material Durability
    8.0
  • Feature Set
    8.0

  • Shell Fabric: Recycled polyester ripstop with C0 DWR finish
  • Available Temperature Ratings: 15 (tested), 30°F
  • Available Sizes: Men's (tested) and Women's; Regular and Long
  • Tested Packed Volume: 6.4 L
  • Tested Weight: 2 lbs., 11 oz.
  • Tested Fill Weight: 1 lb., 7 oz.
  • Insulation: 650 fill-power duck down

Pros

  • NEMO's spoon-shape bag is uber-comfortable, especially for those who toss and turn or side-sleep
  • Updated Thermo Gill vents help modulate temperature
  • Oversized draft collar is cozy to tuck into
  • Smart manufacturing choices mean this bag is 100% recyclable at end-of-life

Cons

  • More of a backpacking bag, and might be more than you need for camping
  • No footbox venting

The NEMO Disco Endless Promise ($270) is a 100% recycled version of the brand’s bestselling backpacking bag. This one has a totally recycled PET shell, PFAS-free waterproofing (even on the hood), a 3D footbox and draft collar, and 650-fill power RDS-certified down. It is also, we found, wickedly comfortable, and nigh-impossible to extract yourself from once cozied up inside. If you can only get one bag for both camping and hiking, it’s tough to go wrong with the Disco.

Most notably, this bag has some unique design elements, like both vertical and horizontal baffling to prevent down migration and draftiness. However, our favorite element of NEMO’s Disco is the Thermo Gills — vertical vents that zipper open or close to dump heat and make adjustments throughout the night so you are always comfortable.

This system teams up with the unique spoon shape to create a bag that’s amenable to being turned around in all night. We had no issue stomach sleeping in this bag, which typically requires a knee jutting out where slimmer bags just can’t accommodate. It isn’t as spacious as a full-on rectangle bag, but it also is a good bit easier to warm all of the bag up (no chilly corners, here). This is what makes it such a great hybrid option.

Also notable with the Disco, and something you see less often with many bags, is that two bags can be zipped together. We haven’t had two of the same Discos on hand to test this out yet, but can confirm that the zipper slides well and the “anti-snag” design seems to work great every time. Overall, this bag packs in a lot, and the regular size still comes at a fairly affordable price point. We’d compare the accuracy of the warmth rating and performance up there with the likes of Sea to Summit or Big Agnes.

The Disco 15 (the version we tested) works great if you are someone who can run warm, but still wants a bag around 15 degrees that can be versatile across three seasons and various conditions. It kept us warm, but was also easy to vent, unzip, and tailor to different comfort levels. For backpacking one weekend and camping the next, the Disco dances between both.


Best Classic Vibes Sleeping Bag

  • Warmth
    6.0
  • Comfort
    8.0
  • Feature Set
    7.0
  • Packed Size
    6.0

  • Shell Fabric: Recycled 40D nylon ripstop
  • Available Temperature Ratings: 20°F (tested)
  • Available Sizes: Regular
  • Tested Packed Volume: 37 L
  • Tested Weight: 6 lbs.
  • Tested Fill Weight: N/A
  • Insulation: Recycled Cloudloft Eco

Pros

  • Classic rectangle shape with some modern features
  • Budget price
  • Separate blanket is soft and cozy
  • Flannel-lined interior

Cons

  • Not as thermally efficient as a snugger-fit bag
  • Packed size is a bit large
  • Blanket isn't fully removable

A true blast from the past option, the Kelty Wayback 20 Sleeping Bag ($170) brings some classic vibes to camp with a plush flannel-lined interior, square profile, and a built-in blanket that ensures you don’t short-sheet yourself. But what really sets this OG option apart are the small modern tweaks that make it better than most bags that offer similar specs.

This bag doesn’t quite have the ‘weighted blanket’ heft of the ALPS Redwood, but it’s still an excellent option for a weekend at the cabin or camping close to home. We found it wide enough to kick out a knee fully, and it won praise from our stomach sleepers. The 72-inch width is wider than bags like the North Face Wawona or Kelty Galactic, but not so wide that we couldn’t efficiently warm it up while sleeping this summer.

The organic cotton flannel lining and blanket are the highlights here, though. They make the Wayback cozier than purely polyester-lined bags. The blanket acts like an oversized draft collar and makes up for the occasional draftiness that rectangular bags can endure. We found it much more snuggly than the synthetic version on the NEMO Jazz.

Inside the bag, a phone pocket is one of the tweaks that brings this classic bag into the modern day, and it’s one of those features that we now look for in any bag we’re sleeping in. The second zipper opposite the main one also bumps up the venting options on this bag, which again is something that lesser-featured rectangle bags won’t bring to the table.

The 20-degree temperature rating is perhaps a bit optimistic (we were comfortable in this bag down to 45 degrees and could probably hit 40 without needing more layers). But for most summer nights, it’s right on the money and a great option if you’re into the flannel options. If this bag had a hood like the REI Siesta, it would be our top budget pick, but as-is, it’s a solid alternative with much more style.


Other Sleeping Bags to Catch Some Zs In

While the seven award-winning sleeping bags above are our go-to choices, there are literally hundreds more we’ve tested over the years, and a number of excellent alternative bags we’d have no problem recommending. Check out the eight below as great options for your next camping trip.

  • Warmth
    9.0
  • Comfort
    9.0
  • Feature Set
    8.0
  • Packed Size
    6.0

  • Shell Fabric: 100% RCS recycled polyester
  • Available Temperature Ratings: 15°F (tested)
  • Available Sizes: Regular (tested), Long
  • Tested Packed Volume: 14 L
  • Tested Weight: 4 lbs., 0.3 oz.
  • Tested Fill Weight: 1 lb., 13 oz.
  • Insulation: 650 FP duck

Pros

  • Very roomy fit with dual zippers for different venting options
  • Quite warm for the shape with plenty of duck down
  • Premium feature set
  • Large hood can fit pillow from home

Cons

  • Large packed size and weight
  • On the pricier side

The Sea to Summit Basecamp 15 ($414) goes long and wide to create an uber-spacious camp bag that’s more similar to our comforters at home than most other sleeping bags. This 75” wide bag allows you to go full starfish while sleeping, and the versatile zipper options mean wearing it around camp is fair game.

This bag packs in 1 pound, 13 ounces of 650-fill down that’s been treated with a non-PFAS DWR finish, making it the heavyweight champ of our review with the most down. That insulation is smartly spread across a mix of vertical and horizontal baffles, and in practice, it didn’t shift awkwardly or lead to cold spots.

Sea to Summit integrates smart zippers into its bags, and the Basecamp is no different. The entire top half zips off, meaning it can be used as a quilt, and two snaps at the shoulders allow you to create arm holes for fixing early morning coffee without leaving the bag.

Senior Editor Nick Belcaster used this bag through a summer in the Pacific Northwest, where it became his car-camping go-to choice. The broad sleeping profile was easy to get comfortable in, and the lofty hood wrangled our pillows from home. It’s easy to think of this bag as the down alternative to the NEMO Jazz — just know you’ll pay $200 more for the performance bump.

This bag rivals the Feathered Friends Penguin YF in many ways. Both are roomy down bags with versatile alternative uses, with the Penguin being able to convert to a double bag, and the Basecamp top zipping off for use as a quilt. The big difference is obviously price: the Penguin will run you $160 more, and that’s before adding the optional $84 hood. 

For a premium feature set without the premium price, the Basecamp 15 makes a strong case for itself.


  • Warmth
    6.0
  • Comfort
    7.0
  • Feature Set
    6.0
  • Packed Size
    6.0

  • Shell Fabric: 50D recycled polyester ripstop With non-PFC DWR
  • Available Temperature Ratings: 20°F (tested), 35°F
  • Available Sizes: Regular and Long
  • Tested Packed Volume: 27 L
  • Tested Weight: 4 lbs., 14.3 oz.
  • Tested Fill Weight: N/A
  • Insulation: 100% polyester fiber batting

Pros

  • Can zip with another Wawona bag to make a double bag
  • Roomy shape works well for folks who toss and turn
  • Upper fleece lining is soft on the face

Cons

  • Polyester insulation less warming than natural
  • Lack of hood may be bothersome for colder sleepers

Maybe you’re only planning on a few weekend trips here and there during the summer, or you’re just looking for something super wallet-friendly. This is where The North Face Wawona 20 Bed Sleeping Bag ($130) comes into play. 

With no frills, extra components, or bulkiness, this sleeping bag is just plain good. Its square shape and wraparound zipper help even the most restless sleepers find a good position for snoozing. Camper Meghan LaHatte is a major toss-and-turner, so she was delighted that this bag could accommodate that without getting too twisted up.

We tried this bag out when temperatures dropped to the mid-30s and 40s at night and stayed comfortable with just baselayers and a sweatshirt on. Upon waking in the morning, we didn’t find any moisture on the bag, thanks to the DWR-coated outer material.  

Despite its cheaper price, the Wawona 20 has expert construction. At the top of the bag, a fleece liner provides some softness on your chest and face. Furthermore, the zippers are durable, and the glow-in-the-dark pull tabs are easy to see at night when you need to crawl in and out of the bag. 

And while we wouldn’t use this sleeping bag for any extreme climate camping, it is a solid choice for the price. Combined with one of our cots, the Wawona 20 Bed Sleeping Bag helped us sleep like a rock. Plus, you can zip it to another Wawona 20 Sleeping Bag to easily form a double bed. The lack of a hood will send some folks into the REI Siesta, but we still think the Wawona ranks high for warmer nights.


  • Warmth
    8.0
  • Comfort
    8.0
  • Feature Set
    6.0
  • Packed Size
    5.0

  • Shell Fabric: Cotton canvas
  • Available Temperature Ratings: -10 (tested), -25°F
  • Available Sizes: Regular (tested)
  • Tested Packed Volume: 31 L
  • Tested Weight: 11 lbs., 8 oz.
  • Tested Fill Weight: N/A
  • Insulation: TechLoft Silver synthetic 

Pros

  • Burly cotton canvas outer resists dirt and debris
  • Oversized zipper slides easily
  • Soft flannel interior is super cozy
  • Thick synthetic insulation is very resistant to moisture

Cons

  • Heavy at nearly 12 pounds
  • Packed size is quite large, with little compression possible

Classic look, classic feel: the ALPS OutdoorZ Redwood ($170) might not be the bag you reach for on backpacking trips, but it certainly makes the cut for front-country basecamp, hunting trips, and impromptu stints of van life. The flannel lining on the interior won us over, and after two years of testing now, we still haven’t been able to put a ding in the rough-and-tumble canvas shell.

ALPS calls this a “heavy-duty” sleeping bag, and based on its rugged cotton canvas outer and thick zippers, we’re inclined to agree. We had no qualms with chucking this bag around the campsite while setting up, nor would we have any worries about open-air cowboy camping in it. We’ve woken to a soaked exterior from morning dew but have been none the wiser tucked inside all night.

Inside the bag, two layers of synthetic insulation are quilted into place, and sewn in offset in order to avoid cold spots forming. Add onto that a 100% cotton flannel liner, and you’ve got one cozy bag to slip into. The heft of this bag is almost weighted-blanket status, and it was a highlight to snuggle into. We were also pleased to see a cinch cord encircling the head-end of this bag — something not often on rectangular bags, but is appreciated when temps drop.

Regarding the stated temperature rating of -10: we’d estimate that this is likely the survival rating, and not the comfort rating, which is probably more around 15-20 degrees F. The Redwood was also the largest packed size and heaviest in our testing — at nearly the size of a 3-foot by 1-foot cylinder — and a fact that likely will keep this bag out of your pack. If a similarly comfy — but less overbuilt — bag is what you need, the NEMO Jazz 30 is a solid bet.

Perfect for rolling out under the stars, the Redwood is a rugged sleeping bag that isn’t afraid of a little dirt or dew. Our hunters have taken to borrowing this bag for shoulder season hunts when a short approach and a canvas tent are in order, but it’s also become an easy go-to for a cozy bag.


  • Warmth
    6.0
  • Comfort
    7.0
  • Feature Set
    7.0
  • Packed Size
    7.0

  • Shell Fabric: 30-denier top shell and 45-denier ripstop nylon bottom
  • Available Temperature Ratings: 15, 30°F (tested)
  • Available Sizes: Regular and Long
  • Tested Packed Volume: 15.6 L
  • Tested Weight: 2 lbs., 5.1 oz.
  • Tested Fill Weight: 12.7 oz.
  • Insulation: 650-fill down

Pros

  • Three separate zippers for maximum in ventilation options
  • Roomy tapered rectangle fit
  • 650 FP down in a budget-minded bag
  • Bottom shell fabric is a robust ripstop 45D nylon

Cons

  • Drawstring hood is a bit fussy to use
  • Not quite as warm as stated

Made for lounging, sprawling, and just a good old-fashioned slumber, the Mountain Hardwear Yawn Patrol ($275) takes the synthetic out of the camping sleeping bag equation and instead piles in the 650-fill down — making for one heck of a cozy bag.

Adaptability is the name of the game with the Yawn Patrol, which, like many Sea to Summit bags we’ve tested, sports three separate zippers (a half-length side, full-length side, and footbox zip) to better control your entry/exit and venting options. The footbox zip itself is worthy of high praise, and during testing, we found it equally useful in airing out our tootsies overnight as it was in converting the bag to a mobile cocoon.

In addition to the foot zip, the two sides of the hood can also be snapped together to create an insulated poncho for cruising around camp, which we quickly adopted as our new default camp outfit. You’ll need to be a little more careful wearing your bed around (we’ve got the ember holes to prove it), but we found this to be a supremely comfortable way to enjoy an evening.

Once it was time to hit the sack, the roomy tapered shape was among the best cuts in our testing. It was not too snug and not too baggy — just right. The interior draft collar complements this, and while we initially had concerns that so many zippers might lead to a drafty evening, it didn’t pan out that way. Each zipper hides behind dual draft tubes, which are efficient barriers to losing precious warmth.

Stacked up next to the NEMO Disco, the Yawn Patrol lands more on the camping side when it comes to a hybrid bag. The more robust 45-denier ripstop nylon bottom is noticeably tougher than the thin shells on either of those bags, and the three-zipper design offers up many more venting options, at a slight weight ding.

Although while we dug the retro-colored drawstring around the hood, we did find using the buried cordlock to be a little finicky in the dark, and it’s something that we hope will be refined in a later iteration of this killer new bag. Available in both a 30 (which we tested) and 15-degree version, the Yawn Patrol goes from the campfire to the cot without even a wardrobe change.


  • Warmth
    7.0
  • Comfort
    8.0
  • Feature Set
    7.0
  • Packed Size
    6.0

  • Shell Fabric: Ripstop nylon
  • Available Temperature Ratings: 0, 20 (tested), 35°F
  • Available Sizes: Regular
  • Tested Packed Volume: 11.5 L
  • Tested Weight: 4 lbs., 12 oz.
  • Tested Fill Weight: N/A
  • Insulation: FireLine synthetic insulation (50% postconsumer recycled content)

Pros

  • Roomy cut for tossing and turning
  • Three different temperature ratings available
  • Detachable camp blanket
  • Pillow barn and pad sleeve

Cons

  • May be too wide/drafty for smaller campers
  • No alternative sizes other than regular

This is hands down one of the most comfortable bags we tested, right up there with the Feathered Friends and NEMO options. Big Agnes’ Echo Park ($200) series is plush, cozy, and loaded with cool features. This bag even has enough room for wide-shouldered campers, thanks to a gaping 80-inch span across the top of the bag.

And for the not-so-broad-shouldered, hand pockets at the top corners let you snuggle the bag around you, nice and tight. The cinchable hood completes the cocooning sensation. Big Agnes also included a wraparound zipper so you can remove the insulated top layer to use as a camp blanket.

Unlike many bags, the Echo Park has zippered entry points on both sides, which makes for a small but convenient touch. You can also unzip the bag from the bottom to pop your feet out.

An internal accessory pocket helps a smartphone preserve a charge on cool nights (and may keep you from losing it outright at night). Big Agnes’ trademark Flex Pad Sleeve helps keep the bag from sliding off your sleeping pad as you move around. And the brand also incorporated a pillow “barn” to help keep that in place, too. 

Amenable to any summer or shoulder-season trip, Big Agnes’s Echo Park series of sleeping bags is available in 35-degree, 20-degree, and even 0-degree temperatures for those frost-nipped nights in the depths of winter. If synthetic insulation isn’t your thing, Big Agnes also offers the same design and cut in its Diamond Park series of bags, filled with 600-fill-power down.

Our only gripe is that smaller campers might find this bag too roomy, which can let cold drafts in. Overall, the Echo Park is a very smart, very comfy sleeping bag.


  • Warmth
    6.0
  • Comfort
    6.0
  • Feature Set
    6.0
  • Packed Size
    6.0

  • Shell Fabric: Polyester
  • Available Temperature Ratings: 20 (tested), 30°F
  • Available Sizes: Regular
  • Tested Packed Volume: 32 L 
  • Tested Weight: 5 lbs.
  • Tested Fill Weight: N/A
  • Insulation: Synthetic

Pros

  • Spacious rectangle cut
  • Affordable price below $50
  • Durable polyester insulation won't pack out quickly

Cons

  • Not as warm as rated for most campers
  • Heavier weight
  • Oversized for most sleeping pads

Clocking in at $47, the Coleman Brazos packs in a lot of features for the budget-minded camper. Not only is this bag a value among sleeping bags, but it also targets those who sleep at the campsite the way they do at home: the tossers, turners, and sprawlers.

A whopping 2.75 feet of shoulder room accommodates a broad torso and large individuals, and it also allows more freedom to move while sleeping. Plus, the gaping hood is big enough to bring your favorite pillow from home.

The Brazos’s synthetic fill is typical of many camping sleeping bags, which are often less concerned with overall weight and bulk. Synthetic fills do, however, provide a number of advantages in camping situations: they resist dampness, are hypoallergenic, and are less costly than their down counterparts.

The bag only goes down to a 30-degree comfort rating (and that’ll be a chilly 30 degrees), so bring layers for cooler nights or prepare to be cold. We have found in our testing that bags that incorporate more roomy cuts are more difficult to warm efficiently, and so when the temps do dip, reach for a bag with more of a roomy mummy cut, such as the Mountain Hardwear Yawn Patrol or Sea to Summit Ascent.

The Brazos 20 is a great fit if you’re looking for something simple and designed for comfort, and a bag that won’t break the bank. 


  • Warmth
    7.0
  • Comfort
    7.0
  • Feature Set
    6.0
  • Packed Size
    5.0

  • Shell Fabric: 600D polyester canvas
  • Available Temperature Ratings: -35, -20, 0 (tested), 20°F
  • Available Sizes: XXL (tested), Mammoth Double, Junior
  • Tested Packed Volume: 50 L
  • Tested Weight: 8 lbs., 12 oz.
  • Tested Fill Weight: N/A
  • Insulation: 'SuperLoft Elite' synthetic

Pros

  • Classic rectangular shape
  • Rugged canvas exterior
  • Adds on a hood to wrangle your pillow
  • Quite roomy for fully spreading out

Cons

  • Need to spend a bit more to get the real flannel lining
  • Temperature ratings are a bit confusing
  • Packed size is quite large

The Teton Bridger Sleeping Bag ($125) is a classic-shaped bag with plenty of space to get comfortable, is offered at a great price, and is regularly on sale. It doesn’t blow any other bag out of the water in any one metric, but does a lot for the money.

The rectangular shape is a full 90” x 40”, and plenty big enough to snuggle down into. We used the Bridger from May to July in the Pacific Northwest for some frontcountry camping, including some under-the-stars evenings that tested and proved the canvas exterior’s resistance to dirt and dew.

There are a few things that keep the Bridger from taking our classic rectangle recommendation, and the first is the interior fabric. While bags like the Kelty Wayback use a brushed flannel material, the flannel in the Bridger is only a pattern, and the material itself is polyester. You can opt for the real-deal cotton flannel lining, but you’ll pay extra for it. 

The temperature ratings on the Bridger are also a little confusing, as the brand uses the survival ratings to name the bags, and suggests adding 20-30 degrees to the listed rating for comfort. This means that the 0-degree bag we tested is really more of a 30-degree bag, which feels like a more accurate number compared to other similar bags.

The Bridger is available in a wide range of sizes (from a ‘Li’l Junior’ to a ‘Mammoth Double’) and four different temperatures, and for the money, it’s certainly worth it. We think there are a few bags that are more worth the investment, but if you’re outfitting a whole flock, it’s not a bad option at all.


  • Warmth
    7.0
  • Comfort
    7.0
  • Feature Set
    6.0
  • Packed Size
    7.0

  • Shell Fabric: 5-denier polyester
  • Available Temperature Ratings: 30°F (tested)
  • Available Sizes: Regular
  • Tested Packed Volume: 14 L
  • Tested Weight: 2 lbs., 11 oz.
  • Tested Fill Weight: 1 lb., 7 oz.
  • Insulation: 550 fill-power down

Pros

  • Simple and classic rectangle design
  • Cheaper price for a down sleeping bag
  • Zips together with another bag

Cons

  • Low fill weight down
  • No alternative sizes offered

With all of the warmth and compressibility of down combined with a classic rectangle shape, this is one solid bag — especially for beginning adventurers. Kelty’s Galactic 30 ($170) also sports one standout feature for cuddly couples — two bags can zip together to turn one rectangular bag into a double-wide snuggle factory. 

Otherwise, it’s a basic bag with fewer bells and whistles (like cinchable hoods, advanced venting, mummy shape) than the pricier models on this list. But as the saying goes, sometimes more money = more problems. The beauty is in the simplicity of this sleeping bag.

At about $170, the Galactic manages to pack in value for the budget-minded car camper. Due to its rectangular shape, we wouldn’t recommend testing that 30-degree lower limit, but for warmer summer nights under the stars, it’s a winner.


Sleeping Bag Comparison Chart

Camping Sleeping BagPriceAvailable Temperature RatingsWeightPacked VolumeInsulation
NEMO Jazz 30$30030°F6 lbs.16.1 L98% recycled polyester/2% polyester
REI Co-op Siesta Hooded 20$14920°F5 lbs., 5 oz.17.7 LRecycled polyester
Feathered Friends Penguin YF 20$56010, 20 (tested), 30, 40°F2 lbs., 10.8 oz.17 L900+ FP goose down
Sea to Summit Women’s Ascent 30$42915, 30°F (tested)1 lbs., 15.5 oz.6.8 L 750+ fill-power Ultra-Dry down
Kelty Tru.Comfort
20 Doublewide
$20020°F9 lbs., 8 oz.65 LSynthetic
NEMO Disco$27015 (tested), 30°F2 lbs., 11 oz.6.4 L650 fill-power duck down
Kelty Wayback 20$17020°F6 lbs.37 LRecycled Cloudloft Eco
Sea to Summit Basecamp 15$41415°F 4 lbs., 0.3 oz.14 L650 fill-power down
The North Face Wawona$13020°F (tested), 35°F4 lbs., 14.3 oz.27 L100% polyester fiber batting
ALPS OutdoorZ Redwood$170-10 (tested), -25°F11 lbs., 8 oz.31 L Synthetic
Mountain Hardwear Yawn Patrol$27515, 30°F (tested)2 lbs., 5.1 oz.15.6 L650 fill-power down
Big Agnes Echo Park$2000, 20 (tested), 35°F4 lbs., 12 oz.11.5 LFireLine synthetic insulation
Coleman Brazos$4720 (tested), 30°F5 lbs.32 L Synthetic
Teton Sports Bridger$125-35, -20, 0 (tested), 20°F8 lbs., 12 oz.50 L‘SuperLoft Elite’ synthetic
Kelty Galactic
30
$17030°F2 lbs., 11 oz.14 L550 fill-power down

How We Tested the Best Camping Sleeping Bags

Our GearJunkie crew has slept in dozens of sleeping bags to bring you the best of the best. Every year, we saddle up and hit the woods to test the latest and greatest camping equipment. Reviewers from across the country converge to catch some Zzzs outdoors and put the best camping sleeping bags through a number of tests to prove their worth.

Our Testing Process and Testing Grounds

We also enrolled our furry friends in our testing efforts; (photo/Meghan LaHatte)

To conduct a proper sleeping bag testing regimen, we tested these bags in a variety of climates and conditions. From 35+ degree nights in a proper tent to mid-40s cozied up in a rooftop canopy, these bags were put through the wringer — and we tracked overnight temps to get an actual idea of relative warmth.

Furthermore, we also noted how well the bags fit our body frames and movement needs and whether they shifted much while we slept. Our lead tester, Meghan, requires much tossing and turning before she knocks out for the night, so being able to do this without the bag getting completely twisted was a major aspect she looked at. Once one tester has a solid feel for a bag, we cycle them out to get a consensus on comfort.

Our camp sleeping bag testing doesn’t end when the camping trip does, either. We dive into the hard numbers and break out the scales to test actual weights against manufacturer claims. We also ground-truth the estimated packed volumes by stuffing each sleeping bag into the same compression sack and measuring how tight we can get it. This gives us a good idea of which brands are accurate in its ratings and which might be fudging it a bit.

We also tested these bags’ relative moisture resistance. We focused on the areas of the bags most often dampened when camping: the footbox and the hoods. Each received a hearty dowsing from a spray bottle to simulate a real downpour (or leaky tent) and was monitored for water ingress.

Our Expert Testers

NEMO Jazz Sleeping Bag in Tent
While mummy shapes dominate the backpacking sleeping bag realm, rectangles reign in camping sleeping bags; (photo/Nick Belcaster)

Our foray into camping sleeping bag testing began in 2021, when GearJunkie Editor-in-Chief Adam Ruggiero assembled a slate of bags and winnowed it down to a set of 11 essentials. Since then, we’ve seen a blizzard of new bags and technologies, and every year we have measured up the newest offerings against the old guard.

Current tester Meghan LaHatte has spent more time under the stars than not since she moved to Colorado in 2017. As an avid adventurer and lover of her beauty sleep, Meghan had no hesitation in helping tackle this buyer’s guide. From backpacking in the backcountry to classic car camping, she finds a lot of comfort in that cozy feeling of nestling into a plush sleeping bag. 

Meghan tested out our most recent round of camping sleeping bags during the late spring and mid-summer in the Colorado Rockies. From nights spent in the dispersed camping areas of Crested Butte to the granite-encrusted deserts of Gunnison, Meghan made sure to evaluate these sleeping bags in more ways than one. 

The final list of recommended sleeping bags is the combined result of thorough firsthand experience across the nation and various conditions. Beyond our field tests and personal experience, we determined the best sleeping bags based on metrics like reported warmth, packability, weight, material durability, and intended use. Ultimately, these bags serve a range of campers in their quest for ample quality sleep outdoors.

Our Sleeping Bag Rating System

We’ve chosen four rating attributes that we feel are most important when deciding on a camping sleeping bag. These metrics cover the range of what we’re looking for in a solid option and provide a detailed look at how we produce our overall bag ratings.

Warmth

A good camping sleeping bag has to be warm, and we consider this the most important attribute when rating a sleeping bag. We also consider the accuracy of the brand’s given temperature ratings when comparing our own findings, and look for a good consensus among our testers for a good rating here.

Comfort

Camping sleeping bags are often much wider and have more space to spread out than mummy bags, and we look for both the shape of the bag and the relative softness of the materials when rating them. We also consider how many different size options are offered when considering comfort, as well as any hoods, draft collars, or integrated sheets.

Feature Set

Camping sleeping bags will have more features than bags meant for backpacking. We look for integrated pockets, zipper systems that allow the bag to be worn, and specialty materials such as canvas or flannel when rating for feature set.

Packed Size

Because front-country camping is often close to home (or the car), the packed size of a sleeping bag isn’t as big of a deal, and we weigh it the least against the overall score. Synthetic bags tend to score lower on this metric, but so long as you can get it into the tent, we didn’t mark any bag down too low for packed size.

Buyer’s Guide: How to Choose a Camping Sleeping Bag

It’s worth spending time finding the right sleeping bag. After all, this is a piece of gear that will not only keep you comfortable at night but can easily last through years of use. And while there isn’t a single sleeping bag that’s best for every camper out there, this buyer’s guide will help identify the best bag for you.

We’ll note that this article is aimed at general camping. While some may be fine for backpacking, due to their size and weight, most are better suited to car camping or short hike-in scenarios. For longer trips in the backcountry, check out our review of the best backpacking sleeping bags.

Size and Shapes

Camping sleeping bags are more often generously shaped, which can make for a more comfortable night outdoors; (photo/Erika Courtney)

No two people are shaped the same, and neither should their sleeping bags be. In searching out the best camping sleeping bags, we aimed for bags we could kick back in, toss, turn, and otherwise be as comfortable as possible. They typically took one of three shapes:

  • Relaxed Mummy Bags: While the strict mummy bag is the sleeping bag shape of choice for many backpackers, there’s not much need on camping bags, and as such many soften the corners and let out the shape a bit for a more generous mummy cut that’s still pretty thermally efficient. The Sea to Summit Women’s Ascent is one of our favorite examples, and the Mountain Hardwear Yawn Patrol is more relaxed.
  • Spoon-Shaped Bags: A decided specialty of NEMO, the hourglass shape of spoon bags bumps up the real estate around the knees and the torso, creating an oasis of space perfect for those a little more acrobatic during sleep. The NEMO Disco is a highlight here and offered up room to spin in our evenings in it.
  • Rectangle Bags: The old stand-by: rectangle bags are simple and cut no corners to give you the maximum space to sprawl out in. Because of this, bags like the REI Co-op Siesta Hooded or Kelty Wayback won’t be as thermally efficient and might have some cold corners when pushed to their rating. Others still, like the ALPS OutdoorZ Redwood, simply have too much insulation for shape to ding their warmth.
  • Double Bags: Sized, for two, double bags are most often rounded-off rectangles with enough space for a couple to snuggle down into. The Kelty Tru.Comfort Doublewide was our favorite of any available today, and had plenty of space for two to spread out.

For a long time, sleeping bag sizing was relegated to “Regular” and “Long” cuts, but recent years have introduced a number more options that better represent the bodies that sleep outdoors. 

For instance, our testing team adored the four different sizes available on the REI Siesta, which mixed regular and long lengths with wide widths to offer up a spectrum of fits. Often, sleeping bag manufacturers will let you know the height ranges for its bags.

Rectangular bags are a classic shape, and while not the most thermally efficient, are much nicer to toss and turn in for active sleepers; (photo/Meghan LaHatte)

Women’s Specific Bags

While some manufacturers are moving away from gendered sleeping bag sizing, it’s important to know what you’re getting when you’re looking at a women’s-specific sleeping bag. These bags are very often wider at the hips and narrower at the shoulders, aiming to increase thermal comfort and eliminate dead space.

Women’s specific bags might also use a different insulation design, where more insulation is added to the core or feet to accommodate different needs. The Sea to Summit Women’s Ascent is one such bag, and our female testers lauded the changes compared to the men’s cut.

Warmth

Hoods can make a big difference in the amount of warmth your camp bag keeps in, and some, like the Feathered Friends Penguin, offer a removable option; (photo/Erika Courtney)

Sleeping bags come with a temperature rating, but depending on the person, a 20-degree bag might keep you cozy down to 20 degrees, or it might be more of a survival number. Because of this factor, we weighed warmth heavily in our testing, and we looked closely at ratings and how they panned out in real-world situations. 

Bags often get rated for comfort — the lowest temperature a bag will keep an average cold sleeper comfortable — and lower limit — the lowest temperature for an average warm sleeper. The ratings are calculated using a person wearing long underwear and a pair of socks, and sleeping on an insulated pad

In our own testing, the ALPS OutdoorZ Redwood -10 surprisingly came out on top in terms of warmth, owing to the massive amount of synthetic insulation it packs in. Following closely behind were the NEMO Disco and Feathered Friends Penguin YF bags, both down-filled but decidedly different shapes.

We find that bags rated between 20 and 30 degrees are ideal for most summer-season testing, and this is where the NEMO Jazz, Sea to Summit Women’s Ascent, Mountain Hardwear Yawn Patrol, and many others file in. Bags that are cut more generously, like the NEMO Disco, will work better in warm temps, while more mummy cuts are better to lower.

Insulation Options

Down Insulation

Sea to Summit Ascent II sleeping bag
The 750-fill down of the Sea to Summit Ascent puts it on the higher end of the price scale, but also in warmth and packability.

As the best insulator nature has come up with yet, down is able to insulate by trapping air in between the fibers and holding it there. It also has the ability to release moisture from within, meaning sleeping bags made with it are more breathable than those made with synthetic fill. 

All down lands on a sort of continuum of efficiency that measures how much loft the fibers have. A higher fill power down will do the same insulating power of a higher amount of lesser down, meaning that a sleeping bag will need less of it to sport the same temperature rating. For example, a 32-degree sleeping bag made with 650 fill down will have more bulk and weight than that of a 32-degree bag made with 850 fill down.

The final metric to pay attention to in a down sleeping bag is the total fill amount. Knowing both numbers will give you an idea of how warm the sleeping bag is bound to be. Down does have its problems, and once damp it loses insulating power and is tough to dry. It also can be on the pricier side when compared to synthetic insulations, and shouldn’t be left compressed for long periods of time.

Synthetic Insulation

NEMO Jazz Synthetic Sleeping Bag in Tent
The 100% recycled polyester of the NEMO Jazz has a very soft hand, and the built-in sheet is ultra-comfy next to skin; (photo/Nick Belcaster)

Synthetic fills are man-made polyester fibers that are designed to mimic the warmth-retention properties of down, but still provide some warmth once wet. These fibers are woven in different patterns to provide differing levels of warmth, breathability, and compressibility. 

Synthetic fills are measured by the grams per meter squared (GSM) metric. This gives users an idea of how warm the sleeping bag will end up being. For example, a synthetic fill with a 2.5-ounce GSM can expect to provide a temperature rating of around 50 degrees Fahrenheit. 

While there has been considerable improvement in synthetic fills over the years, we still haven’t been able to brew up a material that can match down in terms of weight-to-warmth ratio. Because of that, sleeping bags made with synthetic materials will need more insulation to provide the same amount of warmth. This will also mean that they often will be bulkier when packed. While our best overall bag, the NEMO Jazz 30, was cozy as all get-out, it also packs up to a substantial size.

It’s important to note that synthetic fibers are quite durable, but over time will compress down and lose the loft that they once had. Compared to down bags, however, they need a good bit less care in order to keep the sleeping bag rolling for a long time. 

Packed Size

We don’t weigh packed size as heavily when testing camping sleeping bags compared to backpacking versions, but it’s still a consideration; (photo/Meghan LaHatte)

Packed size is of particular importance when backpacking, but isn’t as much of a concern for casual camping trips. But still, keeping things compact means more space in the back of the rig for snacks, and when choosing a sleeping bag that’ll be used for a bit of front and backcountry, packed size is much more important to pay attention to.

Anyone looking to minimize pack weight should consider a crossover backpacking/camping sleeping bag like the NEMO Disco or the Mountain Hardwear Yawn Patrol. These bags are often not quite as trim cut as a full-on backpacking bag, and make space at the feet and shoulders to accommodate more active sleepers.

More comfort-oriented bags with wider cuts won’t compress as well, and may even opt to forego the compression stuff sack entirely. The NEMO Jazz 30 travels in a spacious duffel-bag-like sack, and bags like the Kelty Wayback will roll up into themselves and secure with attached compression straps.

At the far end of the compressibility scale, the ALPS OutdoorZ Redwood has little use for a small packed size, and even less for your sympathies — this bag is large and in charge, and takes up the entire backseat of some sedans. But the comfort provided is well worth it, and the same can be said of the Kelty Tru.Comfort 20 Doublewide, which takes up an impressive 65 L of space in its laundry-bag-sized stuff sack.

Sleeping Bag Construction

Your sleeping bag is your bed-away-from-home, so make sure it’s cozy inside; (photo/Meghan LaHatte)

Shell and Liner Fabric

Most bags will use a ripstop material for the outer shell. Ripstop is a nylon or polyester fabric woven with heavier threads to resist abrasion and tearing. The unique construction of ripstop also allows it to remain fairly breathable.

As for bag liners, taffeta is among the most common choices. This is also a nylon or polyester material, but unlike the coarse feel of ripstop, taffeta has a pleasant, silky feel. And it is more breathable. This makes it an ideal choice for next-to-skin pieces. Some of the bags we reviewed, like the NEMO Jazz, have a removable insert sheet that’s washable and soft. 

Zippers

Sleeping bag zippers may be seemingly simple, but can actually contribute heavily to a bag’s functionality and convenience. From LH and RH zippers to closeable vents, here are some different zipper aspects with camping sleeping bags: 

  • Left-Handed vs. Right-Handed Zippers: You’ll often see sleeping bags labeled as having left-handed (LH) or right-handed (RH) zippers when perusing options. Depending on your dominant hand, these configurations help with the ease of opening and closing the bag while lying down on your back.
  • Full vs. ¾ Zippers: Another design aspect of sleeping bags is how much the zippers open. This often takes the form of being fully openable and closeable or at the ¾ length. A fully zippered sleeping bag is fantastic for doubling as a blanket at camp or if it is a relatively hot night and you need maximum ventilation. These bags tend to allow for more temperature customization since you can open them up all the way. The North Face Wawona and REI Siesta Hooded Bag can both fully unzip, allowing users to use them as a quilt or stick their feet out when the temps rise. 
  • Ventilation Zippers: As sleeping bag designers use more ingenuity, they are creating bags that allow for temperature customizations. Sometimes these venting options are footbox zippers for airflow to the lower extremities, while others, like the Mountain Hardwear Yawn Patrol, have multiple zippers for ventilation options. Another sleeping bag with added ventilation zippers is the Sea to Summit Women’s Ascent which has a side zip and footbox zip for added airflow. Even better, you can wear this sleeping bag like a snowsuit around camp, since it frees the arms and legs.
Look for smooth-running zippers with protective ribbon sewn in to avoid snagging the sliders in the dark; (photo/Meghan LaHatte)

Pad Straps/Sleeves

To prevent slippage, many sleeping bags come with included sleeves or straps for attaching to a sleeping pad. While this is not a necessary feature to have on a sleeping bag, it can definitely be helpful if you tend to toss and turn throughout the night. Waking up on the ground next to your sleeping pad is never a fun feeling. 

The NEMO Jazz 30 has two wide straps at the top and bottom of the sleeping bag for attaching it to a pad. These features will help keep you warm, as you can retain maximum insulation between yourself and the sleeping pad. 

Furthermore, some of the sleeping bags listed also include a sleeve to keep your pillow stationary. If you’re car camping and have the space, a comfortable pillow is definitely a plus. The REI Co-op Siesta can fit a full-size pillow from home, so definitely consider that one if you seek this sort of feature. 

Similar to liners, pad straps or sleeves are not required when it comes to a well-made sleeping bag. Some folks have success with just placing their pads inside the sleeping bag itself, but the shape and silhouette of your bag will need to be almost identical to your bag for this to work well. 

Sleeping Bag Liners and Blankets

The Kelty Tru.Comfort 20 Doublewide hosts two separate sewn-in blankets, which makes sharing the bag extra cozy; (photo/Nick Belcaster)

While they aren’t necessary, sleeping bag liners can help increase the warmth, cleanliness, and longevity of your sleeping bag, whether you’re backpacking remotely in the woods or heading out for a weekend of car camping with friends. 

Sleeping bag liners can take the shape and form of being sewn into the actual sleeping bag or coming as a separate, thin sleeping sack. Because they are lightweight and less cumbersome than a sleeping bag, they are much easier to wash, thus making it easier to keep your sleeping bag in better shape without much maintenance or upkeep. The NEMO Jazz has a removable insert sheet that’s washable and soft. Not only is it breathable, but the taffeta fabric also provides a super comfortable surface when in use. 

Some camping sleeping bags listed in this guide have sewn-in blankets that help retain heat and insulation within the bag itself. Similar to standalone liners, they can also make the sleeping experience much more comfortable due to that nice next-to-skin feel. We particularly enjoyed the flannel blanket on the Kelty Wayback, and the dual blankets on the Kelty Tru.Comfort Doublewide means we don’t have to fight over the covers.

Extra Features

Integrated phone pockets now feel like a standard on a good camping sleeping bag; (photo/Meghan LaHatte)

Camping sleeping bags have the luxury of retaining some of the niceties that backpacking sleeping bags have to leave behind, and we made sure to roll these considerations into our general impression as well. The top of the heap has to go to the NEMO Jazz, which piles on smart features such as an integrated and removable sheet, a pad sleeve, and a pillow pocket for wrangling your camp pillow in place.

Adjustable cinch cords on hoods are nearly universal on more comfort-mummy-shaped bags, and the better-designed versions will use two separate cords (often with different cord locks for midnight recognition) to adjust the upper and lower aperture openings. More modern functions like an internal phone pocket can be handy for keeping your phone warm all night, and we’re pleased that many bags are now jumping on this trend and incorporating them.

Price & Value

GearJunkie Best Sleeping Bags
There’s a whole spectrum of camping sleeping bags on the market, with an equally large range of prices; (photo/GearJunkie)

With a range of prices from $100 and all the way up to $550+ there’s plenty of variety in terms of what you get for your money when it comes to camping sleeping bags, but it generally comes down to a few important differences.

The first is going to be materials. Down versus synthetic will be the first big schism, with down-filled bags always asking for a more handsome sum compared to more affordable synthetic options. Sizing and design, too, will play a big part, with more mummy-style bags being cheaper and luxuriously wide bags going for more. Finally, smaller details, such as additional zippers for ventilation, integrated phone pockets, and pillow-sized hoods can nudge the price up as they are added on.

Budget

If this camping thing is all new to you, or you just don’t find yourself getting out all that much, it may not make sense to really splurge on a luxe sleeping bag (there’s plenty of other kit to get, after all). Budget camping sleeping bags will almost always be synthetic-filled, as it’s far cheaper to source, but don’t think that these bags are less for it. Synthetic bags fare far better with occasional moisture, and won’t lose loft as fast as down bags.

The REI Co-op Siesta Hooded 20 ($149) is an excellent option for those just getting into camping, as its a robust construction and available in a number of different sizes to accommodate any body type. Those looking for a more typical rectangular cut might also consider the Kelty Wayback ($149), which sports a classic shape and even tucks in a little luxury with the flannel interior.

Mid-Tier

If camping is one of your weekend go-tos, we’d suggest spending a bit more to get into a bag that will be ready to take on a wider variety of trips and conditions. Spending a bit more will also often mean you get a warmer-rated sleeping bag.

It will also open up the possibilities of getting into a down-filled sleeping bag, which compresses much more than synthetic bags and can be used for some backpacking as well. Down fills are most often around the 650 FP mark in this price range, where you’ll expect to spend between $200 and $350, depending on the temp rating.

The NEMO Jazz 30 ($300) is still our top pick for an excellent all-arounder, and its synthetic build is turbocharged with a number of different features that make it more versatile: a fully removable top cover, integrated sheet, sleeping pad sleeves, and a hood that’ll fit your pillow from home. The NEMO Disco ($320) is more of a hybrid design for backpacking, but it makes a killer camp bag as well.

Premium

For van lifers or those who find themselves bedding down in frontcountry camps more than they do at home, spending the extra cash to get a seriously nice sleeping bag can be a great investment into your sleep. Expect to pay north of $400 for the privilege, but for the money, you’ll be getting bags that use higher fill power downs and nicer shell fabrics such as Pertex materials.

The Sea to Summit Women’s Ascent 30 ($429) is a very nice bag, and is dialed in to be perfect for female bodies to nestle down into. Equally nice is the Feathered Friends Penguin YF 20 ($560), a camp bag from the boutique Seattle manufacturer that borrows from their knowledge in backpacking bags to trim out a seriously cozy camp bag that’ll even convert into a space for two.

Frequently Asked Questions

How are sleeping bags rated?

In general, every sleeping bag has a temperature rating — from -40 to 55 degrees Fahrenheit — that signifies the warmth of the bag. In the past, each brand conducted its own testing and assignment of temperature ratings. This made for a lot of variances across sleeping bags.

Luckily, most brands now use European Norm (EN) temperature ratings. Bags are therefore tested by a third party in internationally certified labs, using a series of standardized tests. This makes it much easier to compare bags, but not completely foolproof.

As noted above, a rating that may be comfortable for some could mean a shivering night of survival for others. So to make sense of sleeping bag ratings, it’s useful to know if you tend to sleep warm or cold.

Women generally sleep cooler and prefer a bag with a corresponding rating. So for the same camping trip, one person may prefer a 20-degree bag while another is completely comfortable in a 32-degree bag.

Which sleeping bags zip together?

Hoping to snuggle up under the stars? Then it’s great to have two sleeping bags that zip together. The Kelty Galactic is a great budget-friendly option that zips together. Its rectangular shape also maximizes the room for two.

In general, mummy-style bags that share the same zipper type can be zipped together — although you’ll need one right- and one left-side zip bag.

And if you plan to always sleep together, it’s worth considering a double sleeping bag. These bags are designed for two and offer up the best features for a cuddly night’s sleep. We particularly like the Kelty Tru.Comfort 20 Doublewide.

Should I get a down or a synthetic sleeping bag?

Each material has pros and cons. Down, the plumage found underneath a waterfowl bird’s feathers, is loved for its warmth and its easy compressibility. Down sleeping bags tend to pack down small and light. But down can clump and stop insulating as well if it gets wet. Many companies treat down in order to avoid this, but don’t leave a down sleeping pad out in the pouring rain and expect anything less than a very soggy sleep.

Synthetic bags tend to be cheaper than down. It also dries quickly and insulates even when damp. But alas: synthetic is bulkier, packs less warmth at the same weight, and can lose insulating power slowly every time it’s compressed. Both types of bags have a time, place, person, and budget.

Are sleeping pad sleeves necessary?

They’re nice to have, but by no means essential. Many amoung us have camped for over a decade, never used one, and is no worse for wear. We’re used to cramming into a backpacking tent where other people and pads keep movement to a minimum anyway. It really depends on how much you thrash around at night, and how big your tent is.

Free Gear Fridays: Win a 3-Piece Sea to Summit Cook Set

1 August 2025 at 14:00

(Photo/Sea to Summit)

This week, two lucky winners will each receive a Frontier Collapsible One Pot Cook Set from Sea to Summit. The ultralight, multipiece cook-eat-drink system is the ultimate packable solution for solo meals in the backcountry.

For a chance to win, submit the form below. Then, check out ways to earn additional entries to increase your chances of landing the prize.

More on the Prize

Add preparing meals to the list of ways you’re improving your essentials kit on the trail this season. The Frontier Collapsible One Pot Cook Set is the ultimate cook-eat-drink system for prioritizing weight and space when heading out on solo missions in the backcountry.

The 1L pot doubles as a bowl and acts as a nesting space for the included collapsible cup and aluminum spork when not in use. The pot has a hard, anodized aluminum base for efficient heat transfer and fast boil times.

A Click Safe handle ensures a firm grip on hot meals. Food-grade silicone sidewalls allow both the pot and cup to collapse down for easy packing.

More on the Brand

Born in 1983, Sea to Summit’s original ethos of “equipping and inspiring” drives the brand’s research and development of new materials, technologies, and production methods across its diverse line of outdoor products. The Sea to Summit team believes epic adventures bring about pure joy, fresh challenges, and fresh thinking.

Through continued product innovations and design, Sea to Summit strives to make outdoor adventures more successful — from high-altitude expeditions to car camping and everything in between.


This post was sponsored by Sea to Summit.

The Best Backpacking Sleeping Pads of 2025

29 August 2025 at 16:49

A good pad can be a camp comfort game changer; (photo/Chris Carter)

Backcountry sleep comfort starts from the ground up, and the best backpacking sleeping pads ensure that your nights under the stars are restful, not restless.

Leveraging the collective experience of some of the best backwoods snoozers out there, we’ve pulled together the most solid options in 2025, along with our trail-worn opinions on each. Triple Crown thru-hiker Chris Carter has curated our list, and while testing each model, we focused on a number of key metrics.

To merit any real estate in this guide, every pad we blew up had to demonstrate outstanding durability, comfort, and insulation. We paid special attention to pack size, warmth-to-weight ratios, and ease of inflation. Rest assured — we would depend on anything in this roundup for our backcountry beauty sleep.

No stone was left unturned in an effort to narrow in on the most deserving pads for this guide. Right off the bat, the Therm-a-Rest NeoAir XLite NXT proved to be our favorite combination of warmth and packability, and the Klymit Static V emerged as a great budget compromise.

Editor’s Note: We updated our Backpacking Sleeping Pad guide on August 29, 2025 to add our new favorite self-inflating sleeping pad, the Sea to Summit Pursuit. We’ve also added new rating attributes to each pad to make comparison easier when you’re choosing between similar options.

The Best Backpacking Sleeping Pads of 2025

Best Overall Backpacking Sleeping Pad

Therm-a-Rest NeoAir XLite NXT

9.7/10 Rating

Best Budget Backpacking Sleeping Pad

Klymit Static V

6.5/10 Rating

Best Ultralight Backpacking Sleeping Pad

NEMO Tensor Elite Sleeping Pad

9.3/10 Rating

Most Comfortable Backpacking Sleeping Pad

Therm-a-Rest NeoLoft Sleeping Pad

8.9/10 Rating

Best Winter Expedition Sleeping Pad

Therm-a-Rest NeoAir XTherm NXT

9.5/10 Rating

Best Self-Inflating Sleeping Pad

Sea to Summit Pursuit Sleeping Pad

7.9/10 Rating

Most Indestructible Backpacking Sleeping Pad

NEMO Switchback

6.1/10 Rating
See more picks

  • Comfort
    8.0
  • Warmth
    8.0
  • Packed Size
    9.0
  • Material Durability
    8.0

  • Weight: 13 oz.
  • R-value: 4.5
  • Thickness: 3″
  • Lengths Available: Short (66"), Regular (72"), Large (77")
  • Width: Regular (20"), Wide (25")
  • Packed Size: 4.1" x 9" (regular)
  • Shell Fabric: 30D ripstop HT nylon
  • Insulation Type: ThermaCapture aluminized foil

Pros

  • Super light for its high R-value
  • Comfortable and sturdy
  • Durable enough for 2,000+ mile thru-hikes
  • Update is 6 times quieter than previous model

Cons

  • Update adds 1 oz. (but is thicker and warmer)
  • Still has some crinkle to it

Read Review: Therm-a-Rest Neo Air XLite NXT Review: A Killer Sleeping Pad Just Got Better (And Quieter)

The classic pick for thru-hikers or backcountry adventurers who need ultralight simplicity in a durable package, the time-tested NeoAir lineup gets a treasured update with the new Therm-a-Rest NeoAir XLite NXT ($210). Thru-hiker Chris Carter used the previous model alone for all three thru-hikes of the Triple Crown (AT, PCT, and CDT), and while most accrued their fair share of patches along the way, they kept him warm and cozy through all sorts of terrain and climates.

The XLite NXT uses a unique technology called a Triangular Core Matrix, which stacks two layers of triangular baffles to create a super stable surface while trapping as much heat as possible. This is merged with a material called ThermaCapture, which keeps the pad at a featherlight 13 ounces, while still boasting a comparatively stellar R-value of 4.5 (up from 4.2 in the last model).

The obvious question when you see such a light, warm pad is, “How long will it survive”? While it’s not as durable as some of the heavier denier pads we cover here, we can say from personal experience that if you take care of it, it’ll fend off punctures and slow leaks over months of torture.

This pad packs up tiny and disappears in your pack, yet offers superior comfort and warmth. It’s perfect for light or ultralight backpacking kits in pretty much any temperature you may encounter on a three-season thru-hike.

We recently took the new NXT pad on a winter backpacking trip through the Grand Canyon and were impressed by the comfy 3-inch height (a boost from its previous 2.5 inches) and improved insulation. For side-sleepers who tend to bottom out pads, this is a welcome change.

The WingLock valve used to inflate/deflate the pad is brilliant. A larger opening than previous iterations allows it to inflate fast, and a one-way flap means you can pause between breaths without having air escape. Opening the valve and twisting the wings deflates the pad swiftly — that’s the worst part of each morning.

Negatives? The biggest con to the XLite used to be how darn loud it was, but the NXT update targeted that directly, reducing the noise by 83%. We’ve taken this on several backpacking trips already and even slept in a small cave with three other campers. They all agreed that the noise was next to none, and it didn’t wake anybody up, no matter how much we squirmed around in the tight space. Nailed it, Therm-a-Rest!

In short, the NeoAir XLite NXT is one of the best lightweight, durable, and streamlined pads you can buy for long treks across the country or sporadic adventures into the mountains where weight and warmth are paramount.


  • Comfort
    7.0
  • Warmth
    6.0
  • Packed Size
    7.0
  • Material Durability
    6.0

  • Weight: 1 lb., 2.6 oz.
  • R-value: 1.3
  • Thickness: 2.5"
  • Lengths Available: Regular (72")
  • Width: Regular (23")
  • Packed Size: 3" x 8"
  • Shell Fabric: 75D polyester
  • Insulation Type: N/A

Pros

  • Packs compactly
  • Affordable price
  • Inflates fairly quickly
  • Quiet

Cons

  • Not very thick
  • Lacking insulation with a low R-value
  • Long-term durability concerns

Read Review: The Klymit Static V

The Klymit Static V ($65) is an incredible value. For less than 70 bucks, you can get a super-packable and quite comfortable backpacking pad. At a little over a pound, it’s not ultralight, but it’s certainly on the light end of the spectrum.

It packs down easily and only takes a few breaths to inflate. We’ve had one in testing that wore out after 6 months of hard use and stopped holding air, but we’ve had another in testing for more than 18 months with no durability concerns.

For the summertime backpacker on a budget, the infrequent camper, or someone looking to pad out their whole family, Static V is a killer value. It offers a significant bump up in comfort from a closed-cell foam pad. While not as light or plush as our pads from Therm-a-Rest or Big Agnes, we can confidently say you can get a good night’s sleep in warmer conditions.

Since the Static V isn’t as thick as some of its competitors, you’ll be able to inflate it more quickly. Your tent mates won’t need to worry about noise, as we could toss and turn in silence all night while testing.

If you sleep cold or camp during the fall or winter, you may want to consider a pad with a higher warmth rating. The Static also comes in a long and wide version if you need a little more wiggle room. They weigh and cost a bit more, but they’re a little more comfortable and still clock in under or around $100.


  • Comfort
    8.0
  • Warmth
    7.0
  • Packed Size
    9.0
  • Material Durability
    6.0

  • Weight: 8.5 oz. (regular mummy), 8.3 oz. without the stuff sack
  • R-value: 2.4
  • Thickness: 3"
  • Lengths Available: Regular mummy (72") and short mummy (63")
  • Width: 20"
  • Packed Size: 3" x 5.5"
  • Shell Fabric: 10D Cordura nylon ripstop
  • Insulation Type: Aluminized film

Pros

  • The lightest inflatable sleeping pad available
  • Impressive durability
  • Comfortable 3-inch thickness
  • Relatively quiet
  • Effective included pump sack

Cons

  • Slightly slippery face fabric
  • 2.4 R-value limits four-season use

Since the discontinuation of the Therm-a-Rest NeoAir UberLite, we’ve been on the hunt for a pad that focuses on shaving ounces without compromising too much on comfort. Now, the NEMO Tensor Elite ($230) is the lightest inflatable sleeping pad in the lineup at 8.3 ounces, and it has many of the same comfort-centric features found on other pads in the NEMO Tensor line. 

The Tensor Elite is 3 inches thick. Even if you like a soft pad and don’t inflate it tightly, you’re not going to feel the ground. NEMO’s baffle construction distributes weight evenly, and while not totally silent, the 10D shell material is much quieter than the crinkly Therm-a-Rest pads from a few years back.

This pad has an R-value of 2.4, which is plenty for the summer and shoulder seasons. We’d recommend a pad with a higher R-value, like the NEMO Tensor Extreme, for backpacking in winter.

Inflation and deflation are a breeze with the two-stage valve that allows you to adjust the firmness of the pad by pushing on the valve. NEMO includes a pump sack, but we suspect the type of backpacker that’s into this pad will be leaving the pump sack at home.

The Therm-a-Rest UberLite that once held our top ultralight accolade was 2.5” thick, weighed 0.3 ounces more, and had an R-value of 2. Spec-wise, the Tensor Elite bests the UberLite in every way. A lot of the weight savings comes from the Tensor’s 10D nylon shell material, whereas the UberLite uses a slightly thicker and arguably more durable 15D nylon.

That being said, one tester used the Tensor Elite for over 100 nights on the Appalachian Trail. While he took care not to damage the pad, 100 nights without getting a hole and deflating is still mighty impressive for an 8.3-ounce pad. 

The Tensor Elite is expensive, and there are warmer pads out there. Our top pick, the Therm-a-Rest NeoAir XLite NXT, is a better choice if you want one pad to use year-round. But for those who want to be so fast and light that they’re willing to cut off the handle of their toothbrush, the Tensor Elite is the way to go.


  • Comfort
    9.0
  • Warmth
    7.0
  • Packed Size
    7.0
  • Material Durability
    8.0

  • Weight: 1 lb., 9 oz.
  • R-value: 4.7
  • Thickness: 4.6”
  • Lengths Available: 73”
  • Width: 22”
  • Packed Size: 5.7” x 9.5”
  • Shell Fabric: 50D poly knit (top), 75D poly knit (bottom)
  • Insulated Type: ThermaCapture aluminized foil

Pros

  • 4.6” of soft loft
  • 4.7 R-value for year-round comfort
  • Quiet
  • Very soft and stretchy fabric
  • TwinLock valves are easy to use

Cons

  • Rolling off this sleeping pad hits different
  • Heavier than most backpacking pads

The Therm-a-Rest NeoLoft ($240) emphasizes warmth and comfort while barely compromising weight savings. If you’ve been intrigued by the superior packability of the NeoAir XLite, but need the cushion and comfort of a larger, thicker pad, the NeoLoft is twice as thick, has a 4.7 R-value, and only weighs 12 ounces more. That’s adding the equivalent of a beer can to your ultralight kit, and if it means better sleep in the backcountry, then it’s well worth the extra weight. 

The brand has been the king of sleeping pads for a long time now, but it isn’t a stranger to innovation. The NeoLoft is constructed from a soft, stretchy knit fabric that’s quiet and comfortable and conforms to the body. It’s 50 denier on the top and 75 on the bottom, adding some durability compared to the NeoAir’s 30-D ripstop nylon. It’s also a main culprit contributing to the added weight. We found it to be very comfortable, with one tester describing it as supple and gel-like.

This pad is a whopping 4.6 inches thick — that’s an inch and a half more than the NeoAir, and an inch thicker than the Exped Dura 8R (the warmest pad in our guide). It’s only available in the rectangular shape, eschewing the weight savings of the mummy design, but that only makes it more comfortable.

If you’re a larger person, a pad this thick is going to feel awesome compared to the typical ultralight fare. The only complaint we have comfort-wise is that you don’t roll off this pad — you fall off. 4.6” is kind of a long way down, something serious toss-and-turners should consider.

Inflation with the included pump sack takes around a minute. There’s a lot of pad here to inflate, but using the pump sack won’t leave you breathless, and it will keep moisture out of the pad. A two-valve system borrowed from the brand’s camping mattresses allows for fast inflation and deflation. If you’re OK with the extra weight, we recommend the Flextail Tiny Pump 2X to speed up the process.

Comfort and weight savings are always going to be a compromise, but at least with the Therm-a-Rest NeoLoft, you’re compromising less. If you’re just not getting the sleep you need on an ultralight pad, the NeoLoft is the way to go.


  • Comfort
    8.0
  • Warmth
    9.0
  • Packed Size
    8.0
  • Material Durability
    8.0

  • Weight: 15.5 oz.
  • R-value: 7.3
  • Thickness: 3″
  • Lengths Available: Regular (72"), Large (77")
  • Width: Regular (20"), Wide (25")
  • Packed Size: 4.9" x 9"
  • Shell Fabric: 30D nylon top, 70D nylon bottom
  • Insulation Type: ThermaCapture aluminized film

Pros

  • Impressive 7.3 R-value warmth
  • WingLock valve is one of the best we've used
  • Rugged 70D bottom textile
  • Solid pump sack included
  • MAX version is ideal for longterm basecamps in cold places

Cons

  • Not the absolute warmest pad out there
  • Still some crinkle noise while sleeping

The Therm-a-Rest NeoAir XTherm NXT ($240) has an impressive 7.3 R-value, making it among the best winter-ready pads available. Borrowing a bit from the NeoAir XLite, the XTherm adds reflective layers to bounce your body heat back at you, and this pad is ready to sleep directly on snow.

We’ve used the XTherm on many cold-weather trips and expeditions, ranging from ski tour overnights to expeditions in the Brooks Range, and it always kept us warm. The 3″ pad thickness is just right for balancing weight and comfort, and the XTherm is offered in five different sizes (choose the mummy shape for cold-weather backpacking, and the rectangular ‘MAX’ for long-term expeditions when sleeping purely on snow).

Feedback from previous versions of the XTherm noted loud crinkling when moving around on the pad, but the most recent version significantly dampens this. The XTherm’s shell material is tough, with a 70D bottom textile mated to a 30D high-tenacity top. Senior Editor Nick Belcaster has used the same XTherm for 1,500 miles and still hasn’t put a hole in it!

A good pump sack is essential in sleeping pads used in below-freezing conditions, as any moisture from your breath will condense inside the pad. The XTherm has a solid option that securely attaches to the WingLock valve and inflates the pad with about 12 bagfuls of air.

The XTherm differentiates itself from the NEMO Tensor Extreme Conditions pad in a few ways, with overall warmth going to the NEMO (8.5 vs. 7.3 R-values). When comparing valves side by side, we prefer the WingLocks on the XTherm for its usability and the fact that the pump sack won’t disengage if inflated too high. 

Overall, the NEMO edges out the XTherm in pure warmth, while the XTherm is more durable, lighter, and offered in a broader range of sizes. Both options are solid all-season choices, so consider your needs before deciding between them.


  • Comfort
    7.0
  • Warmth
    6.0
  • Packed Size
    6.0
  • Durability
    8.0

  • Weight: 1 lb., 5.3 oz. (Regular mummy)
  • R-Value: 3
  • Thickness: 2"
  • Lengths Available: Regular, Large
  • Width: Regular, Wide
  • Packed Size: 5.5" x 11.4"
  • Shell Material: 20D recycled exterior fabric
  • Insulation Type: Closed-cell foam

Pros

  • Comfortable
  • Quiet
  • Self-inflating
  • Durable

Cons

  • Only self inflates to ~65-75%
  • Doesn't pack away very small
  • Is on heavy end for backpacking sleeping pads

The Sea to Summit Pursuit Sleeping Pad ($139) is a self-inflating backpacking pad that cuts the crinkling of inflatable mattresses and provides a value-heavy option for those who might be light sleepers while camping.

GearJunkie Editor Will Brendza took this pad for a spin this spring and summer and found it to be surprisingly comfortable, given his experience with less-than-impressive self-inflating pads. Sea to Summit’s horizontal foam coring both increases comfort and limits the amount of foam used in order to cut weight. The pad sleeps more comfortably than the 2″ of thickness would lead you to believe, and the foam is to thank here.

The pad itself weighs 1 pound, 5.3 ounces in the regular mummy size, which is heavier than many of the pads we’ve reviewed for backpacking. That said, it isn’t the heaviest and certainly lighter than self-inflating pads of the past.

The ‘XPEL Valve’ is a game-changer when it comes to getting a self-inflating pad like the Pursuit down to a good packed size. It can be flipped around to offer one-way deflation and hold your progress as you roll it up. This is well-appreciated and key to getting the Pursuit down to the size of a football for storage.

This pad is quite similar to the NEMO Flyer, another self-inflator with very similar specs. The Pursuit is a bit wider and is available in more sizes. The Flyer, alternatively, weighs a bit less and has a slightly higher R-value (3.3 vs. 3). It really comes down to the valve for us, and we prefer the XPEL valve on the Pursuit for its one-way deflation abilities.

The price can’t quite match the bottom-dollar value of the $65 Klymit Static-V, but the Pursuit is about the best self-inflating backpacking pad out there for the money. If the crinkle keeps you from getting your shuteye in the backcountry, consider adding the Pursuit to your kit.


  • Comfort
    6.0
  • Warmth
    6.0
  • Packed Size
    6.0
  • Material Durability
    9.0

  • Weight: 14.5 oz.
  • R-value: 2.0
  • Thickness: 0.9"
  • Lengths Available: Regular (71"), Short (51")
  • Width: 20"
  • Packed Size: 5" x 5.5" x 20"
  • Material: PE Foam
  • Insulation Type: Thermal reflective film

Pros

  • Dual-density foam offers plush comfort while still being supportive
  • Taller nodes and smaller pack size than other models
  • Indestructible

Cons

  • Not as comfortable as inflatable pads
  • Bulky pack size

Read Review: NEMO Switchback Ultralight Sleeping Pad Review: New Take on Classic Design

It’s hard to add even more innovation to the simple design and concept of an accordion-style foam pad, but the NEMO Switchback ($50-60 depending on length) continues to impress backpackers and campers with each new design and update.

Their latest iteration offers even greater plushness via taller nodes in a smaller pack size for a cozy, warm pad that will hold up to the wear and tear of weekend use or a months-long thru-hike. Plus, at $55, it’s a nice break for your wallet.

For years, the Therm-a-Rest Z Lite has been the industry’s foam pad standard, without much competition. Now, with the Switchback making a name for itself in the backpacking world, it’s not the only slab of foam seen strapped to hikers’ packs on the trail.

Though it’s 0.5 ounces heavier than the Z Lite and has the same R-value of 2, it’s a tad bit thicker, and we feel like it offers just a little more cushion and comfort. It’s definitely one of the best foam pads we’ve slept on.

A metalized thermal reflective film bounces heat back to your body, while dual-density Axiotomic foam provides a soft layer of comfort, paired with a tougher layer for support. This makes the pad a solid insulator on its own in milder temps, or a great way to add more comfort, protection, and warmth when paired with an inflatable pad on colder adventures.

While we haven’t had the chance to put it through a 2,000+ mile trek yet, it’s shown little wear and tear as we’ve tested it, and a plethora of online comments praise its durability and comfort over the length of a taxing thru-hike. We’d say you don’t have to worry about this falling apart any time soon.

As an ultralight standalone pad for fast and light missions or another addition to your sleep system for freezing expeditions, the NEMO Switchback will have you in a deep, comfortable slumber every night.


Other Trail-Worthy Pads We Tested

While the following pads aren’t our editors’ absolute favorites, they’re all good options depending on your specific needs. If none of our award-winning picks pique your interest, check out these field-tested pads.

  • Comfort
    9.0
  • Warmth
    8.0
  • Packed Size
    8.0
  • Material Durability
    8.0

  • Weight: 1 lb., 3.8 oz.
  • R-value: 7.4
  • Thickness: 3.9"
  • Lengths Available: Regular (72")
  • Width: 25.2"
  • Packed Size: 5.3" x 9.4"
  • Material: 30/40D nylon with TPU lamination
  • Insulation Type: Multi-layer TRM reflective insulation

Pros

  • Quick inflation
  • Comfortable
  • Quiet
  • Tough (for a lightweight sleeping pad)

Cons

  • Heavier compared to a few pads on our list with a similar R-value

Tough, warm, and quiet, the Sea To Summit Ether Lite XR Pro ($229) can’t edge out our top pick spec for spec, but it has a few advantages over the Therm-a-Rest XLite NXT when used in the field. Mainly, it’s much quieter and feels more comfortable to a few of our testers. If your hiking buddies or partner can’t stand the crinkle of the XLite pads, the Ether Lite Pro keeps the noise down while you snooze the night away.

With an R-value of 7.4, the Ether Lite XR Pro is well suited for winter camping, at least in most lower 48. Other versions of the Ether Lite have elicited some complaints about cold spots due to the way the TMR layers are welded together. Our tester spent a night at 8,000 feet with temps in the upper teens and didn’t experience any cold spots. He also tested the Therm-a-Rest XTherm that night and was asked by his partner to switch to the Ether Lite since it’s so much quieter and doesn’t crinkle when he shifted positions.

Inflation bags are standard in the modern sleeping pad, and the Ether Lite Pro arrives with one built into its stuff sack. The valve can be adjusted from one to two-way operation. This pad is almost 4 inches thick when fully inflated, so there’s plenty of wiggle room for adjustment. You can let out some air for a softer pad and still have plenty of insulated space between you and the ground. 

Weight is the only issue we have with the Ether Lite Pro. The regular mummy-shaped version we tested has an R-value of 7.4 and weighs 19.8 ounces. Compare that to the NEMO Tensor Extreme Conditions, with an R-value of 8.5 at just 17 ounces. Or the Therm-a-rest Neo Air NXT, weighing in at 15.5 ounces with an R-value of 7.3. We may be splitting hairs here, but ounce for ounce, the Ether Lite doesn’t come out on top.

Where are those ounces coming from? Multiple layers of TMR reflective insulation certainly add some weight. But we suspect most of the “heft” can be attributed to the 30-denier nylon used on the top of the pad and the 40-denier on the bottom. You don’t want your pad to pop. Consider that many ultralight tents use 10-denier nylon, as does the Mountain Hardwear Ghost Whisperer down jacket. 40-denier is substantial and durable. And anecdotally, the Ether Lite Pro feels more durable than other pads we tested. 


  • Comfort
    8.0
  • Warmth
    9.0
  • Packed Size
    8.0
  • Material Durability
    8.0

  • Weight: 1 lb., 1 oz. (Regular Mummy)
  • R-value: 8.5
  • Thickness: 3.5"
  • Material: 20D and 40D GRS-certified & Bluesign-approved nylon

Pros

  • Best warmth-to-weight ratio on the market
  • Small pack size
  • Durable construction despite light weight
  • Quick inflation time
  • Quiet

Cons

  • Extremely difficult to fit into stuff sack
  • Slippery material
  • Not our favorite valve construction

Read Review: Warmth-to-Weight King: NEMO Tensor Extreme Conditions Sleeping Pad Review

The new NEMO Tensor Extreme Conditions ($250) (EC) pad boldly claims to have the best warmth-to-weight ratio on the market. And well — objectively — they’re not wrong. We brought the EC on several chilly fall backpacking trips, overnight climbing excursions in Appalachia, and even a frigid five-day ascent of El Cap in Yosemite to truly test its mettle.

Capitalizing on NEMO’s established sleeping pad tech, Thermal Mirror Insulation, and new Apex baffles churn out serious heat without packing on pounds. For stellar warmth at an ultralight weight, this is quite literally as good as it gets. An 8.5 R-value at an impressively low 17 ounces — with a 3.5-inch stack height — is plenty to blow the pad’s competition out of the water. No existing pad touches these stats. And, in our experience, it’s not all talk.

We were stunned at how well it protected us from cold seeping in from the granite while sleeping on ledges in Yosemite. This is due to a new tech called “Apex Baffles” within the pad, which are four layers of thermal film placed over trapezoidal trusses. These reflect body heat back at the user, guard against radiant heat loss, while also deflecting cold from the ground. This design cuts weight, boosts heat, and is shockingly quiet.

It’s not perfect, however: During our first night with the EC, we quickly realized we very much disliked its stuff sack. You have to roll it up with factory precision if you want to stow it easily, and it’s more difficult if you dare to add the included pump sack. Considering the EC is designed for use in ungodly temps, this is the last thing you want to fumble with as you try to retain the feeling in your fingers on freezing alpine starts.

Additionally, the fabric is on the slippery side, and the pad is a bit narrow compared to its competition, resulting in limbs sliding off occasionally at midnight. Also, the valve construction isn’t our favorite. It can be a pain to inflate or top off by mouth. For pure ease of use, we think that the Therm-a-Rest NeoAir XTherm is a better all-around cold-weather pad for most backpackers.

For the ultralight madmen braving arctic temps on hunting excursions or winter thru-hikes, you may have just stumbled across the backcountry bed of your dreams, however. If you’re after warmth over all else, the Tensor Extreme Conditions pad is where it’s at.


  • Comfort
    7.0
  • Warmth
    7.0
  • Packed Size
    7.0
  • Material Durability
    8.0

  • Weight: 1 lb., 2 oz. (regular)
  • R-value: 4.8
  • Thickness: 4.25"
  • Lengths Available: Petite (66"), Regular (72"), Long (78')
  • Width: Regular (20"), Wide (25")
  • Packed Size: 4" x 7" (regular)
  • Material: Nylon double ripstop
  • Insulation Type: Aluminized film

Pros

  • Comfortable
  • Great warmth-to-weight ratio
  • Compact and easy to carry

Cons

  • Standard size is small

Big Agnes is no stranger to the sleeping pads scene, and comfort has always been a top priority of the brand’s ethos. The newly re-tooled Rapide SL ($149) is super comfortable due to its supportive offset I-beam construction, 4.8 R-value, and quiet shell material. 

We tested this pad on rocky terrain and weren’t at all careful with it. We saw no punctures and experienced no midnight deflation events, though Big Agnes does include a handy repair kit just in case. The kit includes some 3M patches and glue, and we’ve found them to be quite effective in the past. Locating leaks can be tricky, but a well-placed patch can make the pad as good as new. 

On the warmth-to-weight spectrum, the Rapide SL has a respectable balance, with a weight of 18 ounces and a 4.8 R-value. Compared to the NEMO Tensor Insulated (15 ounces, R-value 5.4) and the Therm-a-Rest NeoAir XLite NXT (4.5 ounces, R-value 4.5), the Rapide looks pretty competitive. It’s also less expensive. 

Big Agnes provides a pump sack to inflate the pad without introducing moisture to the inside, or you can just throw caution to the wind and use your mouth. Either way, it inflates in under a minute. The dual valve system makes it easy to make micro-adjustments and find the firmness to your liking.

One of our testers found the standard 20” x 72” size less than spacious, even for her 5’6” frame, and recommends purchasing a larger (heavier and more expensive) size if you’re a side sleeper or prone to tossing and turning.

If you’re under six feet, the standard size presents an undeniable value thanks to its impressive warmth-to-weight ratio, and while the Rapide SL is on the tippy top of our list, it’s very much worth your consideration if you’re on a budget.


  • Comfort
    8.0
  • Warmth
    6.0
  • Packed Size
    7.0
  • Material Durability
    7.0

  • Pad Type: Air
  • Sleeping Area: 72" x 20" (Regular)
  • Weight: 1 lb., 12 oz.
  • Packed Size: 8" x 4.5" rolled
  • R-value: 3.3
  • Thickness: 3.5"
  • Material: 30-denier polyester ripstop

Pros

  • Excellent packed size
  • Body-contoured pad baffles and elevated head
  • Vortex pump sack works great
  • Great option for side sleepers

Cons

  • Finicky valve system
  • Not quite as warm as comparable pads

The NEMO Quasar 3D Insulated ($160) is a versatile backpacking and camping pad with a larger-than-average surface area and thickness. It is a comfort-first option for those who want a bit more luxury in the backcountry.

At 3.5” thick, this rectangular pad has plenty of space to spread out on, and it builds in a unique 3D architecture to add a curve side-to-side and at the head end to cradle your body. If you’ve ever had trouble falling off smaller mummy-shaped pads, this shape may be the ticket for you, and we found it kept us smack-dab in the center all night.

There are both an insulated and a non-insulated version of the pad, though we think only the insulated version is worth considering, as even at an R-value of 3.3, it’s a little on the cooler side. That lower R-value can be a bonus if you’re after a hot-weather sleeping pad, but for sneaking into the early spring or fall, you’ll want an extra foam pad to use beneath it.

Stacked up beside the new Therm-a-Rest NeoLoft, the Quasar 3D unfortunately just can’t catch much of a break. Not only is the NeoLoft larger in every dimension (1” longer, 2” wider, 1” thicker), but it weighs the same, and has a higher R-value of 4.7, due to the ThermaCapture reflective layers. 

Price, however, is where the Quasar 3D has got the Therm-a-Rest licked, and you’ll need to shell out $70-80 more for the comparable NeoLoft pad. This price difference is significant; for some, the savings will make the difference in specifications. You’ll get the same pad, and so long as your trips don’t take you far into the shoulder season, the Quasar makes a value-heavy alternative.


  • Comfort
    7.0
  • Warmth
    7.0
  • Packed Size
    8.0
  • Material Durability
    7.0

  • Weight: 14 oz.
  • R-value: 4.3
  • Thickness: 3.5"
  • Lengths Available: Regular (70"), Long (78")
  • Width: Regular (20"), Wide (25")
  • Packed Size: 4" x 8"
  • Shell Material: Nylon ripstop
  • Insulation Type: Aluminized film

Pros

  • Lightest weight pad in the Big Agnes lineup
  • Ample protection from the cold in most conditions

Cons

  • Single valve makes it hard to deflate the pad
  • Slippery surface

A great balance of weight and comfort, the Big Agnes Zoom UL ($179) is just an ounce heavier than the lightest pad in our guide, and it has a larger surface area. Unlike the Therm-a-Rest NeoAir Xlite NXT, this pad is only available in a wider rectangular shape. While this isn’t the “optimal” shape for weight savings, it’s definitely a more optimal shape for comfort.

Continuing with the comfort theme, this pad is 3.5” thick and a little thicker on the sides to help you stay on it through the night. Two layers of heat-reflecting film help the pad achieve a respectable R-value of 4.3. This is warm enough to use as a 3-season pad in most of the lower 48. Our tester used the Zoom UL camping all over the U.S., from Bryce Canyon to southern Illinois, sleeping in temperatures ranging from the high 70s to the low 20s.

The main gripe we have with this pad involves the valve system. We have no trouble inflating this pad, but when it comes time to deflate the pad to pack it away, the two-way valve proves a bit finicky. To deflate the pad, you stick a little tab on the side of the valve cover into the valve to hold it open while you squeeze the air out. A clever design that shaves some ounces for sure, but the tab would frequently fall out of the valve, making the packing process cumbersome compared to Big Agnes’ Rapide SL, which has a second valve dedicated to deflation.

Folks who are willing to carry just a few extra ounces than our top picks in exchange for more real estate and a slightly more comfortable sleep experience should put the Big Agnes Zoom UL on their short list. Sometimes “light is right” goes a little too far, and we’d argue that better sleep can equate to more miles hiked.


  • Comfort
    8.0
  • Warmth
    6.0
  • Packed Size
    7.0
  • Material Durability
    7.0

  • Weight: 13.9 oz.
  • R-value: 2.8
  • Thickness: 3"
  • Lengths Available: Regular (72"), Long (76")
  • Width: Regular (20"), Wide (25")
  • Packed Size: 4" x 10"
  • Shell Material: 20D nylon top, 40D nylon bottom
  • Insulation Type: Thermal Mirror metallized film layers

Pros

  • Very comfortable
  • Remains quiet when rolling around
  • Stable yet plush

Cons

  • Not the warmest at 2.8 R-value

Read Review: My Favorite NEMO Sleeping Pad Just Got Warmer, More Sustainable

The NEMO Tensor Sleeping Pad ($200) has always been wide, supportive, quiet, and relatively warm. The original Tensor was somewhere between good and great. It was upgraded in 2022, and the results are top-notch. Sharing similar tech with the toasty Tensor EC above, this pad is plush and comfortable.

The pad’s improvements come from the inside out. NEMO redesigned its Spaceframe — what the brand calls the structural baffles inside the pad that give it support and stability — to make both the insulated and uninsulated pads warmer.

The new baffle design still has individual tack points that prevent the pad from feeling like a raft underneath you, and the insulation is still woven between the baffles in a way that keeps it quiet. There’s no pad squeaking or crinkling while rolling around.

The pad comes with the NEMO Vortex Pump Sack, which inflates all sizes of the pad quickly and efficiently without filling the pad with moisture from your breath.

It’s available in mummy and rectangular shapes, two lengths, and as both insulated and uninsulated options. Though the NEMO Tensor Trail pad is light and compact enough to use for backpacking, it’s plenty comfortable and durable for car camping too. The only drawback here is weight.

The larger version of this pad is approaching a pound. All that comfy real estate has to weigh something, though, and it only weighs a few ounces more than the NeoAir XLite. Folks who typically have trouble sleeping in the backcountry should consider the Tensor Trail over our top pick.


  • Weight: 1 lb., 6 oz.
  • R-value: 3.3
  • Thickness: 2"
  • Lengths Available: Regular (72"), Long (76")
  • Width: Regular (20"), Wide (25")
  • Packed Size: 6.5" x 10"
  • Shell Material: 100% recycled PU polyester, Bluesign approved
  • Insulation Type: Open-cell foam

Pros

  • Foam durability and padding
  • Plus air pad comfort
  • Self-inflating

Cons

  • Heavier/bulkier than some other options
  • Not super thick

Read Review: NEMO Flyer: The World’s First Baffled Self-Inflating Air Pad

The NEMO Flyer ($140) combines the best of foam-core comfort with air bed packability. At 1 pound, 6 ounces, it’s not the lightest, most packable option, but the added comfort is worth it if you don’t mind a few more ounces.

As one of our reviewers noted, “The NEMO Flyer is a lightweight, three-season pad that hits the sweet spot between an air pad and a self-inflating foam pad. The unique air-filled foam baffles create stable, cushioned thickness with more durability and resistance to bottoming than an air pad, with a slight weight and bulk penalty. But it’s lighter and packs smaller than a self-inflating pad.”

We got to take a look at the updated Flyer for 2023, and can confirm that it is still worthy of the pad’s stellar reputation. This popular hybrid design is now made with Bluesign-approved fabrics and is produced in a resource-conserving way that greatly reduces its impact on the environment. We’re big fans of that.

Right out of the bag, we were initially impressed by how quickly the Flyer inflates, whether you want to let it fill up by itself or top it off with your own breath. This thing deploys fast, which is a welcome reprieve from the light-headed task of inflating full-on air pads.

The low-profile valve is pretty easy to use and allows you to make micro-adjustments to the pad’s firmness. We did find it a bit difficult to let small amounts of air out while making adjustments, though, as air would sometimes continue to seep out of the two-way valve until blowing into again or putting the cap back on.

The 3.3 R-value is a solid boost from a dedicated foam pad like the NEMO Switchback, but the added bulk may not be worth it for some. We also appreciate how soft and quiet the outer fabric is, which contributes to a restful night of sleep.

Overall, this is a great option for those who love the reliability and ease of a foam pad but may want a bit more of the loft and comfort found in air pads.


Backpacking Sleeping Pad Comparison Chart

Backpacking Sleeping PadPriceWeightR-ValueThicknessMaterial
Therm-a-Rest NeoAir
XLite NXT
$200-24013 oz.4.53″30D ripstop HT nylon
Klymit Static V$651 lb., 2.6 oz.1.32.5″Polyester
NEMO Tensor Elite$2308.3 oz.2.43″10D Cordura nylon ripstop
Therm-a-Rest NeoLoft$2401 lb., 9 oz.4.74.6″50d poly knit (top), 75d poly knit (bottom)
Therm-a-Rest NeoAir XTherm NXT$24015.5 oz.7.33″30D nylon top, 70D nylon bottom
Sea to Summit Pursuit$1391 lb., 5.3 oz.32″20D recycled exterior fabric, closed-cell foam
NEMO Switchback$50-6014.5 oz. 20.9″PE foam
Sea To Summit Ether Lite XR Pro $2291 lb., 3.8 oz.7.43.9”30/40D nylon with TPU lamination, multi-layer TRM reflective insulation
NEMO Tensor Extreme Conditions$2501 lb., 1 oz.8.53.5″20D and 40D GRS-certified & Bluesign-approved nylon
Big Agnes Rapide SL $1491 lb., 2 oz.4.84.25″Superlight nylon double ripstop
NEMO Quasar 3D Insulated$1601 lb., 12 oz.3.33.5″30D polyester ripstop
Big Agnes Zoom UL $17914 oz.4.33.5″Nylon
NEMO Tensor Trail$200-23013.9 oz.2.83″100% PCR PU polyester, Bluesign certified
NEMO Flyer$140-1601 lb., 6 oz. 3.32″100% recycled PU polyester, Bluesign approved 
Two backpackers on sleeping pads hanging out in the tent
The quality of your sleeping pad can make or break your backpacking trip; (photo/Eric Phillips)

How We Tested the Best Backpacking Sleeping Pads

Our Expert Testers

From weekend warriors to fast and light thru-hikers, the GearJunkie team is made up of avid backpackers. We’ve spent hundreds of hours blowing air into sleeping pad nozzles, and we’ve repeatedly experienced the sadness of a mysterious midnight deflation.

Contributors Mallory Paige and Austin Beck-Doss led the charge in the creation of this guide back in May 2021, accruing our initial selection of 10 sleeping pads. Seasoned pros in the backpacking realm, both authors have paid their dues on rough backcountry trails, and are intimately familiar with the necessity of sound sleep on any demanding adventure.

Senior Editor Chris Carter now leads testing on this guide and has significant experience sleeping atop various inflatables, having thru-hiked the Pacific Crest Trail, the Continental Divide Trail, and the Appalachian Trail. He knows the importance of consistent Zs on trail and is meticulously choosy about the portable beds he picks for the wild.

Our Testing Process and Testing Grounds

Our primary considerations while testing are packed size, comfort, warmth, and ease of use. When backpacking, the ratio between weight and comfort is all-important, so we paid extra attention when examining these two specs.

Secondly, we looked at durability and value. These pads were carefully inspected and repeatedly slept on inside tents and directly under the stars. If you are mainly car camping and aren’t concerned about weight, we focus our critical eye on comfort-focused pads in our guide to the best camping mattresses.

Testing in the field gives us a great big-picture view of how each pad feels and performs as we unpack, inflate, sleep, deflate, and pack them back up again. But taking these pads inside, weighing them, counting breaths to inflate, and comparing them side by side is what helps us distinguish the best of the best.

Our Sleeping Pad Rating System

We’ve keyed in on four different attributes to rate these sleeping pads on to better understand where they stand tall and where they fall a bit short. You can use them to compare pads side by side and better inform your next purchase.

Comfort

Comfort is key, and we look at overall pad thickness, width, and construction when weighing a rating here. When considering air pads, we look for at least 3″ of cushion to rate highly, with that number dropping to 2″ for self-inflating pads. Foam pads, generally, don’t rate very highly in this attribute.

Warmth

The tested R-value of each pad is important when rating for warmth, but it isn’t everything. A pad’s design also has a lot to do with trapping heat, and often, a mummy-shaped pad will rate higher than a rectangle-shaped one due to its more efficient use of space. For summer use, we look for an R-value of at least 3 to rate highly, with a value of at least 5 being required for winter camping.

Packed Size

For backpacking, a compact packed size is important to maintaining a trim backpack, and generally the smaller a pad packs, the higher the rating we assign. Often the most ultralight pads will rate highly here, but trade some performance in comfort and durability for it.

Durability

Finally, we consider season-long durability before rating these pads. We look for material damage on the shell, the operation of the valves, and how well any stuff sacks have held up.

DSC05363
A solid, reliable sleeping pad is essential for maximizing comfort while sleeping, or just hanging around camp; (photo/Honey McNaughton)

Buyer’s Guide: The Best Backpacking Sleeping Pads

A restful night’s sleep sets you up for success on a full day of backpacking adventures. In the past, people rightfully assumed sleeping on a pad on the ground could never match the comfort of a real bed.

However, sleeping pads have improved significantly in recent years. With advancements in cell design and baffling, many high-quality sleeping pads offer exceptional warmth and comfort.

While comfort standards have increased, packed size and weight have also dropped, and the resulting pads are light, easy to use, and wonderful to sleep on.

Because there are so many great pads on the market, it can be difficult to make a selection. In this guide, we break down some of the most important considerations for purchasing the perfect sleeping pad.

In this buyer’s guide, we hope to answer all of your sleeping pad-related questions, from weight and thickness to durability and price.

Types of Sleeping Pads: Foam, Self-Inflating, and Air Pads

ATP04067
Air pads that you inflate with your mouth or a pump sack are usually on the lighter, more packable end of the spectrum, but can be more prone to punctures; (photo/Chris Carter)

There are three types of backpacking sleeping pads: air pads, foam pads, and self-inflating pads. Each category has its own list of pros and cons, and it’s important to understand the differences between them.

Air Pads

Air pads are the lightest and most compact type of sleeping pad. When not in use, they can be deflated and packed into a small stuff sack about the size of a water bottle. Because most of their insulation is trapped in air, they can become quite thick without excess weight or bulk.

Compared to other categories, air pads are the most vulnerable to punctures and air valve issues. Punctures are usually fixable with the proper supplies, but some people avoid air pads due to the puncture risk.

Air pads tend to be the lightest and most packable of the three types of backpacking pads; (photo/Honey McNaughton)

Most pads come with repair kits for punctures or tears, but our testers have had good luck with trusty Tenacious Tape in a pinch or even super glue for fixing issues around the valve.

Self-Inflating Pads

Self-inflating pads have been around for many decades. Most pads in this category combine inflation with open-cell foam to decrease puncture risk and increase durability.

However, self-inflating pads do not pack down as small as air pads, and they tend to be a bit heavier. If these pads do puncture or deflate, you’ll still have some padding between you and the ground, but it won’t be a super comfortable night’s sleep.

Foam Pads

DSC06393
Foam pads such as NEMO’s Switchback are nearly indestructible and can be deployed in seconds; (photo/Honey McNaughton)

Closed-cell foam pads are the original backpacking sleep system technology. Although these tend to be the least comfortable pad style, they are extremely reliable and can last for decades if treated with care.

On a foam pad, you can sleep soundly without worrying about punctures. Usually, foam pads fold or roll to pack away, but they take up far more space in your pack than other types of pads and often have to be strapped to the outside.

Weight

The goal of backpacking is always to minimize the total weight of your pack, particularly when hiking with ultralight backpacks. These days, thick and comfortable pads that are also lightweight offer an ideal solution for backpackers.

Some single-person pads can weigh as little as half a pound, while heftier options may weigh 2 pounds. For a good balance between weight and durability, consider a pad that weighs 14-18 ounces.

Truly ultralight fiends will often carry a torso-length pad, and use their backpack or foam back panel as the insulation for their legs. This greatly cuts base weight but can be a gamble in chilly conditions. Figure out your threshold of comfort, and dial in on a comfort-to-weight ratio that allows you to cruise the miles with ease while getting a full night’s rest when the sun goes down.

Thickness

On uneven or rocky ground, a thin pad will feel only slightly better than lying on the bare earth. As a general rule, thicker pads are more comfortable. However, thickness does add weight and bulk, so we suggest you aim to find a happy medium.

If you are a back sleeper, your weight will be a bit more evenly distributed, and you may be able to get by with a thinner pad. Side sleepers tend to prefer thicker pads, such as the Therm-a-Rest Neoloft.

Any inflatable pad over 3.5 inches thick will be on the more plush side, whereas most foam pads are less than 1 inch thick.

Comfort

Generally, pads made for backpacking will be less plush than pads made for car-based camping. Because backpackers aim to minimize weight, pure comfort is not the priority.

Still, many modern pads offer a generous combination of insulation, padding, and sleeping area all in a lightweight package. For some backpackers, a bit of extra weight is a small price to pay for added comfort.

While stack height isn’t the only determining factor in how comfortable a pad is, it plays a large role. The pads on this list range from under 1 inch to 4 inches thick. Thicker pads obviously land on the heavier, bulkier fringe of the spectrum, but offer plush comfort compared to thinner pads, which bottom out easily. This is particularly true if you are a chronic side sleeper.

R-Value Explained

The higher the R-value a pad has, the warmer it will be for cold, windy nights under the stars; (photo/Honey McNaughton)

The R-value of a pad describes the amount of insulation between the user and the ground. Insulation prevents your body heat from escaping into the earth below. Without a well-insulated pad, sleeping on the ground is very chilly, even when the air temperature is reasonably warm.

In warmer conditions, a sleeping pad with an R-value of less than 3 should be sufficient. However, if you plan to backpack in the shoulder seasons, you’ll be better off with a higher rating (between 3 and 5). For winter camping or mountaineering, an R-value of at least 5 (like the Exped Ultra 7R at 7.1) is the way to go.

Higher R-values are attained in various ways depending on the design, but they generally involve suspending various layers of reflective film within the pad on vertical “trusses” (flexible supports within the pad). These sheets reflect body heat back at the user and guard against radiant heat loss — all while deflecting cold seeping in from the ground.

As insulation technology develops, manufacturers are able to attain better and better warmth-to-weight ratios and dial in on impressively high R-values while keeping weight to a minimum. NEMO’s new Tensor Extreme Conditions is a prime example of this.

Boasting an absurdly high 8.5 R-value, it has a modest minimum trail weight of 17 ounces. Similarly, the Exped Dura 8R has a high R-value of 7.8. Models like these allow backpackers to maintain an ultralight loadout while adventuring in truly arctic conditions.

While most backpackers won’t need such high R-values for their backpacking trips, it can be nice to have for the occasional winter excursion, or stretches of chilly, high-altitude trail on longer journeys like thru-hikes.

Sleeping Pad Dimensions

You want to make sure that the pad you use is big enough for your comfort, but also packs down small enough for a lightweight backpacking trip; (photo/Chris Carter)

Sleeping pads typically come in various sizes, and users can choose the option that best suits their body and preferences. Common sizes include regular, which is usually around 6 feet long, and large, which tends to be closer to 80 inches. Pad width also varies, but anywhere between 18 and 26 inches is fairly standard.

When deciding on the best width for your needs, consider how voluminous your sleeping bag is, and if you tend to wear bulky cold-weather clothes while sleeping. Trying to balance on a narrow pad while bundled up in a bulky cocoon can result in a poor night of rest.

Most backpacking pads are semi-rectangular in shape, and some taper down and become more narrow toward the feet. Two-person sleeping pads are also available, but they’re quite cumbersome and generally not ideal for backpacking.

If you are consistently hiking with a partner, however, they can be a feasible, streamlined option, if one partner carries most of the weight of your two-person tent, and the other carries the two-person pad. Whatever pad you decide to go with, make sure it fits comfortably inside your backpacking tent.

Packed Size

A pad’s packed size depends on construction, materials, and the amount of insulation. Air pads with minimal additional built-in insulation tend to pack down smaller than all other types of pads. Most air pads fit easily into a backpacking pack — some are no larger than a football.

Packed size can be an issue for foam and self-inflating pads. Once fully rolled, these pads can be quite cumbersome, and they often have to be carried on the outside of your backpacking backpack.

Inflation and Deflation

While foam pads do not require inflation to use, all other pad types are built with an integrated air valve. Historically, valves have been the weak point of sleeping pads, and they can be difficult to replace once broken.

But now, high-quality backpacking pads come with reliable valves that are airtight and offer quick and easy inflation and deflation.

Most air pads have flat valves, which include an internal flap that prevents air from escaping in between inflation breaths. These valves are simple and durable, and most pads with flat valves can be inflated with somewhere between 10 and 25 breaths.

These types of valves will also often include the ability to make micro-adjustments to the amount of air in your pad, even while fully weighted. This can be nice if you decide you want a bit of a cushier feel mid-sleep.

Self-inflating pads are designed to fill up on their own once the valve is open, but they usually need some regular inflation breaths to fully pump up and become firm.

DSC06489
Its innovative WingLock valve makes inflating and deflating the XLite a breeze; (photo/Honey McNaughton)

Durability

With proper maintenance, a good backpacking pad can last for many years with regular use. Foam pads can take lots of abuse and last forever, but inflatable pads are fragile and must be handled with care.

Punctures are the main threat to air pads. As with all outdoor gear, abrasion resistance, and fabric thickness are measured with a denier rating. Thick fabric is more resistant to punctures. Air pad denier ratings vary widely, from around 15-denier to 80-denier.

As a rule, always clear away any potentially sharp objects from underneath your sleeping surface before setting up your tent. When sleeping on your pad, the use of a tent footprint creates an extra barrier between your pad and the ground. It’s also wise to keep your pad away from fires that may spit sparks and bits of hot ash.

As the standard has moved toward lightweight backpacking pads, many companies are using thin and potentially vulnerable materials. As with all ultralight gear, durability is not the priority. The lifespan of a lightweight pad will depend on how well it is cared for, and the precautions you take when setting up camp.

Z Lite Sol Sleeping Pad Backpacking photo
The Z Lite Sol foam sleeping pad is so durable that it can be carried on the outside of your pack without concern; (photo/Eric Phillips)

Caring For and Storing Sleeping Pads

Best practices for storing a pad depend on the type of pad you own. Self-inflating pads should be stored unrolled with the valve open to maintain the loft of the insulation. Air pads can be stored rolled up, but always keep them in a stuff sack and make sure they are fully deflated.

For foam pad storage, avoid leaving heavy items on top of the pad. Also, if you store a foam pad rolled up, it may be difficult to get it to lay flat in the future, though the z-pad design prevents this.

While you are rolling your pad up in the morning, make sure to wipe any leaves, twigs, or dirt off your pad. Storing a tightly rolled pad with debris in it could cause small abrasions in the face fabric, and even holes in extreme cases, as the pad jostles around inside your backpack or car.

Also, using a pump sack to inflate your pad will help prolong its life, by reducing the amount of moisture buildup in the pad from your breath. If you can, try and use the often included pump sack to inflate your pad each night instead of your mouth.

Sleeping Pad Comfort
Properly caring for your pad will allow you to enjoy many years of camp comfort; (photo/Eric Phillips)

Pump Sacks: Do They Work?

Some air pads come with pump sacks that allow you to pump up your pad without breathing into a valve. Pump sacks decrease inflation time and prevent breath moisture from getting inside your pad (which can lead to a variety of problems). It also helps you avoid getting light-headed by having to blow it up with your mouth after a long hot day in the sun.

Also, many pump sacks double as stuff sacks, and they generally don’t add much weight to your setup. Some of our testers like to fill them with spare clothes and use them as makeshift pillows.

Pump sacks come in all different shapes and sizes, and some are better than others. During testing, we found the sacks that come with the Sea to Summit Ether Light and NEMO Tensor Extreme Conditions to be the most efficient, easiest-to-use models for swiftly inflating your pad.

However, many backpackers feel pump sacks have solved a problem that didn’t exist in the first place. While some people swear by them, they are not a necessary item in most instances. You can prolong the life of your pad by using a pump sack, though, particularly with pads like the Exped Ultra 7R and the Dura 8R, which have a down filling that could be damaged by excessive moisture buildup.

ATP04110
Several pads, including Exped’s Ultra 7R, come with a pump sack that helps with inflation speed, saves your breath, and keeps moisture out of the interior; (photo/Chris Carter)

Women’s-Specific Sleeping Pads

Some sleeping pads have a women’s version or are designed specifically for women. They often look quite similar to their unisex cousins, but there are some differences that many female adventurers may appreciate.

For starters, they will sometimes be wider and more cushioned at the hips, and will often have a greater R-value overall than the unisex version. Many are also made a little shorter. While these are minor changes, they could provide a significant comfort boost for certain people.

Price & Value

What’s the price of a good night’s sleep? The answer takes us back to good old supply and demand. Some of us could sleep like a baby on a $40 closed-cell foam pad (or just in the dirt) in our 20s. Now, older, wiser, and nursing a lifetime of aches and pains, we’re willing to cough up a bit more for a thicker, more comfortable inflatable pad.

A few of us are even willing to carry a little more weight for comfort. When considering how much you’d like to spend, keep in mind that sleeping well means you’ll be more alert and adept at whatever you’re trying to accomplish out there, be it crushing miles, summiting peaks, or making powder turns.

Budget

The simplest, cheapest pads available are made with closed-cell foam. The venerable Therm-a-Rest Z Lite Sol and the slightly thicker NEMO Switchback ($50) are trail staples that can be used alone or combined with an inflatable pad for more insulation and protection from the ground. They’re also pretty much indestructible.

While we’ve seen critters snack on the edges of foam pads, they can’t pop since they’re not inflatable. You’ll never have to worry about waking up in the middle of the night with just a deflated pad between you and the hard, cold ground.

Inflatable pads are undeniably more comfortable, and the Klymit Static V ($65) is a solid budget choice that’s thicker and more packable than foam pads. It has a pretty low R-value of 1.3 and weighs just over a pound. You’ll need to spend quite a bit more for a lighter, warmer pad, but if most of your outdoor recreating happens in the warmer months, the Static V will do the trick.

Mid-Tier

Spending $100-200 will get you an inflatable pad with substantially more insulative properties and better comfort. These pads often include some type of synthetic insulation lightly spread throughout, puncture and tear-resistant fabrics, and sometimes a pump sack. While not considered “ultra light,” they’re still very pack packable and most weigh around a pound to a pound and a half.

At the upper end of this tier is the Sea to Summit Ether Light XT ($189). Weighing just under a pound with an R-value of 3.8, it’s much more versatile than the budget pads and will allow you to stretch your season a little longer into the fall.

It also has a pump sack so you can inflate the pad without blowing moisture in. The NEMO Flyer ($140) also sits in this tier and uses a combination of air and foam for a plush feel. Unpack it, and the expanding foam will draw in air, making it nearly self-inflatable.

Premium

Pay more, and you’ll compromise less when it comes to weight, warmth, and comfort. At $200 and above, the premium pads employ the latest technical fabrics, insulation, and designs.

The Therm-a-Rest NeoAir XLite NXT ($200) is our top choice for sleeping pads due to its excellent balance of warmth and weight, weighing a scant 13 ounces with an R-value of 4.5. At the extreme end of the warmth scale is the winter-ready NEMO Tensor Extreme Conditions ($250) with an R-value of 8.5 while only weighing 15 ounces.

Using lighter fabrics also allows you to go bigger while keeping the weight down, and the largest rectangular version of the NEMO Tensor Trail weighs around a pound. If you tend to toss and turn at night, this pad has room to sprawl.

Backpacking Sleeping Pads
Getting ready for a chilly fall night on the Exped Ultra 7R; (photo/Honey McNaughton)

Frequently Asked Questions

What is the most comfortable backpacking sleeping pad?

Different backpackers have different comfort preferences. The most comfortable pad is the one that allows you to sleep soundly after a full day of hiking. Before you purchase a pad, make sure that it meets your criteria for size, thickness, materials, price, and above all else, comfort.

What is a good weight for a backpacking sleeping pad?

On the low end, lightweight air pads can be as little as 8 ounces. Heavy foam pads may weigh well over a pound. A four-season pad will contain more material and insulation, and a total weight between 12 and 18 ounces is normal.

ATP04026
Foam pads are quick to set up, lightweight, and durable, but don’t offer quite as much comfort as inflatable pads; (photo/Chris Carter)
What is the best sleeping pad for side sleepers?

Side sleepers will want a thicker pad than back sleepers. If you consistently sleep on your side, consider purchasing an air pad that is at least 3 inches thick. The Therma-a-Rest NeoLoft scored high marks from our side sleepers.

What sleeping pad has the highest R-value?

For cold-weather or winter camping, you’ll want a sleeping pad with an R-value of at least 5. The Sea to Summit Comfort Plus Insulated or Exped Ultra 7R pads fit the bill.

Pads like Rab’s Ionosphere 5.5 boast high R-values, making them prime choices for cold-weather camping; (photo/Honey McNaughton)

The Best Camping Tents of 2025

17 June 2025 at 19:48

We've logged the shuteye in camping tents across the country, and these are the ones that pass the muster in our books; (photo/Erika Courtney)

If you’re going to camp outside, chances are you’ll need a good mobile roof over your head — unless you’re one of those cowboy-camping thru hiker types. We’ve logged some shut-eye in hundreds of shelters, intensely used more than 40, and winnowed down our gear rooms to the 12 best of the best camping tents out there today.

Our team of experts brings decades of camping experience in every sort of condition imaginable, from national park campgrounds to multiday festivals to long road trips. We weighed them on everything from ease of set-up and headroom to how fun and funky the color schemes are.

Some tents are wilder-nests that thrive in a more backcountry-adjacent use, like the Kelty Discovery Basecamp, while others, like our top pick, the REI Co-op Base Camp 6, are downright frontcountry palatial. We’ve also found having a real gear garage like the The North Face Wawona 4 in the stable to be important on equipment-heavy trips, and a front-to-backcountry tent like the REI Co-op Half Dome 2 Plus to work for a range of different adventures.

Consider these award winners our top seven for pretty much any camper, followed by a series of solid shelters for more specific camping weekends.

Editor’s Note: We updated our Camping Tent guide on June 17, 2025, to revise much of our buying advice and add additional context. We also elevated the North Face Wawona 4 to the award-winning status of ‘Best in Vestibule Storage Space’.

The Best Camping Tents of 2025

Best Overall Camping Tent

REI Co-op Base Camp 6

8.9/10 Rating
BUY OPTIONS

Best Tent for Families

REI Co-op Wonderland X

8.6/10 Rating
BUY OPTIONS

Best in Vestibule Storage Space

The North Face Wawona 4

8.0/10 Rating

Most Livable 4-Person Camping Tent

NEMO Aurora Highrise 4P

8.4/10 Rating

Best Crossover Tent for Camping and Backpacking

REI Co-op Half Dome 2 Plus

8.9/10 Rating
See more picks

Best Overall Camping Tent

  • Floor area: 84 sq. ft. (110" x 110")
  • Weight: 20 lbs., 11.5 oz.
  • Height: 74"
  • Footprint included: No
  • Number of doors: Two
  • Carry size: 24" x 11" x 11"
  • Seasons: 3-4 season
  • Best for: All-weather camping where comfort is in high demand

Pros

  • Huge vestibule
  • Excellent weather resistance
  • Easy to set up
  • Compatible with other REI tent accessories such as canopies

Cons

  • Heavy at 20 pounds
  • Expensive

The REI Co-op Base Camp 6 ($549) reigns supreme when it comes to a camping tent tuned to do it all. It may not be the largest, the tallest, or the most affordable, but it does have everything it takes to make camping easy. With 84 square feet of floor space, there’s plenty of room for up to six campers to slumber under the stars.

With a mountaineering-inspired design, the Base Camp 6 employs a durable polyester rainfly that provides full coverage and a sizable vestibule for gear storage, creating 27 square feet of covered space in the front and 17 in the back. Four poles gird the main body and gain strength by intersecting one another, while a final brow pole bumps out the vestibule for added space.

Useful features like pockets, a three-point ventilation system, and reflective trim that shines in the light of a headlamp make this tent the place you’ll want to hang out when the weather is fair or foul. Large doors at either end make for an easy exit when nature calls, without having to crawl over all of your tentmates.

We also tested this tent with the newly released Base Camp Vehicle Connector, an awning specially made to interface with the 4- and 6-person Base Camp tents and connect your living space to the back of your vehicle. This breezeway made a killer spot to park a quartet of camp chairs, and we dug the versatile accessory.

Thanks to the intuitive color-coded poles and attachment points, our team of campers had no trouble erecting the tent in Colorado this spring. For the uninitiated, very clear setup instructions are sewn into the tent’s storage bag. Compared to the similar Mountain Hardwear Bridger, we agreed that the Base Camp is slightly easier to set up.

This tent is freestanding, meaning it can stay up without stakes or guylines. While this is quick and convenient for when you roll up to your campsite in the middle of the night, going the extra mile and using all the included stakes and guylines is well worth the effort. Once fully staked out, the Base Camp 6 is impervious to rain and also stands up well against heavy winds.

The Base Camp 6 is just a hair over 6 feet at its apex, so taller folks won’t be able to stand straight up, and with a packed weight of 20 pounds, it’s limited to car camping. It’s also one of the more expensive models on our list, but if you’re fortunate enough to get out camping a few times a year, this tent is worth every penny.

(Photo/Meghan LaHatte)

Best Budget Camping Tent

  • Floor Area: 53 sq. ft. (97" x 79")
  • Weight: 8 lbs., 8 oz.
  • Height: 58"
  • Footprint Included: No
  • Number of Doors: One
  • Carry Size: 23" x 6"
  • Seasons: 3-season
  • Best For: Casual weekends of car camping, festivals, beach camping

Pros

  • Easy and intuitive to set up
  • Inexpensive
  • Pre-attached guylines
  • Storage duffel is easy to stuff and unpack

Cons

  • Rainfly isn't full protection
  • Fiberglass poles

While there is a glut of budget camping tents on the market, too many have gone too far in trimming features and comfort. The Kelty Discovery Basecamp 4 ($120) isn’t one among them, however, and hits all of the bullet points we’re after, without also coming for our wallets. Done up in an instantly recognizable design, this tent doesn’t take many shortcuts.

Set up with a crossed-pole design, the Discovery Basecamp makes raising the roof easier, including ‘Quick Corners’ — which are short pole sleeves to secure the pole ends. From there, modern pole clips suspend the canopy, which, while not our favorite, helps to keep the price down. When testing in Joshua Tree National Park in early spring, we had little issue setting up the tent sans instructions.

Some other budget-minded tents (like the REI Co-op Campwell 4) attempt to shave ounces (and dollar signs) by hemming the rainfly up high and tight — exposing windows to wind-driven rain, but the Discovery Basecamp makes use of a brow pole to set the porch coverage back far and protect the door window. When fully staked and with the rainfly guyed out, this tent does a commendable job keeping its inhabitants dry, especially considering the price.

While it only has one door, that door is huge, so access is easy. Each side is lined with a few storage pockets, so you’ll have no problem staying organized and keeping the floor free of knick-knacks. While the Discovery Basecamp takes a more traditional approach, it isn’t the tallest tent, and those looking for more vertical should look to the Eureka Copper Canyon LX — a cabin-styled tent that trades weather protection for comfort.

Available in both a 4- and a 6-person size, the Discovery Basecamp 4 is an easy choice for folks looking for their first camping tent, or even just a beater you aren’t worried about leaving it up on the lawn. Don’t expect it to last forever at $120, but for the money, there are plenty of summers in this tent.

(Photo/Nick Belcaster)

Best Tent for Families

  • Floor Area: 70.5 sq. ft. (100" x 100")
  • Weight: 35 lbs., 1 oz.
  • Height: 75"
  • Footprint Included: No
  • Number of Doors: Four
  • Carry Size: 27.4" x 14" x 12.8"
  • Seasons: 3-season
  • Best For: Mondo-sized camping trips with the whole crew

Pros

  • Huge tent for four people
  • Doubles as a massive shelter for cooking, entertaining, or eating
  • Extremely durable
  • The sleeping area is very large and protective from the elements

Cons

  • Expensive
  • Too big for smaller campsites

Read Review: REI Wonderland X Tent Review: A Versatile 4-Person Palace for Car Campers

The REI Co-op Wonderland X ($999) is a very large and unique tent that makes an incredibly spacious abode. Designed as a four-person car camping tent, the Wonderland X is so much more. We’ve tested this tent since the spring of 2022 and are still blown away by the unique tunnel design with interior sleeping quarters — perfect for a weekend with the entire family.

While optimized for a group of four, the Wonderland X serves as a giant camping shelter and a big hangout space. By removing the interior sleeping quarters, the shelter becomes a 13 x 9-foot floorless shelter. It can easily cover a picnic table, the tailgate of a truck, or even a small car.

REI built the Wonderland X with extremely heavy materials, ensuring a very long life if properly maintained. And at 35 pounds, this tent is definitely not coming backpacking — but for those looking at an alternative to canvas wall tents or just a very robust, large car camping setup, this tent is the pinnacle.

Put to the test, the tent performed perfectly in windy and rainy conditions, where the enormous awning provided space for lounging and cooking for four adult men. Copious guylines can be a bit much to get your head around, but in truly unsettled weather, they’re the perfect solution to keeping the Wonderland X where it belongs.

Those looking for a similar design but at a lower price should also consider the Wonderland 4 and Wonderland 6, which work on the same principles but use lighter, less expensive materials. For the real-deal family palace, however, it’s the Wonderland X for us.

REI Wonderland X tent
(Photo/Eric Phillips)
REI Wonderland X interior
(Photo/Eric Phillips)
REI Wonderland X Interior Space
(Photo/Eric Phillips)
REI Wonderland X tent
REI Wonderland X interior
REI Wonderland X Interior Space

Best in Vestibule Storage Space

  • Floor Area: 58 sq. ft. (96" x 90")
  • Weight: 13 lbs.
  • Height:  68"
  • Footprint Included: No
  • Number of Doors: Two
  • Carry Size: 27" x 10" x 10"
  • Seasons: 3-season
  • Best For: Camping with extra kit to store in the vestibules, or just kicking back beneath the shade

Pros

  • Unique second door design
  • Plenty of interior storage pocket options
  • High interior ceiling
  • Relatively lightweight for the space

Cons

  • Rainfly isn’t the most intuitive to put on
  • Rear door isn’t covered by rainfly

Recently updated, The North Face Wawona 4 ($450) got a second skin, going from a single- to double-wall design, and its poles have been re-engineered for easier setup — both worthy upgrades. The tent did just become $50 more expensive, which blunts the benefits a bit, but we still think it’s a solid shelter.

It’s the small things that make the Wawona (which, if you’re wondering, was the name of a famous giant sequoia in Yosemite National Park) tick. A unique hooped pole design kicks out the large vestibule to a comfy 28 square feet of space and provides plenty of dry room to shuffle gear about.

Then there are the interior features: A smaller rear door doubles as an organizational center, while an interior height of 68 inches allows for easy walking about inside the tent. We greatly appreciated the breathability built into the Wawona on a night camping in Washington’s San Juan Islands, where moisture from the sea can be heavy, and keeping air moving is a priority. 

We struggled with the rainfly the first go around, as it has an unusual shape that goes to the ground at the vestibule and then up to window height along the body of the tent. Once we figured out which way was up, snapping it into place was an (adjustable) breeze. 

The fly also doesn’t cover the rear door, although it does sport a waterproof zipper. Our testing hasn’t shown this to be a weak point necessarily, but we have our doubts the tent would keep a heavy rain entirely at bay. It’s because of this that the more weather-resistant REI Co-op Base Camp 6 ranks higher in our lineup.

For more fair weather conditions, however, the Wawona 4 offers a boatload of space for families that bring plenty along on their camping trips. Just consider what the weatherperson has in store for you.

(Photo/Nick Belcaster)
The North Face Wawona 4P
(Photo/Nick Belcaster)
The North Face Wawona 4P
(Photo/Nick Belcaster)
(Photo/Erika Courtney)
The North Face Wawona 4P

Most Livable 4-Person Camping Tent

  • Floor Area: 62.5 sq. ft. (100" x 90")
  • Weight: 15 lbs., 14 oz.
  • Height: 75"
  • Footprint Included: No
  • Number of Doors: Two
  • Carry Size: 25" x 8.5" x 8.5"
  • Seasons: 3-season
  • Best For: Camping with the whole family, sleeping on cots, and tall parents

Pros

  • Steep side walls bumps up livable space
  • Fun print on interior floor
  • Both doors stow away completely

Cons

  • Rainfly doesn't provide 100% coverage
  • A little heavier than comparable tents

Forget hunching over — the NEMO Aurora Highrise 4P Tent ($400) has got headroom to spare. Sporting a tent pole design that bumps out the exterior walls to near vertical, we had no issues with bumping around inside this tent, and no scrunching was needed. The Aurora Highrise does the most with its footprint, and we think it’s the most livable 4-person tent out there currently.

While the 75-inch peak height isn’t quite the tallest in our testing, this height extends far out from the interior, allowing for easy maneuvering for setting up a sleeping pad or just squeezing past a tentmate. A cabin-style tent like the Eureka Copper Canyon will have more headroom overall, but will suffer much more with high winds.

Behind the two doors (which can be folded away into what NEMO calls the Door Jamb pocket) is a full 62.5 sq. ft. of floor space, which has been printed with a fun argyle pattern to lighten up the tent. It’s the little features like this that really up the livability, and after spending a week in the Aurora this spring in Joshua Tree National Park, we came to love our groovy space.

During testing, we found the dual vestibules to provide plenty of space for storing equipment during the night, though not quite large enough to lounge under shade. The four-person version of this tent was perfectly sized for three testers, though we could easily see a family of four enjoying the space, or even a couple having a luxuriously large camping hideout.

While the large side windows do provide an excellent view (and plenty of ventilation), the rainfly does stop short of providing full coverage over them. While this won’t be an issue in typical rain, wind-driven rain will have the ability to soak into these seams. It’s for this reason that the Aurora Highrise doesn’t find itself higher on our list.

A family-sized tent that’s sized for everyone in the family, the Aurora Highrise is available in both a 4-person and 6-person offering.

(Photo/Karuna Eberl)

Best Crossover Tent for Camping and Backpacking

  • Floor Area: 35.8 sq. ft.
  • Weight: 6 lbs., 3.6 oz.
  • Height: 42"
  • Footprint Included: Yes
  • Number of Doors: 2 doors
  • Carry Size: 22.2" x 7.5" x 7.5"
  • Seasons: 3 season
  • Best For: Everything from frontcountry camping to shorter backpacking trips

Pros

  • Extremely spacious with lots of headroom for two
  • Very straight-forward, user-friendly setup/breakdown
  • Well-thought-out interior with numerous pockets
  • Footprint is included

Cons

  • Somewhat heavy/large for solo backpacking

With 45(!) years under its belt, the REI Co-op Half Dome 2 Plus ($359) design has been around the campsite once or twice. Newly redesigned this year, the 2 Plus version adds extra room to this two-person shelter, and makes it the perfect do-it-most tent.

The Half Dome 2 Plus is sold as a backpacking tent, but after significant use, we think it lands smack dab between being carried in a pack and working as a stellar front country shelter. Editor Will Brendza (and his trusty pup) recently took this tent out into the early spring of Colorado, where it showed what 45 years of design get you.

Setup is a cinch, and the multi-hub pole design means there’s only one to wrangle here and get clipped into the tent body. Three minutes is about all the time we needed to get the rest of the tent up and settled. From here, we admired the recent updates to the structure that bumped out the headspace, making this a true 2+ shelter.

The floor plan of this tent is 4” longer and wider than the 2-person version, and that (along with the extra 2” of height) makes it roomy enough to enjoy while camping. Other highlights we found were a bevy of internal pockets for wrangling kit, as well as the ability to drop the top on the rainfly on dry evenings, which means stargazing is fully on the menu.

The 6-pound weight makes this a heavy backpacking tent, but a super light camping one. The 36 sq. foot floor area may be a bit cramped for really base camping in this tent, and for those looking for a bit more wiggle room, we’d suggest bumping up to the Half Dome 3.

We’ve previously recommended the Mountain Hardware Mineral King series as a backpacking/car camping crossover and still think it’s a solid shelter, but the Half Dome does it slightly better. Tougher materials, a more intuitive pole design, and a cheaper price all combine to put this tent over the top.

Half Dome 2 Plus 45th Anniversary Edition Tent
(Photo/Will Brendza)
Half Dome 2 Plus 45th Anniversary Edition Tent
(Photo/Will Brendza)
Half Dome 2 Plus 45th Anniversary Edition Tent
(Photo/Will Brendza)
Half Dome 2 Plus 45th Anniversary Edition Tent
(Photo/Will Brendza)
Half Dome 2 Plus 45th Anniversary Edition Tent

Other Camping Tents to Bed Down In

There are plenty of camping tents on the market, that’s for sure, and the six we awarded above are the best we’ve encountered in all of our collective time sleeping outdoors. That said, there are several other worthy shelters out there. Consider the line-up below before making your purchase.

  • Floor Area: 58 sq. ft. (92" x 90")
  • Weight: 16 lbs., 3 oz.
  • Height: 72"
  • Footprint Included: No
  • Number of Doors: Two
  • Carry Size: 26.5" x 16.5" x 6"
  • Seasons: 3-season
  • Best for: Camping during unsure weather forecasts or in exposed campsites, as well as big group basecamps as a hangout spot

Pros

  • Fast fly mode creates a stand-alone sun shelter for hanging out under
  • Good amount of headroom
  • Easy to assemble DAC hubbed pole design
  • Pass-through doors makes it easy to sneak around tent mates
  • Near-vertical walls

Cons

  • More expensive than similar 4- and 6-person tent options
  • Fast fly mode is a bit hard to set up

After many summers of using the classic Big House tent, we recently upgraded to the Big Agnes Bunk House 4 Tent ($600), and it was 100% worth it. Compared to the lighter-duty version, the newly updated tent drops the fly to the ground, bumps up the ceiling, and boasts a fully freestanding ‘sun shelter mode’ that greatly ups the versatility.

Available in your standard family sizes of 4-, 6-, and 8-person capacities, we tested the 4-person offering in the summer of 2024 across the Pacific Northwest, and it won over our campers left and right. We challenged ourselves to set up camping tents without instructions on the first go, and besides some added helping hands, we had little issue getting the Bunk House up in about 10 minutes.

The 58-square-foot sleeping area is on par with most 4-person shelters, but the added 2” of headroom over the Big House makes a surprising difference in livability. An additional pole supports the ample vestibule space, which sports enough room to wrangle our coolers and chairs, and even rolls out a welcome mat to park your shoes on.

The Bunk House finds itself in good company in our lineup. Other batten-down-the-hatch shelters compare well, though there are a few differences to consider. For true shelter-shaking storms, we found the Base Camp performs better due to its additional crossed poles, and while the vestibule of the Bunk House is spacious, the Bridger is undeniably better suited for hanging out under.

Neither of those tents, however, can set up the fly by itself, and this is the big selling point of the Bunk House. A good canopy tent can act as a mobile dining room or keep tykes out of the sun, and when set up without the inner, the Bunk House accomplishes both and more. Actual setup is a bit finicky (there’s a webbing harness to contend with), but once it’s managed, the canopy rivals even some of our favorite purpose-built options.

At an asking price of $600, the Bunk House 4 is pricier than most similar options, so in our opinion, it comes down to whether you’ll use that fly-only ability. If not, tents like the REI Co-op Base Camp or The North Face Wawona will likely suit you better. But as a two-for-one option, it’s tough to beat the Bunk House.


  • Floor Area: 59 square feet
  • Weight: 14 lbs.
  • Internal Height: 62"
  • Footprint Included: No
  • Carry Size: 27.5" x 9.5" x 9.5"
  • Seasons: 3
  • Best For: Car campers on a budget looking to upgrade

Pros

  • Budget-friendly
  • Spacious footprint
  • Plenty of headspace
  • Quick setup with two people
  • Robust tent poles
  • Large skylight

Cons

  • Minimal protection from driving rain
  • Lacking ventilation with the rain cover
  • No pull-outs for the broadsides of the tent.
  • Drafty in stiff winds

The REI Co-op Campwell 4 ($229) is our recommendation for fair-weather family campers. Designed as a low-barrier-of-entry option, this tent is ideal for campgrounds, car camping, and folks looking to upgrade from their big-box store tents. We still think that the Kelty Discovery Basecamp is a slightly better budget model, but the Campwell does have a leg up on it in a few places.

Best described as a squat cabin-style tent, the Campwell makes full use of its footprint and sports nearly vertical walls to bump out the interior space. That said, overhead height isn’t towering at 62 inches, but we don’t think that’s necessarily a terrible thing: the tent is a bit den-like and cozy to jump into.

Set-up is simple, which is a bonus when introducing folks to the outdoors (little else sucks the fun out of camping like a complicated tent to wrestle). The two fiberglass poles cross at the top of the shelter and are the same length, meaning no shuffling around looking for the right one. After that, simple pole clips support the canopy.

The toupee-style rainfly was never meant to be the most protective, but it is easy to toss on the tent. We’ve weathered light showers and been perfectly dry, but once the winds brew, you begin to wish you had a more storm-worthy shelter. The rear window is particularly vulnerable, as it is only covered by a flap on the interior.

So, if the skies might open up? Look into one of the more weather-ready options we’ve reviewed, like the REI Basecamp or Marmot Limestone. But if you’ve got confidence in the weather forecast? The Campwell 4 is an excellent option.


  • Floor Area: 82.9 sq. ft. (120" x 100")
  • Weight: 17 lbs.
  • Height: 76"
  • Footprint Included: No
  • Number of Doors: Two
  • Carry Size: 24.4" x 10.4"
  • Seasons: 3-season
  • Best For: Any-weather camping where the forecast looks less than optimal

Pros

  • Excellent weather protection
  • Lighter weight than similar 6-person shelters
  • Redesign adds additional vents to the fly
  • Close to vertical wall design

Cons

  • Rainfly contacts tent mesh in some spots
  • Vestibule isn't the largest

While testing in the Rocky Mountains, we experienced sudden high winds and heavy rains. Nearly every tent experienced some damage ranging from broken poles to leaks. The Marmot Limestone 6P ($529) was completely unfazed. It remained sturdy and dry through it all.

It’s not as tall or roomy as some car camping tents, but the sacrifice of space is worth it for excellent weather protection. In 83 square feet of floor space, you can fit six people or spread out and sleep comfortably with just four. Near-vertical walls help to bump up the livability, and while the vestibule is a bit snug, the interior is rightfully cozy.

The large double doors make coming and going easy. Pre-bent poles make for a quick setup. There is a vestibule on one side for holding extra gear, and interior gear pockets keep you organized, and there is plenty of mesh that allows for maximum airflow. Newly redesigned, the Limestone gains a few added rainfly vents with integrated struts for propping them open.

Because the rainfly design is closely related to backpacking tents, there are certain areas of the fly where it can touch the mesh of the inner, which can lead to dribbles in high condensation conditions — a result a few of our testers noted. Properly guying out the shelter can help alleviate this, in conjunction with the newly added vents. For most poor-weather trips, we more often reach for the REI Base Camp.

But if the REI Co-op Base Camp is a bit too rich for your blood, the Limestone 6P is built to withstand storms and is a great choice for anyone camping in unpredictable, inclement weather.


  • Floor Area: 89.4 sq. ft. (140" x 92")
  • Weight: 23 lbs., 15.4 oz.
  • Height: 76"
  • Footprint Included: Yes
  • Number of Doors: Two
  • Carry Size: 28" x 14" x 14"
  • Seasons: 3-season
  • Best For: Camping with the whole crew, or bringing along the kitchen sink in gear

Pros

  • Vestibules are huge, and can fit entire bikes or coolers if needed
  • Many pockets inside the sleeping area and vestibules
  • Saloon-style doors open up to easily combine areas
  • Simple rope-bag style stuff sack

Cons

  • Not the easiest to set up single-handed
  • Pretty pricey

Borrowing DNA from the brand’s mountaineering roots, the new Mountain Hardwear Bridger 6 Tent ($950) hits all the marks we’re looking for in a group camping tent — and that’s before you even open the door. Twin vestibules boast more square footage than even the sleeping area, making a tent that’s as much about hanging out as it is snoozing in.

Starting from the inside, the Bridger 6 keeps the living large with 89.4 square feet of sleeping quarters, and steep walls that meet at a 76-inch peak height. The tent is supported by a classic two-pole configuration, with an additional ridge pole that props up the peaks of the entry and exits.

A full-coverage rainfly encompasses everything on the exterior and extends 7 feet for the front vestibule. When we initially tested this tent in the spring of 2023, our campers flocked to this spot to kick back and store gear in. It easily accommodates a handful of camp chairs, a cooler, or even a couple of parked bikes — and now with a few seasons under the belt, it’s still the tent to hang in.

The doors also feature a saloon-style zip, meaning the interior can be melded into the hang-out zone. Then there’s the storage: 8 pockets on the interior, as well as 2 organizers that hang inside the vestibule space — each sporting 3 pockets. We found these especially handy during the day, as we didn’t need to enter/exit the tent to snag what we needed.

In terms of set-up, the Bridger does take a few minutes to set up. The extended vestibule is a dream once in place, but it did make single-handed setup a bit of a wrestling match. Breaking down the tent goes smoothly, however, and it packs away into one of the nicest zip-up storage bags we’ve seen in a tent.

Perfect as a camping basecamp for a group, the Bridger Tent brings the party from inside to out, and while it’s nearly the most expensive on our list, it’s amenable to many different camping scenarios and ensures it’ll be around for endless campfires. If the price just won’t fly, consider the REI Co-op Base Camp 6 — a $549 option with more sleeping space, but less room to hang in.


  • Floor Area: 64 sq. ft. (96" x 96")
  • Weight: 20 lbs., 4 oz.
  • Height: 84"
  • Footprint Included: No
  • Number of Doors: One
  • Carry Size: 27" x 9" x 9"
  • Seasons: 3-season
  • Best For: Car camping with a view!

Pros

  • Roomy design with plenty of space
  • Airy and open with four windows
  • Tall internal height
  • More budget priced

Cons

  • Only one door
  • Not great in heavy wind
  • Heavier at 20+ pounds

If you’re looking for a family tent that feels like a spacious screened-in porch, the Eureka Copper Canyon LX ($270) is for you. The 7-foot-tall interior height means no more awkward stooping.

And with 64 square feet of floor space, there’s plenty of room to spread out. We found this provided a comfortable amount of space for two adults and two young children. Each wall is lined with pockets, which is great for keeping track of your headlamp and storing other essentials.

The best part about this tent is the airy feel and giant mesh windows. Not only does it keep things breathable, but it also means you can easily enjoy the view in any direction. We spent a week camping outside Moab and loved relaxing in the tent while watching the sunrise.

That said, the benefits of this tent are also its downfall. The tall height and large windows can be problematic in stormy weather. High winds will challenge any tent, and that’s especially true of a tent that’s 7 feet tall. Like other cabin-style tents (such as the Eureka Copper Canyon LX we also tested), fair-weather camping is more the vibe for this tent.

The window zip closed, and the included rainfly protects from rainfall. However, in heavy storms, it is possible to experience slight leaking. We also would have preferred a second door.

For mild summer conditions, though, the Copper Canyon 4 is a winner for family camping. It offers plenty of standing room and is a decent value to boot. We were also pleased with how easily it packed back into the storage bag.


  • Floor Area: 85 sq. ft. (120" x 102")
  • Weight: 18 lbs.
  • Height: 72"
  • Footprint Included: No
  • Number of Doors: One
  • Carry Size: 25.7" x 9"
  • Seasons: 3-season
  • Best For: Car camping in the desert or busy campgrounds

Pros

  • Budget pricing
  • Near-vertical walls
  • Black-out fly blocks out ambient light

Cons

  • Pre-attached poles are good in theory, annoying in practice
  • Front vestibule has poor coverage of door
  • Fly only goes half-way down tent body

You didn’t think we’d leave out a classic Coleman, did you? The Coleman Skydome Darkroom 6-Person Tent ($200) certainly is classic and brings a good bit to the table for the price. There are also some shortfalls to contend with, but the big draw here is the ‘Darkroom’ aspect of this tent — a blackout rainfly that can help block out late-night campground neighbors.

Compared to a traditional dome-style Coleman, the Skydome series bumps out the headroom by putting a kink in each of the poles, making for nearly vertical walls. And while those poles are aluminum and an upgrade from our budget pick, the Kelty Discovery Basecamp, they are pre-attached to the tent — good in theory, but in practice was a bit fussy to manage.

The tent fly is, as promised, quite dark, and it is pretty easy to get situated on the tent itself. This is, however, one of the more skimpy coverage flies in our review (only the toupee-style fly of the Eureka Copper Canyon LX is smaller), and only comes down to about half the height of the tent walls. And while the brow pole does a good job of covering the door from rain from above, it was no match for wind-driven rain in our testing.

Campgrounds these days can be pretty crowded, and if you end up next to the all-night ragers, it can be tough to get some shut-eye with other tents. That’s where we think the Skydome Darkroom shines, even despite the shortcomings. Stuffing the tent away isn’t the easiest — we cycled through multiple campers before concluding that the tent wasn’t going back into the bag quietly — but it can be made to work.

Available in 4-, 6-, and even an 8-person size, the Skydome Darkroom Tent was made for weekends at the campground.


Camping Tent Comparison Chart

Camping TentPriceFloor AreaWeightHeightNumber of Doors
REI Co-op Base Camp 6$54984 sq. ft. (110″ x 110″)20 lbs., 11.5 oz.74″Two
Kelty Discovery Basecamp 4
$12053 sq. ft. (97″ x 79″)8 lbs., 8 oz.58″One
REI Co-op Wonderland X$99970.5 sq. ft. (100″ x 100″)35 lbs., 1 oz.75″Four
The North Face Wawona 4$45058 sq. ft. (96″ x 90″)13 lbs.68″
Two
NEMO Aurora Highrise 4P$40062.5 sq. ft. (100″ x 90″)15 lbs., 14 oz.75″Two
REI Co-op Half Dome 2 Plus$35935.8 sq. ft. (92″ x 56″)6 lbs., 3.6 oz.42″Two
Big Agnes Bunk House 4
$60058 sq. ft. (92″ x 90″)16 lbs., 3 oz.72″Two
REI Co-op Campwell 4$22959 sq. ft14 lbs.62″One
Marmot Limestone 6-Person Tent$52982.9 sq. ft. (120″ x 100″)17 lbs.76″Two
Mountain Hardwear Bridger 6$95089.4 sq. ft. (140″ x 92″)23 lbs., 15.4 oz.76″Two
Eureka Copper Canyon LX 4-Person Tent$27064 sq. ft. (96″ x 96″)20 lbs., 4 oz.84″One
Coleman Skydome Darkroom 6-Person Tent
$20085 sq. ft. (120″ x 102″)18 lbs.72″One

How We Tested the Best Camping Tents

You wouldn’t jump headlong into a full weekend outdoors with an untested roof over your head, and thankfully, you don’t have to. Camping tents come in all different shapes, sizes, and qualities, and while many are winners, we’ve run into a few clunkers in our time.

All of our outdoor addicts know that not only do you need something sturdy and reliable, but it also needs to be set up easily and packed well. We went to the internet for a deep dive into the research. After hours of research, we narrowed it down to the top tents for a head-to-head test. This involved lots of camping and various testers, and to date, our estimated time testing numbers are in the hundreds of hours.

We camped through quintessential Colorado spring weekends, complete with sun, snow, sleet, and gale-force winds. We enjoyed hot summer nights, a few surprise thunderstorms, and plenty of regular ol’ campground outings from Moab, Utah, to the hills of North Georgia.

MSR Habiscape Camping Tent Interior View
Our primary testing is using these camping tents as they’re meant to be used, and we cycle through testers to get the full picture; (photo/Nick Belcaster)

Our Testing Process and Testing Grounds

We start our tent testing with a timed set-up, in which our testers go in totally blind — no instructions allowed. We’ve found this to be the ideal challenge of how intuitive a tent’s structure is. Then, we ensure that these tents are really up to snuff when it comes to capacity ratings, adding in both 20″ and 25″ camping mattresses to test manufacturer claims and get a feel for overall roominess.

Finally, we put the tents to the ultimate head-to-head test. Each is erected in the same valley and left for a week. Through rain, sun, and some epic wind, we see which tents can withstand the elements best. When available, we release a pack of our kiddos into the tents to have their way. It’s hard to put together a better stress test than this.

Our camping tent testing also gets into the nitty-gritty, ground-truthing manufacturer claims and dials in the hard numbers to elevate the winners over the just-alright shelters. To do this, we first measure the total weight of the tent essentials (body, fly, poles, and stakes) on our own scales and compare them against brand numbers. The same goes for packed size, as well as finding out if a tent can easily be packed back into its storage bag (not always an easy task).

Each tent is then left up in a simulated rain shower for 30 minutes at a time and inspected for leaks or wicking water. We use a rotating sprinkler system to ensure that no odd corner of a tent goes untouched, and we pay close attention to window openings and how the rainfly covers the shelter. Rain ingress can be a trip-killer, and we sniff out weak spots in tent construction to identify them.

From our experience and side-by-side testing in both the field and close to home, we crown our winners on a seasonal basis. Every year, we roll out new tent options, and our testing never stops — rest assured that we’re considering the latest and greatest in our Buyer’s Guide.

Timed set-ups are a great way to figure out just how complicated a tent is going to be in the long haul; (photo/Nick Belcaster)

Our Expert Testers

Guide author Mallory Paige has spent hundreds of nights sleeping under the stars, and she knows firsthand the importance of a good shelter. She kicked off our search for the most worthy camping shelters in 2021 with an initial 12 tents, and set out a detailed testing regimen that includes tests against the elements, timing how quickly we can erect each tent, and the classic garden hose rain shower test.

Since then, our testing team has added contributor Ryan Baker, who started backpacking and car camping as a child. He also has lived in tents ranging from lightweight tarps for extended thru-hikes to heavy-duty basecamps to withstand extreme conditions. He is intimately experienced in the joys and pitfalls of only having a thin piece of synthetic fabric between the elements and a dry night’s sleep.

Finally, Senior Editor Nick Belcaster has enjoyed more than his fair share of evenings staring up at the canopy of his tent, waiting out a rainstorm. A veteran of the Pacific Crest Trail, Belcaster has the set-up and tear-down of his tent limited to mere minutes and now travels the West testing camping tents for this guide on a rolling basis.

While our camping tent testing typically takes place in the boundless wilderness of the Western U.S., we also pitch shelters across the country to gain insight into regional performance. A tent that buttons up tight might excel in the arid Southwest but become sweltering in the humidity of the southern Appalachians.

Inside the REI Co-op Wonderland Tent
Our experts dig into the nitty gritty details on these tents and weight features side by side; (photo/Eric Phillips)

Buyer’s Guide: How to Choose a Camping Tent

To help you decide what tent is best for you, we considered five categories: weather resistance, comfort, ease of setup, extra features, and value. Each of these is more important to certain campers than others. Consider when, where, and with whom you plan to use your tent.

We have another guide for the Best Backpacking Tents that focuses on lighter and less bulky tents for your backcountry adventures, as well as a primer article on the Basics of Camping and Backpacking Tents. Here, we focus more on car and family camping tents for adventures where the car is within reach and the weight of a tent is less important. If you like the appeal of leaving your tent pre-rigged wherever you may roam, the ease of a Rooftop Tent might be up your alley.

Camping Tent Breakdown

Ready to set up camp? Here’s the lowdown on what makes a good camping tent, and what we think are important features you shouldn’t miss out on.

Tent Body

Think of the tent body as your four walls at home. Most frequently, the tent body works in tandem with a rainfly to protect campers from adverse weather (although we often tuck it away for some star gazing). Tent bodies, on the other hand, provide protection from both the ground below and from flying insects through a mix of windows and mesh panels.

Of course, tents that incorporate a larger amount of mesh will be more ventilated and better suited to summertime camping when conditions are fair and breezes are frequent. Alternatively, designs with solid panels block cold breezes better and can be camped in further into the shoulder seasons. Zippered windows can be a great compromise and can be opened or closed based on conditions.

The bathtub floor of your tent is the ground floor of your setup. It will sport raised sides to protect your living space from creeping water. These floors are frequently made of a tougher material than the rest of the tent to safeguard against wear and tear. If you’re camping frequently (or camp where spiny plants thrive), using a tent groundsheet or tarp can extend the life of your investment.

The body of the tent is the four walls of your home away from home; (photo/Meghan LaHatte)

Rainfly

The next step in getting your camping tent up and rolling will be securing the rainfly. This topside cover stretches over the mesh canopy of your tent and provides weather protection, as well as trapping some warmth — a hot tip for hedging your bets against a chilly night.

Rainflies on many camping tents provide coverage for your average rainstorm, preventing top-down rain from ruining your night. The NEMO Aurora Highrise is a prime example of this, with a rainfly that extends out over the two side windows but doesn’t fully encapsulate them. At the far end of the spectrum is the Kelty Discovery Basecamp tent, which sports a rainfly that just covers the door of the tent. This makes for easier use and access but lower overall weatherproofing.

On the protective end of the equation, tents like the REI Co-op Base Camp borrow from the world of mountaineering-style tents and drop the rainfly all the way to the ground, ensuring that sneaky breezes or sideways rain have no way of entering. If you live in a place where surprise storms are common or want to camp further into the shoulder seasons, invest in a tent like this.

The rainfly on the NEMO Aurora Highrise is a savvy design, and balances protection with ample ventilation and views; (photo/Karuna Eberl)

Doors and Vestibules

Of course, you’ll need a way to get into and out of your tent. We prefer two-door designs for camping tents simply because tumbling over your tentmate in the middle of the night is no fun. Tents like the REI Co-op Base Camp and NEMO Aurora Highrise boast full-size second doors, while more budget-minded tents like the Kelty Discovery Basecamp make do with one door.

A final mention here for specialty doors, such as those found on The North Face Wawona, where a half-size door at the rear of the tent adds a unique spot for loading gear or catching a cross breeze.

Vestibules are the garages of tents, and make excellent spots to stash kit that you want to keep close — coolers, chairs, shoes — but likely don’t want to share sleeping space with. Some tents sport an ample vestibule or two that will wrangle an average amount of kit, while others, like the REI Co-op Wonderland X, are built around the vestibule experience and become full-on second rooms.

The North Face Wawona 4 Camping Tent Interior With Campers and Dog
The broad entrance on the North Face Wawona is easy to get in and out of, and the smaller secondary door adds an escape hatch for late-night exits; (photo/Nick Belcaster)

Poles and Stakes

Here’s the backbone of your tent. Tent poles are most often segmented aluminum affairs that snap together and slide through pole sleeves or clip to the tent body to support it.

Pole structures can take several different forms. Dome-style tents like the REI Co-op Base Camp or Half Dome 2 Plus are classic and erect simply. They provide more weather protection in exchange for overall headroom.

Cabin-style tents like the Eureka Copper Canyon LX raise the roof and bump the walls out to be more vertical, but do struggle more in stiff winds. The REI Co-op Wonderland X is a final type of structure called a tunnel tent, which lands between the two styles.

Tent stakes are your anchors, and even if you don’t expect overnight wind, it’s wise to plant a few to keep your wilderness home from becoming mobile. Most tents will include basic stakes in a number that will keep your tent from flying away, but if you’re going to be using guylines (or expect high winds), it’s wise to invest in a few more stakes, or even stronger versions. A stake hammer can be a useful tool in getting your pegs in place, and we think that the MSR Stake Hammer is tough to beat.

The REI Co-op Base Camp uses a dome-style pole construction, as well as pole sleeves and clips in its architecture; (photo/Meghan LaHatte)

Storage and Organization

Keeping your camping kit organized can be important for maintaining your sanity, and built-in organizing solutions like pockets, sleeves, and gear lofts can help you organize your loose items. Some, like the NEMO Aurora Highrise 4P, place a handful of high pockets along the ceiling for stashing items such as headlamps or phones, while others, like the North Face Wawona 4, integrate large mesh panels that can store bulkier kit.

Your tent can benefit from some organization, as well. It will come packed away in a stuff sack that should carry all of the essentials to get you set up. Thankfully, many tent manufacturers have moved away from the true ‘stuff sack’ style storage bag and instead now offer zippered or wide-mouth-style bags that open wide to pack the tent inside. The wide bag that the Wawona packs into is easy to fill, but some aren’t as nice to use, and even our top pick, the REI Base Camp, had points deducted for its old-school stuff sack style bags.

Camping Tent Interior Storage Options
Storage pockets along the bathtub floor are fairly standard on budget tents like the Kelty Discovery Basecamp, and we tend to prefer pockets placed a bit higher; (photo/Eric Phillips)

Weather Resistance and Ventilation

If you plan to camp during storms, it’s worth it to save up and buy a sturdier tent. Premium tents have stronger poles, full rain covers, and sealed seams. It’s things like this that seem less important — until you find yourself riding out an epic storm from the confines of your tent.

While testing, we experienced a major thunderstorm complete with high winds and heavy rain. Each of the tents had been properly staked out, but many of them experienced damage. The Marmot Limestone 4P performed incredibly well, with no leaking or broken poles. The REI Co-op Base Camp 6 is also well equipped for inclement weather thanks to its rainfly and many tie-down points.

Ventilation is also key to camping livability, and windows are your best friend here. We place a high value on windows that can be opened from the interior of the tent, such as those on the NEMO Aurora Highrise. Some rainflys will also incorporate rigid stays, such as seen in the North Face Wawona, which holds open a ventilation port when the weather is good, and can be closed when storms brew.

The rear door on The North Face Wawona isn’t entirely covered by the rainfly, but it does use a waterproof zipper and cover to ensure it stays dry; (photo/Nick Belcaster)

Seasonality Ratings

Often, manufacturers refer to its tents with a season rating, which helps convey the types of conditions for which they’ve been designed. While not a hard and fast rule, knowing where you are planning on camping, the weather you may encounter, and what your tent is rated for can greatly hedge your bets against spending a night in a flattened tent.

  • 3-Season Tents: 3-season tents (meaning spring, summer, and fall) are your lightest-duty tents, and will employ lightweight materials in order to keep overall bulk down, as well as improve ventilation. Typically, the tent body will be nearly or entirely mesh and mated to a bathtub floor. These designs are less aerodynamic and more prone to bending under gusts of wind. Finally, most 3-season tents will use a rainfly that isn’t full coverage, and may only extend over windows and doors, instead of all the way to the ground.
  • 3/4-Season Tents: Bulking up on weather resistance, 3/4 or 3.5-season tents are similar to 3-season tents material-wise, but in design, they often are more weather-ready, usually employing dome shapes. Rain flies will also go all the way to the ground, forming vestibules where you might store your backpacks during an overnight rain.
  • 4-Season Tents: This is the realm of winter, mountaineering, and hunting tents, where weather resistance is in high demand and a tough structure is needed. Four-season tents are almost exclusively double-wall designs, and often shaped in domes or tunnels to better survive the wind. They will also sport many guylines to adequately support the tent, and thicker tent poles and materials to resist wind-driven rain and snow.
Half Dome 2 Plus 45th Anniversary Edition Tent
The classic dome-style structure of the REI Half Dome 2+ makes it easy to setup, and better suited to poor weather; (photo/Will Brendza)

Capacity and Floor Area

Every tent worth its salt today will provide a capacity number for the number of campers it was designed to sleep. Many tent models are also available in multiple versions, with 4, 6, and 8-person capacities being the most common for camping tents. This number is derived from the number of regular sleeping mattresses that can be laid side-by-side in the sleeping area, but take note: this often only accommodates 20-inch sleeping pads.

The floor area number will also give you a good idea of the sleeping area space in any one tent, and is generally given in square feet. For 4-person tents, this typically comes in at around 60 sq. ft. For example, the Marmot Limestone 4-Person Tent slides in squarely at 60, while the more comfort-minded Mountain Hardwear Bridger 4 squeezes in a bit more at 62.5.

When it comes to 6-person models, the number jumps up to around 85 square feet, with the REI Co-op Base Camp 6 being the standard-bearer at 84 square feet, and the budget Kelty Discovery Element 6 surprisingly besting it at 89! It’s important to note here that the Kelty tent has less steep walls, and thus floor area isn’t the end-all when it comes to understanding overall livability.

Campers Inside the NEMO Aurora Highrise Camping Tent
The NEMO Aurora Highrise is a four-person tent, but be mindful that larger camping pads can eat into that space; (photo/Nick Belcaster)

Construction Materials

The weather resistance of a tent depends largely on the materials from which it is constructed. Nylon and polyester are very common materials used in car camping tents.

Nylon is stronger, more resistant to abrasion, and can stretch considerably. Unfortunately, it absorbs water, causing your tent to sag in storms or high humidity.

Polyester has less stretch than nylon, so it is more likely to tear. This rigidity is a benefit in wet conditions because it will sag less and absorb less water, but it also makes polyester more fragile.

Kelty Discovery Element Tent
The Kelty Discovery Element comes at a great price, but sacrifices durability by using inexpensive fiberglass poles; (photo/Eric Phillips)

Other Considerations and Taking Care of Your Tent

First and foremost, never put your tent away wet. Remember when we mentioned hydrolysis earlier regarding PU coatings? Water is a major culprit in speeding up that process. Fungi, molds, and mildews love to grow in your dark closet, on your wet tent, at room temperature. These organisms destroy the fibers of your tent and make it smell terrible.

When you get home, set your tent back up and let it air out. This simple chore will pay off later when you are still able to use your tent. If you have no yard or nowhere dry to set it up, your living room makes a great space for this. Check all the seams, especially the floor and fly, before packing it away.

Camping Tent Interior Window Flaps
It’s a good idea to open all doors and vents in your tent so that it can dry out completely before going into storage; (photo/Eric Phillips)

Price & Value

A good camping tent can be one of the bigger purchases when putting together a good summer kit, so it’s important to know what you’re getting for those dollar signs. With a range from just north of a hundo to more than a grand, there’s a lot of territory to cover, and most of it will come down to three important metrics: the number of people the tent will sleep, the weather protection it provides, and the amount of accessories tucked away inside.

Budget

Camping is for everyone, and if you’ve only got a few frontcountry forays on the books for the summer, going to something with a little lower overhead can make a lot of sense. Budget camping tents are generally offered beginning at the $100 mark, and head up to around $200 from there.

A tent like the Kelty Discovery Basecamp 4 ($120) is a fine example. It’s not uncommon for tents in this realm to offer rain flies with less coverage over the body of the tent and often only incorporate a single door as an entrance into the tent. The REI Co-op Campwell 4 ($229) is another spend-wise tent we’d recommend to those looking to get further outdoors, but with an eye on the weather, as the tent shines best when the sun does.

Kelty Discovery Basecamp tent in Joshua Tree National Park
The higher-cut rainfly on the Kelty Discovery Basecamp means it’s better suited to fair-weather camping; (photo/Nick Belcaster)

Mid-Tier

Understanding the limitations of budget tents will safeguard against overextending them in harsh conditions, but for fair-weather campground camping, many do an admirable job. Beyond the $200 to about $500 mark, camping tents begin to feature hardier materials, full-coverage rainflies, and vestibules, with added niceties like internal storage options and windows. 

You’ll also notice a price difference when looking at tents of different occupancies. For example, the REI Co-op Base Camp 4 is $475, while the 6-person version will run you $549. This nearly $100 difference between a 4-person and a 6-person tent isn’t uncommon, and many other manufacturers replicate this.

Premium

Beyond about $600 are high-end tents, which jam in the features to offer true frontcountry luxury. The Mountain Hardwear Bridger 6 ($950) exemplifies this with a burly mountaineering-inspired build, spacious and livable vestibule area, and an incredible amount of pockets and functionality. The asking price is a pretty penny, but the overall durability of tents like these means they’ll last a good bit longer than other, lesser tents.

Spending a bit more on an investment camping tent can open up a range of new custom accessories, including this vehicle awning that works with the REI Base Camp tents; (photo/Meghan LaHatte)

Frequently Asked Questions

What are the best tents for family camping?

The best family camping tent depends on your outdoor goals. In general, most families appreciate having more room and the ability to stand comfortably.

The MSR Habiscape 4 Tent has earned high marks from our family camping testers. If you regularly camp in adverse weather (hello, spring in Colorado), it’s worth considering a slightly smaller and more durable tent.

What is the best camping tent brand?

The best camping tent brand depends largely on your personal needs and budget.

For a premium tent that can withstand the weather, the REI Co-op consistently delivers. If you’re looking for maximum space and flexibility, the Eureka Copper Canyon is a favorite with families. And for a budget-friendly option that is built to last, check out Kelty.

Are expensive tents worth it?

If you plan to camp regularly, it is worth it to invest in a higher-quality tent. The extra expense means sturdier poles, waterproof seams, and generally an easier setup. If budget is a major concern, don’t let that stop you from getting outside.

We’ve consistently been impressed with the budget-friendly options from Kelty. The Kelty Discovery Basecamp 4 costs just $120 and offers plenty of room.

Should you put a tarp over your tent?

Quality tents are waterproof. But if you find yourself camping in an absolute downpour, hanging a tarp can provide extra protection and comfort.

It’s important to tie it up well so the wind isn’t a concern and to be sure that it isn’t touching the tent. In addition to creating an extra tent porch, a tarp is great for protecting your camp kitchen.

The rainflys of most tents are adequately waterproof, but a tarp could boost weather resistance in a pinch; (photo/Scott Wilson)
What shape of tent is most popular?

While there are many different styles of tents available today, each has a better use profile and ideal adventure to use them on. When it comes to camping tents, the most popular shape is a dome-style tent. This is because of ease of use, as well as the trade-off in canopy headroom to the overall complexity.

Some tents, like the REI Co-op Wonderland X, make use of a tunnel-style structure. These tents often boast more headroom overall, but will suffer some during high winds. For this reason, it’s important to properly guyline out a tunnel-style tent.

Other tents still, like the Eureka Copper Canyon 4 Tent or Decathlon Quechua 2 Second Tent, employ a collapsible style of integrated poles that forms a rigid structure once assembled. These tents are often among the easiest to use, but also the weakest overall, as any strong force against their poles could collapse them.

Faster Than Cast Iron, No Seasoning: Solo Stove Makes Big Claims With ‘Steelfire’ Griddle Launch

12 June 2025 at 21:32

(Photo/Solo Stove)

Nothing screams “summer” quite like a backyard griddle party. The smells of cooking meat and veggies in the air, people chatting, cold beverages in hand — it’s a recipe for good times and fond memories. And Solo Stove wants in on the action with its latest release, the Steelfire 30 Stainless Griddle.

On June 12, 2025, the brand, known for its smokeless fire pits, announced its first propane-fired griddle system. The griddle has a patent-pending “Solo Racetrack Burner Configuration” that supposedly heats up faster than conventional cast iron griddles. Solo Stove said it heats evenly, requires no seasoning, and cleans up in a flash.

In a press release, Solo Stove said that it aims to “disrupt the griddle market” with this new release.

Solo Stove Steelfire Griddle
(Photo/Solo Stove)

“We are thrilled to enter into the outdoor griddle space, with an innovation that goes beyond cooking,” John Larson, CEO of Solo Stove, said. “With the Steelfire 30 Griddle, we are introducing another product into our portfolio that will create unforgettable moments and lasting memories with family and friends, all while enjoying the simple joy of easy, outdoor entertaining.”

You can purchase the Griddle alone ($900) or buy the “Stand Bundle” ($1,200), which includes a modular stand.

Solo Griddle

This latest innovation from Solo Stove follows its Windchill Cooler, which was released earlier this spring. The brand that made its name on fire pits continues to branch out into new territory (it already boasts backyard torches and propane pizza ovens).

But griddles are a competitive space. Brands like Traeger, Camp Chef, and Weber have decades of experience designing and dialing their products. So, Solo Stove had to come out of the gate swinging.

To set the Steelfire Griddle apart from its competition, Solo Stove engineered a unique heating system it calls the Solo Stove Racetrack Burner Configuration. Solo Stove claims this heats up 35% faster than traditional cast-iron griddles. In just 7 minutes, it purportedly reaches 300-800 degrees Fahrenheit — the optimal heat range for cooking meats and veggies to perfection.

The Racetrack Burner is also said to eliminate hotspots and dead zones for a consistently hot cooking surface.

Solo Stove Steelfire Griddle
(Photo/Solo Stove)

The griddle also has an integrated grease trap. It funnels the greasy juices from burgers, steaks, bacon, and other foods into a container.

Customers who invest in the Griddle + Stand Bundle will also receive the modular griddle stand. The stand has folding side shelves and an integrated housing for the propane tank. It’s made of powder-coated steel and is built to handle season after season of outdoor griddling weather. The basic package (without the stand) only includes the griddle itself.

The Griddle Stand can be purchased separately ($400), but you can save $100 if you buy them bundled.

Solo Stove: More Griddling Action to Come

Solo Stove Steelfire Griddle
(Photo/Solo Stove)

If you’re excited by the Solo Stove Steelfire Stainless Griddle, you aren’t alone. GearJunkie is working on getting a sample for testing to write a full review sometime this summer.

This isn’t the last griddle product we’ll hear about from Solo Stove, either. The brand promised that later this summer, it plans to release a full lineup of griddling accessories in a Burger Kit, Chef’s Kit, and Essentials Kit. The kits will “make everything from Saturday morning breakfasts to smashburgers or hibachi nights a breeze.”

The Steelfire Stainless Griddle is currently only available for preorder. According to the brand, units are expected to start shipping sometime in mid-July. Buy yours now, and be ready to hit the ground running when griddling season hits high water. The Griddle, the Stand, and the Griddle + Stand Bundle are all on the Solo Stove website now.

For Tall Backpackers Who Go Ultralight: Six Moons Designs Skyscape Trekker Tent Review

10 June 2025 at 19:44

(Photo/David Young)

As I trudged up the nearly 1,000-foot vertical trail leading to the top of the mountain I was camping on, I watched the sunset and the storm clouds building. The conditions weren’t ideal for pitching the new Six Moon Designs Skyscape Trekker Backpacking Tent for the first time, but I was going to put it through a serious test.

About an hour later, as the last light disappeared over the ridge line, fat raindrops started to splat all around me. No sooner had I inverted my trekking poles and inserted them into the tent than the skies opened up and rain started pelting the hybrid double-walled trekking pole tent. 

Perhaps one of the best ways to familiarize yourself with a new tent is to hole yourself up in it for a night in a rainstorm — the good news is the Skyscape Trekker ($275) kept me warm and dry. While I would not call the small one-person tent “spacious,” it did fit my large, tall frame, as this model is designed for tall hikers like myself.

In short: If you are a tall ultralight backpacker looking for a versatile three-season ultralight tent, the Six Moon Designs Skyscape Trekker backpacking tent is a great option. It has an 8-foot-long floor, and weighs a scant 26 ounces. It is ideal for tall backpackers who spend lots of time on the trail and like to go light. The tent is easy to set up, and the double-wall vestibules can open for a 300-degree view of the night sky.

Check out GearJunkie’s guide to the Best Backpacking Tents.

  • Type: Tent, hybrid double wall
  • Cost: $275
  • Sleeps: 1 person
  • Weight: 28 oz.
  • Coverage: 23 ft²
  • Vestibule Size: 16 ft²
  • Pack size: 11" x 4.5"
  • Entry: 2-door
  • Comes with: Tent, stuff sacks, guy lines
  • Frame: Two 45" poles (not included)
  • Stakes: 6 (sold separately)

Pros

  • Hybrid double wall
  • Extended 8’ long floor
  • Two large doors
  • Flies can be left open for 300° views/airflow

Cons

  • Stakes not included
  • Expensive

Six Moons Skyscape Trekker 1-Person Tent Review

setting up the the Skyscape Trekker tent
Setting up the tent was a bit confusing at first; (photo/David Young)

Weight

The first thing you’ll notice about this tent is its minimalist design. The entire thing weighs just 26 ounces (not counting the stakes and trekking poles used to pitch it). Only one tent on GearJunkie’s guide to the Best Backpacking Tents is lighter — the Gossamer Gear The Two, which is a mere 23 ounces.

No matter how you slice it, this is a light tent. But take note: The tent stakes and trekking poles are not included with your purchase — those you have to provide on your own.

six moons skyscape trekker tent
(Photo/David Young)

Setup

The initial setup at dusk with a storm approaching was a little confusing. I followed the instructions on the stuff sack and at first tried to keep the trekking poles upright and outside the tent. 

After realizing they needed to be inverted and inside the body of the tent, it popped up easily. Subsequent setups took a matter of minutes. I got better at figuring out the tension on the three stakes that keep the tent upright over time. 

With a little practice, you can get this tent up and ready to jump into really fast. I had to remove the pads and baskets on my Gossamer Gear LT5 three-piece carbon trekking poles to insert them into the slot at the top of the tent. It helps to notch your poles at 45” so you can quickly adjust them to the right recommended length for the tent.

There’s a built-in bar at the top of the tent on either side of where the trekking poles go. That offers additional support. The two vestibule guy lines can be staked out on either side if the weather is bad. Or, you can roll them back, which is essentially like sleeping in a mosquito net bivvy. Stakes and trekking poles needed to set up this tent are not included when you buy the Skyscape Trekker.

Skyscape Trekker Backpacking Tent interior
The tent offers plenty of room, but is not really spacious; (photo/David Young)

Long but Not Spacious 

Standing at nearly 6’3”, I’ve grown accustomed to tents being a bit cozy if not downright cramped. At times, I’ve carried a two-man tent just for myself to ensure that I have a little extra space. The Skyscape Trekker Backpacking Tent is designed with tall backpackers like me in mind.

This one-person model of this double-walled lightweight tent extends to 8 feet. It ensures I have plenty of room to stretch out after a long day. The tent is also designed with 60% head space versus 40% foot space, creating more room for my head and shoulders. This means I can sit up in the tent and change clothes.

There are two side entrances with an 8-foot vestibule space. I was able to stash my pack and boots under there during the rainstorm. There is a bathtub-style floor to the tent. However, rain and mud still splashed up on the netting when it was really coming down.

The vestibule canopy, depending on how you set it up, leaves about a 6-inch gap between the ground. While good for airflow, this is where the water splashed back up on the tent. 

Overall, this tent is great for rainy conditions thanks to the hybrid double-wall. I was positioned where the heavy rain got one side of the tent a bit wet and muddy. Despite the length of the tent, it is still relatively narrow at about 4 feet across at its widest. The head of the tent comes to a point, so space is at a premium there.

Hybrid Double-Wall & Skyscape Mode

Skyscape Trekker Backpacking Tent converted into a net tent
The Skyscape Trekker can be easily converted into a net tent; (photo/David Young)

At 28 ounces, this is one of the lighter tent options out there, especially for a hybrid double-wall tent. That means that 80% of the canopy is separated from you by a mesh wall. This is key for major rainstorms, as I experienced. It kept the wet canopy from dripping on me. 

The Skyscape Trekker’s body is made of 100% silicone-coated polyester. The canopy is 20D polyester, and the floor is 40D for additional strength. I used it without a footprint and had no issues.

One of the best features of this tent is that you can roll back the vestibule, converting it into a net tent with great airflow and 300-degree views. I wasn’t able to utilize the feature when it was raining. But on clear starry nights, it is an awesome feature.

The two doors on either side are large and easy for bigger hikers to get in and out of. It’s also nice for tossing larger sleeping pads and sleeping bags into the tent. 

Six Moon Skyscape Trekker 1 Plus: Who Is It For?

packed Skyscape Trekker Backpacking Tent
The Skyscape Trekker is a great choice for those looking for a lightweight and reliable tent; (photo/David Young)

If you are a tall thru-hiker or weight-conscious backpacker, then you will appreciate the Skyscape Trekker. At less than 2 pounds, it’s a great option for fast and light backpacking trips and thru-hikes. For bigger backpackers like me, it’s one of the best single-person tent options I’ve come across. It weighs almost nothing, sets up easily, and I fit without issue.

While the tent will work for an overnight trip, from car camping to backcountry excursions, the price will be a hindrance for anyone who is not serious about spending many nights each season. 

At close to $300, this is intended for serious trekkers who are after a lightweight home away from home. It’s a steep price for such a minimalist tent, but for a 26-ounce tent, it’s priced to compete with other similar tents.

For any trip where I just need a tent for myself, and I want to move quickly and as light as possible through the backcountry, this tent has earned a permanent spot in my backpacking setup.

❌